
Mitel One Mobile Application
User Guide
March 18 2024
Notices
The information contained in this document is believed to be accurate in all respects but is not
warranted by Mitel Networks Corporation (MITEL
®
).The information is subject to change without
notice and should not be construed in any way as a commitment by Mitel or any of its affiliates or
subsidiaries. Mitel and its affiliates and subsidiaries assume no responsibility for any errors or omissions
in this document. Revisions of this document or new editions of it may be issued to incorporate such
changes. No part of this document can be reproduced or transmitted in any form or by any means -
electronic or mechanical - for any purpose without written permission from Mitel Networks Corporation.
Trademarks
The trademarks, service marks, logos and graphics (collectively "Trademarks") appearing on Mitel's
Internet sites or in its publications are registered and unregistered trademarks of Mitel Networks
Corporation (MNC), its affiliates, parents, or subsidiaries (collectively "Mitel") or others. Use of
the Trademarks is prohibited without the express consent from Mitel. Please contact our legal
department at [email protected] for additional information. For a list of the worldwide Mitel Networks
Corporation registered trademarks, please refer to the website:http://www.mitel.com/trademarks.
®
,
™
Trademark of Mitel Networks Corporation
©
Copyright 2024, Mitel Networks Corporation
All rights reserved

Getting Started with the Mitel One
Mobile Application
1
This chapter contains the following sections:
• What is Mitel One Mobile Application
• Register and Access the Mitel One Mobile Application
• Log In / Log Out
• Reset Your Password
• Verify your Mobile Number
• Permissions and Notifications
• Mitel One Mobile Application Overview
• Manage Mitel One Settings
• Supported Regions, and Languages
This chapter will help you to install, register, and log in to the Mitel One mobile app; reset your password; get
acquainted with the Home screen; and access your settings, permissions to be enabled to use the app, the
notifications generated and the devices supported by the app.
1.1 What is Mitel One Mobile Application
The Mitel One mobile application is a next-generation collaboration app that provides advanced
communication features and integrates with the MiVoice Office 400 to improve work efficiency and enhance
workplace communication. It consolidates telephony, messaging, and meetings within a single app for a
complete collaboration experience.
User Guide 1
Getting Started with the Mitel One Mobile Application
To download the latest version of the app, iPhone users can tap here for the App Store and Android phone
users can tap here for the Google Play Store. You can also open the App Store or Play Store app on your
phone and search for and download Mitel One.
Download and install the app to:
• Place, answer, hold, retrieve, and transfer a call; and perform multi-call handling
• Initiate secure personal one-to-one messaging, group messaging, and Streams
• Manage communications and voice-centric workflows more effectively
• View the live status (presence) of users for whom the PBX is integrated with the app
• Enable contact synchronization and management (business and personal contacts)
User Guide 2

Getting Started with the Mitel One Mobile Application
1.2 Register and Access the Mitel One Mobile Application
Note:
The following procedure applies only to users who do not have Single Sign-On (SSO) configured
for their Mitel account. Users who have SSO configured by their IT Administrator need not register
their information with Mitel. They can use the SSO functionality to access the application. For more
information, contact your IT administrator or see Configuring Single Sign-On for CloudLink with
Microsoft Azure AD.
Before you log in to the application for the first time, you must register and set up your Mitel One account.
Perform the following steps to set up your account.
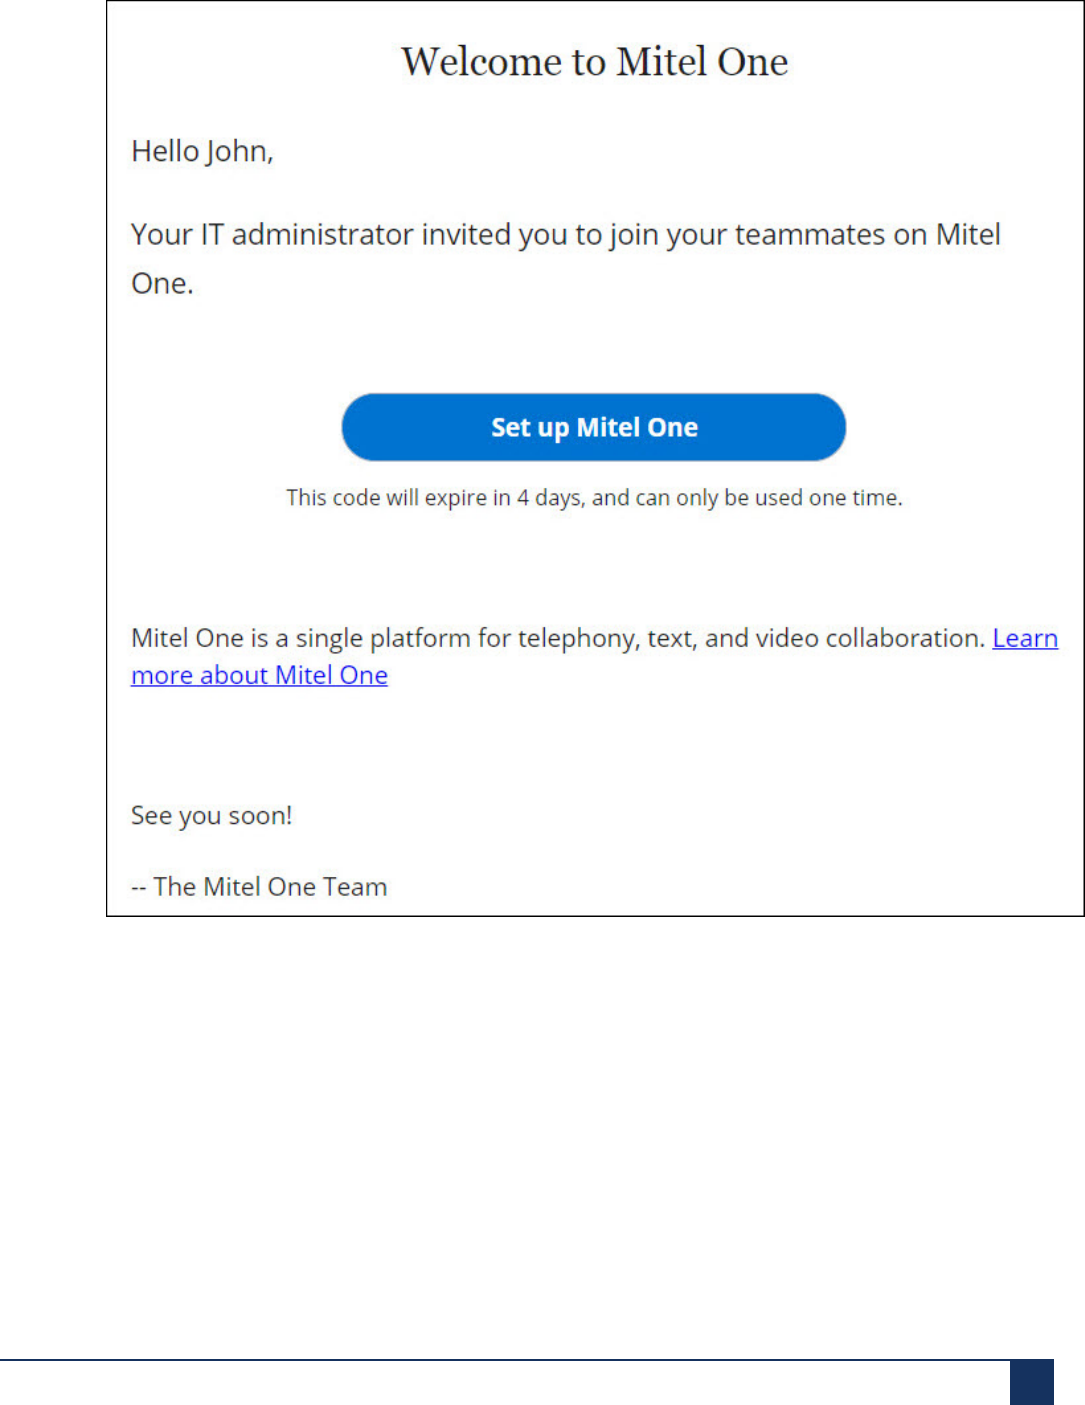
1. Ensure that you have received an email bearing the subject line Welcome to Mitel One from no-
[email protected]. This is the welcome email sent when a Mitel One license is assigned to you by the Mitel
Partner or Account Administrator in the Mitel Administration. If you do not find this email in your mailbox,
check your Junk or Spam folders for recent emails sent to you from [email protected].
3 User Guide
Getting Started with the Mitel One Mobile Application
2. The welcome email includes a Set up Mitel One button.
Tapping this button takes you to the Finish building your account page, where you can provide the
details required to complete the account registration process.
3. In the Name field, your name will get automatically populated. This is the name that will be visible to
other users when you use the application. Create a new password for the Mitel One web application
User Guide 4

Getting Started with the Mitel One Mobile Application
and tap Complete after accepting the terms and conditions to complete the account registration
process.
Upon successful registration, you will be logged in to the application and the Mobile Verification screen
is displayed.
5 User Guide

Getting Started with the Mitel One Mobile Application
User Guide 6

Getting Started with the Mitel One Mobile Application
4. In the Mobile Verification screen:
• Tap VERIFY NOW to verify your mobile number. For more information, see Verify your Mobile
Number on page 12.
• Tap Skip to skip mobile verification and continue to the Home screen.
• Tap Next to open the Create Your Profile screen where you can add a profile picture, and add
a status message. After making the necessary updates, tap DONE to save the changes and to
continue to the Home screen.
1.3 Log In / Log Out
Log In
7 User Guide

Getting Started with the Mitel One Mobile Application
Note:
When you log in to the Mitel One mobile application for the first time after installation:
• For using certain features of the Mitel One app, you must grant permission to the app to access
certain areas of your computer when the app generates on-screen messages asking for
permissions. For more information, see Permissions and Notifications on page 20.
• MiVoice Office 400 users will be alerted to verify their mobile number. Verify the mobile number to
use the carrier network in the mobile to place or answer calls.
1. Open the Mitel One application on your phone and tap Login. The Mitel user login page is displayed.
2. Enter the email address (specified in the account for the user) in the Enter your email address
field and tap Next. If your email address is registered with multiple customer accounts, the message
User Guide 8

Getting Started with the Mitel One Mobile Application
Multiple accounts located. Additional account information needed to proceed is displayed and the
Account ID field appears. Enter the Account ID, and tap Next.
9 User Guide
Getting Started with the Mitel One Mobile Application
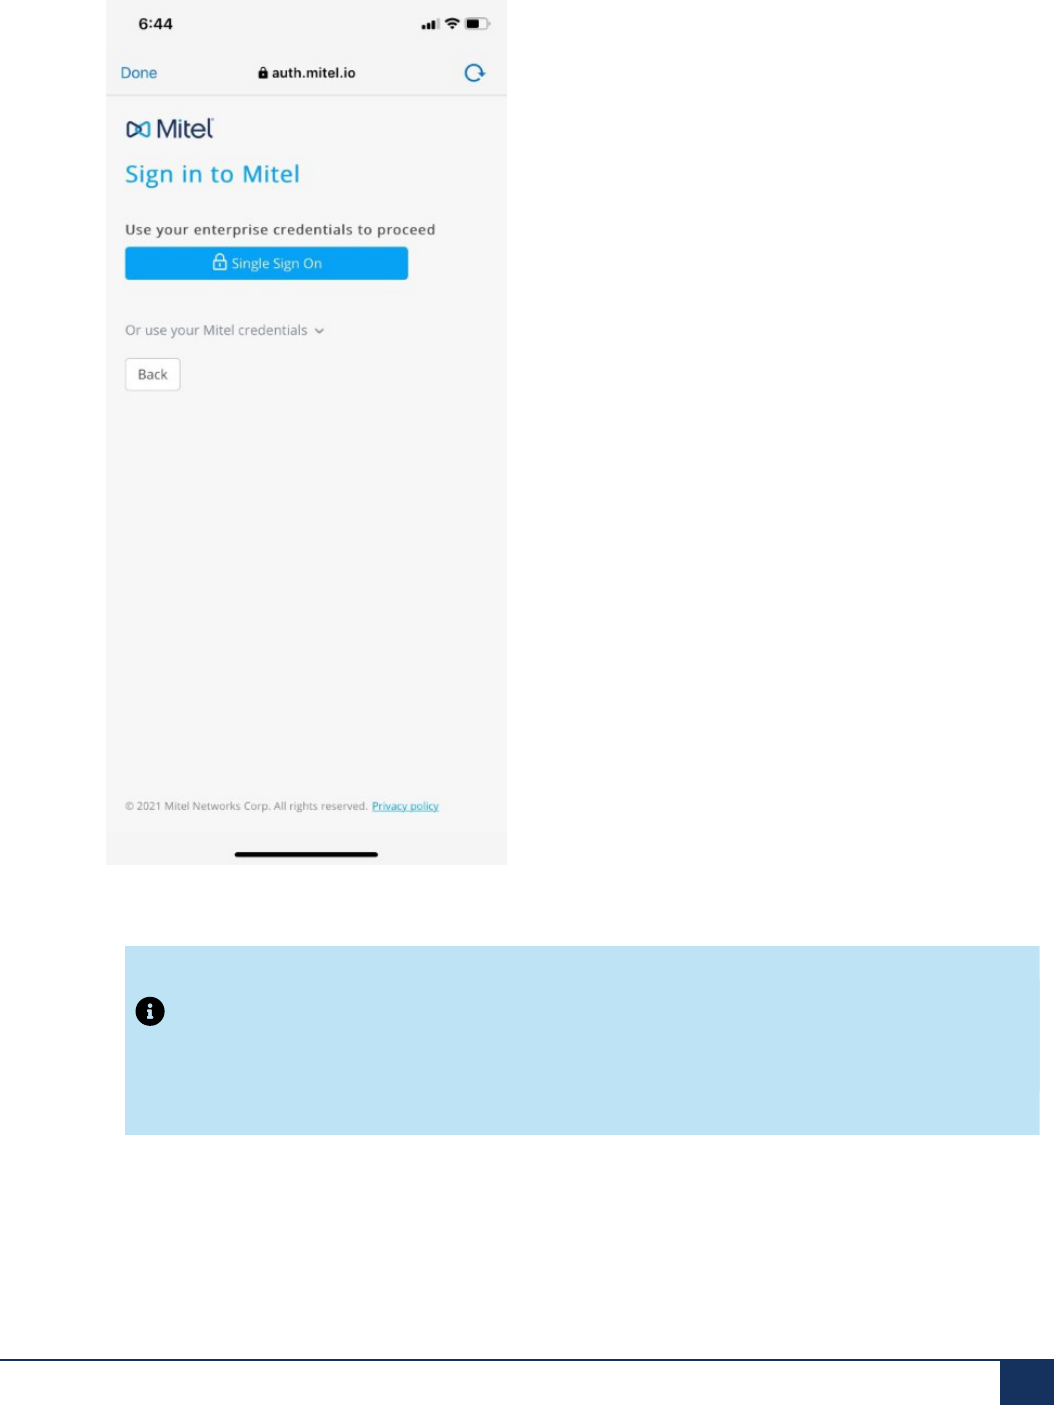
3. From the screen that opens, continue to log in to the application using either of the following methods:
• Using Single Sign-On (SSO)
Note:
You can use SSO to log in to the application only if your IT administrator has configured Single
Sign-On (SSO) for your Mitel account.
a. Tap Single Sign On. You will be redirected to your SSO provider to sign in to your account.
b. Enter your credentials in the fields provided and tap Sign in to log in to the application.
User Guide 10

Getting Started with the Mitel One Mobile Application
Note:
Contact your IT administrator if you are not able to sign in to the application using the SSO
option or if you get the following error.
• Using the Mitel account password
a. Tap the Or use your Mitel credentials option.
b. In the Password field that is displayed, enter the password you specified while registering your
account.
c. Tap Next to log in to the application.
Note:
If you have forgotten your password, see Reset Your Password on page 12 to learn how to
set a new password.
After successful sign in, the End User License Agreement (EULA) is displayed.
4. Tap ACCEPT to accept the end-user agreement and log in to the application. Tapping DECLINE will
display a prompt message that you will be logged out of the application. Tap Proceed to log out of the
application, or tap Cancel to close the message.
11 User Guide

Getting Started with the Mitel One Mobile Application
Note:
The end user agreement appears only when a user logs in to the Mitel One application for the first
time. If you accept the agreement from one of the type of Mitel One client (that is Mobile, or Web),
the agreement will not appear again when the user logs in from other types of Mitel One client.
Log Out
1. Tap your avatar at the top left of the screen. A panel opens.
2. Tap LOG OUT to log out of the application.
1.4 Reset Your Password
If you have forgotten your password, perform the following steps to reset your password.
1. Open the Mitel One app on your mobile phone and tap Login. The Mitel user login page is displayed.
2. Tap Next.
3. Tap the Forgot Password link.
4. Tap Next. If you tap Login Page, you are redirected to the user login page.
5. An email containing a Reset Password link, and a 6-digit code number is sent to the e-mail address
you provided. If you do not find this e-mail in your mailbox, check your Junk or Spam folders for recent
e-mails sent to you from [email protected].
6. Tap the Enter Code tab displayed on your phone and enter the 6-digit code number. Tap Submitto
reset your password.
7. Alternately, in the e-mail that you received, tap the Reset Password link. In the Set a New Password
page that opens, enter a password that meets the Password Requirements and confirm the entry. Tap
Next to reset your password.
1.5 Verify your Mobile Number
Mitel One users can access all the features of the application except managing calls using the carrier
network, without verifying their mobile number. To place and answer calls using the carrier network, users
must verify their mobile number. After installing the application, perform the following steps to verify your
mobile number:
1. Log in to the Mitel One app.
User Guide 12

Getting Started with the Mitel One Mobile Application
2. Navigate to the mobile verification screen. There are three methods by which you can do this:
• By navigating across the initial login screens when you log in for the first time:
a. After you log in for the first time, tap Skip or swipe to navigate across the first four screens after
which the Mobile Verification screen is displayed (as shown in the screenshot below).
b. Tap VERIFY NOW to continue the verification process. Tapping Skip cancels the process.
The Verify Number screen is displayed.
• By using the user profile panel:
a. Tap your avatar at the top left of the screen. A panel opens.
13 User Guide
Getting Started with the Mitel One Mobile Application
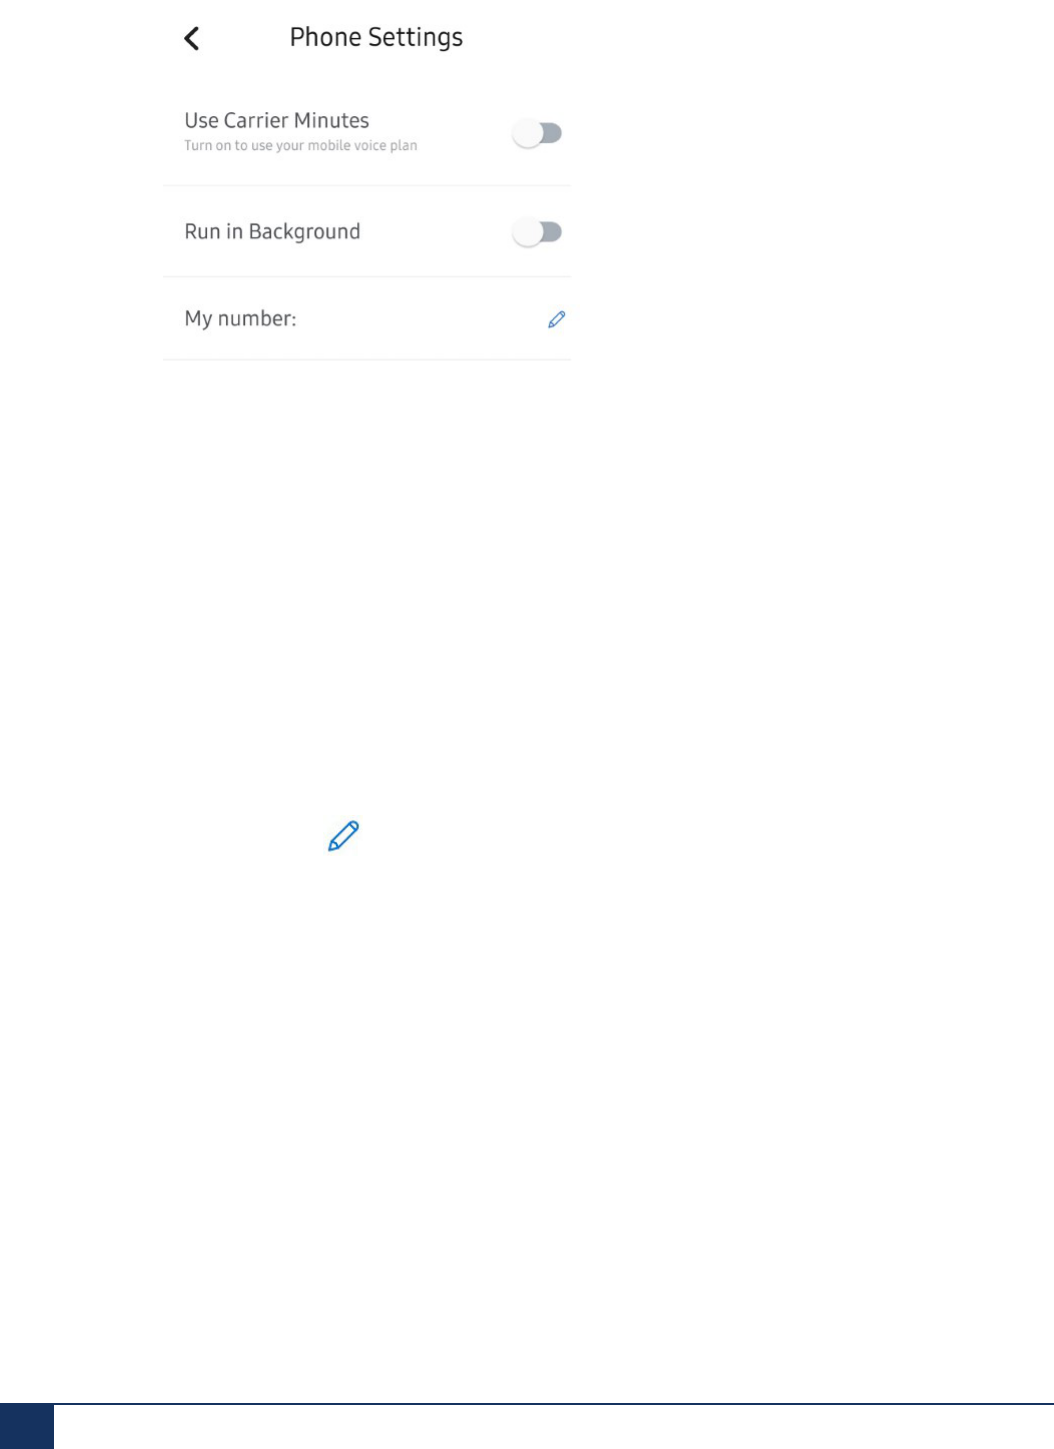
b. Tap the Phone option. The Phone Settings panel opens.
User Guide 14
Getting Started with the Mitel One Mobile Application
c.
Tap the Edit icon ( ) icon associated with My number.
The Verify Number screen is displayed.
• By sliding the Use Carrier Minutes toggle button:
a. Tap your avatar at the top left of the screen. A panel opens.
15 User Guide

Getting Started with the Mitel One Mobile Application
b. Tap the Phone option. The Phone Settings panel opens.
User Guide 16
Getting Started with the Mitel One Mobile Application
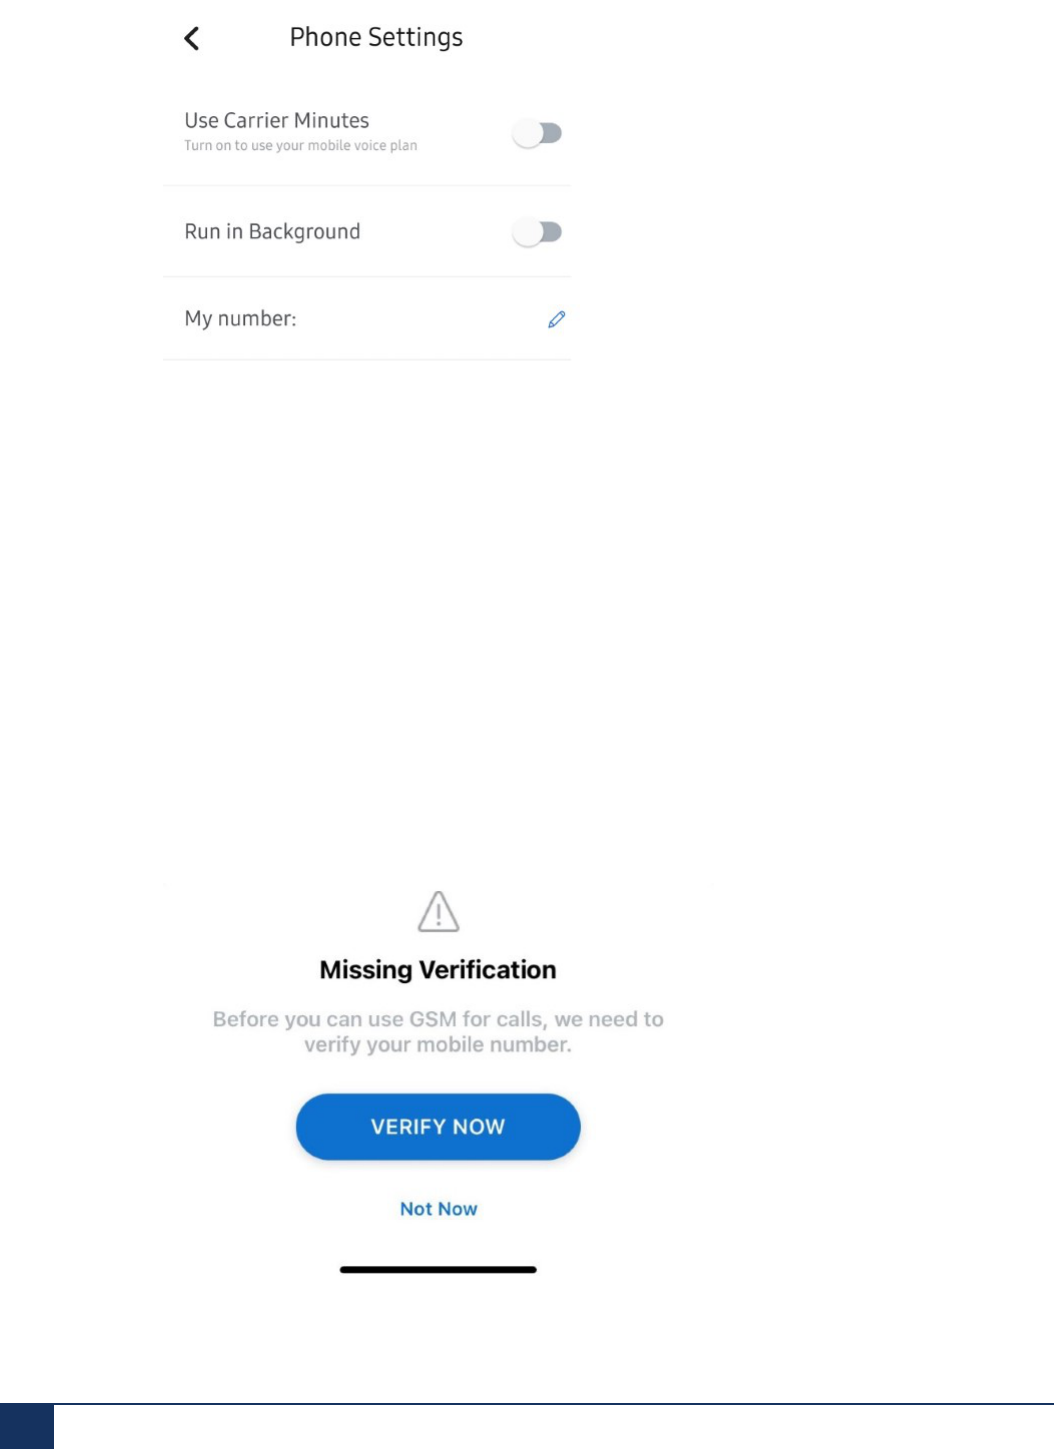
c. Slide the Use Carrier Minutes toggle button to the right. The Missing Verification screen is
displayed.
d. Tap VERIFY NOW to continue the verification process. Tapping Not Now cancels the process.
17 User Guide
Getting Started with the Mitel One Mobile Application
The Verify Number screen is displayed.
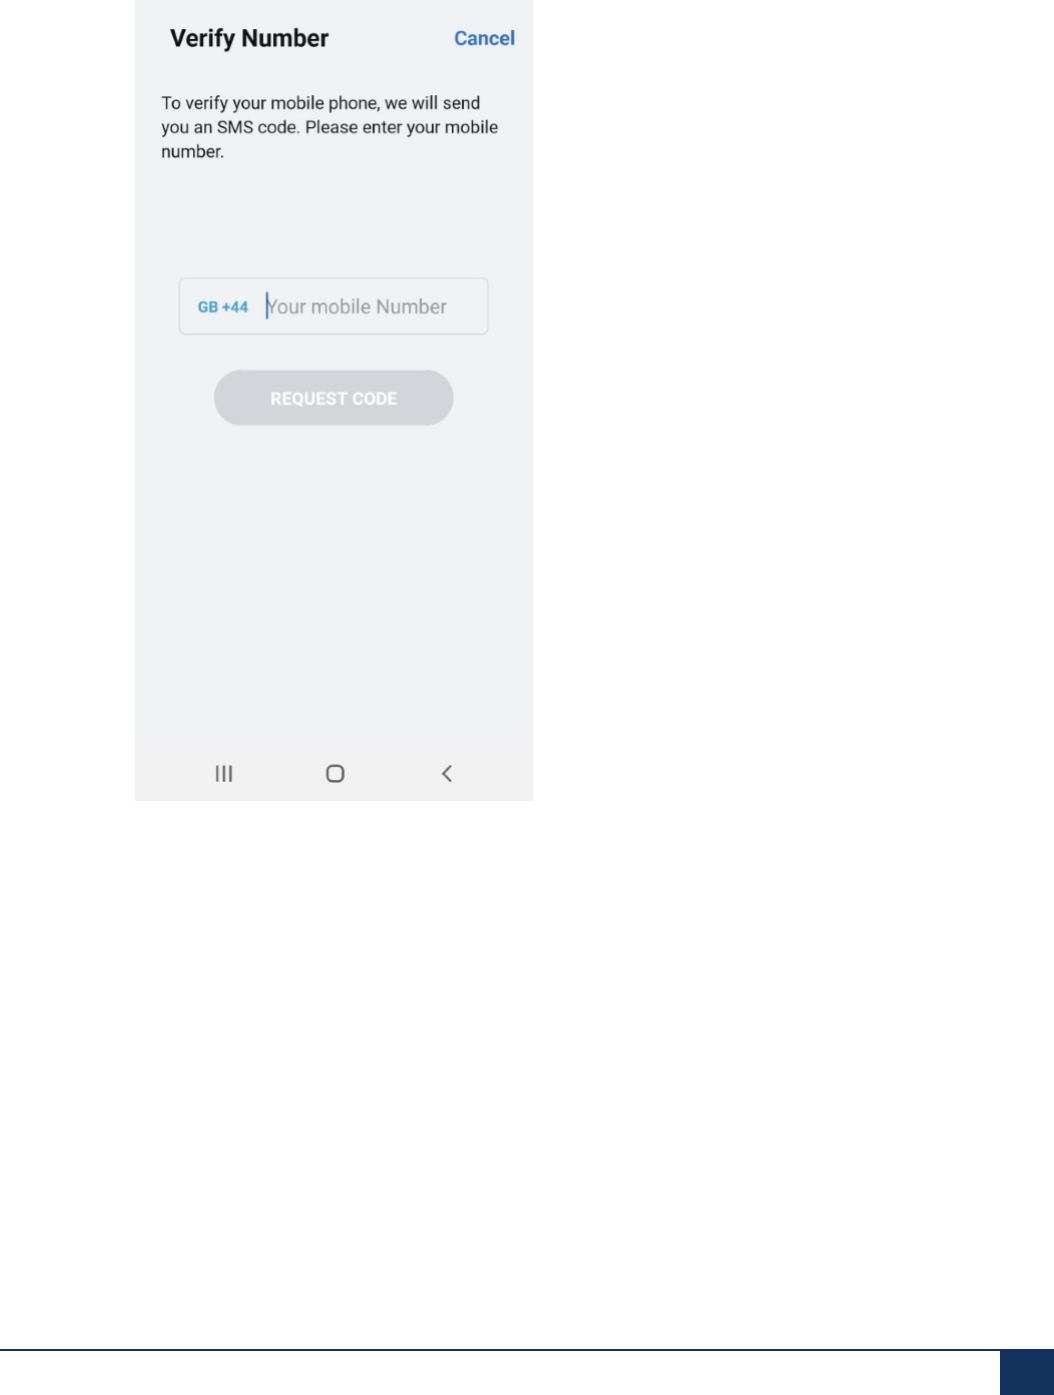
3. In the mobile verification screen, select your resident country by using the drop-down menu and enter
your mobile number. Tap REQUEST CODE. You will receive a six-digit code on the mobile number you
entered.
User Guide 18

Getting Started with the Mitel One Mobile Application
4. In the Verify Number screen that opens, enter the code in the field provided and tap CONFIRM. If you
do not receive a text message containing the code, tap Resend Code.
After successful verification of your number, a green banner with the Number verified! You're ready to
make phone calls. message is displayed.
After verifying your mobile number, you can do the following to turn on your mobile voice plan to manage
calls.
1. Tap your avatar at the top left of the screen. A panel opens.
2. Tap the Phone option. The Phone Settings panel opens.
3. Slide the Use Carrier Minutes toggle button to the right. The toggle button turns blue indicting that all
outgoing and incoming calls will be routed through your carrier network.
For more information about this feature see, Manage Mitel One Settings on page 26.
1.5.1 Replace Your Mobile Number
To replace your mobile number, perform the following steps:
1. Tap your avatar at the top left of the screen. A panel opens.
19 User Guide

Getting Started with the Mitel One Mobile Application
2. Tap the Phone option. Phone Settings panel opens.
3.
Tap the icon associated with My number. Replace Number panel opens.
4. Enter the new number that you want to update, and tap REQUEST CODE. You will receive a six-digit
code on the mobile number you entered
5. In the Verify Number screen that opens, enter the code in the field provided and tap CONFIRM. If you
do not receive a text message containing the code, tap Resend Code.
6. After successful verification of your number, a green banner with the Number verified! You're ready to
make phone calls. message is displayed.
1.6 Permissions and Notifications
When you log in to the Mitel One application for the first time, the use of certain features will generate
a prompt asking for permission to access areas of your device. To enable the application to be fully
functional, select the Allow or OK option for each prompt that asks for your permission. If you choose to
Block or Don't Allow any of these prompts, you will not be able to use the associated features.
The following list describes each type of permission and the associated features.
• Notifications (iPhone only) — Allows the app to display notifications when you receive calls and
messages.
• Contacts (iPhone and Android) — Allows the app to access (sync) the personal contacts you have
saved on your mobile phone to communicate with these contacts from the app.
• Microphone/Record Audio (iPhone and Android) — Allows the app to record your voice for use during a
phone call.
• Phone Calls (Android only) — Allows the app to manage phone calls and call history.
• Run in the Background (Android only) — Allows the app to run in the background and stop optimizing
battery usage. The app must be open or running in the background to receive calls and messages.
• Photos (iPhone and Android) — Allows access to your phone’s stored images to update your avatar or
include in a message.
• Camera/Take Pictures (iPhone and Android) — Allows access to your phone’s camera to take a picture
to update your avatar or include in a message.
To change your permissions, open the Settings menu on your mobile phone (not in the Mitel One
application) and use the following guidelines. The exact steps will be different depending on the OS version
of your phone.
• iPhone users — Navigate to Settings > Mitel One, and change the access setting for the desired
features.
• Android users — Navigate to Settings > Apps or Application Manager > Mitel One > Permissions,
and change the access setting for the desired features.
User Guide 20

Getting Started with the Mitel One Mobile Application
Note:
• Devices running Android 6 or later include battery optimization features, which improve battery
life by placing apps that are inactive in Doze mode or App Standby. These battery optimization
features can prevent the Mitel One app from displaying incoming message and call notifications
when the app is running in the background or closed. To receive incoming messages and call
notifications in the Mitel One app, the user must turn off battery optimization options in the mobile
device.
There are two categories (OS default and mobile device type specific) of Android mobile device
battery optimizations that a Mitel One user must be aware of. The app prompts the user to disable
battery optimization if it is set as the default OS option; however, the user must specifically check
the battery optimization settings specific to your device.
1. Default — When an app user logs in to the Mitel One app or starts the app, the app user
must select Allow and then Allow again if the "Run in the Background" prompt requests a
confirmation to allow the app to run in the background. Selecting Allow will disable battery
optimization related to the Mitel One app. If you select Deny, the app may not receive message
and call notifications when the app is running in the background or closed.
2. Device Specific — Many Android mobile devices have additional battery optimization settings
and options (such as Performance Mode, Power Savings mode, Ultra Power Savings mode,
and Manage All Automatically) that impact the app from receiving notifications. Also, there are
several user options related to the app receiving notifications. Refer to the user guide for your
specific Android mobile device type to ensure that the battery optimization and notifications
options are so set as to allow Mitel One app incoming message and call notifications when the
app is running in the background or closed.
• When a device is set to Low Power Mode, you might experience unpredictable application
behavior. It is recommended to charge the device to overcome this behavior.
For all mobile devices with Android 13, after installing the Mitel One mobile application, notifications from
the application are blocked.
To give permission to the application, do either of the following:
• When you receive a notification while using the application, click Allow in the prompt.
• Go to Settings > Apps > Mitel One > Notifications and then enable the toggle button next to Show
notifications.
Error Notifications
• If there are problems with your network connectivity, a The device is currently offline banner
appears. When this occurs, you may be unable to use the app features. If this issue persists, contact
your IT administrator.
• If there are problems with the softphone in the application, a Call service not available banner
appears. The softphone might be unregistered due to a network outage or the CloudLink Platform or
the PBX might be blocking the softphone registration. When this occurs, you will not be able to place or
answer calls using the application. If this issue persists, contact your IT administrator.
21 User Guide

Getting Started with the Mitel One Mobile Application
Badge Notification
• iOS
This feature displays a number over the app icon on the home screen of your phone. This is the
total number of your missed calls plus unread messages. To enable this feature, go to Settings >
Notifications, select Mitel One, and enable the Badges toggle.
• Android
This feature displays a number over the top of the app icon on the home screen of your phone. This
is the total number of unread messages when there is an active notification in the Notification Center.
To enable this feature, go to Settings > Notifications, enable the App icon badges toggle. (The App
icon badges setting is enabled for all apps, but you can disable it for an individual app by selecting that
app in Notifications.) The exact locations for the App icon badges settings may change depending
upon the device type.
Call Notifications
Incoming calls generate different on-screen notifications depending on a variety of scenarios for your app
and your mobile phone. To learn more, see Answer or Decline a Call on page 48.
Message Notifications
Incoming messages generate different on-screen notifications depending on a variety of scenarios for your
app and your mobile phone. To learn more, see the iPhone or Android section of Respond to a Message
on page 78.
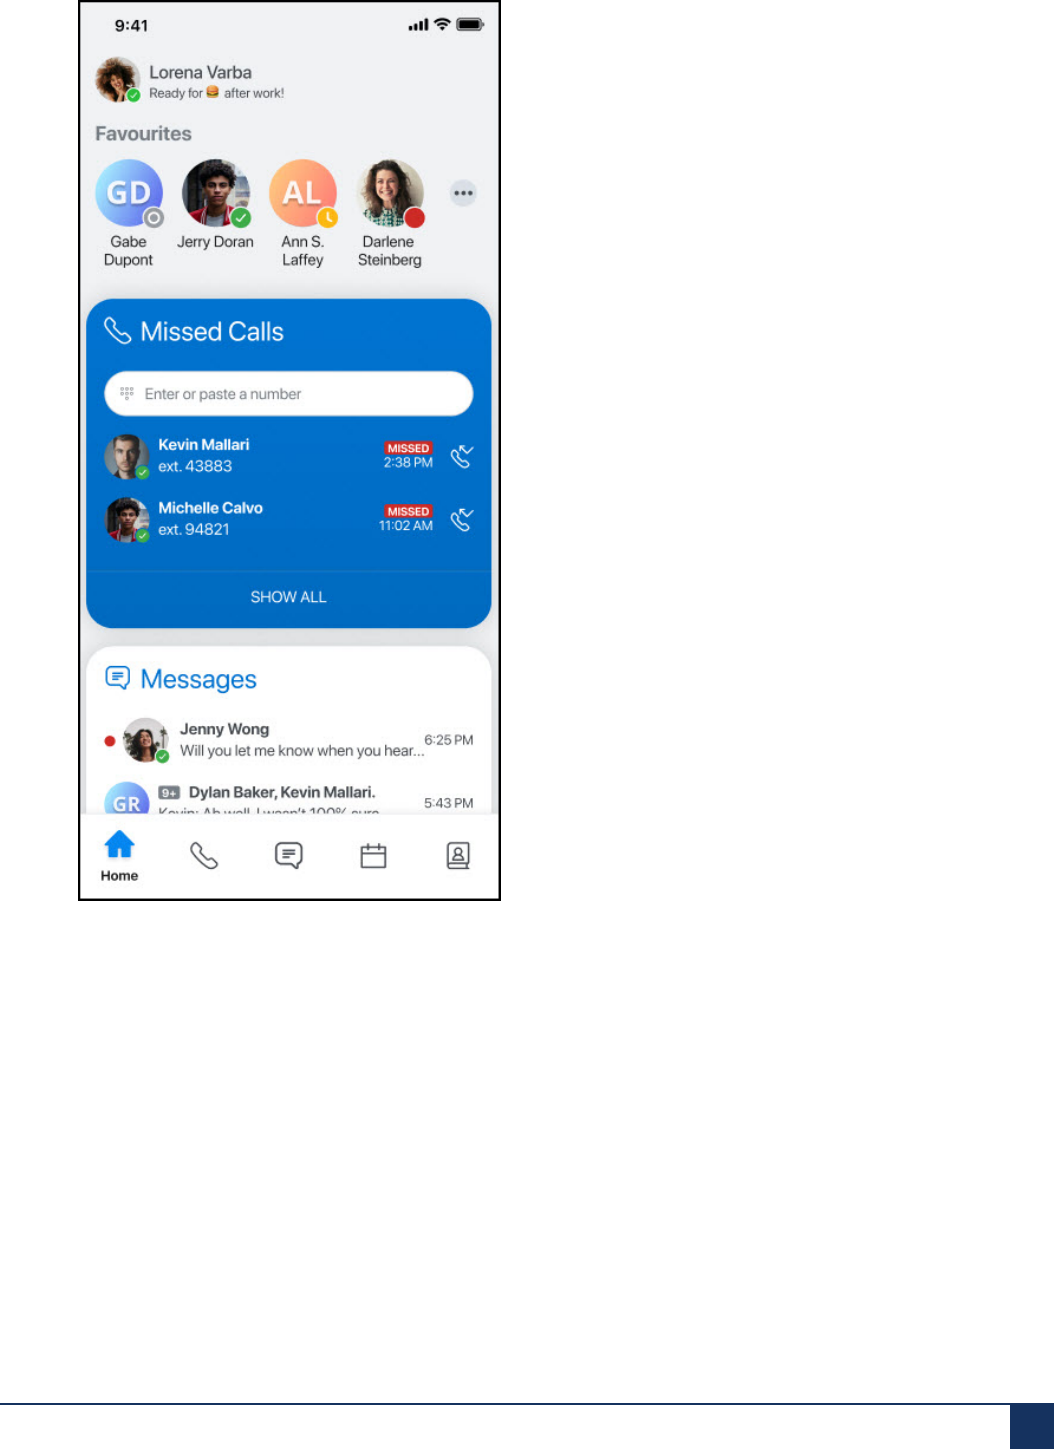
1.7 Mitel One Mobile Application Overview
The main screen of the Mitel One mobile application has two main sections:
A - Home screen
B - Navigation menu
User Guide 22

Getting Started with the Mitel One Mobile Application
23 User Guide

Getting Started with the Mitel One Mobile Application
Note:
• What features are available in the Mitel One application for a user depends on the license that the
user has purchased. For more details about licensing, see the Licensing section of the specific PBX
in the Mitel One Deployment Guide. A CloudLink Administrator can enable or disable specific Mitel
One features for a user. Contact your CloudLink Administrator if you do not have access to the
features mentioned in the license subscribed by you.
• Because Ray Baum is not supported on the MiVoice Office 400 PBX, telephony is disabled on the
Mitel One web application for MiVoice Office 400 PBX users in North America.
Home Screen
The Home screen provides easy access to all the features of the application and enables quick
communication with your contacts.
The Home screen displays:
• the user’s avatar at the top left of the screen.
• the following widgets:
• Favorites
• Messages
• Missed Calls
• Quick Functions
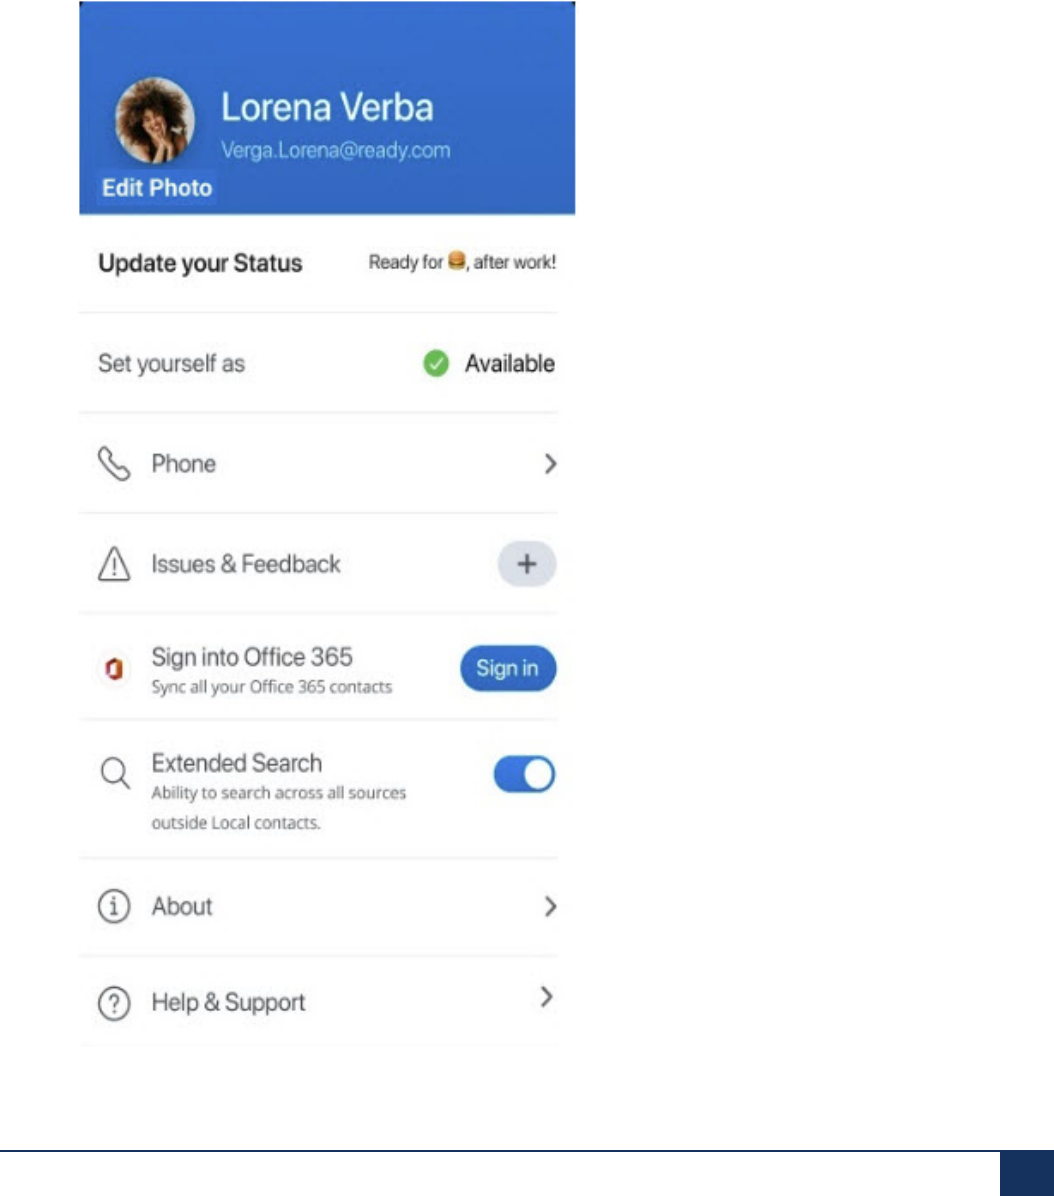
Avatar
Tapping the avatar at the top left of the app screen opens a panel that provides access to change multiple
settings. The most important settings include changing your avatar, mobile number, setting your presence
and a personalized status message, enabling or disabling Use Carrier Minutes, Run in Background
(Android only), change the Log Level, Submit an Issue, and share feedback about the application; and
access the online help documentation, release information, the privacy policy, and the End User License
Agreement; and view the application version number. For more information, see Manage Mitel One
Settings on page 26.
Widgets
• Favorites
The Mitel One mobile app allows you to add up to 48 contacts as favorites. The Favorites widget
also displays the speed dials and user groups you added to your Mitel One web application. For more
information, see Set Your Favorites on page 39.
User Guide 24

Getting Started with the Mitel One Mobile Application
• Missed Calls
The Missed Calls widget displays the calls you have missed. Tapping the SHOW ALL option in the
widget opens the Phone menu where you can:
• View all outgoing and incoming calls in the All list
• View only incoming calls that were not answered in the Missed list
• Search for a contact in the directory using the Search icon.
For more information, see Phone on page 45.
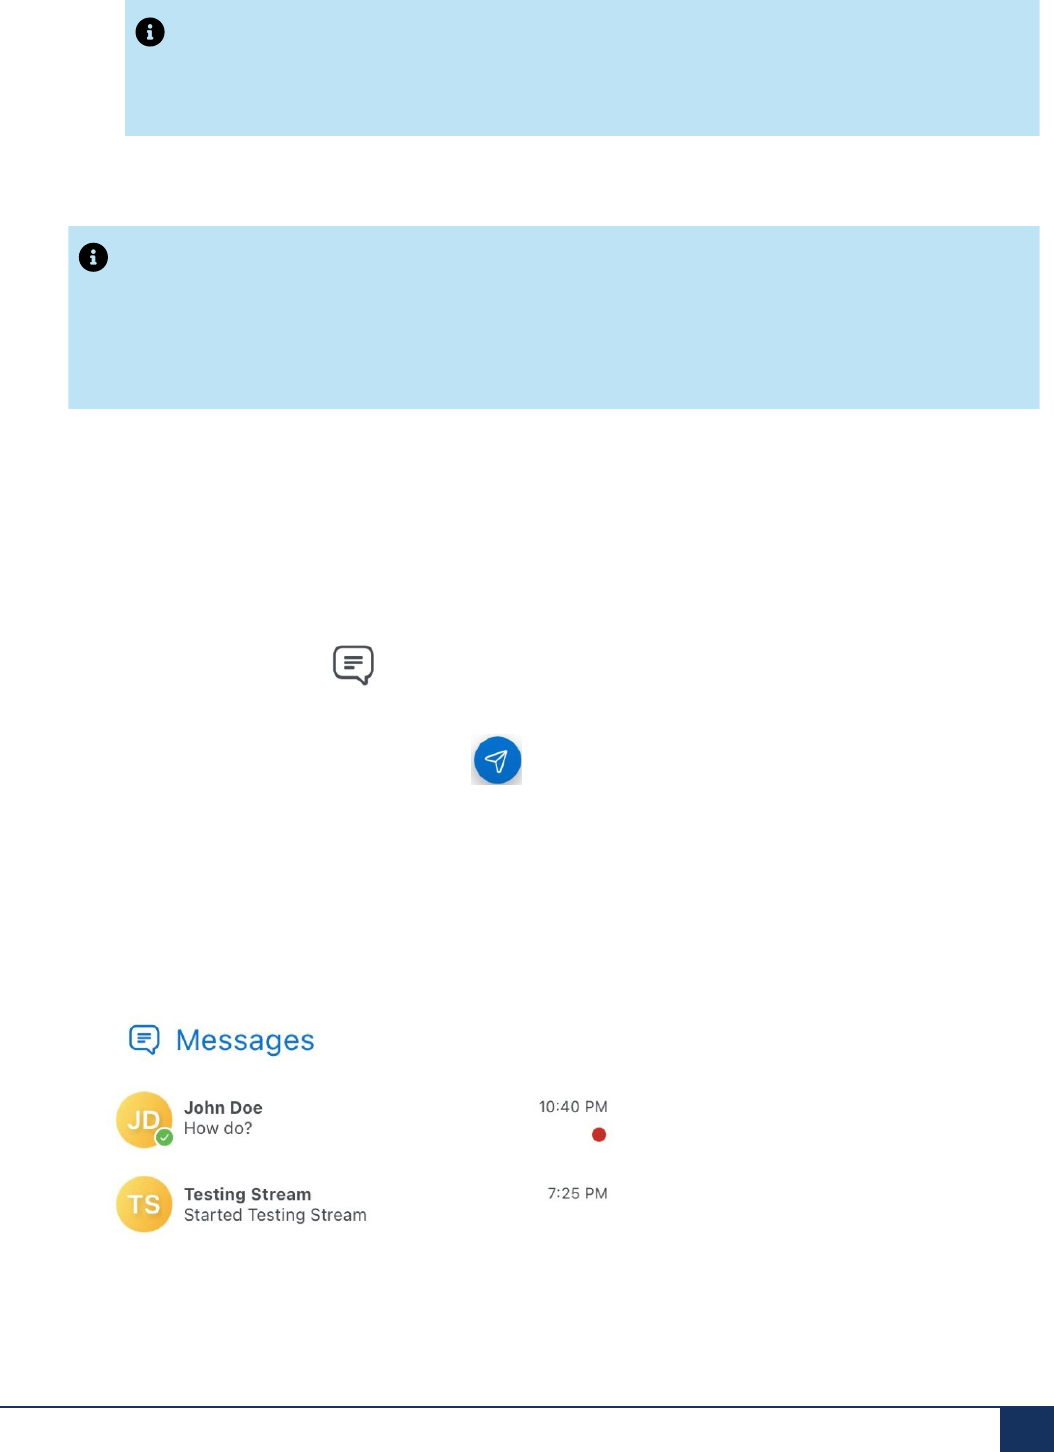
• Messages
The Messages widget lists all the recent messages you received, in chronological order. To reply to
a message in the Messages widget, tap the message. This opens the messaging session with that
contact displaying the messages you received.
For more information, see Messages on page 75.
• Quick Functions
The Quick Function widget lists four frequently used function types available as Quick Functions in
the Mitel One Mobile application. You can activate or deactivate any of these functions by selecting the
corresponding quick function key.
For more information, see Quick Functions on page 92
Navigation Menu
The navigation menu displays the icons for accessing various features of the application. Only the features
you are licensed to use are displayed.
•
Home — Tapping the Home icon opens the Home screen that provides easy access to all
features of the application and enables quick communications with your contacts. For more information,
see Home Screen.
•
Phone — Tapping the Phone icon opens the call history screen of the application that enables
you to view all outgoing, incoming, and missed calls. For more information, see Phone on page 45.
•
Messages — Tapping the Messages icon opens the messages menu that displays all the
Streams and messages you received, in chronological order. For more information, see Messages on
page 75.
•
Meetings — Tapping the Meetings icon in the navigation bar at the bottom of your mobile
screen opens the Meetings menu. For more information, see Meetings on page 91.
•
Contacts — Tapping the Contacts icon opens the Contacts menu that provides access to all
business and personal contacts. It also enables you to search through the contact list quickly to find the
contact you want to communicate with. For more information, see Contacts on page 82.
25 User Guide
Getting Started with the Mitel One Mobile Application
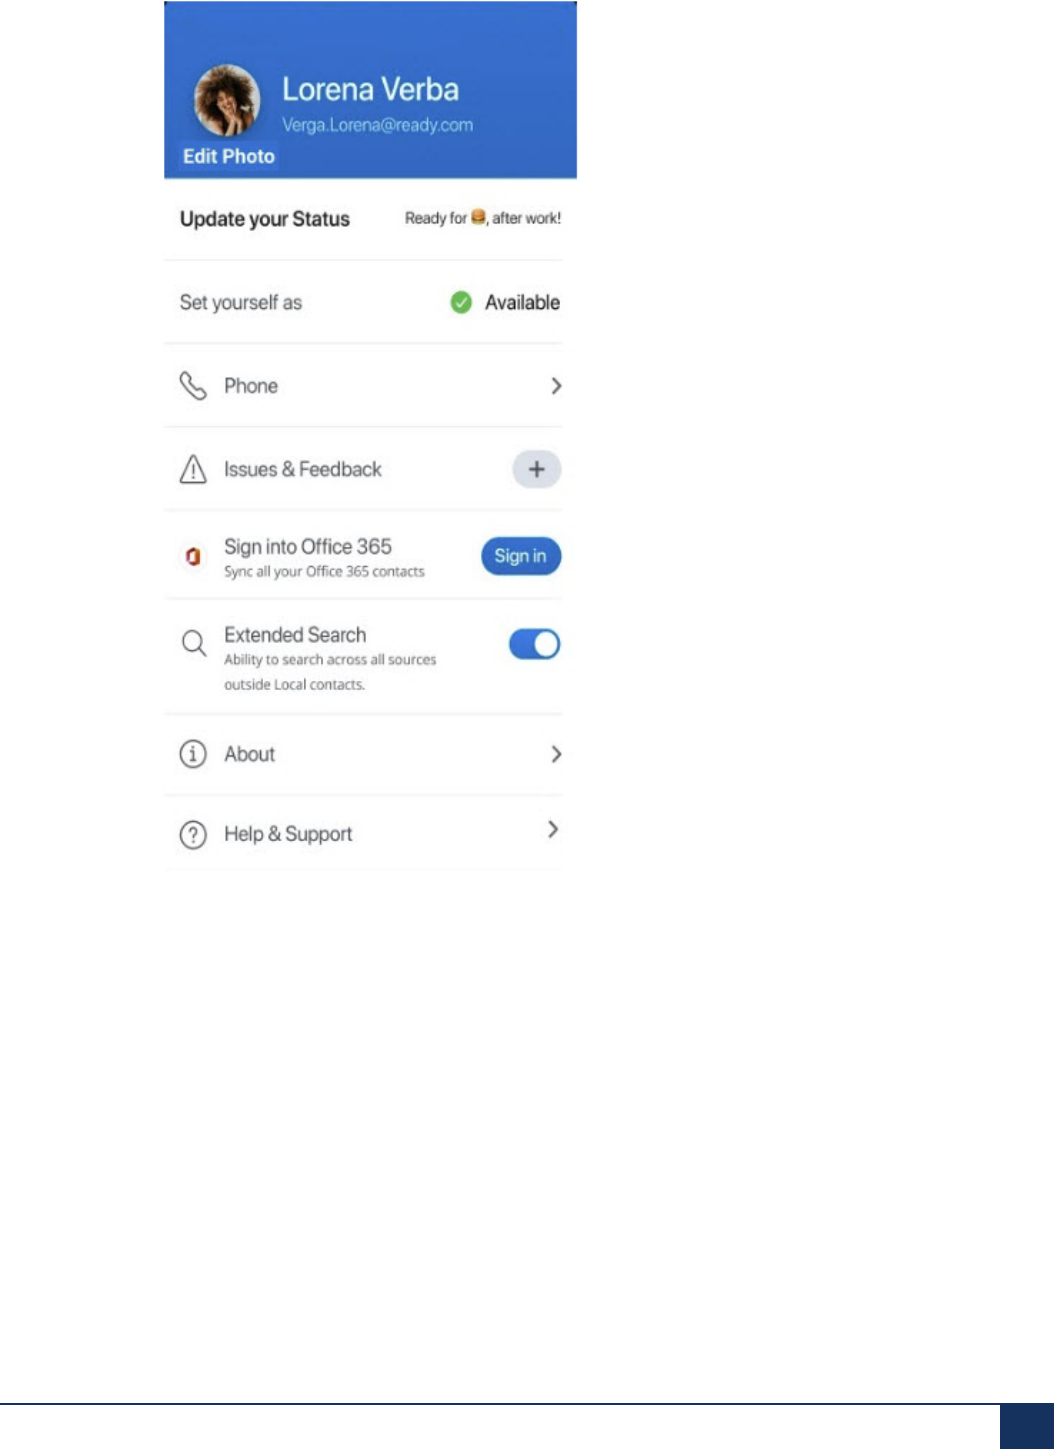
1.8 Manage Mitel One Settings
The Settings panel provides access to change your avatar, and mobile number; set your presence and a
personalized status message; enable or disable using the carrier network in the mobile to manage calls;
report an issue and share feedback about the application; and access the online help documentation,
release information, the privacy policy, and the End User License Agreement; and view the application
version number.
User Guide 26

Getting Started with the Mitel One Mobile Application
The following table summarizes how to utilize the options available on the Settings panel of the Mitel One
application.
Profile You can change your avatar in the Mitel One app. To do this, tap the
Edit Photo, select the image you wish to use and then click Done. For
more information, see Set Up Your Profile on page 30.
Update your Status Tap this option to set your presence in the app, and to add a personal
message as your status. For more information, see Set Your Status
Message on page 37.
Set yourself as Tap this option to set your presence in the Mitel One web application.
Your presence enables other Mitel One users to know your availability.
For more information, see Set Your Presence on page 34.
Phone Tap this option to:
• Enable the Use Carrier Minutes toggle to place and answer calls
using the mobile voice plan. For more information, see Using
Carrier Network for Managing Calls on page 42.
• Add or edit your mobile number in the Mitel One app. For more
information, see Set Up Your Profile on page 30.
• Enable the Run in Background option (Android only) to prevent
the Mitel One app from remaining idle, thereby preventing the
Android OS from putting the application in Doze Mode or App
Standby.
Sign in or Sign out If you have not logged in to your Microsoft Office 365 account tap Sign
in. Tap Sign Out to sign out of your Microsoft Office 365 account.
Extended Search Tap this option to enable or disable a consolidated directory extended
search. For more information, see Contacts Menu.
Issues & Feedback Tap this option to report a problem you encountered while using the
application and to share your ideas and feature suggestions about
the application. For instructions on how to report issues and provide
feedback, see Report an Issue and Share Feedback on page 107.
About Tap this option to view the version details of the application, Account
Number; view the privacy policy, End User License Agreement, and
release information; and to set the logging level.
Help & Support Tap this option to access the end user help documentation.
27 User Guide

Getting Started with the Mitel One Mobile Application
LOG OUT Tap this option to log out of the app. When you log back in, all of your
calls, messages, meetings, and contacts will be there for you to access
again.
1.9 Supported Regions, and Languages
Supported Regions
The following table lists the countries where the Mitel One solution can be deployed.
Africa Americas Asia Pacific Europe Middle East
Botswana Argentina Australia Austria Bahrain
Cape Verde Brazil Bangladesh Belgium Cyprus
Egypt Chile French Polynesia Bosnia and Herze
govina
Jordan
French Southern
Territories 1 2
Colombia India Croatia Kuwait
Libya 2 Curaçao 1 2 Indonesia Czech Republic Lebanon
Madagascar 2 Ecuador Kazakhstan Denmark Qatar
Mauritius El Salvador Malaysia Finland Saudi Arabia
Niger Guadeloupe 1 2 New Caledonia France Turkey
Réunion 1 2 Guatemala New Zealand Germany United Arab Emir
ates
South Africa Martinique 1 2 Papua New Guinea Greece
Tanzania Mexico Philippines Hungary
Panama Singapore Italy
Peru Sri Lanka Kosovo
Taiwan Liechtenstein 1
Thailand Luxembourg
Macedonia 1
Monaco 1 2
Netherlands
Norway
Poland
Portugal
Romania
Russia
Serbia 1
User Guide 28
Africa Americas Asia Pacific Europe Middle East
Slovakia
Spain
Sweden
Switzerland
United Kingdom
1
Not supported by Apple App Store.
2
Not supported by Google Play Store.
Supported Languages
The following languages are supported for both the application and the online help:
• English (North American)
• French
• German
• Spanish (European)
• Portuguese
• Dutch
• Italian
By default, the display language of the app is specific to the country to which you have registered the app.
You can change the default language by selecting a language of your choice in the native settings area
of your mobile phone. The Mitel One app applies this setting to change the display language for the user
interface to the selected language.
Support for Remote Workers
Remote workers using the Mitel One app must register with a CloudLink account in one of the countries
listed in the Supported Regions section in this topic. For help, see Register and Access the Mitel One
Mobile Application on page 3.
The default ringtone is the one specific to the country in which the app was registered. For example, for
remote workers in Italy who have registered their Mitel One app in France, the default ringtone is the one
specific to France.

Setting up Your Mitel One Mobile
Application
2
This chapter contains the following sections:
• Set Up Your Profile
• Upload Your Avatar
• Set Your Presence
• Set Your Status Message
• Set Your Favorites
• Organizing the Widgets
• Using Carrier Network for Managing Calls
This chapter will help you understand how to change your profile picture, mobile number, or your availability
status, and to set your favorite contacts and speed dials.
2.1 Set Up Your Profile
You can edit your profile at any time to change your avatar, and mobile number.
Add or Edit your Avatar
Note:
You cannot change your email address from the Mitel One application. To change your email address,
you must log in to the MiVoice Office 400 server manager.
To edit your avatar:
User Guide 30

Setting up Your Mitel One Mobile Application
1. Tap your avatar at the top left of the app screen. A panel opens.
2. To change your avatar, tap Edit Photo and follow the prompts. For more information, see Upload Your
Avatar on page 33.
Note:
You cannot edit your name from the Mitel One application.
Add or Edit Your Mobile Number
To add or edit your mobile number:
31 User Guide

Setting up Your Mitel One Mobile Application
1. Tap your avatar at the top left of the app screen. A panel opens.
2. Tap Phone. The Phone Settings panel opens.
User Guide 32
Setting up Your Mitel One Mobile Application
3. Do either of the following:
• To add a mobile number
a.
Tap beside the mobile number. The Replace Number screen opens.
b. Select your resident country by using the drop-down menu and enter your mobile number. Tap
REQUEST CODE. You will receive a six-digit code on the mobile number you entered.
• To edit your mobile number
a.
Tap associated with My number . The Verify Number screen opens.
b. Select your resident country by using the drop-down menu and enter your mobile number. Tap
REQUEST CODE. You will receive a six-digit code on the mobile number you entered.
The Verify Number screen opens.
4. Enter the code in the field provided and tap CONFIRM. If you do not receive a text message containing
the code, tap Resend Code.
After successful verification of your number, a Number verified! You’re ready to make phone calls
banner appears at the top of the screen.
2.2 Upload Your Avatar
Your avatar is the icon or image that displays with your profile to help other Mitel One users recognize you.
When you first register your app, your avatar displays your initials until you upload an avatar.
To upload an avatar:
1. Tap your avatar at the top left of the app screen. A panel opens.
2. Tap Edit Photo and choose one of the displayed options:
• Take Photo (follow all on-screen prompts).
• Photo Library (navigate to and tap the desired photo on your mobile device).
• Remove Photo (follow the onscreen prompts to delete).
3. After choosing one of the above options, tap Done.
Note:
The maximum image size is 4.5 MB for the avatar. Supported image types are .jpg, .png, and .bmp.
33 User Guide

Setting up Your Mitel One Mobile Application
2.3 Set Your Presence
You can set your presence in the Mitel One mobile app. Your presence enables other Mitel One users
know your availability.
•
Indicates you are Available to message or receive calls.
•
Indicates you are Busy and not ready to message or receive calls. However, you will still receive
calls, messages, and message notifications when your presence is set to Busy.
Note:
Your presence automatically changes to Busy while you are on a call or in a Mitel One meeting.
•
Indicates that you are Away or have currently locked your system or mobile. However, you will
still receive calls, messages, and message notifications.
•
Enable Not Available to block all voice calls to your application and the desk phone associated
with your Mitel CloudLink account. To disable Not Available on your application, set your availability
status to Available or Busy.
Setting Your Presence
To set your presence, do the following:
User Guide 34

Setting up Your Mitel One Mobile Application
1. Tap your avatar at the top left of the app screen. A panel opens.
35 User Guide

Setting up Your Mitel One Mobile Application
2. Do either of the following:
• Using the Update your Status option. The status screen opens.
a. Tap your current presence. The Set yourself as panel opens.
b. Tap the corresponding option to set your presence to Available, Busy, Away, or Not Available.
c. Tap Save.
• Using the Set yourself as option
a. Tap the Set yourself as option. The Set yourself as panel opens.
User Guide 36

Setting up Your Mitel One Mobile Application
b. Tap the corresponding option to set your presence to Available, Busy, Away, or Not Available.
Setting the presence states in your app updates the presence states in the MiVoice 400 deskphone
associated with your Mitel CloudLink account and vice versa. The following table lists the presence states
in MiVoice Office 400 and their corresponding states in the Mitel One app.
MiVoice Office 400 Mitel One Mobile Application
Available Available
Absent Away
Meeting Busy
Not Available Not Available
Busy Busy
2.4 Set Your Status Message
To set or update your status message:
37 User Guide

Setting up Your Mitel One Mobile Application
1. Tap your avatar at the top left of the app screen. A panel opens.
User Guide 38

Setting up Your Mitel One Mobile Application
2. Tap the What’s your status? option.The status screen opens.
3. In the Type here field, enter your preferred message, and tap Save to save the message as your status
message.
2.5 Set Your Favorites
The Favorites widget will display your favorite contacts and contact groups, and speed dials making it
easier for you to communicate with your most important contacts.
39 User Guide

Setting up Your Mitel One Mobile Application
Note:
• You can add up to a maximum of 48 entries in the Favorites widget.
• You cannot add speed dials or user groups as favorites using the mobile app. However, the
speed dials and user groups added using your Mitel One web application will be displayed in the
Favorites widget of the mobile app.
• You cannot rearrange your favorite contacts in a preferred order using the mobile app. You can
rearrange them using your Mitel One Web application to be displayed in the Favorites widget of
the mobile app.
To add contacts as Favorites:
1.
In the Home screen, tap in the Favorites widget. The widget panel opens.
2. Tap the Add option. The Add Favorite panel opens displaying the contacts.
3.
Tap associated with a contact in the business or personal (if configured) contact list to add that
contact as your favorite.
2.6 Organizing the Widgets
Mitel One mobile app allows users to organize the widgets in the app.
User Guide 40

Setting up Your Mitel One Mobile Application
Note:
You can organize only the Missed Calls widget and the Messages widget in the Mitel One Mobile
application. You do not have an option to move the Quick Functions widget. To change the order of
all widgets including the Quick functions widget, rearrange them in the Mitel One Web application. The
change will reflect in the Mitel One Mobile application.
To organize the widgets:
1. In the Home screen, swipe up to access the EDIT option.
41 User Guide
Setting up Your Mitel One Mobile Application
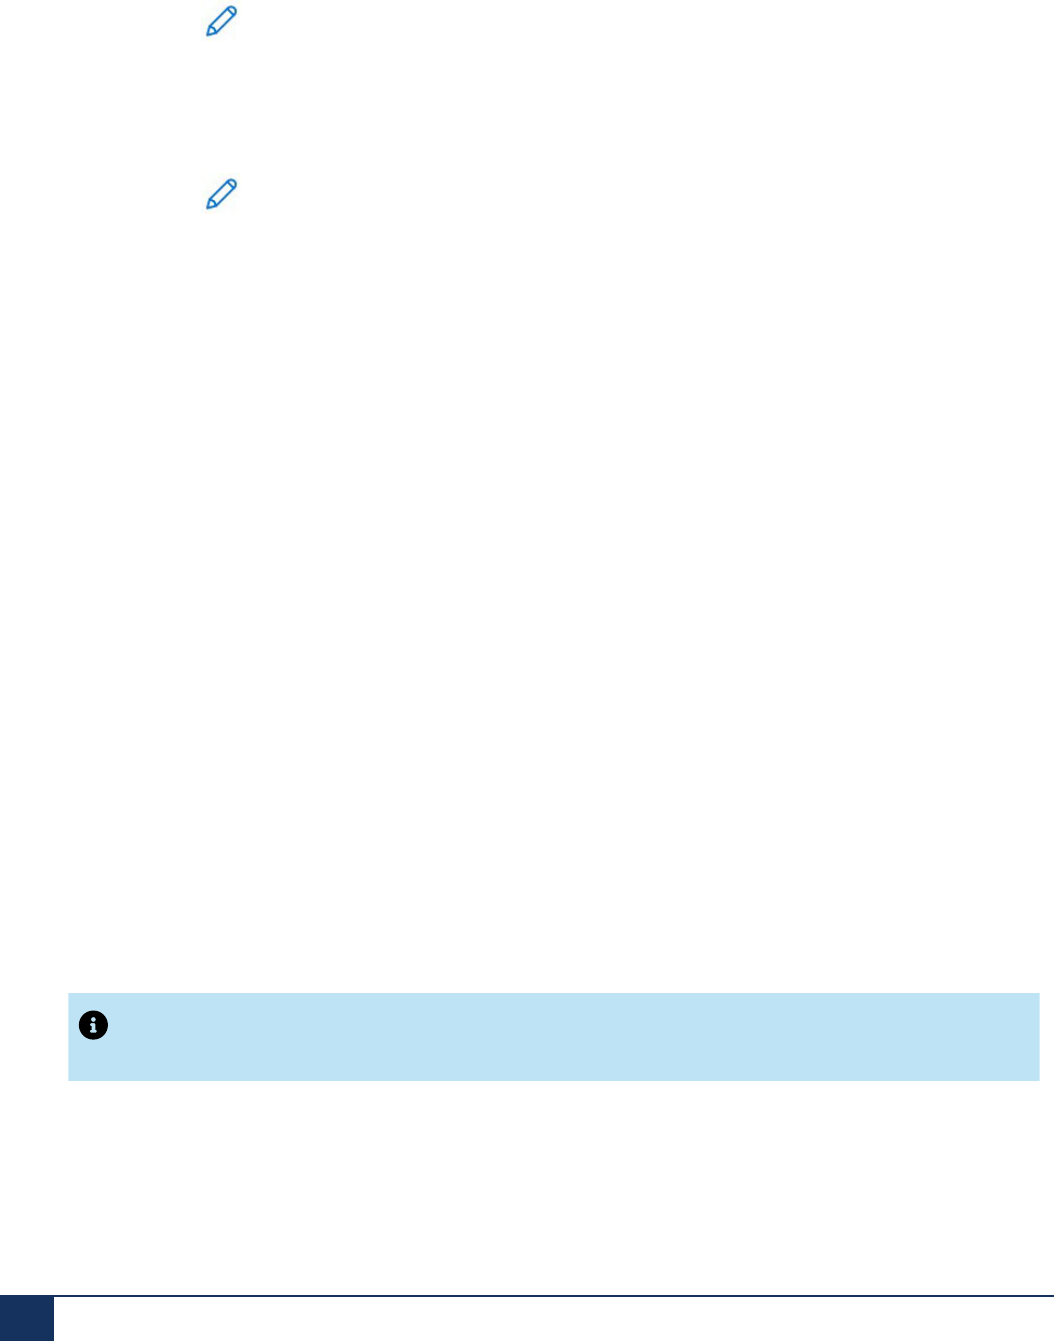
2. Tap EDIT. The Widgets order panel opens.
3. Choose which widget you want to appear on top of the Home screen.
4. Tap SAVE to save the changes
2.7 Using Carrier Network for Managing Calls
You can connect all outgoing and incoming calls using the carrier network in your phone via the native
dialer instead of the Mitel One app.
Note:
• The Use Carrier Minutes toggle is disabled by default.
• You must verify your mobile number to use this functionality. For more information, see Verify your
Mobile Number on page 12.
• The Use Carrier Minutes toggle was previously known as Use GSM.
To enable the toggle:
User Guide 42

Setting up Your Mitel One Mobile Application
1. Tap your avatar at the top left of the app screen. A panel opens.
2. Tap Phone. The Phone Settings panel opens.
43 User Guide

3. Slide the Use Carrier Minutes toggle to the right.
During a carrier call, the call features available in the application’s call screen are not supported. When this
toggle is disabled, calls are placed and received over a Wi-Fi or LTE network via the Mitel One app, and all
call features are supported.
Note the following requirements, limitations, and characteristics for calls placed and received over a carrier
network:
• Carrier calls require configuration of the MiVoice Office 400 PBX for your Mitel CloudLink account. For
details, see the Configure GSM Call Through Feature section of either of the two Configure MiVoice
Office 400 PBX topics located here and here.
• When the following dialog appears while placing a carrier call, tap the Call option to give the app
permission to place the call. The phone number displayed in this dialog is not the number you are
calling; it is an internal routing number that also appears in your mobile phone's native call history
screen.
• You cannot block your outbound caller ID. This means you cannot dial a block caller ID code (for
example, *67) before placing a carrier call and cannot enable a setting on your phone (or on a website
or app used to manage your phone) to block your caller ID.
• Your outbound caller ID displays the DDI phone number of your MiVoice Office desk phone.

Phone
3
This chapter contains the following sections:
• Call Features
• Answer or Decline a Call
• Place a Call
• Place an Emergency Call
• Start a Conference Call
• Handle Multiple Calls
• Transfer a Call
• Call History
Note:
Because Ray Baum is not supported on the MiVoice Office 400 PBX, telephony is disabled on the Mitel One
web application for MiVoice Office 400 PBX users in North America.
The topics listed will help you learn how to best utilize the telephony feature provided by the Mitel One mobile
application.
3.1 Call Features
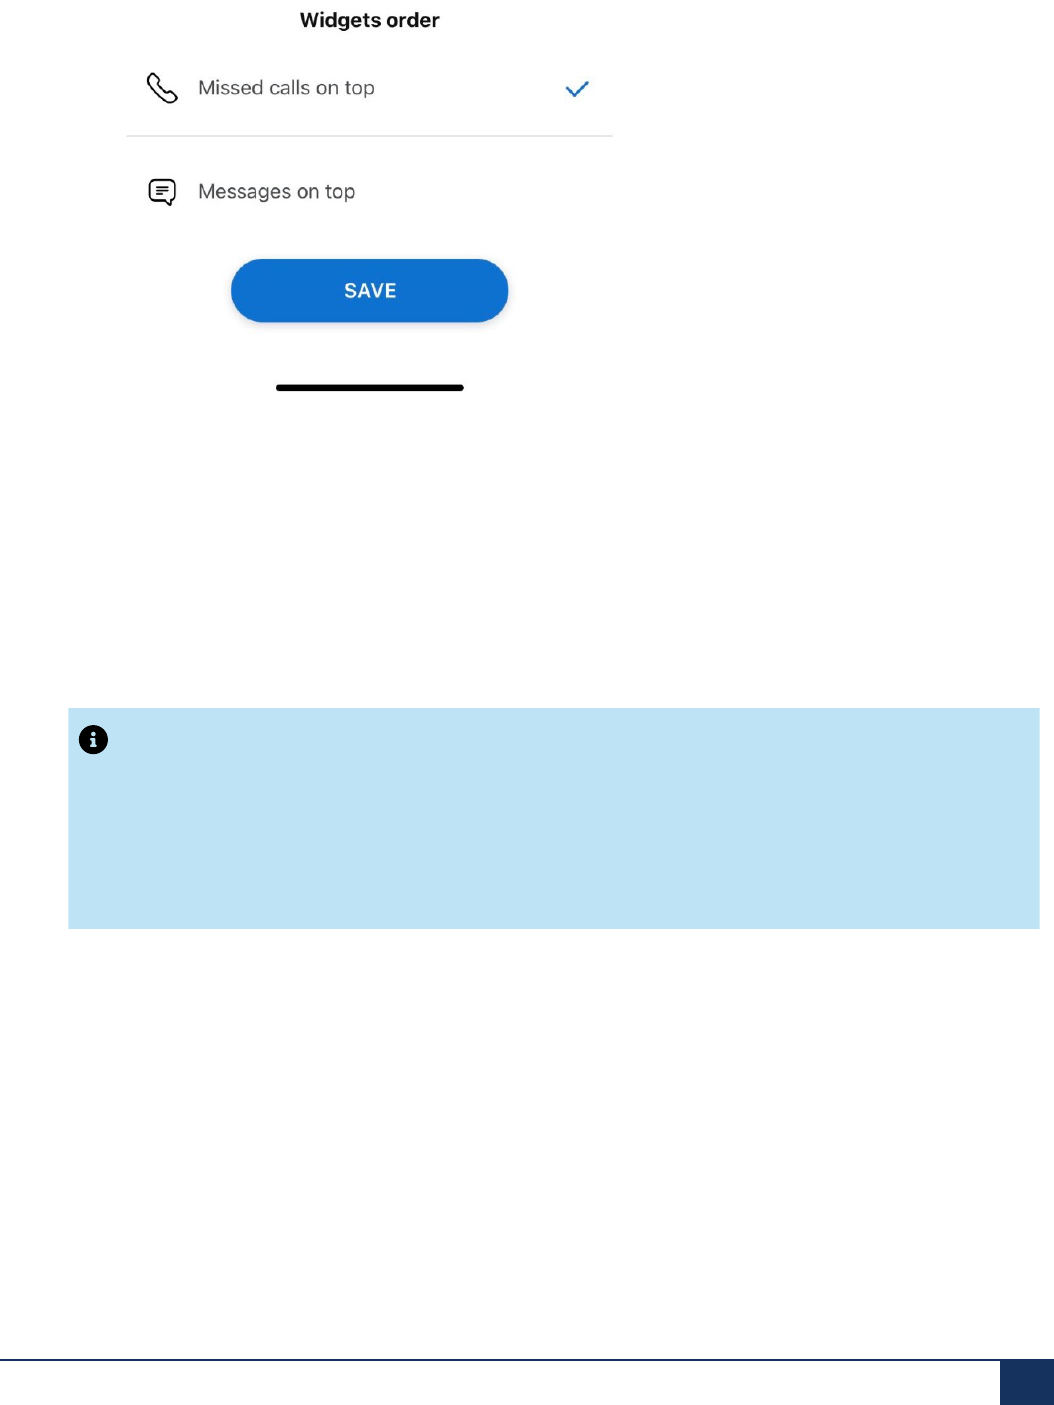
During an active call, the Mitel One mobile app call screen provides access to the following call control
features:
User Guide 45
Phone
• Mute — Prevents the other party from hearing your voice and any background noise.
• Dialpad — Enter the phone number of a contact using the keypad to call the contact. Also, you can use
DTMF tones on IVR to call the number.
• Speaker — Play audio using the speaker on your mobile device.
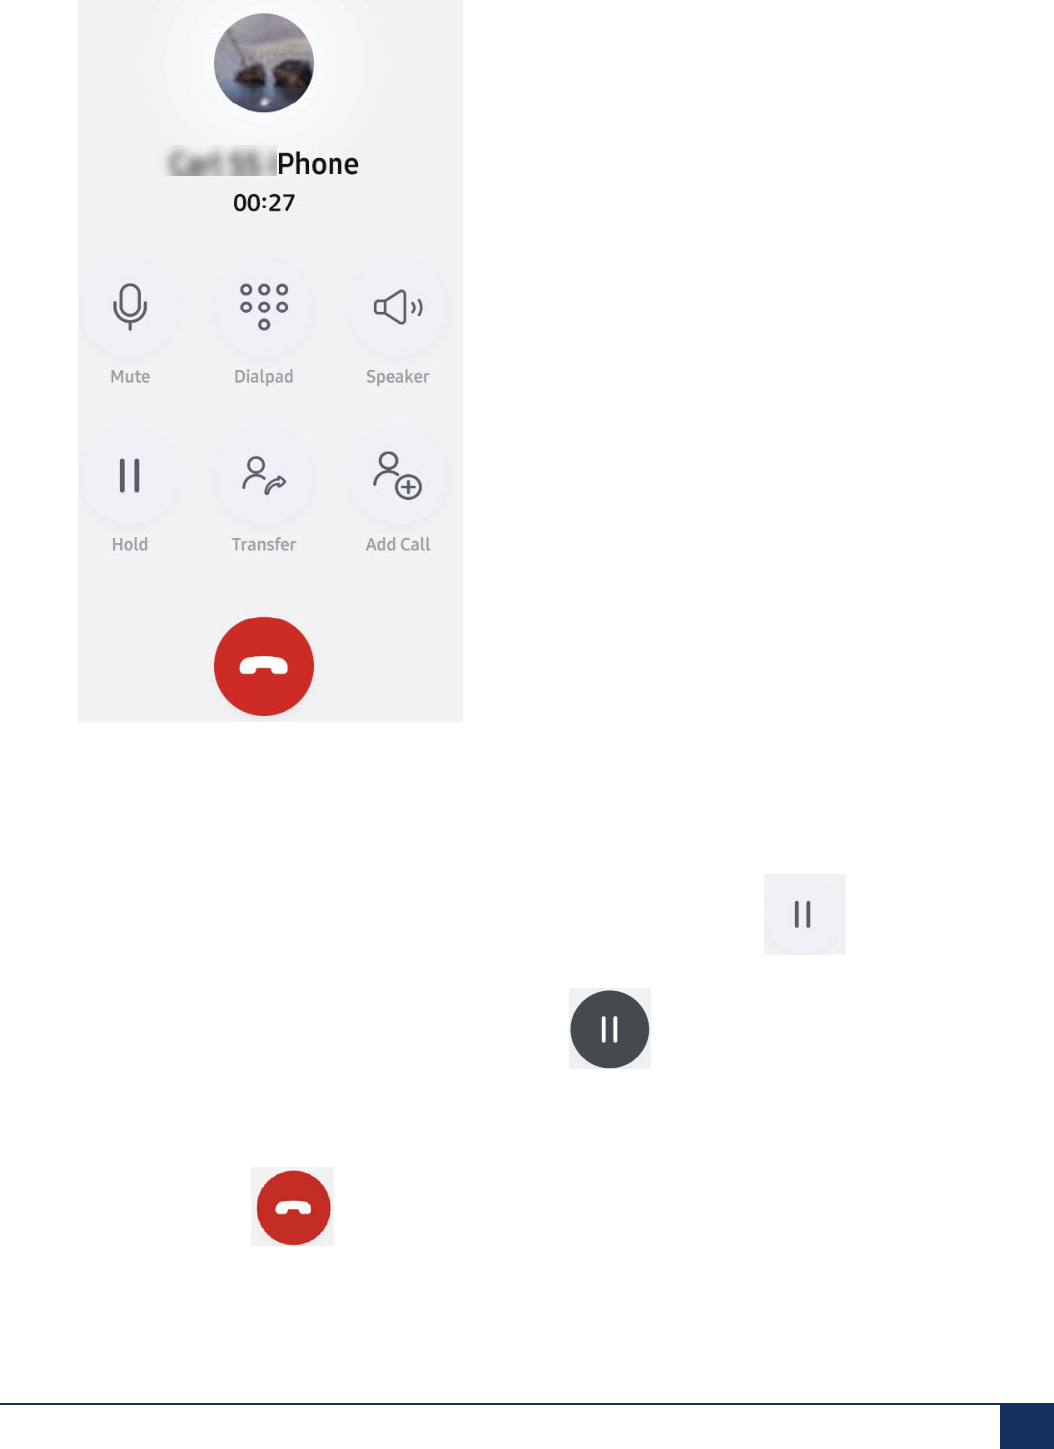
•
Hold — Place teh caller on hold. To place a call o hold, tap the Hold icon ( ). This disables
all the other icons on your call screen. While you place a call on hold, the contact at the other end is
alerted with a beep. To retrieve the held call, tap the icon.
• Transfer — Transfer an active call to one of your contacts or another phone number. For more
information, see Transfer a Call on page 66.
• Add Call — Add a new call to the ongoing call.
•
End Call — Tap to end the call.
User Guide 46
Phone
Note:
• All call screen buttons will not be visible on some device types or in certain screen resolutions. In
such cases, you can scroll the call screen to access the required buttons.
• Call history, incoming caller ID, and outgoing caller ID are synchronized with consolidated directory
contacts . Hence, the name and details displayed in the call history, incoming call screen, and
outgoing call screen are from the consolidated directory if the application is not synchronized with
the Office 365 account of a user. If the application is synchronized with Office 365, all details in the
call history, incoming call screen, and outgoing call screen that are from the consolidated directory
are overridden with the details from the contacts if it exists.
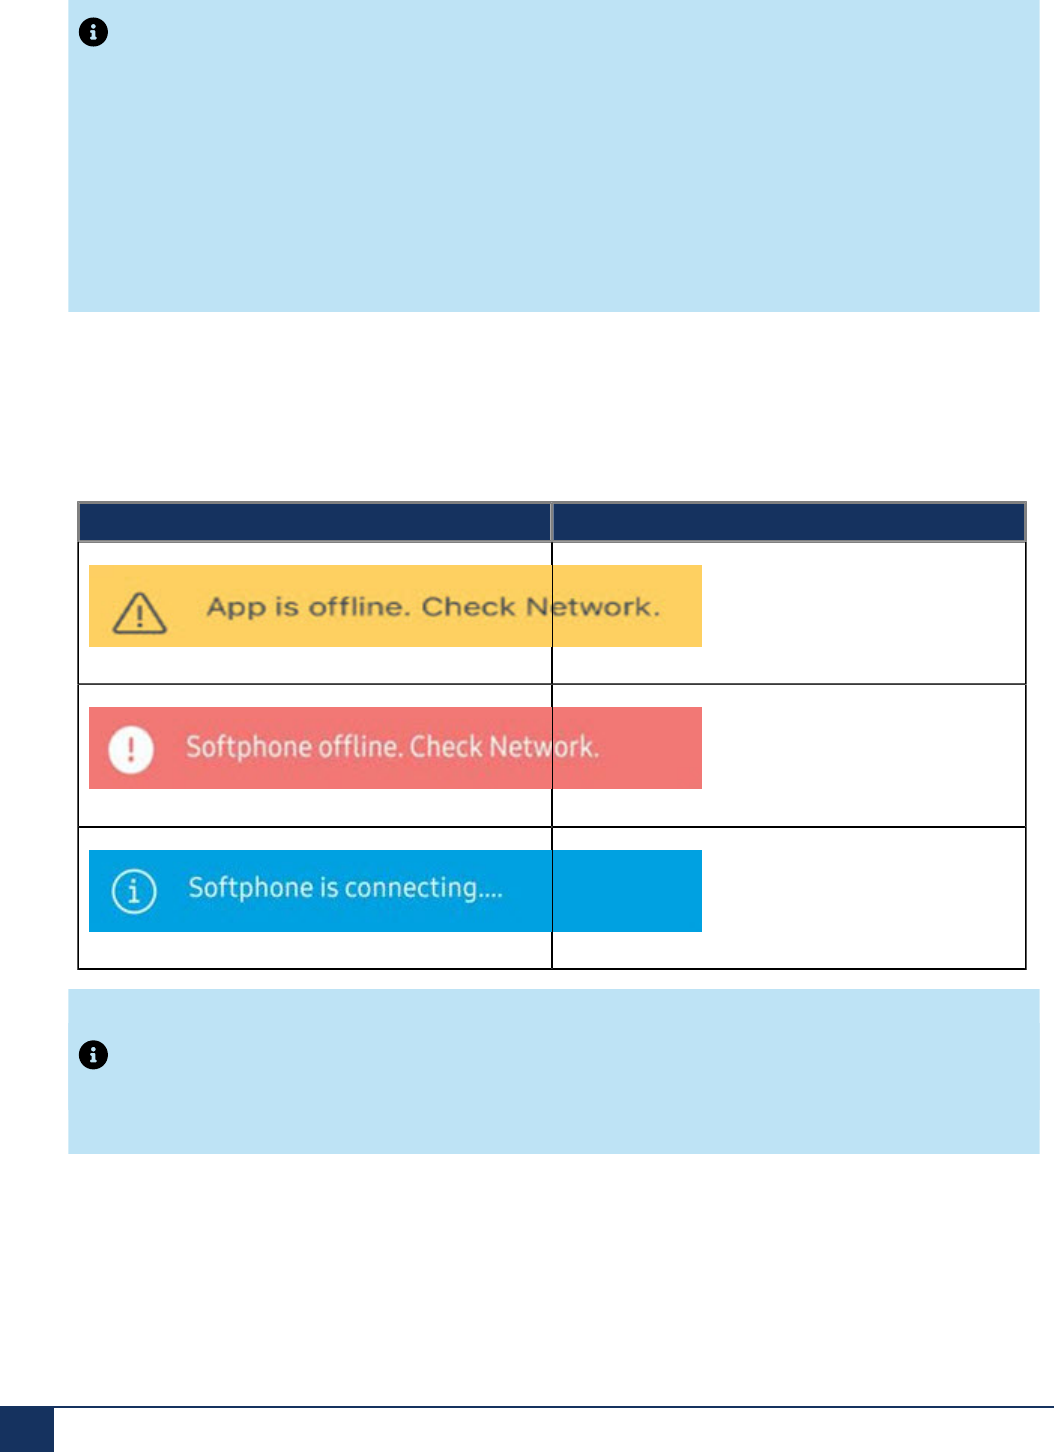
Call Banners
Three different call banners are displayed within the Mitel One Mobile Application. These banners will
appear when the application or softphone are offline, and can be used to identify why it may not possible to
make a call.
Call Banners Description
Indicates that there is no local WiFi or LTE network
connectivity available.
Indicates that the softphone is offline. This banner
is displayed after network outage, or as a result of
a device or application restart.
Indicates that the softphone is not yet registered
and available of making or receiving calls.
Note:
You will not be able to make or receive calls whilst call banners are displayed.
47 User Guide
Phone
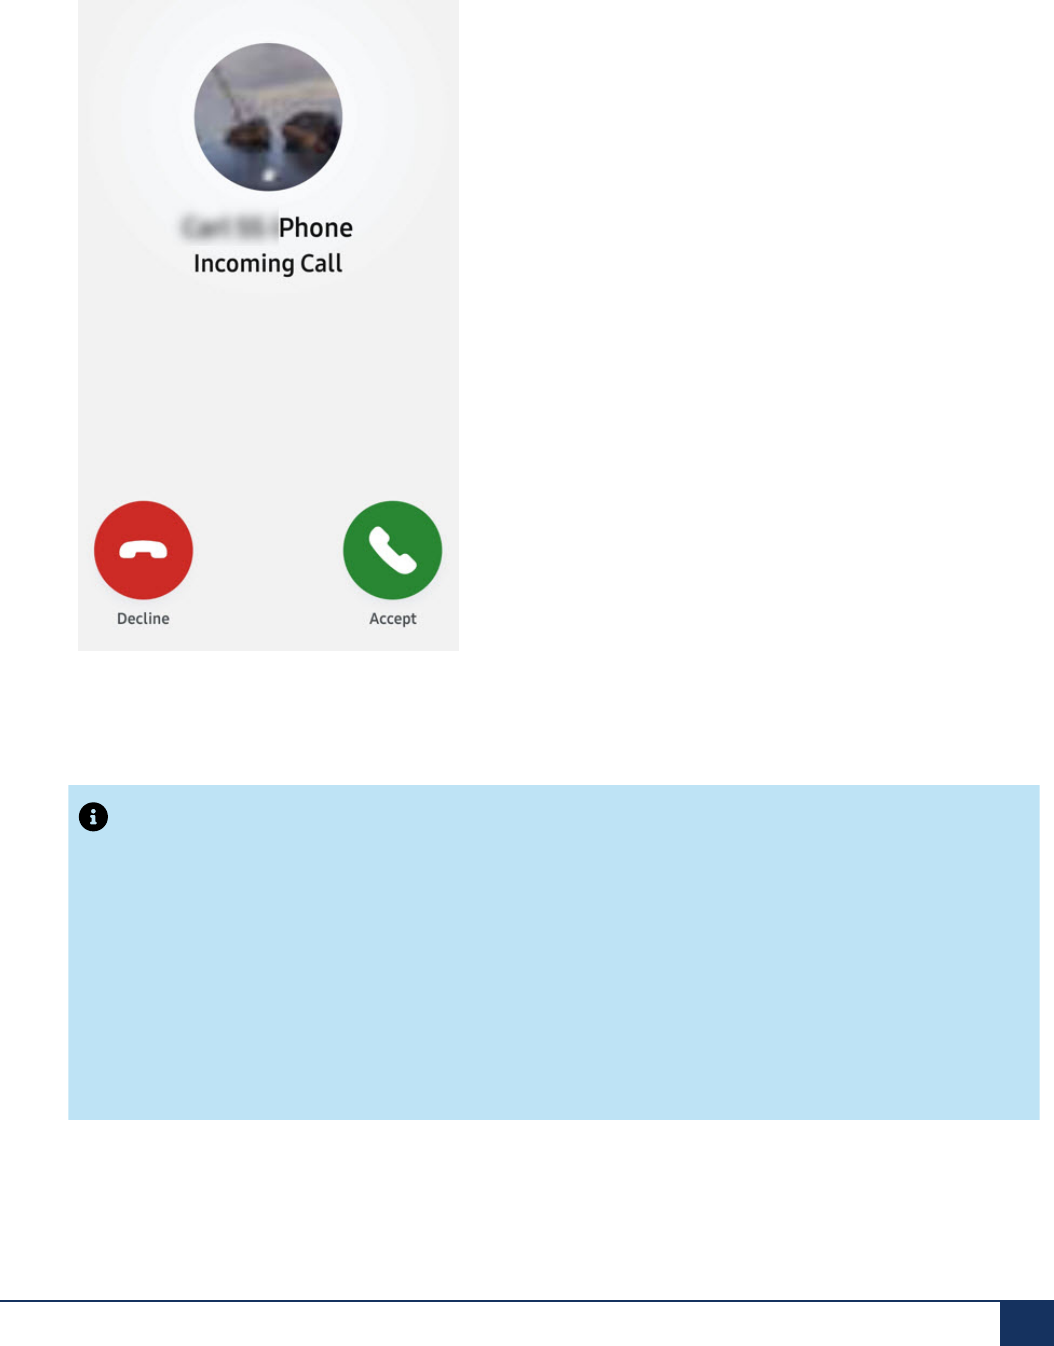
3.2 Answer or Decline a Call
The Mitel One mobile app displays a call screen with the options to accept or decline an incoming call. Tap
Accept to answer the call or Decline to ignore the call.
Note:
• The Mitel One app can simultaneously handle two connected calls; an ongoing call and a call on
hold. If there is a third call when two calls are already connected, the call screen opens displaying
options to Accept or to Decline that call. If you accept the call, the ongoing call gets disconnected.
If you decline the call, the call is routed to the voicemail system associated with your desk phone
depending on how the app is configured in the PBX for your Mitel One account.
• When the Use Carrier Minutes toggle is enabled, you will see your mobile phone’s native call
screen when you answer a call. If the Use Carrier Minutes toggle is disabled, you will see the
Mitel One call screen displaying all the app's call features. For more information, see Using Carrier
Network for Managing Calls on page 42.
For all incoming calls that you receive:
User Guide 48
Phone
• If the caller is one of your contacts, the application displays the caller's name.
• If the caller is not one of your contacts, the application displays the name if a name is available in the
caller ID; otherwise, the application displays the phone number.
• When caller information is marked private, the application displays Unknown.
• If you have saved two or more contact names with the same number, the application displays the first of
these names in the contact list when you receive a call from that number.
When an incoming call is not answered during the time when the call rings and on-screen notifications
are presented, the call is logged in the application as a missed call. If the incoming caller hangs up before
the call forwards to voicemail a red notification dot is displayed along with the Phone icon in the
navigation menu of the application and also updates the Missed Calls widget indicating that you have a
missed call.
If the incoming caller leaves a voicemail message, a voicemail notification icon will appear next to the
Phone icon indicating you have new voicemail messages. The Missed Calls widget also indicates
that you have a missed call.
Call Notifications
Incoming calls generate different on-screen notifications depending on the following scenarios for your
Mitel One mobile app:
iPhone
• When your app is open and visible, or running in the background (open and not visible), an incoming
call rings and an on-screen notification appears. Tapping the notification opens the call screen
displaying options for you to Accept or Decline the call.
• When your app is not running (closed), an incoming call rings and an on-screen notification appears.
Tapping the notification opens the call screen displaying options for you to Accept or Decline the call.
• When your mobile screen is locked, an incoming call rings and an on-screen notification appears.
Swiping the notification to the right answers the call and displays the native call screen. To access the
app call screen, tap the Mitel One icon and unlock your phone.
Android
• When your app is open and visible, or running in the background (open and not visible), or not running
(closed), an incoming call rings and the call screen opens displaying options to decline or accept the
call. These options are displayed even when your mobile phone is locked.
49 User Guide

Phone
Note:
Battery optimization features can prevent the Mitel One app from displaying incoming messages
and call notifications when the app is running in the background or closed. To receive incoming
message and call notifications in the Mitel One app, the user must turn off battery optimization
options in the mobile device. There are two categories (OS default and mobile device type specific)
of Android mobile device battery optimizations that a Mitel One app user needs to be aware of. The
app prompts the app user to disable battery optimization set as the default OS option, however the
mobile device user must specifically check the other device specific battery optimization settings.
1. Default
When an app user logs in to the Mitel One app or starts the app, the app user must select Allow
and then Allow again if the "Run in the Background" prompt requests a confirmation to allow
the app to run in the background. Selecting Allow will disable battery optimization related to the
Mitel One app. If you select Deny, the app may not receive chat and call notifications when the
app is running in the background or closed.
2. Device Specific
Many Android mobile devices have additional battery optimization settings/options (such
as Performance Mode, Power Savings mode, Ultra Power Savings mode, Manage All
Automatically) that impact the app from receiving notifications. Also, there are several user
options related to the app receiving notifications. Refer to the user guide for your specific
Android mobile device type to ensure that the battery optimization and notifications options
are set accordingly to allow Mitel One app incoming chat and call notifications when the app is
running in the background or closed.
3.3 Place a Call
The Mitel One mobile app provides calling icons throughout the application to facilitate you to place calls.
Place a call using dialpad
To place a call using dialpad:
User Guide 50

Phone
1. Access the dialpad by doing either of the following:
• Tap the Press to dial a number option in the Missed Calls widget.
•
Open call history and tap the dialpad icon ( ).
The dialpad opens.
.
51 User Guide

Phone
2. Dial the telephone number using the dialpad, or enter or paste the number in the field provided.
3.
Tap to place the call.
Place a call from Favorites
Tap any contact in the Favorites widget, and tap the Call icon ( ) from the panel that opens to dial
the primary telephone number for a contact.
Place a call from the Contacts menu
To place a call to a contact from the Contacts menu, do either of the following:
•
Swipe right on the contact and tap to dial the primary telephone number for the contact.
•
Tap the contact, and tap the Call icon ( ) from the panel that opens to dial the primary telephone
number for the contact.
User Guide 52

Phone
Place a call from the Phone menu
To place a call using the call history records in the Phone menu, tap any call history log to place a call to
that contact.
Place a call from the messaging window
To place a call when you are messaging a contact, tap displayed at the top-right of the messaging
window to dial the primary telephone number for the contact.
Making calls via the iOS call history
If a Mitel One call is displayed in the iOS call history, and once the call is selected then the call is made via
the Mitel One application.
Note:
1. Not all Mitel One Softphone calls are displayed in the iOS call history. For example, if your call
routing is set to ring on your Deskphone but not your Mitel One Softphone, then the call will appear
in the Mitel One call history but not in the iOS call history.
2. Calls may be categorized differently in the iOS call history and the Mitel One Softphone call history.
For example, if a call rings on both the Mitel One Softphone and the users Deskphone, and the
user answers the call using the Deskphone, in the iOS call history, the call is displayed as a missed
call, while in the Mitel One call history, it is displayed as an answered call.
3. If you see the notification warning Attention Calling is currently unavailable displayed when you
attempt to make a call then the Mitel One softphone is not registered, please check your network
settings and try again.If the issue persists please contact your network administrator.
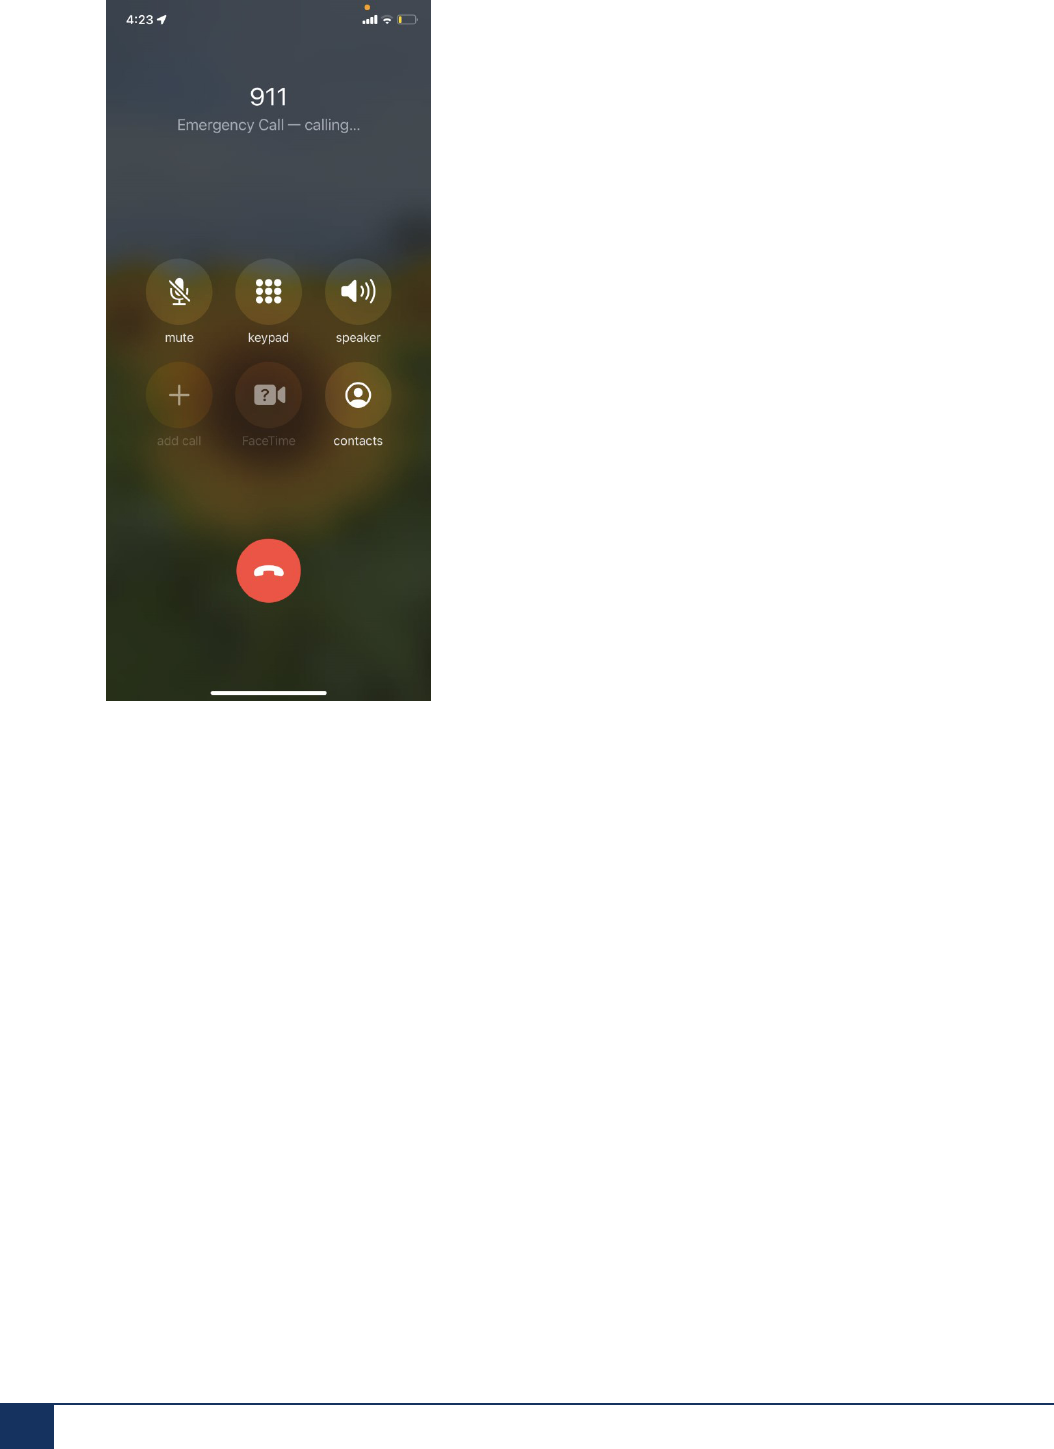
3.4 Place an Emergency Call
Mitel One supports the following Emergency numbers: 000, 110, 111, 112, 118 119, 911, and 999, thereby
allowing users access to these Emergency calling services. The Emergency calling services are specific to
each country supporting such services, and to ensure that there are no dialing conflicts, the administrator
must configure these Emergency numbers in the MiVoice Office 400 PBX.
To place an Emergency call:
53 User Guide

Phone
1. Access the dialpad by doing either of the following:
• Tap the Press to dial a number option in the Missed Calls widget.
•
Access the Phone menu and and tap the dialpad icon ( ).
The dialpad opens.
User Guide 54

Phone
2. Dial the Emergency number using the dialpad, or enter or paste the number in the field provided.
55 User Guide

Phone
3.
Tap to place the call. A Call XXX (Emergency number) prompt appears.
Clicking the prompt places the call through the closest GSM cellular network via your mobile phone’s
native dialer instead of through the Mitel One app. Clicking Cancel cancels the operation.
User Guide 56
Phone
Points to Consider
• It is recommended that you use your mobile phone’s native dialer instead of the Mitel One app to place
an Emergency call.
• It is recommended that you dial the Emergency number specific to the country you are currently located
in.
• In case of Android devices, the device determines whether a dialed number is an Emergency number
or not based on the location, SIM card, Android database, and network, and the device will override
the numbers supported by the Mitel One app. That is, an Emergency number supported by Mitel One
might be determined to be not an Emergency number by the device. For example, 000 is an Emergency
number supported by the app, but an Android device in US will not select it as an Emergency number.
On the other hand, when the Android device is in certain countries, when you dial 144, the device will
select that as an Emergency number even though the Mitel One app does not support that number as
an Emergency number.
3.5 Start a Conference Call
The Mitel One Mobile application supports three-person conference calls. You can talk to two persons at
the same time by starting a conference call among you and them.
57 User Guide

Phone
Note:
• A conference call in Mitel One is limited to three participants.
• During a conference call, the participants in the call can mute the call, put the call on speaker, swap
the call, use the dial pad, or end the call.
• During a conference call, if one of the participants drops, the remaining two participants can
continue the call as a regular call with all the basic call features.
• The call screen of each participant in a conference call will display the name (if provided) or
number of the other two participants in the call.
You can convert an ongoing call into a conference call by following these steps:
User Guide 58

Phone
1.
During an ongoing call, tap the Add Call icon ( ) in the call screen of the application.
59 User Guide

Phone
2. The ongoing call is placed on hold, and the Add Call screen opens where you can select the contact
you want to call by doing one of the following:
• In the Search field, enter the name of the contact. The Search field displays a list of contacts whose
names match the letters that you type. Tap the name to select that contact.
• In the Search field, enter the number of the contact and tap ENTER to select that number.
3. After selecting the contact, tap CALL to place a call to the selected contact. Tapping Cancel cancels
the operation and returns you to the call screen.
User Guide 60
Phone
Note:
Tap Swap to place the current call on hold, and to remove the hold placed with the first contact.
61 User Guide

Phone
4.
After the second contact answers the call, click the Merge icon ( ). The calls are merged into a
conference call involving these contacts.
3.6 Handle Multiple Calls
In a busy work environment, you may need to answer more than one call at a time. The Mitel One mobile
app enables you to answer an incoming call while you are already on another call.
User Guide 62

Phone
Options for Answering a Second Incoming Call
When you are on one call, and you receive a second call, you have the following options:
• To accept the second call and end the first call, tap the End & Accept icon.
• To decline the second call and stay on the first call, tap the Decline icon.
• To accept the second call and place the first call on hold, tap the Hold & Accept icon.
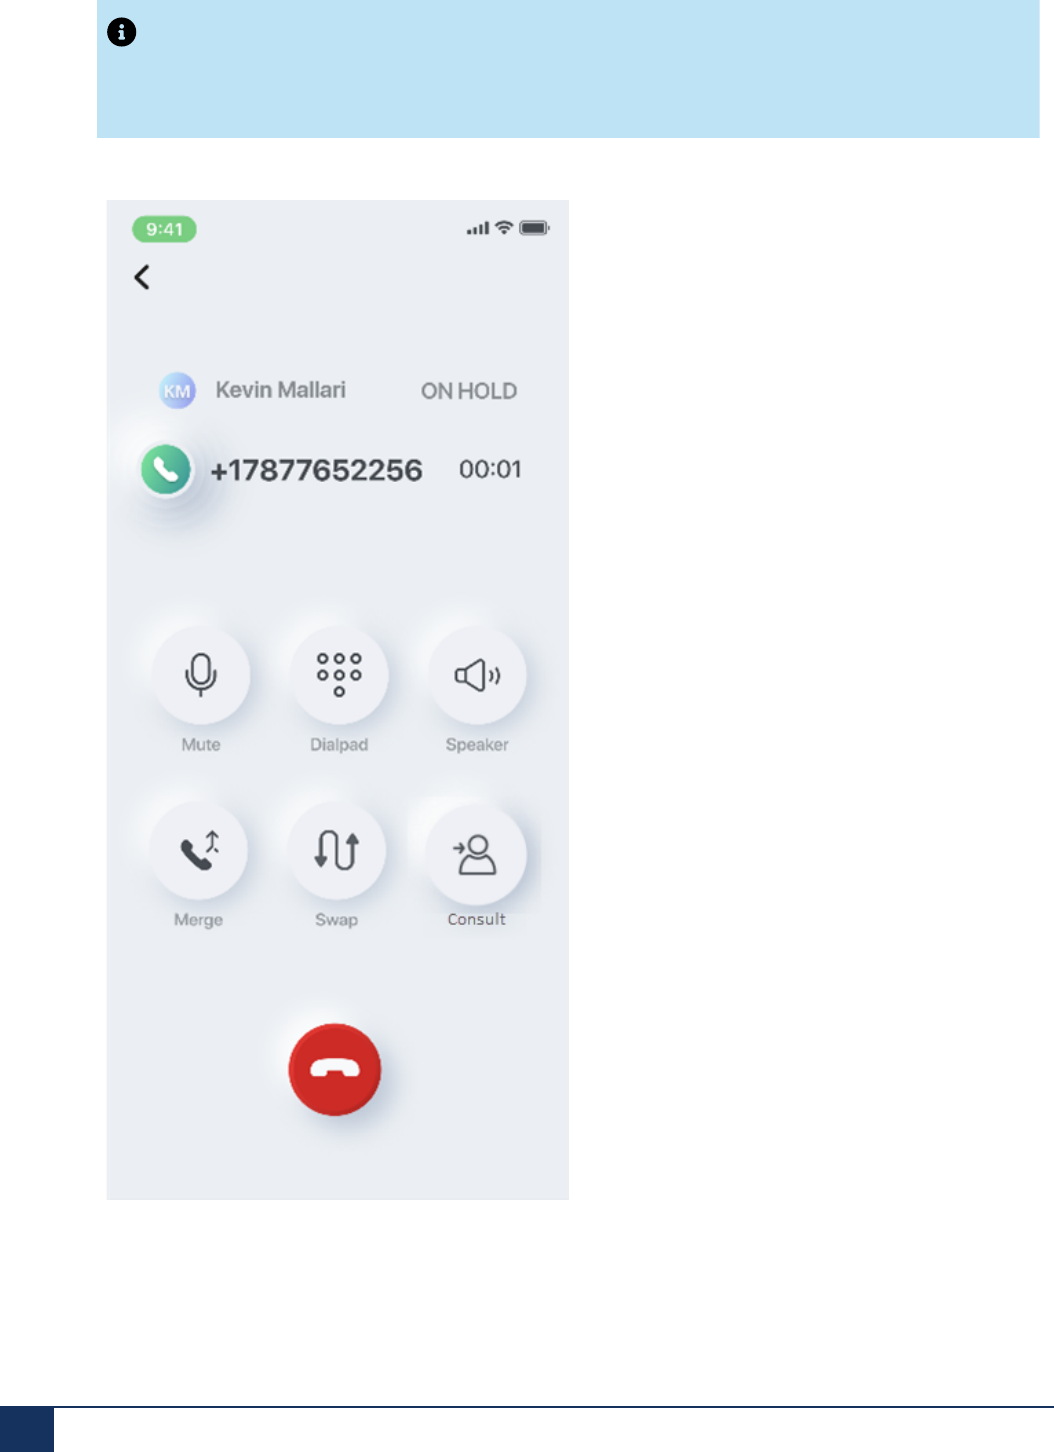
Options for Managing Two Calls
When you have two calls connected at the same time, you have the following options:
63 User Guide

Phone
• Mute: Prevents the other party from hearing your voice and any background noise.
• Dialpad: Enter the phone number of a contact using the keypad to call the contact. Also, you can use
DTMF tones in an IVR.
• Speaker: Play audio using the speaker on your mobile device.
• Merge: Merge an active call with a call on hold to create a three-person conference call.
• Swap: Switch between two calls. This places the active call on hold and changes the call on hold to be
the active call.
• Transfer To Held Call — Transfer the active call to the contact placed on hold.
•
End call: Tap to end the call.
• The call information and options presented on the web application call screens will be the same as
those presented on the mobile application call screens except that the mobile application call screen
shows a call on hold and offers a swap call option because the mobile application always shows only
one call screen at a time. In the web application, there is a call screen for each call; therefore, the call
screen UI does not indicate the call on hold and does not offer swap because the call screen for the
other call is displayed and can be directly accessed.
User Guide 64

Phone
3.6.1 Conference Call
An incoming conference call will appear identical to a normal incoming call, until the call is merged. Once
merged the other two participants names are displayed.
65 User Guide

Phone
Note:
• A conference call in Mitel One is limited to 3 participants.
• During a conference call, the participants in the call can only go on Speaker, Mute or end a call. All
other options are disabled.
• During a conference call, the call screen of the participant who initiated the call displays the name
or number of the other two participants in the call. The call screens of the other two participants
displays the name or number of the participant who initiated the call, plus the other third party in
that Conference Call.
• During a conference call, if one of the participants drops, the call continues as a regular call for the
remaining participants. However, if the participant who initiated the call drops, the call screen of the
application of the participant who last joined the three-person call will continue to display the name
or number of the participant who initiated the call instead of the participant with whom the call is
currently connected.
3.7 Transfer a Call
The Call Transfer feature in the Mitel One mobile app allows you to redirect an ongoing call from your
mobile to another number. When the transfer is successful, you are disconnected from the call and the call
to the redirected number becomes the active call. Either person on a call can transfer the call. Mitel One
mobile application supports two types of call transfers: Blind transfer and Supervised transfer.
Blind Transfer
In Blind transfer, you can transfer an ongoing call immediately without waiting for a response from the
contact to whom you want to transfer the call.
To Blind transfer a call:
1.
During the ongoing call, tap the transfer icon ( ) in the call screen of the Mitel One mobile app.
User Guide 66
Phone
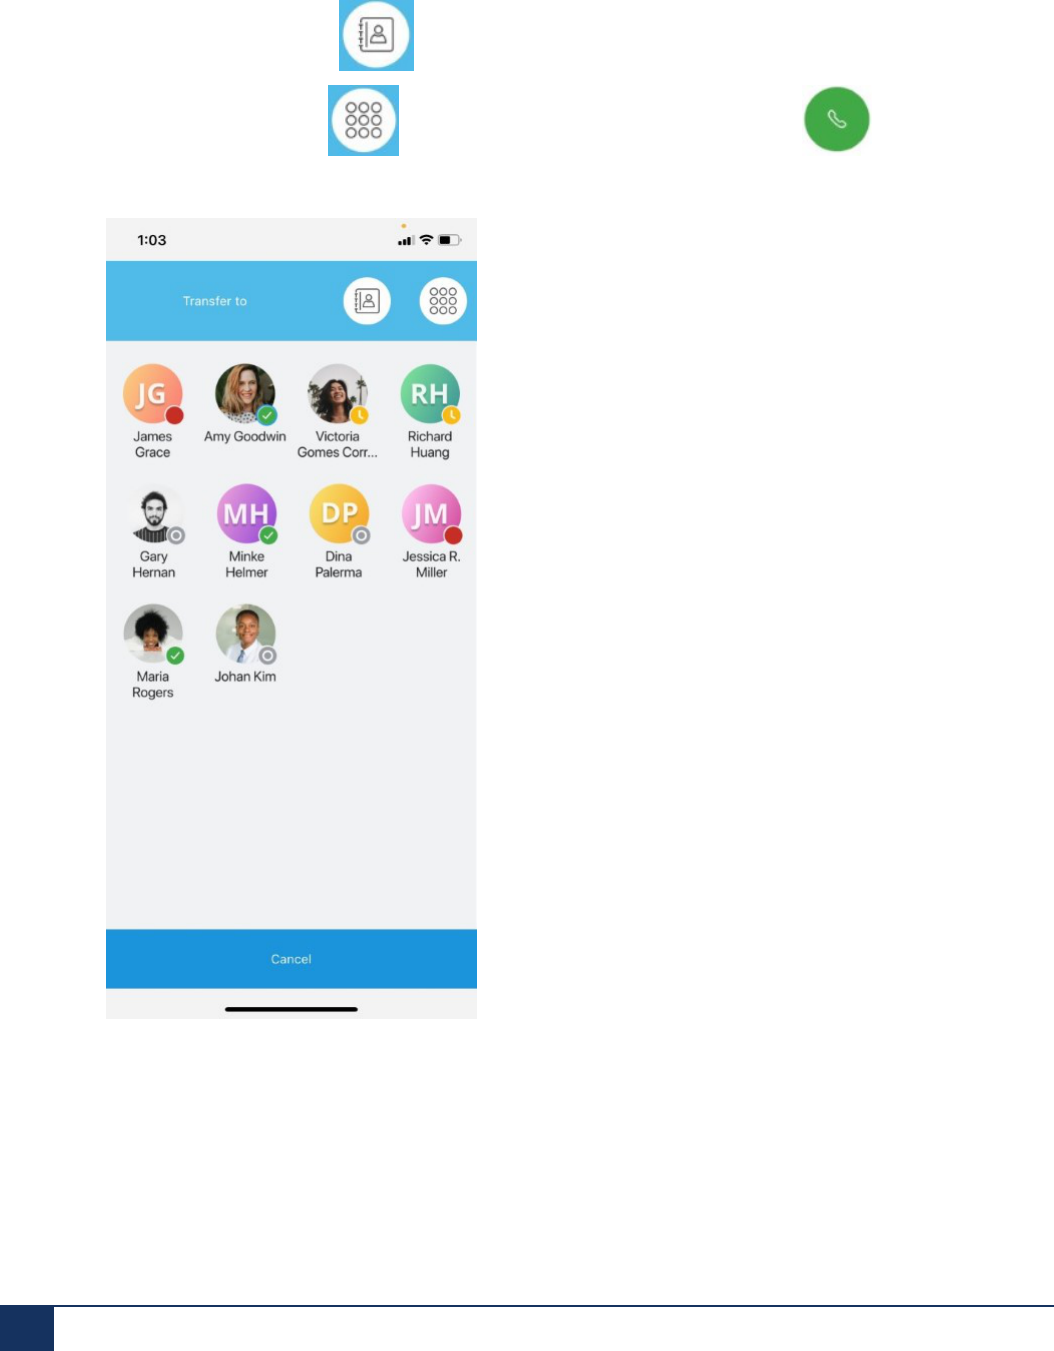
2. The Transfer to screen opens, where you can select the contact and then transfer the call by doing one
of the following:
• Tap the contact’s Tile on the screen.
•
Tap the Contacts icon ( ), and tap the contact from the list that appears.
•
Tap the Dialpad icon ( ), enter the contact’s phone number, and tap ( ) to call that
number.
This completes the Blind transfer. The call ends for you and the contact at the other end is placed on the
transferred call.
Supervised Transfer
Supervised transfer allows you to transfer an ongoing call after consulting with whom you want to transfer
the call to. You will remain on the ongoing call until the transfer is complete.
67 User Guide

Phone
To transfer an ongoing call through Supervised transfer:
1.
Call the contact to whom you want to transfer the call by tapping the Add call icon ( ) on the app
call screen.
2. The active call is placed on hold and the Add a recipient screen opens where you can select and
call the contact to whom you want to transfer the call by doing one of the following. When you call the
contact to whom you want to transfer the call, the contact at the other end of the ongoing call is placed
on hold.
• Tap the contact’s Tile on the screen.
•
Tap the Contacts icon ( ), and tap the contact from the list that appears.
•
Tap the Dialpad icon ( ), enter the contact’s phone number, and tap ( ) to call that
number.
User Guide 68

Phone
If the contact to whom you want to transfer the call agrees to accept the call being transferred, tap the
Transfer To Held Call icon ( ) to transfer the call. This ends the call for you and the contact who is
at the other end on hold is placed in a call with the contact to whom you transferred the call.
Before transferring the call, you can switch between the contact at the other end on hold and the contact to
whom you want to transfer the call by tapping the Swap icon ( ). When you tap this icon, the active
call is put on hold and the call on hold becomes the active call.
If the contact to whom you want to transfer the call does not respond to the call or declines to accept the
call being transferred, tap on the call screen to resume your call with the contact on hold.
For details on call history records for a transferred call, see Call History Records for a Transferred Call on
page 73.
Consolidated Directory Contact Transfer
When you want to transfer a call to a consolidated directory contact, perform the following steps:
1.
During the ongoing call, click the back arrow ( ) on the call screen.
69 User Guide

Phone
2. Select the Contacts option and search for the contact you want to transfer the call.
User Guide 70
Phone
3.
Select the contact and click the call icon ( ).
4. The call screen will now have the option Transfer to held call. Click Transfer To Held Call to complete
the transfer.
3.8 Call History
The Phone menu of the Mitel One mobile app enables you to view all outgoing, incoming, and missed
calls, place a call to any contact in the call history, and delete a call history item.
Call history is synchronized with the consolidated directory contacts configured through the PBX (OIP/AD/
Public and Private Phonebook). If the application is synchronized with the Office 365 account of a user, the
call history screen will display the user's name and details from the contacts if it exists.
The call history is stored in the Mitel CloudLink Platform. Therefore:
71 User Guide
Phone
• you can access the call history from any Mitel One application (web or mobile).
• when you delete the Mitel One mobile app, the call history is not deleted. When you reinstall the
application, and log in, the call history is synced and displayed in the application.
Note:
• The call history in the application is not synced with the call history on the desk phone associated
with your Mitel CloudLink account. Also, the call history in the application displays the name of a
user as registered in the Mitel CloudLink Platform whereas the desk phone associated with your
account displays the name of the same user as registered in the MiVoice 400 PBX.
• After a user leaves a conference, the call history in the application displays an incoming call entry
from each participant in the conference and also an outgoing call entry to the conference bridge.
• When the application is synchronized with the Office 365 account of a user, the call history screen
will display the name and details from the contacts if it exists, when the user calls or receives a
call from a personal contact using the application. However, when the application and the personal
contacts in the mobile device are not synchronized, the call history screen will display details from
the consolidated directory contacts.
• Declined incoming calls are displayed as missed calls in the call history of the application while
the call history in the MiVO400 deskphone associated with your account displays such calls as
answered calls.
• If a Mitel One user enters a function code (for example, *74#), a call history log is created only if
the function code action results in a call connection with another user endpoint. For example, if
the user enters a function code to call into the voicemail system, no call history log is recorded.
However, if the user makes an announcement call to another user (for example, *7998+call
number), it is recorded in the call history as a call to that user.
• For iOS devices, all the calls made using the Mitel One mobile app will be displayed in the native
call history of the device. However, for Android devices the native call history will not display the
calls made using the Mitel One mobile app. Those calls will be displayed only in the Mitel One
mobile app call history.
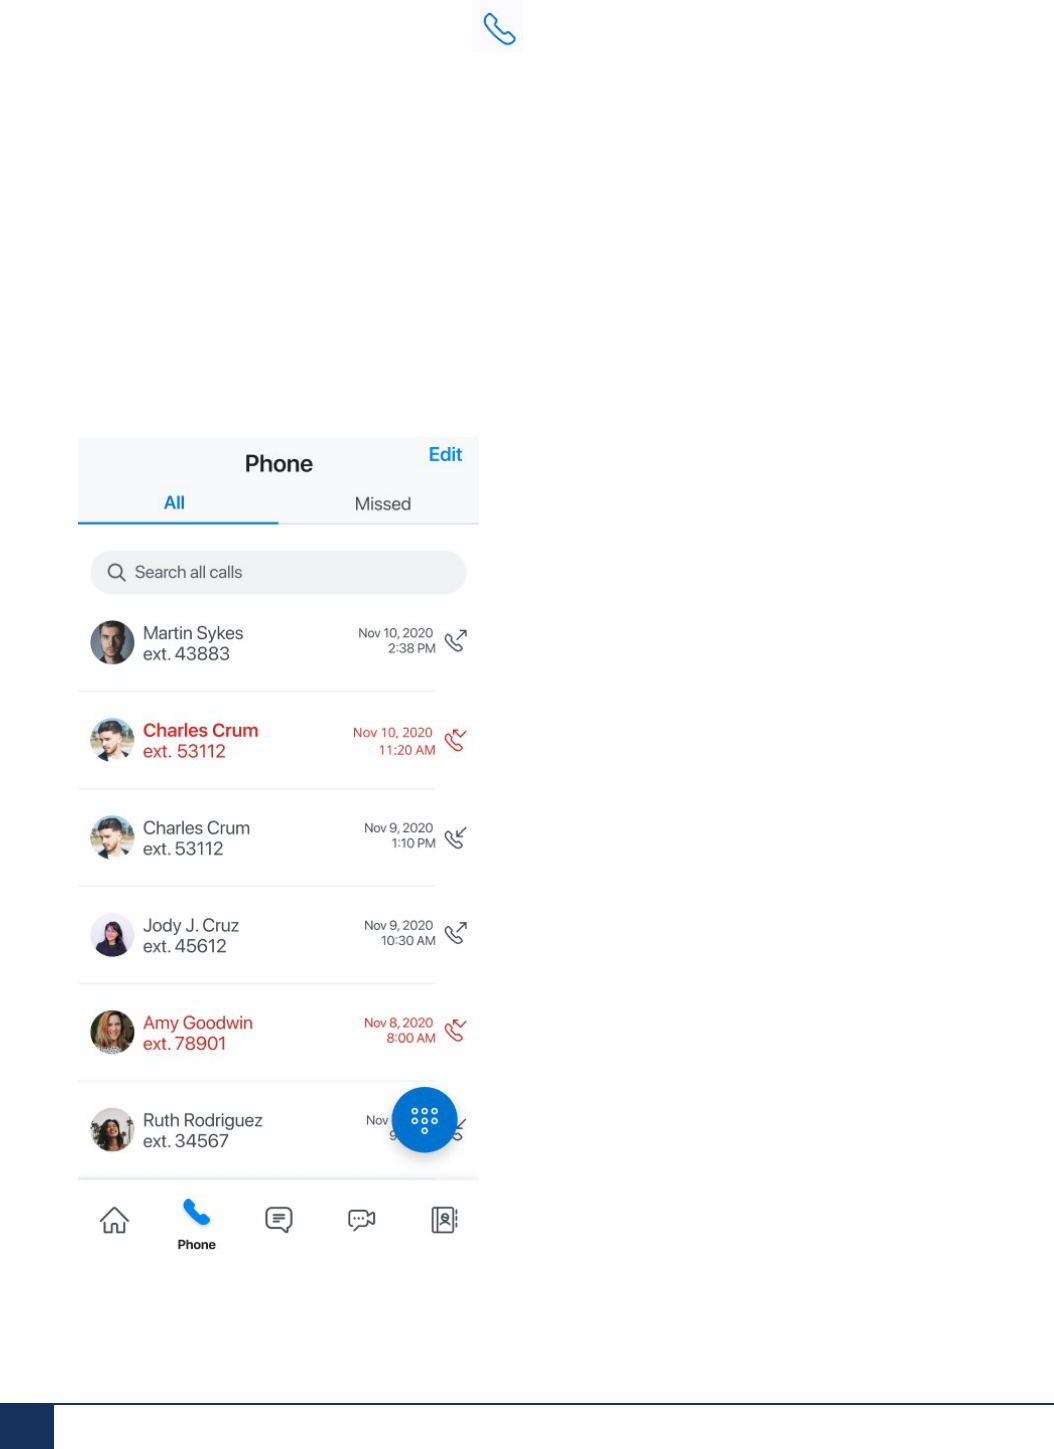
Access Call History
To access your call history, tap the Phone icon ( ) from the navigation menu of the application. The
Phone menu appears displaying your recent call history. You can do the following from the Phone menu.
• View all outgoing and incoming calls in the All list.
• View only incoming calls that were not answered in the Missed list.
• Place a call to a contact in the call history, by tapping the contact or by tapping the Dialpad icon
( ).
• View the details of the contact by tapping the contact's avatar.
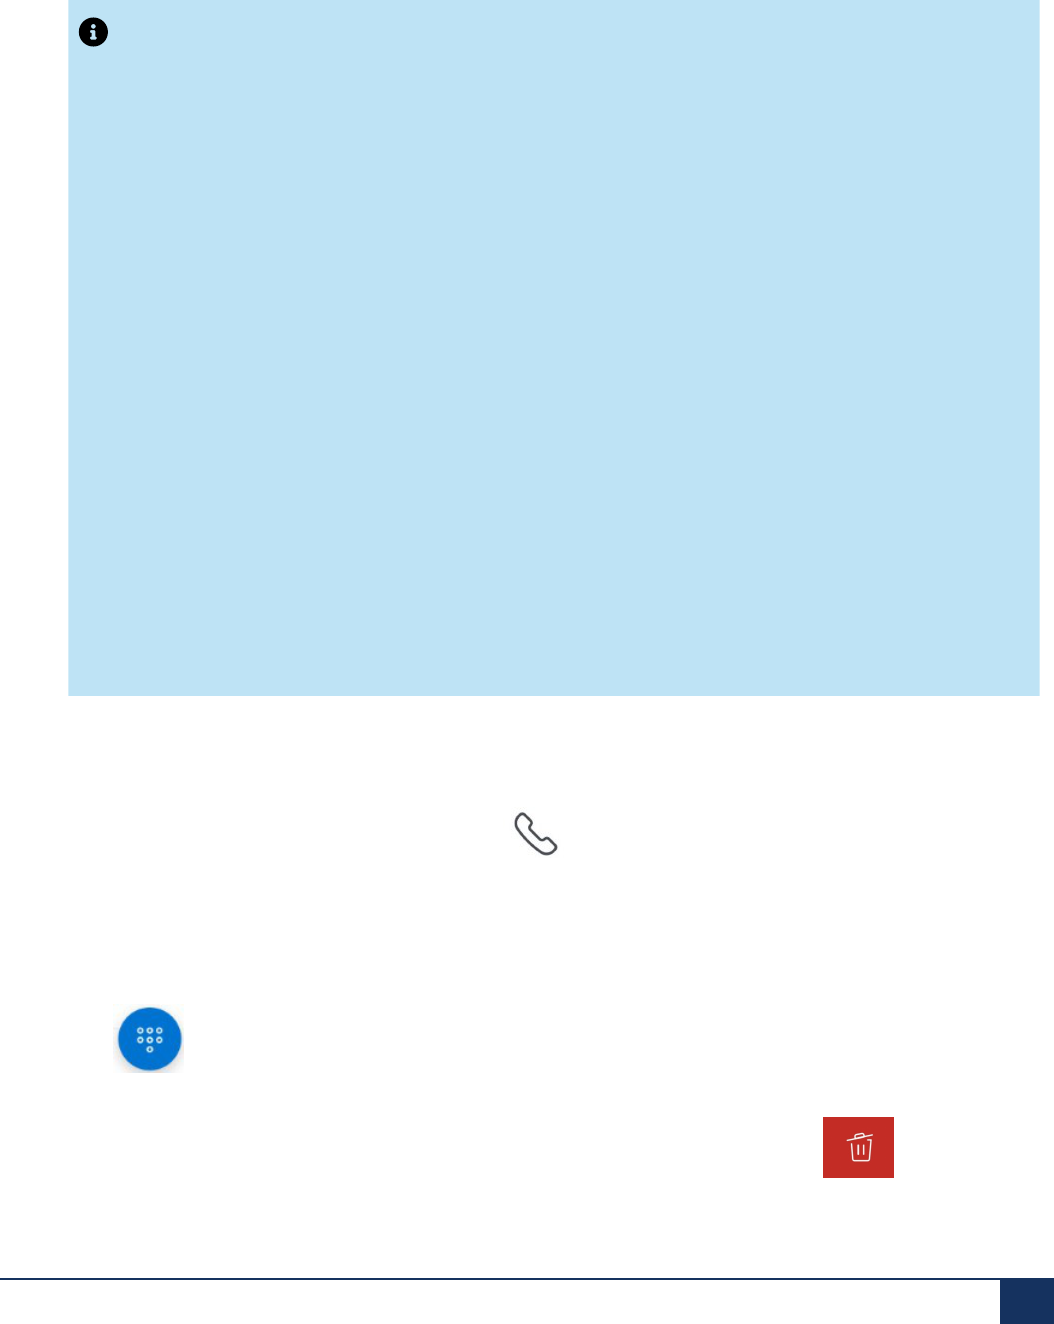
•
Delete a call history item by swiping left on the item and tapping the Delete icon ( ).
User Guide 72
Phone
• If you have a new voicemail message, a message notification icon appears to the left of the handset
icon ( ).
•
Report an issue by clicking the icon. The Submit and issue form is displayed with auto
populated Call ID to track the call in the logs
Call History Records for a Transferred Call
Blind Transfer
• After a Blind transfer is complete, the application call history records of the users involved in the Blind
transfer will display the following call logs:
• The call history of the user who initiated the call will show two outgoing calls to the user who
performed the Blind transfer.
• The call history of the user who performed the Blind transfer will show an incoming call from the user
who initiated the call.
Note:
If the Blind transfer was performed using the deskphone associated with the account, the
application call history records will show an incoming call from the user who initiated the call and
an outgoing call to the user to whom the call was transferred.
• The call history of the user to whom the Blind transfer was made will show an incoming call from the
user who initiated the call, and an incoming call from the user who performed the Blind transfer.
• If a Blind transferred call is not answered by the user and is redirected back, the application call history
records of the users involved in the Blind transfer will display the following call logs:
• The call history of the user who initiated the call will show two outgoing calls to the user who
performed the Blind transfer.
Note:
If the Blind transfer is performed using a MiVO400 terminal, the call history of the user who
initiated the call will show an outgoing call each; to the user who performed the Blind transfer,
and to the user to whom the Blind transfer was made.
• The call history of the user who performed the Blind transfer will show an incoming call from the user
who initiated the call.
• The call history of the user to whom the Blind transfer was made will show a missed call from the
user who initiated the call, and an incoming call from the user who performed the Blind Transfer.
73 User Guide
Supervised Transfer
During a Supervised transfer, the call history of both, the contact that first received the call and the contact
to whom the Supervised transfer was made, will display the number from which the first call was made as
the incoming call number.

Messages
4
This chapter contains the following sections:
• Message Features
• Start a Messaging Session
• Respond to a Message
• Streams
The Messages feature in the Mitel One mobile app allows you to connect in real time to any other Mitel One
contact or group of contacts. The topics listed will help you learn how to best utilize the messages feature
provided by the application.
4.1 Message Features
Individual and Group Messages
The message feature in the Mitel One mobile app allows you to start and respond to individual and group
conversations to communicate with others. After a message is initiated, participants cannot be removed
from or added to the conversation. To add others to a conversation, create a new message and add all of
the contacts you want to message to. There is no limit to the number of contacts that can be added to a
new group message.
Message Typing Indications
When a participant begins typing during an individual or group message, the application provides a visual
indication to other participants that this person is typing. This message typing indication appears every 10
seconds while the typing continues. If typing is stopped for more than 10 seconds, the indication no longer
appears.
Message History
The Messages menu displays all existing messages and Streams you are added to, in chronological order.
The Streams list displays the list of Streams you are added to whereas the Messages list displays a list of
the individual and group contacts with whom you have interacted via a message.
Note:
The Mitel One mobile application will show a maximum of 20 recent conversations (including
Messages and Streams) only. To view more conversations, use the web application.
User Guide 75

Messages
Tapping a Stream or a direct message in the list opens the messaging window for that Stream, or the
individual or group contact, displaying messages from previous conversations including the time of day and
a top banner with the date for each message.
In the Streams list, the messages history shows all Streams of which you are a participant. However, in
the Direct Messages list, the messages history shows only the recent 10 messages. Earlier messages
are auto hidden every 96 hours after the last message was sent or received. The message will reappear
if you receive another message from the participant of that conversation. A user can also access a hidden
message by initiating a direct message with the contact.
Place a Call while Messaging
During a message conversation with a contact, tap at the top-right of the messages screen to call that
contact.
Hide a Message
You can hide a messaging session displayed in the Messages list in the application by swiping left on the
message entry, and tapping .
The message will reappear if you receive another message from the participant of that message.
Note:
You cannot delete messaging sessions displayed in the Messages list of the Mitel One mobile app.
4.2 Start a Messaging Session
To start a messaging session:
1.
Tap the Messages icon ( ) from the navigation menu of the Mitel One mobile application
User Guide 76

Messages
2. In the menu that opens, do one of the following:
• To continue with a previous message, tap the message from the list of messages displayed on the
screen.
• To start a new individual or group message.
a.
Tap , and then tap New Message. The Search Users list screen is displayed.
b. Tap each of the contacts you want included in the conversation (adds a check mark next to each).
c. Tap OK in the top-right corner.
You can also choose to start an individual message or continue with a previous message with a contact
by doing one of the following:
•
Tap the contact in the Favorites widget, and tap the Message icon ( ) from the panel that
opens.
• Tap the message from the contact in the Messages widget.
•
Tap a contact in the Contacts menu and tap the Message icon ( ) from the panel that
opens. Tapping the icon creates a new message or continues with the previous message and opens
the messaging window.
3. Start messaging using the following options:
• Send a text message
a. Type the message in the text area. You can also copy and paste a message from existing
messages.
b.
Tap .
• Send a photo
To send a photo, tap in the text area and choose either of the following methods:
• Take a Photo — Use your mobile phone's camera to take a picture and then tap Use Photo (for
iOS) or OK (for Android) to send that photo. Tap Retake (for iOS) or Retry (for Android) to take
another photo.
• Choose from Library — Navigate to the desired photo stored on your mobile phone and tap it.
77 User Guide
Messages
Note:
The maximum file size for an in-session photo sharing is approximately 10 MB. It is
recommended that you share one photo at a time. Sharing multiple photos at the same time
might cause the application to stop responding.
Note:
After a messaging session starts, additional participants cannot be added. Additionally, after a group
messaging session starts, participants in the conversation cannot leave the group. When you need
to change the participants in a group message, create a new message to add all of the contacts you
want to message to. There is no limit to the number of contacts that can be added to a new group
message.
4.3 Respond to a Message
To respond to messages:
1.
Tap the Messages icon ( ) in the navigation menu of the application. The Messages menu opens.
2. Tap the message you want to respond to. The messaging window opens.
3.
In the text area, type a response and tap to send the reply.
Message Notifications
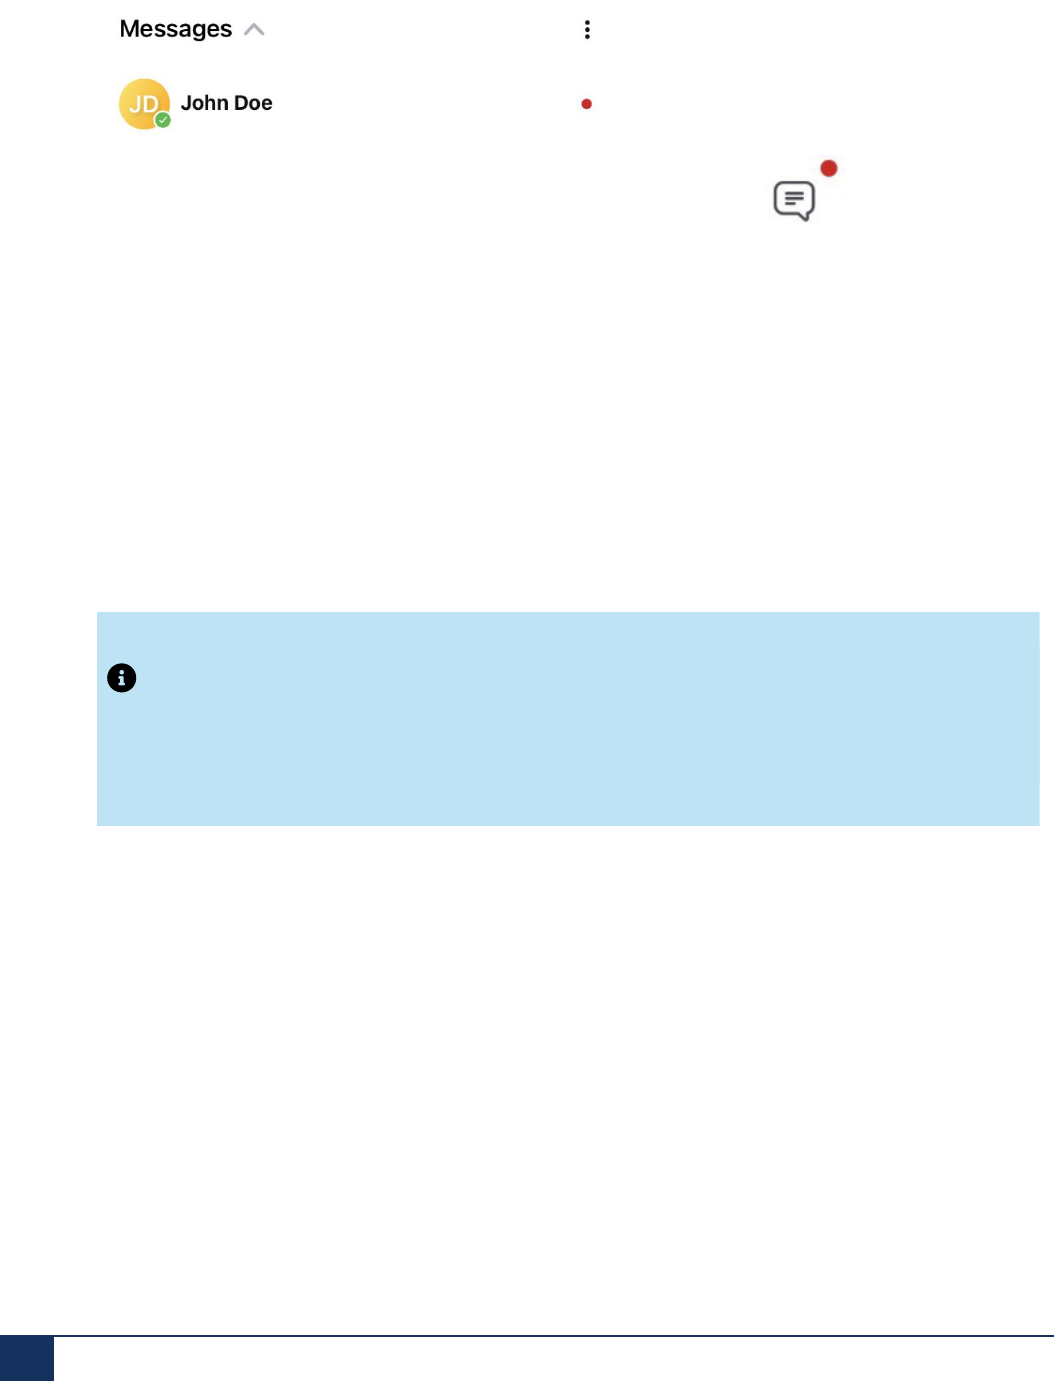
If you have unread messages, the application displays the following:
• The Messages widget in the Home screen displays a red notification dot along with the sender's name
to indicate that the message is unread.
User Guide 78
Messages
• The Messages menu displays a red notification dot along with the sender's name in bold letters to
indicate that the message is unread.
•
The Messages icon in the navigation menu displays a red notification dot ( ) to indicate that
there are unread messages.
Incoming messages generate different on-screen notifications depending on the following scenarios for
your Mitel One mobile application.
• iPhone
• When the application is open and accessible, running in the background (open, but not visible),
or not running (closed), a message notification audio is played and a banner appears on the screen.
Tap the notification banner to go directly to the messaging window for the individual or group who
sent the message.
• When the your iPhone is locked, a message notification audio is played and a banner appears on
the screen. Swipe the notification banner to the right, tap Open, and unlock the screen to go directly
to the messaging window for the individual or group who sent the message.
Note:
To receive native message notifications on your iPhone, you must enable permission for the
application to send notification to your iPhone. This is done from the Settings menu of your
iPhone. For more information, see Permissions and Notifications on page 20.
• Android
• When the application is open and visible, a message notification audio is played and a banner
appears on the screen. Tap the notification banner to go directly to the messaging window for the
individual or group that sent the message.
• When the application is running in the background (open, but not visible), a message notification
audio is played and a notification dot with the number of unread messages is displayed along with
the Mitel One icon on your Android phone's home screen. If you touch and hold the Mitel One icon,
a list of recently received messages is displayed. Tap any message in the list to go directly to the
messaging window for the individual or group that sent the message.
• When the screen is locked on your Android phone, a message notification audio is played and the
locked screen displays a small Mitel logo. Unlock the screen and tap the message indicator to go
directly to the messaging window for the individual or group that sent the message.
• When the application is not running (closed), and the screen is locked on your Android phone, a
message notification audio is played (if enabled in your phone) and the locked screen displays a
79 User Guide
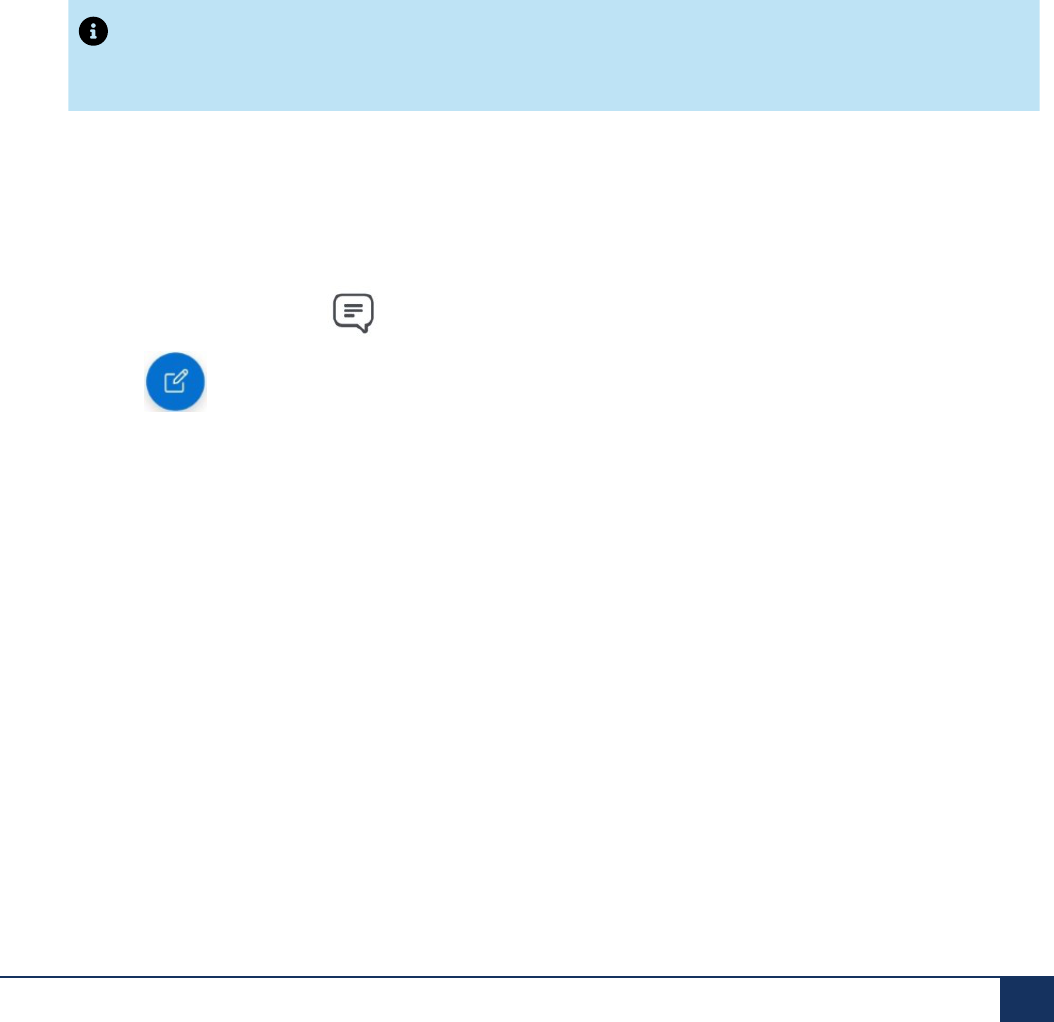
Messages
small Mitel logo. Unlock the screen and tap the message indicator to go directly to the messaging
window for the individual or group who that sent the message.
• When the application is not running (closed), and the screen is not locked on your Android phone, a
message notification audio is played (if enabled in your phone) and a banner appears on the screen.
Tap the notification banner to go directly to the messaging window for the individual or group who
that sent the message.
4.4 Streams
A Stream is a collaboration space designed to enable collaboration between teams, projects, and topics.
In a Stream, you can add several members, message those members, and share images among them.
You can add new members to an existing Stream and these members can view the previous conversation
history inside the Stream.
Note:
The Mitel One mobile application will show a maximum of 20 recent conversations (including
Messages and Streams). To view more conversations, use the web application.
Create Stream
To create a Stream:
1.
Tap the Messages icon ( ) in the navigation menu of the application. The Messages menu opens.
2.
Tap , and then tap Create Stream. The New Stream screen opens.
3. In the Stream name field, enter a name for the Stream.
4. Tap Create at the top-right corner. A messaging window opens displaying the Stream name and a
message You created this channel today. This is the very beginning of the XXXX (Stream name)
channel indicating that the Stream is created. The Stream will be displayed in the Streams section of
your the Messages menu.
To add members to a Stream for the first time:
1. Tap Add members from the messaging window. The Search Users list is displayed.
2. Tap each contact you want to add (a check mark appears beside each selected contact).
3. Tap OK in the top-right corner. The selected contacts are added as members to the stream.
Manage Streams
You can invite members to a Stream, edit a Stream name, view the existing members in a Stream, or leave
a Stream by performing the following steps.
User Guide 80

1.
Tap the Messages icon ( ) in the navigation menu of the application. The Messages menu opens.
2. In the Streams list, tap the Stream you want to manage. The messaging window opens.
3.
Tap at the top-right corner. The Stream Info screen opens.
• To invite members to a Stream:
a. Tap Invite to stream. The Search Users list is displayed.
b. Tap each contact you want to add (a check mark appears beside each selected contact).
c. Tap OK in the top-right corner. The selected contacts are added as members to the stream.
• To view the members in a Stream:
a. Tap Members. A list of all the members currently in the stream appears.
• To edit a Stream name:
a. Tap Edit. The Edit screen is displayed.
b. In the Stream name field, enter the new name of the stream.
c. Tap Update at the top-right corner.
• To leave a Stream:
a. Tap Leave. An Are you sure? alert appears at the bottom of the mobile screen.
b. Tap Leave to leave the Stream and tap Cancel to cancel the operation.

Contacts
5
This chapter contains the following sections:
• Contacts Menu
• Find a Contact
• View Contact’s Status
The Mitel One mobile app provides convenient options for communicating with your business and personal
contacts.
For information about managing contacts, see the topics listed.
5.1 Contacts Menu
The Contacts menu in the Mitel One mobile application provides access to your business and personal
contacts. By default, contacts are displayed in alphabetical order. Whenever your business contacts are
added, changed, or deleted in the Mitel Cloud, the directory in the app is automatically updated. Optionally,
you can allow the app to access the personal contacts on your mobile phone. To learn more, see Find a
Contact on page 89.
User Guide 82

Contacts
The primary number of a contact will be the first business phone number by default. If the contact does
not have a business number, the mobile number becomes the primary number, and if there is no mobile
number, the home number becomes the primary number.
The Contacts menu has the following tabs:
• All — Displays all contacts, including business and personal.
• Business — Displays all contacts from the PBX and corporate Office 365 contacts.
• Personal — Displays all personal contacts synced from the user’s mobile phone.
Contacts in the Mitel One mobile application are synchronized with the consolidated directory contacts,
which include contacts from directories configured through the PBX (Public and Private Phonebook) and
contacts from directories configured through the Open Interfaces Platform (OIP), which may include the
Active Directory (AD). The Microsoft Office 365 contacts (if the Microsoft Office 365 integration is enabled)
and the consolidated directory contacts are not displayed in the Contacts menu by default. These are
displayed in the Contacts menu only when you perform a search.
The extended search is available to you only when an OIP is connected, depending on the configuration.
83 User Guide

Contacts
When an OIP is connected, the Extended Search toggle button is displayed in the Settings panel.
• When the Extended Search toggle button is disabled (the default option), the search results displayed
in the All tab and the Business tab include only contacts from the PBX Phonebooks (Public and
Private).
• When the Extended Search toggle button is enabled, the search is an extended search and the search
results displayed in the All tab and the Business tab include contacts from all configured directories
including the OIP.
For information about enabling and disabling the Extended Search toggle button, see the Manage Mitel
One Settings section.
When you enter a search term to find a contact in the All, Business, or Personal tabs, the search results
are displayed in the Contacts menu as and when received from the configured directories. It might take
a few seconds after a search term is entered for the results to be displayed. When you clear the search
field, any Microsoft Office 365 contacts or consolidated directory contacts displayed in the Contacts menu
disappear.
Note:
• The Extended Search toggle button will not be displayed in the Settings panel when OIP is not
connected.
• The results displayed for the extended search depend on the configuration made by your Account
Administrator in the MiVoice 400 PBX and in the OIP Alpha Quick & Dial Service settings.
The Account Administrator can update the OIP directory configurations in the OIP web portal
(Configurations > Server > Services > Alpha Quick & Dial Service).
• The first time you attempt to access Personal contacts after installing Mitel One, you are requested
to agree to the Consent form to allow the sync of your personal phone contacts.
Your contacts are represented in the Contacts menu by different types of avatars.
• If a contact has uploaded an image, it is displayed as that person's avatar.
• If a contact has not uploaded an image, the avatar defaults to that person's initials.
• If a contact does not have the Mitel One application, the avatar displays a blue phone icon (), which
means you can call this person (at the person's Mitel desk phone), but cannot message that person.
• The avatar of a User Group created in the PBX (MiVoice Office 400) displays the icon followed by the
Name of the Group, if any.
The Search icon ( ) in the Contacts menu enables you to search through the contact list to quickly
find the contact with whom you want to communicate. For more information, see Find a Contact on page
89.
To view the details of a contact, tap the contact from the Contacts menu or Home screen. The contact's
information panel appears displaying the phone number(s) and email address.
User Guide 84
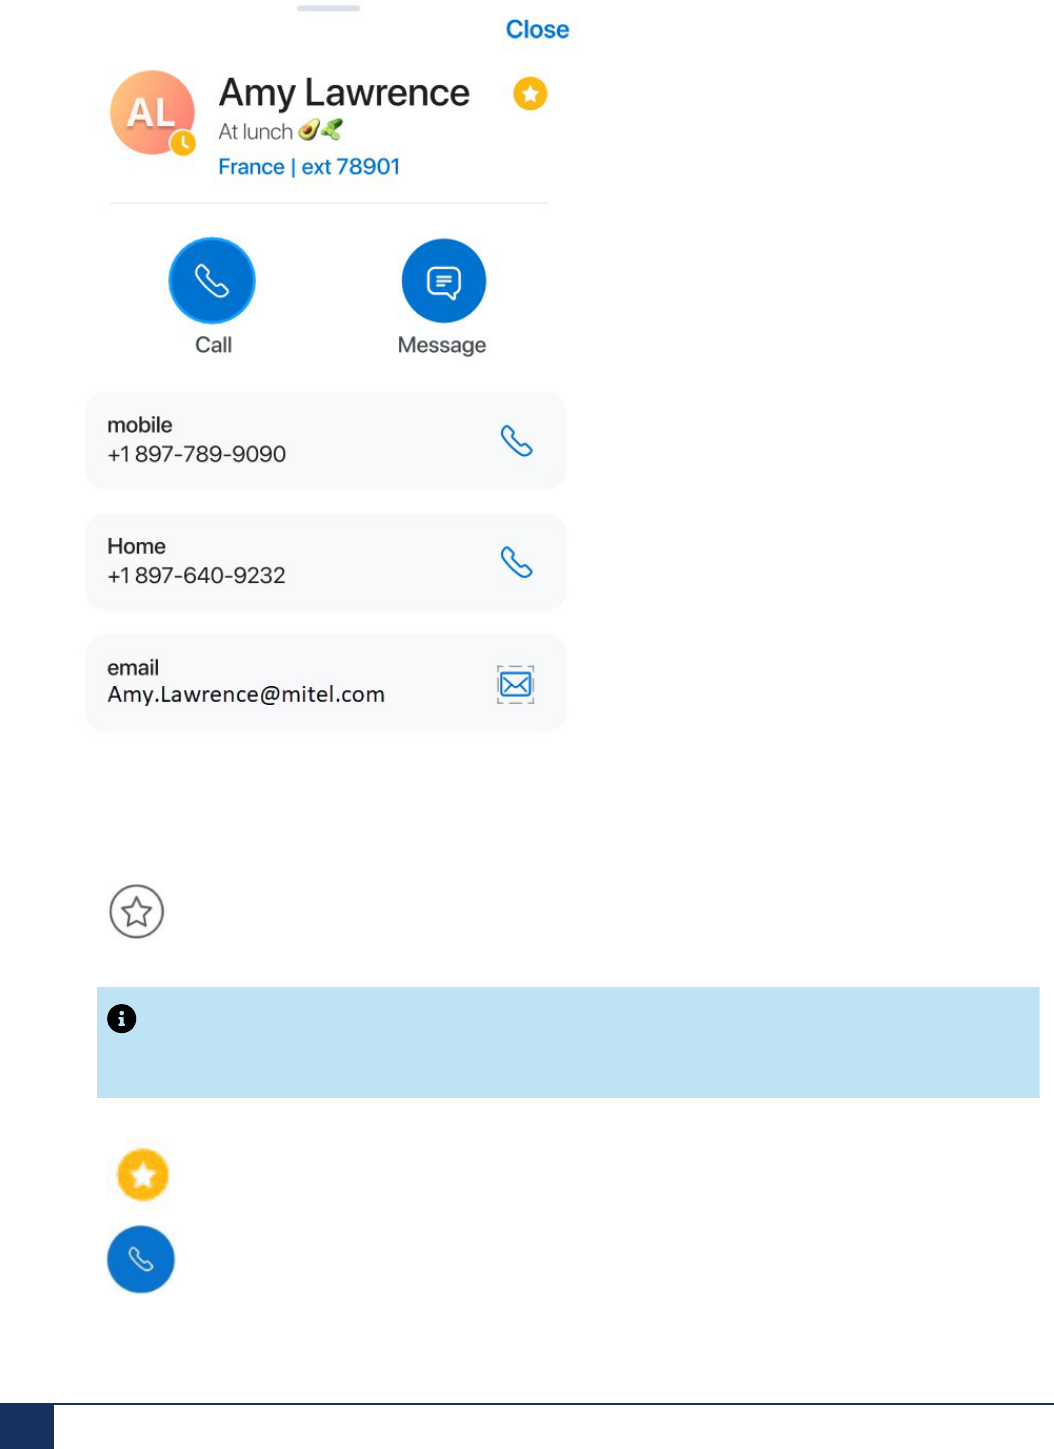
Contacts
Following is a summary of how to use the icons and contact options shown in the preceding image.
•
— Tap this icon to add the contact as your favorite contact.
Note:
The Mitel One Mobile application does not support adding Microsoft Office 365 contacts as your
favorite contact.
•
— Tap this icon to unfavorite a contact.
•
— Tap this icon to call the primary telephone number of the contact.
85 User Guide

Contacts
•
— Tap this icon to open the messaging window where you can message the contact.
•
mobile — Displays the contact's mobile phone number. Tap the associated icon to call the
contact's mobile phone number.
•
Home — Displays the contact's home phone number. Tap the associated icon to call the
contact's home phone number.
•
email — Displays the contact's email address. Tap the associated icon to send an email to the
contact.
Mitel One users can search for their Office 365 contacts using the Contacts tab. Office 365 contacts are
external contacts and are available to everyone in the organization via the various supported Outlook
clients. These contacts are created and managed by Office 365 administrators.
To do this:
1. A CloudLink Account Administrator must enable Microsoft Office 365 integration for your account in the
Mitel Administration. For more information about integrating Microsoft Office 365, contact your Account
Administrator or see Integrating Microsoft Office 365 with Mitel Administration.
2. The IT administrator of your organization must enable Office 365 contact synchronization for your user
account. For more information, contact your Azure administrator or see Set up directory synchronization
for Microsoft 365.
User Guide 86

Contacts
3. After Microsoft Office integration is enabled for your account, you must sign in with Microsoft Office 365
account in Mitel One. To sign in, do either of the following:
• Click your avatar. From the settings page that opens, click Sign In to sign in with your Microsoft
Office 365 account. Click Continue in the confirmation dialog box.
• Navigate to Contacts > All tab. Click SIGN INTO OFFICE 365, and then click Continue to sign in
with your Microsoft Office 365 account.
87 User Guide

Contacts
Note:
Clicking Not Now cancels the procedure.
You will be signed in with your Microsoft Office 365 account and can search for organizational contacts. To
sign out from your Microsoft 365 account, click Sign Out in the settings page. Click Continue to confirm
the sign out.
User Guide 88

Contacts
You can also decline signing in with your Microsoft Office 365 account from the Contacts menu. To do this,
click Not Now next to the SIGN INTO OFFICE 365 button.
When you search for a contact in the Mitel One Mobile application, the application process the top 250
results fetched from Microsoft Office 365. A combined list of business contacts and Office 365 contacts are
then displayed under the All tab with 50 results at a time. To find a specific contact or to refine the search,
you can either continue adding letters to the search field, or scroll down the list.
Note:
When you log in to your Office 365 account, all details in the incoming call screen, outgoing call
screen, and call history that are from the consolidated directory will be overridden with details from the
contacts if it exists.
5.2 Find a Contact
The Contacts menu enables you to search for business contacts and optionally, personal contacts, to
quickly find the contact you want to call or message.
All your business contacts are available in the Mitel One app by default. To enable the app to access the
personal contacts on your mobile phone, tap the Personal tab in the Contacts screen.
To search for a contact:
1.
Tap in the navigation menu. The Contacts menu opens.
2.
Tap the Search icon ( ) at the top-left of the screen.
3. In the Search area that appears, type the first few letters of the contact's first name or last name.
Note:
If you are searching by last name, you must type # followed by the first few letters of the last name
(the # is not required if an OIP is used for an external contact database).
4. When a match is listed, tap the contact.
5. The contact's information page appears, where you can tap the respective icons to call, message, or
email the contact.
89 User Guide

Note:
While one searches for contacts using the search bar, a pop-up message "Search failed" is displayed.
This is due to PBX search limitations. Click RETRY SEARCH to search again.
5.3 View Contact’s Status
You can view a contact's availability status (presence) in the following ways:
• Contact Tiles on the Home Screen: Access the Home screen. Each contact's availability status is
displayed as a colored circle on the lower-right side of each Tile.
• Group Tiles on the Home Screen: Access the Home screen, and tap any Group. In the Group screen
that opens, each group member's availability status is displayed as a colored circle to the lower-right of
each Tile.
• In the Contacts menu: Access the Contacts menu and tap any contact. The contact's information
panel opens, and the status is displayed as a colored circle to the lower-right of the contact's avatar.
• In the Missed Calls widget: Access the Home screen. The availability status is displayed as a colored
circle on the lower-left side of each entry in the widget.
The following describes the different presence status for a contact:
•
Indicates that a contact is available to message or receive calls.
•
Indicates that a contact is busy on a call or does not want to receive messages or calls.
•
Indicates that contact is away or has locked the PC or mobile.
•
Indicates that contact has enabled the Not Available and does not want to receive messages or
calls.
•
Indicates that a contact has not yet set their presence in the Mitel One application.

Meetings
6
Meetings is a multi-party video solution that offers seamless transitions between voice, video, and chat
capabilities for a complete collaboration experience. It enables users to access features such as:
• Collaborate: Perform audio, video, and web sharing
• Chat: Hold chat sessions and receive chat notifications within a meeting
• File Sharing: Store and share files, and recordings
Tapping the Meetings icon in the navigation bar of the application opens the Meetings menu. Tapping MEET
NOW will cross-launch the Meetings mobile application where you can start an ad-hoc meeting, view all your
meetings, and join a meeting. For more information, see MiTeam Meetings Mobile documentation.
User Guide 91

Quick Functions
7
The Quick Functions feature allows you to store frequently used function types in the MiVoice Office 400 PBX as
Quick Functions in the Mitel One Mobile application. You can activate or deactivate a function by selecting the
corresponding quick function key.
Note:
You must have telephony enabled in your CloudLink account to use the Quick Functions feature.
User Guide 92
Quick Functions
For more information about how to configure a quick function key, and how these keys function, see the MiVoice
Office 400 System Functions and Features documentation.
Note:
You can add, edit, or delete a quick function only in the Mitel One Web application. From the Mitel One
Mobile application, you can only trigger the quick functions added via the Mitel One Web application.
Using a Quick Function
After adding a quick function key in the Mitel One web application, you can trigger the function key in the
Mitel One Mobile application by selecting the icon corresponding to it, in the Quick Functions menu. When
you trigger a quick function, the application displays a call screen to indicate that the quick function is being
executed. You will hear a success tone if the function is successful, and a failure tone if the function fails.
The Quick Functions menu of the Mitel One Mobile application displays four function keys, which match the
four function keys displayed in the Mitel One Web application.
93 User Guide
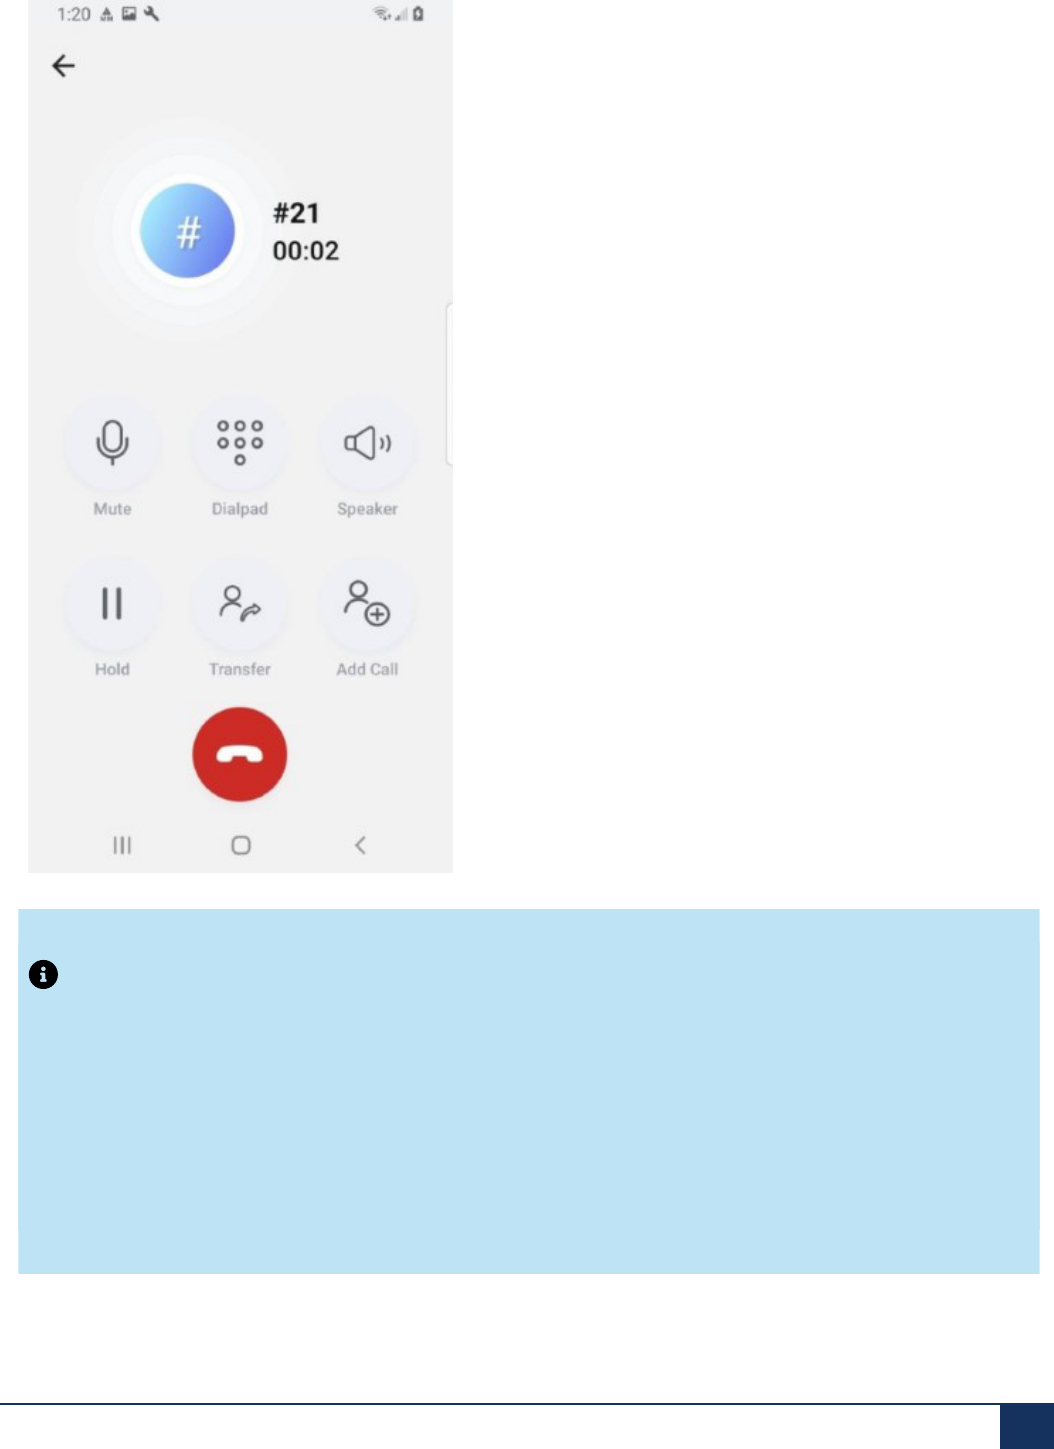
Quick Functions
Note:
• When a quick function is successful, it is indicated by two slowly alternating tones. A fast intermittent
tone indicates that the quick function has failed.
• For more information about why a quick function fails, see the MiVoice Office 400 System Functions and
Features document. This document describes the pre-requisites that must be ensured before using the
quick functions, and the minimum system requirements and permissions required for using the quick
functions. You must ensure that these requirements and permissions are in place in order to activate a
quick function successfully.
User Guide 94
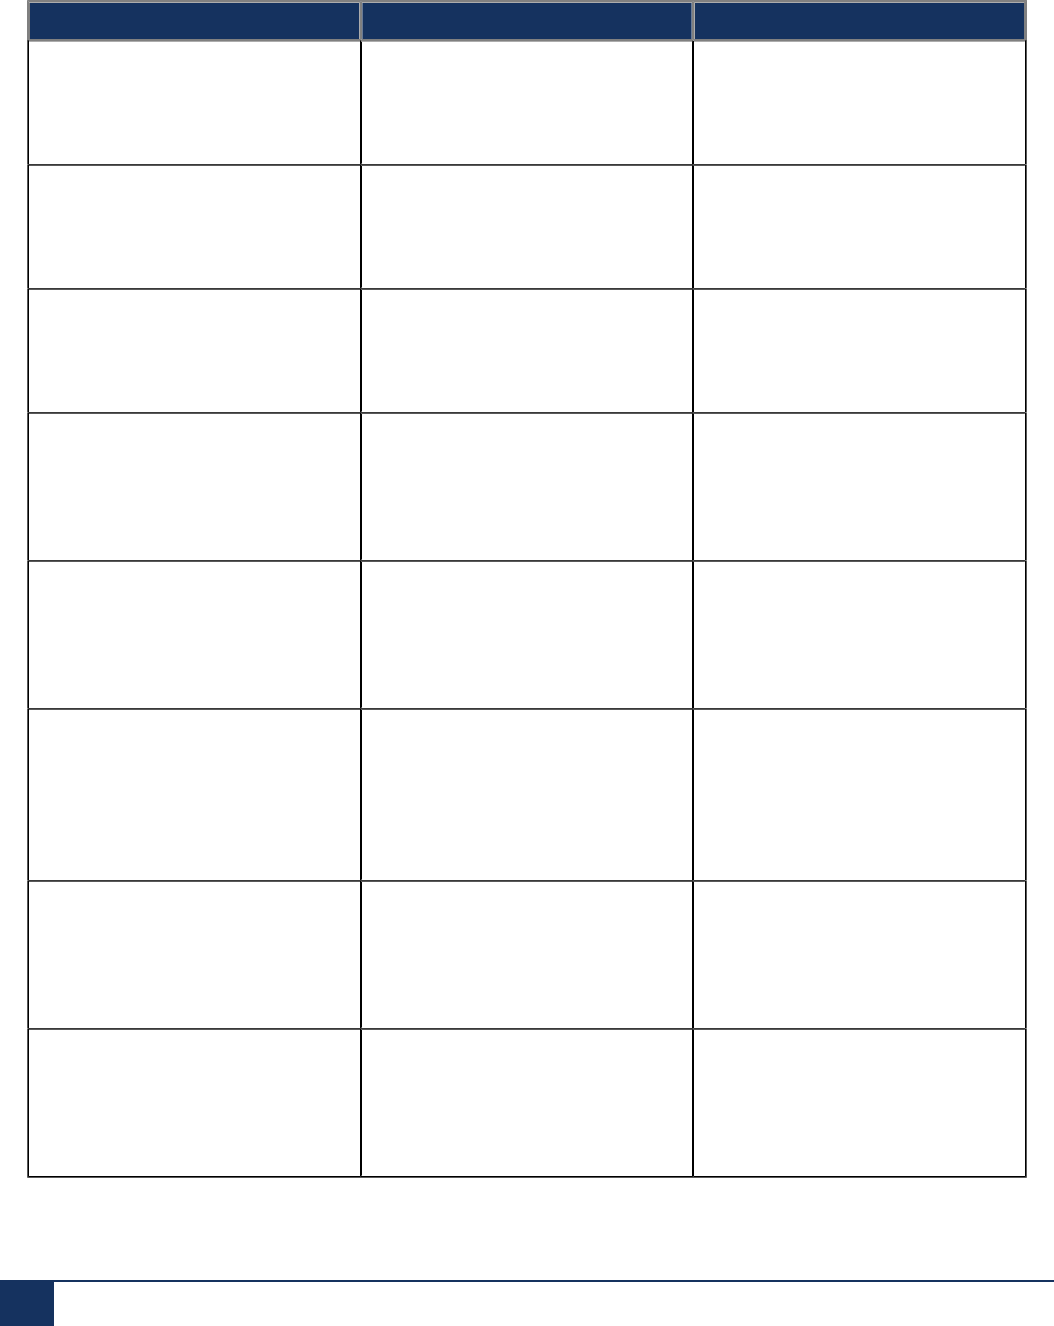
Quick Functions
Supported Quick Functions
Following is a list of quick functions supported by the Mitel One web application. For more information about
each function key, see the MiVoice Office 400 System Functions and Features documentation.
Quick Function Name Description MiVoice Office 400 Access Code
Fast take This function combines the
features of the two quick functions
- Take a call and Pick up a call.
*88
Log in / Log out of one user group This function allows a user to log
out of a single user group and log
in again.
*48 / #48
Log in / Log out of all user groups This function allows a user to log
out of all the user groups and log
in again.
*4800 / #4800
Switch switching group This quick function allows a user
to manually switch the call routing
between the predefined routes; for
example, Night service.
*85
Activate personal call routing This function allows a user to
specify, the terminal to which a
call must be routed to from the call
terminals assigned to the user.
*45
Enable / Disable Call Forward
unconditional to destination
This function allows a user to set
the predetermined location the
call will be forwarded to, when the
unconditional call forward feature
is enabled.
*21 / #21
Enable / Disable Call Forward
unconditional pre-configured
This function allows a user to
enable or disable the unconditional
call forward to the predetermined
destination.
*22 / #22
Enable / Disable Set Call Forward
Busy destination
This function allows a user to set
the predetermined location the call
will be forwarded to, when the call
forward busy feature is enabled.
*67/#67
95 User Guide

Quick Function Name Description MiVoice Office 400 Access Code
Enable/Disable Call Forward No
Reply to destination
This function allows a user to set
the predetermined location the
call will be forwarded to, when
the call forward no reply feature is
enabled.
*61 / #61
Enable / Disable Call Forward No
Reply pre-configured
This function allows a user
to activate or deactivate Call
Forwarding on No Reply (CFNR).
*62 / #62
Call Pickup This function allows a user to
pick up and answer a call from a
different terminal or device than
the one to which the call is routed
to.
*86
Hide number On / Off (External
CLIR)
This function allows a user to
permanently activate or deactivate
suppressing of the display of the
call number to the called party
(CLIR).
*31# / #31#
Clear Configuration This function allows a user to clear
all the personal functions that are
activated except logging in/out in
user groups, and status of CLIR
permanent.
*00

Technical Guidelines
8
This chapter contains the following sections:
• System Requirements
• Bandwidth Requirements
• Firewall Settings
• Network Handling and Requirements
• Scalability
8.1 System Requirements
Supported Mobile Devices
The Mitel One app is designed to support 64-bit hardware only.
The device must meet the following minimum requirements:
• Android Device Requirements
• Operating system version: 11, 12, 13 or 14
• RAM: At least 4GB is recommended (more may be required for adequate performance depending
upon what other apps are in use)
• Internal storage: At least 32GB is recommended (more may be required for adequate performance
depending upon what other apps are in use)
• iOS Device Requirements
• iOS 15, 16 or 17
Note:
• The Mitel One Mobile client is not certified for use on iPads and tablets in general and certain
features are disabled on these devices.
• The Mitel One mobile application does not support the use of multiple SIM cards in a device. You
will experience delays in call handling and/or audio issues if multiple SIM cards are installed on
your device.
Supported Bluetooth Devices
The Mitel One app supports Bluetooth audio devices. The supported Bluetooth features include:
User Guide 97

Technical Guidelines
• Device pairing/unpairing
• Accept/end call
• Mute/unmute call
• Volume control
Note:
• Apple CarPlay and Android Auto are currently not supported.
• Mitel provides Bluetooth integration to ensure that a user can use the Bluetooth controllers on the
vehicle steering wheel. However, the Mitel One app does not fully integrate with all car display
consoles and car kits. Thus, the actual name and number might not be displayed on the car display
console.
For information regarding the minimum system requirements for using the Mitel One mobile app, see
System Requirements.
8.2 Bandwidth Requirements
The Mitel One mobile application works with IPv4 and IPv6 networks. The app will connect to the user’s
preferred Wi-Fi network if that network is available. If the preferred Wi-Fi network is not available, the app
will connect to an LTE network. The app works over Wi-Fi and cellular networks, but the voice quality and
the connectivity depends on the network strength.
Note:
The application's embedded SIP soft phone should not be statically provisioned with an address on
the local network. When a customer’s network has active IPv6 routers they must have some form of
automatic distribution of addresses to a mobile community (SLAAC or DHCPv6).
The following table lists the recommended bandwidths for a single Mitel One call.
Network Kbps Codec
Wi-Fi 220 G.711 and Opus
3G/4G 110 G.711
If the bandwidth is insufficient, the app user might encounter voice quality degradation, slow response,
service interruption, and loss of service.
For more information about bandwidth requirements, the call flows, and bandwidth optimization, see
System Requirements.
User Guide 98

Technical Guidelines
8.3 Firewall Settings
The Mitel One mobile application uses services provided by the CloudLink platform (chat, authorization,
authentication, and audio). To support these services, the application uses destinations and ports. If
inbound or outbound traffic is blocked, the application’s ability to use various services, including audio, and
chat might be affected.
For more information about the performance profile and network requirement prerequisites, see the
following sections in the CloudLink Gateway user guide.
• Configuration Prerequisites
• Network View
• Mitel One Mobile
Note:
Both inbound and outbound ports must be open in order to allow the application to function. You can
also use wildcards to further identify the inbound and outbound traffic to allow or disallow packets
accordingly. However, wildcards are not mandatory for the application to function. Some firewalls do
not allow wildcards to be configured.
To be able to use the Mitel One application each system administrator must also be aware of the URLs the
mobile app uses and ensure that the IP network ports required by the overall solution are open.
Apple Push Notification service
For more information regarding the ports and hosts used for Apple Push Notification service (APNs), see
Apple documentation at https://support.apple.com/en-us/HT203609.
Firebase Cloud Messaging
For more information about configuring your firewall to connect a device with Firebase Cloud Messaging
(FCM), see https://firebase.google.com/docs/cloud-messaging/concept-options#messaging-ports-and-
your-firewall.
Note:
• For VPN recommendations and network requirements, see Network Handling and Requirements
on page 100.
99 User Guide

Technical Guidelines
8.4 Network Handling and Requirements
VPN Recommendations
• Configure VPN to connect over UDP
• Use split tunneling configuration when possible
• Do not set MTU limit unless necessary
The following table summarizes the expected behavior when you switch between access points or
networks during an ongoing call.
Call Flows Call behavior on the app for
calling party
Call behavior on the app for
receiving party
During an ongoing call, if
you switch between access
points of the same type and
configuration within the same
WiFi network having the same
access password
The call will continue as normal. The call will continue as normal.
During an ongoing call, if you
switch between access points
of different types within the
same Wi-Fi network, or between
different WiFi networks with
different access passwords
The call is disconnected.
Note:
If you are not the one who
switched between the
access points, your screen
will continue to display the
ongoing call screen until
you disconnect the call.
The call is disconnected.
Note:
If you are not the one who
switched between the
access points, your screen
will continue to display the
ongoing call screen until
you disconnect the call.
User Guide 100

Technical Guidelines
Call Flows Call behavior on the app for
calling party
Call behavior on the app for
receiving party
During an ongoing call if you
switch between different types
of networks; for example, if you
switch from a WiFi network to a
carrier network or vice-versa
The call is disconnected.
Note:
If you are not the one who
switched between the
networks, your screen will
continue to display the
ongoing call screen until
you disconnect the call.
The call is disconnected.
Note:
If you are not the one who
switched between the
networks, your screen will
continue to display the
ongoing call screen until
you disconnect the call.
During an ongoing call, if you
switch from WiFi network to
carrier network, and the switch
back to WiFi network (within 3
seconds)
The call will continue without
audio while it is on the carrier
network and will continue as
normal on switching back to WiFi
network.
The call will continue without
audio while it is on the carrier
network and will continue as
normal on switching back to WiFi
network.
During an ongoing call, if you
switch from WiFi network to
carrier network, and again switch
back to WiFi network (after more
than 10 seconds)
The call will continue without
audio and the audio will not
recover.
Note:
If you are not the one
who switched between
the networks your screen
will show the ongoing call
screen until you disconnect
the call.
The call will continue without
audio and the audio will not
recover.
Note:
If you are not the one
who switched between
the networks your screen
will show the ongoing call
screen until you disconnect
the call.
During an ongoing call, if you
switch to no network
The call is disconnected after 3
seconds.
The call is disconnected after 3
seconds.
During an ongoing call
connected on WiFi if you switch
to no network and then back to
WiFi
The call will continue without
audio and if switched back to
WiFi within 3 seconds, the call
will continue as normal.
The call will continue without
audio and if switched back to
WiFi within 3 seconds, the call
will continue as normal.
101 User Guide

Technical Guidelines
Call Flows Call behavior on the app for
calling party
Call behavior on the app for
receiving party
During an ongoing call
connected on carrier network if
you switch to WiFi, while you still
have carrier network available
For Android:
The call will continue with one-
way audio.
For iOS
The call will continue as normal.
For Android:
The call will continue with one-
way audio.
For iOS
The call will continue as normal.
During an ongoing call
connected on carrier network,
if you switch to WiFi network
(while you still have carrier
network available) and again
switch back to carrier network
(within 3 seconds)
For Android:
The call will continue with one-
way audio while it is on WiFi.
On switching back to carrier
network, the call will continue as
normal.
For iOS
The call will continue as normal.
For Android:
The call will continue with one-
way audio while it is on WiFi.
On switching back to carrier
network, the call will continue as
normal.
For iOS
The call will continue as normal.
During an ongoing call
connected on carrier network,
if you switch to WiFi network
(while you still have carrier
network available) and then
back to carrier network (after ten
seconds)
For Android:
The call will continue with one-
way audio for a while and then
the call will continue without
audio.
For iOS
The call will continue as normal.
For Android:
The call will continue with one-
way audio for a while and then
the call will continue without
audio.
For iOS
The call will continue as normal.
During an ongoing call
connected on carrier network,
if you switch to no network and
then back to carrier network
The call will continue without
audio, and if switched back to
carrier network within 3 seconds,
the call will continue as normal. If
not, the call will disconnect.
The call will continue without
audio, and if switched back to
carrier network within 3 seconds,
the call will continue as normal. If
not, the call will disconnect.
The voice service in the Mitel One application is VoIP-based (voice over IP); it uses your internet
connection to route calls. Therefore a good signal strength is necessary to place or receive calls using the
application. The following dBm values can be used as a reference to determine whether the signal strength
is sufficient to successfully use the application.
User Guide 102

Technical Guidelines
Note:
During an active call, one of the following icons will be displayed in the top right corner of the screen.
For Android
Scenario Signal strength Icon
Signal strength RSSI or dBm >=
-50
Excellent
Signal strength RSSI or dBm >=
-70 and < -50
Good
If none of the above conditions
are met
Poor
For iOS
The current algorithm used for measuring Android signal strength is not supported on iOS. Support for iOS
is currently under investigation.
8.5 Scalability
The following table summarizes the maximum number of Mitel One users, and the maximum number of
simultaneous calls supported on the MiVoice 400 PBX.
103 User Guide

Technical Guidelines
Testing
Envi
ronment
Mini
mum
Rele
ases
MiVo
ice Offi
ce 400
Clou
dLink Ga
teway
Maxi
mum
Mitel
One Us
ers
Maximum Simultan
eous Call (Direct Sw
itching)
Maximum Simultan
eous Call (Indirect
Switching)
SMBC -
Internal
CloudLink
Gateway
SMBC Embedded
in SMBC
50 • 25 Mitel One to
Mitel One
• 50 Mitel One to
Internal
• 50 Mitel One to
PSTN
• 16 Mitel One to
Mitel One (GSM)
• 12 Mitel One
(GSM) to Mitel
One (GSM)
• 15 Mitel One to
Mitel One
• 15 Mitel One to
Internal
• 15 Mitel One to
PSTN
• 16 Mitel One to
Mitel One (GSM)
• 12 Mitel One
(GSM) to Mitel One
(GSM)
Mitel
470 -
External
CloudLink
Gateway
Physical
Mitel
470
CloudLink
Gateway
300 • 25 Mitel One to
Mitel One
• 50 Mitel One to
Internal
• 50 Mitel One to
PSTN
• 16 Mitel One to
Mitel One (GSM)
• 12 Mitel One
(GSM) to Mitel
One (GSM)
• 25 Mitel One to
Mitel One
• 50 Mitel One to
Internal
• 50 Mitel One to
PSTN
• 16 Mitel One to
Mitel One (GSM)
• 12 Mitel One
(GSM) to Mitel One
(GSM)
Virtual
Appliance
-
Virtualized
CloudLink
Gateway
6.3 or
later
Virtual
Appliance
OVA 300 Default appliance
with 1 core CPU and
2GB RAM
• 25 Mitel One to
Mitel One
• 50 Mitel One to
Internal
• 50 Mitel One to
PSTN
• 16 Mitel One to
Mitel One (GSM)
• 12 Mitel One
(GSM) to Mitel
One (GSM)
Default appliance
with 1 core CPU and
2GB RAM
• 25 Mitel One to
Mitel One
• 50 Mitel One to
Internal
• 50 Mitel One to
PSTN
• 16 Mitel One to
Mitel One (GSM)
• 12 Mitel One
(GSM) to Mitel One
(GSM)
User Guide 104
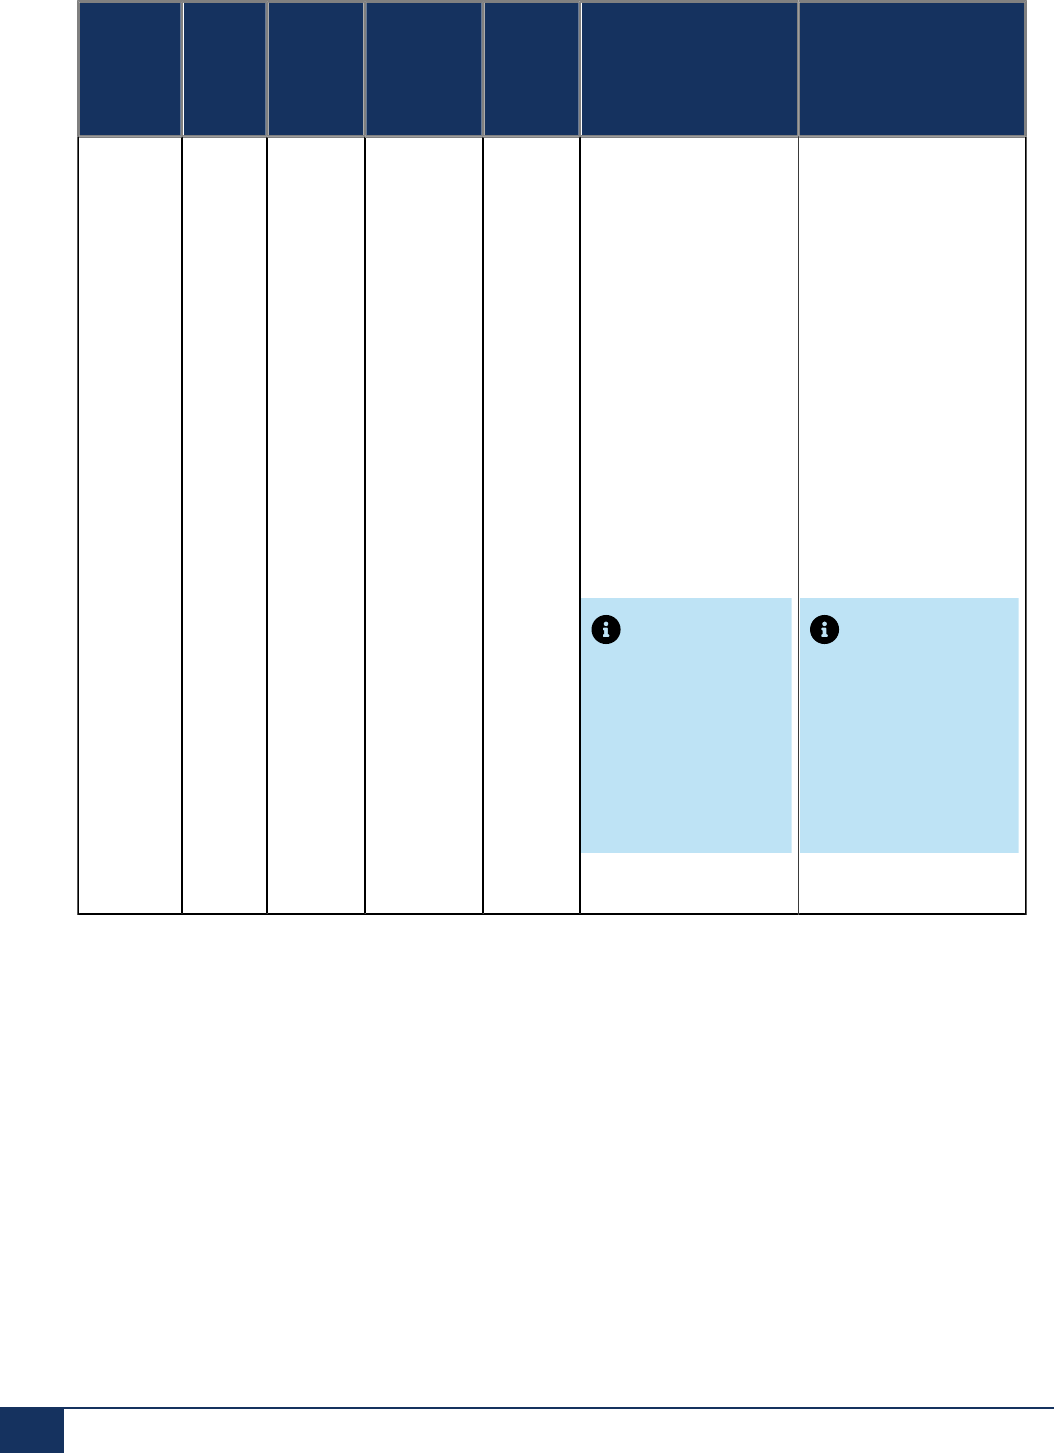
Technical Guidelines
Testing
Envi
ronment
Mini
mum
Rele
ases
MiVo
ice Offi
ce 400
Clou
dLink Ga
teway
Maxi
mum
Mitel
One Us
ers
Maximum Simultan
eous Call (Direct Sw
itching)
Maximum Simultan
eous Call (Indirect
Switching)
Large appliance
with 8 core CPU and
4GB RAM
• 125 Mitel One to
Mitel One
• 125 Mitel One to
Internal
• 125 Mitel One to
PSTN
• 16 Mitel One to
Mitel One (GSM)
• 12 Mitel One
(GSM) to Mitel
One (GSM)
Note:
125
simultaneous
calls are
supported only
if the appliance
is upgraded to
OVA version
1.1.3 or later.
Large appliance with
8 core CPU and 4GB
RAM
• 125 Mitel One to
Mitel One
• 125 Mitel One to
Internal
• 125 Mitel One to
PSTN
• 16 Mitel One to
Mitel One (GSM)
• 12 Mitel One
(GSM) to Mitel One
(GSM)
Note:
125
simultaneous
calls are
supported only if
the appliance is
upgraded to OVA
version 1.1.3 or
later.
105 User Guide
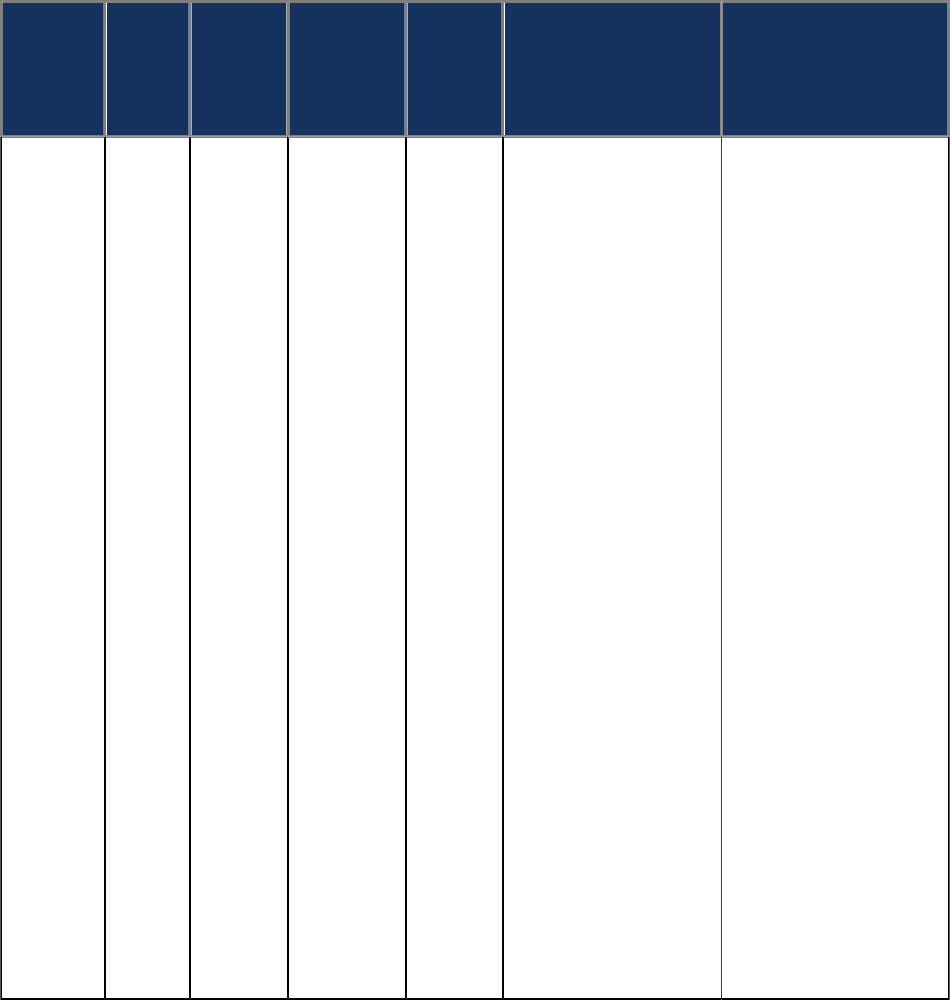
Testing
Envi
ronment
Mini
mum
Rele
ases
MiVo
ice Offi
ce 400
Clou
dLink Ga
teway
Maxi
mum
Mitel
One Us
ers
Maximum Simultan
eous Call (Direct Sw
itching)
Maximum Simultan
eous Call (Indirect
Switching)
MSL
7.0
HF2 or
later
Virtual
Appliance/
MSL
OVA/MSL 300 Default appliance
with 1 core CPU and
2GB RAM
• 25 Mitel One to
Mitel One
• 50 Mitel One to
Internal
• 50 Mitel One to
PSTN
• 16 Mitel One to
Mitel One (GSM)
• 12 Mitel One
(GSM) to Mitel
One (GSM)
Large appliance
with 8 core CPU and
4GB RAM
• 125 Mitel One to
Mitel One
• 125 Mitel One to
Internal
• 125 Mitel One to
PSTN
• 16 Mitel One to
Mitel One (GSM)
• 12 Mitel One
(GSM) to Mitel
One (GSM)
Default appliance with
1 core CPU and 2GB
RAM
• 25 Mitel One to
Mitel One
• 50 Mitel One to
Internal
• 50 Mitel One to
PSTN
• 16 Mitel One to
Mitel One
• 12 Mitel One to
Mitel One
Large appliance with
8 core CPU and 4GB
RAM
• 125 Mitel One to
Mitel One
• 125 Mitel One to
Internal
• 125 Mitel One to
PSTN
• 16 Mitel One to
Mitel One (GSM)
• 12 Mitel One
(GSM) to Mitel One
(GSM)

Report an Issue and Share Feedback
9
Let us know of any issues you encounter while using the Mitel One application. We also encourage you to share
your ideas and suggestions about improving the application features. Use the following procedure to report a
problem or to share your feedback.
1. Tap your avatar at the top left of the app screen. A panel opens.
User Guide 107
2. Tap Issues & Feedback.
• To share feedback
Tap Share Feedback. You will be redirected to a Mitel CloudLink Feedback page in UserVoice, a third-
party website where you can submit your ideas. Here, you can also vote on the ideas submitted by other
users.
• To report an issue
a. Tap Submit an Issue. The Report Issue screen opens.
b. Enter a title for the issue, and provide a brief description of the issue. Tap Add Screenshot if you want
to attach a screenshot that clarifies the issue.
c. Tap SEND.
Setting Logging Level
10
You can set the logging level in your Mitel One mobile application from your Avatar.
To set a log level:
1. Tap your avatar at the top left of the Mitel One mobile application.
2. Tap About and tap Log Level.
The System Profile screen opens.
3. From the Log Level drop-down list, select a log level.
The selected log level is enabled.
Note:
While investigating an issue, Mitel support may request Debug enabled from the Log Level drop-down list
before reproducing the issue.
User Guide 109

mitel.com
Copyright 2024, Mitel Networks Corporation. All Rights Reserved. The Mitel word and logo are trademarks of
Mitel Networks Corporation, including itself and subsidiaries and authorized entities. Any reference to third party
trademarks are for reference only and Mitel makes no representation of ownership of these marks.
