
UCPath Task:
Add Direct Deposit
Last changed on: 7/11/24
Page 1
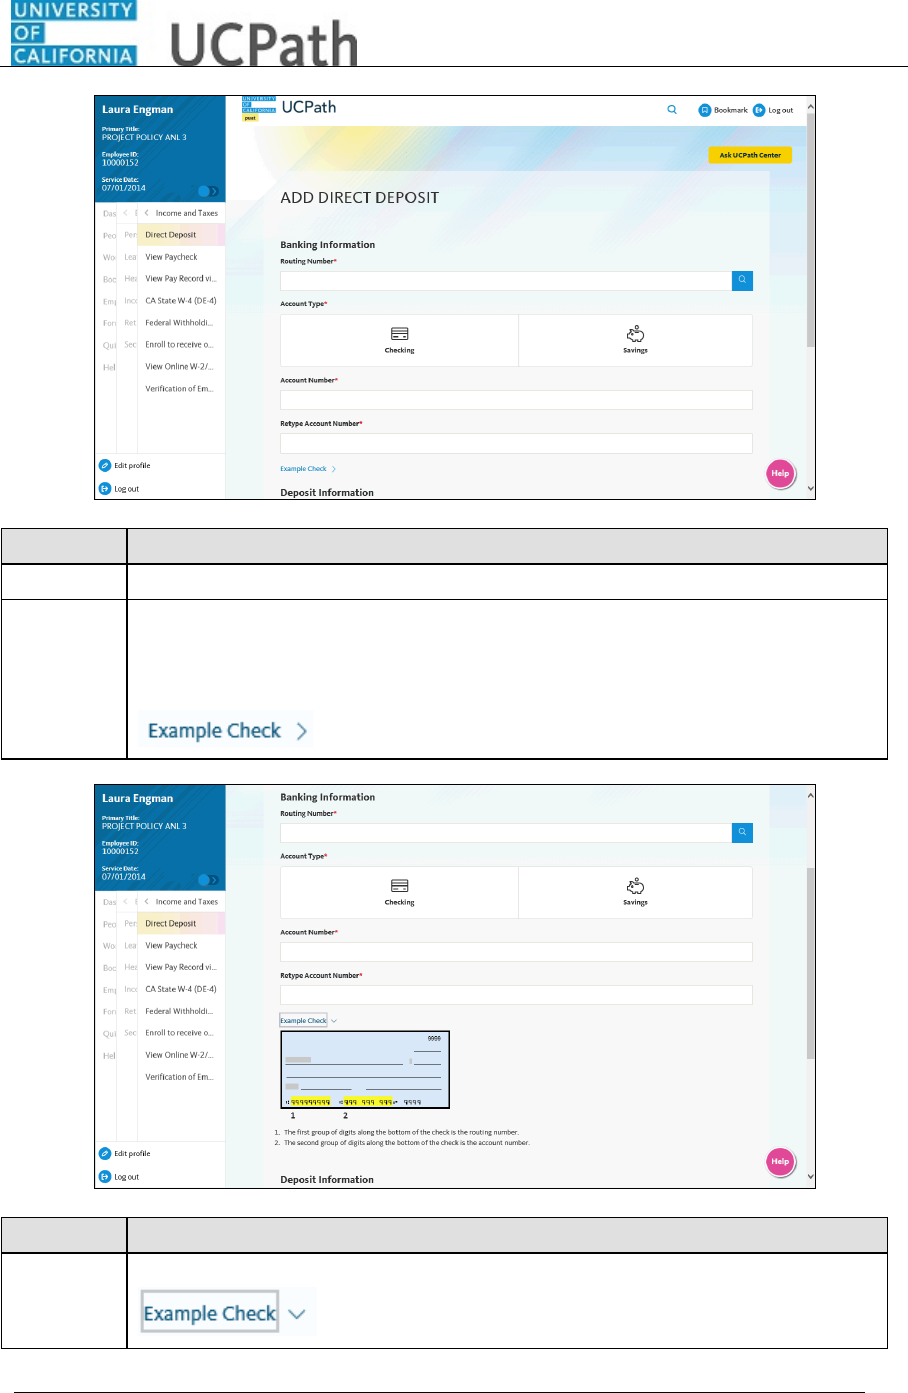
Add Direct Deposit
Use this task to add direct deposit information in UCPath.
Dashboard Navigation:
Income and Taxes > Direct Deposit
or
Menu Navigation:
Employee Actions > Income and Taxes > Direct Deposit
You can add/update your direct deposit only once per day. This means you can click the Submit
Changes button only once per day. Make all direct deposit changes, deletions and additions
before you save.
Note: This example uses sample images as seen on a computer. Sample images appear differently
on a tablet or smartphone, but the steps remain the same.
Step
Action
1.
Before you change your direct deposit information, you must validate your identity.
UCPath randomly displays one of the security questions set up on your profile.
For this example click in the Who is your childhood best friend? field.
2.
Enter the desired information into the Security Question field.
For this example, enter Molly.
3.
If you answer the question correctly, UCPath displays the next page.
If you answer incorrectly, an error message appears. You have three attempts to
answer this question correctly. After three incorrect answers, UCPath displays the
Security Questions Setup page. You must provide your date of birth and the last
four digits of your Social Security number to validate your identity and then
update your security questions and answers.

UCPath Task:
Add Direct Deposit
Page 2
Last changed on: 7/11/24
Step
Action
4.
Your answer appears as a series of dots.
Click the Submit button.
Step
Action
5.
The Direct Deposit page displays all of your direct deposits.
In this example, add a savings and a checking account.
6.
Note: You can add/update your direct deposit only once per day. This means you
can click the final Submit Changes button only once per day.
Make sure you do all direct deposit changes, deletions and additions before you
click Submit Changes.
7.
Click the Add Account button.
UCPath Task:
Add Direct Deposit
Last changed on: 7/11/24
Page 3
Step
Action
8.
Click the scroll bar.
9.
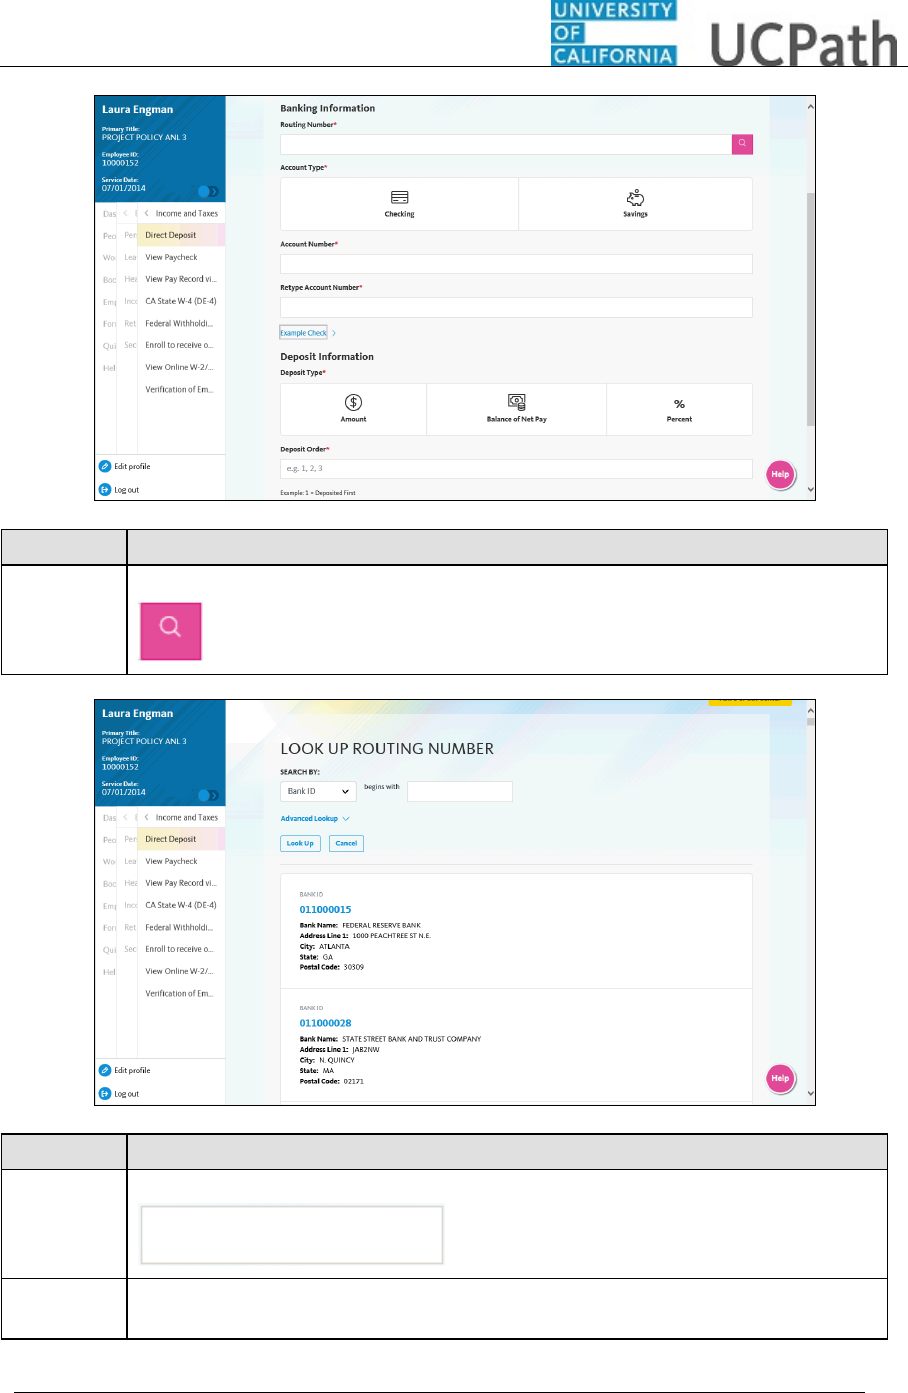
Expand the Example Check section to see how routing and account information
appear on a check.
Click Example Check.
Step
Action
10.
After reviewing the example, click Example Check to collapse the section.
UCPath Task:
Add Direct Deposit
Page 4
Last changed on: 7/11/24
Step
Action
11.
Click the Routing Number Lookup button.
Step
Action
12.
Click in the begins with field.
13.
Enter the desired information into the begins with field. For this example,
enter 121042.

UCPath Task:
Add Direct Deposit
Last changed on: 7/11/24
Page 5
Step
Action
14.
Click the Look Up button.
15.
Click the scroll bar.
Step
Action
16.
Click the Bank ID number link.

UCPath Task:
Add Direct Deposit
Page 6
Last changed on: 7/11/24
Step
Action
17.
Select the account type.
For this example, click the Savings button.
18.
Click in the Account Number field.
19.
Enter the desired information into the Account Number field.
For this example, enter 140522579.
20.
Click in the Retype Account Number field.
21.
Enter the desired information into the Retype Account Number field.
For this example, enter 140522579.
22.
Click the scroll bar.

UCPath Task:
Add Direct Deposit
Last changed on: 7/11/24
Page 7
Step
Action
23.
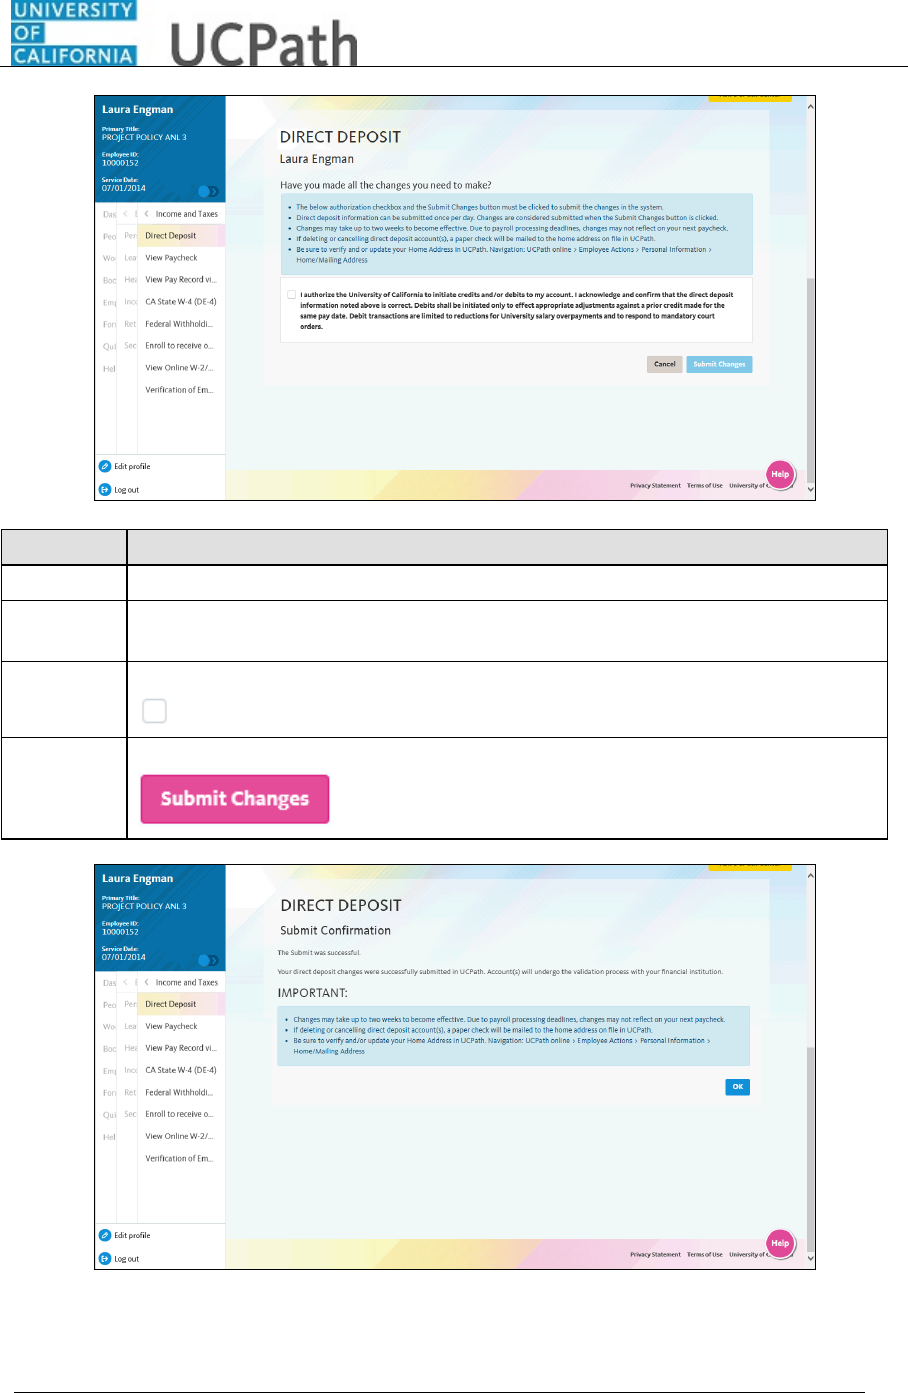
Select one of the following options:
Amount: Use this option if you want to specify a fixed dollar amount to be
deposited to the bank account.
Balance of Net Pay: Use this option if you want the remaining net pay amount
(after all other deposit types have been distributed) deposited to the bank account.
Percent: Use this option if you want to specify a percentage of pay to be deposited
to the bank account.
For this example, click the Amount button.
24.
Click in the Amount field.
25.
Enter the desired information into the Amount field. For this example,
enter 100.00.
26.
The Deposit Order field indicates the order in which pay is distributed to bank
accounts when you have multiple direct deposit accounts. The lower the number,
the higher the priority.
Click in the Deposit Order field.
27.
Enter the desired information into the Deposit Order field.
In this case, you want $100.00 distributed to the savings account before the
Balance of Net Pay is distributed to the checking account.
For this example, enter 1.
28.
Click the Save button.

UCPath Task:
Add Direct Deposit
Page 8
Last changed on: 7/11/24
Step
Action
29.
To add a second account, click the Add Account button.
Step
Action
30.
Click in the Routing Number field.
31.
Enter the desired information into the Routing Number field. For this example,
enter 121042882.

UCPath Task:
Add Direct Deposit
Last changed on: 7/11/24
Page 9
Step
Action
32.
This next account is a checking account.
Click the Checking button.
33.
Click in the Account Number field.
34.
Enter the desired information into the Account Number field. For this example,
enter 392486454.
35.
Click in the Retype Account Number field.
36.
Enter the desired information into the Retype Account Number field. For this
example, enter 392486454.
37.
Click the scroll bar.
Step
Action
38.
Use the Balance of Net Pay option for this second account.
Click the Balance of Net Pay button.

UCPath Task:
Add Direct Deposit
Page 10
Last changed on: 7/11/24
Step
Action
39.
The Deposit Order defaults to LAST when Balance of Net Pay is selected.
40.
Click the Save button.
41.
In this example, you added two bank accounts for direct deposit. You can add up to
three accounts for your direct deposit.
Step
Action
42.
Click the Save and Continue button.
UCPath Task:
Add Direct Deposit
Last changed on: 7/11/24
Page 11
Step
Action
43.
Please read the important information on this page carefully before proceeding.
44.
Make sure to do all direct deposit changes, deletions and additions before you click
Submit Changes.
45.
Click the I authorize the University of California... option.
46.
Click the Submit Changes button.

UCPath Task:
Add Direct Deposit
Page 12
Last changed on: 7/11/24
Step
Action
47.
A confirmation email is sent to your business email and to your personal email
(marked as primary), if you have one set up.
48.
The initial Direct Deposit setup may take up to two weeks to become effective..
49.
Click the OK button.
Step
Action
50.
The Direct Deposit page now reflects the changes you made today.
51.
You have added direct deposit information in UCPath online.
End of Procedure.
