
2023
Facilitating
Programs for
Youth
A Training Manual
Heather Wynkoop Beach
ACT FOR YOUTH CENTER FOR COMMUNITY ACTION

| 1
Facilitating Programs for Youth:
A Training Manual
Heather Wynkoop Beach
2023
ACT for Youth Center for Community Action
Bronfenbrenner Center for Translational Research
Cornell Human Ecology
Cornell University
Ithaca, New York
act4youth@cornell.edu
Manual, slides, and handouts available for download on the ACT for Youth website:
Facilitating Programs for Youth: A Training Manual
https://actforyouth.net/pro-resources/trainings/facilitating-manual.cfm
| 2
Table of Contents
Facilitating Programs for Youth: A Training Manual.............................................................................1
Acknowledgements............................................................................................................................4
Development Team ................................................................................................................................... 4
Special Thanks ........................................................................................................................................... 4
Curriculum Overview .........................................................................................................................5
Purpose ..................................................................................................................................................... 5
Learning Objectives ................................................................................................................................... 5
Intended Audience .................................................................................................................................... 5
Development Process ............................................................................................................................... 5
Curriculum Design ..................................................................................................................................... 5
Implementation ........................................................................................................................................ 6
Evaluation ................................................................................................................................................. 7
DAY 1, Section 1: Introductions and Overview ....................................................................................8
1.1 Welcome and Introductions (15 minutes) .................................................................................... 8
1.2 Training Overview (5 minutes) .................................................................................................... 10
1.3 Group Agreements (5 minutes) .................................................................................................. 12
Section 2: Quality Facilitation ........................................................................................................... 14
2.1 Facilitation vs. Traditional Instruction (12 minutes) ................................................................... 14
2.2 Quality Facilitation (15 minutes) ................................................................................................. 15
2.3 Workshop Components (30 minutes) ......................................................................................... 17
Section 3: Working with Youth ......................................................................................................... 19
3.1 Values Self-Assessment: Who Am I? (45 minutes) ..................................................................... 19
3.2 Developmental Tasks (30 minutes) ............................................................................................. 20
3.3 Impact of Covid-19 (15 minutes) ................................................................................................ 23
3.4 Engaging Youth (20 minutes) ...................................................................................................... 26
3.5 Icebreakers and Interactive Activities (45 minutes) ................................................................... 27
Section 4: Presentation Preparation ................................................................................................. 29
4.1 Time Management (5 minutes) .................................................................................................. 29
4.2 Presentation Prep (20 minutes) .................................................................................................. 30
4
.3 Presentation and Feedback Process (20 minutes) ...................................................................... 31
| 3
DAY 2, Section 5: Group Presentations ............................................................................................. 33
5.1 Welcome Back, Icebreaker, Set Up for Presentations (30 minutes) ........................................... 33
5.2 Presentations (time dependent on number of participants; see note) ...................................... 34
5.3 Large Group Processing (10 minutes) ......................................................................................... 35
5.4 Continuous Quality Improvement and Self-Awareness (45 minutes) ........................................ 36
Section 6: Challenging Behaviors and Self-Care ................................................................................. 38
6.1 Challenging Behaviors (20 minutes) ........................................................................................... 38
6.2 Behavior Management (45 minutes) .......................................................................................... 39
6.3 Boundaries and Self-Care (25 minutes) ...................................................................................... 40
6.4 Wrap-Up (35 minutes) ................................................................................................................ 45
| 4
Acknowledgements
The Facilitating Programs for Youth curriculum was developed by Heather Wynkoop Beach and past and
present members of the ACT for Youth Center for Community Action Training and Capacity Building
Team. Some portions of the curriculum are drawn from ACT for Youth’s Positive Youth Development 101
manual.
Development Team
Lead Author/Developer
Heather Wynkoop Beach, MS
Director of Training and Capacity Building
ACT for Youth Center for Community Action
Bronfenbrenner Center for Translational Research
Cornell Human Ecology
Cornell University
ACT for Youth Training / Capacity Building Team
Marisol De Leon, MPS
Michele Luc, MSW
Mary Maley, MS
Past members of ACT for Youth Training Team
Jutta Dotterweich, MA
Beth Mastro, MPH
Divine Sebuharara, MS
Additional writing and editing
Karen Schantz
Clearinghouse Director, ACT for Youth
Special Thanks
Cornell Cooperative Extension Risk and Thriving in Adolescence Program Work Team
Facilitating Programs for Youth pilot participants

| 5
Curriculum Overview
Purpose
Our goal in developing this curriculum is to improve the capacity of Cornell Cooperative Extension (CCE)
educators and volunteers, together with other community members who work with youth, to facilitate
effective youth development programming.
Ultimately, our aim is to benefit youth i
n New York State and beyond by building facilitators’
competencies to deliver skill-building programs that engage and challenge young people.
Learning Objectives
By the end of this training, participants will be able to:
• Identify the elements of quality facilitation
• Engage youth with interactive, youth-centered activities
• Put effective facilitation skills into practice
• Provide and receive useful feedback
Intended Audience
This curriculum is designed for professionals and volunteers who work directly with youth in late
childhood and adolescence in a wide range of educational, recreational, or residential programs. It is
especially appropriate for 4-H and community educators and volunteers within the CCE network.
Development Process
The first year of the project (2020-2021) focused on forming an advisory group of experienced youth
work professionals recruited from the CCE Risk and Thriving in Adolescence Program Work Team.
Members represent NYS 4-H, the wider NYS CCE network, and ACT for Youth Center for Community
Action. Initial discussions included a review of existing trainings and resources that focus on engaging
adult learners and enhancing facilitation skills. In year two (2021-2022) the ACT for Youth training and
capacity building team developed a draft of the curriculum and piloted it with educators in the
adolescent pregnancy prevention field. In year three (2022-2023) we incorporated feedback from the
pilot into the program design, then offered the training to a group of CCE and other community
educators. With their final input, we were able to complete the manual and share with the wider
community.
Curriculum Design
Facilitating Programs for Youth is a 2-day skill-building workshop covering the following content areas:
1. Effective Facilitation
2. Working with Youth
3. Continuous Quality Improvement
| 6
4. Challenging Behaviors
5. Self-Care
Drawing on an experiential learning model, the curriculum uses small and large group activities to allow
for active participation, discussion, and reflection, in combination with short lectures, informative
handouts, and web-based resources. As the central skill-building activity, each participant gives a brief
presentation, assesses their own performance, and takes/gives feedback.
Implementation
Timing
The full curriculum requires roughly 12 hours of training time presented in two full days. According to
adult learning theory, adult participants do best with regular breaks at 50-minute intervals, but the exact
timing of the breaks is up to you. We have not included breaks in the curriculum.
Group Size
The recommended group size is 14-20 participants (max 24).
Room Requirements
• For groups with 12 or more participants, a second training room is needed for the first part of
Day 2. (Exact amount of time depends on number of participants.)
• The training includes small group activities; spacious training spaces will work best for these.
• Free wall space is needed for displaying larger pieces of paper.
• Room set-up tables arranged in a banquet, classroom, or “U” shape style are recommended.
Facilitator Requirements
• Facilitators should have youth work experience and be familiar with the theory and concepts of
positive youth development.
• If the training is being offered in full days, a team of two facilitators is highly recommended. Two
facilitators are essential for groups of 12 or more.
Equipment/Supplies
• AV: Laptop/projector/speakers/screen (or room with built-in AV equipment)
• Easel/chart paper
• Prepared chart paper (see headnotes for each section)
• Office paper
• Markers, pens
• Masking tape
• Large bag
• Handouts (folders optional)
• Name tags

| 7
• Supplies for selected energizers (see Sections 3 and 5))
• Optional: manipulable toys (e.g., pipe cleaners, Play-Doh, slinkies)
• Optional: Wellness Basket (basket of items participants might need such as cough drops, tissues,
menstrual products, band-aids, etc.)
Handouts
Handouts are available at: https://actforyouth.net/pro-resources/trainings/facilitating-manual.cfm
• Sample participant agenda
• General Presentation Skills (include extra copies – handout is needed on both days)
• Workshop Components
• Values Self-Assessment (youth focus)
• Stages of Adolescent Development
• Icebreakers, Energizers & Teambuilders
• Behavior Management Techniques
• Keeping Groups Focused
• Feedback Form
Activity Guide
• Activity Guide: Facilitation vs. Traditional Instruction
Evaluation
A training feedback form is included with the handouts.

| 8
DAY 1, Section 1: Introductions and Overview
Objectives: Participants will:
Begin to get to know each other.
Understand course objectives and what to expect.
Create group agreements.
Supplies/Prep: AV, slides, chart paper, markers, paper, pens
P
rep agenda handout
Time: 25 minutes
Handout: P
articipant agenda
1.1 Welcome and Introductions (15 minutes)
Slide 1: Welcome
Welcome to the training: Facilitating Programs for Youth! If you are here to develop your ability to
deliver programs that engage and challenge young people, you are in the right place.
Trainers introduce themselves, sharing names, pronouns, and organizations.
This course was created by the ACT for Youth Center for Community Action at Cornell University. The
training is part of an extensive suite of tools and trainings that support youth work professionals and
volunteers in bringing the positive youth development approach to their organizations, communities,
and the young people they work with. You’ll find many more resources on the ACT for Youth website,
actforyouth.net.
Add housekeeping details: location of bathrooms, break/lunch times, manipulatives, wellness basket, etc.
We’re going to be together for the next two days, so let’s all get introduced!

| 9
Slide 2: Pair Up
Activity: Who Are We?
You’re probably sitting with the folks you came with, so let’s shake it up a little! In a moment, we’d like
you to move around the room and find someone you don’t know, or don’t know well. With your
partner, identify 10 things you have in common. Grab a piece of paper and a pen. You’ve got just 5
minutes – now, go!
Participants mingle, chat. Give a 2-minute warning. When 5 minutes have passed, call for quiet.
Slide 3: Who Are We?
Okay, time’s up! Let’s introduce ourselves and share our commonalities while we’re still in pairs. Please
share your name (and give us any tips to help us remember how to pronounce it), five of the things you
have in common, your pronouns, your organization, and one thing that you hope to gain from this
training.
NOTE ON PRONOUNS: If anyone questions the need for sharing pronouns, give an explanation. You
might use language such as: We ask folks to share their pronouns so that we can all avoid making
assumptions that are disrespectful and hurtful. Sharing pronouns is one way we can show that we
want this to be a comfortable, inclusive space for everyone.
| 10
One facilitator should record participants’ expectations for the workshop on chart paper.
Take a moment to model an activity debrief, asking how easy or difficult it was to find commonalities.
Without discussion, ask them to consider how easy or hard it is for youth to connect with other training
participants they don’t know. Review expectations briefly.
Thank you all! It’s great to see the high expectations for this training. Here’s what we’re planning to
cover over the next two days.
1.2 Training Overview (5 minutes)
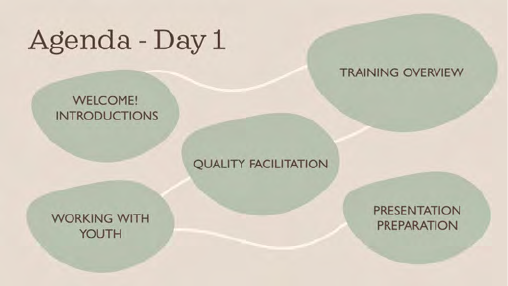
Slide 4: Agenda, Day 1
Distribute agenda.
Today our focus is on building and sharing knowledge about high quality facilitation. We’ll talk about
what facilitation is and discuss the components of a well-designed workshop. Then we’ll shift our focus
to the participants we are trying to reach, young people. This afternoon we’ll take some time to refresh
our understanding of what it means to be an adolescent, considering young people’s development and
wellness. We’ll share ideas about youth engagement and youth-centered learning. Then, in preparation
for Day 2 activities, we’ll discuss ways to deliver a skill-building presentation and how to give
constructive feedback.

| 11
Slide 5: Agenda, Day 2
Most of our day tomorrow is dedicated to using what we learn today to practice and build our skills as
facilitators. Each participant will give a 3-minute skill-building presentation on any topic, and we’ll
practice giving constructive feedback to each other. In the afternoon, we’ll talk about the value of
continuous quality improvement and self-assessment. We’ll discuss group dynamics and behavior
management. Finally, we’ll give some consideration to the importance of boundaries and self-care when
working with young people.
Slide 6: Learning Objectives
Here are our learning objectives for this training. We are setting the stage for you to be able to:
• Identify the elements of quality facilitation
• Engage youth with interactive, youth-centered activities
• Put effective facilitation skills into practice
• Provide and receive useful feedback
Are there any questions about the content and flow of the training?

| 12
Take questions. Provide any further housekeeping details such as scheduled breaks, lunch, etc.
1.3 Group Agreements (5 minutes)
Slide 7: Group Agreements
We’ve talked about what we’re doing and when we’re doing it—now let’s talk about how.
Activity: Group Agreements (full group)
You’ve probably all created group agreements in workshops before. Group agreements help us stay on
track and create a space where all of us can learn. What are some agreements that you think are
important and effective that you’d like to put into place for this group?
Label chart paper “Group Agreements.” As people volunteer suggestions, list them, briefly checking in
with the group to see if there is general agreement. After everyone who wants to has shared, make sure
Group Agreements include:
• S
tep Up/Step Back or 3 Then Me
Step Up/Step Back: If you’ve been hesitating, push yourself a little to contribute to our
discussion; if you’ve been speaking a lot, hold back a little to make space for others.
3 Then Me: If you’ve spoken, wait until 3 others speak before you take another turn.
• 1 Mic
There’s just one “microphone” at a time—we don’t talk over each other; one person speaks at a
time.
NOTE: Don’t let participants get too sidetracked on their presentation for tomorrow. If necessary,
explain: Tomorrow’s presentation should be a 3-minute lesson on how to do any simple skill.
We’ll discuss it more this afternoon. Today the focus is on learning about quality facilitation and
engaging youth participants.

| 13
• Se
lf-Care
If any topic is triggering, feel free to step away to get a break. And we know you have lives and
responsibilities outside this room so please take care of those things without feeling the need to
explain; we just ask that it not interrupt the session.
• Manage Te
chnology
Silence your phone and, if possible, please put it away. Let’s all try to keep our attention in the
room with each other. There will be periodic breaks when you can use your phone. If you do
need to make or take a call, please step out of the room.
• Participate at Yo
ur Own Level
We understand that there may be things that limit participation. For example, maybe someone
has a back problem and needs to stand or walk around periodically. Don’t feel the need to
explain, just do what you need to do to take care of yourself and your responsibilities.
Are there any others, or any q
uestions about our expectations and agreements over the next two days?
Take questions, offer clarifications. Make the connection to facilitating programs with youth:
Group agreements are the first time you establish behavior expectations with the group, and they work
because participants are taking an active role in establishing those agreements. Many times youth spend
the day with rules that tell them all the things they can’t do. As you can see, we purposefully establish
the “how” of what you can do.

| 14
Section 2: Quality Facilitation
Objectives: Participants will be able to:
Identify skills, qualities, and behaviors that make a good facilitator.
Reflect on their own strengths and challenges as facilitators.
Describe the components of a successful workshop and why they matter.
Supplies/Prep: AV, slides, prepared chart paper, prepared activity cards, tape, markers, paper, pens
Prep ahead for “F
acilitation vs. Traditional Instruction” activity: 2 sheets of chart paper,
one labeled “Traditional Instruction” and the other labeled “Facilitation”
P
repared cards (see “Activity Guide: Facilitation vs. Traditional Instruction”)
Time: 60 minutes
Handouts
: “General Presentation Skills,” “Workshop Components”
2.1 Facilitation vs. Traditional Instruction (12 minutes)
To get started, let’s clarify what it is we do as facilitators. When we compare facilitating to more
traditional instruction, how are they different? What are the similarities?
Slide 8: Traditional Instruction or Facilitation?
Activity: Traditional Instruction or Facilitation (small groups)
Break participants into 2 groups. Place chart paper labeled “Traditional Instruction” and “Facilitation” on
the wall.
We’re using this definition of traditional instruction: “A structured education program that focuses on
face-to-face, teacher-centered instruction, including teacher-led discussion and teacher knowledge
imparted to students.”
Is this how you would define it? How else would you describe it?

| 15
Here’s the definition of facilitation: “Assisting or making easier the progress or improvement of
something. Contributing to the fulfillment of a need or furtherance of an effort or purpose.”
Is this what you think of when you think of facilitation? Is there anything missing?
When working with youth you may use some traditional Instruction techniques, but we are going to
focus on facilitation skills during this training because of how it aligns with Positive Youth Development
strategies and because the work you do will most likely take place outside the school classroom.
Distribute instructing/facilitating activity cards evenly between the groups.
In your group, discuss each card and consider whether it falls under “facilitation” or “traditional
instruction.” When you’ve come to an agreement, tape the card to the sheet on the wall.
You have 5 minutes.
When 5 minutes have passed, go over each description to see if it is under the correct heading. Note that
some descriptions may fall under both headings. Debrief by asking what the overall differences between
traditional instruction and facilitation seem to be and where they seem to be (or should be) similar.
Which approach works best with most young people?
2.2 Quality Facilitation (15 minutes)
Let’s dive into the question at the heart of this training: What is high quality facilitation?
Slide 9: What makes a good facilitator?
Activity: Good Facilitator Brainstorm (full group)
What are the personal qualities or characteristics that make a good facilitator? Let’s brainstorm.
Encourage participants to call out ideas. Write ideas on chart paper where everyone can see them. Ideas
might include warmth, positive attitude, inclusiveness, humor…
These are great. How about skills?
What skills do you need to practice to do a really good job as a
facilitator?

| 16
Take notes on chart paper. Skills might include time management, being well-prepared, classroom
management techniques, communication skills, technology know-how…
Have we got it all covered? Let’s look at it another way. What are the behaviors t
hat a good facilitator
displays? Let’s get really concrete.
Continue note taking. Ideas might include projecting one’s voice, moving around the room, using a
po
sitive tone, checking participants’ understanding…
Excellent—we’ve got a solid list here of characteristics, skills, and behaviors.
A good program is not just dependent on its curriculum. Facilitation matters. That doesn’t mean that we
all have to facilitate in exactly the same way—in fact, a program can be much more interesting when our
individual personalities shine through. But there are certain factors that influence quality: skills,
characteristics, and behaviors that can make all the difference as we set out to create a learning
environment. Much of the program content can simply be lost in the gap between a clear, well-
managed, and engaging facilitation style and one that is confused, out of control, or dull.
But of course we don’t start out with all of these qualities and skills, right? We all bring strengths to this
work as well as challenges—things we may need to work on.
Activity: Identifying Strengths and Challenge (pair share)
Take a look at our list. Which of these are strengths for you, and which are challenges? Come on up and
circle one of each—one strength and one challenge. For the challenge, pick something that you can
develop—a skill you can build over time. Once you’ve circled your two items, pair up with a partner and
share what you circled and why. Why do you think this strength and this challenge is especially
important to you?
If you are not over time, you can have a few people share with the larger group after the pair share.
Thank you! I think we’ve done a good job of sketching out what makes a good facilitator. You’ve also got
a handout on General Presentation Skills. This list can be helpful because it’s quite concrete, giving
examples of what it might look like to do these skills well and what it looks like when it’s not so well-
executed.
Distribute General Presentation Skills handout if not using folders.
When we facilitate a workshop, our goal is to assist participants in learning something for themselves.
We typically use interactive or experiential activities such as games to engage the group, followed by
reflection. The facilitator is more guide than instructor, often pulling knowledge from the group. As
facilitators we are not predominantly lecturers, though short mini-lectures—like this one!—can be a
useful strategy. And we’re not simply running a meeting, though meetings may have similar strategies
such as forming group agreements and encouraging participants to share their experiences and insights.
As facilitators we create paths to ease learning. In many cases we are setting the stage for increased
awareness, changing attitudes, skill building, and—ultimately—behavior change.

| 17
Of course, much depends on the design of the workshop itself. We’ll look next at the components of a
well-designed workshop.
2.3 Workshop Components (30 minutes)
Let’s take a look at the “Workshop Components” handout.
Distribute handout or have participants remove it from folder.
Slide 10: Workshop Components
There are eight components identified here, including advance preparation and what needs to be done
soon after the workshop itself ends.
Preparation happens well before the workshop begins. In addition to gathering materials and
coordinating with your co-facilitator, you need to thoroughly understand the goals of the workshop and
how the activities are designed to get you to your goal.
The introduction sets the tone for the event by helping participants begin to feel familiar with the
facilitators and each other, helping everyone understand what to expect, and establishing group norms
through group agreements.
A warm-up activity or icebreaker increases comfort and energy by bringing everyone together to begin
the workshop.
Transitions should be incorporated throughout to help the flow of the event and explain how each part
of the workshop relates to the next.
The main activity (or activities) are the heart of the experience and the primary way to achieve the
goals of the workshop.
Processing or debriefing is a way for participants to reflect together on the main activities, sharing
perspectives and what they’ve learned.
Closure through an intentional activity helps participants feel hopeful, connected, and done for the day.

| 18
After the event, in the next day or two, it’s helpful to debrief with your cofacilitator or just with
yourself, reviewing feedback forms soon after the session and considering any adjustments you might
want to make the next time you present this workshop.
Which component is the most important? Let’s dig a little deeper into each component.
Activity: Debating Workshop Components (small groups)
Divide participants into eight groups and assign one component to each group.
Each group has a component. You have five minutes to make the case for why your component is the
most important. We’ll need a volunteer from each group to report out. One question you might want to
ask—what would happen if your component was left out or wasn’t taken seriously?
After 5 minutes, ask a volunteer from each group to report out briefly. Highlight the importance of group
agreements for setting tone and expectations.
Debrief by pointing out that each component is critical when facilitating a program with young people.

| 19
Section 3: Working with Youth
Objectives: Participants will:
Assess personal values around working with youth.
Increase knowledge of adolescent development.
Increase knowledge of the impacts Covid has had on youth.
Practice techniques for engaging youth participants.
Supplies/Prep: AV, slides, bag, chart paper, markers, paper, pens, supplies for selected energizers (see
handout)
Prep ahead for Youth Engagement and Experience ac
tivity: 4 sheets of chart paper, each
labeled with one topic for discussion (“Choice,” “Involving Youth in Planning,” “Roles
and Responsibilities,” “Connecting Activities to Life”).
Prep ahead for Icebreakers demo: The 3.5 Icebreakers and Energizers activity involves
selecting activities from the handout to try out with participants. Prep for the demo and
bring any supplies needed for selected energizers.
T
ime: 2 hours, 35 minutes
Handouts
: “Values Self-Assessment,” “Stages of Adolescent Development,” “Icebreakers,
Energizers & Teambuilders”
3.1 Values Self-Assessment: Who Am I? (45 minutes)
We’ve clarified our understanding of what high quality facilitation is, and we’ve looked at the
components that make a workshop run well. Now let’s turn to our participants: young people. This
afternoon we’ll look briefly into what adolescent development is all about. But first, let’s reflect on our
own beliefs and attitudes about adolescents.
Slide 11: Who Am I?

| 20
Activity: Who Am I? (full group)
Distribute the Values Self-Assessment.
This is a self-reflection exercise. We will share responses, but anonymously. Don’t put your name on the
paper, just a mark or symbol so that you can recognize your own. Let’s take five minutes to fill these out.
No talking yet—let’s just fill these out privately. Try to be as honest as you can. No one will know whose
responses are whose. And there are no right or wrong answers!
After 5 minutes, see if they need one or two extra minutes.
Okay, now crumple your sheet into a ball—not too tight! We’re going to collect and redistribute them.
Gather all the balls of paper into a large bag and stir them up. Then hand the bag around and have each
person take one.
Take one and smooth it out—make sure it’s not your own! We’re going to each take on the values and
perspectives of the person whose sheet we picked. You’re not representing your own values, you’re
representing the person who filled out the sheet you’re holding in your hand.
Break up the space in the room to reflect the range from strong agreement to strong disagreement.
Picture a spectrum in this space that goes from “strongly disagree” to “disagree” in this area, and from
“agree” to “strongly agree” over here. When I read each statement, go stand in the part of the room
that reflects the answer on the sheet—not your own perspective. Any questions?
Read one statement and ask participants to move into position. Ask one or two people in each group to
make the case for the position they are representing. Repeat for the remaining value statements.
Debrief: Even in a room full of people who want to support youth, there can be a difference in values and
perspectives. This exercise also helps participants start thinking about their own attitudes and ideas. You
could invite participants to begin considering how their views come across to young people.
3.2 Developmental Tasks (30 minutes)
[Note to facilitators: this activity is drawn from the ACT for Youth curriculum Positive Youth
Development 101.]
Let’s take a brief look at the youth we are working with. What do we know about adolescent
development? What is going on regarding physical/sexual, cognitive, social, emotional, and moral
development? Although many of you have taken a course in child and adolescent development, a brief
refresher might be helpful.
When does adolescence start and end?
Take some comments.

| 21
This is not an easy question, is it? Generally, adolescence is considered to begin with the onset of
puberty. The average age for female-bodied children is 10-12 (though some enter puberty as early as 8),
and for male-bodied youth the age is 12-14 (some as early as 10), so we can say roughly around 10.
There is less agreement about the end of adolescence. In the past, age 19 was commonly seen as the
end of adolescence. With findings in adolescent brain development, there is some push to lengthen
adolescence to age 25. For now let’s go with the age range 10-19.
Slide 12: Timeline Activity
Activity: Timeline of Adolescent Development (small groups)
I would like to invite you to test your understanding of adolescent development – the common
milestones, events, and tasks that young people have to develop or cope with at certain ages. Let’s
divide you into three groups. One group will investigate elementary school, one middle school, and one
high school. We include elementary school since puberty and adolescence start there for some youth.
In your group, think about the development that happens during that time – physically, socially,
emotionally, cognitively, and morally. What skills and competencies are they developing? Also, think
about the challenges they face during that time: major events or changes that might influence their
behavior and development.
Work on it collectively as a group. You can use words or symbols or pictures to record your events and
tasks.
Debrief: Have groups report out, starting with elementary school. Ask after each group report if others
have questions or want to add something. Add important tasks and events if they are missing.
Thank the groups for doing a good job.
Keep in mind that developmental psychologists are moving away from the use of milestones to describe
adolescent development. Young people often do not progress through milestones; their development
tends to jump up and down in these charts. However, developmental charts can still be useful as a
general guide while working with youth and when developing program activities.

| 22
Slide 13: Tasks of Adolescence
Text: (click through the topics)
Reviewing adolescent development as we just did, we realize that adolescents face many tasks and
challenges during this time. Here is a brief summary:
• They need to adjust to bodies that nearly double in size and acquire sexual characteristics. This
also includes establishing a sexual identity and developing the skills for romantic relationships.
• Their cognitive skills change gradually but profoundly, allowing abstract and hypothetical
thinking.
• They acquire the ability to see things from another person’s perspective, increasing their ability
to resolve problems and conflicts in social situations and relationships.
• As they confront and handle all the changes that are occurring, adolescents acquire new abilities
to cope with risk, stress, and conflict.
• They develop a more complex, personal, and moral belief system that will guide their decisions
and behavior.
• They develop more competent and sophisticated ways to understand and handle emotions.
• The quality of their friendships changes; the focus shifts from interests and activities to feelings
and understanding.
• They explore and form a stable sense of self. Core roles that are explored are gender, sexual
orientation, and race/ethnicity.
• They take on the roles and responsibilities of adulthood with respect to work, family,
community, and citizenship.
• They negotiate a new relationship with parents and adults, balancing independence and
ongoing connection.
Refer to handout “Stages of Adolescent Development” as a reference.

| 23
3.3 Impact of Covid-19 (15 minutes)
Slide 14: Impact of Covid
We cannot talk about the tasks of adolescence without now also talking about the impact Covid-19 and
the pandemic has had on the young people’s development and well-being. Because it is so recent, there
isn’t a lot of research, but there is some—so let’s take a look.
One study done by the National Institutes of Health started before the pandemic. In that research, 64
teens aged 13-17 were being monitored to see how their brains changed over time. The study had to
pause when Covid hit, and was then restarted after 10 months. The researchers realized this would be
an opportunity to do some comparisons of the brain images before and after the first 10 months of the
pandemic, and what they found was stunning.
Slide 15: NIH Study
• Brain scans showed that parts of the brain involved in memory and emotion — the
hippocampus and the amygdala — were thicker in post-shutdown teen brains. The cortex — the
area involved in executive functions, such as self-control and problem-solving — was thinner.
• These changes are normal in brain development but appear to have happened faster during the
pandemic shutdowns.
• After 10 months of the Covid-19 pandemic, the brains of teens looked as though they had aged
about 3 years.

| 24
• This premature aging is similar to changes that happen in the brains of teens who experience
violence, neglect, and family dysfunction.
Slide 16: Yale Study
Another study by Yale neuroscientists looked at brain scans of adults during interactions in person vs.
Zoom. Researchers found that our brains do not function the same way on Zoom as they do during in-
person interactions. During online conversations, there is less activity in the brain’s social systems
compared to neuron activity during face-to-face interactions.
This finding highlights the importance of in-person interactions, which was almost nonexistent during
the lockdown phase. What’s more, we know that the ability to interpret facial cues is still developing
during adolescence (and therefore already a struggle). With so many middle schoolers having to interact
via Zoom, that development may have not only been interrupted, but hindered.
Slide 17: Tasks Affected
How may what we’ve learned through these studies show up among the young people you work with?
We might see the effects of lengthy lockdowns and Covid stress in their ability to:
• Develop/apply abstract thinking skills
• Understand/express more complex emotional experiences
• Form friendships that are close and supportive

| 25
Slide 18: Impact
In turn we may see impacts in young people’s:
• Decision making ability
• General studying and learning capabilities
• Increased overall stress, while they may be unable to tell anyone what is happening to them
• Communication skills
o Within peer relationships
o With adults
Studies are showing that students who were in middle school during the height of the pandemic have
been less able than younger students to rebound from academic disruptions.
Isolation and anxiety brought on by Covid clearly had negative effects on development. And while it can
be energizing to join in common cause, the struggle for racial justice that was reignited by the murder of
George Floyd also put the full impacts of racism front and center. The effects of isolation, stress, anxiety,
and trauma on young people’s mental health and social-emotional skills during these years could well
last into adulthood.
Slide 19: Vulnerable
And of course, keep in mind that all of this is magnified for vulnerable students.

| 26
3.4 Engaging Youth (20 minutes)
Youth engagement happens when young people participate in meaningful opportunities and have roles
that allow them to build on their strengths, take on responsibilities, and contribute to decisions that
affect themselves and others. As a facilitator, you can create experiences that put youth engagement at
the center of whatever work you are doing with young people by considering the questions of:
• What are ways in which you give youth choice?
• When or how do you give youth opportunities to decide how certain activities are done?
• What are some roles and responsibilities that you give to young people?
How do you connect the activities to their real life experiences?Slide 20: Engaging Youth
Activity: Youth Engagement and Experience (small groups)
If you work with youth, or if you’ve observed youth programs, you may already have seen some of these
principles in action. Let’s think it through more deeply.
Divide into 4 small groups. Put chart paper near each group with labels “Choice,” “Involving Youth in
Planning,” “Roles and Responsibilities,” “Connecting Activities to Life.”
Group 1, your task is to think about ways we tend to give youth choice during programming. For
example, we often involve youth in creating group agreements, right? What else?
References
Gotlib, I. H., Miller, J. G., Borchers, L. R., Coury, S. M., Costello, L. A., Garcia, J. M., & Ho, T. C. (2022).
Effects of the COVID-19 pandemic on mental health and brain maturation in adolescents:
Implications for analyzing longitudinal data. Biological Psychiatry: Global Open Science.
https://doi.org/10.1016/j.bpsgos.2022.11.002
Zhao, N., Zhang, X., Noah, J. A., Tiede, M. & Hirsch, J. (2023). Separable processes for live “in-person”
and live “Zoom-like” faces. Imaging Neuroscience. https://doi.org/10.1162/imag_a_00027

| 27
Group 2, think about how we involve youth in designing the program or activities. When or how do you
give youth opportunities to decide how certain activities are done?
Group 3, what are the roles and responsibilities we can give to young people? You might also think
about participants who are disengaged—what roles or responsibilities might get them involved again?
Group 4, your task is to think about how we connect activities to young people’s real life experiences.
How do we make activities relevant to youth?
Give the groups 5 minutes to complete their tasks.
Have each group report out, giving other participants the chance to ask questions and add to the lists.
Allow participants to take pictures of the sheets to refer to after the training.
As you can see, there are many ways youth can be active participants in their learning. And the more
involved they are, the more they actually experience the “what” of what they are learning and have
input on the “how,” the more they will retain and continue to be engaged.
3.5 Icebreakers and Interactive Activities (45 minutes)
Slide 21: Icebreakers
Of course, it’s hard to sustain energy throughout a longer workshop or training. Energy and engagement
will predictably flag as the day goes on—or the day might even start with energy held back if
participants aren’t comfortable or aren’t sure they want to be there. This is where icebreakers and
energizers come to the rescue. When participants are less engaged or you feel they are holding back,
you may want to break out a short activity to change the energy in the room, even if it’s not on the
regular schedule.
Activity: Icebreakers and Energizers
Distribute Icebreakers, Energizers handout (or have participants remove it from their handout folders).
There are many icebreakers and energizers out there—and you are only limited by your imagination.
Let’s try out a few of the ones we’ve given you.
| 28
Try selected activities from the handout or take suggestions from the group. Divide into small groups or
keep the whole group together depending on the size of the group and the activity selected.
After each activity, debrief:
Is this an activity you might use with young people?
Do you see any potential challenges with using this activity? For example, is it accessible? Inclusive? Are
there modifications you would make?

| 29
Section 4: Presentation Preparation
Objectives: Participants will:
Increase awareness of time management.
Prepare for Day 2 presentations.
Understand feedback process.
Supplies/Prep: AV, slides
Time: 45 minutes
Handouts: “
General Presentation Skills”
4.1 Time Management (5 minutes)
Now that we’re energized again, let’s move on in the last 45 minutes or so of our day to get ready for
tomorrow’s presentations. But first, take your seats for one quick activity.
Slide 22: Time Management
Activity: How long is a minute? (full group)
Now close your eyes and raise your hand. I’d like you to keep your eyes closed, but you can put your
hand down after two minutes have passed. Got it? The clock starts NOW. When you think two minutes
have passed, put your hand down.
Silently count how many hands go down at what time point (three hands go down at 45 seconds, etc.)
Wait until all participants have lowered their hands. Then ask them to open their eyes (after a true 2:00
have passed – if all hands went down early). Give the results of how many hands went down when, and
how much time elapsed when the last hand went down.
Part of time management is, of course, having a good sense of the passage of time! This exercise can
give us an indication of how we perceive time and the importance of being mindful of time while
facilitating.

| 30
4.2 Presentation Prep (20 minutes)
Now—on to presentation preparation!
Slide 23: Presentation Prep
Tomorrow you will each be giving a 3-5 minute skill-building presentation: you’re going to facilitate
learning a skill of your choice. Examples include how to make pie dough, recite a verse in sign language,
do a dance move, tap a maple tree, fold a fitted sheet, and so forth. We’ll do the presentations in small
groups.
You’re welcome to bring in materials if you like. And you can improvise—but be ready to demonstrate
the presentation skills outlined on your General Presentation Skills handout. Let’s review that now.
Slide 24: Presentation Skills
Distribute General Presentation Skills checklist (or have participants remove it from their handout
folders).
Let’s take a look at this checklist in detail. As you prepare and practice your presentation tonight, we’d
like you to consider these skills. Tomorrow you will offer feedback to other presenters based on the
criteria in this checklist.

| 31
Go through each section of the skills checklist, taking questions and comments along the way.
4.3 Presentation and Feedback Process (20 minutes)
Tomorrow, we’ll not only be presenting, we’ll be assessing our own presentations and offering feedback
to others.
Slide 25: Presentation and Feedback Process
The process will go like this:
• We’ll divide into two groups (if overall group is 12 or larger)
• Each of you will give your 3- to 5-minute presentation
o Your audience will be keeping the skills checklist in mind as they listen or participate
• Following your presentation, you’ll stay in the front of the room and reflect on your own
presentation, verbally to the group:
o What specific skills did you do well?
o What would you change for next time?
o You have 2 minutes for this self-assessment
• Next, we’ll take 3 minutes for the group to offer feedback
• Finally, when all the presentations and feedback have wrapped up, we’ll come back into the
large group and talk about how it went and what we learned.
Now, what makes good and useful feedback?
Take some answers from the group.
Right, we want feedback that is specific and based on behavior that can be changed. Remember that the
purpose of this feedback is to help the presenter understand how they are coming across and where
they might be able to improve. This is where the checklist comes in handy. What behaviors did you see?
Begin by pointing out specific strengths you saw, then areas that could go better with practice.
And as you’re listening to the feedback the group is giving you, try to do so in a spirit of learning. It’s
really hard to know just how you are coming across as a presenter! Feedback like this is gold. Try not to
| 32
be defensive. If you don’t agree with or understand what’s being offered, ask for clarification. If you run
out of time, you can follow up later if needed.
That’s it for today! Are there any questions about tomorrow?

| 33
DAY 2, Section 5: Group Presentations
Objectives: Participants will:
Practice facilitation by presenting a skill or activity to the group.
Practice giving and receiving useful feedback.
Understand Continuous Quality Improvement and how it applies to facilitation.
Supplies/Prep: AV, slides, icebreaker/energizer supplies as needed, group agreements on flip chart
(from previous day)
Time: 30-minute intro, plus presentation/feedback time for each presenter. Allow
approximately 10 minutes for each presenter, plus about 15 minutes total
set-up/flex time.
Handout: Ge
neral Presentation Skills Checklist (extra copies)
5.1 Welcome Back, Icebreaker, Set Up for Presentations (30 minutes)
Group agreements should be posted on easel or wall.
Slide 26: Day 2
Welcome back to Facilitating Programs for Youth! Let’s get started with an energizer!
Facilitate a brief energizer from the handout or another icebreaker of your choice.
Okay, now that we’re all warmed up let’s get ready for the main event! We will spend the morning doing
our presentations and using the feedback process we discussed yesterday. First, let’s quickly review our
group agreements from yesterday.
Read through (or have a participant read through) the group agreements.
Are there any questions about the group agreements?
As a refresher, let’s also look back at the Presentation and Feedback process we’re about to undertake.

| 34
Slide 27: Presentation and Feedback Process
(Note: same as slide 25)
Remember, we are using the General Presentation Skills handout for this activity—does anyone need a
copy?
Each person will give a 3- to 5-minute presentation, followed by a 2-minute self assessment. Then the
group will take 3 minutes to offer feedback, being specific and providing examples, and keeping the
focus of feedback on behaviors that can be changed. Use the skills handout to identify the presenter’s
strengths and areas that could use some practice. Be kind, and also be helpful! Feedback is gold!
5.2 Presentations (time dependent on number of participants; see note)
Slide 28: Presentations
Activity: Participant Presentations
If you have 12 or more participants, divide into two groups and use two rooms for the presentations.
Each room should have one facilitator.
| 35
Facilitators should manage time and help participants focus on behavior-based feedback using the
General Presentation Skills checklist.
At the end of each presentation, ask the presenter to stay in the front of the room and prompt them:
• Let’s start with what you think you did well. What are the all the skills you demonstrated
successfully?
After about a minute, move to areas for improvement.
• Now tell us what you’d like to change next time.
After another minute, invite the group to give feedback, beginning with what the presenter did well.
Take up to 3 minutes for group feedback, giving the presenter a chance to ask for clarification as needed
(without filibustering). If any dialogue looks like it might go on too long, suggest that it be continued
later, outside the group. Thank the presenter and the group, and invite the next presenter up.
If the group or groups are large, take a break in the middle.
When all participants have presented and received feedback, bring everyone back together in the main
room.
5.3 Large Group Processing (10 minutes)
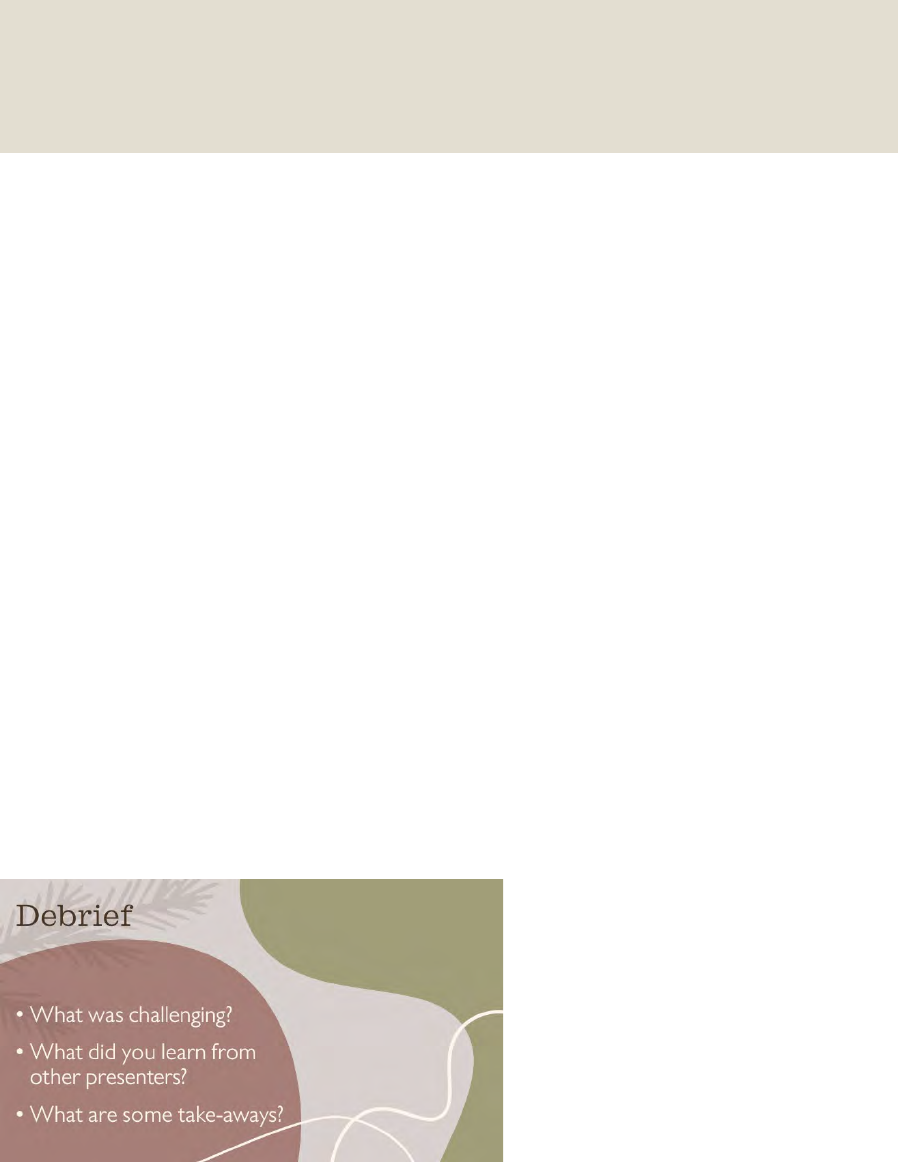
Slide 29: Debrief
When everyone has gathered back in main room, debrief the presentation/feedback process.
Let’s take some time to reflect on what just happened.
NOTE ON TIMING: Each presentation is reviewed and discussed (3- to 5-minute presentation; 2-
minute self-assessment, 3-minute group feedback). Total time needed depends on the number
of participants. Allow approximately 10 minutes for each presenter, plus about 15 minutes total
set-up/flex time.

| 36
• How was it? What worked? What didn’t?
• What did you learn from the presenters that went before you?
• What did you learn about yourself as a presenter?
5.4 Continuous Quality Improvement and Self-Awareness (45 minutes)
Begin with an energizer. Select from the Icebreakers/Energizers handout or use your own.
The presentation and feedback process we went through this morning is a great example of a practice
you can use to ensure continuous quality improvement, or CQI. CQI is just that, steps you can take to
constantly improve upon your craft and skills.
Slide 30: CQI
You could use this same process in conjunction with practice sessions in front of co-workers, a recorded
video presentation, or simply internal self-reflection. Here are some helpful CQI questions:
• What was the observed behavior?
Just as we did in our presentation/feedback process, you can use a recorded or practice session
to observe the specific behaviors on the General Presentation Skills checklist.
• What are my strengths/challenging areas?
Looking at the observable behaviors you’ve identified, which areas are potential challenges to
modify, and which are desirable behaviors you want to duplicate or expand upon?
• What were some contributing factors?
There may be factors beyond observable behaviors that contribute to success or difficulties, and
identifying these factors can help your CQI. Did you not practice before a session? Did you
practice more than usual? Was there a fire drill mid-session that interrupted the flow?
• What else should I be mindful of?
Going beyond observable behaviors and external contributing factors, is there anything else
rattling around in the back of your mind that you could bring forward? You might consider
things like your comfort in the setting, whether you feel supported in and clear about this work,
or your own attitude toward participants.
| 37
• What are my next steps?
What are you going to do to address the behaviors and contributing factors? Do you need
additional learning around a certain topic? Do you need more practice with a specific activity?
CQI for facilitation is a process that can be used individually, or it can be used as a tool within the
organization to look at program improvement as well. This is just one way of looking at how you can
improve your skills. Does anyone else have additional ideas?

| 38
Section 6: Challenging Behaviors and Self-Care
Objectives: Participants will:
Learn to recognize and respond to challenging behaviors.
Identify self-care strategies and ways to avoid compassion fatigue.
Review additional resources.
Supplies/Prep: AV, slides
P
rep ahead for Modeling Behavior Management Techniques activity: you will
demonstrate a range of behavior management techniques (as described in handout),
taking scenarios from the group.
T
ime: 2 hours, 5 minutes
Handouts:
“Behavior Management Techniques,” “Keeping Groups Focused”
6.1 Challenging Behaviors (20 minutes)
We’ve spent a lot of time focusing on our own general presentation skills. Let’s get back to our
participants.
If you’ve done any facilitating—whether with groups of youth or with groups of adults—you know that
sometimes participant behaviors arise that can impact what you are trying to do, right? People are on
their phones, or talking to each other off topic, or in some other way resisting full participation or
impeding others’ ability to participate fully.
We also know that people come to training with their own full lives and stressors. They have a range of
feelings about being in this group to begin with, and a range of coping strategies—some of which may
look like distraction. Let’s break into pairs and share a little about our experiences.
Slide 31: Challenging Behavior

| 39
Activity: Challenging Behavior (pair share)
Have participants split off into pairs.
Take turns answering the following questions:
• What is the most challenging behavior you have encountered working with young people?
If you haven’t yet worked with young people yet or work with youth infrequently, what behavior
are you worried you will encounter?
• In which ways does a facilitator impact the behavior of a group?
Let’s take 10 minutes for this discussion.
When 10 minutes are up, invite a couple of volunteers to share.
6.2 Behavior Management (45 minutes)
So, what can we do when these kinds of behaviors surface? When we are working with young people
especially, we want to approach challenging behaviors with empathy. And if we do, there are some
strategies we as facilitators can employ to help things stay on track while remaining inclusive of all
participants.
Let’s take a look at how some well-tested behavior management strategies work.
Distribute Behavior Management Techniques handout, or have them remove the handout from their
folders. (Distribute Keeping Groups Focused handout if it is not already in folders, but this handout is not
being reviewed.)
Slide 32: Behavior Management
Let’s review these techniques.
Proximity: Maybe you see that a participant is getting antsy, distracted, or just on the edge of being
disruptive. Sometimes just walking near them serves as a reminder that you’re there, you’re aware of
them, and there’s a certain behavioral expectation.

| 40
If you are offering support, being near the person—rather than across the room—may feel more
supportive.
While touch can be powerful, it should be used judiciously and only if you are certain the young person
trusts you.
Prompts may be short verbal reminders or non-verbal cues. You may want to remind the group of the
group agreements, or cue participants that we are moving on to the next task.
Hurdle help is useful when a participant is overwhelmed or can’t get started with a task. Breaking the
task down into smaller steps is an example of this strategy.
Time away is not an old-fashioned time out—it’s not intended to be punitive. Instead, if a participant
seems to be stressed or unable to continue, give them an option to do something else for a little while
so that they can regroup before returning.
Redirection simply refers to pointing out alternatives if a youth is stressed about a given situation.
Planned ignoring can be used when a participant is trying to get attention by being disruptive. When the
behavior stops (because attention is not forthcoming), be sure to notice and reward any subsequent
positive behavior.
Directives are clear statements that give a stressed participant a path forward. It’s important to keep
calm when giving a directive.
Caring gestures like smiles, thumbs up, encouragement, and appreciation are great for all participants.
Young people need to know that the adults around them care about them!
Let’s give this a try.
Activity: Modeling Behavior Management Strategies (full group)
Take examples from volunteers and model a technique that could work with this type of challenge. You
might also ask the group “what technique might work with this challenge?”
Refer the group to the handout “Keeping Groups Focused” as an additional resource for behavior
management.
6.3 Boundaries and Self-Care (25 minutes)
Youth work can be tough. Despite the pleasure of getting to know young people and really enjoying
their company, strengths, and insights, it’s hard to navigate their needs and also hard to see their
struggles.

| 41
We cannot stress enough the importance of self-care and healthy boundaries for anyone working with
young people.
Slide 33: What is Self-Care
What is Self-Care? We like this definition from the University at Buffalo School of Social Work.
Read slide:
“The term ‘self-care’ refers to activities and practices that we can engage in on a regular basis to reduce
stress and maintain and enhance our short- and longer-term health and well-being.
“Self-care is also necessary for you to be effective and successful in honoring your professional and
personal commitments.”
Regular is an important word in this description here, as many of us do emergency or reactionary self-
care more often than not. To keep in balance, maintaining our well-being proactively is important, not
just reacting when stress becomes too much to bear.
Why are we emphasizing that self-care is important for people who work with youth?
Slide 34: Why is self-care important if you work with youth?

| 42
• Some of you may be working with high need, high risk youth. And we know that positive youth
development principles tell us that even youth who are not considered “at risk” still need
additional caring adults to be invested in them.
• Youth work easily encompasses more time and energy than other positions.
• Adults who work with youth are tasked with “molding the future” with an ever-decreasing
budget.
• Sometimes, we are looking to fix wrongs we experienced in our own adolescence. There can be
unexpected emotional tolls. Frontline youth development professionals have a high turnover
rate that can many times be attributed to burnout.
It begs the question, why do we do the work that we do?
Take some responses.
So we have good reasons! But it makes sense to be aware of the pitfalls that can come along for the
ride.
Slide 35: Compassion Fatigue
One of these pitfalls is often called “compassion fatigue”—but a more formal name for it is “secondary
traumatic stress disorder.” Compassion fatigue is a natural consequence of stress that stems from caring
for and helping traumatized people. And it can lead to the lessening of compassion.

| 43
Slide 36: Avoiding Compassion Fatigue
There are strategies for avoiding compassion fatigue and finding more balance in your work and life.
• Identify and work on issues or situations that may be triggers for your own hurt.
• Learn to not internalize others’ emotional pain; learn to set healthy boundaries.
• Schedule time to simply relax and play and really set your work down:
o Maintain non-work friends
o Have non-work-related hobbies
• Become more comfortable with strong emotions—your own and others’. Learn that powerful
emotions can be tolerated and need not always be avoided.
• Use positive coping strategies:
o Journaling, for example, may help.
We recognize that this “to do” list is way more easily said than done. But if something here resonates
with you, consider focusing on that and taking steps to put it into action.
Slide 37: Steps to Self-Care
Here are some steps you can use to put your self-care goal into action:
• Identify the coping strategies you are already using
| 44
• Consider using an assessment tool to determine what you’d like to add into your routine
• Make a plan
• Identify potential barriers to carrying out your plan
• Make a commitment to yourself
• Share your intentions
• Follow through
Ask them to share how they practice self-care and set healthy boundaries.

| 45
6.4 Wrap-Up (35 minutes)
We are just about at the end of our training! We want to share a few resources to help you going
forward.
Slide 38: Resources
ACT for Youth developed this training. They have a wealth of resources for people who work with youth,
including libraries of activities on social and emotional learning and preparation for adulthood, and all
things positive youth development.
PBIS World is a good resource for learning more about behavior management.
First Time Facilitator and Seeds for Change give deep dives into facilitation skills.
Check them all out!
Slide 39: Wrap Up
So what have we learned? Let’s take some time to reflect on the experience and what we’re taking
away.
Activity: FLAWLESS closure (full group)
Use this FLAWLESS closure or another closing activity if preferred. As a group, have participants sum up
their feelings about the session by completing one prompt from each column.

| 46
I…
I am….
Felt Leaving with
Learned Excited about
Appreciated Shout-out (would like to)
Wish Serious about doing after this
Distribute Feedback Form and request that everyone fill it out before leaving.
Slide 40: Contact Information
Add your contact information to the slide and share with group.
Slide 41: Thank you!
Thank you for joining us!
Distribute certificates.
