
TIBCO GridServer
®
Developer’s Guide
Software Release 7.0.0
November 2018
Two-Second Advantage
®
Important Information
SOME TIBCO SOFTWARE EMBEDS OR BUNDLES OTHER TIBCO SOFTWARE. USE OF
SUCH EMBEDDED OR BUNDLED TIBCO SOFTWARE IS SOLELY TO ENABLE THE
FUNCTIONALITY (OR PROVIDE LIMITED ADD-ON FUNCTIONALITY) OF THE
LICENSED TIBCO SOFTWARE. THE EMBEDDED OR BUNDLED SOFTWARE IS NOT
LICENSED TO BE USED OR ACCESSED BY ANY OTHER TIBCO SOFTWARE OR FOR
ANY OTHER PURPOSE.
USE OF TIBCO SOFTWARE AND THIS DOCUMENT IS SUBJECT TO THE TERMS AND
CONDITIONS OF A LICENSE AGREEMENT FOUND IN EITHER A SEPARATELY
EXECUTED SOFTWARE LICENSE AGREEMENT, OR, IF THERE IS NO SUCH
SEPARATE AGREEMENT, THE CLICKWRAP END USER LICENSE AGREEMENT
WHICH IS DISPLAYED DURING DOWNLOAD OR INSTALLATION OF THE
SOFTWARE (AND WHICH IS DUPLICATED IN THE LICENSE FILE) OR IF THERE IS
NO SUCH SOFTWARE LICENSE AGREEMENT OR CLICKWRAP END USER LICENSE
AGREEMENT, THE LICENSE(S) LOCATED IN THE “LICENSE” FILE(S) OF THE
SOFTWARE. USE OF THIS DOCUMENT IS SUBJECT TO THOSE TERMS AND
CONDITIONS, AND YOUR USE HEREOF SHALL CONSTITUTE ACCEPTANCE OF
AND AN AGREEMENT TO BE BOUND BY THE SAME.
ANY SOFTWARE ITEM IDENTIFIED AS THIRD PARTY LIBRARY IS AVAILABLE
UNDER SEPARATE SOFTWARE LICENSE TERMS AND IS NOT PART OF A TIBCO
PRODUCT. AS SUCH, THESE SOFTWARE ITEMS ARE NOT COVERED BY THE TERMS
OF YOUR AGREEMENT WITH TIBCO, INCLUDING ANY TERMS CONCERNING
SUPPORT, MAINTENANCE, WARRANTIES, AND INDEMNITIES. DOWNLOAD AND
USE THESE ITEMS IS SOLELY AT YOUR OWN DISCRETION AND SUBJECT TO THE
LICENSE TERMS APPLICABLE TO THEM. BY PROCEEDING TO DOWNLOAD,
INSTALL OR USE OF ANY OF THESE ITEMS, YOU ACKNOWLEDGE THE
FOREGOING DISTINCTIONS BETWEEN THESE ITEMS AND TIBCO PRODUCTS.
This document contains confidential information that is subject to U.S. and international
copyright laws and treaties. No part of this document may be reproduced in any form
without the written authorization of TIBCO Software Inc.
TIBCO, Two-Second Advantage, GridServer, FabricServer, GridClient, GridBroker,
FabricBroker, LiveCluster, VersaUtility, VersaVision, SpeedLink, Federator, and RTI
Design are either registered trademarks or trademarks of TIBCO Software Inc. in the
United States and/or other countries.
EJB, Java EE, J2EE, and all Java-based trademarks and logos are trademarks or registered
trademarks of Sun Microsystems, Inc. in the U.S. and other countries.
TIBCO products may include some or all of the following:
Software developed by Terence Parr.
Software developed by the Apache Software Foundation (http://www.apache.org/).
This product uses c3p0. c3p0 is distributed pursuant to the terms of the Lesser General
Public License. The source code for c3p0 may be obtained from
http://sourceforge.net/projects/c3p0/. For a period of time not to exceed three years
from the Purchase Date, TIBCO also offers to provide Customer, upon written request of
Customer, a copy of the source code for c3p0.
Software developed by MetaStuff, Ltd.
Software licensed under the Eclipse Public License. The source code for such software
licensed under the Eclipse Public License is available upon request to TIBCO and
additionally may be obtained from http://eclipse.org/.
Software developed by Info-ZIP.
This product includes Javassist licensed under the Mozilla Public License, v1.1. You may
obtain a copy of the source code from http://www.jboss.org/javassist/
This product includes software licensed under the Common Development and
Distribution License (CDDL) version 1.0. The source code for such software licensed
under the Common Development and Distribution License (CDDL) version 1.0 is
available upon request to TIBCO.
Software developed by Jason Hunter & Brett McLaughlin.
Software developed by JSON.org.
Software developed by QOS.ch.
Software developed by the OpenSymphony Group (http://www.opensymphony.com/).
This product includes WSDL4J software which is licensed under the Common Public
License, v1.0. The source code for this software may be obtained from TIBCO’s software
distribution site.
Software developed by the Indiana University Extreme! Lab
(http://www.extreme.indiana.edu/).
Software developed by Jean-loup Gailly and Mark Adler.
All other product and company names and marks mentioned in this document are the
property of their respective owners and are mentioned for identification purposes only.
THIS SOFTWARE MAY BE AVAILABLE ON MULTIPLE OPERATING SYSTEMS.
HOWEVER, NOT ALL OPERATING SYSTEM PLATFORMS FOR A SPECIFIC
SOFTWARE VERSION ARE RELEASED AT THE SAME TIME. SEE THE README FILE
FOR THE AVAILABILITY OF THIS SOFTWARE VERSION ON A SPECIFIC OPERATING
SYSTEM PLATFORM.
THIS DOCUMENT IS PROVIDED “AS IS” WITHOUT WARRANTY OF ANY KIND,
EITHER EXPRESS OR IMPLIED, INCLUDING, BUT NOT LIMITED TO, THE IMPLIED
WARRANTIES OF MERCHANTABILITY, FITNESS FOR A PARTICULAR PURPOSE, OR
NON-INFRINGEMENT.
THIS DOCUMENT COULD INCLUDE TECHNICAL INACCURACIES OR
TYPOGRAPHICAL ERRORS. CHANGES ARE PERIODICALLY ADDED TO THE
INFORMATION HEREIN; THESE CHANGES WILL BE INCORPORATED IN NEW
EDITIONS OF THIS DOCUMENT. TIBCO SOFTWARE INC. MAY MAKE
IMPROVEMENTS AND/OR CHANGES IN THE PRODUCT(S) AND/OR THE
PROGRAM(S) DESCRIBED IN THIS DOCUMENT AT ANY TIME.
THE CONTENTS OF THIS DOCUMENT MAY BE MODIFIED AND/OR QUALIFIED,
DIRECTLY OR INDIRECTLY, BY OTHER DOCUMENTATION WHICH ACCOMPANIES
THIS SOFTWARE, INCLUDING BUT NOT LIMITED TO ANY RELEASE NOTES AND
"READ ME" FILES.
This Product is covered by U.S. Patent No. 6,757,730, 7,093,004, 7,093,004, and patents
pending.
Copyright © 2001-2018 TIBCO Software Inc. All Rights Reserved.
TIBCO GridServer
®
Developer’s Guide
|
vii
Contents
Preface . . . . . . . . . . . . . . . . . . . . . . . . . . . . . . . . . . . . . . . . . . . . . . . . . . . . . . . . . . . . . . . . . . . . . . . .xv
TIBCO Documentation and Support Services . . . . . . . . . . . . . . . . . . . . . . . . . . . . . . . . . . . . . . . . . . . . . . . . . . . .xvi
How to Access TIBCO Documentation. . . . . . . . . . . . . . . . . . . . . . . . . . . . . . . . . . . . . . . . . . . . . . . . . . . . . .xvi
Product-Specific Documentation . . . . . . . . . . . . . . . . . . . . . . . . . . . . . . . . . . . . . . . . . . . . . . . . . . . . . . . . . .xvi
How to Contact TIBCO Support . . . . . . . . . . . . . . . . . . . . . . . . . . . . . . . . . . . . . . . . . . . . . . . . . . . . . . . . . . xvii
How to Join TIBCO Community . . . . . . . . . . . . . . . . . . . . . . . . . . . . . . . . . . . . . . . . . . . . . . . . . . . . . . . . . . xvii
Typographical Conventions . . . . . . . . . . . . . . . . . . . . . . . . . . . . . . . . . . . . . . . . . . . . . . . . . . . . . . . . . . . . . . . . . xviii
Chapter 1 GridServer Application Development. . . . . . . . . . . . . . . . . . . . . . . . . . . . . . . . . . . . . . .1
GridServer Programming Options . . . . . . . . . . . . . . . . . . . . . . . . . . . . . . . . . . . . . . . . . . . . . . . . . . . . . . . . . . . . . . 2
Services . . . . . . . . . . . . . . . . . . . . . . . . . . . . . . . . . . . . . . . . . . . . . . . . . . . . . . . . . . . . . . . . . . . . . . . . . . . . . . 2
PDriver . . . . . . . . . . . . . . . . . . . . . . . . . . . . . . . . . . . . . . . . . . . . . . . . . . . . . . . . . . . . . . . . . . . . . . . . . . . . . . . 2
Python . . . . . . . . . . . . . . . . . . . . . . . . . . . . . . . . . . . . . . . . . . . . . . . . . . . . . . . . . . . . . . . . . . . . . . . . . . . . . . . 3
Resource Deployment . . . . . . . . . . . . . . . . . . . . . . . . . . . . . . . . . . . . . . . . . . . . . . . . . . . . . . . . . . . . . . . . . . . . . . . 4
Logging and Debugging. . . . . . . . . . . . . . . . . . . . . . . . . . . . . . . . . . . . . . . . . . . . . . . . . . . . . . . . . . . . . . . . . . . . . . 5
Logging Overview . . . . . . . . . . . . . . . . . . . . . . . . . . . . . . . . . . . . . . . . . . . . . . . . . . . . . . . . . . . . . . . . . . . . . . . 5
Viewing Engine Logs . . . . . . . . . . . . . . . . . . . . . . . . . . . . . . . . . . . . . . . . . . . . . . . . . . . . . . . . . . . . . . . . . . . . 6
Writing to Logs . . . . . . . . . . . . . . . . . . . . . . . . . . . . . . . . . . . . . . . . . . . . . . . . . . . . . . . . . . . . . . . . . . . . . . . . . 8
Debugging Engines . . . . . . . . . . . . . . . . . . . . . . . . . . . . . . . . . . . . . . . . . . . . . . . . . . . . . . . . . . . . . . . . . . . . 11
Creating a Native Stack Trace in Linux . . . . . . . . . . . . . . . . . . . . . . . . . . . . . . . . . . . . . . . . . . . . . . . . . . . . . . 12
Notes For Java Developers . . . . . . . . . . . . . . . . . . . . . . . . . . . . . . . . . . . . . . . . . . . . . . . . . . . . . . . . . . . . . . . . . . 14
Notes For C++ Developers . . . . . . . . . . . . . . . . . . . . . . . . . . . . . . . . . . . . . . . . . . . . . . . . . . . . . . . . . . . . . . . . . . 15
Changing the C++ Compiler Used with CPPDriver . . . . . . . . . . . . . . . . . . . . . . . . . . . . . . . . . . . . . . . . . . . . 15
C++ Multithreading Requirement . . . . . . . . . . . . . . . . . . . . . . . . . . . . . . . . . . . . . . . . . . . . . . . . . . . . . . . . . . 15
Using Global Statics in C++ Service Code . . . . . . . . . . . . . . . . . . . . . . . . . . . . . . . . . . . . . . . . . . . . . . . . . . . 15
Running both 32-bit and 64-bit Services on 64-bit Windows Daemons . . . . . . . . . . . . . . . . . . . . . . . . . . . . . 16
Running Examples on Visual Studio. . . . . . . . . . . . . . . . . . . . . . . . . . . . . . . . . . . . . . . . . . . . . . . . . . . . . . . . 16
Other C++ Notes . . . . . . . . . . . . . . . . . . . . . . . . . . . . . . . . . . . . . . . . . . . . . . . . . . . . . . . . . . . . . . . . . . . . . . 17
Notes For .NET Developers . . . . . . . . . . . . . . . . . . . . . . . . . . . . . . . . . . . . . . . . . . . . . . . . . . . . . . . . . . . . . . . . . . 18
.NET Driver Upgrades . . . . . . . . . . . . . . . . . . . . . . . . . . . . . . . . . . . . . . . . . . . . . . . . . . . . . . . . . . . . . . . . . . 18
Notes for Python Developers . . . . . . . . . . . . . . . . . . . . . . . . . . . . . . . . . . . . . . . . . . . . . . . . . . . . . . . . . . . . . . . . . 21
Chapter 2 Driver Installation . . . . . . . . . . . . . . . . . . . . . . . . . . . . . . . . . . . . . . . . . . . . . . . . . . . . . .23
GridServer SDK Installation. . . . . . . . . . . . . . . . . . . . . . . . . . . . . . . . . . . . . . . . . . . . . . . . . . . . . . . . . . . . . . . . . . 24
The Java Driver (JDriver) . . . . . . . . . . . . . . . . . . . . . . . . . . . . . . . . . . . . . . . . . . . . . . . . . . . . . . . . . . . . . . . . 24
TIBCO GridServer
®
Developer’s Guide
viii
|
The C++ Driver (CPPDriver) . . . . . . . . . . . . . . . . . . . . . . . . . . . . . . . . . . . . . . . . . . . . . . . . . . . . . . . . . . . . . 25
The Parametric Job Driver (PDriver) . . . . . . . . . . . . . . . . . . . . . . . . . . . . . . . . . . . . . . . . . . . . . . . . . . . . . . . 25
The Python Driver (PyDriver). . . . . . . . . . . . . . . . . . . . . . . . . . . . . . . . . . . . . . . . . . . . . . . . . . . . . . . . . . . . . 25
The .NET Driver . . . . . . . . . . . . . . . . . . . . . . . . . . . . . . . . . . . . . . . . . . . . . . . . . . . . . . . . . . . . . . . . . . . . . . . 26
The COM Driver. . . . . . . . . . . . . . . . . . . . . . . . . . . . . . . . . . . . . . . . . . . . . . . . . . . . . . . . . . . . . . . . . . . . . . . 26
The R Driver. . . . . . . . . . . . . . . . . . . . . . . . . . . . . . . . . . . . . . . . . . . . . . . . . . . . . . . . . . . . . . . . . . . . . . . . . . 27
Prerequisites . . . . . . . . . . . . . . . . . . . . . . . . . . . . . . . . . . . . . . . . . . . . . . . . . . . . . . . . . . . . . . . . . . . . . . . . . 27
Installation . . . . . . . . . . . . . . . . . . . . . . . . . . . . . . . . . . . . . . . . . . . . . . . . . . . . . . . . . . . . . . . . . . . . . . . . . . . 28
Driver Configuration . . . . . . . . . . . . . . . . . . . . . . . . . . . . . . . . . . . . . . . . . . . . . . . . . . . . . . . . . . . . . . . . . . . . . . . 30
Configuring Multi-Interfaced Drivers . . . . . . . . . . . . . . . . . . . . . . . . . . . . . . . . . . . . . . . . . . . . . . . . . . . . . . . 30
Driver Cleaner Configuration . . . . . . . . . . . . . . . . . . . . . . . . . . . . . . . . . . . . . . . . . . . . . . . . . . . . . . . . . . . . . 31
Multiple Driver Instances . . . . . . . . . . . . . . . . . . . . . . . . . . . . . . . . . . . . . . . . . . . . . . . . . . . . . . . . . . . . . . . . 31
Chapter 3 Creating Services . . . . . . . . . . . . . . . . . . . . . . . . . . . . . . . . . . . . . . . . . . . . . . . . . . . . . 33
Overview . . . . . . . . . . . . . . . . . . . . . . . . . . . . . . . . . . . . . . . . . . . . . . . . . . . . . . . . . . . . . . . . . . . . . . . . . . . . . . . . 34
Steps in Using a Service. . . . . . . . . . . . . . . . . . . . . . . . . . . . . . . . . . . . . . . . . . . . . . . . . . . . . . . . . . . . . . . . . . . . 35
Service Method Compliance . . . . . . . . . . . . . . . . . . . . . . . . . . . . . . . . . . . . . . . . . . . . . . . . . . . . . . . . . . . . . . . . . 36
Java/.NET Services . . . . . . . . . . . . . . . . . . . . . . . . . . . . . . . . . . . . . . . . . . . . . . . . . . . . . . . . . . . . . . . . . . . . 36
C++ Services . . . . . . . . . . . . . . . . . . . . . . . . . . . . . . . . . . . . . . . . . . . . . . . . . . . . . . . . . . . . . . . . . . . . . . . . . 36
Command Services . . . . . . . . . . . . . . . . . . . . . . . . . . . . . . . . . . . . . . . . . . . . . . . . . . . . . . . . . . . . . . . . . . . . 36
R Services . . . . . . . . . . . . . . . . . . . . . . . . . . . . . . . . . . . . . . . . . . . . . . . . . . . . . . . . . . . . . . . . . . . . . . . . . . . 37
Python Services. . . . . . . . . . . . . . . . . . . . . . . . . . . . . . . . . . . . . . . . . . . . . . . . . . . . . . . . . . . . . . . . . . . . . . . 37
Client Calling Conventions . . . . . . . . . . . . . . . . . . . . . . . . . . . . . . . . . . . . . . . . . . . . . . . . . . . . . . . . . . . . . . . . . . 38
Java/.NET Client . . . . . . . . . . . . . . . . . . . . . . . . . . . . . . . . . . . . . . . . . . . . . . . . . . . . . . . . . . . . . . . . . . . . . . 38
C++ Client . . . . . . . . . . . . . . . . . . . . . . . . . . . . . . . . . . . . . . . . . . . . . . . . . . . . . . . . . . . . . . . . . . . . . . . . . . . 38
R Client . . . . . . . . . . . . . . . . . . . . . . . . . . . . . . . . . . . . . . . . . . . . . . . . . . . . . . . . . . . . . . . . . . . . . . . . . . . . . 38
Python Client . . . . . . . . . . . . . . . . . . . . . . . . . . . . . . . . . . . . . . . . . . . . . . . . . . . . . . . . . . . . . . . . . . . . . . . . . 39
Registering a Service Type . . . . . . . . . . . . . . . . . . . . . . . . . . . . . . . . . . . . . . . . . . . . . . . . . . . . . . . . . . . . . . . . . . 40
Container Binding . . . . . . . . . . . . . . . . . . . . . . . . . . . . . . . . . . . . . . . . . . . . . . . . . . . . . . . . . . . . . . . . . . . . . 40
.NET AppDomains . . . . . . . . . . . . . . . . . . . . . . . . . . . . . . . . . . . . . . . . . . . . . . . . . . . . . . . . . . . . . . . . . . . . . 41
.NET Framework Versions . . . . . . . . . . . . . . . . . . . . . . . . . . . . . . . . . . . . . . . . . . . . . . . . . . . . . . . . . . . . . . . 42
Language Interoperability . . . . . . . . . . . . . . . . . . . . . . . . . . . . . . . . . . . . . . . . . . . . . . . . . . . . . . . . . . . . . . . . . . . 43
Strings and Byte Arrays . . . . . . . . . . . . . . . . . . . . . . . . . . . . . . . . . . . . . . . . . . . . . . . . . . . . . . . . . . . . . . . . . 43
Object Conversion from Strings and Byte Arrays. . . . . . . . . . . . . . . . . . . . . . . . . . . . . . . . . . . . . . . . . . . . . . 43
XML Serialization for Java, .NET, and R . . . . . . . . . . . . . . . . . . . . . . . . . . . . . . . . . . . . . . . . . . . . . . . . . . . . 45
Interoperable Types for XML Serialization . . . . . . . . . . . . . . . . . . . . . . . . . . . . . . . . . . . . . . . . . . . . . . . . . . . 45
R Interoperability . . . . . . . . . . . . . . . . . . . . . . . . . . . . . . . . . . . . . . . . . . . . . . . . . . . . . . . . . . . . . . . . . . . . . . 47
Python Interoperability . . . . . . . . . . . . . . . . . . . . . . . . . . . . . . . . . . . . . . . . . . . . . . . . . . . . . . . . . . . . . . . . . . 50
Maintaining State . . . . . . . . . . . . . . . . . . . . . . . . . . . . . . . . . . . . . . . . . . . . . . . . . . . . . . . . . . . . . . . . . . . . . . . . . 51
Initialization . . . . . . . . . . . . . . . . . . . . . . . . . . . . . . . . . . . . . . . . . . . . . . . . . . . . . . . . . . . . . . . . . . . . . . . . . . . . . . 52
Cancellation . . . . . . . . . . . . . . . . . . . . . . . . . . . . . . . . . . . . . . . . . . . . . . . . . . . . . . . . . . . . . . . . . . . . . . . . . . . . . 53
Destruction . . . . . . . . . . . . . . . . . . . . . . . . . . . . . . . . . . . . . . . . . . . . . . . . . . . . . . . . . . . . . . . . . . . . . . . . . . . . . . 54
TIBCO GridServer
®
Developer’s Guide
|
ix
Service Instance Caching . . . . . . . . . . . . . . . . . . . . . . . . . . . . . . . . . . . . . . . . . . . . . . . . . . . . . . . . . . . . . . . . . . . 55
Invocation Variables. . . . . . . . . . . . . . . . . . . . . . . . . . . . . . . . . . . . . . . . . . . . . . . . . . . . . . . . . . . . . . . . . . . . . . . . 56
Chapter 4 Accessing Services . . . . . . . . . . . . . . . . . . . . . . . . . . . . . . . . . . . . . . . . . . . . . . . . . . . .59
Services . . . . . . . . . . . . . . . . . . . . . . . . . . . . . . . . . . . . . . . . . . . . . . . . . . . . . . . . . . . . . . . . . . . . . . . . . . . . . . . . . 60
Proxy Generation . . . . . . . . . . . . . . . . . . . . . . . . . . . . . . . . . . . . . . . . . . . . . . . . . . . . . . . . . . . . . . . . . . . . . . . . . . 61
Service Options . . . . . . . . . . . . . . . . . . . . . . . . . . . . . . . . . . . . . . . . . . . . . . . . . . . . . . . . . . . . . . . . . . . . . . . . . . . 62
Service Invocation Context . . . . . . . . . . . . . . . . . . . . . . . . . . . . . . . . . . . . . . . . . . . . . . . . . . . . . . . . . . . . . . . . . . 63
Setting Task Description . . . . . . . . . . . . . . . . . . . . . . . . . . . . . . . . . . . . . . . . . . . . . . . . . . . . . . . . . . . . . . . . . 63
Shared Services . . . . . . . . . . . . . . . . . . . . . . . . . . . . . . . . . . . . . . . . . . . . . . . . . . . . . . . . . . . . . . . . . . . . . . . . . . 64
Creating a Shared Service . . . . . . . . . . . . . . . . . . . . . . . . . . . . . . . . . . . . . . . . . . . . . . . . . . . . . . . . . . . . . . . 64
Limitations to Shared Services . . . . . . . . . . . . . . . . . . . . . . . . . . . . . . . . . . . . . . . . . . . . . . . . . . . . . . . . . . . . 64
Ending a Shared Service . . . . . . . . . . . . . . . . . . . . . . . . . . . . . . . . . . . . . . . . . . . . . . . . . . . . . . . . . . . . . . . . 65
Shared Services and Failover. . . . . . . . . . . . . . . . . . . . . . . . . . . . . . . . . . . . . . . . . . . . . . . . . . . . . . . . . . . . . 65
Broker Spanning Services . . . . . . . . . . . . . . . . . . . . . . . . . . . . . . . . . . . . . . . . . . . . . . . . . . . . . . . . . . . . . . . . . . . 66
Enabling Broker Spanning on a Driver . . . . . . . . . . . . . . . . . . . . . . . . . . . . . . . . . . . . . . . . . . . . . . . . . . . . . . 66
Admin API Usage . . . . . . . . . . . . . . . . . . . . . . . . . . . . . . . . . . . . . . . . . . . . . . . . . . . . . . . . . . . . . . . . . . . . . . 66
Scheduling and Task Expiration . . . . . . . . . . . . . . . . . . . . . . . . . . . . . . . . . . . . . . . . . . . . . . . . . . . . . . . . . . . 67
Administration. . . . . . . . . . . . . . . . . . . . . . . . . . . . . . . . . . . . . . . . . . . . . . . . . . . . . . . . . . . . . . . . . . . . . . . . . 68
Broker Spanning Service Limitations . . . . . . . . . . . . . . . . . . . . . . . . . . . . . . . . . . . . . . . . . . . . . . . . . . . . . . . 68
Service Groups . . . . . . . . . . . . . . . . . . . . . . . . . . . . . . . . . . . . . . . . . . . . . . . . . . . . . . . . . . . . . . . . . . . . . . . . . . . 69
Data References . . . . . . . . . . . . . . . . . . . . . . . . . . . . . . . . . . . . . . . . . . . . . . . . . . . . . . . . . . . . . . . . . . . . . . . . . . 70
C++ Data References . . . . . . . . . . . . . . . . . . . . . . . . . . . . . . . . . . . . . . . . . . . . . . . . . . . . . . . . . . . . . . . . . . . 70
Python Data References. . . . . . . . . . . . . . . . . . . . . . . . . . . . . . . . . . . . . . . . . . . . . . . . . . . . . . . . . . . . . . . . . 71
Service Collection . . . . . . . . . . . . . . . . . . . . . . . . . . . . . . . . . . . . . . . . . . . . . . . . . . . . . . . . . . . . . . . . . . . . . . . . . 72
Collect After Submit . . . . . . . . . . . . . . . . . . . . . . . . . . . . . . . . . . . . . . . . . . . . . . . . . . . . . . . . . . . . . . . . . . . . 72
Deferred Collection (Collect Later) . . . . . . . . . . . . . . . . . . . . . . . . . . . . . . . . . . . . . . . . . . . . . . . . . . . . . . . . . 73
No Collection (Collect Never) . . . . . . . . . . . . . . . . . . . . . . . . . . . . . . . . . . . . . . . . . . . . . . . . . . . . . . . . . . . . . 76
Engine Pinning. . . . . . . . . . . . . . . . . . . . . . . . . . . . . . . . . . . . . . . . . . . . . . . . . . . . . . . . . . . . . . . . . . . . . . . . . . . . 78
Running a Driver from an Engine Service . . . . . . . . . . . . . . . . . . . . . . . . . . . . . . . . . . . . . . . . . . . . . . . . . . . . . . . 79
Chapter 5 PDriver. . . . . . . . . . . . . . . . . . . . . . . . . . . . . . . . . . . . . . . . . . . . . . . . . . . . . . . . . . . . . . .81
Overview . . . . . . . . . . . . . . . . . . . . . . . . . . . . . . . . . . . . . . . . . . . . . . . . . . . . . . . . . . . . . . . . . . . . . . . . . . . . . . . . 82
Installing PDriver . . . . . . . . . . . . . . . . . . . . . . . . . . . . . . . . . . . . . . . . . . . . . . . . . . . . . . . . . . . . . . . . . . . . . . . . . . 83
Resource Deployment . . . . . . . . . . . . . . . . . . . . . . . . . . . . . . . . . . . . . . . . . . . . . . . . . . . . . . . . . . . . . . . . . . 83
PDriver Commands . . . . . . . . . . . . . . . . . . . . . . . . . . . . . . . . . . . . . . . . . . . . . . . . . . . . . . . . . . . . . . . . . . . . . . . . 84
The pdriver Command . . . . . . . . . . . . . . . . . . . . . . . . . . . . . . . . . . . . . . . . . . . . . . . . . . . . . . . . . . . . . . . . . . 84
The bsub Command . . . . . . . . . . . . . . . . . . . . . . . . . . . . . . . . . . . . . . . . . . . . . . . . . . . . . . . . . . . . . . . . . . . . 86
The bcoll Command . . . . . . . . . . . . . . . . . . . . . . . . . . . . . . . . . . . . . . . . . . . . . . . . . . . . . . . . . . . . . . . . . . . . 87
The bstatus Command . . . . . . . . . . . . . . . . . . . . . . . . . . . . . . . . . . . . . . . . . . . . . . . . . . . . . . . . . . . . . . . . . . 88
TIBCO GridServer
®
Developer’s Guide
x
|
The bcancel Command . . . . . . . . . . . . . . . . . . . . . . . . . . . . . . . . . . . . . . . . . . . . . . . . . . . . . . . . . . . . . . . . . 89
About PDS Scripts . . . . . . . . . . . . . . . . . . . . . . . . . . . . . . . . . . . . . . . . . . . . . . . . . . . . . . . . . . . . . . . . . . . . . . . . 90
PDS Basics . . . . . . . . . . . . . . . . . . . . . . . . . . . . . . . . . . . . . . . . . . . . . . . . . . . . . . . . . . . . . . . . . . . . . . . . . . 90
PDS Structure . . . . . . . . . . . . . . . . . . . . . . . . . . . . . . . . . . . . . . . . . . . . . . . . . . . . . . . . . . . . . . . . . . . . . . . . 90
The Depends Statement . . . . . . . . . . . . . . . . . . . . . . . . . . . . . . . . . . . . . . . . . . . . . . . . . . . . . . . . . . . . . . . . 92
The Include Statement. . . . . . . . . . . . . . . . . . . . . . . . . . . . . . . . . . . . . . . . . . . . . . . . . . . . . . . . . . . . . . . . . . 92
Lifecycle Blocks . . . . . . . . . . . . . . . . . . . . . . . . . . . . . . . . . . . . . . . . . . . . . . . . . . . . . . . . . . . . . . . . . . . . . . . 93
The Options Block . . . . . . . . . . . . . . . . . . . . . . . . . . . . . . . . . . . . . . . . . . . . . . . . . . . . . . . . . . . . . . . . . . . . . 94
The Discriminator Block. . . . . . . . . . . . . . . . . . . . . . . . . . . . . . . . . . . . . . . . . . . . . . . . . . . . . . . . . . . . . . . . . 99
The Schedule Block . . . . . . . . . . . . . . . . . . . . . . . . . . . . . . . . . . . . . . . . . . . . . . . . . . . . . . . . . . . . . . . . . . . . 99
Variables, Types and Expressions . . . . . . . . . . . . . . . . . . . . . . . . . . . . . . . . . . . . . . . . . . . . . . . . . . . . . . . . . . . 101
Basics . . . . . . . . . . . . . . . . . . . . . . . . . . . . . . . . . . . . . . . . . . . . . . . . . . . . . . . . . . . . . . . . . . . . . . . . . . . . . 101
Scoping . . . . . . . . . . . . . . . . . . . . . . . . . . . . . . . . . . . . . . . . . . . . . . . . . . . . . . . . . . . . . . . . . . . . . . . . . . . . 101
Variable Substitution . . . . . . . . . . . . . . . . . . . . . . . . . . . . . . . . . . . . . . . . . . . . . . . . . . . . . . . . . . . . . . . . . . 102
Expressions . . . . . . . . . . . . . . . . . . . . . . . . . . . . . . . . . . . . . . . . . . . . . . . . . . . . . . . . . . . . . . . . . . . . . . . . . 102
Arrays. . . . . . . . . . . . . . . . . . . . . . . . . . . . . . . . . . . . . . . . . . . . . . . . . . . . . . . . . . . . . . . . . . . . . . . . . . . . . . 102
Built-in Variables . . . . . . . . . . . . . . . . . . . . . . . . . . . . . . . . . . . . . . . . . . . . . . . . . . . . . . . . . . . . . . . . . . . . . 104
Statements . . . . . . . . . . . . . . . . . . . . . . . . . . . . . . . . . . . . . . . . . . . . . . . . . . . . . . . . . . . . . . . . . . . . . . . . . . . . . 106
Built-in Commands. . . . . . . . . . . . . . . . . . . . . . . . . . . . . . . . . . . . . . . . . . . . . . . . . . . . . . . . . . . . . . . . . . . . 106
The If Statement . . . . . . . . . . . . . . . . . . . . . . . . . . . . . . . . . . . . . . . . . . . . . . . . . . . . . . . . . . . . . . . . . . . . . 108
The For and Foreach Statement . . . . . . . . . . . . . . . . . . . . . . . . . . . . . . . . . . . . . . . . . . . . . . . . . . . . . . . . . 108
Shell Directives in Heterogeneous Environments . . . . . . . . . . . . . . . . . . . . . . . . . . . . . . . . . . . . . . . . . . . . 109
Example . . . . . . . . . . . . . . . . . . . . . . . . . . . . . . . . . . . . . . . . . . . . . . . . . . . . . . . . . . . . . . . . . . . . . . . . . . . . . . . 111
Chapter 6 Creating Grid Libraries. . . . . . . . . . . . . . . . . . . . . . . . . . . . . . . . . . . . . . . . . . . . . . . . 113
Overview . . . . . . . . . . . . . . . . . . . . . . . . . . . . . . . . . . . . . . . . . . . . . . . . . . . . . . . . . . . . . . . . . . . . . . . . . . . . . . . 114
Grid Library Format. . . . . . . . . . . . . . . . . . . . . . . . . . . . . . . . . . . . . . . . . . . . . . . . . . . . . . . . . . . . . . . . . . . . . . . 115
Variable Substitution . . . . . . . . . . . . . . . . . . . . . . . . . . . . . . . . . . . . . . . . . . . . . . . . . . . . . . . . . . . . . . . . . . 119
Versioning . . . . . . . . . . . . . . . . . . . . . . . . . . . . . . . . . . . . . . . . . . . . . . . . . . . . . . . . . . . . . . . . . . . . . . . . . . 120
Dependencies . . . . . . . . . . . . . . . . . . . . . . . . . . . . . . . . . . . . . . . . . . . . . . . . . . . . . . . . . . . . . . . . . . . . . . . 122
Conflicts . . . . . . . . . . . . . . . . . . . . . . . . . . . . . . . . . . . . . . . . . . . . . . . . . . . . . . . . . . . . . . . . . . . . . . . . . . . . 122
Grid Library Loading . . . . . . . . . . . . . . . . . . . . . . . . . . . . . . . . . . . . . . . . . . . . . . . . . . . . . . . . . . . . . . . . . . . . . . 124
State Preservation . . . . . . . . . . . . . . . . . . . . . . . . . . . . . . . . . . . . . . . . . . . . . . . . . . . . . . . . . . . . . . . . . . . . 124
Task Reservation . . . . . . . . . . . . . . . . . . . . . . . . . . . . . . . . . . . . . . . . . . . . . . . . . . . . . . . . . . . . . . . . . . . . . 125
Environment Variables and System Properties . . . . . . . . . . . . . . . . . . . . . . . . . . . . . . . . . . . . . . . . . . . . . . 125
Using Grid Libraries from a Service . . . . . . . . . . . . . . . . . . . . . . . . . . . . . . . . . . . . . . . . . . . . . . . . . . . . . . . . . . 126
Super Grid Libraries . . . . . . . . . . . . . . . . . . . . . . . . . . . . . . . . . . . . . . . . . . . . . . . . . . . . . . . . . . . . . . . . . . . . . . 127
C++ Bridges . . . . . . . . . . . . . . . . . . . . . . . . . . . . . . . . . . . . . . . . . . . . . . . . . . . . . . . . . . . . . . . . . . . . . . . . . . . . 128
JREs . . . . . . . . . . . . . . . . . . . . . . . . . . . . . . . . . . . . . . . . . . . . . . . . . . . . . . . . . . . . . . . . . . . . . . . . . . . . . . . . . . 129
R Grid Libraries. . . . . . . . . . . . . . . . . . . . . . . . . . . . . . . . . . . . . . . . . . . . . . . . . . . . . . . . . . . . . . . . . . . . . . . . . . 130
Building TERR Runtime Grid Libraries . . . . . . . . . . . . . . . . . . . . . . . . . . . . . . . . . . . . . . . . . . . . . . . . . . . . 130
TIBCO GridServer
®
Developer’s Guide
|
xi
Python Bridges . . . . . . . . . . . . . . . . . . . . . . . . . . . . . . . . . . . . . . . . . . . . . . . . . . . . . . . . . . . . . . . . . . . . . . . . . . 132
Python Grid Libraries . . . . . . . . . . . . . . . . . . . . . . . . . . . . . . . . . . . . . . . . . . . . . . . . . . . . . . . . . . . . . . . . . . . . . . 133
Windows Application Deployment . . . . . . . . . . . . . . . . . . . . . . . . . . . . . . . . . . . . . . . . . . . . . . . . . . . . . . . . . . . . 134
Grid Library Example . . . . . . . . . . . . . . . . . . . . . . . . . . . . . . . . . . . . . . . . . . . . . . . . . . . . . . . . . . . . . . . . . . . . . . 137
Chapter 7 GridCache . . . . . . . . . . . . . . . . . . . . . . . . . . . . . . . . . . . . . . . . . . . . . . . . . . . . . . . . . . .139
Overview . . . . . . . . . . . . . . . . . . . . . . . . . . . . . . . . . . . . . . . . . . . . . . . . . . . . . . . . . . . . . . . . . . . . . . . . . . . . . . . 140
General Capabilities. . . . . . . . . . . . . . . . . . . . . . . . . . . . . . . . . . . . . . . . . . . . . . . . . . . . . . . . . . . . . . . . . . . . . . . 141
API . . . . . . . . . . . . . . . . . . . . . . . . . . . . . . . . . . . . . . . . . . . . . . . . . . . . . . . . . . . . . . . . . . . . . . . . . . . . . . . . 141
Modes. . . . . . . . . . . . . . . . . . . . . . . . . . . . . . . . . . . . . . . . . . . . . . . . . . . . . . . . . . . . . . . . . . . . . . . . . . . . . . 141
Cache Configuration and Access . . . . . . . . . . . . . . . . . . . . . . . . . . . . . . . . . . . . . . . . . . . . . . . . . . . . . . . . . 142
Data Storage. . . . . . . . . . . . . . . . . . . . . . . . . . . . . . . . . . . . . . . . . . . . . . . . . . . . . . . . . . . . . . . . . . . . . . . . . 142
Attributes. . . . . . . . . . . . . . . . . . . . . . . . . . . . . . . . . . . . . . . . . . . . . . . . . . . . . . . . . . . . . . . . . . . . . . . . . . . . 142
Consistency/Synchronization . . . . . . . . . . . . . . . . . . . . . . . . . . . . . . . . . . . . . . . . . . . . . . . . . . . . . . . . . . . . 143
Cache Loaders . . . . . . . . . . . . . . . . . . . . . . . . . . . . . . . . . . . . . . . . . . . . . . . . . . . . . . . . . . . . . . . . . . . . . . . 143
Cache Loader Write-through and Bulk Operations. . . . . . . . . . . . . . . . . . . . . . . . . . . . . . . . . . . . . . . . . . . . 144
Notification . . . . . . . . . . . . . . . . . . . . . . . . . . . . . . . . . . . . . . . . . . . . . . . . . . . . . . . . . . . . . . . . . . . . . . . . . . 145
Disk/Memory Caching . . . . . . . . . . . . . . . . . . . . . . . . . . . . . . . . . . . . . . . . . . . . . . . . . . . . . . . . . . . . . . . . . 145
Cache Region Scope . . . . . . . . . . . . . . . . . . . . . . . . . . . . . . . . . . . . . . . . . . . . . . . . . . . . . . . . . . . . . . . . . . 145
Data Conversion Matrix . . . . . . . . . . . . . . . . . . . . . . . . . . . . . . . . . . . . . . . . . . . . . . . . . . . . . . . . . . . . . . . . 146
Using The GridCache API . . . . . . . . . . . . . . . . . . . . . . . . . . . . . . . . . . . . . . . . . . . . . . . . . . . . . . . . . . . . . . . . . . 147
Fault Tolerance and GridCache . . . . . . . . . . . . . . . . . . . . . . . . . . . . . . . . . . . . . . . . . . . . . . . . . . . . . . . . . . . . . . 149
Chapter 8 GridServer Design Guidelines . . . . . . . . . . . . . . . . . . . . . . . . . . . . . . . . . . . . . . . . . .151
Data Movement . . . . . . . . . . . . . . . . . . . . . . . . . . . . . . . . . . . . . . . . . . . . . . . . . . . . . . . . . . . . . . . . . . . . . . . . . . 152
Principles of Data Movement . . . . . . . . . . . . . . . . . . . . . . . . . . . . . . . . . . . . . . . . . . . . . . . . . . . . . . . . . . . . 152
Data Movement Mechanisms . . . . . . . . . . . . . . . . . . . . . . . . . . . . . . . . . . . . . . . . . . . . . . . . . . . . . . . . . . . . 152
Data Movement Examples . . . . . . . . . . . . . . . . . . . . . . . . . . . . . . . . . . . . . . . . . . . . . . . . . . . . . . . . . . . . . . 155
Service or Task Duration . . . . . . . . . . . . . . . . . . . . . . . . . . . . . . . . . . . . . . . . . . . . . . . . . . . . . . . . . . . . . . . . . . . 159
Engine Interruption and Smoothing . . . . . . . . . . . . . . . . . . . . . . . . . . . . . . . . . . . . . . . . . . . . . . . . . . . . . . . 159
Summary . . . . . . . . . . . . . . . . . . . . . . . . . . . . . . . . . . . . . . . . . . . . . . . . . . . . . . . . . . . . . . . . . . . . . . . . . . . 160
Chapter 9 The Admin API . . . . . . . . . . . . . . . . . . . . . . . . . . . . . . . . . . . . . . . . . . . . . . . . . . . . . . .161
Documentation for the GridServer Admin API . . . . . . . . . . . . . . . . . . . . . . . . . . . . . . . . . . . . . . . . . . . . . . . . . . . 162
Using the Admin API over SOAP . . . . . . . . . . . . . . . . . . . . . . . . . . . . . . . . . . . . . . . . . . . . . . . . . . . . . . . . . . . . . 163
Using Server Hooks. . . . . . . . . . . . . . . . . . . . . . . . . . . . . . . . . . . . . . . . . . . . . . . . . . . . . . . . . . . . . . . . . . . . . . . 164
Using JMX . . . . . . . . . . . . . . . . . . . . . . . . . . . . . . . . . . . . . . . . . . . . . . . . . . . . . . . . . . . . . . . . . . . . . . . . . . . . . . 165
Chapter 10 Using Conditions . . . . . . . . . . . . . . . . . . . . . . . . . . . . . . . . . . . . . . . . . . . . . . . . . . . .167
Conditions . . . . . . . . . . . . . . . . . . . . . . . . . . . . . . . . . . . . . . . . . . . . . . . . . . . . . . . . . . . . . . . . . . . . . . . . . . . . . . 168
TIBCO GridServer
®
Developer’s Guide
xii
|
Discriminator Conditions . . . . . . . . . . . . . . . . . . . . . . . . . . . . . . . . . . . . . . . . . . . . . . . . . . . . . . . . . . . . . . . . . . . 169
Setting Discriminators in the Administration Tool. . . . . . . . . . . . . . . . . . . . . . . . . . . . . . . . . . . . . . . . . . . . . 169
Setting Discriminators Programmatically . . . . . . . . . . . . . . . . . . . . . . . . . . . . . . . . . . . . . . . . . . . . . . . . . . . 169
PDriver Discriminators . . . . . . . . . . . . . . . . . . . . . . . . . . . . . . . . . . . . . . . . . . . . . . . . . . . . . . . . . . . . . . . . . 171
Affinity Conditions . . . . . . . . . . . . . . . . . . . . . . . . . . . . . . . . . . . . . . . . . . . . . . . . . . . . . . . . . . . . . . . . . . . . . . . . 172
Setting Affinity Conditions Programmatically . . . . . . . . . . . . . . . . . . . . . . . . . . . . . . . . . . . . . . . . . . . . . . . . 172
Setting Affinity Conditions in the Administration Tool. . . . . . . . . . . . . . . . . . . . . . . . . . . . . . . . . . . . . . . . . . 172
Task Affinity . . . . . . . . . . . . . . . . . . . . . . . . . . . . . . . . . . . . . . . . . . . . . . . . . . . . . . . . . . . . . . . . . . . . . . . . . 173
Custom Discriminator and Affinity Conditions. . . . . . . . . . . . . . . . . . . . . . . . . . . . . . . . . . . . . . . . . . . . . . . . . . . 174
Dependency Conditions . . . . . . . . . . . . . . . . . . . . . . . . . . . . . . . . . . . . . . . . . . . . . . . . . . . . . . . . . . . . . . . . . . . 175
Creating Dependencies . . . . . . . . . . . . . . . . . . . . . . . . . . . . . . . . . . . . . . . . . . . . . . . . . . . . . . . . . . . . . . . . 175
Administering Task Dependencies. . . . . . . . . . . . . . . . . . . . . . . . . . . . . . . . . . . . . . . . . . . . . . . . . . . . . . . . 175
Queue Jump Conditions . . . . . . . . . . . . . . . . . . . . . . . . . . . . . . . . . . . . . . . . . . . . . . . . . . . . . . . . . . . . . . . . . . . 177
Descriptor Conditions . . . . . . . . . . . . . . . . . . . . . . . . . . . . . . . . . . . . . . . . . . . . . . . . . . . . . . . . . . . . . . . . . . . . . 178
EXTRAConditions . . . . . . . . . . . . . . . . . . . . . . . . . . . . . . . . . . . . . . . . . . . . . . . . . . . . . . . . . . . . . . . . . . . . . . . . 179
Using the EXTRACondition REST Interface . . . . . . . . . . . . . . . . . . . . . . . . . . . . . . . . . . . . . . . . . . . . . . . . 179
Setting EXTRAConditions . . . . . . . . . . . . . . . . . . . . . . . . . . . . . . . . . . . . . . . . . . . . . . . . . . . . . . . . . . . . . . 181
Condition Sets. . . . . . . . . . . . . . . . . . . . . . . . . . . . . . . . . . . . . . . . . . . . . . . . . . . . . . . . . . . . . . . . . . . . . . . . . . . 182
AND set . . . . . . . . . . . . . . . . . . . . . . . . . . . . . . . . . . . . . . . . . . . . . . . . . . . . . . . . . . . . . . . . . . . . . . . . . . . . 182
OR Set . . . . . . . . . . . . . . . . . . . . . . . . . . . . . . . . . . . . . . . . . . . . . . . . . . . . . . . . . . . . . . . . . . . . . . . . . . . . . 182
Service Set . . . . . . . . . . . . . . . . . . . . . . . . . . . . . . . . . . . . . . . . . . . . . . . . . . . . . . . . . . . . . . . . . . . . . . . . . 182
Engine Properties . . . . . . . . . . . . . . . . . . . . . . . . . . . . . . . . . . . . . . . . . . . . . . . . . . . . . . . . . . . . . . . . . . . . . . . . 183
Intrinsic Engine Properties. . . . . . . . . . . . . . . . . . . . . . . . . . . . . . . . . . . . . . . . . . . . . . . . . . . . . . . . . . . . . . 183
Custom Engine Properties. . . . . . . . . . . . . . . . . . . . . . . . . . . . . . . . . . . . . . . . . . . . . . . . . . . . . . . . . . . . . . 183
Engine Session Properties . . . . . . . . . . . . . . . . . . . . . . . . . . . . . . . . . . . . . . . . . . . . . . . . . . . . . . . . . . . . . 184
GPU Services Engine Properties . . . . . . . . . . . . . . . . . . . . . . . . . . . . . . . . . . . . . . . . . . . . . . . . . . . . . . . . 184
MIC Processor Engine Properties . . . . . . . . . . . . . . . . . . . . . . . . . . . . . . . . . . . . . . . . . . . . . . . . . . . . . . . . 185
NUMA Engine Properties and Configuration . . . . . . . . . . . . . . . . . . . . . . . . . . . . . . . . . . . . . . . . . . . . . . . . 187
Chapter 11 Extending GridServer . . . . . . . . . . . . . . . . . . . . . . . . . . . . . . . . . . . . . . . . . . . . . . . . 189
Manager Hooks. . . . . . . . . . . . . . . . . . . . . . . . . . . . . . . . . . . . . . . . . . . . . . . . . . . . . . . . . . . . . . . . . . . . . . . . . . 190
Engine Hooks . . . . . . . . . . . . . . . . . . . . . . . . . . . . . . . . . . . . . . . . . . . . . . . . . . . . . . . . . . . . . . . . . . . . . . . . . . . 191
Engine Hook Example . . . . . . . . . . . . . . . . . . . . . . . . . . . . . . . . . . . . . . . . . . . . . . . . . . . . . . . . . . . . . . . . . 191
Appendix A Task Instrumentation . . . . . . . . . . . . . . . . . . . . . . . . . . . . . . . . . . . . . . . . . . . . . . . 195
Overview . . . . . . . . . . . . . . . . . . . . . . . . . . . . . . . . . . . . . . . . . . . . . . . . . . . . . . . . . . . . . . . . . . . . . . . . . . . . . . . 196
Syntax . . . . . . . . . . . . . . . . . . . . . . . . . . . . . . . . . . . . . . . . . . . . . . . . . . . . . . . . . . . . . . . . . . . . . . . . . . . . . . . . . 197
Client . . . . . . . . . . . . . . . . . . . . . . . . . . . . . . . . . . . . . . . . . . . . . . . . . . . . . . . . . . . . . . . . . . . . . . . . . . . . . . 197
Action. . . . . . . . . . . . . . . . . . . . . . . . . . . . . . . . . . . . . . . . . . . . . . . . . . . . . . . . . . . . . . . . . . . . . . . . . . . . . . 197
Object . . . . . . . . . . . . . . . . . . . . . . . . . . . . . . . . . . . . . . . . . . . . . . . . . . . . . . . . . . . . . . . . . . . . . . . . . . . . . 198
Phases . . . . . . . . . . . . . . . . . . . . . . . . . . . . . . . . . . . . . . . . . . . . . . . . . . . . . . . . . . . . . . . . . . . . . . . . . . . . . . . . 199
TIBCO GridServer
®
Developer’s Guide
|
xiii
Driver-side . . . . . . . . . . . . . . . . . . . . . . . . . . . . . . . . . . . . . . . . . . . . . . . . . . . . . . . . . . . . . . . . . . . . . . . . . . 199
Engine-side. . . . . . . . . . . . . . . . . . . . . . . . . . . . . . . . . . . . . . . . . . . . . . . . . . . . . . . . . . . . . . . . . . . . . . . . . . 200
Broker-side . . . . . . . . . . . . . . . . . . . . . . . . . . . . . . . . . . . . . . . . . . . . . . . . . . . . . . . . . . . . . . . . . . . . . . . . . . 200
DDT file writes . . . . . . . . . . . . . . . . . . . . . . . . . . . . . . . . . . . . . . . . . . . . . . . . . . . . . . . . . . . . . . . . . . . . . . . 201
Native . . . . . . . . . . . . . . . . . . . . . . . . . . . . . . . . . . . . . . . . . . . . . . . . . . . . . . . . . . . . . . . . . . . . . . . . . . . . . . 201
Example Phases in a Service Execution . . . . . . . . . . . . . . . . . . . . . . . . . . . . . . . . . . . . . . . . . . . . . . . . . . . . . . . 203
Appendix B The grid-library.dtd . . . . . . . . . . . . . . . . . . . . . . . . . . . . . . . . . . . . . . . . . . . . . . . . .205
The grid-library.dtd . . . . . . . . . . . . . . . . . . . . . . . . . . . . . . . . . . . . . . . . . . . . . . . . . . . . . . . . . . . . . . . . . . . . . . . . 206
TIBCO GridServer
®
Developer’s Guide
xiv
|

TIBCO GridServer
®
Developer’s Guide
|
xv
Preface
TIBCO GridServer
®
is a highly scalable software infrastructure that enables
application services to operate in a virtualized fashion, unattached to specific
hardware resources. Client applications submit requests to the Grid environment
and GridServer dynamically provisions services to respond to the request.
Multiple client applications can submit multiple requests in parallel and
GridServer dynamically creates multiple service instances to handle requests in
parallel on different Grid nodes. This architecture is therefore highly scalable in
both speed and throughput. For example, a single client will see scalable
performance gains in the processing of multiple requests, and many applications
and users will see scalable throughput of the aggregate load.
Topics
• TIBCO Documentation and Support Services, page xvi
• Typographical Conventions, page xviii

TIBCO GridServer
®
Developer’s Guide
xvi
|
TIBCO Documentation and Support Services
How to Access TIBCO Documentation
Documentation for TIBCO products is available on the TIBCO Product
Documentation website, mainly in HTML and PDF formats.
The TIBCO Product Documentation website is updated frequently and is more
current than any other documentation included with the product. To access the
latest documentation, visit https://docs.tibco.com.
Product-Specific Documentation
Documentation for TIBCO products is not bundled with the software. Instead, it
is available on the TIBCO Documentation site. To directly access documentation
for this product, visit
https://docs.tibco.com/products/tibco-datasynapse-gridserver-manager.
The following documents for this product can be found on the TIBCO
Documentation site:
• Introducing TIBCO GridServer
®
Introduces GridServer and key concepts and
terms such as work, Engines, Directors, and Brokers. Read this first if you are
new to GridServer.
• GridServer Administration Guide Tells the system administrator how to operate
a GridServer installation. It describes scheduling, fault-tolerance, failover,
performance and tuning, and other concepts and procedures.
• GridServer Installation Guide Describes how to install GridServer for Windows
and Unix, including Managers, Engines, and pre-installation planning.
• GridServer Developer’s Guide Provides information on writing applications for
GridServer. Subjects include Service Domains, using Services, PDriver (the
Batch-oriented GridServer Client), R Driver, the theory behind development
with the GridServer API, and concepts needed to write and adapt
applications.
• GridServer Speedlink Guide Describes SpeedLink, a high throughput, low
latency compute paradigm implemented using GridServer, and provides
information on how to use SpeedLink for both developers and administrators.
• GridServer Service-Oriented Integration Tutorial Tutorial on developing
applications for GridServer using Services such as Java, .NET, native, or
binary executable Services.
TIBCO GridServer
®
Developer’s Guide
|
xvii
• GridServer PDriver Tutorial Tutorial on using PDriver, the Parametric Service
Driver, to create and run Services with GridServer.
• GridServer COM Tutorial Tutorial explaining how client applications in
Windows can use COMDriver, GridServer’s COM API, to work with services
on GridServer.
The following documentation is also included in the Manager installation:
• GridServer Administration Tool Help: Click the context-sensitive help on any
page of the GridServer Administration Tool to see online help.
• API Reference: For information on the GridServer API, see the GridServer
SDK in the docs directory. Java API information is in JavaDoc format; C++
documentation is in HTML; and .NET API help is in HTMLHelp. You can
view the API documentation from the GridServer Administration Tool; log in
to the Administration Tool and click the download icon.
How to Contact TIBCO Support
You can contact TIBCO Support in the following ways:
• For an overview of TIBCO Support, and information about getting started
with TIBCO Support, visit http://www.tibco.com/services/support
• For accessing the Support Knowledge Base and getting personalized content
about products you are interested in, visit the TIBCO Support portal at
https://support.tibco.com
• For creating a Support case, you must have a valid maintenance or support
contract with TIBCO. You also need a user name and password to log in to
https://support.tibco.com. If you do not have a user name, you can request
one by clicking Register on the website.
How to Join TIBCO Community
TIBCO Community is the official channel for TIBCO customers, partners, and
employee subject matter experts to share and access their collective experience.
TIBCO Community offers access to Q&A forums, product wikis, and best
practices. It also offers access to extensions, adapters, solution accelerators, and
tools that extend and enable customers to gain full value from TIBCO products. In
addition, users can submit and vote on feature requests from within the TIBCO
Ideas Portal. For a free registration, go to https://community.tibco.com.

TIBCO GridServer
®
Developer’s Guide
xviii
|
Typographical Conventions
The following typographical conventions are used in this manual.
Table 1 General Typographical Conventions
Convention Use
TIBCO_HOME Many TIBCO products must be installed within the same home directory. This
directory is referenced in documentation as
TIBCO_HOME. The default value of
TIBCO_HOME depends on the operating system. For example, on Windows
systems, the default value is
C:\tibco.
DS_INSTALL TIBCO GridServer
®
installs into directory within TIBCO_HOME named
datasynapse. This directory is referenced in documentation as DS_INSTALL. The
default value of
DS_INSTALL depends on the operating system. For example, on
Windows systems, the default installation directory is
C:\tibco\datasynapse.
DS_MANAGER The Manager directory contains the read-only software files; by default, it is a
directory within
DS_INSTALL named manager, and is referred to as
DS_MANAGER. For example, on Windows systems, the default Manager
directory is
C:\tibco\datasynapse\manager.
DS_DATA The data directory is the location of all volatile files used by the application server,
such as server properties and configuration. By default, it is a directory within
DS_INSTALL named manager-data, and is referred to as DS_DATA. For example
on Windows systems, the default data directory is
C:\tibco\datasynapse\manager-data
code font Code font identifies commands, code examples, filenames, pathnames, and
output displayed in a command window. For example:
Use
MyCommand to start the foo process.
bold code
font
Bold code font is used in the following ways:
• In procedures, to indicate what a user types. For example: Type
admin.
• In large code samples, to indicate the parts of the sample that are of
particular interest.
• In command syntax, to indicate the default parameter for a command. For
example, if no parameter is specified,
MyCommand is enabled:
MyCommand [enable | disable]

TIBCO GridServer
®
Developer’s Guide
|
xix
italic font Italic font is used in the following ways:
• To indicate a document title. For example: See TIBCO ActiveMatrix
BusinessWorks Concepts.
• To introduce new terms. For example: A portal page may contain several
portlets. Portlets are mini-applications that run in a portal.
• To indicate a variable in a command or code syntax that you must replace.
For example:
MyCommand PathName
Key
combinations
Key names separated by a plus sign indicates keys pressed simultaneously. For
example: Ctrl+C.
Key names separated by a comma and space indicate keys pressed one after the
other. For example: Esc, Ctrl+Q.
The note icon indicates information that is of special interest or importance, for
example, an additional action required only in certain circumstances.
The tip icon indicates an idea that could be useful, for example, a way to apply
the information provided in the current section to achieve a specific result.
The warning icon indicates the potential for a damaging situation, for example,
data loss or corruption if certain steps are taken or not taken.
Table 1 General Typographical Conventions (Continued)
Convention Use
Table 2 Syntax Typographical Conventions
Convention Use
[ ] An optional item in a command or code syntax.
For example:
MyCommand [optional_parameter] required_parameter
| A logical OR that separates multiple items of which only one may be chosen.
For example, you can select only one of the following parameters:
MyCommand param1 | param2 | param3

TIBCO GridServer
®
Developer’s Guide
xx
|
{ } A logical group of items in a command. Other syntax notations may appear
within each logical group.
For example, the following command requires two parameters, which can be
either the pair
param1 and param2, or the pair param3 and param4.
MyCommand {param1 param2} | {param3 param4}
In the next example, the command requires two parameters. The first parameter
can be either
param1 or param2 and the second can be either param3 or param4:
MyCommand {param1 | param2} {param3 | param4}
In the next example, the command can accept either two or three parameters.
The first parameter must be
param1. You can optionally include param2 as the
second parameter. And the last parameter is either
param3 or param4.
MyCommand param1 [param2] {param3 | param4}
Table 2 Syntax Typographical Conventions
Convention Use

TIBCO GridServer
®
Developer’s Guide
|
1
Chapter 1 GridServer Application Development
This chapter is your starting point for developing applications that utilize your
GridServer installation. The document is divided into several chapters to help
you understand the principles of the GridServer system, and how to program
applications utilizing GridServer.
Topics
• GridServer Programming Options, page 2
• Resource Deployment, page 4
• Logging and Debugging, page 5
• Notes For Java Developers, page 14
• Notes For C++ Developers, page 15
• Notes For .NET Developers, page 18

TIBCO GridServer
®
Developer’s Guide
2
|
GridServer Programming Options
There are several options available to you when you adapt your applications to
use GridServer. The following sections describe how to use each of them.
Services
Services provide for remote execution of code in a way that is scalable,
fault-tolerant, dynamic and language-independent. Services can be written in a
variety of languages and do not need to be compiled or linked with DataSynapse
code. There are client-side APIs to create Service Sessions using Java, C++, COM,
R, and .NET. A Service object on a client can create and use a Service
implemented in the same or another languages. In the Service model, requests on
the client are routed over the network, ultimately resulting in invocations on a
remote machine, and response values make the reverse trip.
With GridServer, Services are virtualized; rather than send a request directly to the
remote machine hosting the Service Session, a client request is sent to the
GridServer Manager, which enqueues it until an appropriate Engine is available.
The GridServer Manager selects which Engine services a request. The first Engine
to dequeue the request hosts the Service Session. Subsequent requests can be
routed to the same Engine or can result in a second Engine running the Service
concurrently. For information on how this decision is made see the GridServer
Administration Guide. If an Engine hosting a Service Session becomes unavailable,
another takes its place. This mechanism, in which a single virtual Service Session
is implemented by one or more physical Sessions (Engine processes) provides for
fault tolerance and essentially unlimited scalability.
See Chapter 3, Creating Services, on page 33 for details how to implement
Services; Chapter 4, Accessing Services, on page 59 explains how to utilize
Services in your application.
PDriver
The Parametric Job Driver, or PDriver, is a Driver that can execute command-line
programs as a parallel processing service using the GridServer environment. This
enables you to write a simple script to run a program on several Engines, and
return the results to a central location.
PDriver scripts, which are written in the PDS scripting language, enable you to
run the same program on Engines several times with different parameters. A
script is used to define how these parameters change.
TIBCO GridServer
®
Developer’s Guide
|
3
One way PDriver scripts can achieve parallelism is to iteratively change the value
of variables that are passed to successive tasks as parameters. A script can step
through a range of numbers and use each value as a parameter for each task that
is created. Or, a variable can be defined containing a list of parameters.
For more information see Chapter 5, PDriver, on page 81.
Python
The Python Driver, or PyDriver, is a Driver that can submit Python scripts for
execution in the GridServer environment. This enables you to create Python
scripts to run on multiple Engines, and return the results to a central location. You
can achieve parallelism by iteratively changing the script that is passed to
successive tasks.

TIBCO GridServer
®
Developer’s Guide
4
|
Resource Deployment
Service resource files that are used by Engines are centrally managed, starting at
the Director. The centrally located resources on the Director are then synchronized
to Managers, which then synchronize them with Engines.
Grid Libraries are the method of deploying resources to Engines. They are an
archive containing a set of resources and properties necessary to run a Service,
along with configuration information that describes how those resources are to be
used. Grid Libraries can contain Java classes and JARs, native libraries, .NET
assemblies, configuration files, Java system properties, Engine hooks, and
alternate JREs needed to run a Service. They can also contain references to other
Grid Libraries as dependencies. A Service Session can use a Grid Library by
setting the appropriate options for the Service Type used by the session.
The
build directory of the SDK includes an example ANT build script that can be
used to build Grid Libraries. The examples in the SDK can be automatically
packaged as Grid Libraries by using this script and included configuration files.
Each Service example contains
grid-library.xml and build.properties files.
The
build directory contains build.xml, deploy.bat and deploy.sh, which
parse the
grid-library-build-properties files to create Grid Libraries.
For more information on packaging Grid Libraries, see Chapter 6, Creating Grid
Libraries, on page 113. For information on deploying Grid Libraries, see the
GridServer Administration Guide.

TIBCO GridServer
®
Developer’s Guide
|
5
Logging and Debugging
GridServer contains comprehensive logging facilities on Engines. This can be
used to diagnose problems with Services running on Engines, and your
application can write information to these logs. This section contains an overview
of GridServer’s log facility, plus information on using it from your application,
and how to attach a debugger to an Engine, if needed.
Logging Overview
GridServer uses the java.util.logging package for its internal logging, to
provide diagnostic messages to the console and to file. This section covers how to
access these logs, and how to interface with the loggers.
The logger uses the following log levels, in order:
Typically, the Info level is sufficient for most purposes, and is best to use on a busy
grid. In some cases you might need to log at Fine level to diagnose certain issues.
For example, you must set the log level to at least Fine to log JMX statistics.
Finer or Finest levels should not be used unless you are debugging a detailed
issue and you are directed to do so by TIBCO support , as they might degrade
performance and introduce unnecessary logging that can make it more difficult
for diagnosing problems. If you must use Finest or Finer on the Manager, consider
only increasing the component level.
The log format is:
{timestamp} {level}: [{component}] {message}
Level Description
Severe Indicates serious failures
Warning Indicates potential problems
Info Displays informational messages
Config Displays static configuration messages
Fine Provides tracing information
Finer Indicates a fairly detailed tracing message
Finest Indicates a highly detailed tracing message

TIBCO GridServer
®
Developer’s Guide
6
|
Only messages that are at or above the current log level are logged.
An example of a log message:
09/20/13 19:19:10.423 Info: [BrokerServicePlugin] Broker:Total:1
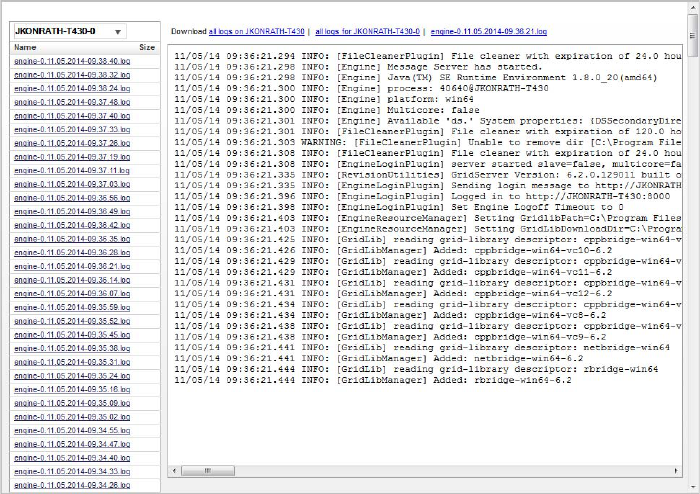
Viewing Engine Logs
There are several ways of viewing the logs. The most straightforward is to view
the actual log files using the Log Files feature in the GridServer Administration
Tool.
To view an Engine log:
1. In the Administration Tool, go to
Grid Components > Engines > Engine
Admin
.
2. Select the Engine for which you want to view a log.
3. Click the Actions list, and select Log Files.
4. A window opens with a list of links for each of the logs residing on that
Engine, listed by date and time. You can do any of the following:
— Select an Engine Daemon or a particular Engine from the list in the upper
left. This will show all of the log files on that Engine Daemon or Engine and
It’s considered unsafe to set all logging at a level below Info.
TIBCO GridServer
®
Developer’s Guide
|
7
their sizes. You can also type in the list box to quickly filter the list to partial
matches.
— Click on a log file name and its content is displayed to the right in the
window.
— Click the links in the upper right to download a ZIP archive of all log files
on the host, a ZIP archive of all log files of an Engine Daemon or Engine
instance, or a particular log file.
You might also wish to view the logs in real time. You can do this with the remote
log feature.
To view the remote log:
1. Go to Grid Components > Engines > Engine Admin.
2. Select the Engine for which you want to view a log.
3. Click the Actions list, click Remote Log.
4. A window opens, displaying the log on the Engine as events occur. You can
click Clear to clear the log, or Snapshot to capture a screen of the log in a new
window.
Figure 1 The Log Files Window.
TIBCO GridServer
®
Developer’s Guide
8
|
You can also run the Engine in console mode; typically, this is only done during
development.
Windows
You can run the Engine from a command line with the command
engine.exe
-console. This starts the Engine in console mode, and logging information
scrolls in the command window in which you start it.
Unix
You can run the Engine from a command line with the command
engine.sh
startfg. This starts the Engine in the foreground, and logging information scrolls
in the terminal in which you start it. Note that this is only suitable for debugging
purposes.
The Engine Log Search page enables you to search for all Severe-level Engine logs
for a Service ID across all Engines, and optionally search those results for a
keyword. Results are shown with a summary of each matching log for each
Engine, with links to corresponding URLs to logs with excerpts. First, logs are
searched for the given Service ID; then they are searched for the regular
expression “
.*Severe.*”, then they are optionally searched for a given keyword.
To search Engine logs:
1. Go to
Diagnostics > Service Diagnostics
.
2. Enter a Service Session ID in the Service Session ID box, or click a name in
the Service Name list. The list of Service Names is provided from the Service
Admin list, which is the in-memory list of all Services recently run.
3. Enter a keyword in the Keyword box, or leave it blank to return all entries.
4. Click Search.
Results are shown with a summary of each matching log for each Engine, with
links to corresponding URLs to logs.
Writing to Logs
Your Service also logs messages, and you can direct the messages to the
DataSynapse logger.
Java
GridServer uses the Java logger, so any messages logged using a Java Logger
object will be written to the Engine or Driver log file. For example:

TIBCO GridServer
®
Developer’s Guide
|
9
Logger mylog =
Logger.getLogger("com.mycompany.myproduct.MyClass");
The level of logs can be increased on a per-class and package level, to help in
isolating issues. For example, you could do the following:
LogManager.getLogManager().getLogger("com.livecluster.admin.servle
t.AdminControllerServlet").setLevel(Level.INFO);
Both Drivers and Engines capture stdout and stderr, so typically no changes are
required to existing implementations to capture logs.
Additionally, the DataSynapse logger is registered as the Apache Commons
Logging default handler. If your implementation uses this interface, your
messages are logged automatically. The following is a map of levels to
DataSynapse levels:
The Java Driver log manager can be completely disabled, so that all Driver log
messages are logged according to your configuration of the Java Logging
Framework, rather than according to the Driver properties. For example, if the
Driver is a part of a large client application that uses a number of Java libraries
whose logs are all managed by the Java Logging Framework configuration, you
would disable this so that the Driver logs are managed the same way. There is a
Driver property,
DSLogUseJavaConfig, that enables this behavior when set to
true.
.NET
The .NET
System.Diagnostics.Trace facility is used for logging; the
DataSynapse logger is simply a Trace listener. The DataSynapse logger captures
any messages written to the Trace facility. This includes .NET Services; any trace
message written by the Service is logged to the Engine log.
Commons DataSynapse
fatal Severe
error Severe
warn Warning
info Info
debug Fine
trace Finer

TIBCO GridServer
®
Developer’s Guide
10
|
C++
The
UtilFactory::log function is the preferred method of logging to the
DataSynapse log. You can use it on both the Engine and Driver.
R
The included
rlogger package contains a log method for logging. For example,
the following logging is used in the Pi tutorial included in the SDK:
library("rdriver")
library("rlogger")
...
RDPI <- function(N, K) {
rlogger.log(list("RDPI(", N, ", ", K, ") = ", pi), rlogger.FINE)
PDriver
The PDS script language provides redirection of
stdout and stderr to a file, via
the
stdout and stderr clauses in the execute statement. For example:
execute
stdout="$DSWORKDIR/pijob.$DSTASKID.out"
stderr="$DSWORKDIR/error.$DSTASKID"
".\resources\win32\lib\PdriverPiCalc.exe $seed
$iterations"
Writing to the Log directory
The Engine’s log directory is
[work directory]/log. You can view files written
to this directory with the Log Files feature. You can write log messages to your
own files, and view them with the Administration Tool.
The work directory is available as follows:
• Java: The system property
ds.WorkDir
• .NET: The System.AppDomain.CurrentDomain data value ds.WorkDir
• C++, Command Service: The environment variable ds_WorkDir
• PDriver: The variable $DSWORKDIR
For logging to become effective, it is necessary to instantiate the Driver message
server first — for instance, by creating a Service object, or by calling
DriverManager::connect.
TIBCO GridServer
®
Developer’s Guide
|
11
C++/.NET Native stdout/stderr
Aside from the logging methods described above, it is possible to write native
stdout and stderr to files that are managed by the Engine. Enable this with the
Logging for Native Streams settings in the Engine Configuration. The log files
are created in the Engine instance log directory, typically
install-dir/work/machine
name
-instance/log/*. The file names are engine-stdout-PID.log,
engine-stderr-PID.log. The files roll when they exceed the maximum size
configured in the Engine Configuration.
This affects only native standard output / standard error for C++ and .NET. Java
writes to
System.out/err go to the regular invoke log file, as do writes from C++
or .NET that use the documented logging facilities.
Debugging Engines
This section covers the basics on how to attach a debugger to an Engine.
Java
The Java Platform Debugger Architecture (JPDA) enables the connection of a
debugger to the Engine via a socket. You can set the socket used for debugging in
the Engine Configuration. Create a new Engine Configuration or modify an
existing one, and change the value of Debug Start Port. If you have a single
Engine per Engine Daemon, set this value to the port you wish to use on each
Engine. If you have more than one Engine per Engine Daemon, the value given in
Debug Start Port is the port used for the first Engine instance, and the port is
incremented for each additional Engine Instance. You can also set Debug
Suspend to true, which will keep the Engine suspended until a debugger is
attached.
.NET, Windows DLL
Microsoft Visual Studio comes with a remote debugging facility. To debug, you
must first make sure that you build with debug symbols, and deploy the symbols
(PDB) file with the DLL. Once the Engine has logged in, you attach the debugger
to the
invoke.exe process via the Processes dialog on the Debug menu.
CPPDriver and Linux
GDB can be used to debug native code in CPPDriver or JNI in Linux. Also, GDB
can be useful in identifying unusual problems with the Linux JVM. However,
there are some subtle issues when trying to use GDB on a JVM, as is the case with
the GridServer Engine.
TIBCO GridServer
®
Developer’s Guide
12
|
When attaching GDB to the Engine, you must specify the LD_LIBRARY_PATH to
both the Engine components and the JVM components.
LD_LIBRARY_PATH=lib:jre/lib/i386:jre/lib/i386/native_threads:jre/l
ib/i386/server:resources/lib/linux
You must also obtain the process ID of a running invoke (or invokeGCC34)
process from the
ps command. It's also easier if you run GDB from the base
directory of the Engine install (typically
DSEngine). The GDB command used is
similar to this:
gdb bin/invoke $INVOKEPID
Replace bin/invoke with bin/invokeGCC34 when using GCC34.
One difficulty with debugging C++ code is that your application shared objects
are loaded only when the Service is instantiated, so it becomes difficult to set a
breakpoint in the application shared object. (However, more recent versions of
GDB feature deferred symbol resolution, which makes this possible.) A technique
that works in this instance is to have your application Service method include
some conditional code to enter a loop checking some variable value that is never
changed by the application code, effectively creating an infinite loop. When you
need to attach GDB, trigger the conditional that causes the loop to be entered on
the next invocation. Then attach GDB as above. You’ll see that the invoke process
is stopped while running in the loop. At that point you can change the loop
evaluation value so that the infinite loop is exited, and the code continues to your
breakpoint where you can continue debugging.
Creating a Native Stack Trace in Linux
Sometimes when you are troubleshooting native C/C++ code on linux, you want
to generate a stack trace, for example when a SIGSEGV is thrown. Since the JVM
on the Engine already traps SIGSEGV and prints out a Java (not native) stack
trace, you need to override the actions of the JVM and install your own SIGSEGV
handler for debugging. The
backtrace_fd() and backtrace_symbols_fd()
methods from glibc can be used for this purpose.
To install your own SIGSEGV handler for debugging, add code to your Service
initialization method similar to this:
#include <execinfo.h>
#include <stdio.h>
#include <signal.h>
#define TRACE_DEPTH 50
void MyService::segv_handler(int signum) {
void *trace[TRACE_DEPTH];
int depth;
FILE *fp;
depth = backtrace(trace, TRACE_DEPTH);
fp = fopen("trace.log", "w");
backtrace_symbols_fd(trace, depth, fileno(fp));
TIBCO GridServer
®
Developer’s Guide
|
13
fclose(fp);
abort();
}
void MyService::init() {
signal(SIGSEGV, segv_handler);
signal(SIGBUS, segv_handler);
}

TIBCO GridServer
®
Developer’s Guide
14
|
Notes For Java Developers
A Java client, unlike C++ and .NET clients, will not terminate automatically, and
will pend after submitting Services and collecting results. Instead of calling
System.exit() to terminate the client, you can set a property to change this
behavior. Add this line to your code:
DriverManager.setProperty(DriverManager.IS_DAEMON,
Boolean.TRUE.toString());
You can also enable this by setting DSIsDaemon=true in the driver.properties
file.
When this property is set to true, all client threads are daemon threads, meaning
that they will allow the process to shut down when all threads have shut down.

TIBCO GridServer
®
Developer’s Guide
|
15
Notes For C++ Developers
Changing the C++ Compiler Used with CPPDriver
The CPPDriver and Service bridge libraries are built for nearly all standard
compilers used on Windows, Linux, and Solaris. You must link your client
application and/or Service implementation with the appropriate libraries for the
compiler.
You must also run any C++ Services against the proper C++ bridge libraries. This
is done using Grid Libraries, in that any C++ Grid Library must include the
proper bridge Grid Library as a dependency These libraries come already
deployed in the
DS_DATA/deploy/resources/gridlib directory.
Also, because different Linux releases support different compilers which use
incompatible versions of the STL, the GCC Version property in the Engine
Configuration dictates which compiler version of the bridge is supported by the
Engine.
You can run Linux C++ Services built against unsupported STL implementations,
using an Engine built with no STL conflicts. To use this:
1. Download the Engine installation, and locate the
invokeGCC file.
2. Make a copy of
invokeGCC, called invokeGCC34.
3. Replace this file in the appropriate
engineUpdate subdirectory on your
Managers.
C++ Multithreading Requirement
Note that you must compile all Unix C++ code multithreaded. This includes both
Service code and Engine or Driver code.
Using Global Statics in C++ Service Code
By default, the Linux C++ Driver loads application libraries with RTLD_LOCAL,
which only makes statics available within an object. This is done primarily to
ensure that statics defined in a Service Session are unique.
However, this can cause issues in your application, such as when using dynamic
cast with RTTI. Instead, you can use
RTLD_GLOBAL, which makes statics available
by any object in a process. There is an Engine Configuration option to set
RTLD_GLOBAL to true to handle such cases.
TIBCO GridServer
®
Developer’s Guide
16
|
Running both 32-bit and 64-bit Services on 64-bit Windows Daemons
The 64-bit Windows Engine Daemon can be configured to allow execution of
32-bit Services. For more information, see "Configuring 64-bit Engine Daemons to
run 32-bit Services" in the GridServer Administrator’s Guide.
Running Examples on Visual Studio
To run the Calculator client in windows using any Visual Studio version other
than Visual Studio 2010:
1. Open the CPPCalculator solution file in Visual Studio.
2. Set the configuration to "Release" and Platform as "x64".
3. Right-click "Calculator", select Properties > Configuration Properties >
General > Platform Toolset, and select your version of Visual Studio. Do the
same for "CalculatorClient".
4. Right-click "Calculator", select Properties > Linker > General, and replace
"Output File" with the value for your version of Visual Studio. (For example
..\..\target\o\win64\vc11\Calculator.dll)
5. Right-click "CalculatorClient" select Properties > Linker > General, and
replace "Additional Library Directories" with the value for your version of
Visual Studio (For example
..\..\..\..\..\cppdriver\lib\vc11\x64;%(AdditionalLibraryDirect
ories))
6. Right-click "CalculatorClient", select Properties > Linker > Input, and replace
"Additional Library Directories" with the value for your version of Visual
Studio (For example
DSDriverVC11.lib;DSUtilVC11.lib;odbc32.lib;odbccp32.lib;%(Addit
ionalDependencies))
7. Modify
env.bat for your version of Visual Studio. For example:
set dsos=win64
set dscompiler=vc11
set dsbridgename=win64-vc11
set devenvpath="%VS110COMNTOOLS%\..\IDE\devenv.exe"
8. Edit driver.properties as needed.
9. Run the
build-and-deploy.bat script. The Grid Library will be deployed
with the correct
calculator.dll file packaged in it.
TIBCO GridServer
®
Developer’s Guide
|
17
Other C++ Notes
Microsoft Visual Studio 2008, 2010, 2013, and 2015 redistributables are installed
when the Windows Engine is installed with the installer program. Engine updates
from the Manager to pre-existing Engines will not install the runtimes.
When using existing Grid Libraries that use JNI on Windows systems, you must
enable the “Restart on lib-path change” property in an Engine Configuration.

TIBCO GridServer
®
Developer’s Guide
18
|
Notes For .NET Developers
The GridServerNetClient.dll references GridServerNetBridge, which isn’t
needed for clients. This causes a build warning about
GridServerNetBridge, but
can safely be ignored.
To throw a custom exception from a .NET Service and retain all data when the
exception reaches the .NET client, the exception must implement
ISerializable.
For more information, consult MSDN.
Parts of the
BatchInfo, ServiceInfo, Options, and Discriminator classes use
variable / constant names that are not CLS compliant, and might not be usable
from non-C# Framework languages. If this is an issue, please contact
DataSynapse technical support for a possible workaround.
.NET cache loaders for GridCache must be packaged as a Super Grid Library. For
more information on using Super Grid Libraries, see the GridServer Administration
Guide.
.NET Driver Upgrades
The .NET Driver (GridServerNETClient.dll) is strongly named. This means
that when a new major version of the .NET Driver is released in an update, steps
may need to be taken for existing clients to allow the assembly to be loaded. For
example, that version changed from 5.1.x to 6.0; however it has remained the
same for all 6.x.
There are two ways of doing this:
• Rebuild the .NET application with the new
GridServerNETClient.dll.
or
• Configure the application to allow the new version.
You can do this in various ways, depending on your .NET policy; that is, whether
the assembly is deployed into the GAC or used locally.
An example of how to do this when the
GridServerNETClient.dll is used
locally, is as follows:
Method 1: Using the Microsoft .NET Framework Configuration tool:
1. Select Start > Control Panel > Administrative Tools > Microsoft .NET
Framework x.y Configuration, where x.y is the version of .NET.
Note that the tool is no longer included with Windows or in the .NET runtime;
you must install the .NET Framework SDK to obtain the file.
TIBCO GridServer
®
Developer’s Guide
|
19
2. Select Applications > Add an Application To Configure.
3. If your application is in the list, click it; otherwise, find it using the Other…
button.
4. Your application is now in the Applications list. Expand your application, and
select
Assembly Dependencies
.
5. Drag the
GridServerNETClient
, noting the version number, to the Configured
Assemblies icon.
6. Click the
Configured Assemblies
icon. Double-click
GridServer
NETClient,
and select
Binding Policy
.
7. Under
Requested Version
, enter the version you noted in step 5. This is the
version with which you built your application. Under
New Version
, enter the
new version of the
GridServerNETClient.dll that you just installed. This
enables your application to bind with the new version even though you built
it with a previous version.
Method 2: Directly creating the file
In Method 1, the .NET tool creates an Application Configuration file in the
directory of the application. However, you can create this file yourself.
1. Create a file next to you application executable called
my.exe.config, where
my.exe is the name of your executable.
2. Add the following as the file’s content:
<?xml version="1.0"?>
<configuration>
<runtime>
<assemblyBinding xmlns="urn:schemas-microsoft-com:asm.v1">
<dependentAssembly>
<assemblyIdentity name="GridServerNETClient"
publicKeyToken="42129437978483df" />
<bindingRedirect oldVersion="5.0.0.1-5.1.2.30"
newVersion="6.0.0.1" />
</dependentAssembly>
</assemblyBinding>
</runtime>
</configuration>
Note that the oldVersion is the version you built your application with, and the
newVersion is the version of the new assembly. In this example, oldVersion is a
range of versions. If your applications already have a configuration file, edit the
configuration file appropriately.
TIBCO GridServer
®
Developer’s Guide
20
|
If you have a .NET Service implementation that links to the
GridServerNETClient.dll, you do not need perform either of these steps. An
invoke.exe.config file is included in any .NET upgrade that manages this for
you. However, you can rebuild your implementation if you wish.

TIBCO GridServer
®
Developer’s Guide
|
21
Notes for Python Developers
The Python client wraps the 64-bit VC14 version of the C++ Driver on Windows,
so the 64-bit C++ Driver and Python (3.6+) need to be in the path and the VC14
Runtime needs to be installed.
TIBCO GridServer
®
Developer’s Guide
22
|

TIBCO GridServer
®
Developer’s Guide
|
23
Chapter 2
Driver Installation
This chapter describes how to install the GridServer SDK and Drivers and
configure the Drivers.
The Driver is the component that maintains a connection between the GridServer
Manager and the client application. The GridServer SDK, available for Windows,
Linux, and Solaris, provides the Drivers.
Topics
• GridServer SDK Installation, page 24
• Driver Configuration, page 30

TIBCO GridServer
®
Developer’s Guide
24
|
GridServer SDK Installation
This section describes the GridServer SDK installation. To understand your
complete installation procedure, read the SDK instructions and the instructions
for each Driver you plan to install.
To install the GridServer SDK:
1. In the
GridServer
Administration Tool, go to the top navigation bar, and click
the Downloads icon.
2. Click the SDK for your platform to download it.
3. Unzip or unarchive the SDK.
4. Read the following sections for directions on installing Drivers.
The Java Driver (JDriver)
The Java Driver, also known as JDriver, consists of a JAR file used with your Java
application code.
To use JDriver:
1. Ensure that you installed the Java SE SDK (also commonly referred to as the
JDK). You can download it from Oracle.
2. Define an environment variable
JAVA_HOME that contains the location of the
JDK.
3. Install the unlimited strength JCE for your Java SDK. This is available for
download from the Oracle web site.
Each of the Java examples in the
examples directory of the GridServer SDK
includes
env, build, and run scripts. The examples demonstrate how to properly
set classpaths and environment variables to run a Java application using JDriver.
To use the Driver, add the
DSDriver.jar file and the config directory of the
GridServer SDK to your classpath when running your application. Additionally, a
DSDriverNoDeps.jar is included, which contains only DataSynapse classes and
no third party dependencies, allowing you to upgrade these dependencies if and
when necessary.
Solaris systems require GNU tar to unarchive the GridServer SDK.
TIBCO GridServer
®
Developer’s Guide
|
25
The C++ Driver (CPPDriver)
The C++ Driver, also known as CPPDriver, consists of libraries and include files
that are linked with your GridServer application.
To use the C++ Driver:
1. Set the environment variable
DSDRIVER_DIR to the path of the config
directory in the SDK.
2. For Windows, add the applicable directory for your complier to the
PATH
environment variable.
3. For Unix, set the
LD_LIBRARY_PATH environment variable to include the
applicable directory in the
lib directory.
The Parametric Job Driver (PDriver)
PDriver, or the Parametric Job Driver, is a Driver that can execute command-line
programs as a parallel processing job using the GridServer environment. This
enables you to take a single program, run it on several Engines, and return the
results to a central location, without writing any new code.
The Python Driver (PyDriver)
To use PyDriver:
1. Add the 64-bit C++ Driver directory to the
PATH environment variable.
2. Make certain the Python 3.7.0 directory is in the
PATH environment variable.
3. For Windows, make certain the VC14 runtime is installed.
Windows Installation
To install PDriver on Windows systems, run the
PDriverInstaller.msi installer
in the
pdriver directory of the SDK download. By default, this will install
PDriver to the
c:\TIBCO\datasynapse\PDriver directory.
This will also install the VC runtime if it is needed, and will associate
.PDS files
with PDriver.
The installer will set the
DS_PDRIVER_CONF environment variable, which specifies
the location of the
driver.properties file, to the installation directory. Verify
that the
driver.properties file contains the correct Manager and authentication
settings so that the Driver points to your local Manager.
TIBCO GridServer
®
Developer’s Guide
26
|
Unix Installation
To install PDriver on Unix systems:
1. Copy the files in the SDK directory to your machine and set your path to
include
pdriver/bin.
2. Set the environment variable
DSDRIVER_DIR to the path of the config
directory in the SDK.
3. Set the
LD_LIBRARY_PATH environment variable to include the
cppdriver/lib and pdriver/lib directories.
Note that there are not versions of PDriver for 64-bit systems; you should use the
applicable 32-bit installer for your platform.
Using PDriver
To run a PDriver script file, invoke the PDriver binary and pass the PDriver script
file as the first argument. For example, on Unix systems:
pdriver examples/example.pds
Running pdriver or PDriver.exe without a PDS argument provides a usage
message.
The
examples directory contains several example PDriver script files.
The .NET Driver
The .NET Driver consists of an assembly that includes classes for creating and
managing Services from .NET. The .NET Driver is available only for Windows.
Perform the following steps to use the .NET Driver:
1. Find the
GridServerNETClient.dll in the NETDriver directory and link this
assembly to your application.
2. Set the environment variable
DSDRIVER_DIR to the path of the config
directory in the SDK.
The COM Driver
The COM Driver enables an application using the Component Object Model
architecture to access GridServer, enabling distributed parallel execution of the
application on a Grid of Engines. The Driver includes an example, an Option
Evaluation spreadsheet in Excel that uses GridServer for its calculations. The
COM Driver is available only for Windows.
Perform the following steps to install the COM Driver:
TIBCO GridServer
®
Developer’s Guide
|
27
1. In the COMDriver directory of the SDK, double-click the setup.exe to start the
installer.
2. After the installer welcome screen appears, click Next.
3. Click
Browse
to select a location for the COM Driver. The default location is
C:\TIBCO\DataSynapse\DSCOMDriver. Click Next.
4. Enter the address of the primary and secondary Directors, in the form
hostname:port. For example, http://server1.example.com:8000. You can
proceed without filling in any values, but you must later specify your
Directors by editing the
driver.properties file. Click Next.
5. Click Finish.
The R Driver
The R Driver enables you to write Services in R, and access them from R or from
applications in another language such as Java, C++, or .NET. Applications written
in R can also access Services deployed in GridServer.
Prerequisites
• Install and start the GridServer Manager.
• Install and start a Windows 64 Engine.
On your local machine:
• Download and extract the GridServer SDK for Windows.
• Set the environment variable
DSDRIVER_DIR to the path of the config directory
in the SDK.
— For Windows, add the directory
cppdriver/bin/vc11 to the PATH
environment variable.
— For Unix, set the
LD_LIBRARY_PATH environment variable to include the
applicable directory in the lib directory. For example, to use GCC3.4
libraries, set the variable to
cppdriver/lib/gcc34.
• Install TERR 4.1. Set
TERR_HOME and R_HOME to the TERR install folder.
• Install Ant 1.9 or newer. Set
ANT_HOME to the Ant install folder.
• Add
%TERR_HOME%\bin and %ANT_HOME%\bin to the system path.
TIBCO GridServer
®
Developer’s Guide
28
|
Installation
To install the R Driver:
1. Go to
GridServerSDK-Windows/tools/bin and run createTERRGL.bat to
build and upload the Grid Libraries:
createTERRGL.bat --terrHome="TERR HOME FOLDER" --64 --complete
2. For CPP Driver only, install rdriver and rlogger:
TERR.exe CMD INSTALL ".\GridServerSDK-Windows\rdriver\rdriver"
TERR.exe CMD INSTALL ".\GridServerSDK-Windows\rdriver\rlogger"
3. Change directories to GridServerSDK-Windows/examples/service/r/pscl
4. Modify the build.xml to change /bin/Rscript to /bin/TERRscript.
5. Run
ant. This will build the Win32 version of the Rextras and Rpscl Grid
Libraries.
6. Edit the
build.properties in the pscl folder. Set the dsos property to
Win64, save the file and rerun ant.
7. Repeat the above step, setting the
dsos value to linux64.
8. Upload the six created Grid Libraries (three Rextras and three Rpscl) to the
Manager and deploy them. Deploy the Extras first, then PSCL.
9. Change directories to
GridServerSDK-Windows/examples/service/r/picalculator
10. Run ant to build and deploy the Rcalculator Grid Library.
11. For CPP Driver only, run
TERR25.bat.
12. Create a new Java project and include the
RPICalculatorClient.java class
in it.
13. Set up the Java project just like you would any other Java client (with
DSDriver.jar, driver.properties, and so forth).
Creating the Rpscl Package for 64-Bit Linux
Note that the above steps will generate an Rpscl Grid Library that does not work
with 64-bit Linux.
pscl depends on the gam package. However, gam is not
available for 64-bit linux in CRAN for R. The resulting package is missing the
pscl and gam packages.
An alternative is to install
pscl from a package repository and repackage the
binaries as a Grid Library. For example, in Ubuntu:
1. Install
r-cran-pscl:
sudo apt-get install r-cran-pscl
TIBCO GridServer
®
Developer’s Guide
|
29
2. Add these directories from /usr/lib/R/site-library into the Grid Library:
- coda
- colorspace
- gam
- lattice
- MASS
- mvtnorm
- pscl
- vcsd

TIBCO GridServer
®
Developer’s Guide
30
|
Driver Configuration
Driver configurations reside in the driver.properties file, which is included in
the GridServer SDK. When you install the Manager, the
driver.properties file
contains hostnames for the primary and secondary Director. To change the default
values, edit the
driver.properties file. For example, edit this file to add a
username and password for authentication, change the primary and secondary
Director, change the Broker Timeout, and so on.
You can move the
driver.properties file to another directory. For Java, add the
new directory to your classpath. For C++, .NET, R, and the Unix PDriver, the
DSDRIVER_DIR environment variable must be set to the location of this directory.
For Windows PDriver, the
DS_PDRIVER_CONF environment variable must be set to
the location of this directory.
If you use the following characters in properties in the
driver.properties file,
precede each with a backslash:
#, !, # =, \, and :
Backslash characters in hostname or directory properties receive special handling
on Windows Drivers. The first backslash, indicating the root directory, translates
as the current Windows drive. Other backslashes are ignored. Forward slashes
translate as backslashes.
For example, to set a directory to
c:\sdk\log, use /sdk/log in the
driver.properties file. To use a UNC path such as \\homer\job1-dir, use
//homer/job1-dir in the driver.properties file.
You can also set Driver properties programatically with the API. When you do
this, the
driver.properties file is unnecessary. At minimum, you need to set
DSPrimaryDirector, DSSecondaryDirector (set them both to the same
hostname when using a single Director),
DSUsername, and DSPassword (unless
using Windows or Kerberos authentication).
If your username or password is non-ASCII, you must express it in Unicode
converted format rather than as the Unicode characters. For example:
DSUsername=\u6B21\u306E\u30E6\u30FC
Configuring Multi-Interfaced Drivers
In some network configurations, on a PC with more than one network interface, a
Driver might default to using the incorrect interface, resulting in the Engines
using the incorrect IP address for the Driver's fileserver. To configure the Driver to
use a different network interface, set the
DSLocalIPAddress property to the IP
number of the correct interface. For example:
DSLocalIPAddress=192.168.12.1
TIBCO GridServer
®
Developer’s Guide
|
31
Driver Cleaner Configuration
When Direct Data Transfer (DDT) is enabled and data is transferred directly to the
Engines from this Driver, DDT files are persisted for a configurable amount of
time, and then deleted by a file cleaner process. The file cleaner will delete files
and directories when they are no longer needed, such as files left over by a Service
that did not complete normally. Files used by a currently executing Service will
not be deleted regardless of the files’ age or the Driver’s configuration.
There are four properties in the
driver.properties that control the cleaner:
•
DSDataTransferFileExpirationHours: The amount of time DDT files will
persist before being deleted. By default, this is set to 120 hours.
•
DSDataTransferFileExpirationFrequency: The number of times per day
that the Driver will check for and clean expired DDT files. By default, this is
set to 6 times. To disable the file cleaner, set this to 0.
•
DSDataReferenceFileExpirationHours: The amount of time Data
Reference files will persist before being deleted. By default, this is set to 120
hours.
•
DSDataReferenceFileExpirationFrequency: The number of times per day
that the Driver will check for and clean expired Data Reference files. By
default, this is set to 24 times. To disable the file cleaner, set this to 0.
Multiple Driver Instances
Services can fail if you enable Direct Data Transfer and write a script that
instantiates multiple Drivers from the same
driver.properties file with the
same port number. The first Driver opens a web server listening to the defined
socket. Subsequent Drivers do not open another web server as long as the first
Service is running, but can continue running by using the first Service’s server for
direct data. However, when the first Service completes, its server terminates,
causing subsequent Services to fail.
You can avoid this problem by writing a shell script to create Services, each with
its own Driver running from its own Java VM. Your script must provide a
different port number for the
DSWebserverPort property normally set in the
driver.properties file. To write a shell script for this situation, you can remove
the
DSWebserverPort property from the driver.properties file and assign a
unique port number for each iteration.
More than one Driver can share the same directory. However, if you do so you
must set a unique
DSCacheRootDirectory for each Driver if using GridCache.
Also, if using long-running Services, you must set a unique
DSWebServerDir
property so that one Driver’s file cleaner does not clean another session’s
initialization data.
TIBCO GridServer
®
Developer’s Guide
32
|

TIBCO GridServer
®
Developer’s Guide
|
33
Chapter 3
Creating Services
This chapter provides information on how to create Services.
Topics
• Overview, page 34
• Steps in Using a Service, page 35
• Service Method Compliance, page 36
• Client Calling Conventions, page 38
• Registering a Service Type, page 40
• Language Interoperability, page 43
• Maintaining State, page 51
• Initialization, page 52
• Cancellation, page 53
• Destruction, page 54
• Service Instance Caching, page 55
• Invocation Variables, page 56

TIBCO GridServer
®
Developer’s Guide
34
|
Overview
Services enable remote, parallel execution of code in a way that is scalable,
fault-tolerant, dynamic and language-independent. You can write Services in a
variety of languages and do not need to compile or link them with DataSynapse
libraries. There are client-side APIs in Java, C++, COM, R, and .NET. A client
written in one language can invoke a Service written in another.
The Service execution model is the same as that of other distributed programming
solutions: method calls on the client are routed over the network, resulting in
method calls on a remote machine, and return values make the reverse trip. We
prefer the term request to call or invocation, partly because the operation can be
either synchronous or asynchronous.
Use Services to implement parallel processing solutions in which a single
computation is split into multiple, independent pieces whose results are
combined. To split the computation, divide the problem, submit the individual
requests asynchronously, then combine the results as they arrive. Services also
work well for executing multiple, unrelated serial computations in parallel.

TIBCO GridServer
®
Developer’s Guide
|
35
Steps in Using a Service
Using a Service involves six steps:
1. Write the Service, or adapt existing implementations. A Service can be
virtually any type of implementation: a library (DLL or .so), a .NET assembly,
a Java class, an R function, a command, script or executable, or even an Excel
spreadsheet. You do not need to link a Service with any DataSynapse libraries,
but make sure the remotely callable methods of the Service follow
conventions that enable cross-language execution and support stateful
Services. For details, see Client Calling Conventions on page 38.
For examples of code utilizing Services, see the GridServer SDK and the
GridServer Service-Oriented Integration Tutorial.
2. Deploy the Service. Make the implementation and other resources required
for the Service accessible from all Engines. Do this through
GridServer
’s
resource deployment mechanism.
3. Register the Service Type. Make the Service visible to clients by registering it
as a Service Type in the
GridServer
Administration Tool.
4. Create a Service Session from a Client. Develop a Client Application that
accesses the registered Service Type and creates a Service Session. Each
Service Session has its own state that is client-specific.
5. Make requests. The Client Application calls the methods of a Service
implementation either synchronously or asynchronously.
6. Destroying the Service Session. Client Applications destroy Service Sessions
when they are done with them.
This chapter describes how to develop a Service Implementation that runs on an
Engine. Chapter 4, Accessing Services, on page 59 describes how to use this
Service Implementation from a Client Application.

TIBCO GridServer
®
Developer’s Guide
36
|
Service Method Compliance
Although Service methods do not link to DataSynapse libraries, they must
comply with the rules in the following sections.
Java/.NET Services
Java/.NET Services must comply with these rules:
• Make the Service class public, and make all methods called by the client
public.
• A method can take any number of arguments, and can have a return type of
void. The return values of state methods are ignored, and a Service method
with a void return type returns a null.
• If you plan to use the Service cross-language, the arguments and return values
must conform to the rules of interoperability, as described in the section
Interoperable Types for XML Serialization on page 45.
• If only a client of the same language uses the Service, you can use any
serializable object for arguments and return values.
• Overloaded methods are prohibited.
• Methods can throw exceptions within a Service, which captures and includes
stack trace data and nested exception data when available.
C++ Services
C++ Services must comply with these rules:
• Export all service methods in the shared library.
• The Service method must either take a
char*, or a char** for multiple
arguments. Alternatively, if using the macro it can take a
std::string or a
vector of
std::strings.
• The method returns data through a
char** argument, which is set to the
returned data. Alternatively, if using the macro it returns a
std::string.
• Overloaded methods cannot be used.
Command Services
Command Services must comply with these rules:
TIBCO GridServer
®
Developer’s Guide
|
37
• The name of the method that is called is appended to the command line.
• Argument values are sent to stdin or an input file. If there is more than one
argument, the data is separated by the
argDelimiter, which can be registered
on the Service.
• You can append argument values to the command line instead, if the option is
selected. In this case, the client passes the argument values in as strings.
• If your command spawns subprocesses, it must cancel them if the main
command is cancelled.
R Services
R Services must comply with these rules:
• All functions visible in the R runtime environment can be used as a Service.
• These include all functions defined in any
.R script files defined in the R/
directory in the Grid Library and any function exported by third-party
libraries.
• Functions exported by libraries can only be accessed when using
functionInterface as NATIVE_R. The functionInterface setting is
described in R Interoperability on page 47.
Python Services
Your Python libraries not only need to be added to the grid-library.xml for the
Python bridge, but also the PIP install needs to be done in your code. Your Python
libraries need to use the Python Service Type to ensure that the proper Python
script is executed.
You should carefully handle type conversion since the Python driver wraps the
C++ Driver and the data is being implicitly converted to string before being
transmitted, and then it is implicitly converted from string in the Grid Library
unless explicit conversion is used.

TIBCO GridServer
®
Developer’s Guide
38
|
Client Calling Conventions
Clients must comply with the following rules when calling methods in a Service.
Java/.NET Client
Java/.NET Clients must comply with the following rules when calling methods in
a Service:
• Pass arguments into calls as
Object[], which corresponds to the arguments of
the method. Note that you must use exactly type
Object[]. For instance, a set
of strings cannot be passed in as a
String[]. The array length must match the
number of arguments.
• For convenience, if the method takes only a single argument, you pass it
directly into the call. It is the equivalent of passing in an
Object[1] with the
0th element being the object.
• If a method takes no arguments, you can call it only with zero-length
Object[] or a null object.
• Autoboxing is used for primitive types. For example, a Service method that
returns a double returns a
Double on the client.
C++ Client
C++ Clients must comply with the following rules when calling methods in a
Service:
• Pass arguments into calls as
char**. Alternatively, if using the macro found in
DynamicLibraryFunctions.h, it can be a vector of std::string.
• If a method takes no arguments, you can call it only with a
NULL or
zero-length
char* or string.
R Client
See R Interoperability on page 47 for more information.
TIBCO GridServer
®
Developer’s Guide
|
39
Python Client
When setting parameters with the Python client, you need to initialize the input
parameters using
driver.init_input_parameter(n) where n is the number of
parameters to initialize. Each parameter is then set with a call to
driver.set_input_parameter(parameter name or literal). Here is an example from
python_client_example.py:
driver.create_services(b'PythonExample')
driver.init_input_parameter(2)
driver.set_input_parameter(b"8.23")
driver.set_input_parameter(b"1.25")
driver.submit(b"add")
In the above example, the literal values are expressed as 'b"8.23"' and
'b"1.25"'. These are expressions specific to Python. Please refer to Python
documentation if you have questions on them.

TIBCO GridServer
®
Developer’s Guide
40
|
Registering a Service Type
Service Types are registered in the GridServer Administration Tool. On the
primary Director, go to Services > Services > Service Types. Service Types
registered on the Director are then replicated to Brokers. A list of existing Service
Types appears on that page, along with a line for adding a new Service Type.
Enter the Service Type name on the blank line. Select a Service Implementation,
then click Add.
In the window that appears after clicking the Add button, enter any name,
property or option values for the Service Type.
Container Binding
When you register a Service Type, an associated Container Binding is created. The
Container Binding binds the Service implementation (the library or command) to
the Container of the Service (the Engine). The Container Binding describes how to
use the implementation.
The binding contains the following fields:
Table 3 Container Binding Fields
Field Description
initMethod Called when a Service Session is first used on an
Engine. It is called prior to any requests or updates.
destroyMethod Called when a Service Session is destroyed.
cancelMethod Called when the Service is cancelled if
KILL_CANCELLED_TASKS is false for this Service. Use
this field to interrupt the request if the user does not
want the Engine to restart on a cancel.
serviceMethods Methods that perform a request and return a
response. These are the actual methods that perform
the calculations. Use the * character to denote all
methods that are not bound to any other action.
appendStateMethods Updates state, appending to previous updates.
setStateMethods Updates state, and flushes the list of previous
updates.

TIBCO GridServer
®
Developer’s Guide
|
41
You must bind all methods used to one of these methods. All methods are
optional except
serviceMethods.
The binding also contains the following fields, only applicable to Java, .NET, and
R:
The binding for R contains the
functionInterface field, which is described in R
Interoperability on page 47.
Python Services need to use the
Python Service type. The only other critical step is
making certain to set the
pythonModule which is the name of the Python file that
contains the implementation, without the file extension.
.NET AppDomains
Services implemented in .NET have full access to .NET’s AppDomain
functionality. You can manage multiple persistent AppDomains across Service
invocations while still having access to the entire DataSynapse Engine-side API.
You can specify an AppDomain as part of a Grid Library deployment, and the
Engine sets up and manages it automatically.
The Provider section in the Service Type Registry for .NET Services supports an
appDomainName value. Set the appDomainName value to specify a unique
AppDomain for Services created from this Service Type. If you do not specify an
AppDomain for a Service, the Service receives a new anonymous AppDomain
with a randomized name. The Service does not run in the Default Domain as it
Table 4 Additional Container Binding Fields For Java, .NET, and R
Field Description
xmlSerialization Whether to use XML serialization to serialize objects. See
Interoperable Types for XML Serialization on page 45 for
more details.
TargetPackage The package (Java) or namespace (.NET) into which the
generated proxy classes are placed. If not set, the default
is the name of the Service. This is only necessary when
using generated proxies. In this case, if not set,
serialization errors may occur.
Note: When you do not set the
targetPackage name in
the Service Types page and use a generated proxy,
deserialization errors occur. To remedy this, edit the
Service Type on the Service Types page of the
GridServer Administration Tool and assign a value for
the
targetPackage property.
TIBCO GridServer
®
Developer’s Guide
42
|
did in previous versions of GridServer. If you create a Service that uses legacy
Default Resources rather than a Grid Library, the Service runs in an auxiliary
AppDomain. All resources-backed Services use this same auxiliary AppDomain
for the lifetime of the Engine.
When you specify an AppDomain as part of a Service Type definition and an
Engine creates the Service for the first time, the Assembly search paths used for
the AppDomain depend on how you deploy resources:
• When a Service uses a Grid Library, the
assembly-path path elements for that
Grid Library (and any dependent Grid Libraries) are the Assembly search
paths for the AppDomain.
• When a Service does not use a Grid Library, the default Assembly search path
is used.
The Engine searches the Assembly search path for a valid AppDomain
Configuration File, which has the same name as the AppDomain, plus the
.config suffix.
An Engine restarts if it needs to load a Grid Library to run a Service in an
AppDomain that has an Assembly search path that conflicts with the new Grid
Library’s search path. This is different behavior from previous versions of
GridServer.
Use the
unloadAppDomain property in the Service Type to specify what to do with
Grid Library-backed AppDomains after the Service Sessions using them are
destroyed. Select
true to unload AppDomains no longer in use.
.NET Framework Versions
In the Provider section of the Service Type Registry is a frameworkVersion value.
Set this value to the .NET Framework version required by Service. This prevents
Services that specify a Framework version from executing on Engines without
that framework version installed.
To determine which Engines have a version of the Framework installed, go to
Grid Components > Engines > Engine Admin, select the Engine Details action,
and look for the
NETFrameWorkVersion and NETFramework Engine Properties.
The
NETFramework property is false if a Framework is not installed or if it is an
unsupported version (such as 1.0.)

TIBCO GridServer
®
Developer’s Guide
|
43
Language Interoperability
Services provide various levels of interoperability among languages. To provide
this interoperability, GridServer can perform conversions on arguments sent to
objects. The following sections describe conversion of arguments between Service
Implementations.
Strings and Byte Arrays
All Services can use byte arrays (byte[]s) interchangeably with Strings as
arguments. Conversions use UTF-8 encoding. For example, if an argument is of
type
String, and the client passes in a byte[], the byte[] is UTF-8 encoded and
passed into the method as a
String.
Because a C++ Service always returns a
string/char*, you must convert the
returned type of an invocation to a
String or byte[]. The first argument to the
invocation determines the type of conversion:
• A string first argument returns a string.
• An argument of
byte[] returns a byte[].
• If you pass no arguments to the invocation, it returns a
byte[].
This is most relevant for a .NET, as string I/O must be ASCII. If you are returning
binary data, make sure that the first argument is a
byte[].
A Command Service converts the output data to a
String only if the first
argument is a
String and the appendArgsToCommandline option is false.
Java and .NET Services do not convert return values if they are
Strings or
byte[]s.
In the case where a
parameterType value is specified, GridServer converts to the
specified value. For example, if
parameterType is set as string, GridServer
returns strings. If set to
byte[], GridServer converts the return value to byte[].
This applies to both the C++ Service and the Command Service. You can specify
the
parameterType value for DynamicLibrary and Command Services on the
Service Type Registry page.
Object Conversion from Strings and Byte Arrays
Java and .NET Services automatically attempt to convert String/byte[]s to and
from
Objects when necessary. This is useful when calling these Services from a
different language, or when using Service Runners from Batches.

TIBCO GridServer
®
Developer’s Guide
44
|
If an argument is not a String or byte[], and it is passed in as such, an attempt is
made to convert it. If the data is a
byte[], it is first converted to a String. Then
the
String is converted to the Object as follows:
If the return value is not a
String/byte[], and the client is not of the same
language as the Service, the returned value is converted to a
String, as follows:
Table 5 String Argument to Object Conversion
Input Argument String Argument-to-Object Conversion
Primitives The primitive wrapper class’s parse method
Date, Calendar (Java) DateFormat.getDateTimeInstance().parse
DateTime (.NET) DateTime.Parse
org.w3c.dom.Document
(Java)
Uses the parse method from the DocumentBuilder
given by
DocumentBuilderFactory.newInstance().newD
ocumentBuilder()
XmlDocument (.NET) XmlDocument.loadXml
Other If the class has a constructor that takes a single
String as an argument, it uses that constructor.
Tabl e 6 R etur ned O bject to String Conversion
Return Type Returned Object-to-String Conversion
Primitives The object-equivalent
toString() method
Date, Calendar (Java) DateFormat.getDateTimeInstance().format
DateTime (.NET) date.ToUniversalTime().ToString("r",
DateTimeFormatInfo.InvariantInfo)
org.w3c.dom.Document
(Java)
The transform method from the Transformer given
by
TransformerFactory.newInstance().newTrans
former()
XmlDocument
(.NET) doc.WriteTo(XmlTextWriter)
Other The toString method

TIBCO GridServer
®
Developer’s Guide
|
45
XML Serialization for Java, .NET, and R
XML serialization provides the following features:
• Java, .NET, and R can use rich objects as arguments and return values with
each other.
• A client can use a Service with such objects, without needing the original
implementation classes. This is because client-side proxy classes are
generated.
To use XML serialization, enable it on the Service Type. Note that when you
enable this, the other interoperability conversions are no longer used.
Additionally, the client must use the proxy that is generated using the Service
Type Registry, which contains all user-defined types.
You must use Interoperable Types for the arguments and return values on such
Services, as discussed in the following section.
Interoperable Types for XML Serialization
When you use XML Serialization, you must use interoperable, or interop,
parameters and return types, as follows:
Table 7 Interoperable Types
Type Description
Primitives
bool, byte( Java), sbyte (.NET), byte[], double,
float, short, int, long, string.
Calendar
(Java) or
DateTime
(.NET)
Interoperability between Calendar and DateTime in a mixed
Java/.NET setup does not support timezones. .NET's
DateTime structure does not support the concept of timezone
so that information is not maintained. You must send that
information separately. The timezone itself is not preserved
across serialization so all Calendar objects are created with
local timezones. .NET has an additional limitation in that it
assumes that all date time data is in its local timezone.
Therefore, serialization of XML not in that local timezone
produces an incorrect time. If you cannot determine the .NET
deserializer's local timezone from Java to set in the Calendar,
pass the Calendar data as a String instead.
Arrays The type can be an array of any interop type.

TIBCO GridServer
®
Developer’s Guide
46
|
The following is an example of a Java Interop type:
public class Valuation {
private java.util.Calendar valuationDate;
private double value;
private MarketData data;
private String[] names;
public Valuation() {}
public java.util.Calendar getValuationDate() {
return valuationDate;
}
public void setValuationDate(java.util.Calendar
valuationDate) {
this.valuationDate = valuationDate;
User-Defined
Types
User-defined types can be used, as long as they follow the
standard “bean” pattern. For both languages, use
interoperable types (including other user-defined types) for
all data. For Java, all data must be Java Bean properties; that
is, each must have public get/set methods. For .NET, all data
must be public fields. When generating a proxy for this
Service type, user-defined types result in generated classes.
You can have other data and methods in the type, such as
private non-interop fields, but they are ignored and not
reflected in the generated class. Also, user-defined types
must be concrete; abstract classes and interfaces are not
allowed.
Data
References
(Java and
.NET)
This type can be used as an argument, return type, or
GridCache object, and is interoperable whether XML
Serialization is on or off. When generating a proxy for a
Service type using Data References, it does not include all
methods of the Data References. Normally, the data in a Data
Reference is stored and served in the fileserver on the
GridServer component that created it.
C++ Data References are not interoperable with Java or .NET.
For more information, see Data References on page 70.
Table 7 Interoperable Types (Continued)
Type Description

TIBCO GridServer
®
Developer’s Guide
|
47
}
public double getValue() {
return value;
}
public void setValue(double value) {
this.value = value;
}
public String[] getNames() {
return names;
}
public String getNames(int index) {
return names[index];
}
public void setNames(String[] names) {
this.names = names;
}
public void setNames(int index, String name ) {
this.names[index] = name;
}
}
public void setValuationDate(java.util.Calendar valuationDate)
{
this.valuationDate = valuationDate;
}
public double getValue() {
return value;
}
public void setValue(double value) {
this.value = value;
}
}
The following is an example of a .NET Interop type:
[Serializable]
public class Valuation {
public DateTime valuationDate;
public double value;
}
R Interoperability
Before you create an R Service, you must decide which types of clients you intend
to support. There are restrictions to the input and return types depending on the
client that is used.
TIBCO GridServer
®
Developer’s Guide
48
|
There are three main issues to address for each client type:
• Input and return value types
•
ServiceType definition
•
init method interface
Input/return Values and the functionInterface Setting.
The
functionInterface setting in the Service Type determines the conversion
scheme that is applied to incoming input arguments and the outgoing return
value.
There are three possible settings:
•
RAW (default) - Input arguments and return values are not converted at all.
•
UNWRAP_RETURN - Input arguments are not converted at all. However, if an R
function returns a vector with a single element, the single element in the
vector is returned instead. This is convenient for Java and .NET Drivers and a
requirement for C++ drivers. This setting has no effect if the returned value
has more than one value.
•
NATIVE_R - Input arguments and return values are native R types. Therefore
they are not subject to any conversion.
Below are examples of how to create R services depending on the client that has
access to it.
Supporting C++ Clients
The C++ client is the most restrictive client to support.
Input and return type
C++ clients only support strings as input arguments and return values. Therefore,
if your Service is accessed by a C++ client, all R functions exposed in the Service
must only take strings and return a single string value.
ServiceType
Set
functionInterface to UNWRAP_RETURN for C++ clients.
init method
If your Service has an init method, it must take at least one argument. For
example:
TIBCO GridServer
®
Developer’s Guide
|
49
init <- function(unused) {
}
The init method requires at least one argument even when
ServiceFactory::createService(const std::string &serviceName) is
used.
The init method can have multiple string arguments and the precise number of
parameters must be provided as
initData when creating a Service. Otherwise,
Service initialization fails.
Supporting Java/.NET Clients
Java and .NET client are less restrictive than the C++ client.
Input and return type
Java and .NET clients support their respective native types, and these types can be
used as input arguments and return values.
ServiceType
functionInterface can be unset, or set to UNWRAP_RETURN depending your
preference.
init method
The init method can have multiple arguments and the precise number of
parameters must be provided as
initData when creating a Service. Otherwise,
Service initialization fails.
Supporting R Clients in R mode
R clients can access Services exposed using the C++ like Service interface and
Services implemented in R and exposed as
NATIVE_R.
R clients can call Services with the C++ like interface and Services exposed as
NATIVE_R concurrently. Keep in mind that you cannot expose some functions
with the C++ like interface and others as
NATIVE_R in the same Service Type.
Input and return type
R clients can use native R types as arguments and return values. Refer to the list of
supported types below.
TIBCO GridServer
®
Developer’s Guide
50
|
ServiceType
functionInterface can be set to NATIVE_R.
init method
The
init method can have multiple arguments and the precise number of
parameters must be provided as
initData when creating a Service. Otherwise,
Service initialization fails.
Supported R Types
Supported R types are:
•
logical
• integer
• real
• raw
• complex
• nil (NULL value)
•
string
• vector
vector can contain any combination of the above types and vector itself.
Python Interoperability
You should carefully handle type conversion since the Python Driver wraps the
C++ Driver and the data is being implicitly converted to string before being
transmitted, and then it is implicitly converted from string in the Grid Library
unless explicit conversion is used.

TIBCO GridServer
®
Developer’s Guide
|
51
Maintaining State
To maintain state on a non-virtualized Service, you typically use a field or set of
fields in your object to maintain that state. (For C++ or Command Services, state
is saved in a slightly different manner.) Because a Service Session can be
virtualized on a number of Engines, adjusting a field’s value using a Service
request adjusts only that value on the Engine that processed that request. Instead,
you must declare the appropriate class method as a stateful method in the Service
Type Registry and use the
updateState method to guarantee that all Engines
update the state. Register all methods used to update the state as such on the
Service type, either as one of the
setStateMethods or appendStateMethods.
When an Engine processes a Service request, it first processes all update state calls
that it has not yet processed, in the order in which they were called on the Service
instance. These calls are made prior to the execution of the request. The append
value determines whether to make previous update calls. If append is false (a set),
all previous update calls are ignored. If append is true, all calls starting from the
last set call are performed. Typically, then, append calls update a subset of the
state, whereas set calls refresh the entire state. If you intend your Service instance
to be a long running state with frequent updates, use a set call on a regular basis
so that Engines just coming online do not need to perform a long set of updates
the first time they work on this Service instance.
In the case of a task retry when appending state, a task will be appended until the
correct update state required by the task is reached. Note that this will not occur
when using multiplexed Engines — the task will receive the most current state.

TIBCO GridServer
®
Developer’s Guide
52
|
Initialization
Use the initMethod, one of the container binding fields defined above, to
initialize the state on a Service that maintains state. You can also use it for other
purposes, such as establishing a database connection. The
initMethod is called
with the initialization data the first time an Engine processes a request on a
Service instance. It is also called prior to an
updateState call if it has not already
been called.

TIBCO GridServer
®
Developer’s Guide
|
53
Cancellation
A request can be cancelled for a number of reasons. The Admin API or
Administration Tool can directly cancel requests. Cancelling a Service Session
cancels a request. If the
killCancelledTasks option is true for this Service, the
Engine process exits and the Engine restarts. (By default, the
killCancelledTasks option is true, except for .NET Services, where it is false by
default.) However, in many cases it is not necessary to do so, and you would
prefer to interrupt the calculation so that the Engine becomes immediately
available.
In this case, set the
killCancelledTasks option to false, implement a
cancelMethod, and register it on the Service type. This method must interrupt
any Service method that is in process. It is also possible to call
cancelMethod after
the Service method finishes processing, so the implementor must take this into
account.
A typical use case is a calculation that periodically checks a cancel flag. The cancel
method would set that flag, interrupting the calculation.
Use the cancelMethod to interrupt the task execution only. Do not use
cancelMethod for cleanup of any sort. Use the destroyMethod for cleanup.

TIBCO GridServer
®
Developer’s Guide
54
|
Destruction
Often, a Service needs to perform cleanup operations on the Engine when the
instance is destroyed, such as closing a database connection. If so, implement and
register a
destroyMethod on the Service type. This method is called whenever a
Service instance is destroyed. It is called on any active Service Sessions on an
Engine whenever an Engine shuts down.

TIBCO GridServer
®
Developer’s Guide
|
55
Service Instance Caching
Engines maintain a cache of all Engine Service Instances that are currently active
on that Engine, set by the Engine Configuration. If an Engine is working on too
many Sessions, Engine Service Instances can get dropped from the cache. When
this happens, the
destroyMethod is called, and work that began on that Service is
discarded. If an Engine processes a subsequent request, it restarts working on that
Service from scratch.

TIBCO GridServer
®
Developer’s Guide
56
|
Invocation Variables
While you can implement a Service that is independent of DataSynapse libraries,
on certain occasions you might need to refer to properties within the environment
of the Engine. This can be accomplished without using additional code with
variables that are retrieved in various ways dependent on the type of Service:
•
Java System properties
•
DynamicLibrary Environment variables, with the same name as Java variables,
except with dots replaced with underscores. You can also use symbolic
constants provided by
DynamicLibraryFunctions.h.
•
.NET System.AppDomain.CurrentDomain data values; for example:
System.AppDomain.CurrentDomain.GetData("ds.ServiceSessionID")
• Command Environment variables, with the same name as Java variables,
except with the dots replaced with underscores.
The Engine provides the following variables:
Table 8 Engine Variables
Variable Description
ds.ServiceSessionID The unique identifier for the Service Session being
invoked.
ds.ServiceInvocationID A number uniquely identifying the invocation
(task) of the Service instance.
ds.ServiceCheckpointDi
r
The absolute path to the directory that the Service
uses for reading and writing of checkpoint data, if
checkpointing is enabled for the Service.
ds.ServiceInfo If this variable is set in an invocation, the value is
displayed in the Administration Tool upon
completion of the invocation.

TIBCO GridServer
®
Developer’s Guide
|
57
In addition, any environment variables available on the Engine are also available
in the Engine Service Instance. Note that any environment variables will use
absolute paths.
ds.WorkDir The work directory for the Engine. This variable is
set to the directory from which the Service is
executed. By default it is the absolute path to the
Engine installation directory, where
machinename
is the name of the machine running the Engine,
and
instance is the number of the Engine
instance. For example, a single Engine machine
has a
machinename
-0 directory; one with two
Engine instances also has a
machinename
-1
directory. Each Engine instance directory has a
log
directory containing Engine logs and a
tmp
directory.
Note that the
tmp directory is periodically deleted
by the Engine. The Temp File Time-to-Live
(hours) setting in each Engine Configuration
controls the frequency with which the Engine
cleans this directory.
ds.DataDir The data directory for the Engine, which is the
absolute path directory in which DDT (Direct Data
Transfer) data is stored. The cleanup frequency is
also controlled by the Engine Configuration.
ds.GridLibraryPath A list of paths, the contents of which are absolute
paths to the root directories of all the expanded
and loaded Grid Libraries.
Table 8 Engine Variables (Continued)
Variable Description
TIBCO GridServer
®
Developer’s Guide
58
|

TIBCO GridServer
®
Developer’s Guide
|
59
Chapter 4
Accessing Services
This chapter describes how to access and use Services with GridServer.
Topics
• Services, page 60
• Proxy Generation, page 61
• Service Options, page 62
• Service Invocation Context, page 63
• Shared Services, page 64
• Broker Spanning Services, page 66
• Service Groups, page 69
• Data References, page 70
• Service Collection, page 72
• Engine Pinning, page 78
• Running a Driver from an Engine Service, page 79

TIBCO GridServer
®
Developer’s Guide
60
|
Services
You can use the GridServer API in Java, C++, .NET, COM, or Python to develop
an application that accesses Services. These Drivers contain API documentation
describing how to do this. For example, when you use Java, refer to the Javadocs
found in the GridServer Administration Tool, for the package
com.datasynapse.gridserver.client. Use the Service class to access the
Service either synchronously or asynchronously.
For examples of developing applications using the GridServer APIs, see the
GridServer Service-Oriented Integration Tutorial.

TIBCO GridServer
®
Developer’s Guide
|
61
Proxy Generation
Proxy Generation is the automatic generation of a client proxy class that mirrors
the registered Service type.
Think of the Service as a binding to a virtualized Web Service that can process
asynchronous requests in parallel. Additionally, because the proxy does not
expose any DataSynapse classes, it provides a standards-compliant approach to
integrating applications in a vendor non-specific way.
The following rules apply to the generated proxy:
• The use of the proxy class is completely independent of the DataSynapse API.
Client code that uses the proxy class does not need to import or reference any
DataSynapse classes.
• If the Service has an
initMethod, the proxy constructor takes any arguments
to that method.
• All Service methods produce synchronous and asynchronous versions of the
method on the proxy.
• Each update method has a corresponding update method on the proxy.
•The
cancelMethod and destroyMethod are called implicitly and thus do not
generate methods on the proxy.
•The
targetPackage field identifies the package (in Java) or namespace (in
.NET) in which to place the generated classes. Its default value is the name of
the Service.
• If you use xmlSerialization, classes are generated for all non-primitive types,
which must be interop types. If you do not use xmlSerialization, classes can be
any serializable type, they are not generated, and the client must have access
to those same classes (by a JAR/Assembly.)
• When generating proxies, a Java
Calendar object is represented by a
DateTime object in a .NET proxy, and vice-versa.
The proxy is generated using the Services > Services > Service Types page. The
proxy is generated on an Engine, so successful proxy generation requires an
available idle Engine.

TIBCO GridServer
®
Developer’s Guide
62
|
Service Options
Each Service has an Options object that contains configuration parameters and
settings. For example, some commonly used options include
PRIORITY and
GRID_LIBRARY. To see the options for the Options object, refer to the API
reference documentation.
Service Options can be set in two ways: on the Service Types page, or when you
create the Service Session with the client. If an option is set in the registry, the
client cannot override it. If it is left as
[not set] in the registry, and it is not set by
the client, Service Options has the default value.

TIBCO GridServer
®
Developer’s Guide
|
63
Service Invocation Context
The ServiceInvocationContext class provides an interface for interacting with
an invocation, such as getting the session and task IDs, while it is running on an
Engine. This is an alternative to using, for example, the system properties when
running a Java Service. Using this class enables immediate updating of invocation
information. In contrast, setting the
INVOCATION_INFO system property only
updates at the end of the invocation.
The
ServiceInvocationContext object can be reused; the method calls always
apply to the currently executing Service Session and invocation. Make all method
calls by a
service, update, or init method; if not, the method call might throw
an
IllegalStateException or return invalid data. Note that you cannot call this
method from a different thread; it will fail if it is not called from the main thread.
Setting Task Description
An example use case of the ServiceInvocationContext class is how to change
the task info field.
You can use the
ServiceInvocationContext.updateInfo() method on the
Engine to set the info, and can be updated a number of times while the task is
running to provide real-time info on the task state.

TIBCO GridServer
®
Developer’s Guide
64
|
Shared Services
A Shared Service is a Service instance that multiple Clients executing on different
processes or machines can attach to. State is maintained across the Service
instance, and there is only one instance at any given time of a particular Shared
Service running on a Broker. For example, you might use a Shared Service when
GridServer Service invocation requests are delivered on an Enterprise Service Bus
to a middle-tier client. If this middle-tier client is load-balanced across multiple
systems, using a Shared Service lets the Broker reaggregate these related Service
invocations.
Creating a Shared Service
To create a Shared Service, specify the SHARED_SERVICE_NAME option when
creating the Service. Once the Shared Service exists, any client of the same type
attempting to create a Service with the same name and the same
SHARED_SERVICE_NAME attaches to the already existing Service. All clients
sharing the instance also share the same Service ID.
Limitations to Shared Services
There are certain limitations to Shared Services, listed below:
• If there is an init method, it cannot take any arguments.
• Service options are set when the Service Instance is created initially; you
cannot override these Service options on subsequent attaches.
• Clients that share Services must be the same type. For example, a Java Driver
cannot share a Service created with CPPDriver.
Never use the same Shared Service from within the same process, or launch
multiple Drivers with the same data/log directories. Shared Services are not
designed for such situations and there is no benefit or reason to do so. Doing so
can result in premature task data deletion, and poor performance.
TIBCO GridServer
®
Developer’s Guide
|
65
Ending a Shared Service
To cancel an entire Shared Service, use the Administration tool (at Services >
Servides > Service Session Admin) or the Web Service Admin interface. When a
client cancels a Shared Service instance, it cancels only the tasks it submitted;
other clients' tasks continue. The Shared Service becomes inactive when the last
client detaches from the Service. The inactive Service closes after waiting for the
amount of time specified by
SHARED_SERVICE_INACTIVITY_KEEP_ALIVE_TIME. If
this variable is not set or has a value of 0, the Service closes immediately.
Shared Services and Failover
Do not depend upon Engine state for a Shared Service being maintained through
failover. Engine update information can reside on several Drivers running the
Shared Service. If, after failover, all of these Drivers are not available or not
running the Service, Engine state is indeterminate.

TIBCO GridServer
®
Developer’s Guide
66
|
Broker Spanning Services
A normal Service runs on a single Broker and is available to the Engines
connected to that Broker. Using Broker Spanning, a single Service can take
advantage of all Engines on an entire grid across all of the grid’s Brokers. When
Broker Spanning is enabled on a Driver, the Driver concurrently maintains
connections to a user-defined set of Brokers, and tasks for Services are submitted
to all of those Brokers.
Enabling Broker Spanning on a Driver
Broker Spanning is enabled at the Driver level. When enabled, all Services are
panned over all Brokers. To enable Broker Spanning on a Driver, set
DSBrokerList to a semicolon-delimited string of Broker names for all the Brokers
you want to span.
For example:
DSBrokerList=London1;London2;Cambridge
Note that you must allow the Driver on all Brokers in the list.
You can also set
DSBrokerList to the wildcard character of *. This will set the list
to all Brokers on which the Driver has the Execute Services permission. This
includes offline Brokers.
When Broker Spanning is enabled, the Driver will submit an independent Service
for each of the Brokers specified in
DSBrokerList. The Services submitted to each
of the Brokers are separate entities, but for the convenience of the user, will have
the same Service ID. This allows the user to reference the Services easily across the
Brokers when using the Dashboard. While Service IDs for the Broker Spanning
Services are the same across all spanned Brokers, the Task IDs for the spanned
Service is unique across all spanned Brokers and the Task ID is maintained if the
task is moved across spanned Brokers.
Admin API Usage
For the purposes of Broker Spanning, the Admin API provides a way to specify
which Manager the Admin API is acting on.
AdminManager.setManager() takes
the name of the Manager it acts on as a string parameter. Admin API components
retrieved act only on the Manager most recently specified by
AdminManager.setManager(). To perform Admin API operations on multiple
Managers at the same time, prepare collections of Admin API component objects
retrieved after each
AdminManager.setManager() call. For example, if you want
to get all
EngineInfos for all spanned Managers, call
TIBCO GridServer
®
Developer’s Guide
|
67
AdminManager.setManager() followed by a call to
AdminManager.getEngineAdmin() for the Manager last specified by
AdminManager.setManager(). This should be done for each of the Managers.
Each of the
EngineAdmins can now be used to call
EngineAdmin.getAllEngineInfo() to retrieve all the EngineInfos associated
with that
EngineAdmin’s Manager. See Chapter 9, The Admin API, on page 161
for more information.
Scheduling and Task Expiration
When Broker Spanning is enabled, the Driver continuously attempts to maintain
connections to all Brokers. It assigns tasks to Brokers using a simple algorithm
that attempts to balance the workload. If a connection times out on any Broker,
the Driver will do Driver-side expiration and resubmit any outstanding tasks to
the remaining Brokers. In the event of a Broker failure, long running tasks will
continue to run on Engines; when they log into the Director, they will be directed
to whichever Broker ended up with the expired task.
After submitting a large number of tasks, some Brokers may contain tasks in the
queue to execute whereas other Brokers may not. When Task Expiration is
enabled, tasks expire on the Broker if they are not scheduled to any Engine after a
specified period of time after submission. Task Expiration alleviates the problem
of unbalanced Broker queues. Upon expiration, tasks are automatically assigned
to the next appropriate Broker. Task Expiration is available for Broker Spanning
Services only.
To activate Task Expiration, set the following Service options:
•
PENDING_TASK_TIMEOUT — To enable Task Expiration, set this to a value
indicating the number of minutes to wait before reassigning tasks to another
Broker.
•
TASK_EXPIRATION_START_OFFSET — Optionally enables you to delay the
start of Task Expiration by a specified number of minutes. This offset
represents a one-time delay in starting the timer to check for Task Expiration.
For example, if the value of
PENDING_TASK_TIMEOUT is set to 5 and
TASK_EXPIRATION_START_OFFSET is set to 60, the first task to be expired will
be 65 minutes after the Service was submitted to the Broker. Additional task
expiration would happen every 5 minutes after the first expiration event. The
Broker first waited for
TASK_EXPIRATION_START_OFFSET to pass (60 minutes)
before starting the
PENDING_TASK_TIMEOUT timer (5 minutes) for a total of 65
minutes. The default value for
TASK_EXPIRATION_START_OFFSET is 0.
You can also tune Task Expiration on the Broker by specifying the following
values in the Administration Tool at Admin > System Config > Manager
Configuration > Services:
TIBCO GridServer
®
Developer’s Guide
68
|
• Minimum Tasks to Expire — You can require that a certain number of tasks
expire regardless of the Percentage of Tasks to Expire (Given that there are
eligible tasks to expire).
• Percentage of Tasks To Expire — You can expire only a percentage of tasks of
those eligible for expiration every minute.
• Idle Broker Only Task Expiration Enabled — When enabled (the default),
this setting prevents tasks from expiring if there is not an idle Broker
available.
Administration
Broker Spanning Services can be viewed and administered in the GridServer
Administration Tool, at Dashboard > Spanned Services. This page is only
viewable on Directors. By default, this page will show no Services; you must first
perform a search using the Search tool. Administrators can dynamically change
Pending Task Timeout and Task Expiration Start Offset on each Service from this
page.
Broker Spanning Service Limitations
Broker Spanning Service limitations are as follows:
• Shared Services are not supported. Shared Service functionality conflicts with
Broker Spanning Services.
• GridCache is not supported. Since a Service’s cache is local to a Broker, the
tasks from other Brokers cannot access each other’s caches.
• Task Dependencies are not supported. Task Dependency is Broker-scope and
therefore cannot work across Brokers.
• Service dependencies are not supported. Service Dependency is Broker-scope
and therefore cannot work across Brokers.
• AutoPack is not supported.
• PDriver is not supported.
• The number of priority levels, which is set at Admin > System Admin >
Manager Configuration > Services > Scheduling, must be the same on all
Brokers. If you change this value on a Broker, you must restart the Broker.
• Engine Timeout Minutes > 0 is not supported. That is, if an Engine logs off
while working on a Task, it will not continue to work on that while attempting
to log back in to a Broker.

TIBCO GridServer
®
Developer’s Guide
|
69
Service Groups
Service Sessions can be collected together in a group to aid in administrative
tasks. A convenience class called
ServiceGroup is provided in the API, which
enables you to create a Service Group and later create new Service Sessions within
the Service Group. Each new Service Session created within a Service Group is
automatically assigned
Description.SERVICE_GROUP_ID, a generated random
unique ID for that group.
To view and maintain Service Groups, select Services > Services > Service Group
Admin. The Service Group Admin page enables you to take actions on an entire
group of Services at once, similar to the way you can act on Services on the
Services > Services > Service Session Admin Page. For example, you could
cancel a Service Group, which would cancel all of the Service Sessions within that
Service Group.

TIBCO GridServer
®
Developer’s Guide
70
|
Data References
Data References are a convenient programming interface for passing lightweight
references to data across the network. A Grid client or Service can create Data
References, pass them over the network, but leave the data where it created the
original Data Reference. If any Grid client or Grid node actually needs the data, it
can de-reference the object and the data is automatically downloaded from the
original source.
You can use this abstraction for generalizing Grid workflows. A Grid client can
receive the results of a particular Service as a reference, and then send another
request to the Grid with that reference. The GridServer Engine that services the
request de-references the data object, loading it from the original Grid node that
produced the data. This is equivalent to passing pointers across the network.
A
DataReference is an Object that you can pass interoperably if you use it as an
argument, return type, or a GridCache object. Note that to work interoperably, it
must be the actual object passed; it can’t be part of another object.
To create a
DataReference, use a DataReferenceFactory. You cannot create
Data References with a null source. To retrieve the actual data, use the
fetch
methods. The data is not cached after a
fetch, that is, each fetch retrieves data.
After a reference expires, a
fetch throws a FileNotFound exception. A downed
Client throws a Connect exception, although in some cases, refused connections
are due to other causes, such as socket backlog limitations.
When an object is transmitted over the network, it is serialized on the sending
side and then reconstituted completely in memory on the receiving side. The
larger the object, the more memory it occupies. In situations with large
DataReference objects, you should use DataReferenceOutputStream instead.
Streaming the data can reduce the memory that would otherwise be necessary to
reconstitute it in its entirety. As an added benefit, streaming also saves the time it
would have taken to reconstruct the entire object.
C++ Data References
Because there is no inherent serialization support in C++, functionality is added
to convert a Data Reference to a
byte[] (and the reverse) so that it can be sent to
another client and used by that client.
Because reflection is not available in C++, object Data References are not available
from the C++ API.
TIBCO GridServer
®
Developer’s Guide
|
71
Python Data References
As a result of Python wrapping the C++ Driver, object Data References are not
available from the Python API.

TIBCO GridServer
®
Developer’s Guide
72
|
Service Collection
By default, the Driver Service Instance collects results as soon as they are
available. In some cases, you want to collect results at a later time, or never collect
them. Service collection can be defined with the Service Option
COLLECTION_TYPE. Possible values for COLLECTION_TYPE include IMMEDIATELY,
LATER, NEVER, and AFTER_SUBMIT.Values used with COLLECTION_TYPE are as
follows:
The
LATER and NEVER collection modes are not for long running Services. Use
them only for batch submissions that finish quickly. If you use them for Services
with indefinite duration, there is no way to clean up the inputs.
Collect After Submit
A common Service pattern is to submit all of your requests, then wait for the
results. When using this pattern, the
AFTER_SUBMIT collection mode should be
used. This enables optimal submission without network competition from
collection.
Table 9 Service Collection Values
Value Description
AFTER_SUBMIT Collection will not begin until all tasks have been
submitted. See Collect After Submit, page 72 for more
information. This enables optimal submission without
network competition from collection when the Service
follows the “submit all, collect results” pattern.
IMMEDIATELY Task outputs are collected as soon as they are ready. This is
the default.
LATER Task outputs are not collected in this Service. Another
Service collects them later. See Deferred Collection (Collect
Later) on page 73 for more information. This is not available
from a Service proxy.
NEVER Task outputs are not collected. See No Collection (Collect
Never) on page 76 for more information. This can be used,
for example, in the case where a Service write data directly
to a database. This is not available from a Service proxy.
TIBCO GridServer
®
Developer’s Guide
|
73
When this mode is used, collection of the results begins when either
Service.waitUntilInactive(long) or Service.destroyWhenInactive() is
called.
Also, when using this mode or even when using some hybrid pattern that
submits many requests at a time,
Options.INVOCATIONS_PER_MESSAGE must
always be set greater than one, to speed submission time.
Calling
Service.execute(String methodname, Object data) will not work
with this collection type; an instance of
ServiceException will be thrown.
The following is an example of using the
AFTER_SUBMIT collection mode:
Properties props = new Properties();
props.setProperty(Options.COLLECTION_TYPE,
Options.Collection.AFTER_SUBMIT);
props.setProperty(Options.INVOCATIONS_PER_MESSAGE, "20");
Service s =
ServiceFactory.getInstance().createService(serviceType, null,
props, null);
// submit all the work
for (int i = 0; i < numInputs; i++) {
s.submit("myMethod", getData(i), handler);
}
s.waitUntilInactive();
Fault Tolerance
In the event of a Driver failure, the Broker will autocancel the Service after the
interval specified by the Client Timeout setting. It is possible to collect tasks from
a failed client application for Services of type
Collection.AFTER_SUBMIT and
Collection.IMMEDIATELY if cancellation has not yet occurred. To do this, you
must collect and pass in the Driver session ID, in the same fashion as collection of
a
Collection.LATER Service, as described in Deferred Collection (Collect Later)
on page 73.
Note that for fault tolerance to work, the collecting Driver must be the same
platform as the original submitting Driver. That is, if the Service was created with
Java Driver, it must also be collected with Java Driver.
Deferred Collection (Collect Later)
The LATER mode indicates that the client can submit and update data to the
Service Session. It does not collect the results, however, as another instance
attaches to the Service Session to collect the results. None of the results are
removed from the Service Session until it is destroyed by the collector. The
LATER
mode cannot be used from a Service proxy.

TIBCO GridServer
®
Developer’s Guide
74
|
There are two reasons to use this method:
1. The architecture requires different applications for submission and results
processing.
2. To recover from a failure in the application that embeds the Driver. Since
results are not removed until the Session is destroyed, if the application
undergoes a failure it can recollect the results when it restarts.
Deferred collection Services require that the submitting Driver to call destroy on
the Service to indicate that submission is complete. If you are using the
submitting Driver in such a way that it exits after submitting the tasks and calling
destroy, do not call
System.exit or exit from the ServiceLifecycleHandler, as
this stops the destroy message from getting to the Broker. Also note that if you are
exiting the submitting Driver immediately, you must set
DirectDataTransfer to
false in the
driver.properties file.
After creating a Service with deferred collection, use
ServiceFactory.getService() to retrieve results. After you collect all results,
call destroy to indicate to the Broker:
• that the instance has collected all outputs and
• to destroy the Session
You can create multiple collectors, but keep in mind that if a collector calls
destroy(), the Service is destroyed and no other collectors can finish collecting
outputs.
The following is an example of how to use the
LATER mode with recovery:
// Creates a new Session and submits requests to the Session
// @param serviceType The type
// @param methods The list of methods
// @param args The list of arguments
// @return The id of the Session
// @throws Exception on error.
private String submitService(String serviceType, String methods[], Object[][] args)
throws Exception {
// create the session as a Collection.LATER type
Properties props = new Properties();
props.setProperty(Options.COLLECTION_TYPE, Options.Collection.LATER);
Service cs = ServiceFactory.getInstance().createService(serviceType,
null, props, null);
// Submit all requests.
// Note that the handler must be null because this Instance cannot collect.
for (int i = 0; i < args.length; i++) {
cs.submit(methods[i], args[i], null);
}
String id = cs.getId();
// destroy to indicate that submission is complete, and to free local
// resources
cs.destroy();

TIBCO GridServer
®
Developer’s Guide
|
75
// save this ID to a file, for recovery purposes
saveServiceForRecovery(id);
return id;
}
// Starts collection of results from a Collection.LATER Session
// @param id The id of the session
// @param handler The invocation handler
// @throws Exception on error.
private void collectService(final String id, ServiceInvocationHandler handler)
throws Exception {
// create a handler that removes this Service ID from the list in the file
// when it is finished
ServiceLifecycleHandler slc = new ServiceLifecycleHandler() {
public void destroyed() {
removeServiceFromRecovery(id);
}
public void destroyed(ServiceException e) {
removeServiceFromRecovery(id);
}
};
// get an instance of the session, which starts collecting results
Service cs = ServiceFactory.getInstance().getService(id, handler, slc);
// set the Service to be destroyed when it finishes collecting all output
cs.destroyWhenInactive();
}
// Runs a Service by first creating a Collection.LATER Session, submitting all
// requests, then getting the collection instance to collect the results.
// @param serviceType The type
// @param methods The list of methods
// @param args The list of arguments
// @param handler The invocation handler
// @throws Exception on error.
private void runService(String serviceType, String methods[], Object[][] args,
ServiceInvocationHandler handler) throws Exception{
String id = submitService(serviceType, methods, args);
collectService(id, handler);
}
// Recovers from an application failure by starting collection of Sessions that
// did not complete collection prior to failure
// @param handler The invocation handler
// @throws Exception on error.
//
private void recoverAll(ServiceInvocationHandler handler) throws Exception {
String[] recovered = getAllRecoveryServices();
for (int i = 0; i < recovered.length; i++) {
collectService(recovered[i], handler);
}
}
TIBCO GridServer
®
Developer’s Guide
76
|
Deferred Collection Failover
While other Sessions manage failover by resubmitting all outstanding tasks to a
Failover Broker, in this case the submitting Session has already been destroyed,
and the Driver may even be offline. So, to handle failover in this case, you must
do the following:
1. Every standard Broker must have one Failover Broker associated with it.
2. Configure a shared filesystem that can be accessed from each Broker pair.
3. Go to Admin > System Admin > Manager Configuration > Services, and
under the
DataTransfer
heading, change the
DataTransfer
Base Directory to
the location of the shared filesystem for each pair. Each pair must have its own
directory
4. If the submitting Driver does not use an external webserver and it disconnects
after submission, disable DDT. The data will then be served by the Broker
from the shared filesystem.
5. Since the collecting Driver cannot auto-resubmit when the results cannot be
collected from a Daemon that is offline, it’s recommended that DDT is also
disabled on Engines.
6. The submitting and collecting Drivers must be allowed to login to both
Brokers in the pair
If a Broker fails while the Service is running, the Failover Broker will take over by
recreating the task queues. If the original Broker comes back up, the Failover will
relinquish control and the original will recreate the task queues.
When the collecting Driver starts to collect, if the original is down, it will collect
results from the Failover. If that then comes up, it will migrate to the original and
continue.
No Collection (Collect Never)
The NEVER collection mode enables a Service to submit tasks and not collect them.
Such a Service, for example, writes results to a database. Services created with
NEVER collection can only submit and update. Calls to execute throw an
Exception. This collection mode is not available when using a Service proxy. To
create a
NEVER collection Service, set the CollectionType option to NEVER.
Calling destroy releases resources locally on the Driver, and indicates that the
Instance is finished with submission. If the Driver is shut down and times out, the
session is considered to be done submitting, just as if the Driver called destroy.
After the session finishes submitting due to one of the two prior events, and all
tasks complete or fail, the session automatically closes.
TIBCO GridServer
®
Developer’s Guide
|
77
No Collection Failover
There are no special issues with failover on No Collection Services, and as many
Brokers as you want can be used to recover any running Services. You would,
however, need to ensure that any database to which you are sending results has
its own failover or redundancy configuration in case of failure.

TIBCO GridServer
®
Developer’s Guide
78
|
Engine Pinning
Engine Pinning enables a Service Session to specify that once an Engine has
worked on a Service Session, it cannot work on any other Service Sessions as long
as that session is in progress. This enables you to quickly replicate 1-to-1
architectures, or if for legacy reasons or lack of availability to source code to
maintain massive amounts of expensive-to-replay state on an Engine.
Typically, you use Engine Pinning in conjunction with Max Engines to limit one or
a set of Engines to work solely on a Service.
Engine Pinning is available for any type of Service. It is exposed as two
Engine-side methods,
pinToService() and unpinFromService(). If an Engine
calls
pinToService() while working on a task for a Service, it is marked as
pinned to the session when it completes the task, regardless of whether the task
succeeded. From this point, the Engine takes tasks only from this Service. Once
the session finishes, or when the Engine calls
unpinFromService(), the Engine is
no longer pinned and can work on other Services.
Engines that are pinned are unpinned automatically in the following
circumstances:
• If the Broker loses its connection with the Engine for any reason (such as loss
of heartbeat)
• If the Engine process terminates for any reason
• If an Engine performs a soft logoff due to Engine Sharing
• If a task fails due to an error in DataSynapse code (such as reading input)
• If the session is destroyed
Exceptions issued by user code that result in task failure do not cause an Engine
to be unpinned, unless the exception specifies Engine restart, in which case the
above requirement applies.
You can configure Engine balancing so pinned Engines are always reported as
busy by Brokers. This will prevent the Engine from being shared to other Brokers.
This can be configured at Admin > System Admin > Manager Configuration >
Engines and Clients, under the Engine Balancing heading, with the Tre at
Pinned Engines as Busy parameter. This is false by default.
You can implement other pin/unpin strategies—for instance, unpinning after a
certain amount of idle time, or when the Broker queue is empty—as a separate
Engine thread that polls for a given condition and unpins as necessary.

TIBCO GridServer
®
Developer’s Guide
|
79
Running a Driver from an Engine Service
It’s possible to run a recursive Service, which is a Service that runs a Driver on the
Engine to call a Service. To do this, you must deploy the Driver packaged in a
Grid Library.
To run a Driver from an Engine Service:
1. In the
GridServer
Administration Tool, go to the top navigation bar, and click
the Downloads icon.
2. Click the SDK for your platform to download it.
3. Package the
driver.properties file in a Grid Library. (For more information
on creating Grid Libraries, see Chapter 6, Creating Grid Libraries, on
page 113.) In the
grid-library.xml, set the environment variable
DSDRIVER_DIR to the value $ds.GridLibraryRoot$. Also set the jar-path
element to
$ds.GridLibraryRoot$. The grid-library.xml should look
similar to the following:
<?xml version="1.0" encoding="UTF-8"?>
<grid-library>
<grid-library-name>
driver-properties
</grid-library-name>
<grid-library-version>7.0</grid-library-version>
<environment-variables>
<property>
<name>DSDRIVER_DIR</name>
<value>$ds.GridLibraryRoot$</value>
</property>
</environment-variables>
<jar-path>
<pathelement>
$ds.GridLibraryRoot$
</pathelement>
</jar-path>
</grid-library>
4. Create a Grid Library that contains all of the DLLs or JAR required to run the
Driver. For example, to run CPPDriver for VC14, you would need to create a
Grid Library that contained all of the DLLs from the
cppdriver/bin/vc14
directory of the SDK in a
bin/vc14 directory inside the Grid Library. Make
this Grid Library dependant on the
driver-properties Grid Library, and set
the
lib-path to the location of the DLLs. The grid-library.xml should look
similar to the following:
<?xml version="1.0" encoding="UTF-8"?>
<grid-library os="win64">
<grid-library-name>
cppdriver-win64-vc14
</grid-library-name>
TIBCO GridServer
®
Developer’s Guide
80
|
<grid-library-version>7.0</grid-library-version>
<dependency>
<grid-library-name>
driver-properties
</grid-library-name>
</dependency>
<lib-path>
<pathelement>.\bin\vc14</pathelement>
</lib-path>
</grid-library>
5. Upload and deploy both Grid Libraries on the
Services > Services > Grid
Libraries
page.

TIBCO GridServer
®
Developer’s Guide
|
81
Chapter 5
PDriver
The PDriver, or Parametric Job Driver, can execute command-line programs as a
parallel processing service using the GridServer environment. This driver lets you
run a single program on several Engines and return the results to a central
location, without writing a program in Java, C++, or .NET.
Topics
• Overview, page 82
• Installing PDriver, page 83
• PDriver Commands, page 84
• About PDS Scripts, page 90
• Variables, Types and Expressions, page 101
• Statements, page 106
• Example, page 111

TIBCO GridServer
®
Developer’s Guide
82
|
Overview
The PDriver, or Parametric Job Driver, can execute command-line programs as a
parallel processing service using the GridServer environment. This driver lets you
run a single program on several Engines and return the results to a central
location, without writing a program in Java, C++, or .NET.
PDriver achieves parallelism by running the same program on Engines several
times with different parameters. A script defines how these parameters change.
For example, a distributed search mechanism using the
grep command can
search a network-attached file system, giving each task in the Service a different
directory or piece of the file system to search. Scripts can iteratively change the
value of variables that are passed to successive tasks as parameters, step through
a range of numbers, and use each value as a parameter for each task that is
created, or define variables containing lists of parameters.
PDriver uses its scripting language, called PDS, to define Services. You can also
use these scripts to set options for a PDriver Service, such as remote logging and
exit-code checking.

TIBCO GridServer
®
Developer’s Guide
|
83
Installing PDriver
PDriver comes with with the GridServer SDK. For installation details, see The
Parametric Job Driver (PDriver) on page 25.
To use PDriver with SSL, you must configure your Manager to use SSL for all
connections. For directions, see the GridServer Installation Guide.
Resource Deployment
If you plan to run any custom executables using PDriver, deploy them to Engines
using GridServer’s application resource deployment feature, described in the
GridServer Administration Guide. Deploy resources in the
deploy/resources/platform/lib directory or in another directory referenced by
the
execute command.

TIBCO GridServer
®
Developer’s Guide
84
|
PDriver Commands
Use the following commands to run, batch, and cancel PDriver Services on Unix
and Windows systems.
The pdriver Command
Start PDriver with the pdriver command:
pdriver [ -bsub | -bcoll batchid | -parallel] [-RA] [-noprompt]
[-user driverusername] [-pass driveruserpassword] [-domain
windowsdomain] script
Table 10 PDriver Commands
Command Description
pdriver Starts PDriver, and runs a PDS script.
bsub Starts a one-time Service batch submission.
bcoll Collect a batch job on a one-time basis.
bstatus Lists status on pending batch jobs.
bcancel Cancels a pending batch job.

TIBCO GridServer
®
Developer’s Guide
|
85
The pdriver command runs the script specified with script. The following table
describes the arguments you can use:
Table 11 PDriver Command Arguments
Argument Description
bsub and bcoll Use bsub and bcoll for batch submission and
collection. Use them to
• Submit long-running Services without tying up the
Driver. Submitting a Service using
bsub creates a
Batch Execution with a Batch ID that you can use to
run the Service unattended and collect the outputs
later. The Batch Executions created are of the same
type as those from the Batch scheduling facility. See
the GridServer Administration Guide for more
information on Batches.
• Run multiple tasks and or prejob/postjob tasks that
the PDS script defines.
parallel When you run a single PDS that contains multiple job
blocks, this option runs the blocks in parallel.
RA RA specifies a Run-as job—a job that runs as the current
user and with the current Windows domain. PDriver
prompts for a password and passes it with the user and
domain for authentication. If you run PDriver on a unix
machine, you must use the
domain argument to pass a
domain, as shown below.
For more information on Run-As, including how to
configure your Engines, the GridServer Administration
Guide.
noprompt noprompt turns off the password prompt and sends no
password when authenticating for Run-as; this is useful
only when you use the
RA argument and Service RA
authentication is disabled on the Broker.
user name and pass
password
When you use the RA argument and run PDriver on a
Windows machine, you can use
user
and
pass
to pass a
Driver user and password (as defined in the GridServer
Administration Tool) to PDriver.

TIBCO GridServer
®
Developer’s Guide
86
|
The bsub Command
You can also run a one-time Service batch submission with the bsub command:
bsub [ -name name ] [ -priority val ] [ -disc setting ] [ -mail address ]
[ -stdin file ] [ -stdout file ] [ -stderr file ] [ -nfs ] [-RA] [-domain
windowsdomain] [-noprompt] app [args...]
This submits a single Service, defined by app [args...], to be scheduled and run
on the Grid. The arguments are as follows:
-domain
<windowsdomain>
When you are using the RA argument and running
PDriver on a Unix machine, you can use the
domain
argument to specify a win32 domain for Windows Engines
to use when authenticating.
Table 11 PDriver Command Arguments (Continued)
Argument Description
Table 12 bsub Command Arguments
Argument Description
name Name of the Service.
priority Priority of the Service.
disc Indicates a name comparator value discriminator expression that
must be satisfied to assign a Service or task to a node. For
example, valid settings include
os==win32 or cpuNo>=4. You
can use this switch multiple times. Put quotes around
parameters containing a greater-than or less-than symbol.
mail Email address to send a confirmation message to when the
Service is completed.
stdin File to use as input for the Service. This setting is variable based
on the
-nfs switch, described below.
stdout File to use as output when -nfs is enabled.
stderr File to use as error output when -nfs is enabled.

TIBCO GridServer
®
Developer’s Guide
|
87
When you submit the Service, a batch ID is reported to the console. Use this ID
when collecting outputs (when using the staging directory for input and output
rather than NFS mounts.)
The bcoll Command
To collect batch jobs on a one-time basis, use the bcoll command:
bcoll batchid
This is a convenience utility for retrieving the jobname.out and jobname.err files
generated by
bsub with nfs mode off. The argument is the batch ID indicated
when
bsub is finished submitting.
nfs Indicates whether inputs and outputs are available on a shared
file system or whether you must stage them on the Manager.
When enabled,
-stdin, -stdout, and -stderr function as
absolute locators for these files. When not enabled,
-stdout and
-stderr are ignored, and files designated as jobname.out and
jobname.err are placed in the staging directory. When not
enabled,
-stdin refers to a file on the Driver file system which is
to be staged on the Manager and retrieved by the Engine
performing the Service.
RA Runs
the job on Engines as the current desktop user with the
current Windows domain. PDriver first prompts for a password.
domain Lets you specify
a Windows Domain for Windows Engines to use
when authenticating. This applies only when running PDriver from
a Unix machine.
noprompt noprompt turns off the password prompt; this is useful only
when Service RA auth is disabled on the Broker.
<app>
[args...]
The application to run, and any optional arguments. The
application is a binary or script on the Engine and found in the
Engine’s path.
args are any arguments passed to the
application.
Table 12 bsub Command Arguments (Continued)
Argument Description

TIBCO GridServer
®
Developer’s Guide
88
|
To check the status of a Batch Job, you must be running PDriver with a Driver
user that has the appropriate Security Role on the Manager. To do this, create a
Driver user mapped to a role with access to the Batch Admin View feature (such
as the default Manage role), and set
DSUsername and DSPassword in the
driver.properties file to this username.
The bstatus Command
To get status on batch jobs, use the bstatus command:
bstatus [ -jobs ] [ -engines ] [ -stagedir id ] [ -canceljob id ] [
-batches]
bstatus accepts the following arguments:
The
bstatus command prints its output interspersed with Manager log output
on
stderr. To view only the bstatus output on a Unix system, you can redirect
stderr to null, for example, with bstatus -jobs 2>/dev/null. Windows users
can use the syntax
bstatus -jobs 2>&0.
Table 13 bstatus Arguments
Argument Description
jobs Lists all jobs on the Manager. This does not include pending
batch jobs. The output displays name, jobid, tasks, priority,
and status for each job. If there are no jobs, only the four
rows of heading lines are returned.
engines Lists all Engines connected to the Manager. The output
displays name, ID, OS, and status of each Engine. If there
are no jobs, only the four rows of heading lines are returned.
stagedir Lists all files living on the staging directory for the given job
ID or batchjob ID.
canceljob Cancels a job. This only works for job IDs, not batch IDs,
and the Driver must have appropriate permissions for this
operation.
batches Lists all Batch jobs on the Manager and their status. The
output displays name, batchid, and status of each Batch. If
there are no batches, no output is returned.
TIBCO GridServer
®
Developer’s Guide
|
89
To check the status of a Batch Job, you must be running PDriver with a Driver
user that has the appropriate Security Role on the Manager. To do this, create a
Driver user mapped to a role with access to the Batch Admin View feature (such
as the default Manage role), and set
DSUsername and DSPassword in the
driver.properties file to this username.
The bcancel Command
To cancel a batch job pending on the Manager, use bcancel:
bcancel batchid
The argument is the batch ID returned by bsub or pdriver in bsub mode.
There is an important distinction between batch IDs and Service IDs. A batch ID
refers to a Service that is pending execution in the batch queue but has not been
handed over to the scheduler. Once that Service is scheduled, a Service with a
separate Service ID is launched. The
-canceljob switch in bstatus only works
for Service IDs. To remove a pending batch job,
bcancel must be used. This is
unavoidable, since running Services and pending batch jobs are separate entities
and are tracked differently. Likewise, to perform output collection and to see the
contents of the staging directory, the batch ID must be used. This is due to the fact
that at batch submission, only the batch ID is known, since the Service ID is not
generated until run-time. Therefore the batch ID is used as a key for the staging
directory.

TIBCO GridServer
®
Developer’s Guide
90
|
About PDS Scripts
PDriver uses scripts written in the PDS syntax to define how a Service operates.
Aside from defining what programs are run during a Service, PDS scripts enable
you to define what happens before and after a task or Service. It also enables you
to schedule Services to run in the future, add conditional structure to a Service,
and pass custom parameters to a Service or task.
The PDriver script (hereafter referred to as PDS) language enables the expression
of distributed computations that are composed of executable programs. It is
designed so that typical computations are easy to describe, while providing for
advanced features like conditional execution, iteration, scheduling and
discriminators.
This section is a reference for the PDS language. For sample PDriver scripts, see
the
examples/pdriver directory of the GridServer SDK.
PDS Basics
A single PDS file corresponds to a single GridServer Service. The computation
represented by the Service usually does the following:
1. Split up the input data into several pieces, one for each task.
2. Run the tasks in parallel on the Engines.
3. Collect and combine the results.
If the data is too large to be passed as command-line arguments to the program
running on the Engine, then place it into files. You can locate these files in a
shared directory, or copy them to the Engine and copy back the result files.
The PDS language contains constructs for carrying out various statements, such
as running executables and copying files, at each point in the lifetime of a Service.
A few words about the lexical structure of PDS: whitespace is not significant, but
case is. All text from the “#” character to the end of the line is a comment and is
ignored.
PDS Structure
A PDS file begins with the keyword job (a synonym for Service) and ends with
the keyword
end. Supply a name after job to identify the Service. Two types of
elements can occur in between
job and end: parameter declarations, which assign
values to variables, and blocks, which describe features or statements of the
Service. The
options, schedule and discriminator blocks describe various

TIBCO GridServer
®
Developer’s Guide
|
91
facets of the Service, such as when to run it and which Engines can accept its
tasks. The other five blocks describe statements to be executed at different phases
of the Service. All blocks are optional except for the
task block. Multiple job
blocks also be defined in a single PDS file, and they run sequentially by default.
You can also run the
pdriver command with the -parallel flag to run multiple
jobs in one PDS file in parallel.
The table below details the structure of a PDS file:
job jobname
options
onerror ( fail | retry | ignore )
maxFailedTaskRetries =
val (default: 3)
enableBlacklisting = true|false
jobPriority = <val> (default: 5)
autoCancelMode = "always" | "never" | "libloadfailure"
jobOption "
key" "val"
jobDescription "
key" "val"
end
<variable assignment>
schedule
properties
[email = "address"]
Figure 2 The structure of a PDS file.
TIBCO GridServer
®
Developer’s Guide
92
|
end
discriminator
[ affects
properties
end ]
properties
end
prejob
statements
end
pretask
statements
end
task taskcount
statements
end
posttask
statements
end
postjob
statements
end
end
The Depends Statement
Multiple job blocks can be included in a single translation unit (a PDS file and
any included PDS files), and by default, they run sequentially. It is also possible to
define jobs that run based on the completion or failure of other jobs using the
depends statement within a job block. For example, the job containing the
following code runs if
firstjob succeeds, if secondjob fails, and following
thirdjob in either case:
depends
firstjob succeeds
secondjob fails
thirdjob succeeds or fails
end
The Include Statement
You can include another PDS script within a PDS script by using the include
statement. For example:
include "filename"
TIBCO GridServer
®
Developer’s Guide
|
93
This includes a PDS script contained within filename. The filename can be
declared with any string type. The filename is relative to the working directory
from which you run PDriver, and can contain a relative or absolute path to a PDS
file. The PDS file must contain a full job, and you can use it only outside the
top-level
job block. For example, a single PDS file can contain three include
statements, each one including a
job block stored in another file.
Lifecycle Blocks
Lifecycle blocks include statements that execute during the life of a Service. The
following sections describe the lifecycle blocks.
Other blocks include the options block, discriminator block, and schedule block.
prejob
The prejob lifecycle block executes once at the very beginning of the job before
any tasks are submitted to the Manager. These commands execute on the Driver.
pretask
The pretask lifecycle block executes once on every Engine that processes tasks for
the job, before any tasks are processed. Use this block for generic initialization
such as obtaining input files common to all tasks.
task
Commands in the task lifecycle block execute once per task. The number of tasks
in the Service is determined by the expression following the
task keyword. Array
variables referenced in the task block are indexed by the task ID, as explained in
more detail in the Arrays section, below.
Since the same Engine can take more than one task, the statements in the
task
block run many times on the same Engine. The statements in the
pretask and
posttask blocks run only once per Engine.
The task block is the only required block in a PDS file. Thus a computation that
only required executing a program ten times could be expressed by the PDS
program:
job simple
task 10
execute "myprog"
end
end

TIBCO GridServer
®
Developer’s Guide
94
|
posttask
The posttask lifecycle block executes once on every Engine at some point after the
job finishes. Place Engine cleanup tasks here. Please note however that the
Engine’s file cleaner automatically cleans all files in the
DSWORKDIR directory. The
posttask block typically executes after the postjob block executes on the Driver
side, although it is not guaranteed to execute then. Execution order of the blocks
in a PDS file is typically
prejob, pretask, task, postjob, and posttask, but this
is not guaranteed.
postjob
The postjob lifecycle block executes once on the Driver after all tasks finish. Use
this block to obtain outputs from the staging directory, run post-processing
scripts, and so on.
The Options Block
Use the options block to set Service options and description information.
Use the following directives for features specific to PDriver jobs:
Table 14 Options Block Keywords and Arguments
Keyword Argument Description
onerror ignore, retry or
fail
The default way to handle errors. See “Builtin
Commands” below for details.
maxFailedTaskRetries A numeric
expression
The number of times to resubmit a failed task.
autoCancelMode never, always or
libloadfailure
Whether to cancel the entire job when a single
task fails. The default is
libloadfailure, which
cancels the job if a task fails due to the inability to
load a library on the Engine side. You can set this
standard option with
jobOption, but the
autoCancelMode directive enables you to use
mnemonic strings, rather than numbers, as
arguments.
enableBlacklisting An expression
evaluating to
true
or
false
This argument is the same as
engineBlacklisting for other Services. The
default value is
false.

TIBCO GridServer
®
Developer’s Guide
|
95
Set standard options (described in the C++ API reference documentation for the
Options object) with the jobOption directive:
jobOption "engineBlacklisting" "true"
jobOption "priority" "8"
Set elements of the job description with the jobDescription directive:
jobDescription "serviceName" "Distributed Grep"
Each argument to jobOption or jobDescription must be a string or an
expression that evaluates to a string. Literal numbers are not allowed.
The following
jobOption directives are common to both PDriver and CPPDriver:
Table 15 jobOption Directive Keywords and Arguments
Keyword Argument Description
email string An email address which is notified when a Service is
completed.
priority integer The priority of this Service. The default value is 5.
taskMaxTime integer If a running task exceeds this amount of time in seconds,
the task is rescheduled or retried based on the setting of
rescheduleOnTimeout. The task is rescheduled or
retried when the rescheduler checks for expired tasks after
each poll period. This poll period is 60 seconds by default; it
can be changed at
Admin > System Admin > Manager
Configuration > Services
, under the Service Rescheduler
heading, with the Poll Period property. The default value
of
taskMaxTime is infinite.
autoCancel 0, 1, or 2 Whether to automatically cancel the Service on a task
failure. Possible values include 0 (AUTO_CANCEL_NEVER),
1 (
AUTO_CANCEL_LIBRARY_LOAD), or 2
(
AUTO_CANCEL_ALWAYS). The default value is 1
(AUTO_CANCEL_LIBRARY_LOAD).
compressData true or false Whether to compress the task, input, and output data.
Compression time is minimal and recommended for data
sizes greater than 10K for each input or output. The default
is
false.

TIBCO GridServer
®
Developer’s Guide
96
|
killCancelledTasks true or false Whether to kill and restart an Engine if a task is cancelled. If
false, the cancelled method is called rather than killing
the Engine, to provide user-defined interruption of the task
and any necessary cleanup. The default value is
true.
Tasks are cancelled when cancelled in the Administration
Tool, when a Service is cancelled, and when another Engine
completes the task due to redundant rescheduling.
tasksPerMessage integer The maximum number of tasks for each submission or
retrieval message. Regardless of this number, messages do
not exceed 100 KB. The default is 100.
autoPackNum integer The number of tasks in an auto-packed task. In this mode, a
tasklet processes multiple task inputs in one Service routine
by packing task inputs into a single task and calling your
Service routine on all inputs. Use this mode when there are
more inputs than Engines, or tasks are of short duration, to
maximize efficient use of memory and Engine processing
power.
If inputs are added outside of
createTaskInputs, the
Service checks every second if there are any unsubmitted
tasks and submits them in a package even if there are fewer
than the number requested, to ensure that all tasks are
submitted.
Task IDs in the Administration Tool are the IDs of the task
packages, so they do not directly correspond to the task ID
from the Driver and Engine’s point of view.
TaskletException auto-resubmission and task-level
discrimination are not supported for this mode, and are
ignored. Autopack is also not supported on multiplexed
Engines.
The default value is 0.
sharedUnixDir string A directory in which the Driver and Unix Engines exchange
data. This directory must be an NFS mounted directory to
which all Unix Engines working on this job have
read/write access. This overrides use of the fileservers on
the Driver and Engines, and is optimally a directory local to
this Driver for minimum network bandwidth.
If set and using Windows Engines, the Windows shared
directory must also be set to the equivalent of this directory.
Table 15 jobOption Directive Keywords and Arguments (Continued)
Keyword Argument Description

TIBCO GridServer
®
Developer’s Guide
|
97
sharedWinDir string A directory in which the Driver and Engines exchange data.
This directory must be a Windows shared directory to
which all Windows Engines working on this job have
read/write access. This overrides use of the fileservers on
the Driver and Engines, and is optimally a directory local to
this Driver for minimum network bandwidth. Typically,
the share is Windows UNC format, such as
\\server\data.
If set and using Unix Engines, the Unix shared directory
must also be set to the equivalent of this directory.
checkpoint
true
or
false
Enables checkpointing for this Service. The default value is
false.
maxEngines integer The maximum number of Engines that can be working on a
task at a time. The default value is infinite.
statusExpires true or false Whether the status of the job in the
Services > Services >
Service Session Admin
page expires. If false, the status
must be manually removed. The default value is
true.
engineBlacklisting true or false Whether to prevent Engines that fail at a task from taking
other tasks from that Service. The default value is false.
unloadNativeLibrary true or false Whether to unload the native library once the Service
finishes. Set the value to false for sharing global objects in
the library. The default value is
true.
deleteInvocationData 1 or 2 When to purge Service invocation data from display in the
Administration Tool. The default value is 1
(
SERVICE_COMPLETED), to purge when a Service
completes. Set to 2 (
SERVICE_REMOVED), to purge when a
Service is removed from the Administration Tool.
maxTaskRetries integer The maximum number of retries allowed for any task that
fails. A retry occurs if the task failed and
serviceFailRetry is true, or if the task exceed the
taskMaxTime and maxTaskReschedules is false. The
default value is 3.
maxTaskReschedules integer The maximum number of redundant reschedules allowed
for any task, if the any of the rescheduler strategies are in
effect on the Broker. The default value is 3.
Table 15 jobOption Directive Keywords and Arguments (Continued)
Keyword Argument Description

TIBCO GridServer
®
Developer’s Guide
98
|
JobDescriptions
All Services have a
JobDescription object created upon instantiation, with
default settings. Predefined properties are stored in the database. You can define
any other properties. The following
JobDescriptions properties are set by
default:
rescheduleOnTimeout true or false How a task is dealt with if it exceeds the taskMaxTime. If
true, the request is rescheduled, and the current one
continues. If
false, the Engine running the task is killed,
and the task is retried. The default is false.
serviceFailRestart true or false Whether an Engine restarts itself on a Service invocation
failure. The default is false.
serviceFailRetry true or false Whether a Service request is retried on a failure. If true, it
is retried up to the maximum numbers of times, as set by
maxTaskRetries. The default is false.
gridLibrary string A Grid Library that is used for this Service. The string
argument specifies the name of the Grid Library.
gridLibraryVersion string The version of the Grid Library that is used for this Service.
The string argument specifies the version of the Grid
Library.
Table 15 jobOption Directive Keywords and Arguments (Continued)
Keyword Argument Description
Table 16 JobDescription Properties
Property Description
appName The application name.
appDescription The application description.
deptName A department name associated with the Service.
groupName A group name associated with the Service.
individualName An individual’s name associated with the Service.
serviceName The name of the Service. By default, this is the
Service ID.
class The name of the class in the Service.

TIBCO GridServer
®
Developer’s Guide
|
99
The Discriminator Block
This block specifies either a job-level or task-level discriminator for the job. A
discriminator without the
affects clause is considered a job-level discriminator.
You can declare only one job-level discriminator. The
affects clause specifies
conditions that must be met for the discriminator to be applied to a particular
task. You can use multiple discriminator blocks with
affects clauses.
Discriminator declarations consist of a property name, a comparator, and a value:
param-name ==|!=|<|>|<=|>= param-value
The property name refers to Engine properties. A predefined set of properties is
assigned to all Engines by default. The administrator can assign additional
properties to Engines at Engine Properties and Engine Property List. To see an
Engine’s properties, select Engines > Engine Admin, and from the Actions list,
click Engine Details. Property names are case sensitive in PDS scripts. For
example, the following discriminates against Engines with a value of less than 350
in the
cpuMHz Engine property:
cpuMHz > 350
This example shows the format of the affects clause:
discriminator
affects
$DSTASKID #variable
< #comparator
10 #numeric or string
end
The variable can be any array type or built-in variable. $DSTASKID is the number
of the current task, starting with zero. The comparator and numeric or string
match against the literal to determine if the discriminator applies against this task.
The example above applies a discriminator to the first ten tasks in a job.
The Schedule Block
Parameters in this block have an effect only if the job is submitted asynchronously
with
bsub. You can use these schedule declarations:
serviceType The type of Service.
Table 16 JobDescription Properties (Continued)
Property Description
TIBCO GridServer
®
Developer’s Guide
100
|
relative
type = relative
minuteDelay = val
absolute
type = absolute
startTime = "mm/dd/yy hh:mm AM|PM"
With either type, declaring email="string" in the Schedule block sends an email
to the address given in the string when the job is complete.

TIBCO GridServer
®
Developer’s Guide
|
101
Variables, Types and Expressions
Basics
PDS has two primitive types, string and floating-point number, with the usual
notations. You need not declare variables. Variables can take on values of different
types over time. To dereference a variable, precede its name with a dollar sign.
Values are converted to the appropriate type depending on context. For instance,
a string is converted to a number when it appears in an arithmetic expression. The
grammar forbids certain combinations of expressions to catch common mistakes.
Some examples:
a = 5.2
b = "2.5"
c = $a + $b # succeeds, value is 7.7
d = 5.2 + "2.5" # disallowed by the grammar
Scoping
Variables assigned outside of any block are global and visible to all blocks. A
variable assigned within a block is visible only within that block.
Inside a block, you can assign a variable as a global variable, which is visible
within other related blocks. Use the following syntax:
global a = 5.2
The following table describes what blocks are related with respect to scope:
Note that assigning a variable with the same name as a previously defined global
variable does not change the value of the global variable. Instead it, creates a new
local variable in the block, and that local variable has local scope and does not
change the value of the global variable.
Global variable set in Effective in
outside of the lifecycle blocks all blocks
the
prejob block all blocks
the
pretask block pretask, task and posttask
the
task block task and posttask
the
posttask and postjob blocks that block
TIBCO GridServer
®
Developer’s Guide
102
|
Variable Substitution
Variable references are expanded within quoted strings in all contexts. For
example, after
a = "foo"
b = "$a fighters"
the value of b is "foo fighters". Use curly braces to separate a variable name
from adjacent non-whitespace text:
b = "${a}bar" # b contains "foobar"
Inside quotation marks, represent a quote by escaping it with another quotation
mark. Also, inside quotation marks, represent the dollar sign character by
escaping it with another dollar sign. For example:
a = """hello""" # a contains "hello"
b = "$$100" # b contains $100
The backquote can also be used to assign the output of a shell command to a
variable. For example:
datetime = ‘date‘
Expressions
PDS supports the usual arithmetic operators (+, -, *, /) with standard precedence.
All arithmetic operations use double precision floating-point values.
PDS also supports the standard C-style comparison operators
(==, !=, >, <, >=,
<=). These operators perform numeric comparison if both arguments are valid
numbers; otherwise, they perform string comparison. They evaluate to zero if the
comparison is false and to a non-zero value if it is true.
PDS does not support the relational operators
and, or, and not.
Backquote expressions
A string enclosed in backquotes (
‘such as this‘) has variable substitution
performed on it, and the result is evaluated in a subshell. The standard output of
the command is collected, newlines and linefeed characters are replaced by
spaces, and trailing whitespace is removed. The result is the value of the
expression.
Arrays
Arrays are fundamental to achieving parametric parallelism in PDS, because an
array variable is implicitly indexed in the task block.
TIBCO GridServer
®
Developer’s Guide
|
103
Construction
You can construct arrays of primitive values in several ways. Write a literal value
as follows:
a = [1, 2, 3, 4, 5]
You can construct an arrays with autorange expressions. The expression
begin n end m step k
constructs an array starting with n and proceeding in increments of k until m is
reached. More precisely, it constructs
[n, n+k, n+2k, ..., n+rk]
where r is the largest integer such that n+rk<= m.
The expression
begin n count c step k
constructs an array of c elements beginning with n and proceeding in increments
of k, that is,
[n, n+k, n+2k, ..., n+(c-1)k].
For example,
begin 10 end 15 step 2
and
begin 10 count 3 step 2
both construct the array
[10, 12, 14].
The third way to construct an array is to use the split function, which divides a
string into array elements at whitespace. Quoted elements keep embedded
whitespace and strip the quotes upon placement into the array. For example, on
Unix machines:
split(‘ls‘)
returns an array of the files in the current directory.
Indexing
In most contexts, when a variable containing an array is referenced, the first
element is returned. However, in the task block, the element corresponding to the
ID of the currently running task is returned. (If the task ID exceeds the array size,
the last element of the array is returned.) This feature makes it easy to write the
most common kinds of distributed computations. For example, you can set up an
array of values and run a command on each one in parallel with the following
PDS script:

TIBCO GridServer
®
Developer’s Guide
104
|
args = begin 100 end 200 step 5
task sizeof($args)
execute "doit $args"
end
The $args in the execute statement expands to 100 for the first task, 105 for the
second, and so on.
Another exception to the first element being returned from an array is that inside
a
for loop, the variable containing the array returns the value at the current
iteration of the loop. This is redundant with the loop variable. For example, in
for
i in $args log "$i" log "$arg" end
, $i and $arg are the same every time;
the loop variable
$i is there only for convenience.
Explicit array indexing is unsupported: To obtain an array element other than the
first, use one of the following:
• Implicit indexing in the task block
•The
for statement
Even within those contexts, assignment to the variable holding the array changes
the entire variable value, not the current element.
Other Features
An array that includes both string and numeric values is legal. Arrays of arrays
are not allowed.
You can use the
sizeof function to determine the number of elements in an array,
as shown in the argument to the
task block in the above example.
You can use the
for statement to iterate over the elements of an array. See The For
and Foreach Statement on page 108, for more information.
Built-in Variables
In addition to user-defined parameters, you can use the following built-in
variables:
Table 17 Built-in Variables
Variable Description
DSTASKID ID of the current task (meaningless if not in task block)
DSJOBID ID of the current job. If submitted using the
bsub
switch,
this indicates the batch ID.

TIBCO GridServer
®
Developer’s Guide
|
105
It is important to put any temporary files in the DSWORKDIR directory. If you put
them elsewhere and a task is interrupted, the files stay on the computer and are
never automatically removed.
You can use automatic variables such as
$1, $2, $3, and so on to reference
arguments to the PDriver command that follow the script file name. You can use
the automatic variable
$* to reference these automatic variables collectively as a
string. To create an array of all command-line arguments, use
split($*).
Arguments to the PDriver command that follow the script file name be
referenced with the automatic variables
$1, $2, $3 ... These variables also be
referenced collectively as a string using the automatic variable
$*. To create an
array of all command-line arguments, use
split($*).
$? contains the execution status of the last execute command.
DSWORKDIR The temporary directory for job files. This is an
Engine-side variable. This directory is in the Engine
installation directory, typically
./work/
machinename
-
i
/tmp/
session-ID
, where
machinename is the name of the Engine host;
i
is the
instance, starting with 0; and session-ID is the Service
Session ID for the PDriver Job.
The Engine periodically deletes the
tmp directory. To set
the frequency of deletion, set Temp File Time-to-Live
(hours) in each Engine Configuration.
DSENGINEHOME The Engine home. This is an Engine-side variable.
DSSTAGEDIR The Alias for the Manager staging directory. You can use
this as a source or destination directory for the
copy
command. Files in this directory are automatically
deleted periodically.
DSOS The OS of the current system (for example, “linux”,
“solaris”, “win32”, “plinux”)
Table 17 Built-in Variables (Continued)
Variable Description

TIBCO GridServer
®
Developer’s Guide
106
|
Statements
Built-in Commands
You can use the following built-in commands inside any lifecycle block (with the
exception of
onerror and throw). These commands are operating-system
independent.
Table 18 Built-in Commands
Command Description
mkdir "dir-name" Creates a directory.
copy "src-file"
"dest-file"
Copies a file. Typically, the prejob block is
used to copy input files from the Driver
machine to the staging directory on the
Manager, which can be referenced as
$DSSTAGEDIR
. In the task or pretask block,
the input file is copied from the staging
directory to the Engine’s local filesystem.
Output files are copied in the reverse
direction
.
rmdir "dir-name" Removes a directory. The directory must be
empty.
delete "file" Deletes a file. Supports the
*
wildcard.
log "log-message" Writes a message to the Driver log (in
prejob or postjob lifecycle blocks) or the
Engine log (in pretask, task, or posttask
lifecycle blocks).

TIBCO GridServer
®
Developer’s Guide
|
107
execute
[stdin="stdin=file"]
[stdout="stdout-file"]
[stderr="stderr-file"]
"command-to-execute"
Executes a command on the local machine
using the shell specified with the
shell
command. A subshell is spawned for the
command, unless specified otherwise with
the
shell command. The subshell has the
path available on the Engine (as set in the
Library Path property of the Engine
Configuration) or Driver.
Before running custom executables, deploy
those executables to Engines using
GridServer’s application resource
deployment feature. See Resource
Deployment on page 83 for more details.
shell "shell-type" Specifies the shell to spawn for commands
run by the
execute command. The defaults
are
/bin/bash for Linux, /bin/sh for
Solaris, and
cmd.exe for Windows. If you
set this to
none, no shell is spawned.
env (variable) Returns the value of the specified
environment variable. If the variable is a
string literal, enclose it in quotes. Returns
an empty string for nonexistent variables.
onerror
<ignore|retry|fail>
Indicates what happens when an execute
command returns with a nonzero exit code.
ignore takes no action; retry reschedules
the task on another Engine; and
fail
returns an exception back to the Driver. The
default is
fail. When used with retry,
you can use
onerror only within the job or
task blocks.
throw "message" Causes the task to fail and throws an
exception. The message is displayed on the
Driver and written into the Driver log. This
cannot be used in the posttask lifecycle
block.
Table 18 Built-in Commands (Continued)
Command Description
TIBCO GridServer
®
Developer’s Guide
108
|
Enclose arguments to all statements in quotes, except for arguments to onerror. If
you include a linebreak in a quoted argument, escape it with a backslash.
The
mkdir, copy, delete, and rmdir commands are not dependent on operating
system. Pathnames automatically translate to work on the appropriate platform.
For example,
mkdir "sample/log1" creates sample\log1 on Windows systems.
The If Statement
The syntax of the if statement is
if expression comparisonOperator expression then
statements
end
PDS also supports elsif and else clauses. You can use the if statement inside a
lifecycle block (
prejob, pretask, task, posttask, postjob) to conditionally
execute statements. One typical use is to execute different commands depending
on the Engine’s operating system:
if $DSOS == "win32" then
cmd = "dir"
else
cmd = "ls"
end
execute "$cmd"
An if statement can also appear at the top level of a PDS script, to include or
exclude global assignments or entire blocks. An example is
if $1 == "alwaysCancel" then
options
autoCancelMode "always"
end
end
The if statement is not legal in the options, schedule, or discriminator blocks.
The For and Foreach Statement
Explicit looping over an array is not often needed. If you need explicit looping,
use the
for statement:
for variable in expression
statements
end
The expression must evaluate to an array. The variable takes on successive
elements of the array on each iteration of the loop. Assignment to the loop
variable is legal but has an effect only for the remainder of that iteration. It does
not alter the array.
TIBCO GridServer
®
Developer’s Guide
|
109
Inside a for loop, the variable containing the array returns the value at the
current iteration of the loop. This is redundant with the loop variable. For
example, in
for i in $args log "$i" log "$args" end
the $i and $args are both equal for each iteration. The loop variable $i is there
only for convenience.
The
foreach statement lets you implicitly index an array, without the loop
variable:
foreach expression
statements
end
Shell Directives in Heterogeneous Environments
It is the PDS script writer’s responsibility to declare a shell directive that is
appropriate to the executing node’s platform. For jobs in heterogeneous
environments, you can specify different directives within an if-then-else block.
For example,
if $DSOS == "win32" then shell "cmd.exe" else shell "/bin/bash" end
You can specify the argument “none”, in which case all following execute tasks
spawn directly and not in a subshell.
It is also possible to use the bash shell with Windows by utilizing Cygwin, the
Unix environment for Windows.
To use bash and Cygwin on Windows machines:
1. Install Cygwin on another machine. You can get it at
www.cygwin.com
.
2. From the Cygwin installation, copy
bash.exe and cygwin1.dll into the
Engine’s path. This is either in a directory within the
%PATH% on the Engine, or
the replication directory
<engine_home>/resources/win32/bin. Also, copy
any other Cygwin executables you use from the bash shell.
3. If bash is already in the path for the Engine, use the following syntax in the
PDS script:
task
shell "bash.exe"
...
end
or
task
shell "none"
execute stdout="outfile"
"<optional_path>/bash.exe -c ""mycommand.exe"""
TIBCO GridServer
®
Developer’s Guide
110
|
end
If the path to bash is not set, use the following syntax:
task
shell "c:\cygwin\bin\bash"
execute stdout="outfile" "echo hello"
end
The above example also requires that you copy the Cygwin echo.exe to the
Engine.

TIBCO GridServer
®
Developer’s Guide
|
111
Example
pi.pds performs a distributed Monte Carlo calculation of the value of pi. A
picalc command-line executable resides in the bin/platform directory of the
distribution. The executable is also available on all Engines in your GridServer
installation. Running PDriver distributes calculation of Pi across the network,
using autoranged parameters to generate differing seed values for the program’s
pseudorandom number generator. The postjob block runs a script that derives an
average of all the values returned.
TIBCO GridServer
®
Developer’s Guide
112
|

TIBCO GridServer
®
Developer’s Guide
|
113
Chapter 6
Creating Grid Libraries
This chapter provides information on creating Grid Libraries, which are
versioned sets of resources that may be used by multiple Services.
Topics
• Overview, page 114
• Grid Library Format, page 115
• Grid Library Loading, page 124
• Using Grid Libraries from a Service, page 126
• Super Grid Libraries, page 127
• C++ Bridges, page 128
• JREs, page 129
• R Grid Libraries, page 130
• Python Bridges, page 132
• Python Grid Libraries, page 133
• Windows Application Deployment, page 134
• Grid Library Example, page 137

TIBCO GridServer
®
Developer’s Guide
114
|
Overview
A Grid Library provides a solution to the problem of managing versioned sets of
resources that may be used by multiple Services. A Grid Library is a set of
resources and properties necessary to run a Grid Service, along with
configuration information that describes to the GridServer environment how
those resources are to be used. For example, a Grid Library can contain JARs,
native libraries, configuration files, environment variables, hooks, and other
resources.
Grid Libraries are identified by name and version. All Grid Libraries must have a
name, and typically have a version. The version is used to detect conflicts
between a required library and library that has already been loaded; it also
provides for automatic selection of the latest version of a library. A GridServer
Service can specify that it is implemented by a particular Grid Library by
specifying the
gridLibrary and gridLibraryVersion Service Options or Service
Type Registry Options.
Grid Libraries can specify that they depend on other Grid Libraries; like the
Service Option, such dependencies can be specified by the name, and optionally
the version. Also, nearly all aspects of a Grid Library can be specified to be valid
only for a specific operating system. This means that the same Grid Library can
specify distinct paths and properties for Windows, Linux, and Solaris, but only
the appropriate set of package options is applied at run-time.

TIBCO GridServer
®
Developer’s Guide
|
115
Grid Library Format
The Grid Library can be any archive file in ZIP (.zip) or gzipped TAR format
(
.tgz or .tar.gz), with a grid-library.xml file in the root. It may also contain
any number of directories that contain resources. Although the filename has no
inherent meaning, the following format is strongly encouraged:
library_name-library_version.[zip|tar.gz|tgz]
If a Grid Library has the OS attribute set, the following format should be used:
library_name-library_version-os.[zip|tar.gz|tgz]
To reduce Engine restarts when you deploy a new version, always include the
version in the filename, as overwriting existing libraries requires a restart,
whereas a new library does not.
The directory structure is completely up to you, since the configuration file is
used to specify where resources are found within the Grid Library.
The configuration file must be a well-formed XML file named
grid-library.xml, and be in the root of the Grid Library.
The GridServer SDKs include a
grid-library.dtd file that can be used to
validate the XML file. They also include an example Apache Ant
build.xml file
that can be used to validate and build Grid Libraries. This DTD can also be found
in Appendix B, The grid-library.dtd, on page 205.
Following is a table that specifies all elements and attributes of the
grid-library.dtd file. It uses the XML schema notation for elements and
attributes, such as:
[no tag] (Required)
? (Optional)

TIBCO GridServer
®
Developer’s Guide
116
|
* (Optional and Repeatable)
Table 19 Grid Library DTD Elements and Attributes
Element Description Elements and Attributes
grid-library The root element. Note that
attributes effect deployment in that
Engines only download Grid
Libraries whose attributes match
their own properties and ignore
those with non-matching attributes.
If no attributes are specified in this
element for a particular Grid Library,
all Engines download this Grid
Library.
ELEMENTS
•
grid-library-name
• grid-library-version?
• arguments?
• dependency*
• conflict*
• jar-path*
• lib-path*
• assembly-path*
• command-path*
• hooks-path*
• environment-variables*
• java-system-properties*
ATTRIBUTES
•
jre
• bridge?
• super?
• os?
• compiler?
grid-library-n
ame
The library name. All libraries must
be named.
grid-library-v
ersion
The version. If not specified, 0 is
implied. If in comparable format as
defined below, it can be used to
determine the latest version.

TIBCO GridServer
®
Developer’s Guide
|
117
dependency
A library dependency. If the version is
not specified, the latest version is chosen
at runtime.
ELEMENTS
•
grid-library-name*
• grid-library-version?
ATTRIBUTES
•
os?
• compiler?
conflict
Indicates that this library conflicts with
the given library. If this Grid Library is
NOT a dependency, and
grid-library-name="*", then it
indicates that this Grid Library conflicts
with all other Grid Libraries (aside from
its dependencies).
ELEMENTS
•
grid-library-name*
pathelement
An element containing a relative path,
typically set to a directory. This element
must be in the proper format for the OS.
jar-path
The JAR path. If specified, all JARs and
classes in the path are loaded.
ELEMENTS
•
pathelement*
ATTRIBUTES
•
os?
• compiler?
lib-path
The native library search path.
ELEMENTS
•
pathelement*
ATTRIBUTES
•
os?
• compiler?
Table 19 Grid Library DTD Elements and Attributes (Continued)
Element Description Elements and Attributes

TIBCO GridServer
®
Developer’s Guide
118
|
assembly-path
The .NET assembly search path. Absolute
assembly paths, mapped drives, and
UNC paths do not work.
ELEMENTS
•
pathelement*
• os?
• compiler?
command-path
The path in which the Engine searches
for Command Service executables.
ELEMENTS
•
pathelement*
ATTRIBUTES
•
os?
• compiler?
hooks-path
Path to Engine Hook XML files. Engine
Hooks are initialized at the time the
containing Grid Library is loaded.
ELEMENTS
•
pathelement*
ATTRIBUTES
•
os?
• compiler?
name
The name of a property
value
The value of a property
property
A name/value pair, used by
environment variables and Java System
properties.
ELEMENTS
•
name, value
environment-va
riables
Environment variables to set.
ELEMENTS
•
property
ATTRIBUTES
•
os?
• compiler?
Table 19 Grid Library DTD Elements and Attributes (Continued)
Element Description Elements and Attributes

TIBCO GridServer
®
Developer’s Guide
|
119
The following is a list of attributes used above. Valid values can be found in the
About page in the Administration Tool:
Variable Substitution
You can use placeholder variables in a grid-library.xml file, which are then
substituted with their value as defined in a properties file or in an OS
environment variable. This enables quick changes in properties in the
grid-library.xml file without redeploying the Grid Library.
If the
grid-library.xml file contains a property with a value contained with the
$ character, such as $mydir$, it will be substituted with the value in one of three
places, in this order:
• A default properties file in your Grid Library named
grid-library.properties. This can provide baseline values for your
variables.
java-system-pr
operties
Java system properties, which are set
immediately prior to executing a task
using this library.
ELEMENTS
•
property
ATTRIBUTES
•
os?
• compiler?
Table 19 Grid Library DTD Elements and Attributes (Continued)
Element Description Elements and Attributes
Table 20 Grid Library Attributes
Attribute Description
os The os attribute specifies that it is only applied to this OS.
If the attribute is not this operating system (OS), the
containing element and its children and content are
ignored.
compiler If the attribute is not this compiler, the containing element
and its children and content are ignored.
super If set to true, the Grid Library is a Super Grid Library,
meaning it is always loaded when the Engine starts up.
See Super Grid Libraries on page 127 for more
information.

TIBCO GridServer
®
Developer’s Guide
120
|
• An external properties file, named with the same name as the Grid Library
archive, with the extension
.properties, in the Grid Library deployment
directory. Values in an external properties file replace those defined in in the
default properties file within the Grid Library.
• A defined OS environment variable. This value replaces the value defined in
either properties file.
Substitutions are allowed anywhere in a string within the content of property
value elements and pathelements. Multiple substitutions per string are allowed.
$
characters can be treated as literals by escaping them with another
$ character.
Windows paths that are specified in the
[library].properties file must escape
the
\ character with another \.
The implicit property
ds.GridLibraryRoot can be used in the
grid-library.xml file. This is useful for including a driver.properties file in
a Grid Library, and setting the the
DSDRIVER_DIR to the location of the file in the
library. This can be done in a C++ or .NET Grid Library as follows:
<environment-variables>
<property >
<name>DSDRIVER_DIR</name>
<value>$ds.GridLibraryRoot$</value>
</property>
</environment-variables>
The following would be done in a Java Grid Library:
<jar-path>
<pathelement>$ds.GridLibraryRoot$</pathelement>
</jar-path>
Versioning
Versioning provides the following functionality:
• It enables deployment of new versions of libraries and deletion of old versions
without interrupting currently executing Service Sessions.
• It provides for specifying conflicts, or libraries that cannot coexist with each
other.
• It enables a Service Session or dependency to specify the use of the latest
version of a Grid Library.
• It enables easy management of multiple applications needing different
versions of the same set of libraries.
If the substitution is not found in the file, the empty string, "", is substituted.
TIBCO GridServer
®
Developer’s Guide
|
121
To use versioning, you must specify the Grid Library version in the configuration
file. An Engine can load only one version of the library with the same name at any
time. If the version is not specified, it is implied to be 0.
The version must be a String that follows the proper comparable version format.
It can also be used to determine the latest version of the library, for automatic
loading. This format is
[n1].[n2].[n3]...
where nx is an integer, and there may be one or more version points.
For instance,
4.0.1.1, 4.1, 3
are in the proper comparable version format.
The integer at each version point is evaluated starting at the first point, and
continue until a version point is greater than the other. If a version point does not
exist for one, it is implied as zero.
For instance
4.0.0.1 > 4.0
4.0.0.5 < 4.0.1.1
To specify that a dependency or Service use a particular version of a Grid Library,
the version field is set to that value. To specify that it use the latest version, the
field is left blank.
If a version is specified it must match exactly. That is,
3.0.0 is not same as 3; if the
library’s version is
3.0.0 and the Service specifies 3, the Service will not find that
library and subsequently fail.
If a version is specified but not in this format, and there are multiple versions of a
library, the “latest version” is undefined. Thus, automatic selection of the latest
version is only possible when all Grid Libraries with the specified name provide a
version in the proper format.
By default, if a Service was set to use the latest version of a Grid Library, all
Engines will work on the latest version at the time the Service was started,
regardless of whether a newer library has been deployed. This can be changed by
setting the
GRID_LIBRARY_STRICT_VERSIONING Driver option to false. When
false, if a newer version of the library is deployed while the Service is running,
Engines that have not yet worked on the Service will use the newer version, while
Engines that worked on it prior to deployment will continue to use the older
version.
TIBCO GridServer
®
Developer’s Guide
122
|
Dependencies
Grid Libraries may specify dependencies on other Grid Libraries. A dependency
specification resolves to a particular Grid Library using two values:
•
grid-library-name The name of the Grid Library, as specified in the
dependency’s XML
•
grid-library-version The version of the Grid Library, as specified in the
dependency’s XML. OS compatibility is determined by checking the
os and
compiler tags for the top-level element in the dependent Grid Library. If not
specified, it uses the latest version supported by the OS.
Note that if a dependency resolves to more than one Grid Library, the
dependency used is undefined.
Two dependent libraries conflict if they have the same library name, but different
versions.
It is possible to specify an OS attribute to
<dependency> element for ignoring
Grid Libraries that do not apply to an Engine’s particular operating system. For
example, if a Grid Library contains native libraries for multiple platforms, you
can specify OS specific dependencies on the bridge Grid Libraries such that the
Engine only loads the bridge corresponding to its operating system.
Note that if a dependency is missing, the Engine logs a warning. Rather than the
current task failing, the Engine attempts to continue loading all necessary
libraries to run the task.
Conflicts
A conflict between two Grid Libraries means that these libraries cannot be loaded
concurrently. When there is a conflict between a loaded Grid Library and a Grid
Library required by a Service, the Engine must restart to unload the current
libraries and load the requested library.
The following circumstances result in a conflict:
•
Version Conflict The most common conflict arises via versioning, and
typically when upgrading versions or using more than one version of the
same library concurrently. This conflict arises when a Grid Library with the
same
grid-library-name as the requested Grid Library, but different
version, is loaded.
•
Explicit Conflict There can be situations in which different Grid Libraries can
conflict with each other due to conflicting native libraries, different versions of
Java classes, and so on. Because the Engine cannot determine these implicitly,
the
conflict element can be used to specify Grid Libraries that are known to
conflict with this Grid Library.
TIBCO GridServer
®
Developer’s Guide
|
123
Additionally, the value of the grid-library-name can be set to "*". This means
that this Grid Library can conflict with all other Grid Libraries (aside from its
dependencies), and it is guaranteed that no other Grid Libraries loads
concurrently with this Grid Library. Note that this is only allowed if the Grid
Library is not a dependency; if the
"*" is used as a conflict in a Grid Library
that is a dependency, a verification error occurs.
•
Dynamic Version Conflict A Grid Library conflict occurs if dynamic versioning
is used, and the latest version of a Grid Library or Grid Library dependency
has changed due to an addition or removal of a dependency since the Grid
Library has been loaded.
•
Variable Substitution Conflict A Grid Library conflict occurs if its variable
substitution file has changed since it has been loaded.

TIBCO GridServer
®
Developer’s Guide
124
|
Grid Library Loading
When a Service Session is set to use a Grid Library, that library is loaded. Loading
is the process of setting up all resources in the Grid Library for use by the Service.
A library is loaded only once per Engine session.
First, the library loads itself, and then it loads all dependencies.The library loader
uses the depth-first, or preorder traversal algorithm when loading libraries. When
there are a number of dependencies in a Grid Library, the order in the XML is
considered left-to-right with respect to the algorithm. The library search order for
lib-path and jar-path is determined by their respective lists. Certain aspects of
a load may require a restart, and possibly re-initialization of the state. The
following steps are performed by a load of the root library and all dependencies:
1. Checks for conflicts with currently loaded Grid Libraries. If so, it restarts with
the requested Grid Library and clear out the current state of any loaded
libraries.
2. If new
lib-paths have been added for its OS, they append to the current list
of
lib-paths. The state of loaded libraries includes all libraries already
loaded, plus the requested library. Note that specifying a JRE dependency has
this effect.
3. If new
jar-paths have been added for its OS, the jars and classes are added to
the classloader.
4. If new
assembly-paths have been added, it adds them to the .NET search
path.
5. If new
command-paths have been added for its OS, it is added to the search
path for Command tasks.
6. If new
hooks-paths have been added, any hooks in the path is initialized.
7. If the default is current and a Grid Library is requested, the Engine restarts.
State Preservation
Under most cases, when an Engine shuts down, it preserves the current state of
which Grid Libraries it has loaded. When it starts back up, it loads all Grid
Libraries that were loaded when it shut down. As Grid Libraries are loaded, the
pathelements they contain are added to a ‘master’ list of paths for that type of
pathelement. For example, if a Grid Library contains a
lib-path specification,
that
lib-path is appended to the list of lib-path values obtained from
already-loaded Grid Libraries.
TIBCO GridServer
®
Developer’s Guide
|
125
Note that this means that is up to the creator of the Grid Libraries deployed on the
grid to ensure that the ordering of library paths does not lead to loading the
wrong library. For example, if two different Grid Libraries each provide DLLs in
their
lib-paths that share the same name, because of OS-specific library load
conventions, the one used is the first one in the aggregate
lib-path from across
all loaded Grid Libraries. Likewise for Java classes, when more than one copy of
the same class is in the classloader, it is undefined which class loads. Therefore it
is important to either subdivide Grid Libraries appropriately when such conflicts
could arise, or to use the
conflict element to explicitly state conflicts.
Grid Library and RunAs State information persists on normal Engine shutdowns,
which includes task failures aside from crashes. If the Engine does not shut down
normally, such as if it crashes, or if the Daemon kills the process due to it
exceeding the shutdown timeout, the state is reset.
If an Engine shuts down due to a conflict, it clears the current state and sets up for
only the requested Grid Library upon restart. This is referred to as preloading. If
an Engine shuts down due to internal library inconsistencies or a crash, the state
is not saved. State is also cleared on all instances when a Daemon is disabled and
reenabled.
Task Reservation
If an Engine requires a restart to load a Grid Library, the task is reserved on the
Broker for that Engine. The Engine is instructed to log back into the same Broker,
and takes that task upon login. The timeout for this is configurable at Admin >
System Admin > Manager Configuration > Services.
Environment Variables and System Properties
All Environment variables and Java System properties for a Grid Library and all
dependencies are set each time a task is taken from a particular Service that
specified that Grid Library. (They are not cleared after the task is finished.)
Environment variables are set via JNI so that they can be used by native libraries
or .NET assemblies, and they are also passed into Command Services. Note that
environment variables such as
PATH and LD_LIBRARY_PATH should not be
changed through this mechanism. Rather,
library-path and command-path are
reserved for manipulating these variables.

TIBCO GridServer
®
Developer’s Guide
126
|
Using Grid Libraries from a Service
Services can specify a Grid Library to use by setting the GRID_LIBRARY and
optionally the
GRID_LIBRARY_VERSION Service Options. This would typically be
set by Service Type in the Service Types page, although it can be set
programatically on the Session. Services can specify a Grid Library to use by
setting the corresponding Service Option values. If the version is not set, a Service
uses the latest version of a Grid Library.
If a Service needs to find resources in a Grid Library, it can use the Grid Library
Path. This value is a path value that includes the root directories of all Grid
Libraries currently loaded. For Java, .NET, and C++, the path is
EngineProperties.GRID_LIBRARY_DIR; for command Services, it is the
environment variable
ds_GridLibraryPath.

TIBCO GridServer
®
Developer’s Guide
|
127
Super Grid Libraries
A Grid Library can be declared as a Super Grid Library. This means that it will
always be loaded when the Engine starts up. The typical use case for this is to
have an
EngineHook that queries the system for some information, which is used
to set
EngineSession properties prior to the Engine running any tasks.
To specify that a Grid Library is a Super Grid Library, set the
super attribute in
the
grid-library element. For example, <grid-library ... super="true" />
. Super Grid Libraries also cannot have conflicts or dependencies. Other libraries
cannot depend on or conflict with them.
Super Grid Libraries are loaded upon startup before anything else. They are
ignored on conflict checks for
* (all).
If a new Super Grid Library is deployed while an Engine is running, it will be
loaded. If a new version of an existing Super Grid Library is deployed while an
Engine is running, the Engine will restart.

TIBCO GridServer
®
Developer’s Guide
128
|
C++ Bridges
C++ Bridges are the native bridges that allow Engines to execute native Services.
They are packaged as Grid Libraries, named
cppbridge-[os]-[compiler]-[M]-[m], where M and m are the GridServer major
and minor version numbers. All C++ Bridges are pre-packaged and deployed in
the Grid Library replication directory upon GridServer Manager installation or
upgrade.

TIBCO GridServer
®
Developer’s Guide
|
129
JREs
In the rare event that a particular service cannot use the default JRE that is
deployed to the Engines, a JRE can be packaged as a Grid Library. The Service’s
top-level Grid Library would then declare it as a dependency. When an Engine
takes a Task, it will then restart using this JRE. Note that the JRE must be a
supported version.
JREs are packaged as
jre-version-os.gz or jre-version-os.zip. Version is the JRE
version, for example,
1.8.0.161. The os is the platform, such as linux or win32.
To package a JRE Grid Library, create a Grid Library that contains the JRE in a
directory in the root of the Grid Library. Then, set the
jre attribute in the
grid-library element. For example, <grid-library ... jre="true" />
For a JRE Grid Library, you can optionally specify JVM arguments in the XML. To
do so, add an
<arguments> element to the root element. It can take any number of
<property> elements, each containing a <name> element and an optional
<value> element.
If the property has a value, the argument
name=value is added. Otherwise, just
the
name argument is added.
If the same argument is set in the Engine Configuration and the Grid Library, the
Grid Library overrides the Engine Configuration.
For an example of how to package a JRE Grid Library, see the "Deploying
Services" section of the GridServer Administration Guide.
You must also install the unlimited strength JCE in your JRE. The files reside in
DS_MANAGER/webapps/livecluster/WEB-INF/etc/jce. Follow the
instructions in the
README.txt for your JRE to install the files.
Specifying the JVM debug port inside a Grid Library results in unpredictable
behavior and is not supported. Set this functionality with the Debug Start Port
setting on the Grid Components > Engines > Engine Configurations page.

TIBCO GridServer
®
Developer’s Guide
130
|
R Grid Libraries
Grid libraries with Services implemented in R must contain a top-level directory
named
R. This means the following Grid Library structure is used:
/
/grid-library.xml
/R/
The R directory is required, unless the Grid Library contains only R packages. All
files ending in
.R are sourced. The order that the R files are sourced is not
guaranteed.
Grid libraries with R Services must depend on the
rbridge-platform Grid Library.
That dependency can be direct or indirect.
Grid Libraries can also contain R packages in non-source form. Packages root
directory within the Grid Library is defined using the
lib-path element.
The following is an example
grid-library.xml with R packages:
<?xml version="1.0" encoding="UTF-8"?>
<grid-library os="win64">
<grid-library-name>Rpscl-win64</grid-library-name>
<grid-library-version>3.0.3</grid-library-version>
<lib-path>
<pathelement>library</pathelement>
</lib-path>
<dependency os="win64">
<grid-library-name>rbridge-win64</grid-library-name>
</dependency>
<dependency os="win64">
<grid-library-name>Rextras-win64</grid-library-name>
</dependency>
</grid-library>
Building TERR Runtime Grid Libraries
A tool to create a TERR runtime Grid Library is provided in the SDK’s
$SDK_HOME/tools/bin directory.
The
createTERRGL.bat and createTERRGL.sh scripts are a wrapper for the Java
implementation. Therefore, Windows and Linux versions take the same
parameters:
Option Description
--terrHome=${TERR_HOME} Specify the TERR_HOME directory. Required.

TIBCO GridServer
®
Developer’s Guide
|
131
--version=${gl version} Override the version information information deduced from
${TERR_HOME}/bin/TERR --version.
--32|--64 Generate 32-bit or 64-bit Grid Library. By default, Windows
generates a 32-bit runtime, and Linux generates a 64-bit runtime.
--complete Generate Grid Library with all files. By default, smaller Grid
Libraries are generated without some unused files.
--no-build-info Generate Grid Library without build information. By default, build
information is in the Grid Library descriptor.
--verbose Generate more output.
--help Show a list of all options.
Option Description

TIBCO GridServer
®
Developer’s Guide
132
|
Python Bridges
Python Bridges are the native bridges that enable Engines to execute Python
scripts using the packaged Python runtime. They are packaged as Grid Libraries,
named
pybridge-os-compiler-M.m, where M and m are the GridServer major and
minor version numbers. All Python Bridges are pre-packaged and deployed in
the Grid Library replication directory upon GridServer Manager installation or
upgrade.

TIBCO GridServer
®
Developer’s Guide
|
133
Python Grid Libraries
Grid Libraries with Services implemented in Python should contain a top-level
folder where the individual
.py files will be stored. In the example below, this this
folder is named
commands. In the grid-library.xml, you will need to reference
this folder in a
lib-path element.
The Grid Library should either contain the binary ("pybridge-win64-vc14" for
Windows or "pybridge-linux64-gcc34" for Linux) or reference a dependent
grid-library containing it.
Lastly, it is necessary to set an environment variable
ds.PYTHON_USER_FILE_PATH
which references the folder containing the
.py files set above. The value of this
environment variable should be
$ds.GridLibraryRoot$/folder-name where
folder-name is the folder containing the .py files.
Here is an example of a
grid-library.xml for Python:
<?xml version="1.0" encoding="UTF-8"?>
<grid-library>
<grid-library-name>Python-example</grid-library-name>
<grid-library-version>1.0.0</grid-library-version>
<lib-path>
<pathelement>commands</pathelement>
</lib-path>
<dependency os="win64">
<grid-library-name>pybridge-win64-vc14</grid-library-name>
<grid-library-version>7.0</grid-library-version>
</dependency>
<dependency os="linux64">
<grid-library-name>pybridge-linux64-gcc34</grid-library-name>
<grid-library-version>7.0</grid-library-version>
</dependency>
<environment-variables>
<property>
<name>ds.PYTHON_USER_FILE_PATH</name>
<value>$ds.GridLibraryRoot$/commands</value>
</property>
</environment-variables>
</grid-library>

TIBCO GridServer
®
Developer’s Guide
134
|
Windows Application Deployment
The Windows Deployment Scripting Language provides a mechanism by which
programs can be executed in conjunction with file updating on Windows Engines.
This can be used for such purposes as registering COM DLLs and .NET
assemblies, running Microsoft Installer packages, and so on. It runs an installation
command when the script is added, and when any dependent files are modified.
It can also run an uninstallation command when the script is removed.
A deployment script is a file named
dsinstall.conf. This is a reserved filename,
and the Engine Daemon interprets any file with this name as a deployment script.
The script is a properties file, with name and value pairs that govern the
command execution.
The script is placed, with associated files, in its own subdirectory of a Grid
Library. This is referred to as the installation directory. In situations where a
remote application installation must take place when the Engine is first started, it
can be packaged in a Super Grid Library.
The following properties are provided:
Table 21 Deployment Script Properties
Property Description
install_cmd The installation command. The command should be
in the current directory; you can also specify the full
path to a command. This command is run when the
dsinstall.conf file is added, modified, and when
any dependency is modified.
Note that the Engine’s
PATH environment variable is
not set within the installation command. You must set
the path in order to use some commands, such as
ping or find.
workdir Working directory from which the commands are
launched. The directory is relative to the installation
directory.

TIBCO GridServer
®
Developer’s Guide
|
135
The : and \ characters must be escaped with a backslash (\) character in the
dsinstall.conf file. Also, you should not rename the dsinstall.conf file.
The following is an example of a script that installs a Microsoft Installer package:
workdir=.
waittime=30
uninstall_cmd Optional. The uninstall command. This is executed
when the script is deleted, or prior to subsequent
runs of the install command if
uninstall_first is
true. Supporting files for the uninstall script may be
deleted along with the script; the command is
executed prior to local deletion of the files. Typically
an uninstall is performed by simply removing the
entire installation directory.
Note that the path is not set within the uninstall
command. You must set the path in order to use some
commands, such as
ping or find.
waittime Number of seconds to wait for install/uninstall
command to finish. The default is 30 seconds. If this
time is exceeded, the process running the command
is killed.
uninstall_first Optional. If true, the uninstall command always runs
prior to the install command, except for the first time
the install command is run. This is for situations in
which you need to uninstall software prior to
reinstallation.
success_exit_codes Optional. Comma-delimited list of exit code values
that indicate successful command execution. If the
exit code does not match any value, an error logs
with the failure code, and the next time the Daemon
restarts it retries the installation. If this property is not
set, exit codes are ignored.
disable_on_fail If an Engine Daemon should disable itself upon the
failure of an install. The default is false if not
specified in the conf file. When the value is true, the
Engine Daemon disables itself if the installation
returned exit code is not in the success exit codes.
Table 21 Deployment Script Properties (Continued)
Property Description
TIBCO GridServer
®
Developer’s Guide
136
|
uninstall_first=true
install_cmd=install.bat
uninstall_cmd=uninstall.bat
success_exit_codes=0
install.bat:
%SystemRoot%\system32\msiexec /q /i mypackage.msi ALLUSERS=1
uninstall.bat:
%SystemRoot%\system32\msiexec /q /x mypackage.msi ALLUSERS=1
These three files, plus the mypackage.msi file, are all placed in a Grid Library.
Note that the
uninstall_first property is used to uninstall the previous version
of the software whenever the package is changed. To uninstall the software,
simply undeploy the Grid Library; the uninstallation is performed prior to
deleting the files.

TIBCO GridServer
®
Developer’s Guide
|
137
Grid Library Example
The following example grid-library.xml is for a mixed Java/C++ application
that runs on Windows, and both
gcc and gcc34 for Linux:
<?xml version="1.0" encoding="UTF-8"?>
<grid-library>
<grid-library-name>MyLib</grid-library-name>
<grid-library-version>1.0.0.1</grid-library-version>
<!-- Example of how to use both gcc and gcc34 libraries -->
<lib-path os="linux" compiler="gcc">
<pathelement>lib/gcc</pathelement>
</lib-path>
<lib-path os="linux" compiler="gcc34">
<pathelement>lib/gcc34</pathelement>
</lib-path>
<!-- All three C++ bridges are included here -->
<dependency>
<grid-library-name>cppbridge-vc14</grid-library-name>
</dependency>
<dependency>
<grid-library-name>cppbridge-gcc</grid-library-name>
</dependency>
<dependency>
<grid-library-name>cppbridge-gcc34</grid-library-name>
</dependency>
<!-- Specifies that win32 use this JRE Grid Library, others use default -->
<dependency>
<grid-library-name>jre-win32</grid-library-name>
<grid-library-version>1.8.0.161</grid-library-version>
</dependency>
<!-- Specifies JVM options in a JRE Grid Library -->
<arguments>
<property>
<name>-Xdebug</name>
</property>
<property>
<name>-Xmx512m</name>
</property>
<property>
<name>-Dfoo</name>
<value>bar</value>
</property>
</arguments>
<!-- Example of linking to another of my Grid Libraries-->
<dependency>
<grid-library-name>MyCalculator</grid-library-name>
</dependency>
<hooks-path>
<pathelement>hooks</pathelement>
</hooks-path>

TIBCO GridServer
®
Developer’s Guide
138
|
<!-- Example of multiple jar paths -->
<jar-path>
<pathelement>jars</pathelement>
<pathelement>morejars</pathelement>
</jar-path>
<!-- Example of a lib path with absolute dir -->
<lib-path os="win32">
<pathelement>lib\win</pathelement>
</lib-path>
<!-- Example of OS-dependent env vars, using a property sub -->
<environment-variables os="win32">
<property >
<name>MY_WIN_VAR</name>
<value>$WinVar$</value>
</property>
</environment-variables>
<environment-variables os="linux" compiler="gcc">
<property >
<name>MY_GCC_VAR</name>
<value>$LinuxDriverDir$</value>
</property>
</environment-variables>
<java-system-properties>
<property>
<name>foo</name>
<value>bar</value>
</property>
</java-system-properties>
</grid-library>

TIBCO GridServer
®
Developer’s Guide
|
139
Chapter 7
GridCache
This chapter provides information on using GridCache, a dynamically updateable
distributed object cache that any GridServer Driver or Engine can use to store
data for later retrieval by other GridServer components.
Topics
• Overview, page 140
• General Capabilities, page 141
• Using The GridCache API, page 147
• Fault Tolerance and GridCache, page 149

TIBCO GridServer
®
Developer’s Guide
140
|
Overview
GridCache is a
dynamically
updateable
distributed object
cache that any
GridServer Driver
or Engine can use
to store data for
later retrieval by
other GridServer
components.
While GridServer
extensively uses
object caches
internally,
applications can
access the GridCache object cache directly through an API, to reduce load on
backend datastores and decrease access time to data. GridCache is similar to the
proposed JSR-107 JCache, with a similar interface and a subset of features.
GridCache meets the requirements of many informational market data systems,
where a consistent view of object state is extremely important but it is not
necessary to guarantee that all participants process every individual state change
(for instance every individual quote move) as a transaction.
Figure 3 A typical GridCache implementation.

TIBCO GridServer
®
Developer’s Guide
|
141
General Capabilities
GridCache is a general distributed cache that provides a consistent view of data to
all clients (Drivers and Engines) in the Grid. Data resides in unique regions of the
cache. Data can be serializable Java objects, .NET objects, strings, and byte arrays
for C++. The global cache of data can be arbitrarily large, limited only by the
amount of disk space on the Manager. Each component locally caches only the
data requested by users on that component. The local cache of each client,
designed to speed up access to frequently used data, is in-memory with the
option in Java Drivers and Engines to spool to disk. The size of the local cache is
configurable through the Engine distribution configuration or the Driver
properties file.
API
You can access GridCache through a client API available on Drivers and Engines.
The API follows the JCache specification where appropriate. The API is available
in Java, .NET, and C++, and provides cross-platform access to data where
appropriate. That is, C++ and Java applications can share XML documents
(strings), but have little use for sharing Java or .NET objects. You can also use
Data References across different platforms to support streaming very large
objects. See Data References on page 70 for more information.
Modes
GridCache operates in one of the following modes:
•
Local This mode lets you cache data locally by putting elements into the
cache. This mode does not synchronize clients that are accessing local cache
regions with the same name. This is similar to having a local hashtable with
LRU and eviction based on time-to live from creation time.
•
Local with loader This mode lets you load data into the local cache using a
loader specified at create time. Puts (cache writes) are not allowed in this
mode. Users can manually synchronize clients’ local caches using clear and
invalidate methods.
•
Global Data that users put into the cache is then available globally. Full
automatic synchronization occurs in this mode. All components have access
to a synchronized view of all entries.
•
Global with loader Users can use a global loader to load data into the cache.
Full automatic synchronization occurs in this mode.
TIBCO GridServer
®
Developer’s Guide
142
|
Cache Configuration and Access
To configure cache regions, use the GridServer Administration Tool at Services >
Services > Cache Regions. Define the region names or regular expressions with a
set of attributes. The
getRegion method in CacheFactory provides access to the
region if it already exists or creates the region with the mapped attributes. A
region name throws an exception when it matches multiple regular expressions
from different schemas. A second Cache access method is available and takes the
schema name to provide dynamic mapping of regions to attribute schemas.
When you configure Local and Global loaders, the class name of the loader and
the type are arguments to the constructor. Users can define bean properties for
loaders. Loaders are available only in Java and .NET, but can be used by the C++
API. JNI, or managed C++ can be used to implement loaders to access native
resources. Each schema that requires a loader defines the loader within the
configuration page.
Changes to the cache configuration take effect the next time you create regions
with that cache configuration. Pre-existing regions that require the configuration
changes must be manually destroyed and recreated.
Data Storage
All data put to a global cache is stored in a persistent backend datastore on the
Broker’s file system. You can limit the size of the Broker’s file cache. The default is
that there is no limit. If the Broker’s file cache is size limited and full, the Broker
silently removes data to make room for the incoming data. If the cache entry is too
big, it first goes to the memory cache, and if it cannot fit there it goes to the disk
cache. If it is too big for the disk cache too, then it is dropped. There is no global
resilience when using a memory-based cache; however, you can use a loader for
that purpose.
Attributes
Define the GridCache Configuration Attributes in schemas. Then, apply the
attributes to newly created regions. You can define the following types of
attributes:
•
TimeToLive Regions can define a time-to-live attribute. Data that is stored in
the cache for longer than the time-to-live attribute is evicted, and you must
reload that data from the backend datastore. Data in local caches is evicted
locally. Data for distributed regions is evicted from the distributed cache, and
the Broker and all clients delete that data if they have cached it locally.
•
Local/GlobalLoader Loads data from a backend datastore. See Cache Loaders,
below.
TIBCO GridServer
®
Developer’s Guide
|
143
• KeepAlive Specifies how long the client keeps the region and its keys in its
local cache after the last reference to the region goes away.
Consistency/Synchronization
The cache synchronizes by propagating update notifications to all clients listening
on a region. These notifications occur any time the region changes. Specifically,
they occur on a put (when an element already exists), clear, remove, or invalidate.
This applies to different region types differently:
•
Engines GridCache guarantees that all Engines receive all update
notifications by the time they take the next task or Service request.
•
Drivers There are no synchronization guarantees for the Driver. The Driver
receives notification messages the next time it performs a request, polls the
server for results, or sends a heartbeat.
Cache Loaders
Loaders provide an optional mechanism for loading data into the cache from a
backend datastore, such as a relational database. Users can implement and
associate Cache Loaders with a region of the cache. These Cache Loaders can be
installed locally on the client (Driver or Engine) or globally, in the GridServer
Broker.
Global
Use a Global Cache Loader for synchronized regions from which all clients can
access data.
• Global loaders are defined and configured in the schemas.
• When other clients get access to that region, they automatically are using that
loader.
• A client can specifically pre-load data into the cache by explicitly calling the
load method with a single key or a list of keys.
• If a get does not find data, the loader then attempts to load for that key by
calling the loader’s load method.
• Puts are not allowed on regions with loaders.
• Global loaders are written in Java, but can be bridged to native or .NET code
through JNI.
• Global CacheLoader JAR files are deployed to the
lib directory in the cache
directory. By default, the cache directory is
DS_DATA/cache. Configure the
TIBCO GridServer
®
Developer’s Guide
144
|
cache directory in the Cache section of the Manager Configuration page in
the Administration Tool.
Local
Use a local loader to cache data locally from an external database. Clients do not
share local loaders.
• Puts (writes) are not allowed, as it is a local cache, and data is not propagated
to other clients or regions.
• Removing an item is not allowed. Instead, invalidate the item. Invalidating
causes the item to be removed from other client’s caches.
• Local loaders can only be .NET or Java. You can adapt CPP loaders through
JNI or managed C++.
Cache Loader Write-through and Bulk Operations
To simplify using back end datastores with GridCache, it’s sometimes desirable to
add a means for supporting store and remove methods on the loader rather than
just supporting it purely as a data fetching mechanism. It’s also sometimes
desirable to be able to use such methods in a batch form, such that a cache can be
“primed” with entries through a bulk load method, or that multiple objects can be
stored, removed and invalidated with a single method to cut down on per-store
operation overhead.
Loaders can inherit from two interfaces that support methods for supporting
store and remove methods on the loader:
• The preload methods are exposed in the
BulkCacheLoader interface.
• The store, remove and clear methods are exposed in another interface,
CacheStore, and can be used by the underlying cache mechanism for
modifying the content of cache puts and removals on the backend datastore.
The cache mechanism can then invalidate the corresponding entry or entries
for all other caches listening on that region, if applicable.
It is possible that the backend store gets updated without sending an invalidation
message to all other clients. If this scenario is detected, it throws an exception
indicating a loss of synchronization, but the cache client must handle recovery
from that point on.
The caching system in GridServer does not provide a mechanism to auto-update
data in the cache when it changes in the backend, if done so by a mechanism other
than those offered by the CacheStore interface.
Support is available for datastore write-through, bulk write-through, remove,
bulk remove and bulk load, on both global and local loaders, in Java and .NET.
TIBCO GridServer
®
Developer’s Guide
|
145
Notification
GridCache provides an optional mechanism whereby you can implement a class
that listens for update notifications. An update is defined to be either an
invalidation call on a loaded object or on a put call on a key that exists in the cache
already. You can then take any action desired such as updating local copies of the
object or data to the new version or ignoring the update completely. The next time
that the data is requested from the cache, GridCache fetches and locally caches the
most current version of that data.
Disk/Memory Caching
When the cache is full, cache puts (or writes) push the oldest element out of the
cache. Elements are then put into the backing disk cache or removed entirely. This
makes the caches LRU caches. You can configure the size of the local cache and
the size of the backing disk cache:
•In the
driver.properties file, for Drivers.
• In the Engine configuration, for Engines.
If you configure disk caching, then any puts into the memory cache when the
memory cache is full force the oldest element out of the memory cache into the
disk cache. Any access to a cache element that has to get the element from the disk
cache brings the element into the memory cache. CPP Drivers do not have
disk-backed cache.
Cache Region Scope
Global cache regions exist until they are destroyed through the destroy method
regardless of whether any client has a reference to that region. Unnecessary global
cache regions impact eviction performance, so it is important to destroy global
regions when they are no longer needed.
After all references to a cache region on a client go out of scope, local cache
regions persist on clients until their keepalive timeout. At that point, the region is
swept from the cache. Use the
close() method to explicitly release a reference to
a region. If you do not use the close method, garbage collection handles
decrementing references to the region. However, garbage collection is never
guaranteed so the keepalive timeout is not a guaranteed timeout. Using the close
method is recommended.

TIBCO GridServer
®
Developer’s Guide
146
|
Data Conversion Matrix
The following table outlines the results of putting a data type into GridCache and
then getting it with a different Driver.
Input .NET Output Java Output C++ Output
String String String std::string
Java or .NET
byte[]
byte[] byte[] std::string
.NET Object Object undefined undefined
Java Object undefined Object undefined
DataReference DataReference DataReference DataReference

TIBCO GridServer
®
Developer’s Guide
|
147
Using The GridCache API
Details about the GridCache API are in the GridServer API JavaDoc, which is
available from the Documentation page of the Administration tool.
Documentation for the
Cache interface covers the use of GridCache.
The GridCache API supports the following seven primitives:
GridCache constructor with CacheFactory
To create a new GridCache instance, use the CacheFactory to get a reference to a
particular region. On a particular client component, you can construct multiple
instances of a GridCache with the same region, but each exposed instance with
the same region shares the same underlying implementation. This lets multiple
Sessions share the same view of a cache without having to duplicate the storage
or the code.
Put and Get
The
put method writes to the cache a new entry for a key and object. The get
method returns the object stored in the cache, for a given key. If you use the get
method on a key that does not exist and the region has an associated loader, the
loader attempts to load the data for that key. A second get method, when given a
mapping of keys, bulk-gets a mapping of keys and their objects. Bulk gets use a
single HTTP request for each map, which can lower transaction overhead.
Region
Region names are any printable low ASCII character (32-126), except for
characters prohibited in XML attribute values (', ", &, <).
Keys
A Key is a string that refers to an object in the cache. The
keys method gets:
• For a global region type, a list of all keys currently stored on the Manager for
this cache.
• For a local region type, a list of locally cached keys.
Remove
Removes this object from the region, from the Manager, and from all distributed
caches.
TIBCO GridServer
®
Developer’s Guide
148
|
Clear
Clears all objects from the region, the Manager, and regions on other components.
Invalidation handlers
By default, GridCache implements a lazy invalidation mechanism where callers
are told only that their version of an object is out-of-date when they make a fresh
“get” call for the object. The invalidation handler interface lets the caller register
or deregister to receive asynchronous notification that a get, put, remove, or clear
has invalidated the caller’s local copy of an object.
Note that .NET cache loaders for GridCache must be packaged as a Super Grid
Library. For more information on using Super Grid Libraries, see the GridServer
Administration Guide.

TIBCO GridServer
®
Developer’s Guide
|
149
Fault Tolerance and GridCache
GridCache supports fault-tolerance. For details, see the GridServer Administration
Guide.
TIBCO GridServer
®
Developer’s Guide
150
|

TIBCO GridServer
®
Developer’s Guide
|
151
Chapter 8
GridServer Design Guidelines
This chapter discusses two important aspects to consider when designing an
application to run on GridServer: data movement, and task or Service request
duration. There are a variety of ways to move data among the machines involved
in an application; the first section considers their characteristics, and suggests
which to choose under various circumstances. When you divide a problem into a
set of tasks or Service requests, you can usually select how many to use, or
equivalently, how much time each one can take. The second section discusses
factors that can influence this decision.
Topics
• Data Movement, page 152
• Service or Task Duration, page 159

TIBCO GridServer
®
Developer’s Guide
152
|
Data Movement
Every distributed computation ultimately executes as a local computation—a
single computing process. You must move every piece of input data across the
network from wherever it resides to the machine that needs to process it, and
every piece of output data must travel over the network from the machine that
produced it to its ultimate destination. Additionally, you can use caching to
optimize data movement, providing a strategy for lowering the amount of data
transfer. Moving large amounts of data over a network efficiently is a crucial
aspect in the design of most distributed applications. Efficient data movement can
often make a dramatic difference in performance.
Principles of Data Movement
Good data movement design can be summarized in two principles:
• Move each piece of data over the network as few times as possible—
preferably just once.
The less that data is moved, the less time it takes to move it. But the many
layers of abstraction offered by modern computer systems can hide data
movement, making it harder to see the bottlenecks. Network file systems are a
good example: there is no way to tell from reading the code whether a file is
being read from the local disk or over a network, but the performance
difference can be significant.
• Move data as early as possible—preferably before the computation starts.
Doing so improves the performance of the computation because the
stopwatch that times the computation is started after the data movement has
already occurred. But this is more than a mere accounting trick. Consider a
nightly report that must run after 5 PM to avoid conflicting with daytime
Services. If the data for the report is available at 4 PM, it can be distributed to
Engines in the hour before the report runs.
Data Movement Mechanisms
The GridServer software uses the following data movement mechanisms:
•Service Request Argument and Return Value
• Service Session State
• Shared Directories and Direct Data Transfer
• Resource Update
TIBCO GridServer
®
Developer’s Guide
|
153
•GridCache
•Data References
Service Request Argument and Return Value
The most direct way to transmit data between a Grid client and an Engine is
through:
• The argument to a Service request and
• The return value from the Service request.
If you enable Direct Data Transfer, the data travels directly between Driver and
Engine.
Each request is handled efficiently, but the aggregate data transfer across
hundreds of requests adds up significantly. Therefore, factor data common to all
requests into session state or init data, or distribute it by another mechanism.
Service Session State
Any Service Session can have an associated state. As described in the Services
chapters, this state resides on the Driver as well as on each Engine hosting the
instance, so it is fault-tolerant with respect to Engine failure.
Service Session state is ideal for data that is specific to a session. Service Session
state is easy to work with, because it fits the standard object-oriented
programming model; it is downloaded once per Engine.
Transmission of the Service Session state from Driver to Engine is peer to peer and
is GridServer’s Direct Data Transfer (DDT) feature. DDT is enabled by default.
When DDT is enabled and a Service creation or Service request is initiated on a
Driver, the initialization data or request argument resides on the Driver, sending
only a URL (and not data) to the Manager. When an Engine receives the request, it
downloads the data directly from the Driver rather than the Manager. This
mechanism saves one network trip for the data and can result in significant
performance improvements when the data is much larger than the URL that
points to it, as is usually the case. It also greatly reduces the load on the Manager,
improving Manager throughput and robustness.
Shared Directories and DDT
Some network configurations are more efficient using a shared directory for DDT
rather than the internal fileservers included in the Drivers and Engines. In this
case, configure the Driver and Engines to read and write requests and results to
the same shared network directory, rather than to transfer data over HTTP. All
Engines and the Driver must have read and write permissions on this directory.
TIBCO GridServer
®
Developer’s Guide
154
|
Configure shared directories at the Service level with the SHARED_UNIX_DIR and
SHARED_WIN_DIR options. If you use both Windows and Unix Engines and
Drivers, configure both options to be directories that resolve to the same directory
location for the respective operating systems.
Resource Update
GridServer’s Resource Update mechanism replicates Grid Libraries, or archives
of versioned sets of resources, with Engines. It also replicates the contents of a
directory on the Manager to a corresponding directory on each Engine. When you
use Resource Update, use the Services > Services > Grid Libraries page in the
GridServer Administration Tool to upload files to the Manager. After all currently
running Services finish, the Engines download the new files. For more on
Resource Update, see the GridServer Administration Guide.
Resource Update is the best way to guarantee that the same file is on the disk of
every Engine in your Grid. File Update is ideal for distributing application code,
but it is also a good way to deliver configuration files or static data to Engines
before your computation starts. Any kind of data that changes infrequently, like
historical data, is a good candidate for distribution in this fashion.
GridCache
GridServer’s GridCache feature is a repository on the Manager that is
aggressively cached by components (Drivers and Engines). The repository
comprises a set of regions, each of which is a map from string keys to arbitrary
values. The GridCache API supports reads, writes, removing key-value pairs, and
getting a list of all keys in a catalog. For more information on GridCache, see
Chapter 7, GridCache, on page 139.
A GridCache component caches every value that it gets or puts. If a component
changes a key’s value or removes it, the Manager asks all components to
invalidate their cached copy of that key’s value.
GridCache is fault tolerant with respect to Engine failure, because the data is
stored on the Manager. When an Engine fails, its cached data is lost and its task is
rescheduled. The Engine that picks up the rescheduled task gradually builds up
its cache as it gets data from the Manager.
GridCache is a flexible and efficient way for Engines and Drivers to share data.
Like File Update, an Engine needs only a single download to obtain a piece of
constant data. Unlike File Update, GridCache supports data that changes over the
life of a computation.
You can use GridCache for having Engines post results. This is generally only
useful if those results are to be used as inputs to subsequent computations.
TIBCO GridServer
®
Developer’s Guide
|
155
Data References
GridServer Data References are objects that represent data existing on a
GridServer client. You can use them to pass lightweight data from one client to
another, so that only the destination needing the data performs the data transfer.
Typically, one client filesystem stores the data and and another client’s fileserver
serves the data.
Data Movement Examples
As an example of using the data movement mechanisms discussed above,
consider the problem of determining the value of a financial instrument. This
example uses a computation method named value. The value method takes two
arguments: a deal and a pricing scenario. The deal argument contains all
information specific to a financial instrument needed to determine its value, such
as coupon and maturity date. The pricing scenario argument contains all other
determinants of the deal’s value, such as interest rates and prices of underlying
instruments. The output of the value function is a single number representing the
value of the deal under the given pricing scenario.
Typical applications require the value of many deals over one or several pricing
scenarios. To distribute and parallelize this computation, we execute the value
function simultaneously on many Engines. We assume the code for the value
function is available to each Engine (whether by Resource Update or over a
network file system). We also assume that the numbers returned by the value
function make their way back to the client through the standard Service return
value mechanism. The question we want to consider is how to get the deal and
pricing scenario information to the Engines.

TIBCO GridServer
®
Developer’s Guide
156
|
Database Access
We first look at the deal information itself, stored in a database or data server
somewhere on the network. Compare the two scenarios in Figure 8-1. In the first
diagram, on the left, the Driver loads the deal information from the data server
and sends it to the Engines. In the second diagram, on the right, the Driver sends
just the unique identifier and has each Engine access the data server on its own.
The second choice is better because less data moves across the network to
accomplish the same result. In the first choice, the data moves across the network
twice, once from the data server to the Driver and second from the Driver to the
Engine. In the second choice, the data moves across the network only once from
the data server to the Engine. Also, the data needs marshalling and
unmarshalling only once.
The second choice also increases parallelism at the data server. In the first choice,
only the Driver is attempting to load data from the data server. In the second,
multiple Engines attempt to load data concurrently. Assuming that the data
server can handle the load, the second choice increases parallelism.
Single Pricing Scenario
We now consider the case in which you use a single pricing scenario to evaluate
many deals. Here is one (suboptimal) way to organize this computation. We
assume throughout that you already deployed and registered a Service containing
the value function.
Algorithm 1 (suboptimal):
1. Create a Service Session of the value Service.
Figure 4 Data Flow Between A Driver, Two Engines and A Data Server
TIBCO GridServer
®
Developer’s Guide
|
157
2. For each deal, submit the deal identifier and the pricing scenario as an
asynchronous request to the Service Session.
3. Wait for results.
Although this algorithm gets the job done, it needlessly sends the same pricing
scenario multiple times.
This is an ideal application of Service Session state:
Algorithm 2:
1. Create a Service Session of the value Service, initialized with the pricing
scenario.
2. For each deal, submit the deal identifier as an asynchronous request to the
Service Session.
3. Wait for results.
By making the pricing scenario be part of the session’s state, it is transmitted only
as many times as there are Engines that implement the session, rather than once
per request. GridServer never allocates more Engines to a Service session than
there are requests for that instance, so Algorithm 2 never moves more data than
Algorithm 1. And in the likely event that there are many more requests than
Engines (we argue below in the Task Duration section why this is a good idea),
Algorithm 2 moves much less data than Algorithm 1.
Several Pricing Scenarios
What if the application needs to value the portfolio of deals for more than one
pricing scenario? One approach is simply to repeat Algorithm 2 several times,
creating a new Service session for each pricing scenario. It is also possible to use a
single session and employ the
updateState method of the Service client API to
transmit each successive pricing scenario to the Engines running the session. If
the differences between pricing scenarios are small and they are used to perform
the update instead of the pricing scenarios themselves, then using
updateState
can result in a considerable data movement savings; even if the pricing scenarios
themselves are used as updates, this approach is still likely to be superior to using
separate instances.
Multiple Pricing Scenarios Available Early
Now let us add the following wrinkle: we still want to compute the value of many
deals over many pricing scenarios, but the pricing scenarios are available to us
some time before we can run the application. For instance, pricing scenario
information be available at 4 PM, but we cannot start the nightly report until 5:30
PM, to avoid interfering with daily work. In this situation, we can exploit the time
TIBCO GridServer
®
Developer’s Guide
158
|
gap to push information to the Engines before the computation starts. One
approach would be to use File Update to put all the pricing scenario data on all
the Engines. Another would be to put the pricing scenario data into GridCache
and run a “primer” Service that copies the data to the Engines. The trade-offs
between these two approaches were discussed above under Data Movement
Mechanisms.
Deal-Pricing Scenario Symmetry
Finally, we point out that deals and pricing scenarios are for the most part
symmetric in these examples (the main difference being that pricing scenarios are
less likely to be indexed by primary key in a database, so the discussion of deal
identifiers versus deal data does not apply to them). For instance, if deals are
available to you early, you can use File Update or GridCache to push deal
information to Engines before your application starts.

TIBCO GridServer
®
Developer’s Guide
|
159
Service or Task Duration
Service or Task duration has an important impact on the performance of
distributed computations. Recall that a task corresponds to a single Service
request when using Services. Make tasks long enough to compensate for
communication overhead, but not so long that their interruption seriously delays
the overall computation. Dividing the work into more tasks, each of which takes
less time, can also mitigate the performance degradation that can arise from
having tasks of different sizes. We discuss these issues in detail in the following
sections.
As a running example, we use the deal valuation problem discussed in the
previous section on data movement. There we assumed that each task was
responsible for pricing a single deal. But this is unlikely to be efficient for most
types of deals; instead, group several deals together in a single task.
Engine Interruption and Smoothing
If an Engine is interrupted or fails during a task, that task must run again from the
beginning. Therefore, divide work into tasks with short execution times. The
shorter the task, the less work you lose when an Engine fails.
Additionally, shorter tasks result in better performance. This is because you are
reducing the variability of task durations in a computation.
For example, suppose that you divide the work of a computation so that 10
Engines each have one task. You expect that this minimizes communication
overhead and that Engines do not fail. However, what if you misestimate one task
and it takes twice as long as the others? Since all tasks must finish for the
computation to be complete, the longest task determines the computation time. If
you have nine one-minute tasks and one two-minute task on 10 Engines, the
computation takes two minutes, with the last minute consisting of nine idle
Engines and one Engine still working on the two-minute task. With exactly as
many tasks as Engines, your program runs as long as the longest task. (This
section simplifies this discussion by ignoring communication time.)
Suppose you use twice as many tasks as Engines. This significantly improves the
expected running time. To understand why, continue the above example. If you
divide each of the 10 tasks in two, you have 20 tasks for 10 Engines: 18 30-second
tasks, and two one-minute tasks. Each Engine takes two tasks at random. The
chance of the same Engine receiving both long tasks is fairly small, so this
program is likely to take one and a half minutes most of the time.
TIBCO GridServer
®
Developer’s Guide
160
|
Similarly, more, shorter tasks smooth out the effect of different processor speeds.
Assume that all tasks take the same time, but that one Engine is slower than the
others. With exactly one task per Engine, the slow Engine determines the
computation time. With many short tasks, the slow Engine takes fewer tasks than
the other Engines, and all Engines finish at close to the same time, minimizing the
time for the whole computation.
Summary
Communication overhead dictates using long tasks, but the possibility of Engine
failure and the opportunity to smooth over differences in task durations and
processor speeds suggest using many quick tasks. The best compromise is to
choose a task running time between 30 seconds and several minutes, and to
choose a number of tasks that is three or four times the number of available
Engines.
These are just a few examples of how to improve the performance of your
Services. For a more complete list, see the Performance and Tuning chapter of the
GridServer Administration Guide.

TIBCO GridServer
®
Developer’s Guide
|
161
Chapter 9
The Admin API
The GridServer Admin API offers programmatic access to administrative tasks or
information normally performed or presented in the web-based GridServer
Administration Tool. The API is available through Java, C++, and .NET Drivers
and Services, on Managers through a Server Hook, from a SOAP Web Service, and
with JMX.
Topics
• Documentation for the GridServer Admin API, page 162
• Using the Admin API over SOAP, page 163
• Using Server Hooks, page 164
• Using JMX, page 165

TIBCO GridServer
®
Developer’s Guide
162
|
Documentation for the GridServer Admin API
Detailed documentation on GridServer Admin API is in the API documentation.
The WSDL is available in the GridServer Administration Tool at Grid
Components > Drivers > Web Services.
The following components are defined:
•
BatchAdmin
• BrokerAdmin
• DriverAdmin
• DriverManager
• EngineAdmin
• EngineDaemonAdmin
• ManagerAdmin
• ServiceAdmin
• UserAdmin
• Version
The methods allowed are based on the Security Roles of the user. When called in a
Service, the user is considered to be the user that created the Service Session.
When called in a Server Hook, all methods are available. Note that methods
return null if there is no output, as opposed to returning a zero-length array. For
example,
EngineAdmin.getAllEngineInfo() returns null if there are no Engines
currently logged into the Broker.
See the Admin > User Admin > Role Admin page on the Administration Tool for
a list of all permissions.

TIBCO GridServer
®
Developer’s Guide
|
163
Using the Admin API over SOAP
The following example uses the Admin API over SOAP with Java:
1. Locate the WSDL for the Service from the Manager’s Web Service List. For
example, for the
EngineDamonAdmin class use,
http://example:8080/livecluster/webservices/EngineDaemonAdmin?w
sdl
2. Generate Java Stubs for the Service. For example, using Axis:
org.apache.axis.wsdl.WSDL2Java
http://example:8080/livecluster/webservices/EngineDaemonAdmin?w
sdl
3. Use the Stubs. For example:
// Get the interface to the Admin Service
EngineDaemonAdmin server = (new
EngineDaemonAdminServiceLocator()).getEngineDaemonAdmin();
// Required when Driver authentication is enabled
((Stub)server).setUsername("admin");
((Stub)server).setPassword("admin");
// Maintain the session ID for each request
((Stub)server).setMaintainSession(true);
// Query the Admin Service
EngineDaemonInfo[] info = server.getAllEngineDaemonInfo();

TIBCO GridServer
®
Developer’s Guide
164
|
Using Server Hooks
The entire Java Admin API is available within a Server Hook. For details about
implementing Server Hooks, see the JavaDoc documentation for the
ServerHook
class.

TIBCO GridServer
®
Developer’s Guide
|
165
Using JMX
The Java Admin API is also available using JMX. Most API components are
exposed as MBeans within the
com.datasynapse.gridserver.admin tree. See
the JavaDoc documentation for the
com.datasynapse.gridserver.admin
package for more information about each object.
TIBCO GridServer
®
Developer’s Guide
166
|

TIBCO GridServer
®
Developer’s Guide
|
167
Chapter 10
Using Conditions
In a typical Grid environment, machines are not all identical. Some machines are
slower, or have less RAM; other machines are faster, but work to capacity during
the day. Depending on the Services you have and the general demographics of
your computing environment, the scheduling of Services to Engines might not be
clearly deterministic. And sometimes, a specific Service might require special
handling to ensure that optimal resources are available for it.
Topics
• Conditions, page 168
• Discriminator Conditions, page 169
• Affinity Conditions, page 172
• Custom Discriminator and Affinity Conditions, page 174
• Dependency Conditions, page 175
• Queue Jump Conditions, page 177
• Descriptor Conditions, page 178
• EXTRAConditions, page 179
• Condition Sets, page 182
• Engine Properties, page 183

TIBCO GridServer
®
Developer’s Guide
168
|
Conditions
Conditions are a feature of GridServer. Conditions affect how Service Sessions and
tasks are scheduled to Engines. Conditions enable you to use Engines selectively
based on their properties.
GridServer provides the following types of Condition:
•
Discriminator Conditions specify a subset of Engine that can work on a task or
Session, typically based on Engine properties.
•
Affinity Conditions enable you to set an affinity for tasks or Sessions for
Engines, based on Service state and typically properties. Unlike
Discriminators, it does not prevent tasks from going to any Engine, it only
attempts a best match.
•
Dependency Conditions enable submitting workflows to a Broker without an
active Grid client to manage Dependencies (wait for completed tasks, submit
more based on successful outcome, and so on).
•
QueueJump Conditions enable the Driver to specify that a Task be placed at the
front of the waiting queue, rather than at the back.
•
Descriptor Conditions set descriptive information about an Invocation request.
•
EXTRAConditions prevent Engines from taking Tasks when a necessary
resource, such a database connection, is not available. The current resource
counts are updated with a simple REST API.

TIBCO GridServer
®
Developer’s Guide
|
169
Discriminator Conditions
Use Discriminator Conditions to select Engines for particular Services based on
Engine properties. Discriminators have many uses:
• Limit a Service to run only on Engines whose usernames come from a
specified set, to confine the Service to machines under your jurisdiction.
• Limit a resource-intensive task to run only on Engines whose processors are
faster than a certain threshold, or that have more than a specified amount of
memory or disk space.
• Direct a task that requires operating-system-specific resources to Engines that
run that operating system.
Discriminator Conditions can be dynamically attached to a Service based on the
Service Description on the Manager or set programmatically with the Driver.
Setting Discriminators in the Administration Tool
You can also attach Discriminators to Services in the GridServer Administration
Tool, at Services > Services > Service Conditions. This page enables you to create
Discriminators by entering three defining factors: the Services that the
Discriminator affects, the types of Engines that can run on those Services, and
optionally, if an EXTRACondition must be met. (See EXTRAConditions on
page 179 for more information on EXTRAConditions.) This differs from
programmatic Discriminators because they aren’t explicitly attached to a Service
at its creation; instead, a group of Services is defined as being attached to that
Discriminator, by Service name, application name, department name, or
wildcards on that or other criteria.
By default, changes made to Discriminators in the GridServer Administration
Tool are applied to Services immediately. This can be changed so that
Discriminator changes only apply to subsequently created Services. To change
this behavior, go to Admin > System Admin > Manager Configuration >
Services, and under the Scheduling heading, change the value of Apply
Condition Admin Changes Immediately.
Setting Discriminators Programmatically
You can use the GridServer API to set Discriminators for a Service or task. Create
Discriminators with the
SchedulingConditionFactory. In Java, this is located in
com.datasynapse.gridserver.client. You can use the factory to create several
Conditions. The method to use to create Discriminators is
createPropertyDiscriminator.
TIBCO GridServer
®
Developer’s Guide
170
|
The following example in Java code creates a SchedulingConditionFactory,
which you then use to create a Discriminator Condition to run a Service or task
only on Engines where the operating system is Linux:
SchedulingConditionFactory schedFactory =
SchedulingConditionFactory.getInstance();
Condition isLinux =
schedFactory.createPropertyDiscriminator(EngineProperties.OS,
SchedulingConditionFactory.CONTAINS, "Linux", false);
The createPropertyDiscriminator method takes four parameters:
• The first parameter is the name of an Engine property.
• The second parameter is a comparator used to compare the Engine property
to the property value. You can use several comparators to compare numbers
or strings. (See details in the
SchedulingConditionFactory API
documentation.) For example, the
CONTAINS comparator is true if an Engine
property matches any one of a comma-delimited list of properties.
MATCHES
compares against a Java regular expression;
EQUAL checks if parsed numerical
values are equal.
• The third parameter is a property value.
• The fourth parameter defines what happens if the property is not set on an
Engine. In this case, the Engine is not considered. In some situations you
might want the opposite behavior, such as when you are using a
Discriminator to exclude a subset of Engines with a specific property, but
allowing any other Engines.
After you create a Condition such as a Discriminator, you can use it when creating
or submitting Services. The following example in Java code creates a
Discriminator and sets it in a Service:
SchedulingConditionFactory schedFactory =
SchedulingConditionFactory.getInstance();
//Only run on Linux Engines
Condition isLinux =
schedFactory.createPropertyDiscriminator(EngineProperties.OS,
SchedulingConditionFactory.CONTAINS, "Linux", false);
Service s =
ServiceFactory.getInstance().createService("MyService", null,
null, null, isLinux);
If you change properties of Engines, the changes take effect during the execution
of a Service. For example, if you configure a Discriminator attached to a running
Service to look for a certain Engine property, changing this property can change
what Engines work on that Service.
TIBCO GridServer
®
Developer’s Guide
|
171
Discriminators are, however, attached to a Service at Service creation, so changes
you make to the Discriminator affect only subsequently submitted Services, not
Services that are already running.
PDriver Discriminators
When writing a PDS script, you can create job-level or task-level Discriminators to
limit which Engines work on a PDriver job or task. The
discriminator block
specifies either a job-level or task-level Discriminator for a job.
For more information on PDriver Discriminators, see The Discriminator Block on
page 99.

TIBCO GridServer
®
Developer’s Guide
172
|
Affinity Conditions
When a Broker is assigning tasks to Engines, one of the methods used to make
optimal matches is affinity, or the degree to which an Engine has initialization data
and updates from a particular Service. If there are a number of possible matches at
a point in the scheduling decision, the Broker assigns tasks to the match with the
highest affinity score. Affinity is a number that is calculated between an Engine
and a Service Session. By default, the affinity number is based on the amount of
state the Engine has for the session, whether it has loaded its Grid libraries, and
whether it is on a Home Broker.
It is possible to use a Affinity Condition to add affinity, typically based on Engine
properties. This Condition is similar to a Discriminator Condition, except when it
is satisfied, it adds a defined number to the affinity score.
If you plan to use affinity, aside from Affinity Conditions, you also need to tune
how and how much the scheduler uses affinity. For more information see the
GridServer Administration Guide.
Setting Affinity Conditions Programmatically
Create Property Affinity Conditions with the SchedulingConditionFactory,
using the
createPropertyAffinity method.
The following example in Java code creates a
SchedulingConditionFactory,
which is then used to create a Property Affinity Condition that would add four to
the affinity of any Engine-Service pairing where the Engine has two CPUs:
SchedulingConditionFactory schedFactory =
SchedulingConditionFactory.getInstance();
Condition dualAffinity =
schedFactory.createPropertyAffinity(EngineProperties.CPU_NO,
SchedulingConditionFactory.EQUALS, "2", 4.0);
Setting Affinity Conditions in the Administration Tool
You can also attach Property Affinity Conditions to Services in the GridServer
Administration Tool. Go to Services > Services > Service Conditions. This page
enables you to create Affinity Conditions by entering two defining factors: the
Services that the Condition affects, and the affinity change that will occur based
on an Engine’s properties.
TIBCO GridServer
®
Developer’s Guide
|
173
Task Affinity
Task Affinity provides the ability to run a set of Tasks on the same Engine or set of
Engines. It is primarily used for data awareness and locality. For example, you
may have a large dataset, and have Tasks that work on subsets of that dataset, so
you would prefer that an Engine works on Tasks from the same subset.
Create Task Affinity Conditions with the
SchedulingConditionFactory, using
the
createTaskAffinity method.
When set on a Task, it specifies that this Task should only run on an Engine that
has already worked on a Task with the same
TaskAffinity as specified by a tag.
The
wait value indicates how long it should wait for an Engine with affinity
before being allowed on any Engine. This wait countdown starts the first time
that the task becomes available for scheduling, and only if it is the next task to be
assigned of this set.
The first
TaskAffinity for a given tag should be assigned a wait value of 0 so
that it is immediately assigned to an Engine. Typically the remaining in the set
would use the same value, for example, 10000 for a wait of 10s. An Engine will
retain the affinity for the duration of the Service Session but not beyond.
The tag is not guaranteed to be unique among all Services, so you would typically
append a unique value to the tag, such as the Service ID. This is left to the caller,
since there may be a unique string shorter than the Service ID which results in
quicker string comparisons.
TaskAffinity can be used in a ConditionSet. For example, you can use this
along with a
PropertyDiscriminator and a Descriptor using an AND
ConditionSet.

TIBCO GridServer
®
Developer’s Guide
174
|
Custom Discriminator and Affinity Conditions
In addition to Conditions based on Engine Properties, you can implement your
own custom Conditions. For example, you may have a number of Services that
require a connection to a database, and may have more Engines working on those
Services than available connections. You could write a Server Hook that keeps
track of how many tasks are currently running, and write a Custom Discriminator
to prevent all Engines from taking a Task if all connections are in use by other
Tasks.
To write a Custom Condition:
1. Implement the
CustomDiscriminator or CustomAffinity interface in
SchedulingConditionFactory.
2. Package your classes into a JAR file, and for each Broker on which this is used,
place that file in
DS_MANAGER/webapps/livecluster/WEB-INF/lib.
3. At Service creation time, create it using the
SchedulingConditionFactory.createCustom[Affinty/Discriminator]
call. Note that it is not necessary to have the JAR in a Java Driver classpath;
likewise this is also available for C++ and .NET Services, since the class is only
used on Brokers.

TIBCO GridServer
®
Developer’s Guide
|
175
Dependency Conditions
Dependency Conditions allow you to submit workflows to a Broker without an
active Grid client to manage Dependencies (wait for completed tasks, submit
more based on successful outcome, and so on). When you submit a Session, you
can require one or more tasks or entire Services to complete before the scheduled
Service. These Dependencies can be Sessions or tasks already submitted, or ones
that have not yet been created. This way, multiple tasks in different Services can
be submitted, but they are not eligible for scheduling until certain conditions are
met—namely the successful completion of specific tasks or Sessions.
Creating Dependencies
Dependencies are Conditions which are applied to a Service or a Task. This
Condition has methods for adding Dependencies in the form of a Session ID, and
for an optional Task ID. Dependencies also allow a Boolean operation that dictates
whether to cancel an entire Task/Service when a dependent Task/Service fails.
You can create a forward Dependency for a Session, and optional Task ID, that
does not yet exist. To create a forward Dependency, generate a reference ID to a
Session, and then use that ID when creating the Session.
In Java, you use
com.datasynapse.gridserver.client.DependencyFactory to
create Dependency Conditions. You can assign more than one Dependency by
using a
ConditionSet. C++ and .NET APIs are similar. See the GridServer API
documentation for more details.
If there is no session with the dependent Service ID on the Broker when the
Session or task with Dependencies is added, it is automatically canceled with the
reason that the Dependency does not exist. If it is a forward Dependency, no such
cancellation is made.
You can specify that a Session or task be canceled if it has a Dependency that fails.
If a non-forward Dependency is made, and the session does not exist, the task is
always canceled.
Administering Task Dependencies
You can view Dependencies in the GridServer Administration Tool. Select
Services > Services > Service Sessions, or from the Task Admin page, available
from the Actions list on the Service Session Admin page. On either page, select
Service Session Details or Task Details from the Actions list. View the details for
a list of Dependencies showing which are pending and which are complete.

TIBCO GridServer
®
Developer’s Guide
176
|
You can remove Dependencies from a task or Service with the Remove
Dependencies action on the Actions list on the Task Admin page. This removes
the entire Dependency object, which removes all pending Dependencies; there is
not a way to remove a single Dependency from the Administration Tool.
Because the default for the
PURGE_INVOCATION_DATA option is
SERVICE_COMPLETED, task information can be lost on a Service, making a
dependent Service unavailable to find the information. In this situation, you can
set
PURGE_INVOCATION_DATA to SERVICE_REMOVED instead.
Task Dependencies are Broker-scope, and rely on Service and task events on a
Broker. They do not work across Brokers.

TIBCO GridServer
®
Developer’s Guide
|
177
Queue Jump Conditions
The Queue Jump Condition is used to specify that a Task be placed at the front of
the waiting queue, rather than at the back. It cannot be set on a Session. A typical
use case is a Service that submits some work, waits for results, and submits more
work based on earlier results. If an early task fails and you need to resubmit it,
you use this condition to make sure it is executed as soon as possible instead of
waiting for all other work to complete.
Queue Jump Conditions are created programmatically using the
SchedulingConditionFactory class. See Setting Discriminators
Programmatically, page 169 for more information on using this class.

TIBCO GridServer
®
Developer’s Guide
178
|
Descriptor Conditions
Use Descriptor Conditions to display descriptive information about an invocation
request.
Descriptive information about an invocation request is also available on the Task
Admin page and Admin API. Also, the Descriptor name is part of any log
message for a task with a Descriptor Condition.
Create Descriptors with the
DescriptorFactory. For example:
DescriptorFactory descFactory = DescriptorFactory.getInstance();
descFactory.create("C++ Driver Linux Build");
You cannot create a Condition Set of Descriptors. A Descriptor Condition can be
only a sole Condition in a Service or Service Set.

TIBCO GridServer
®
Developer’s Guide
|
179
EXTRAConditions
An EXTRACondition is an External Resource Advisory Condition, and is used to
prevent Engines from taking Tasks when a necessary external resource, such a
database connection, is not available. When using EXTRAConditions, the
scheduler will ensure that a task’s required resources are available before
assigning it to an Engine.
There are two parts involved in using EXTRAConditions: defining the Service
Condition, and maintaining the EXTRACondition count. Like other Conditions,
this type of Condition is defined on the Service Conditions page, and consists of
one or more named resources with a numerical comparison. The current resource
counts are then updated with a simple REST API.
Using the EXTRACondition REST Interface
Each EXTRACondition consists of a key and value pair that specifies a resource
count. To use an EXTRACondition, you must create a key and then periodically
update its count as the resource count changes.
Resource counts for EXTRAConditions are created and updated with a REST API.
The EXTRACondition REST Interface root is:
http://host:port/livecluster/restadmin/extracondition-admin/
The REST interface resides on the Primary Director. Values are backed up to the
Secondary Director but updates to the Secondary Director are not replicated back
if the Primary Director comes back up. In the event of a Primary Director failure,
you must use the Secondary Director’s URL to update the EXTRACondition
values until the Primary Director comes back up.
The API includes the following resources:
•
extracondition — for operations on a single EXTRACondition
•
extraconditions — for operations on all EXTRAConditions.
REST requests use basic authentication.
Creating and Updating an EXTRACondition
HTTP
PUT requests are used to create and modify an EXTRAConditon. The
following syntax is used:
/restadmin/extracondition-admin/extracondition/key
TIBCO GridServer
®
Developer’s Guide
180
|
The value for the key must be passed in the body of the request. The request will
return the value of the EXTRACondition as a string with an HTTP Response code
of 201 upon success. Any other server-side error will return exception text with
an HTTP Response code of 500.
For example, the following
PUT request, when made with a value in the body of
the request, will create a new EXTRACondition for the key
db.connections, or
update the existing
db.connections EXTRACondition:
/restadmin/extracondition-admin/extracondition/db.connections
Getting an Existing EXTRACondition
An HTTP
GET request can be used to retrieve the value of an EXTRACondition.
The following syntax is used:
/restadmin/extracondition-admin/extracondition/key
If the EXTRACondition was not found, an HTTP Response code of 404 will be
returned. Any other server-side error will return exception text with an HTTP
Response code of 500.
For example, the following
GET request will return the value of the
EXTRACondition of the key
db.connections as a string with an HTTP Response
code of 200 upon success:
/restadmin/extracondition-admin/extracondition/db.connections
Deleting an existing EXTRACondition
An HTTP
DELETE request can be used to remove an EXTRACondition. The
following syntax is used:
/restadmin/extracondition-admin/extracondition/key
The request will return with an HTTP Response code of 200 even if the key does
not exist. It will only return an exception text with an HTTP Response code of 500
for other server errors or an existing EXTRACondition was not able to be deleted.
For example, the following
DELETE request will delete the EXTRACondition with
the key
db.connections.
/restadmin/extracondition-admin/extracondition/db.connections
Batch Operations
There is also an
extraconditions resource that enables you to make an HTTP
GET to retrieve all EXTRAConditions. The following syntax is used
/restadmin/extracondition-admin/extraconditions
TIBCO GridServer
®
Developer’s Guide
|
181
The request will return a JSON array of key-value pairs formatted like the
following:
{
"Boston.BigFatDB.Connections":600,
"SF.BigFatDB.Connections":500,
"NYC.BigFatDB.Connections":1000
}
Similarly, an HTTP PUT with the same JSON in the body of the request will update
or create all pairs in the list.
To batch delete EXTRAConditions, you must use an HTTP
PUT using the
following syntax:
/restadmin/extracondition-admin/extraconditions/delete
The keys to be deleted must be passed in the body of the request, like the
following:
{
"Boston.BigFatDB.Connections",
"SF.BigFatDB.Connections",
"NYC.BigFatDB.Connections"
}
Batch operation requests will return with an HTTP Response code of 200 upon
success. Any other server-side error will return exception text with an HTTP
Response code of 500.
Setting EXTRAConditions
EXTRAConditions can be specified in Discriminators, which are attached to
Services in the GridServer Administration Tool at Services > Services > Service
Conditions. You can specify that one or more comparisons of EXTRACondition to
resource criteria must be true, or the Task will not be given to an Engine.
When creating a Discriminator using an EXTRACondition, there is a modifier
column for each Condition, which you can set to a positive or negative number.
When a Task is assigned to an Engine, the scheduler modifies the
EXTRACondition’s external resource value by adding the modifier value. Note
that the external resource value is not automatically changed when a Task
completes; you must script this using the REST interface, as described above.

TIBCO GridServer
®
Developer’s Guide
182
|
Condition Sets
In addition to using a single Condition, you can also combine Conditions. A
Condition Set is a set of one or more Conditions; the set is treated as a single
Condition.
Create Condition Sets with
ConditionSetFactory. (In Java, this is
com.datasynapse.gridserver.client.ConditionSetFactory.) After you
create a Condition Set, use its
add method to add Conditions to it. There are three
types of Condition Sets, described below, which dictate how the Conditions are
evaluated, and what Conditions can be added.
AND set
The AND set creates a set of ANDed Conditions. Two possible combinations of
Conditions are legal in an AND set:
• An AND set can contain Discriminators, Dependencies, or both. If all the
Conditions in the set are true, the Condition Set is true.
• Or, an AND set can contain Property Affinity Conditions. If all Affinity
Conditions are true, the scores that match are added to the affinity score.
You cannot mix Discriminators, Dependencies, and Property Affinity Conditions
in one AND set. Note that you cannot add Descriptor Conditions to an AND set.
OR Set
The OR set creates a set of Conditions for which any Condition can be true for the
set to be true. The OR set can contain only Discriminators, Dependencies, and sets
of either or both.
Service Set
The Service Set creates a Condition Set for adding different Condition types to an
Invocation or Session. You can add this set only to
ServiceFactory.createService(...), Service.execute(...), and
Service.execute(...). You can add only one Condition of each type
(Discriminator/Dependency, Affinity, Descriptor, and QueueJump).
You can, however, add a Condition Set containing only one type of Condition. For
example, a Service Set could include a Condition Set of Discriminators and
Dependencies, a Condition Set of Property Affinity Conditions, and a Descriptor.
(You cannot create a set of Descriptor Conditions.)

TIBCO GridServer
®
Developer’s Guide
|
183
Engine Properties
Within GridServer, each Engine has a set of properties. GridServer sets some
Engine properties automatically, such as the Engine’s operating system and the
estimated speed of the Engine’s processor. You can also create custom properties
for Engines.
Intrinsic Engine Properties
An Engine has a number of properties that reflect machine specific information,
such as OS, hostname, free memory, etc. For information about these properties,
see
EngineProperties in the com.datasynapse.gridserver.engine package
of the API documentation.
Custom Engine Properties
You can create your own custom Engine properties, and give them values using
the GridServer Administration Tool. To do so, first create the property on the
Manager, and then give it a value for each Engine, either from the GridServer
Administration Tool or programmatically with the Admin API.
To create new custom Engine properties and give them values with the
Administration Tool:
1. In the GridServer Administration Tool, go to
Grid Components > Engines >
Engine Properties
.
2. In the upper right corner, click Add.
3. Enter a property name and a brief description, then click Add. You can now
set a value to this property on any Engine.
4. Go to
Grid Components > Engines > Daemon Admin
and select Set Property
for Daemons on Page or Set Property for All Daemons from the Global
Actions list. This displays the user-defined properties you can set on Engines
started by a Daemon.
5. Select one or more Engine Daemons from the list, then select a predefined
property and enter a value, or enter a new property name and assign a value.
Instead of 3-4, you can also use the Admin API on a Driver to programmatically
set them.
TIBCO GridServer
®
Developer’s Guide
184
|
Engine Session Properties
Session Properties are properties that last for the duration of an Engine session on
the Manager. They are set on an Engine when it logs in and reset when the Engine
logs off.
This example sets a Session Property:
public void init() {
// initialize some static data for use by another service
EngineSession.setProperty("inited", "true");
// this property can now be used by the Discriminator
// of the other Service
}
See the API documentation for the EngineSession class for more information.
GPU Services Engine Properties
One set of intrinsic Engine properties are the CUDA GPU Engine properties. On
Windows and Linux systems, the Engine Daemon detects the presence and
characteristics of GPU processors with the CUDA runtime library, and provides
those characteristics as Engine properties. This allows for the development of
Services that can take advantage of machines that have GPU cards.
If the Engine Daemon detects a CUDA GPU, it sets the following Engine
properties:
•
CUDA_DEVICES – The number of CUDA devices detected on an Engine.
•
CUDA_FIRST_GPU_NAME – The name of the first CUDA device.
•
CUDA_GLOBAL_MEMORY – The amount of CUDA global memory supported. If
there is more than one device, this is the minimum amount supported.
•
CUDA_VERSION – The CUDA capability version. If there is more than one
device, this is the minimum version.
•
CUDA_PROCESSORS – The number of CUDA processors supported. If there is
more than one device, this is the minimum number of processors.
Note that on 64-bit Windows machines, CUDA properties are only detected when
the Engine Daemon is started on the physical console. Engine Daemons started
via RDP will not detect any GPUs.
On Linux machines, you need to ensure that the device files
/dev/nvidia* exist
and have read/write file permissions for the user running the Engine. This can be
done creating a startup script to load the driver kernel module and create the
entries at boot time. For more information, see the Linux documentation at the
NVIDIA support site.
See the CUDA example in the GridServer SDK for more information.
TIBCO GridServer
®
Developer’s Guide
|
185
CUDA detection was tested on the GeForce 210 device with 3.0 drivers, GeForce
9800 GT device with 3.10 drivers, the Quadro NVS 295 with 3.0 and 3.20 drivers,
and the Quadro FX 380 with 3.10 drivers.
MIC Processor Engine Properties
GridServer supports Intel Many Integrated Cores (MIC) coprocessors. This
includes MIC detection and Engine properties that provide information that can
be used for discrimination.
Intel MIC coprocessors, such as the Xeon PHI, are a multi-core processor
architecture capable of running large number of tasks in parallel due to large
number of physical cores available in the card. MIC coprocessors support two
execution models: native, where programs are executed directly in the
co-processor; and offload, where programs are executed in the host machine and
some parts are executed in the coprocessor. Support for MIC coprocessor in
GridServer is restricted to the offload model.
Requirements
Support for MIC coprocessors requires the following:
• Linux on X86_64
The following compilers are supported:
• Intel Composer XE 13
MIC support has the following limitations:
• The Engine requires a pre-load of shared libraries to run Services with offload
code.
• Services with offload code share global objects across Service instances. This is
a limitation due to how Intel handles shared libraries with offload code.
• The availability of the MIC coprocessor is determined at Engine Daemon
startup time. Changes to the status of coprocessors are not visible to the
Engines.
Properties
If the Engine Daemon detects a MIC device, it sets the following Engine
properties:
•
MICDevices – The number of MIC devices enabled at the Engine Daemon
startup time.
TIBCO GridServer
®
Developer’s Guide
186
|
• MICModel – The identifier of the coprocessor model. This information is based
on information from the
cpuid opcode.
•
MICCores – The number of logical cores.
•
MICMemory – The amount of memory in bytes.
MICModel, MICCores, and MICMemory refers to the oldest co-processor available
in the host machine. Oldest is defined based on these information from the
cpuid
opcode.
Configuration
To use MIC in your Service, you must do the following:
Engine Configuration
To preload the required shared libraries:
1. In the GridServer Administration Tool, go to Grid Components > Engines>
Engine Configurations and select the appropriate Engine configuration.
2. Set this value under Engine Daemon and Instance Process Settings:
Environment Variables:
LD_PRELOAD=libjsig.so liboffload.so.5
libjsig.so is part of the JRE and liboffload.so.5 is part of the Intel
runtime libraries.
Service Type
Services with offload code require
unloadNativeLibrary set to false in the
Service Type registry.
Grid Libraries
Services with the above Service Type setting share global objects across Services.
Use the
<conflict> setting in your grid-library.xml to avoid sharing of global
objects with other Services:
<?xml version="1.0" encoding="UTF-8"?>
<grid-library>
...
<conflict>
<grid-library-name>[name of grid-library that shares
global objects]</grid-library-name>
</conflict>
...
</grid-library>
TIBCO GridServer
®
Developer’s Guide
|
187
See the MIC example in the GridServer SDK for more information.
NUMA Engine Properties and Configuration
Non-uniform memory access (NUMA) can increase processor speed without
increasing the load on the processor bus. In a NUMA system, CPUs are arranged
in smaller systems called nodes. A node has its own processors and memory, and
is interconnected connected to the larger system. The system attempts to improve
performance by scheduling processes on processors that are in the same node as
the memory being used.
Requirements
NUMA is only supported on Windows Engines.
Windows 7 and Windows 2008 R2 require the following hotfix:
http://support.microsoft.com/kb/2417038
32-bit Engine installations in 64-bit Windows are only able to address processors
#0 through #31 in any given processor group.
Properties
The following Engine properties are related to NUMA support:
•
HIGHEST_NUMA_NODE – The highest NUMA node available in the system. 0 is
reported in non-NUMA systems.
•
PROCESS_SCHEDULING_POLICY – The process scheduling policy in effect. The
possible values are described below.
Configuration
To change the process scheduling policy to utilize NUMA:
1. In the GridServer Administration Tool, go to Grid Components > Engines>
Engine Configurations and select the appropriate Engine configuration.
2. Change the Process Scheduling Policy to the desired value, which is described
below.
There are three possible process scheduling policy settings in the Engine
Configuration:
• Native (the default) uses the process scheduling as assigned by Windows.
• Balanced makes the best effort to balance the number of Engine processes and
processors. The Engine process is allowed to run in all processors in a given
processor group. Engines can run in processors from different NUMA nodes.
TIBCO GridServer
®
Developer’s Guide
188
|
• NUMA makes the best effort to assign Engine processes to the ideal NUMA
node. This options is implicitly 'balanced'. An Engine process is only allowed
to run in processors in the ideal NUMA node.
Balanced Versus Native Policies
Windows assigns processes to processor groups at creation time in a round-robin
fashion. This might be undesirable when you have an unbalanced number of
logical processors in processor groups. Processor groups with fewer logical
processors may end up with the same number of Engines as processor groups
with more logical processors.
The balanced policy attempts to assign Engines proportionally to the number of
logical processors in the processor groups. The processor group with more logical
processors is assigned more Engines.
The native policy is preferred when the number of logical processors in processor
groups is balanced.
Balanced and native policies behave identically in machines with at most one
processor group or no support for processor groups.

TIBCO GridServer
®
Developer’s Guide
|
189
Chapter 11
Extending GridServer
You can extend the GridServer Manager and Engine with Manager and Engine
Hooks. A Manager Hook enables you to interface your own Java object directly
with the Manager’s event processing mechanism, and interact with any Server
Event. An Engine Hook can perform user-defined operations on Engine startup
or termination, or before or after Service invocation.
A Hook consists of two parts: the class implementation of the Hook, and the
Hook registration. Register Manager Hooks on the Hook Admin page. Register
Engine Hooks with an XML file that is deployed to Engines.
Topics
• Manager Hooks, page 190
• Engine Hooks, page 191

TIBCO GridServer
®
Developer’s Guide
190
|
Manager Hooks
You can create Manager Hooks on the Broker or the Director. Depending on
where the hook resides, it receives a different subset of the Server Events
broadcast by the Manager. See the
ServerEvents class JavaDoc for available
events and the components for which they are relevant. For example, a hook that
needs to see the addition or removal of an Engine must run on the Broker, because
the
ENGINE_ADDED and ENGINE_REMOVED events are Broker specific.
For details on Manager Hook implementation, see the JavaDoc documentation for
the
ServerHook class. After implementing a Manager Hook, contain its class
definition in a JAR file in the shared classes directory (
hooks/component, where
component is either broker or director).
To register a Manager Hook in the GridServer Administration Tool, go to Admin
> System Admin > Manager Hooks. The Hook Admin page enables you to edit,
enable, or disable hooks on the Manager. To add a new hook, select Create New
Hook from the Global Actions list. This opens a Hook Editor in a new window.
Enter a filename for the hook XML file, and select whether to apply the hook to
the Director or Broker. Enter the name of a class in the hooks directory and click
Update Properties to display an updateable property list. After you enter
properties, click Save to edit the hook or Cancel to revert to the last saved version
of the hook.
From the Actions control of each hook, you can Enable, Disable, Edit, or Delete an
existing hook. Note that you do not need to restart the Manager after deploying
the JAR file. However, if you redeploy a JAR file, you must remove and re-add the
hook for any new changes to take effect.

TIBCO GridServer
®
Developer’s Guide
|
191
Engine Hooks
Engine Hooks are implemented to perform operations on an Engine:
• On library initialization
• Before or after Service invocation
• On Engine termination
Engine Hooks are useful for performing AOP operations such as setting up a
global environment, administering a database or other external component, or
collecting metrics on performance or utilization without requiring Services to call
a library on their own. You can also use them to do things like restart an Engine
after a certain number of invocations.
Engine Hook implementation details are in the JavaDoc documentation for the
EngineHook class.
Add Engine Hooks by adding the XML and JAR file containing the class
definition to a Grid Library. In order for an Engine Hook to always be loaded at
Engine startup, you can define it as a Super Grid Library; see the GridServer
Adminstration Guide for more information on Super Grid Libraries.You can use
multiple XML files in Grid Libraries (as opposed to the method of having a single
hooks.xml file, used in previous releases). Note that if you are using Grid
Libraries, hooks in the
deploy directory do not work. For an example of the XML
format to use for your Hook, see the
EngineHook JavaDoc.
Engine Hook Example
The following example initializes a JDBC database.
package examples.hook;
import com.datasynapse.gridserver.engine.*;
import java.sql.*;
import java.util.*;
/*
* This is an example of a hook that initializes data from a database.
* The property "initialized" can be used to discriminate on Services, so that
* only Engines that have initialized the data will take tasks.
*/
public class JDBCHook extends EngineHook {
public void initialized() {
initializeData();
EngineSession.setProperty("initialized", "true");
}
TIBCO GridServer
®
Developer’s Guide
192
|
// static method is used by the task
public static Vector getData() {
return vData;
}
private void initializeData() throws ClassNotFoundException {
System.out.println("initializing");
Class cl = Class.forName(getDriver());
System.out.println("Driver class:" + cl);
boolean successful = false;
do {
try {
Connection conn = DriverManager.getConnection(getUrl(),
getUsername(), getPassword());
PreparedStatement ps = conn.prepareStatement("select * from
people");
ResultSet rs = ps.executeQuery();
System.out.println("rs:" + rs);
while ( rs.next() )
vData.add( rowToLine(rs) );
successful = true;
} catch (SQLException e) {
System.out.println("JDBCHook: failed to retrieve data, will try
again.");
}
if (!successful) {
try { Thread.sleep(getFrequency()); } catch (InterruptedException ie)
{ break; }
}
} while (!successful);
}
static String rowToLine( ResultSet input ) throws SQLException {
StringBuffer buf = new StringBuffer();
int cols = input.getMetaData().getColumnCount();
for ( int i=1; i <= cols; i++ ) {
buf.append(input.getString(i));
buf.append(' ');
}
buf.append('\n');
return buf.toString();
}
public final void setUrl(String url) {
_url = url;
}
public final String getUrl() {
return _url;
}
public final String getDriver() {
return _driver;
}

TIBCO GridServer
®
Developer’s Guide
|
193
public final void setDriver(String driver) {
_driver = driver;
}
public final String getUsername() {
return _user;
}
public final void setUsername(String user) {
_user = user;
}
public final String getPassword() {
return _pass;
}
public final void setPassword(String password) {
_pass = password;
}
public final void setFrequency(long frequency) {
_frequency = frequency;
}
public final long getFrequency() {
return _frequency;
}
private String _url;
private String _driver;
private String _user;
private String _pass;
private long _frequency = 5000;
private static Vector vData = new Vector();
}
The following is also an example of the XML to add to the hooks.xml file for the
JDBC example given above.
<hook class="examples.hook.JDBCHook">
<property name="username" value="sa"/>
<property name="password" value=""/>
<property name="url"
value="jdbc:HypersonicSQL:hsql://%server%:2034"/>
<property name="driver" value="org.hsql.jdbcDriver"/>
</hook>
TIBCO GridServer
®
Developer’s Guide
194
|


TIBCO GridServer
®
Developer’s Guide
196
|
Overview
This Appendix describes the instrumentation phases produced by enabling task
instrumentation. To enable task instrumentation, see the GridServer Administration
Guide.
Use task instrumentation only for development, not for production environments.
Task instrumentation slows down the Manager significantly, and also requires
additional disk space, so it is important to disable it after you finish using it.

TIBCO GridServer
®
Developer’s Guide
|
197
Syntax
All instrumentation phases have an absolute time marker, which is the time at the
start of the action. Actions also have a relative duration marker, if it is possible to
measure the duration. The times are marked according to the client’s clock.
Instrumentation phases have the following syntax:
[Client] [Action] [Object]
Client
The Client of an instrumentation phase can be one of the following:
•Engine
•Driver
•Broker
Action
The Action of an instrumentation phase can be one of the following:
Table 22 Instrumentation Phase Actions
Action Description
Send A send of a message. The absolute time is the start time of the
send, and there is no duration value.
Receive A receive of a message. The absolute time is the end of the
retrieval. There is no duration value.
Retrieve A receive, with a measurement of the duration. The absolute
time is the time at which the retrieval started.
Serialize The conversion of an in-memory object to its serialized format,
for transfer to another client.
Deserialize The conversion of a serialized object to an in-memory object.
Write The writing of data to a file, typically for DDT (Direct Data
Transfer).
Download The downloading of data from another client.

TIBCO GridServer
®
Developer’s Guide
198
|
Object
The Object of an instrumentation phase can be one of the following
Call A call to a user-implemented method.
Load A native library load.
Table 22 Instrumentation Phase Actions (Continued)
Action Description
Table 23 Instrumentation Phase Objects
Object Description
Jar The JAR file, which is only used for dynamic class
loading.
Instance The instance object, which is either the task or the
initialization data.
Input The input data or message.
Output The output data or message.
Update The update data, message, or call.
Checkpoint Checkpoint data, if checkpointing is enabled.
Library A native library.
Initialize The initialization call.
Service The Service call.
Completed The callback on completion.
Failed The callback on failure.
Serialize The call to a user-implemented native serialize method.
Deserialize The call to a user-implemented native deserialize method.

TIBCO GridServer
®
Developer’s Guide
|
199
Phases
The following is the complete list of all phases.
Driver-side
The following are Driver-side phases:
Table 24 Instrumentation Driver-side Phases
Phase Description
Driver Serialize Jar The serialization of the JAR file when the JAR file is
set.
Driver Serialize
Instance
The serialization of the Service instance object.
Driver Serialize Input The serialization of the Service input.
Driver Send Input The time the Driver sends the input message to the
Broker. Keep in mind that more than one input can be
sent in one message.
Driver Call
Completed
The callback of a successful task.
Driver Call Failed The callback of a failed task.
Driver Download
Output:
The download of output over DDT.
Driver Deserialize
Output
The deserialization of output over DDT.
Driver Retrieve
Output
The time at which the Driver receives the output
message from the Broker. Keep in mind that more than
one output be retrieved in one message.

TIBCO GridServer
®
Developer’s Guide
200
|
Engine-side
The following are Engine-side phases:
Broker-side
The following are Broker-side phases:
Table 25 Instrumentation Engine-side Phases
Phase Description
Engine Receive Input The time at which the Engine receives the input
message from the Broker.
Engine Deserialize
Instance
The deserialization of the Service instance object.
Engine Call Initialize The initialization call.
Engine Download Update The download of update data.
Engine Deserialize Update The deserialization of update data.
Engine Call Update The update call.
Engine Deserialize Input The conversion of the serialized input to an
in-memory object.
Engine Download
Checkpoint
The download of checkpoint data from another
Engine.
Engine Call Service The Service call.
Engine Serialize Output The serialization of the output.
Engine Send Output The time at which the Engine sends the output
message to the Broker.
Tabl e 26 In strum ent ation Broker-side Phases
Phase Description
Broker Receive Input The time at which the Broker received the input
from the Driver.

TIBCO GridServer
®
Developer’s Guide
|
201
DDT file writes
The following are DDT file write phases:
Client can refer to the Engine, Driver, or Broker.
Native
The following are native phases:
Broker Send Input The time at which the Broker sent the input to the
Engine.
Broker Receive Output The time at which the Broker received the output
from the Engine.
Broker Send Output The time at which the Broker sent the output to the
Driver.
Broker Remove Output The time at which the Broker removed the output
due to the acknowledgement from the Driver.
Table 26 Instrumentation Broker-side Phases (Continued)
Phase Description
Table 27 DDT File Write Phases
Phase Description
[Client] Write Input: The input file write.
[Client] Write Output: The output file write.
[Client] Write Instance The instance object write.
[Client] Write Jar The JAR file write.
[Client] Write Update The update data write.
Tabl e 28 Na tive Phas es
Phase Description
Engine Load Library The load of a native dynamic library.

TIBCO GridServer
®
Developer’s Guide
202
|
Driver Call Serialize The native object serialize call.
Driver Call Deserialize The native object deserialize call.
Table 28 Native Phases (Continued)
Phase Description

TIBCO GridServer
®
Developer’s Guide
|
203
Example Phases in a Service Execution
The following is a reference example of a typical list of native Service execution
phases. Not all possible phases are shown.
Table 29 Example Service Execution Phases
Phase Description
1. Driver Serialize Instance The serialization of the Service instance object.
2. Driver Serialize Input The serialization of the Service input.
3. Driver Write Input Driver writes input data to driver machine file
system.
4. Driver Write Instance Driver writes task data to driver machine file
system.
5. Driver Send Input Driver sends the input message to the Broker.
Keep in mind that more than one input can be
sent in one message.
6. Broker Receive Input: Broker receives the new task entry.
7. Broker Send Input Broker sends the input to the Engine.
8. Engine Receive Input Engine receives the input message from the
Broker.
9. Engine Deserialize
Instance
Engine deserializes task data.
10. Engine Load Library Engine loads all necessary libraries for the task.
11. Engine Call Initialize Engine calls init method.
12. Engine Deserialize
Input
Engine deserializes input data.
13. Engine Call Service Engine executes the task.
14. Engine Serialize Output Engine serializes output data.
15. Engine Write Output Engine writes output data to disk.

TIBCO GridServer
®
Developer’s Guide
204
|
16. Engine Send Output Broker receives the task complete message from
Engine.
17. Broker Receive Output Broker marks the task complete.
18. Broker Send Output Broker notifies driver task is ready to collect.
19. Driver Retrieve Output Driver retrieves completed tasks info from
Broker.
20. Driver Download
Output
Driver gets output data from Engine.
21. Driver Deserialize
Output
Driver deserializes output data.
22. Driver Call Completed Driver completes the task.
23. Broker Remove Output Broker removes the task from task entry.
Table 29 Example Service Execution Phases (Continued)
Phase Description

TIBCO GridServer
®
Developer’s Guide
|
205
Appendix B
The grid-library.dtd
The grid-library.xml configuration file in the root of a Grid Library must be a
well-formed XML file. The GridServer SDKs include a
grid-library.dtd file
that can be used to validate the XML file. The DTD is also shown in this chapter
Topics
• The grid-library.dtd, page 206

TIBCO GridServer
®
Developer’s Guide
206
|
The grid-library.dtd
The following is the grid-library.dtd file:
<?xml version="1.0" encoding="ISO-8859-1"?>
<!-- Copyright 2018 TIBCO Software, Inc. All Rights Reserved. -->
<!-- Grid-Library is in the root of the GL. -->
<!ELEMENT grid-library (grid-library-name, grid-library-version?, arguments?,
dependency*, conflict*, jar-path*, lib-path*,
assembly-path*, command-path*, hooks-path*, environment-variables*,
java-system-properties*)>
<!ATTLIST grid-library jre (true|false) "false">
<!ATTLIST grid-library bridge (true|false) "false">
<!ATTLIST grid-library super (true|false) "false">
<!ATTLIST grid-library os CDATA #IMPLIED >
<!ATTLIST grid-library compiler CDATA #IMPLIED >
<!-- The library name. -->
<!ELEMENT grid-library-name (#PCDATA)>
<!-- The version. If not specified, 0 is implied. -->
<!ELEMENT grid-library-version (#PCDATA)>
<!-- Additional arguments to the JVM. -->
<!ELEMENT arguments (property*)>
<!-- A library dependency. Dependencies can be specified by package name and
optional version.
If the version is not specified, the latest version is chosen at load time.
-->
<!ELEMENT dependency (grid-library-name, grid-library-version?)>
<!-- A library conflict. Indicates that this library conflicts with the given
library.
If this library is NOT a dependency, and grid-library-name="*",
then it indicates that this library conflicts with all other libraries
(aside from its own dependencies). -->
<!ELEMENT conflict (grid-library-name)>
<!-- The JAR path. If specified, all jars and classes in the path are loaded. -->
<!ELEMENT jar-path (pathelement*)>
<!ATTLIST jar-path os CDATA #IMPLIED>
<!ATTLIST jar-path compiler CDATA #IMPLIED>
<!-- An element of a path, typically a directory. -->
<!ELEMENT pathelement (#PCDATA)>
<!-- Load library path. If not specified, it is assumed that no native libraries are
loaded by this GL.
If this is specified and it the library was not loaded at init time, the Engine
will restart, adding this path to the current path. -->
<!ELEMENT lib-path (pathelement*)>
<!ATTLIST lib-path os CDATA #IMPLIED>
<!ATTLIST lib-path compiler CDATA #IMPLIED>
TIBCO GridServer
®
Developer’s Guide
|
207
<!-- .NET assembly path. System.AppDomain.CurrentDomain.AppendPrivatePath(path)
will be called on this path,
which add it to the lookup location for assemblies. -->
<!ELEMENT assembly-path (pathelement*)>
<!ATTLIST assembly-path os CDATA #IMPLIED>
<!ATTLIST assembly-path compiler CDATA #IMPLIED>
<!-- The path in which the Engine will search for Command Service executables. -->
<!ELEMENT command-path (pathelement*)>
<!ATTLIST command-path os CDATA #IMPLIED>
<!ATTLIST command-path compiler CDATA #IMPLIED>
<!-- Engine hooks library path. Hook will be initialized as libraries are loaded.
-->
<!ELEMENT hooks-path (pathelement*)>
<!ATTLIST hooks-path os CDATA #IMPLIED>
<!ATTLIST hooks-path compiler CDATA #IMPLIED>
<!-- Environment variables to set. Environment variables are set via JNI immediately
prior to executing a task using this library. -->
<!ELEMENT environment-variables (property*)>
<!ATTLIST environment-variables os CDATA #IMPLIED>
<!ATTLIST environment-variables compiler CDATA #IMPLIED>
<!-- A property, used by env vars & system props. -->
<!ELEMENT property (name,value)>
<!-- The name for a property element. -->
<!ELEMENT name (#PCDATA)>
<!-- The value for a property element. -->
<!ELEMENT value (#PCDATA)>
<!-- Java system properties, which are set upon load. -->
<!ELEMENT java-system-properties (property*)>
<!ATTLIST java-system-properties os CDATA #IMPLIED>
<!ATTLIST java-system-properties compiler CDATA #IMPLIED>
<!-- end of grid-library dtd -->
TIBCO GridServer
®
Developer’s Guide
208
|
