
Anatomage Table EDU 9.0 Application Manual Table of Contents
Anatomage Table EDU 9.0 User's Manual
Anatomage, Inc.
3350 Thomas Rd Suite 150
Santa Clara, CA 95054 USA
408-885-1474
TS001 Ver A. 4 October 2022 - Page 1 of 54 - UM-TSWEDU-ENG-80A

Anatomage Table EDU 9.0 Application Manual Table of Contents
Warranty Statement
There are no warranties, expressed or implied, with respect to the contents of this document, and all information provided
herein is provided “as is.” Anatomage reserves the right to periodically change the information that is contained in this
document; however, Anatomage makes no commitment to provide any such changes in a timely manner or at all.
Limitation of Liability
In no event shall Anatomage or its affiliates be liable to any party for any direct, indirect, special, or consequential damages
in connection with your use of this document, including, without limitation, loss of business revenue or earnings, lost data,
damages caused by delays, lost profits, or a failure to realize expected savings, even if Anatomage was expressly advised of
the possibility of such damages.
Trademarks
Anatomage and related marks, images, and symbols are the exclusive properties of, and trademarks of, Anatomage Inc. All
other brands and marks are the properties of their respective owners.
Copyright
Documentation for Anatomage Table EDU 9.0 and the operating system are copyrighted with all rights reserved. Under the
copyright laws, this documentation may not be reproduced, transmitted, transcribed, or translated into any human or
computer language in whole or part without the prior written permission of the copyright holder. All images and videos
created with the Anatomage Table must be approved by Anatomage. Please contact Anatomage for more information.
About Anatomage and Software
The Anatomage Table Application software (Table EDU 9.0) was released in 2022 as an update to the Table Application
software from Anatomage, Inc. In this document, the Anatomage Table Application software refers to the latest version of
the Anatomage Table Application software and is synonymous with the terms “Table application”, “Table EDU 9.0”, and
“Anatomage Table application”. To learn more about Anatomage, visit our website at www.Anatomage.com.
Note: Table 9.0 is intended for educational purposes only, and is not to be used for clinical or diagnostic purposes.
End of Life Statement
Table EDU 9.0 software is dependent on its hardware requirements. The life-cycle is limited only by the required hardware.
Language
The original language of this manual and the Table EDU 9.0 software is English.
Sound Credit
Sound effects were obtained from https://www.zapsplat.com.
Image Credit
The following image sets were provided by Dr. Jin Seo Park, Department of Anatomy, Dongguk University College of
Medicine and Dr. Min Suk Chung, Department of Anatomy, Ajou University School of Medicine.
Full Body Male (Asian): The original slice data is from the Visible Korean data set.
Full Body Female (Asian): The original slice data is from the Visible Korean data set.
Full Dog and Cat slice data: This work (2012R1A2A2A01012808) was supported by Mid-career Researcher Program through the National Research
Foundation of Korea (NRF) grant funded by the Ministry of Education, Science and Technology (MEST).
Full Head slice data: This research was supported by Basic Science Research Program through the National Research Foundation of Korea (NRF)
funded by the Ministry of Education, Science and Technology (MEST) (2010-0023360).
The following image sets were provided by the Visible Human Project, Courtesy of the U.S National Library of Medicine.
Full Body Male (Caucasian): The original slice data is from the Visible Human data set.
Full Body Female (Caucasian): The original slice data is from the Visible Human data set.
The following image set was provided by Brad Smith from the University of Michigan ([email protected], NIH award
N01-HD-6-3257 P/G F003637).
Embryo slice data set (Cases 2013 – 2023) Imaging was performed at the Center for In-Vivo Microscopy, Duke University.
The following image set was provided by David R. Hunt, PhD. (Physical / Forensic Anthropologist, D-ABFA) from the
Smithsonian Institute.
Skull collection (Cases 3008 – 3054)
© 2011 The Board of Trustees of the Leland Stanford Junior University
TS001 Ver A. 4 October 2022 - Page 2 of 54 - UM-TSWEDU-ENG-80A

Anatomage Table EDU 9.0 Application Manual Table of Contents
Table of Contents
System Requirements.................................................................................................................................4
Touchscreen Requirements........................................................................................................................4
Installation Instructions..............................................................................................................................5
Controls......................................................................................................................................................5
Controlling the Volume Rendering............................................................................................................6
Touch Control......................................................................................................................................6
Keyboard and Mouse Control..............................................................................................................7
Introduction to the Anatomage Table Application.....................................................................................8
Launching Table EDU 9.0 Application................................................................................................8
User Interface and Layout..........................................................................................................................9
Navigation................................................................................................................................................32
Cadavers...................................................................................................................................................34
Image Adjustment ...................................................................................................................................35
Annotations..............................................................................................................................................37
DCM/INV Files........................................................................................................................................38
Model Settings...................................................................................................................................39
Preset Dialog............................................................................................................................................40
Functional Anatomy.................................................................................................................................42
Case Library.............................................................................................................................................45
Histology Library.....................................................................................................................................48
Curriculum...............................................................................................................................................49
Prosection.................................................................................................................................................50
Anatomage Share.....................................................................................................................................51
Opening DCM/INV Scans.......................................................................................................................52
PACS Integration......................................................................................................................................53
Table Application Troubleshooting..........................................................................................................54
TS001 Ver A. 4 October 2022 - Page 3 of 54 - UM-TSWEDU-ENG-80A

Anatomage Table EDU 9.0 Application Manual Table of Contents
SYSTEM REQUIREMENTS
The Table software is a graphically intense application for use on a PC workstation running a
Windows operating system. It has not been designed for use on Linux, OSX, Android or iOS
platforms such as iPads or other tablets.
Summary
Minimum Recommended
CPU Intel Core i5 2500 series
(compatible multi-core processor)
Intel Core i7 10000 series
(comparable multi-core processor)
RAM 16GB 32GB
GPU
(Graphics Card)
AMD Radeon R7 370 NVIDIA RTX 3070
Hard Disk 500GB 1TB
OS Windows7 64bit Windows10 64bit
TOUCHSCREEN REQUIREMENTS
Summary
Hardware Minimum Requirement
Screen Size (Diagonal) 19 inches
Resolution 1280x720
Touch Points 3 or more
TS001 Ver A. 4 October 2022 - Page 4 of 54 - UM-TSWEDU-ENG-80A

Anatomage Table EDU 9.0 Application Manual Table of Contents
INSTALLATION INSTRUCTIONS
The Anatomage Table application is available from Anatomage. The software is distributed by
downloading an installer and requires a license USB to operate. The installer contains both the
application files and demonstration content (Navigation, Cadavers, Functional Anatomy, Case Library,
Histology Library, Curriculum, and Prosection Library). Be sure you have the license USB and your
Table meets the minimum system requirements.
1. Insert license USB into PC workstation and run Anatomage Table EDU 9.0 installer.
Workstation should be connected to a network with internet connectivity.
2. Open Anatomage Table EDU 9.0 Upgrade installer, double click “autorun” and follow on-
screen instructions to complete installation.
3. Launch Table application and enter the Authorization Code to activate software license.
CONTROLS
The following section discusses controls for the Table software. For touchscreen devices, please refer
to your specific touchscreen hardware manufacture's calibration instructions and verification
procedures before using with Table EDU 9.0.
Touch Commands
Right click Touch and hold.
Selecting icons Tap icon to select. If compatible multi-icons are shown, use a second
tap to select desired multi-icon. A double-tap on the same icon will
open the icon.
On-screen keyboard Tap the keyboard icon on the toolbar next to the windows icon. This
will open the onscreen keyboard.
Keyboard-Only Commands
Exiting Full-Screen and
viewing application on single
display monitor
Step 1: Press F11 on keyboard or FN + F11 on on-screen keyboard.
Step 2: Press the Windows key and the left/right arrow to snap
application window to left/right display monitor.
WARNING: Resizing the application window from full-screen to a single monitor will cause the user
interface and scan to be rescaled based on the new application window size.
TS001 Ver A. 4 October 2022 - Page 5 of 54 - UM-TSWEDU-ENG-80A

Anatomage Table EDU 9.0 Application Manual Table of Contents
CONTROLLING THE VOLUME RENDERING
The following section discusses use of the touchscreen for controlling the volume rendering. Table
application supports keyboard, mouse, and touch controls when navigating the application. Some
functions are keyboard specific and do not have a designated icon in the user interface.
TOUCH CONTROL
Within the Rendering Window, the Table application accepts single- and multi-touch inputs.
Number of Touches Movement Result Description
Volume Viewing:
Single Drag Rotate Rendering will rotate about the scanning
region's geometric center point.
Two Drag Pan Rendering will pan in the dragged direction.
Pinch Zoom in/out Rendering will become larger or smaller.
Rotate Spin Rendering will rotate about the axis
perpendicular to Table surface and through the
scanning region's geometric center point.
(Settings → Spin Enabled)
Three Drag up/down Adjust
Clipping
Plane
Can adjust clipping plane by scrolling through
volume rendering in parallel with initial cutting
plane.
Slice Mode Viewing:
Single DISABLED N/A N/A
Two Drag Pan Slice image will pan in the dragged direction.
Pinch Zoom in /out Slice image will become larger or smaller.
Three Drag up/down Scroll through
slices
Can scroll through cross-sectional slices of
selected data.
TS001 Ver A. 4 October 2022 - Page 6 of 54 - UM-TSWEDU-ENG-80A

Anatomage Table EDU 9.0 Application Manual Table of Contents
KEYBOARD AND MOUSE CONTROL
Number of Touches Movement Result Description
Volume Viewing:
Left Click Drag Rotate Rendering will rotate about the scanning
region's geometric center point.
Shift + Left Click Drag Pan Rendering will pan in the dragged
direction.
Ctrl + Left Click Drag up/down Zoom in/out Rendering will become larger or
smaller.
Space + Left Click Drag up/down Spin clockwise/
counterclockwise
Rendering will spin clockwise or
counterclockwise about its geometric
center point.
Scroll Wheel Roll up/down Adjust Clipping
Plane
Can adjust clipping plane by scrolling
through volume rendering in parallel
with initial cutting plane.
Slice Mode Viewing:
Shift + Left Click Drag Pan Rendering will pan in the dragged
direction.
Ctrl + Left Click Drag Zoom in/out Rendering will become larger or
smaller.
Scroll Wheel Roll up/down Scroll through slices Can scroll through cross-sectional slices
of selected data.
TS001 Ver A. 4 October 2022 - Page 7 of 54 - UM-TSWEDU-ENG-80A
Anatomage Table EDU 9.0 Application Manual Table of Contents
INTRODUCTION TO THE ANATOMAGE TABLE APPLICATION
LAUNCHING TABLE EDU 9.0 APPLICATION
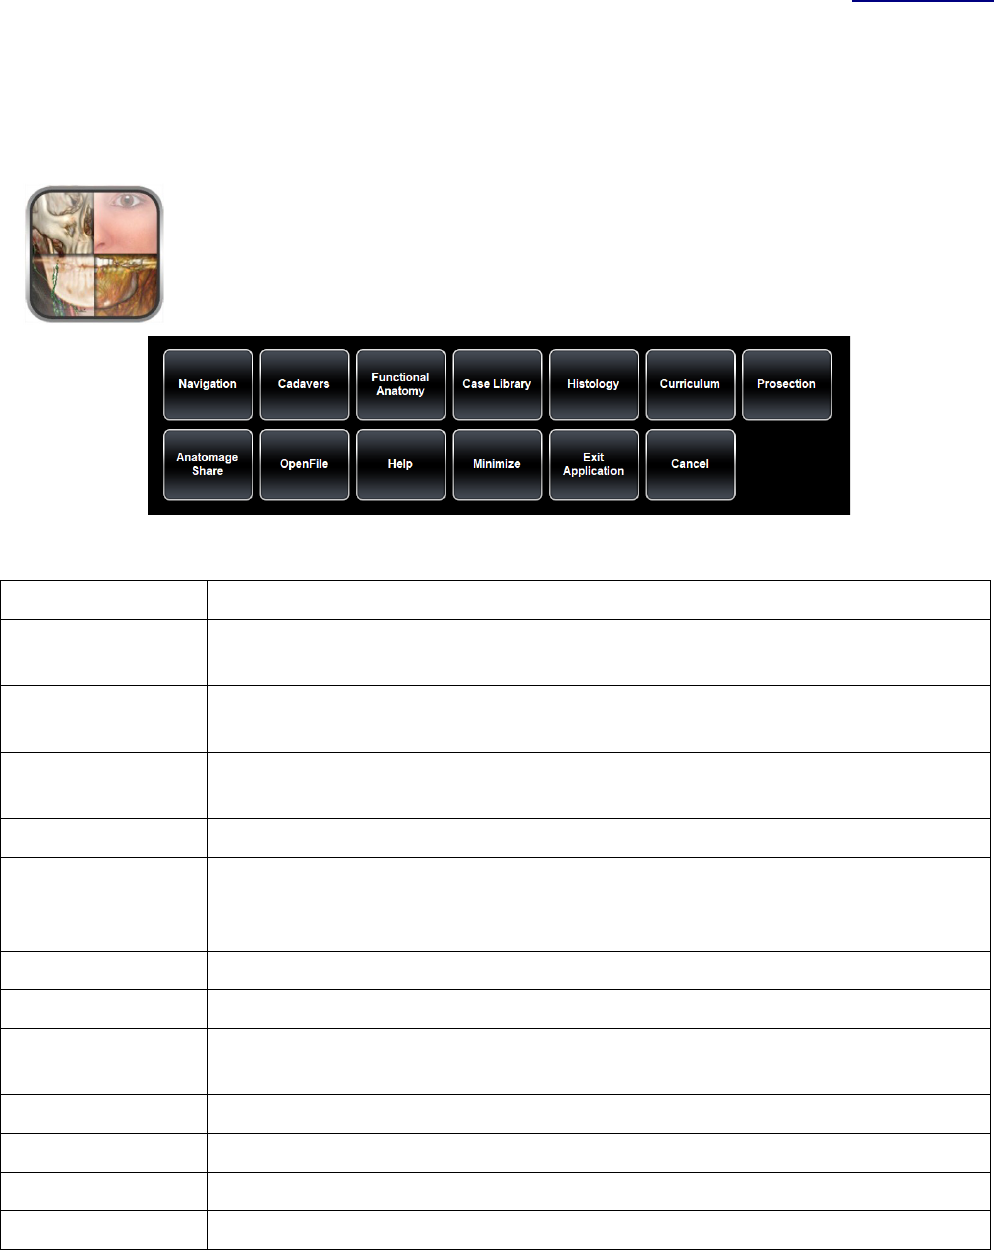
From the desktop, double-tap (double-click) the Table icon to launch the
Anatomage Table application. Users will be shown the Application Toolbar
below.
Navigation Opens navigation tool to open Table content related to a specific subject.
Cadavers Opens user interface for selecting full body Gross Anatomy data and Regional
Anatomy scans.
Functional
Anatomy
Opens user interface for selecting functional anatomy related content.
Case Library Opens user interface for selecting educational clinical case data sets including
Ct, MRI and segmented dog and cat.
Histology Opens user interface for selecting histology slides.
Curriculum Opens user interface for selecting curriculum views. Curriculum views,
provided by Anatomage, are single scans with pre-made annotations and view
sequences for teaching purposes.
Prosection Opens user interface for selecting prosection data.
Anatomage Share Opens sign in window for Anatomage created materials and other user content.
Open File Opens multi-dicom (DCM) scan files or Invivo (INV) scan files. Opens user
interface for establishing PACS connection and downloading files.
Help Opens a user interface for selecting “how to” documents for aspects of Table.
Minimize Minimizes the Table application. Available only when case is currently open.
Exit Application Closes the Table application.
Cancel Closes the Application toolbar. Available only when case is currently open.
TS001 Ver A. 4 October 2022 - Page 8 of 54 - UM-TSWEDU-ENG-80A

Anatomage Table EDU 9.0 Application Manual Table of Contents
USER INTERFACE AND LAYOUT
Icon Description
Application Toolbar
Opens the Application toolbar. (Navigation, Cadavers,
Functional Anatomy, Case Library, Histology, Curriculum,
Prosection, Anatomage Share, Open File, Help, Minimize, Exit
Application, and Cancel).
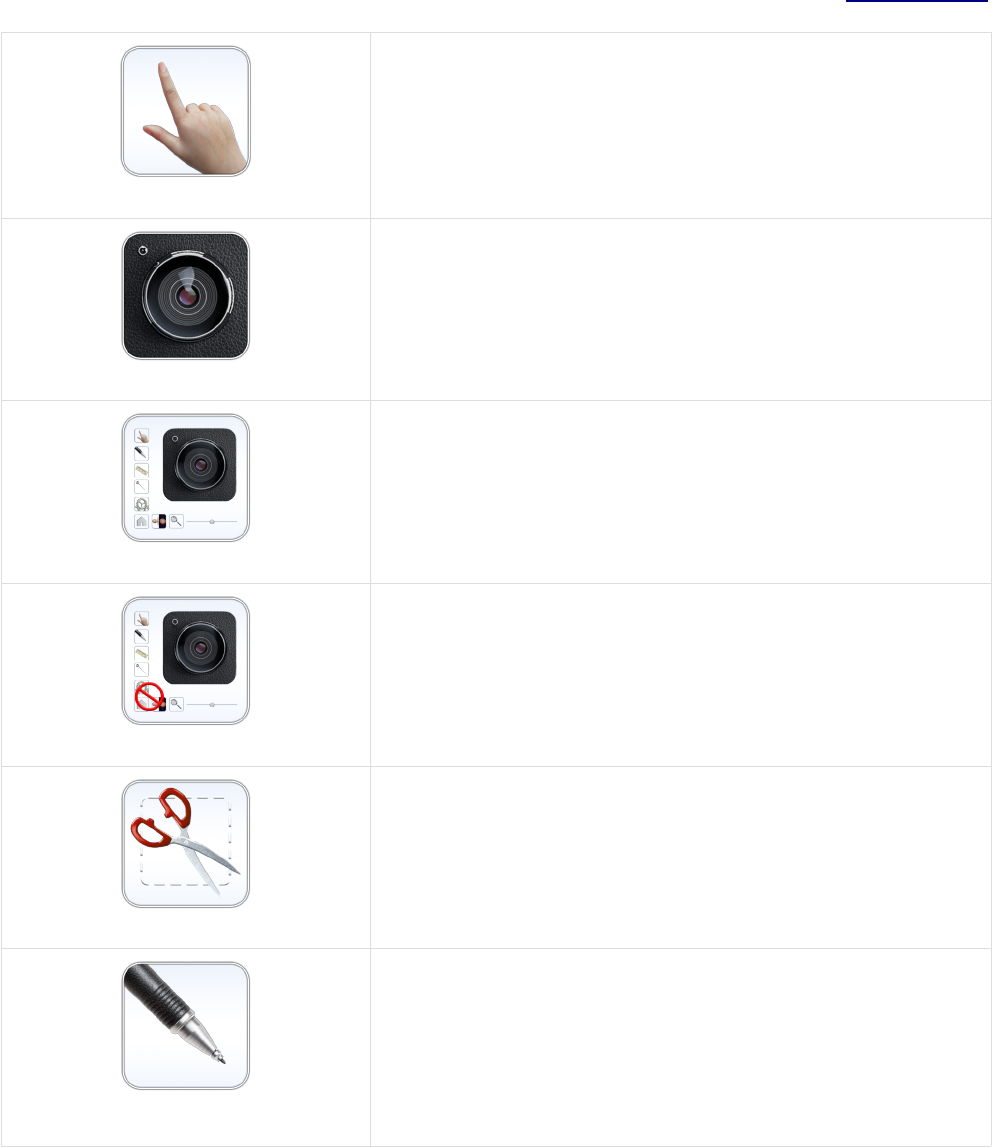
Learning Assistant
Tap to view more information about a structure.
Layout
Tap the Layout icon to display all Layout options. 3D Layout
is selected by default.
TS001 Ver A. 4 October 2022 - Page 9 of 54 - UM-TSWEDU-ENG-80A
Red box outlines Rendering Window. Image rendering, surface models, and annotations will
appear in this region. Region accepts keyboard, mouse, single-touch, and multi-touch controls.

Anatomage Table EDU 9.0 Application Manual Table of Contents
3D Layout
Tap to view a volume rendering of the data.
3D-2D Layout
Tap to view a split-screen view of a volume rendering of the
data and a cross-section in the axial, coronal, or sagittal plane.
2D Layout
Tap to view one cross-section at a time. Users can view cross-
sections in the axial, coronal, or sagittal plane.
The user can switch between a single 2D view and two
different 2D layouts that contain three 2D slices each. The
default slices for these split-screen layouts is Axial, Coronal,
and Sagittal. The layouts can be customized to contain slices
in Axial, Coronal, Sagittal, and Parallel planes.
Histology Layout
Tap to view a split-screen view of a volume rendering of the
data and a histology slide. Any histology slides associated
with a structure will be shown when the structure is selected
from the volume rendering using a single tap.
Choose a prosection or CT/MR case. Select the icon for the
content then select the slides icon to open the menu to choose a
case.
TS001 Ver A. 4 October 2022 - Page 10 of 54 - UM-TSWEDU-ENG-80A

Anatomage Table EDU 9.0 Application Manual Table of Contents
Flythrough
Tap to view split-screen view of a volume rendering of the data
and a flythrough data set. The user can load in default
flythrough data sets when available or create custom
flythroughs if desired.
Curved Planar Reformation
Tap to view split-screen view of a volume rendering of the data
and a curved planar reformation. Curved planar reformations
can be exported.
Spline
Tap to create a spline on the volume rendering of the data. The
user can choose the points of the spline by tapping on a
structure.
Curved Spline
Tap to create a curved spline.
Straight Spline
Tap to create a linear spline.
TS001 Ver A. 4 October 2022 - Page 11 of 54 - UM-TSWEDU-ENG-80A
Anatomage Table EDU 9.0 Application Manual Table of Contents
Pointer Tool
Tap to open the Pointer Tool Dialog. Tap to select a particular
pointer icon. Tap or drag in rendering window to move pointer.
The size and color of the pointer may be adjusted in the dialog.
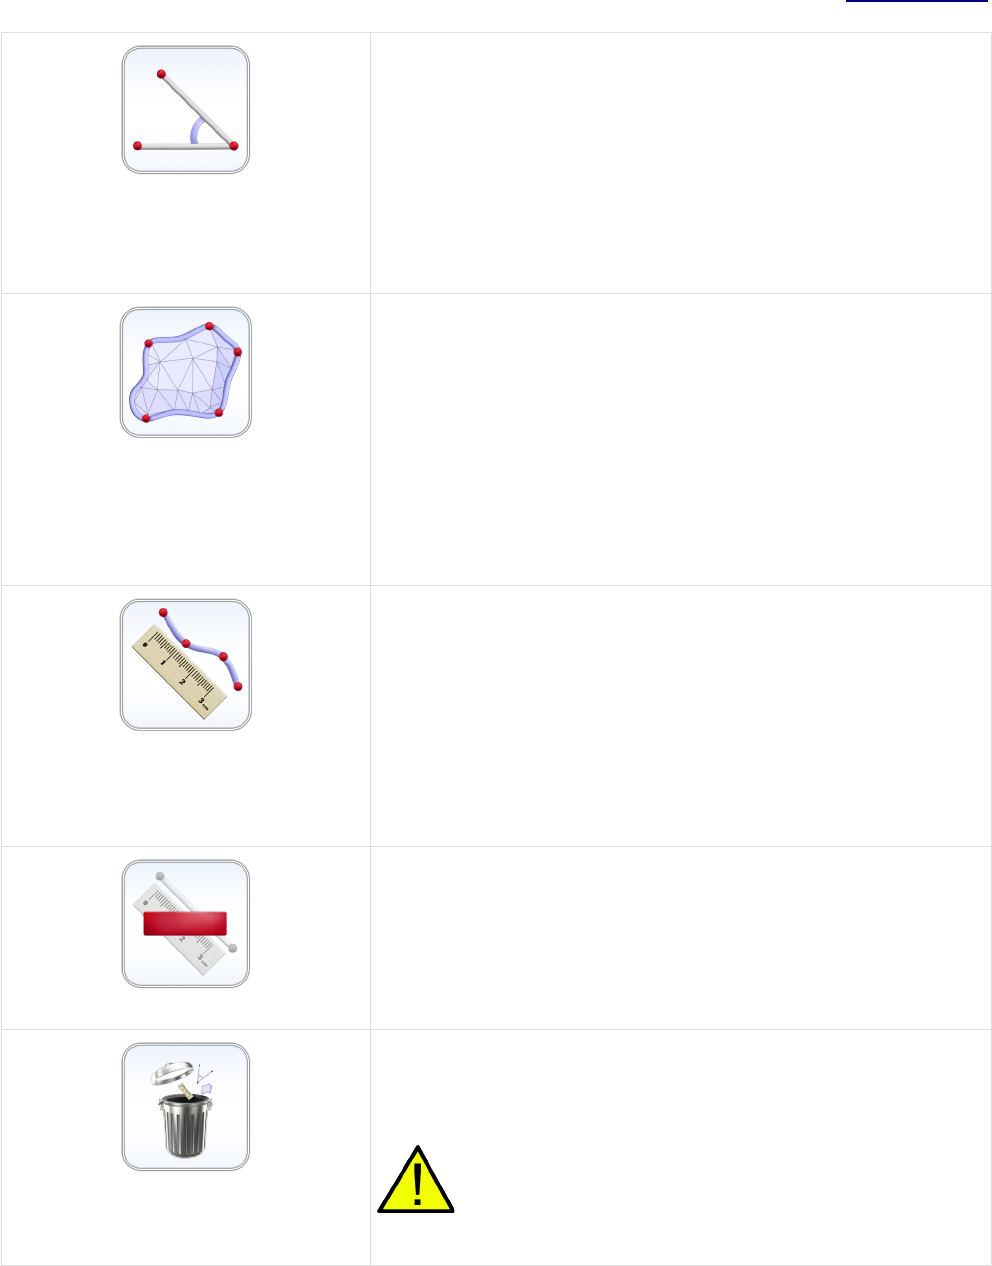
Screen Capture
Tap the camera icon to save a screen shot (.jpg, .png, or .bmp)
of the application using three different options.
Screen Capture with Icons
Tap the camera with icons to save a screenshot (.jpg, .png,
or .bmp) of the application that includes the Table icons.
Screen Capture without Icons
Tap the camera without icons to save a screenshot (.jpg, .png,
or .bmp) of the application that does not include the Table
icons.
Cropped Screen Capture
Tap the scissor icon and drag across screen to select an area
and save a screenshot (.jpg, .png, or .bmp) of the application
within the selected area.
Pen Tool
Tap to open the Pen Tool Dialog. Using second tap, select a
particular Pen Tool.
Draw by dragging in rendering window.
TS001 Ver A. 4 October 2022 - Page 12 of 54 - UM-TSWEDU-ENG-80A

Anatomage Table EDU 9.0 Application Manual Table of Contents
Predefined Draw Colors
Tap to select a predefined Pen Tool color. From top left going
clockwise: Red, White, Yellow, Blue.
Default width of Draw Stroke for all colors is 2.
Custom Pen Tool
The Custom Pen Tool allows the user to customize the color
and width of a pen.
Step 1: Tap to select a particular pen preset.
Step 2: Tap the Custom Pen Tool Settings icon to adjust color
and stroke width.
The Pen Tool will save the latest setting used for each preset.
Eraser: Tap to enable. Drag on display window to remove
pen, text, or arrow marks.
Text Tool: Tap to activate and then tap on display window to
place text. Use on-screen or external keyboard to enter text.
Arrow Tool: Tap to activate and then tap on display window to
draw arrow tail. Tap again to draw arrow head.
TS001 Ver A. 4 October 2022 - Page 13 of 54 - UM-TSWEDU-ENG-80A

Anatomage Table EDU 9.0 Application Manual Table of Contents
Undo: Tap icon to undo last drawing action.
Redo: Tap icon to redo last drawing action.
Minimize: Tap icon to minimize Draw Tool dialog.
Clear: Tap icon to erase all drawings in the Rendering
Window.
Measurement Tool
Tap the icon to show the associated measurement icons.
The font size and color of the measurement value may be
adjusted in the Adjust Text window under the Image Control
Settings icon (p. 28).
Measurements can be made in both volume and slice mode
viewing.
WARNING: The default measurement unit will be
millimeters (mm). Any measurement that is less than 1 mm
will be displayed in micrometers (um).
Distance Measurement Tool
Step 1: Select distance measurement tool.
Step 2: Tap on two locations on the volume. Red dots will
indicate the selected spots, and a line will appear between them
with a distance measurement. To adjust a measurement spot,
select and drag the landmark red dot.
TS001 Ver A. 4 October 2022 - Page 14 of 54 - UM-TSWEDU-ENG-80A
Anatomage Table EDU 9.0 Application Manual Table of Contents
Angle Measurement Tool
Step 1: Select angle measurement tool.
Step 2: Tap on three locations on the volume. Red dots will
indicate the selected spots, and an angle will appear
between them with an angle measurement. Distance
measurements of the angle's sides will also appear. To adjust a
measurement spot, select and drag the landmark red dot.
Area Measurement Tool
Step 1: Select area measurement tool.
Step 2: Tap on multiple locations on the volume. Red dots will
indicate the selected spots, and a line will connect the dots to
outline the area.
Step 3: Tap on the area measurement tool when finished and
an area measurement will appear. To adjust a measurement
spot, select and drag the landmark red dot.
Curved Measurement Tool
Step 1: Select curved measurement tool.
Step 2: Tap on multiple locations on the volume. Red dots will
indicate the selected spots, and a line will connect the dots.
Step 3: Tap on the curved measurement tool when finished and
a distance measurement will appear. To adjust a measurement
spot, select and drag the landmark red dot.
Delete Measurement
Step 1: Select measurement. Specified measurement will turn
red and become bold.
Step 2: Select icon to remove specified measurement.
Clear All Measurements
Select icon to clear all measurements from the volume.
WARNING: Identification of anatomical landmarks and
structures are limited in part to image resolution and
subject to user error. To ensure correct identification of
landmarks and other fine measurements, it is
recommended that users plug-in and use a USB computer
TS001 Ver A. 4 October 2022 - Page 15 of 54 - UM-TSWEDU-ENG-80A

Anatomage Table EDU 9.0 Application Manual Table of Contents
mouse and keyboard for the most accurate possible
placement of measurement landmarks (red dots). All
measurement landmarks, including those placed using the
touchscreen interface, can be adjusted by selecting and
dragging the landmark. It is the responsibility of the user
to place or adjust the measurement landmark locations as
needed for analysis.
Pin Tool
Used for placing 3D pin models in volume viewing.
To place a pin, select the pin style of choice and then
select a place on the volume. The pin may be moved by
first tapping on the pin to display a red box and again to
display a yellow sphere. Holding and dragging the red box
moves the pin's XYZ location while holding and dragging
the yellow sphere rotates the angle of the pin. The lumbar
needle and syringe within the pin menu are used the same way.
This icon can be used to import in a custom model that can be
placed like the pins, lumbar needle, and syringe. An action
menu will appear which will allow you to manipulate the
model. Double tapping on a model will open the models action
menu also.
This icon will turn on/off the 3D widget which allows you to
precisely move the model.
This icon allows you to map the model to a structure.
Selecting the 3D/2D view icon will open the 3D/3D layout
where you can see the outline of the model in the 2D plane.
This icon will allow you to edit the dimensions (L x W x H) of
the model.
TS001 Ver A. 4 October 2022 - Page 16 of 54 - UM-TSWEDU-ENG-80A

Anatomage Table EDU 9.0 Application Manual Table of Contents
Volume Orientation
Tap the icon to show orientation icons.
Coronal, Sagittal, Axial Views
Tap to select a particular orientation. From top left going
clockwise: Coronal View, Sagittal View, Axial View.
If an orientation icon is tapped a second time, the view will be
flipped.
WARNING: Image orientation is based on scanner/DCM
definitions or redefined orientations from Invivo6 software.
90° Rotation
Tap once to rotate the image 90° clockwise.
1:1 Life Size Scaling
Tap icon to rescale image to life size.
WARNING: Exact scaling depends on scan size, scan
resolution, and hardware specifications.
Dissection Tool (for segmented cadaver data)
The Dissection Tool allows the user to create custom cuts and
remove structures, or parts of structures, within the sculpt area.
After tapping the tool, the icon becomes highlighted signifying
it is enabled and the Dissection Tool dialog appears. Either a
linear cut or curved sculpt can be selected.
TS001 Ver A. 4 October 2022 - Page 17 of 54 - UM-TSWEDU-ENG-80A

Anatomage Table EDU 9.0 Application Manual Table of Contents
To make a custom sculpt:
Step 1: Hold and drag the custom sculpt anywhere on the
volume. A red line will appear outlining the sculpt area.
Step 2: Tap inside or outside the area to select dissection
boundaries. All structures in selected boundary can be
removed.
A loading screen followed by a dialog (“Select structure to
remove layer by layer!”) appears. Tap “Ok.”
Step 3: Remove structures within the sculpt area by tapping on
them.
Freehand Dissection Tool (for segmented cadaver and
DICOM data)
The Freehand Dissection Tool allows the user to create custom
cuts on the segmented cadaver or scan volume. After tapping
the tool, the icon becomes highlighted signifying it is enabled.
To make a custom sculpt:
Step 1: Hold and drag the custom sculpt anywhere on the
volume. A green line will appear outlining the sculpt area.
Step 2: Tap inside or outside the area to remove the visible
volume on either the inside or outside of the sculpt outline,
respectively.
To enable another freehand sculpt, tap the Freehand Dissection
Tool icon again. Once the icon is highlighted, repeat steps 1
and 2 to make another freehand sculpt.
TS001 Ver A. 4 October 2022 - Page 18 of 54 - UM-TSWEDU-ENG-80A

Anatomage Table EDU 9.0 Application Manual Table of Contents
Restore Tool
Selecting this icon will restore the volume to its original state,
removing all operations.
Undo: Will undo the last structure removal action.
Redo: Will redo the last structure removal action.
Note: The undo and redo icons do not work for the Freehand
Dissection Tool.
Craniotomy Tool (For DICOM data)
Step 1: Select craniotomy tool.
Step 2: Hold and draw custom sculpt across any cranial
portion of the CT or MRI Scan.
Step 3: Release touch and software will automatically close
the custom sculpt and perform craniotomy.
WARNING: The Craniotomy Tool is meant to be used as
a Demonstration Tool only. The amount of volume
removed from a scan is dependent on the scalar range
used to view DICOM data.
Clipping Plane Control
Tap icon to display Clipping Plane Control all Clipping Plane
icons as well as the Flip and Reset icons.
Custom Clipping Plane is activated by default.
Case Information (For DICOM data, Histology, and
Prosection)
View scan and case information.
TS001 Ver A. 4 October 2022 - Page 19 of 54 - UM-TSWEDU-ENG-80A

Anatomage Table EDU 9.0 Application Manual Table of Contents
Custom Clipping Plane
Step 1: Tap scalpel icon with the straight line to activate
custom clipping plane. The custom clipping plane is activated
by default (indicated by a blue highlight.)
Step 2: Using one touch, drag anywhere across the volume to
generate the custom clipping plane, defined by a blue line. The
line will update to show the current clipping definition.
Step 3: Release touch to finish defining plane.
Step 4: Select a side of the plane to remove by tapping the
volume on that side.
Repeat the above steps to create up to six (6) Custom Clipping
Planes. After the sixth plane, the seventh plane will replace the
first defined Custom Clipping Plane. The eighth will replace
the second and so forth.
Predefined Clipping Planes
Select a predefined clipping plane by tapping on the icon. The
volume will automatically be clipped in the designated
direction. From top left going clockwise: Sagittal Plane,
Coronal Plane, Axial Plane, Parallel Plane.
Parallel defines the Table surface as the clipping plane.
Only one predefined clipping plane may be applied at a time.
Flip Clipping Plane
Tap icon to flip visibility between sides of the clipping plane.
This affects all predefined clipping planes and the most
recently defined custom clipping plane.
TS001 Ver A. 4 October 2022 - Page 20 of 54 - UM-TSWEDU-ENG-80A

Anatomage Table EDU 9.0 Application Manual Table of Contents
Reset Clipping Plane
Tap icon to remove all applied clipping planes (custom and
predefined).
Clipping Plane Slider Bar
When a clipping plane, either a predefined or a custom plane,
is active, the slider bar can be used to adjust the location of the
plane. The slider bar can be used to adjust only the most
recently defined clipping plane.
Presets
Tap to show presets numbered 1-10. Use a second tap on one
of the numbered icons to select a particular preset, or open the
Presets Menu by tapping on the cogwheel icon.
Users can create an unlimited number of presets using the
Preset Menu. Presets will automatically switch the image in
rendering window based on saved definitions. See Table 9.0
“How to Use Presets” for more information on how to create,
save to folder and export presets.
Quiz Mode
Select the quiz icon then select the icon to create a quiz or take
a quiz.
Set up the desired structure view and add annotations to define
quiz questions.
Adjust any quiz settings (enabled features, randomize
questions, timing, scoring, etc.) by tapping on settings.
TS001 Ver A. 4 October 2022 - Page 21 of 54 - UM-TSWEDU-ENG-80A

Anatomage Table EDU 9.0 Application Manual Table of Contents
Select the quiz type (Pick Me, Flashcards, Highlight, Multiple
Choice, or Game).
See Table 9.0 “How to Use Quiz Mode” for more information
on how to create and take a quiz.
Explore Tool
Used for identifying segmentation and structures.
Step 1:
Tap the icon to open up the Explore Tool Dialog. Next, select a
particular icon with a second tap. The icon will become
highlighted to indicate it is enabled.
Step 2:
Remove Tool
Tap anywhere on volume. Structure closest to touch location
will be removed from view.
After removing structures, select white removal icon to view
removed structures on the right.
When the isolated structure appears on the right, you can turn
on sync to have the two images rotate together. Turning off
sync will allow the two images to rotate individually.
Blood Flow Tool
Tap on a vein or artery. Blood flow will be simulated to or
from the Heart. A second tap will apply a flat color to the vein
or artery. A third tap will add annotations to all branches of the
vein or artery.
Isolate Tool
Tap anywhere on volume. Structure closest to touch location
will be annotated and all other volume elements will be made
transparent. Tap on the isolation icon again to remove all
transparent structures. Tap a third time on the icon to add
TS001 Ver A. 4 October 2022 - Page 22 of 54 - UM-TSWEDU-ENG-80A

Anatomage Table EDU 9.0 Application Manual Table of Contents
structures back in again. Tap on name to enable more detailed
annotations.
Step 3: To exit out of any explore tool mode, tap the enabled
tool to disable (the icon will no longer be highlighted).
Undo & Redo:
After using the Removal or Isolate Tool, tap Undo to undo the
last action or Redo to redo the last action.
The font size and color of the explore text may be adjusted in
the Adjust Text window under the Image Control Settings icon
(p. 28).
Live Tool
Tap on the icon to open live tool dialog.
Blood Flow (Only in Cadavers)
Tap once on the icon to turn on blood flow. A second tap will
turn off the feature.
Heart Motion (Only in Cadavers)
Tap once on the icon to turn on heart motion. A second tap will
turn off the feature.
Visibility Control
Structures
Tap icon to open Volume Visibility dialog to adjust rendering
window images. User can add/remove structures in data sets
or adjust volume rendering view presets for any DCM file data
sets. See p. 35 for more information on using the Volume
Visibility dialog.
Annotations
TS001 Ver A. 4 October 2022 - Page 23 of 54 - UM-TSWEDU-ENG-80A

Anatomage Table EDU 9.0 Application Manual Table of Contents
Tap “A” icon next to any entry to turn on all annotations under
that entry.
Brightness/Contrast Slider Bars
When viewing segmented cadaver data:
Drag the upper slider bar right/left to add/remove large systems
or structures from the volume rendering. Drag the lower slider
bar left/right to add/remove the cardiovascular, nervous, and
lymphatic systems from the volume rendering.
When viewing DICOM data:
Drag the upper slider bar right/left to increase/decrease the
Brightness (density) of the volume in the Rendering Window.
Shift the lower slider bar right/left to increase/decrease the
Contrast of the volume in the Rendering Window.
WARNING: Brightness and Contrast settings are dependent
upon the volume rendering range defined in the Image
Control Settings (p. 26).
Action Menu
Tap structure and then action menu or double tap a structure to
view action menu for selected structure. The functions of each
tool within the Action Menu are outlined below.
Structure On/Off
Tap to toggle a structure on or off. A white check mark
indicates that the structure is toggled on. A dashed check mark
indicates that the structure is toggled off.
Transparency
Tap to adjust surface and volume transparencies (50% surface
opacity, 0% volume opacity) for selected structure. A blue
background indicates that a transparency is applied.
TS001 Ver A. 4 October 2022 - Page 24 of 54 - UM-TSWEDU-ENG-80A

Anatomage Table EDU 9.0 Application Manual Table of Contents
Color Select
Tap downward arrow to choose a color from the drop-down
menu. Tap the color button to highlight selected structure in
chosen color.
Annotations
Tap to enable all annotations for selected structure. A blue
background indicates that annotations are applied.
Origin and Insertion
Tap to display origin and insertion points for a selected bone.
A blue background indicates that origin and insertion points
are turned on. A grayed-out icon indicates no origin/insertion
for a structure.
Tap on any of the painted surfaces to turn on/off the
annotations.
Bony Landmarks
Tap to display bony landmarks for a selected bone. A blue
background indicates that the bony landmark points are turned
on. A grayed-out icon indicates no bony landmarks for a
structure.
Tap on any of the painted surfaces to turn on/off the
annotations.
Blood Flow Tool
Tap to display blood flow for selected vein or artery. A blue
background indicates that the blood flow tool is activated. A
grayed-out icon indicates no bloodflow for a structure.
Curved Dissection
Tap to activate the curved dissection tool, as indicated by a
blue background.
TS001 Ver A. 4 October 2022 - Page 25 of 54 - UM-TSWEDU-ENG-80A

Anatomage Table EDU 9.0 Application Manual Table of Contents
Step 1: Hold and drag anywhere on the selected structure. A
red line will appear outlining the sculpt area.
Step 2: Tap inside or outside the area to select dissection
boundaries. The cut will be made only on the selected
structure.
Linear Dissection
Tap to activate the linear dissection tool, as indicated by a blue
background.
Step 1: Hold and drag anywhere on the selected structure. A
red line will appear.
Step 2: Tap on either side of the line to select which side will
be dissected. The linear cut will be made only on the selected
structure.
Reset Dissection
Tap to remove any dissections performed on the structure,
returning the structure to its natural state.
Application Properties
Tap the icon to open the Image Control Settings dialog to
adjust the multi-touch and rotation controls, volume rendering
range (DICOM data only), camera projection, UI settings, and
to enable Feature Lock.
TS001 Ver A. 4 October 2022 - Page 26 of 54 - UM-TSWEDU-ENG-80A

Anatomage Table EDU 9.0 Application Manual Table of Contents
Tap the Layout button to make adjustments to the Layout
Options and to enable Vertical Viewing Mode.
Adjust Layout: Toggle the application icons between the four
quadrants of the Anatomage Table. Icons are rotated to
accommodate users in different areas of the Anatomage Table.
Split Screen: Tapping the split screen icons will snap the
software to the left monitor or to the right monitor.
Enable Vertical: Toggle between Vertical Viewing Mode and
Horizontal Viewing Mode. In Vertical Viewing Mode, icons
are rotated and condensed into categories. Table application
has slightly limited functionality.
WARNING: If Table application detects that some DCM files
are missing, corrupt, or otherwise determined inaccurate, an
error message will appear about possible inaccurate
reconstruction. The user may continue with volume
reconstruction and should exercise caution when reviewing
any data with possible inaccuracies. An inaccurate volume
reconstruction created in Horizontal Viewing Mode will still
contain inaccuracies when viewed in Vertical Viewing Mode.
Volume Rendering Preference (for DICOM Data Only):
Min/Max: Define the minimum and maximum limits of the
scalar values for reconstructing volume from slice image data.
Anatomage recommends -500 to 1500 for CT data and 0 to
3000 for MRI data. Table 9.0 will automatically set this value
upon loading a scan.
WARNING: The values set in this Volume Rendering
Preference field will have a direct effect on how the image
data is reconstructed and displayed within the rendering
window. The rendering range should be adjusted
appropriately depending upon the modality (CT, MR, etc.)
and scanning parameters.
Quality: When icon is selected, quality rendering is on. When
icon is not selected, performance rendering is turned on.
TS001 Ver A. 4 October 2022 - Page 27 of 54 - UM-TSWEDU-ENG-80A

Anatomage Table EDU 9.0 Application Manual Table of Contents
Apply: Enable any changes made to the rendering range or
rendering performance adjustments.
Adjust Text: Tapping the Adjust Text icon brings up the
Adjust UI Dialog. In the dialog, the user can customize the
behavior of annotations, and size and color of annotations,
measurements, and explorer text with the corresponding pull-
down menus. They can also adjust the structure labeling.
Link 2D and 3D view: Determines whether or not 2D cross-
sectional image will snap to structure chosen using Explorer
Tools (must be in 3D + 2D viewing mode).
Dissection Tool Labels: Determines whether annotations will
appear when removing structures via Dissection Tool.
Lead lines linked to Clipping Plane: The annotations are by
default linked to the clipping plane. If a clipping plane is
applied, any annotations turned on will only have their lead
lines appear if they are mapped to a location within a few mm
of the clipping plane. To turn this option off, tap to uncheck the
white box.
Adjust Colors: The user can apply a flat color to veins (blue),
arteries (red), nerves (yellow), and lymphs (green).
The user can also change the background color of the Volume
Rendering Window to black, white, or gray using the quick
access buttons, or to other colors using the drop down menu.
TS001 Ver A. 4 October 2022 - Page 28 of 54 - UM-TSWEDU-ENG-80A

Anatomage Table EDU 9.0 Application Manual Table of Contents
Default On: The user can adjust the default settings so that
Live mode and Learning Assistant are turned on or off upon
initial loading of scan.
Structure Pronunciation: The Table will read aloud a
selected structure.
Turn this function on or off by tapping the icon to enable or
disable. Tap the R/L icon to read only the structure name
without identifying which side of the body it is on.
Feature Lock: Lock specific features. The features that are
checked will be unlocked.
Define locked features using Options. Create a password for
managing use of the Feature Lock and enable it using Enable.
Password must be used for disabling Feature Lock as well. In
the event that the password is forgotten, the master password
can be used to disable Feature Lock.
Master password – AnatoTest0
TS001 Ver A. 4 October 2022 - Page 29 of 54 - UM-TSWEDU-ENG-80A

Anatomage Table EDU 9.0 Application Manual Table of Contents
Language Menu: The user can toggle between languages.
Currently supported languages include Chinese (Simplified),
English, French, German, Italian, Kazakh, Korean, Russian,
Spanish (Spain).
After the language has been changed, the user must adjust the
system locale.
Annotation Controls (for DICOM data and Prosection)
Opens Annotation interface that allows for custom annotations
to be made. These annotations can be added to a group and
new annotations can be put in a specific group.
To place the annotation, tap a location on the scan. Location of
annotations can be edited.
Once the annotations are made, they can be turned on/off by
checking the box or tapping the “A” at the bottom of the menu.
A list of annotations can be exported and imported.
Annotation Regions/Histology Labels (for Prosection and
Histology)
Tap icon to open Annotation Regions in Prosection and
Histology Labels in segmented Histology.
Turn on/off a region or label by checking the box and turn
on/off annotations by tapping the “A”.
TS001 Ver A. 4 October 2022 - Page 30 of 54 - UM-TSWEDU-ENG-80A

Anatomage Table EDU 9.0 Application Manual Table of Contents
Slider Bar (for Prosection)
Tap and drag the slider bar to adjust the view for prosections
with different states.
View Sequencer
Tap icon to import and playback View Sequences (.vseq files)
created from Invivo6 software. Use this icon to also play the
4D cases in the Case Library.
This icon can also be used to view Curriculum slides in the
Curriculum data sets.
WARNING: View Sequencer behavior is best when using the
same particular image data set that was used when initially
creating the View Sequence in Invivo6.
TS001 Ver A. 4 October 2022 - Page 31 of 54 - UM-TSWEDU-ENG-80A

Anatomage Table EDU 9.0 Application Manual Table of Contents
NAVIGATION
Navigation is an easy way to open Table content related to a specific subject.
There are ten subjects with content:
• Cardiology
• Sports Medicine
• Interesting Pathology
• Optometry
• Nervous
• Dental
• Oncology
• Surgical Devices
• Developmental anatomy
• Respiratory
TS001 Ver A. 4 October 2022 - Page 32 of 54 - UM-TSWEDU-ENG-80A

Anatomage Table EDU 9.0 Application Manual Table of Contents
Each thumbnail image is outlined in a different color which represents where the Table scan is located
within the Table:
Color Scan Location Example
Purple Cadavers
Red Functional
Anatomy
Cyan Case Library
Blue Histology
Orange Prosection
Green Curriculum
TS001 Ver A. 4 October 2022 - Page 33 of 54 - UM-TSWEDU-ENG-80A

Anatomage Table EDU 9.0 Application Manual Table of Contents
CADAVERS
(This section contains images featuring educational content and should not be used as clinical
reference or for diagnostic purposes).
Tap Cadavers on Application toolbar to open the Gross Anatomy and Regional Anatomy menus.
• Dialog lists all available Gross Anatomy and Regional Anatomy scans with resolution, size, and
gender.
• Tap entry name, then tap Open or double tap entry name.
• Tap Close to close dialog.
TS001 Ver A. 4 October 2022 - Page 34 of 54 - UM-TSWEDU-ENG-80A

Anatomage Table EDU 9.0 Application Manual Table of Contents
IMAGE ADJUSTMENT
Segmented Cadaver Data
Selecting the Volume Visibility Control Icon will open the following dialog.
• Structures are organized into systems and categories.
• Tap Checkbox icon at the bottom of the system list to turn all structures On/Off.
• Tap Checkbox icon next to each entry to turn systems, categories, or individual structures On/Off.
• Tap a system or category to show associated subsystems. Selected entry name will be highlighted blue.
• Tap grayed color wheel icon next to entry names to adjust Opacity, No Clip, and Color settings for
volumes and to toggle Origin/Insertion and Bony Landmarks for bones. If adjusted, gray color wheel
icon becomes colored.
No Clip: If enabled, structures cannot be
sliced through.
Transparent: Auto adjust surface and
volume transparencies (50% surface
opacity, 0% volume opacity)
Opacity: Adjust slider bars to adjust
surface and volume transparencies.
TS001 Ver A. 4 October 2022 - Page 35 of 54 - UM-TSWEDU-ENG-80A

Anatomage Table EDU 9.0 Application Manual Table of Contents
Flat Color: Choose a color from quick
access or the drop-down color menu. Tap
button to highlight structure in chosen
color.
Origin and Insertion: Toggles On/Off
Origin and Insertion for selected bone
structure.
Bony Landmarks: Toggles on/off bony
landmarks for selected bone structure.
• L and R buttons in lower left-hand corner allow the user to toggle On/Off the left and right structures
for select systems and categories.
• The counter-clockwise, curved arrow color wheel button restores the cadaver to its default view by
removing any Opacity, No Clip, Color settings, Origin/Insertion and Bony Landmarks.
• The A button in the lower right corner expands the Volume Visibility dialog to include Annotations.
When the dialog is expanded: the circled A button toggles On/Off Annotation Visibility, the downward
and upward arrow buttons allows the user to import and export custom annotations, and the counter-
clockwise, curved arrow allows the user to restore to default annotations. See p. 37 for additional
details on Annotations.
• Search bar in lower right corner allows user to search for a particular structure. Tap X to clear all search
terms.
TS001 Ver A. 4 October 2022 - Page 36 of 54 - UM-TSWEDU-ENG-80A

Anatomage Table EDU 9.0 Application Manual Table of Contents
ANNOTATIONS
Annotations can be activated in the Volume Visibility Dialog. Annotations are linked with clipping
planes. Chosen annotations will be displayed, but lead lines will only appear when associated volume
is close to the clipping plane. If no clipping plane is defined, lead lines will always appear.
• Tap the “A” button at the bottom right of the Volume Visibility Dialog to expand the dialog to
include Annotations. This includes structure annotation, Origins/Insertions, Bony Landmarks.
◦ Tap the arrow icon next to Annotations, Bony Landmarks, or Origins/Insertions to expand
that annotation list.
◦ Tap the circled “A” button at the lower right of the dialog to show/hide all enabled
annotations.
◦ Check the box next to each entry to enable that specific annotation.
◦ In the Annotation list, tap “New Annotation” to create your own annotation. Type out the
desired annotation text and tap anywhere on the volume to select annotation coordinate.
• Tap on the settings tab and tap “Adjust Text” to adjust where annotation texts will appear (Top,
Bottom, Right, Left) and how annotation text will appear (Size, Color).
• Annotations saved with Invivo will appear with Comment and Marker as System and Category,
respectively.
• User can adjust coordinates of annotations by tapping the Ellipsis Button to the right of the
annotation and then “Edit Location”. A dialog will appear prompting “Edit Location” and the
user can tap anywhere on the structure to change its location. When the Annotation (.csv) file
is exported, the new location(s) will be updated.
WARNING: Saving the new coordinates for an annotation will overwrite the associated
information on the currently loaded .csv annotation spreadsheet. A back up annotation
spreadsheet is available on the Table desktop.
Load Default
Annotations
Load in default annotations (.csv file) from the Presets, Annotations folder on
the Table desktop.
Load Annotation File Load in custom annotations (.csv file with character set “UTF-8”, separated
by tab, and set to “quoted field as text”) created using Invivo6 software (or
other software).
Customizing
Annotations (for
DICOM Data)
Annotations can be added to any DICOM scan. There are no default
annotations for these scans, but custom annotations can be made by tapping
on “New Annotations”. Placing these is this same as with Gross Anatomy.
WARNING: Open same data set that was used to create annotation file in order to
preserve correct coordinate system.
TS001 Ver A. 4 October 2022 - Page 37 of 54 - UM-TSWEDU-ENG-80A

Anatomage Table EDU 9.0 Application Manual Table of Contents
DCM/INV FILES
(This section contains images featuring educational content and should not be used as clinical
reference or for diagnostic purposes).
Selecting the Volume Visibility Control Icon will open the following dialog.
Volume Renderings
(Gray Scale, X-Ray,
Transparent Soft Tissue,
Transparent Hard Tissue,
Transparent Soft + Hard,
etc.)
Collection of different volume rendering presets (filters.) Each can be
adjusted using the Brightness and Contrast slider bars on the main
Table user interface. Users can create their own custom volume
rendering presets using the Invivo6 software. This setting can be
exported as a volume configure file (.vcf). Custom loads in a .vcf file.
WARNING: Ultra High-Quality Rendering (UHQ) requires an NVIDIA graphics
card to function. If Table application detects that some DCM files are missing,
corrupt, or otherwise determined inaccurate, an error message will appear about
possible inaccurate reconstruction. The user may continue with volume
reconstruction and should exercise caution when reviewing any data with possible
inaccuracies.
TS001 Ver A. 4 October 2022 - Page 38 of 54 - UM-TSWEDU-ENG-80A

Anatomage Table EDU 9.0 Application Manual Table of Contents
CT Settings (Only available in slice mode for DCM image sets)
Tap to show all available radiology presets. Using a second tap, select a particular
radiology preset. The brightness and contrast can be adjusted using the slider bars to
the right.
Available CT presets: Brain, Abdomen, Mediastinum, Bone, Lung, Liver
WARNING: CT presets are dependent upon original scanner/DCM HU
definitions. User is responsible for adjusting rendering range and settings
to ensure all structures are visible in the scan.
WARNING: MRI scans will automatically have their volume rendering
range adjusted for optimal viewing. The user can specify a specific
rendering range by manually entering the minimum and maximum
values in the settings menu.
MODEL SETTINGS
Open an INV file with models created from a
DICOM file in Invivo or MedicalDesignStudio.
Open Visual Property Dialog for currently selected
digital surface model.
Visibility
• Turn On/Off model visibility
• Adjust the Opacity of a particular model
Rendering
• Adjust Mode: Surface, Wireframe, or Points
• Adjust shading: Smooth or Flat
• Turn On/Off Back Face Culling
• Enable No Clipping (clipping planes do not
affect model)
Material
• Adjust surface model appearance by
changing color and light settings
Texture
• Turn On/Off texture applied to model
• Turn On/Off shading applied to model
Tapping OK will close the Visual Property window
and save the changed settings.
TS001 Ver A. 4 October 2022 - Page 39 of 54 - UM-TSWEDU-ENG-80A

Anatomage Table EDU 9.0 Application Manual Table of Contents
PRESET DIALOG
Select All
Selects all Presets, as indicated by a blue
number to the left of the dialog.
Save Preset
Create an unlimited number of presets: saves
volume orientation, clipping planes, freehand
dissection cuts, model visibility, volume
visibility, annotations, and pins.
Remove Selected
Presets
Delete the currently selected preset(s).
Reorder Presets
When tapping on this icon, each preset will
have this icon preset. Drag this icon for a
select preset to adjust the numbered order of
the presets.
Load in preset file (.vpf).
Export all selected presets as a visibility
preset file (.vpf).
Choose to add a select preset(s) to a custom
folder. You can lock a folder by giving it a pin
number.
TS001 Ver A. 4 October 2022 - Page 40 of 54 - UM-TSWEDU-ENG-80A

Anatomage Table EDU 9.0 Application Manual Table of Contents
This will show a list of all folders made.
There is a purple “Anatomage Created” folder
within this.
Tapping on this folder will show premade
Anatomage created presets with annotations
and flat colors applied for each system.
Tap on the preset icon then tap on this icon to open the playback
dialog. Use the play button or scroll bar to play through presets.
WARNING: Preset behavior is best when using the same particular image data
set and volume rendering range that was used when initially creating the presets.
Current presets in the menu will be overridden by newly imported presets.
TS001 Ver A. 4 October 2022 - Page 41 of 54 - UM-TSWEDU-ENG-80A

Anatomage Table EDU 9.0 Application Manual Table of Contents
FUNCTIONAL ANATOMY
(This section contains images featuring educational content and should not be used as clinical
reference or for diagnostic purposes).
Tap Functional Anatomy on Application Toolbar to open the Functional Anatomy Dialog.
• Dialogue lists all available Functional Anatomy scans with type and description.
◦ Dental: Shows dental arch and pano slice view.
◦ Kinesiology: Shows various joint movements.
◦ Pregnancy: Shows a pregnant cadaver with fetus.
◦ Ocular Applications: Shows vision and ocular movements.
◦ Neural Pathways: Shows what nerves innervate specific dermatomes, muscles, and organs.
◦ Cardiology: Shows a beating heart with ECG.
◦ Cardiology (Full Body): Shows a beating heart with ECG in full body cadaver.
◦ Pathways: Outlines a particular physiology pathway. (Available in both male and female).
◦ Catheterization: Steps through the placement of a few heart cauterization procedures.
TS001 Ver A. 4 October 2022 - Page 42 of 54 - UM-TSWEDU-ENG-80A

Anatomage Table EDU 9.0 Application Manual Table of Contents
• Tap entry name, then tap Open or double tap entry name.
TS001 Ver A. 4 October 2022 - Page 43 of 54 - UM-TSWEDU-ENG-80A
Femur on Pelvis
From left to right: Abduction/Adduction,
Internal Rotation/External Rotation,
Flexion/Extension
Volume Visibility (in Pregnancy only)
Tap on the pink icon to open Volume Visibility dialog for the
pregnant cadaver. Tap on the blue icon to open Volume Visibility
dialog for the fetus.
Knee
From left to right: Flexion/Extension,
Internal Rotation/External Rotation
Joint Movements (in Kinesiology only)
Tap this icon to open joint movements dialog. Tap
on a joint icon or tap directly on a joint and use
arrows to view movements.
Shoulder
From top left going clockwise:
Abduction/Adduction, Flexion/Extension,
Internal Rotation/External Rotation,
Protraction/Retraction, Elevation/Depression
Pelvis on Femur
From left to right: Abduction/Adduction,
Internal Rotation/External Rotation,
Flexion/Extension

Anatomage Table EDU 9.0 Application Manual Table of Contents
TS001 Ver A. 4 October 2022 - Page 44 of 54 - UM-TSWEDU-ENG-80A
Pathways (in Pathways only)
Tap on this icon to open the pathways interface. Tap on any of the arrows
or a certain pathway to play through this pathway. Create a new pathway
and customize by tapping on the structures in the pathway and adding
them to a list.
Nerve Flow Visualization (in Neural Pathways only)
Tap this icon to open the nerve flow vizualization tool. Tap on a
dermatome, muscle, or organ to reveal the nerve pathway. Tap on the
highlighted region in the legend to see more details.
ECG (in Cardiology or Catheterization only)
Tap this icon in either of the above scans to open the ECG
interface to adjust the controls and view the beating heart.
Catheter (in Catheterization only)
Tap to choose a procedure and path. Go step by step through the procedure.
ECG (in Pregnancy only)
Tap the pink icon to open ECG interface for the pregnant
cadaver. Tap the blue icon to open the ECG interface for the
fetus.
Vision (in Ocular Applications only)
Tap this icon to open vision dialog. Use slider bars to adjust vision.
View adjustments with eye chart.
Ocular movements (in Ocular Applications only)
Tap this icon to open ocular movements. Use slider bars to adjust
motions.

Anatomage Table EDU 9.0 Application Manual Table of Contents
CASE LIBRARY
(This section contains images featuring educational content and should not be used as clinical
reference or for diagnostic purposes).
The Case Library is a collection of scans showing various clinical case examples. Through the use of contrast
media and other imaging techniques, real patient anatomical features are highlighted. Each scan comes with scan
information, if available.
Select Case Library from Application toolbar to open the Case Library dialog.
• Scans are sorted by the following icons: Head and Neck, Thorax, Abdomen and Pelvis, Upper Limb,
Lower Limb, Full Body, Animal, Archaeology, Embryo, and 4D.
• Tap on a divisional icon to view all associated scans.
• Select scan name to display additional clinical information (Info, History, Findings, Impression, Other)
along with scan resolution and size.
• Tap the MRI or CT icons to see scans organized by tag.
• To search the Case Library, type text into the bottom left search bar, then tap Apply.
• There are also two folder icons for Recently Viewed and Case Folders.
• Case Folders include Recently Added and Favorites.
• To create your own folder, tap the button and enter in the desired Folder name.
• To remove your own folder, tap the button.
TS001 Ver A. 4 October 2022 - Page 45 of 54 - UM-TSWEDU-ENG-80A

Anatomage Table EDU 9.0 Application Manual Table of Contents
• To add a case to a folder, tap the button and choose the desired folder.
• To remove a case to a folder, tap the button.
• To export a custom folder (.txt file), open the custom folder and tap the button. A dialog will
appear allowing the user to choose the name and location of the .txt file.
• To import a custom folder (.txt file), tap the button under the folder’s category and locate the .txt
file for the desired custom folder.
Comparison Displays three related scans linked in movement, clipping plane,
brightness/contrast, and volume rendering mode for comparison. Note:
Comparison Cases are not compatible with Vertical Viewing Mode.
TS001 Ver A. 4 October 2022 - Page 46 of 54 - UM-TSWEDU-ENG-80A

Anatomage Table EDU 9.0 Application Manual Table of Contents
4D scans Scans showing movement
To Play 4D scan:
Step 1: Tap the View Sequencer icon .
Step 2: Tap to start/pause movement. Tap to loop playback.
Step 3: Tap to move forward one frame. Tap to move backward one frame.
Step 4: Tap to cut to the last frame. Tap to return to the first frame in the sequence.
Step 5: Tap the red X in the upper right to close dialog.
User can rotate or clip volume while video loop is playing. Video playback will pause when user is
rotating volume. Pause playback when not viewing scan to conserve computer memory.
TS001 Ver A. 4 October 2022 - Page 47 of 54 - UM-TSWEDU-ENG-80A

Anatomage Table EDU 9.0 Application Manual Table of Contents
HISTOLOGY LIBRARY
(This section contains images featuring educational content and should not be used as clinical
reference or for diagnostic purposes).
The Histology Library is a collection of slides showing various physiological and pathological examples with
the use of various microscopic and staining techniques. Each slide comes with information, if available.
Select Histology from Application toolbar to open the Histology Library dialog.
• Slides are sorted by tissue type (ET, CT, MT, NT) or by organ system (Cardiovascular, Connective
Tissue, Reproductive, etc.).
• Tap on a divisional icon to view all associated slides.
• Tap Interactive to view slides with drawings and annotations.
• Tap on this icon then double tap on up to 4 slides to compare them side by side.
• Select scan name to display additional information, including a larger preview image, and microscopic
technique/stain when available.
• To search the Histology Library, type text into the bottom left search bar.
TS001 Ver A. 4 October 2022 - Page 48 of 54 - UM-TSWEDU-ENG-80A

Anatomage Table EDU 9.0 Application Manual Table of Contents
CURRICULUM
The Curriculum consists of a set of single scans with pre-made annotations and view sequences,
provided by Anatomage. Scans are sorted by region (Thorax, Upper Limb, etc) and system (Skeletal,
Muscular, etc). The curriculum is intended for teaching purposes.
(This section contains images featuring educational content and should not be used as clinical
reference or for diagnostic purposes).
TS001 Ver A. 4 October 2022 - Page 49 of 54 - UM-TSWEDU-ENG-80A

Anatomage Table EDU 9.0 Application Manual Table of Contents
PROSECTION
Prosections consists of regional prosected 3D real cadaver images. These images consist of the
external data so they can be rotated to view at different angles. No cuts can be made through these
images. Some prosection images have pathology (diseased liver, partial knee replacement, etc.) and
some are “healthy” prosections (brain, lower limb, etc.)
(This section contains images featuring educational content and should not be used as clinical
reference or for diagnostic purposes).
TS001 Ver A. 4 October 2022 - Page 50 of 54 - UM-TSWEDU-ENG-80A

Anatomage Table EDU 9.0 Application Manual Table of Contents
ANATOMAGE SHARE
Anatomage Share is a website platform where users can access Anatomage Created materials (like
example activities, tutorial videos, How-to Documents, and more), upload and store their Anatomage
content, and share material with other Anatomage users around the world.
Sign in on the Anatomage Share window from the main menu to access your account.
See Table 9.0 “How to Use Anatomage Share” for more information on how to create an account,
navigate the website, and upload or download content.
TS001 Ver A. 4 October 2022 - Page 51 of 54 - UM-TSWEDU-ENG-80A

Anatomage Table EDU 9.0 Application Manual Table of Contents
OPENING DCM/INV SCANS
Step 1: Select Open File from the Application toolbar.
Step 2: Tap on browse and use the Windows Explorer interface to navigate to directory of INV file or
DCM file series.
INV file Select file and press Open.
DCM series Select a single DCM file and press Open. Software will scan through
folder and check each DCM file's metadata prior to loading all DCM files
in the same series.
Step 3: Table application will automatically construct image volume based on INV or DCM file.
For INV files, any additional content created and saved with the patient data using Invivo6
software (surface models, models, etc.) will be loaded as well.
WARNING: Table application and Invivo6 software will load in DCM files contained within the same
folder and of the same imaging series when reconstructing the volume. It is the responsibility of the
user to confirm that all slice information is available and in the same folder when loading onto
Table6.0 or saving from Invivo6.
WARNING: If Table application detects that some DCM files are missing, corrupt, or otherwise
determined inaccurate, an error message will appear about possible inaccurate reconstruction. The
user may continue with volume reconstruction and should exercise caution when reviewing any data
with possible inaccuracies.
WARNING: When loading additional content created (surface models, comments, etc.), content is
created by another user and is not part of the original patient image data.
TS001 Ver A. 4 October 2022 - Page 52 of 54 - UM-TSWEDU-ENG-80A

Anatomage Table EDU 9.0 Application Manual Table of Contents
PACS INTEGRATION
The Anatomage Table can import scans directly from PACS server. Tap on “Open File”, tap on
“Import PACS” and then tap on “Configure”. Under Server Setup, type in the PACS server AE Title,
Host Name and Port. Under Client Setup, type in the AE Title and Port.
Tap Test Connection to confirm that the connection is successful.
Please contact Anatomage with any questions regarding this process.
WARNING: Anatomage is not responsible for verifying the accuracy of patient information from
a PACS system. Anatomage also assumes no responsibility in relation to privacy requirements for
viewing and sharing patient scan information.
TS001 Ver A. 4 October 2022 - Page 53 of 54 - UM-TSWEDU-ENG-80A

Anatomage Table EDU 9.0 Application Manual Table of Contents
TABLE APPLICATION TROUBLESHOOTING
This section discusses common software troubleshooting issues.
For all troubleshooting, be sure to follow the safety guidelines outlined in the Safety Instructions
and Warnings section of the hardware manual.
Issue With Problem Action
Installation
Error Message: Server is not responding
Check Internet connection. If Internet is connected, try
again later.
Error Message: Please run as
administrator to activate software
Run the application as administrator.
Error Message: Invalid Authorization code Check license code and try again.
File Operations
Error Message: Error: Cannot read this file Check if this file is supported by Table 9.0.
Error Message: Failed to read DICOM file! Check if this file is supported by Table 9.0.
Image Rendering
Error Message: Can't detect hardware
acceleration for OpenGL support!
Check if graphics card meets system requirements.
Check if latest driver is installed for graphics card.
Image is distorted Switch to another view and switch back.
Grayscale image shows up for all rendering
presets
Check if graphics card meets system requirements.
Check if latest driver is installed for graphics card.
Warning message: 3D reconstruction may
not work!
Check if the DICOM files are exported correctly.
Slow performance
For Cadavers and Functional Anatomy, keep a
maximum of 2-3 applications open at any given time.
These require the most data and keeping too many open
can cause slow performance or lag. If this is observed,
close one of the applications.
Computer Blue screen
Restart system and see if problem persists.
Note the error code given and learn more at
support.microsoft.com
Contact Anatomage at (408) 885-1474 for additional support.
TS001 Ver A. 4 October 2022 - Page 54 of 54 - UM-TSWEDU-ENG-80A
