
© 2008 Oryx Digital Ltd
The easiest way to create the table seating plan for your wedding, celebration or event

PerfectTablePlan2
© 2008 Oryx Digital Ltd
Table of Contents
PerfectTablePlan 3.1.4
................................................................................................................................... 61 Introduction
.......................................................................................................................................................... 6Introduction
.......................................................................................................................................................... 6Conventions in this document
.......................................................................................................................................................... 7System requirements
.......................................................................................................................................................... 7The help system
................................................................................................................................... 92 Quick start guide
.......................................................................................................................................................... 9Quick start guide
................................................................................................................................... 183 Movies
.......................................................................................................................................................... 18Movies
................................................................................................................................... 184 Tutorial
.......................................................................................................................................................... 18Tutorial
.......................................................................................................................................................... 191. Getting started
.......................................................................................................................................................... 222. Add guests
.......................................................................................................................................................... 283. Set Proximity
.......................................................................................................................................................... 304. Add tables
.......................................................................................................................................................... 355. Assign guests
.......................................................................................................................................................... 376. Assess plan
.......................................................................................................................................................... 407. Print plan
.......................................................................................................................................................... 428. Print stationery
.......................................................................................................................................................... 489. Import guests
................................................................................................................................... 555 User interface
.......................................................................................................................................................... 55Main window
.......................................................................................................................................................... 57Menu bar
.......................................................................................................................................................... 57Task tool bar
.......................................................................................................................................................... 58Main tool bar
.......................................................................................................................................................... 60Insert tool bar
.......................................................................................................................................................... 61Status bar
.......................................................................................................................................................... 61Left pane
......................................................................................................................................................... 61Left pane
......................................................................................................................................................... 62Guests pane
......................................................................................................................................................... 64Groups pane
.......................................................................................................................................................... 66Top pane
......................................................................................................................................................... 66Top pane
......................................................................................................................................................... 66Floor plan pane
......................................................................................................................................................... 70Table plan pane
......................................................................................................................................................... 73Schematic pane
......................................................................................................................................................... 75Table chart pane
......................................................................................................................................................... 76Guest chart pane
......................................................................................................................................................... 77Stationery pane
......................................................................................................................................................... 84Statistics pane
.......................................................................................................................................................... 85Bottom pane
......................................................................................................................................................... 85Bottom pane
......................................................................................................................................................... 85Proximity pane
.......................................................................................................................................................... 86Windows
......................................................................................................................................................... 86Windows

3Contents
3
© 2008 Oryx Digital Ltd
......................................................................................................................................................... 88About window
......................................................................................................................................................... 88Change group window
......................................................................................................................................................... 88Chart title/footer window
......................................................................................................................................................... 89Dimensions window
......................................................................................................................................................... 90Export window
......................................................................................................................................................... 90Export data window
......................................................................................................................................................... 92Export PDF window
......................................................................................................................................................... 92Export vCard window
......................................................................................................................................................... 93Fonts and colours window
......................................................................................................................................................... 93Group properties window
......................................................................................................................................................... 94Guest properties window
......................................................................................................................................................... 97Import window
......................................................................................................................................................... 97Import data window
......................................................................................................................................................... 102Information window
......................................................................................................................................................... 102Insert couple window
......................................................................................................................................................... 105Insert family window
......................................................................................................................................................... 108Insert group window
......................................................................................................................................................... 110Insert guest window
......................................................................................................................................................... 113Insert guests scratch-pad
......................................................................................................................................................... 113Insert shape window
......................................................................................................................................................... 114Insert table window
......................................................................................................................................................... 116Insert text window
......................................................................................................................................................... 117Licence window
......................................................................................................................................................... 118Most recently accessed window
......................................................................................................................................................... 118Numbers and budget window
......................................................................................................................................................... 119Preferences window
......................................................................................................................................................... 123Print window
......................................................................................................................................................... 124Print setup window
......................................................................................................................................................... 125Save stationery layout window
......................................................................................................................................................... 125Shape properties window
......................................................................................................................................................... 126Stationery layout window
......................................................................................................................................................... 127Table order window
......................................................................................................................................................... 127Table properties window
......................................................................................................................................................... 129Text properties window
.......................................................................................................................................................... 130Drag and drop
................................................................................................................................... 1316 Importing
.......................................................................................................................................................... 131Importing
.......................................................................................................................................................... 132Importing guests from vCard files
.......................................................................................................................................................... 133Importing guests from text and Excel CSV files
................................................................................................................................... 1347 Names and titles
.......................................................................................................................................................... 134Names and titles
................................................................................................................................... 1358 Groups
.......................................................................................................................................................... 135Groups
................................................................................................................................... 1359 RSVP status
.......................................................................................................................................................... 135RSVP status
................................................................................................................................... 13710 Seat assignment
.......................................................................................................................................................... 137Seat assignment
.......................................................................................................................................................... 138Automatic seat assignment
.......................................................................................................................................................... 141Genetic algorithm
................................................................................................................................... 14211 Copying to the clipboard
.......................................................................................................................................................... 142Copying to the clipboard
................................................................................................................................... 14312 Printing

PerfectTablePlan4
© 2008 Oryx Digital Ltd
.......................................................................................................................................................... 143Printing
.......................................................................................................................................................... 145Stationery
................................................................................................................................... 14613 Emailing
.......................................................................................................................................................... 146Emailing
................................................................................................................................... 14614 Exporting
.......................................................................................................................................................... 146Exporting
.......................................................................................................................................................... 148Export formats
................................................................................................................................... 14915 Back-up files
.......................................................................................................................................................... 149Back-up files
................................................................................................................................... 15016 Creating a good table plan
.......................................................................................................................................................... 150Creating a good table plan
................................................................................................................................... 15017 Multiple user access
.......................................................................................................................................................... 150Mutliple user access
................................................................................................................................... 15018 Frequently asked questions
.......................................................................................................................................................... 150Frequently asked questions
................................................................................................................................... 15119 Integrating PerfectTablePlan
.......................................................................................................................................................... 151Integrating PerfectTablePlan
.......................................................................................................................................................... 151Command line arguments
.......................................................................................................................................................... 152PerfectTablePlan file format
................................................................................................................................... 15520 How do I?
.......................................................................................................................................................... 155How do I?
.......................................................................................................................................................... 158Add a chart title/footer
.......................................................................................................................................................... 158Add a dance floor, stage etc to the floorplan
.......................................................................................................................................................... 158Add a graphic or logo
.......................................................................................................................................................... 159Add a new stationery layout
.......................................................................................................................................................... 159Add a title or text into the floor plan
.......................................................................................................................................................... 159Add or remove dots at the end of titles
.......................................................................................................................................................... 160Arrange multiple seatings for an event
.......................................................................................................................................................... 160Assign guests to seats
.......................................................................................................................................................... 160Change fonts and/or colours
.......................................................................................................................................................... 161Change how guest names are displayed in the floor plan
.......................................................................................................................................................... 161Change proximity for multiple guests
.......................................................................................................................................................... 161Change the print pagination
.......................................................................................................................................................... 162Change the size of the room
.......................................................................................................................................................... 162Change the table order
.......................................................................................................................................................... 163Choose a format to export to
.......................................................................................................................................................... 163Copy guests from one plan to another
.......................................................................................................................................................... 164Create a re-useable floor plan template
.......................................................................................................................................................... 164Customise standard guest titles
.......................................................................................................................................................... 165Email my plan
.......................................................................................................................................................... 165Estimate numbers and budget
.......................................................................................................................................................... 165Export a chart to Excel/Word
.......................................................................................................................................................... 166Export guest and seating data to Excel
.......................................................................................................................................................... 166Export to PDF format
.......................................................................................................................................................... 167Handle guests with unknown names
.......................................................................................................................................................... 167Handle post-nominal titles
.......................................................................................................................................................... 168Import guest details from Apple Address Book
.......................................................................................................................................................... 169Import guest details from Excel spreadsheets
.......................................................................................................................................................... 169Import guest details from Outlook
.......................................................................................................................................................... 171Import guest details from Outlook Express
.......................................................................................................................................................... 173Import guests in couples/families/groups

5Contents
5
© 2008 Oryx Digital Ltd
.......................................................................................................................................................... 173Insert a new guest into an existing group
.......................................................................................................................................................... 174Liaise with caterers
.......................................................................................................................................................... 174Load sample stationery
.......................................................................................................................................................... 175Lock guests to seats
.......................................................................................................................................................... 175Move guests from one group to another
.......................................................................................................................................................... 176Only assign guests who have accepted
.......................................................................................................................................................... 176Order a bespoke plan online
.......................................................................................................................................................... 176Print a guest list
.......................................................................................................................................................... 176Print place cards, invitations, address labels etc
.......................................................................................................................................................... 177Print legible plans on a small format printer
.......................................................................................................................................................... 178Print to poster size
.......................................................................................................................................................... 178Rename a table
.......................................................................................................................................................... 178Retrieve old versions of the plan
.......................................................................................................................................................... 179Set the RSVP status for multiple guests
.......................................................................................................................................................... 179Show gender in the floor plan
.......................................................................................................................................................... 179Show groups in the floor plan
.......................................................................................................................................................... 180Show the proximity for one group at a time
.......................................................................................................................................................... 180Show unassigned seats
.......................................................................................................................................................... 181Track details of non-seated guests
.......................................................................................................................................................... 181Turn off guest name capitalisation
.......................................................................................................................................................... 181Turn the floor plan grid on/off
.......................................................................................................................................................... 181Zoom in/out of the floor/table plan
................................................................................................................................... 18221 Licensing
.......................................................................................................................................................... 182Licensing
................................................................................................................................... 18322 Support
.......................................................................................................................................................... 183Contact support
.......................................................................................................................................................... 183Report a bug
.......................................................................................................................................................... 183Request an enhancement
................................................................................................................................... 18423 Updates
.......................................................................................................................................................... 184Updates
.......................................................................................................................................................... 184Newsletter
................................................................................................................................... 18424 Uninstalling
.......................................................................................................................................................... 184Uninstalling
Index 185

PerfectTablePlan6
© 2008 Oryx Digital Ltd
1 Introduction
1.1 Introduction
PerfectTablePlan v3.1.4 for MacOSX
PerfectTablePlan helps you quickly create table plans and seating charts for
weddings, parties, banquets and events. We think you will find it a lot easier than
using scraps of paper.
The unlicensed version of PerfectTablePlan only allows to you to save, export or
print plans with up to 30 guests. If you want more than 30 guests you will have to
purchase a licence.
If you are confident of your computer skills you should start with the Quick start
guide. This will get you creating your first table plan very quickly. If you would like
more in-depth instructions please go through the Tutorial. You can also watch
online demonstration movies.
Note We have a separate version of this document for Windows.
1.2 Conventions in this document
Screenshots are taken from the Windows Vista version of PerfectTablePlan.
Text that refers to elements of the user interface is in bold, e.g. Main window.
menu1>item1 means: click on menu1 in the menu bar and select item1.
Text that the user can type is in a
non-proportional
font.
Text that refers to keyboard keys is in italics, e.g.:
The keyboard accelerator for Insert> Single guest is +G, which means hold
down the Key and press the G Key.
Hyperlinks are shown in conventional hyperlink format.
Underline is used for emphasis.
'Click' means clicking the left mouse button, unless stated otherwise. If you have a

PerfectTablePlan 3.1.4 7
© 2008 Oryx Digital Ltd
single button mouse you can simulate right click by holding down the Ctrl key and
clicking the left mouse button.
1.3 System requirements
The suggested requirements for running this software are:
Operating system
MacOSX 10.3.9 or later.
Processor
G3 or better
Memory
32 MB or better
Screen resolution
800x600 pixels or better
Colours
65,536 colours or better
You may be able to run the software satisfactorily on lower specification systems,
but we can't guarantee it. If in doubt, try running an unlicensed version before you
purchase a licence.
1.4 The help system
Help is available in a number of different ways.
Context sensitive help
Context sensitive help provides detailed information on the use of each pane and
window.
To access context sensitive help press ? or click on a Help button.
This opens help in a separate window.
The MacOSX Help Viewer

PerfectTablePlan8
© 2008 Oryx Digital Ltd
The Macintosh Help is similar to the Windows Help, but is displayed inside a web
browser window. If you can't see the contents tree in the left pane, try enabling
Java in your browser.
PDF help
A PDF version of the help is also installed with the application. You may find this
more suitable for printing.
'How do I?' help
Click on the How do I? button on the tool bar to see a list of common tasks you
might want to perform. Click on an item in the list to go to the relevant help page.
The list of topics shown varies depending on what you are trying to do (e.g. which
panes are visible).
Tool tips
Some controls display tool tip windows when you hover your mouse cursor over
them. You can turn this feature on/off using the show tool tips checkbox in the
Preferences window.
'What's this' help
What's this help provides tips on individual controls, e.g. on the function of tool
bar buttons, menu items, text entry fields etc.
To access What's this help from the Main window select Help> Whats this. Then
click on the item you are interested in and a brief description will appear in a
small What's this window.
Note pressing Shift+F1 also activates this facility for the Main window.
Web pages
Additional documentation may be available on our web pages. To open the web
pages in a browser select Help>FAQ page or Help> Web pages.
PerfectTablePlan 3.1.4 9
© 2008 Oryx Digital Ltd
2 Quick start guide
2.1 Quick start guide
This page gives you instructions to get you started using PerfectTablePlan quickly.
If you want step-by-step instructions please go to the Tutorial.
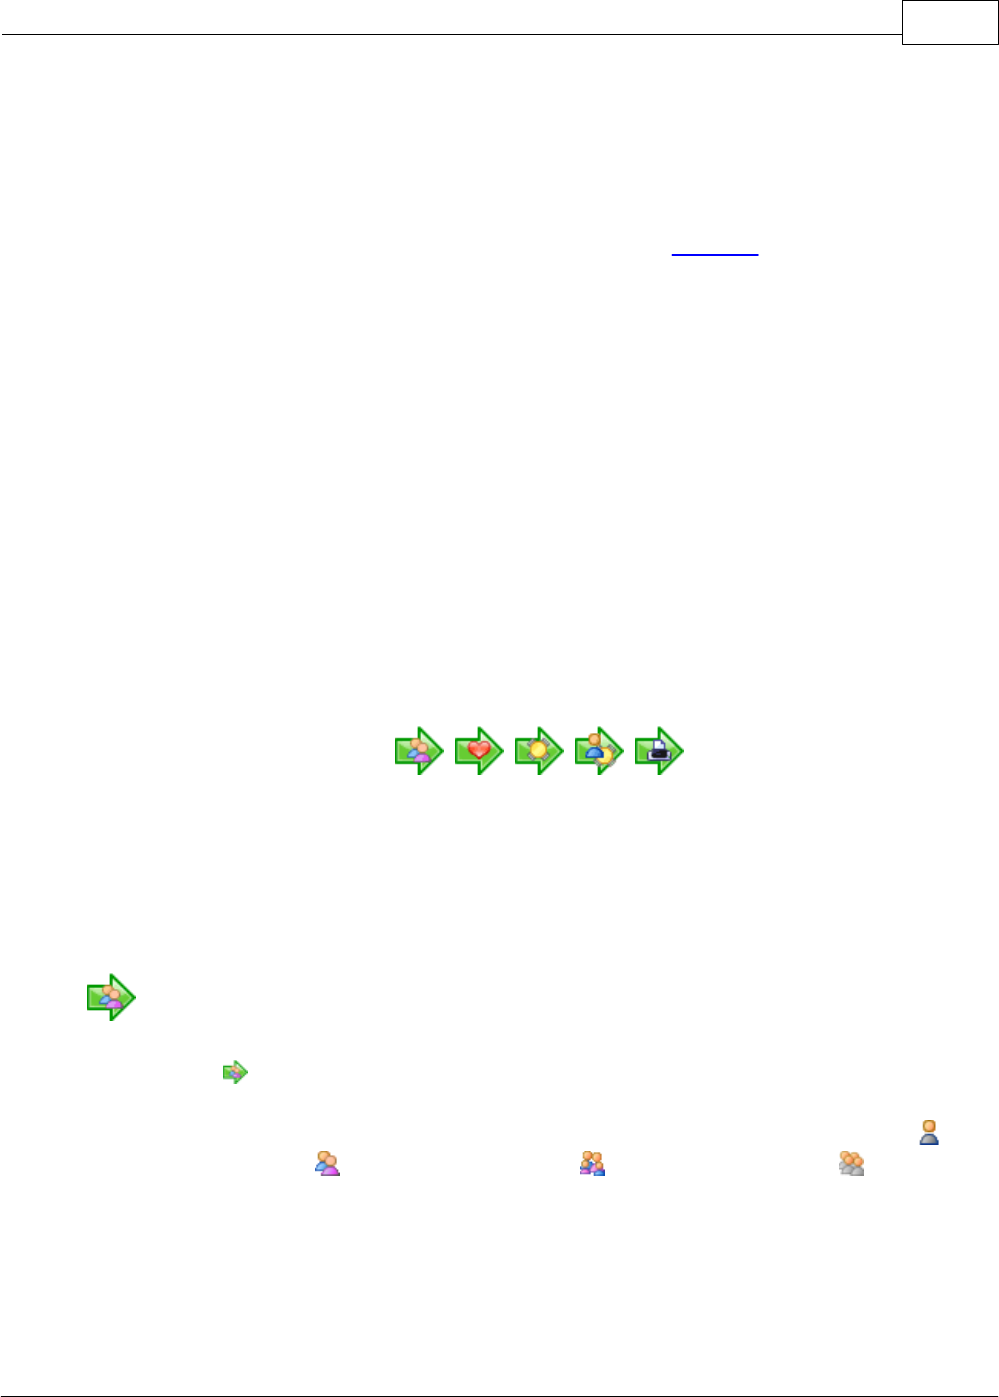
There are 5 simple steps to creating a table plan:
1. Add guests.
2. Define who should sit near (or not near) whom.
3. Add tables.
4. Assign guests to seats.
5. Print/export results.
These 5 steps correspond to the 5 Task tool bar buttons.
When one of these buttons is pressed you will only be able to see the panes and
tool bar buttons appropriate to that task.
Ensure View>User interface>Basic is selected so that the Task tool bar is visible.
1. Add guests
Click on the button in the Task tool bar, if it isn't already selected.
Guests can be added as individuals, couples, families or groups using Insert>
Single guest, Insert> Guest couple, Insert> Guest family, Insert> Guest
group or the equivalent Insert tool bar buttons. You can add everyone as
individuals, but it saves time to add them as couples, families and groups where
appropriate.
Each guest has the following properties:

PerfectTablePlan10
© 2008 Oryx Digital Ltd
Property
Meaning
Title
The guest's title.
First name
The guest's first (given) name.
Last name
The guest's last (family) name.
Display name
The name you wish to display for the
guest (which may include qualifications,
job title and other information).
Gender
Whether the guest is male or female.
Age
Whether the guest is an adult or a child.
Meal
The guest's choice of meal (separate by
commas if there is a choice in more
than one course).
Special req
Any special requirements the guest has,
e.g. diabetic or in a wheelchair
(separated by commas if there is a
choice in more than one special
requirement).
Notes
Information not recorded elsewhere.
VIP
Used to mark a Very Important Person;
for a wedding this may be a member of
the wedding party, for a conference it
may be a keynote speaker and for a
business lunch it may be a table
sponsor.
RSVP
Whether the guest has been sent an

PerfectTablePlan 3.1.4 11
© 2008 Oryx Digital Ltd
invitation and whether they have
accepted, declined or accepted then
cancelled.
Most of this information is optional, but a guest must have at least a first name or
a last name. Guests are shown in bold if they have not been assigned a seat.
In addition, every guest is a member of a group (even single guests belong to their
own group). Each group has optional contact details and notes. Each group only
has one set of contact details, so generally you should assign people to a group if
they have the same contact address (e.g. a couple or representatives from the
same company). You can easily drag guests from one group to another in the
Groups pane.
If you already have guest data (for example as vCards, in a spreadsheet, text file
or address book) you can import it using File> Import.... See Importing data for
more information.
You can also quickly create a guest list using the Insert> Guests scratch-pad or
the equivalent Insert tool bar button. This allows you to enter one guest/couple/
family/group per line in free text format.
Once you have entered a guest's details you can change their properties later by
selecting them and then choosing Edit> Properties or the equivalent Main tool
bar button.
Click on the appropriate column headers in the Guests pane to sort the guests by
first name, last name etc. You can also see how guests are grouped in the
Groups pane.
You can enter general information about your event using File> Information...
and check the number of attendees and cost using File> Numbers and budget....
You should now make sure you save your plan using File> Save. You will be asked
to provide a name for the new plan file.
2. Define who should sit near who
Click on the button in the Task tool bar.

PerfectTablePlan12
© 2008 Oryx Digital Ltd
You may want to have some guests sitting close to each other (for example
couples, friends and people who you think might be compatible) and some sitting
far apart (for example divorced couples). The automatic assignment function will
take account of proximity when it decides where to place guests.
Proximity
Icon
Meaning
Next to
should be placed next to
each other
Near to
should be placed next to
or on the same table
Neutral
no preference
Not next to
should not be placed next
to and preferably not on
same table
Not near to
should not be placed on
the same table
If you add guests using Insert> Guest couple, Insert> Guest family or Insert>
Guest group a sensible default value will be set for their proximity. However you
can change the proximity so that members of a group are not sat together.
You can view and edit the proximity of guests in the Proximity pane. Just click
on the appropriate drop-down menu in the table to change the proximity. Note
that the table is symmetric - if you change the proximity for column A and row B
the proximity for row A and column B will change to match.
If you want to set the proximity for a number of guests, select them all in the
Guests pane (using Shift+click or +Click) and then select the appropriate
proximity from Edit>Proximity (you must select more than one guest).
Alternatively click on a group in the Groups pane and select the appropriate
proximity from Edit>Proximity. You will need to click on the button to show
the Guests pane.

PerfectTablePlan 3.1.4 13
© 2008 Oryx Digital Ltd
3. Add tables
Click on the button in the Task tool bar.
Tables can be added using Insert> Circular table, Insert> Rectangular table,
Insert> Banquet table, Insert> Head table, Insert> Custom table or the
equivalent Insert tool bar button. The types of table are:
Table
Icon
Meaning
Circular
a circular table with seats
all around it
Rectangular
a rectangular or square
table with matching
numbers of seats on
opposite sides
Banquet
a long table with a
matching number of seats
on two sides
Head
a long table with seats on
only one side, for
example a head (top)
table at a wedding or
banquet
Custom
a rectangular or square
table with any number of
seats on each of the 4
sides
Each table has the following properties:
Property
Meaning

PerfectTablePlan14
© 2008 Oryx Digital Ltd
Name
The name displayed for the table. The
default name is "Table 1" , "Table 2" etc,
but you can set any name.
Shape
See above.
Angle
The rotation angle of the table in the
Floor plan and Table plan panes.
Colour
The colour of the table in the Floor
plan and Table plan panes. This
overrides any colour set for the pane.
Seats
The number of seats for the table.
Size
The size of the table. Check the auto
check box to size the table
automatically (according to the seat
size and the number of seats).
VIP
Check the box to designate a VIP table.
The automatic seat assignment attempts
to assign VIP guests to VIP tables.
Notes
Used to record useful information not
recorded elsewhere
The Create field allows you to add more than one table at a time.
Once you have created a table you can change any of its properties (including the
name and shape) by selecting it and then choosing Edit> Properties or the
equivalent Main tool bar button.
You should make sure that you have enough seats for all your guests. You can see
how many seats and guests you have at any time by looking in the Status bar at the
bottom of the Main window.

PerfectTablePlan 3.1.4 15
© 2008 Oryx Digital Ltd
New tables will be placed in an empty space near the centre of the Floor plan
pane. You can move tables in the Floor plan by dragging them (left click on the
centre of a table, hold down the left mouse button and drag to the appropriate
position). You can zoom in and out of the Floor plan using the and buttons
or zoom so all tables are visible using the button. When you are zoomed in you
can move around the Floor plan by clicking on the scroll bars or by dragging the
background (the cursor will change to a hand). You can change the size of the floor
plan using the button.
Use the Insert shape and Insert text buttons to add shapes and text to the
Floor plan pane. Shapes can be used to represent dance floors, stages, walls and
other features of your floor plan. Text can be used for titles, headers and footers.
Rotate a table, shape or text by clicking the Rotate button.
Move a table, shape or text behind (under) another by clicking the Move to back
button.
You can also view one table at a time in the Table plan pane. Use the
navigation buttons to change table.
Save your plan using File> Save.
4. Assign guests to seats
Click on the button in the Task tool bar.
Once you have entered guest details and added tables, you can assign seats
automatically or using drag and drop. You will often need a combination of both
for best results.
If you have people that you definitely want to sit in certain seats (for example the
wedding party or VIP guests) you can assign their seats manually. Drag these guests
or groups from the Guests or Groups pane to the appropriate table or seats in
either the Floor plan, Table plan or Schematic panes. To drag a guest or
group left click, hold down the mouse button and drag to the appropriate seat

PerfectTablePlan16
© 2008 Oryx Digital Ltd
(select more than one guest/group by using Shift+click or +click). Drag a whole
group by holding down the Shift key when you start to drag a member of that
group. Make sure the Guests or Groups pane is set to drag and drop mode.
You can 'lock' guests to stop the automatic seat assignment moving them later.
Lock them in place by selecting the guests, for example in the Guests or Floor
plan pane, and choosing Edit>Locked (you can also select a table and lock all the
guests on it).
The rest of the guests can now be assigned to the remaining seats automatically by
selecting File> Auto assign seats or the equivalent Main tool bar button. If you
have a large table plan (200+ guests) you may need to increase the amount of time
allowed for the automatic assignment in the Preferences window.
The automatic assignment will try to find the best seating assignment using a
scoring approach. The scoring takes account of:
·
guest proximity
·
alternating genders (if selected in the Preferences window)
·
seating VIPs on VIP tables
·
not seating guests on their own
·
VIPs score higher than guests who aren't VIPs
You can halt the automatic assignment at any time by pressing the Stop button.
The best solution so far will be kept. If you don't like the changes you can select
Edit> Undo to undo the change.
PerfectTablePlan 3.1.4 17
© 2008 Oryx Digital Ltd
You can reassign guests by dragging and dropping them in the Floor plan,
Table plan or Schematic panes to fine-tune the seat assignments. You can also
change proximities and re-run the automatic assignment as often as you like.
You can see how good your seat assignment is by looking at the scores in the
Schematic pane (check show scores, positive scores are good, negative scores are
bad) or by holding down the proximity buttons at the top of the Floor plan or
Table plan panes. For example the button will show you any non-ideal
positioning (such as guests with proximity who aren't sat next to each other). To
see these proximity buttons you will need to click on the button in the Floor
plan or Table plan pane. Obviously, what makes a good table plan is hard to
fully define in mathematical terms, but the score will usually give a fair indication.
Use the Table chart pane to see your plan ordered by table.
Use the Guest chart pane to see your plan ordered by guest last name.
Use the Statistics pane to see some statistics about your plan.
At any time you can unassign a guest from their seat by choosing Edit>Unassign or
dragging them on to the background in the Floor plan or Table plan pane. You
can select multiple guests for unassigning (except in the Floor plan or Table
plan pane) by using Shift+click or +Click.
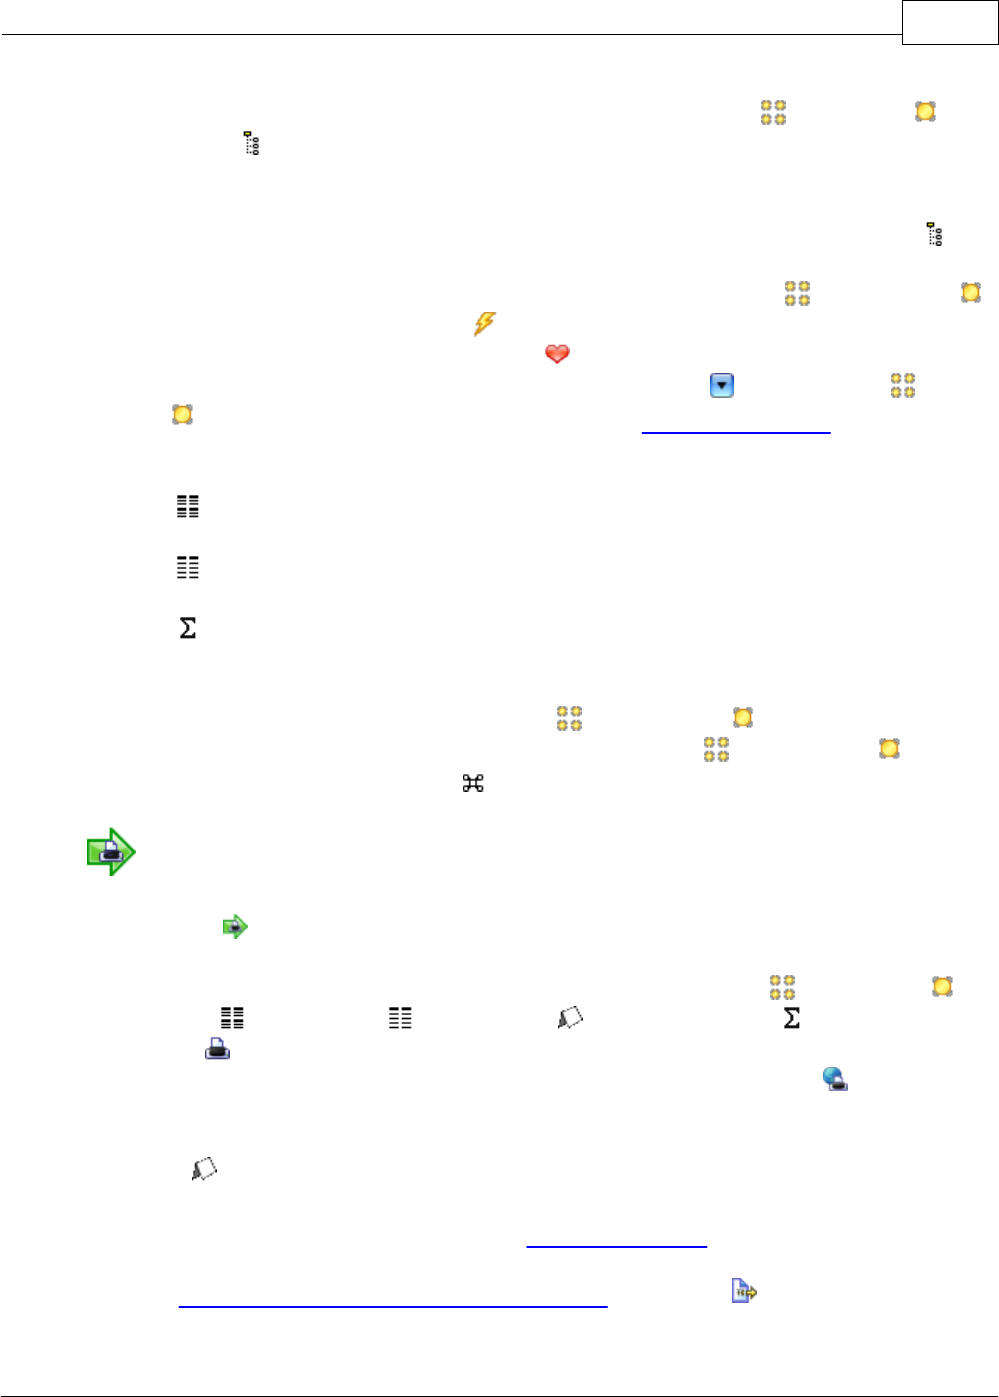
5. Printing/exporting
Click on the button in the Task tool bar.
When you are happy with your table plan you can print off the Floor plan ,
Table plan, Table chart, Guest chart, Stationery and/or Statistics panes
using File> Print or the equivalent Main tool bar button. Alternatively, order a
table plan/seating chart online from one of our partners using File> Order plan
online.
From the Stationery pane you can print invitations, place cards, escort cards,
labels and other stationery. You can easily merge guest names and addresses and
other details into stationery items using substitution text.
You can export your plan to another application using File> Export.

PerfectTablePlan18
© 2008 Oryx Digital Ltd
Copy the contents of the Floor plan , Table plan, Table chart, Guest
chart and/or Statistics panes into the clipboard using Edit> Copy, for example
to paste into Microsoft Word or Excel.
Make sure you save your plan using File> Save before exiting.
If you want to try laying out a more realistic table plan, try loading one of the
sample plans supplied with PerfectTablePlan.
If you are confident in your abilities you may wish to change to the expert user
interface by selecting View>User interface>Expert.
This completes the quick start guide.
See also:
Frequently Asked Questions
Tutorial
Movies
3 Movies
3.1 Movies
We have demonstration movies on our website. This can be a useful way to get a
quick overview of the capabilities of PerfectTablePlan. They are in 'Flash' format
(viewable in most web browsers) and Windows .exe format.
4 Tutorial
4.1 Tutorial
This tutorial gives you step-by-step instructions on how to use some of the major
features of PerfectTablePlan. If you are a confident computer user and want to get
started quickly you might prefer the Quick start guide.
Note You can also view these tutorials as movies on our website.
Next: 1. Getting started >>
PerfectTablePlan 3.1.4 19
© 2008 Oryx Digital Ltd
4.2 1. Getting started
Note You can also view this tutorial as a movie on our website.
If PerfectTablePlan isn't already running, start it now.
Double click on the PerfectTablePlan icon in the Applications folder (or
wherever you copied it to)
If you are reading this help on your computer screen try arranging the Help and
PerfectTablePlan windows so you can see them both. Alternatively you may find it
easier to print out this tutorial. To print the tutorial select File>Print... from your
browser.
You can also print the PDF version of the help.
Warning The PDF help is nearly 200 pages!
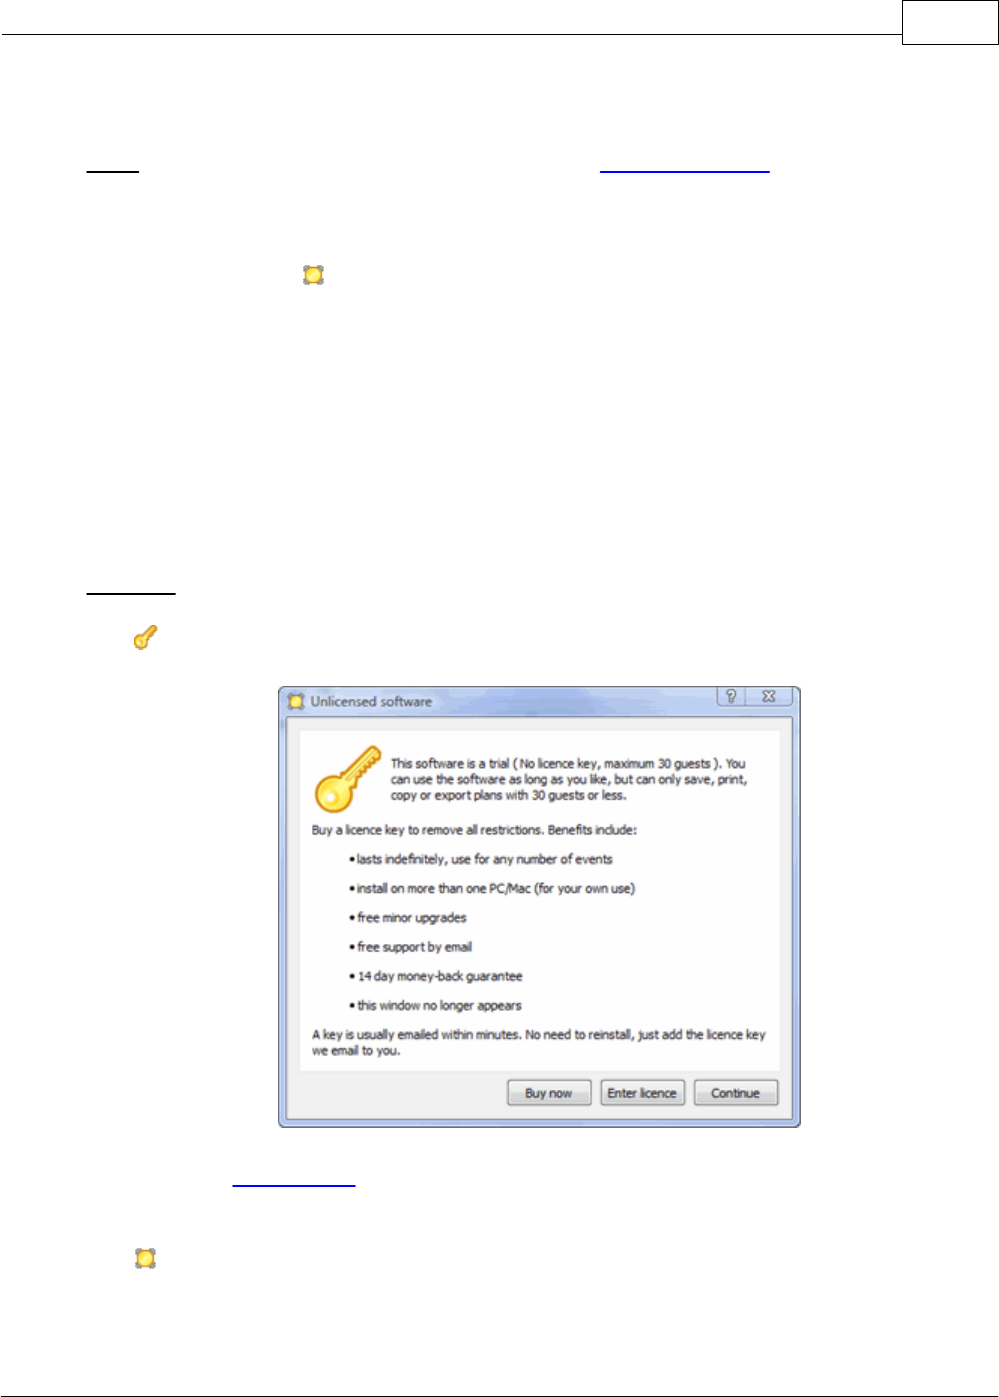
The Unlicensed software window may appear when you start PerfectTablePlan.
If you have a licence key you can enter it now, however you can complete the
tutorial without it. Click the Continue button.
The Getting Started window may now appear.

PerfectTablePlan20
© 2008 Oryx Digital Ltd
If you don't want to see it again uncheck the show this message next time check
box. Click the Continue button. You should now see the Main window. For this
tutorial we will use the basic interface, select View>User interface>Basic, if it
isn't already selected. Then click on the 1.Guests button in the Task tool bar, if
it isn't already selected.

PerfectTablePlan 3.1.4 21
© 2008 Oryx Digital Ltd
Take a minute to investigate the various menu items and tool bar buttons. If you
hover the mouse cursor over a tool bar button, a Tool tip window will appear with
some helpful text.
Select File> Information and add some basic details about the event.
Next: 2. Add guests >>

PerfectTablePlan22
© 2008 Oryx Digital Ltd
4.3 2. Add guests
Note You can also view this tutorial as a movie on our website.
The first step to creating your table plan is to add information about your guests.
Click on the Insert single guest button in the Insert tool bar (on the left of the
Main window).
The Insert guest window will appear.

PerfectTablePlan 3.1.4 23
© 2008 Oryx Digital Ltd
Select Mr from the Title drop-down list. Note that the Gender has now been set
to Male.
Type
john
in the First name field. Note that it is automatically capitalised to
John
. Press the keyboard Tab key to move to the next field.
Type
smith
in the Last name field. Press the Tab key. Note the Display name has
been set to
Mr John Smith
.
Click the Add button. The guest will be added to the Guests pane.
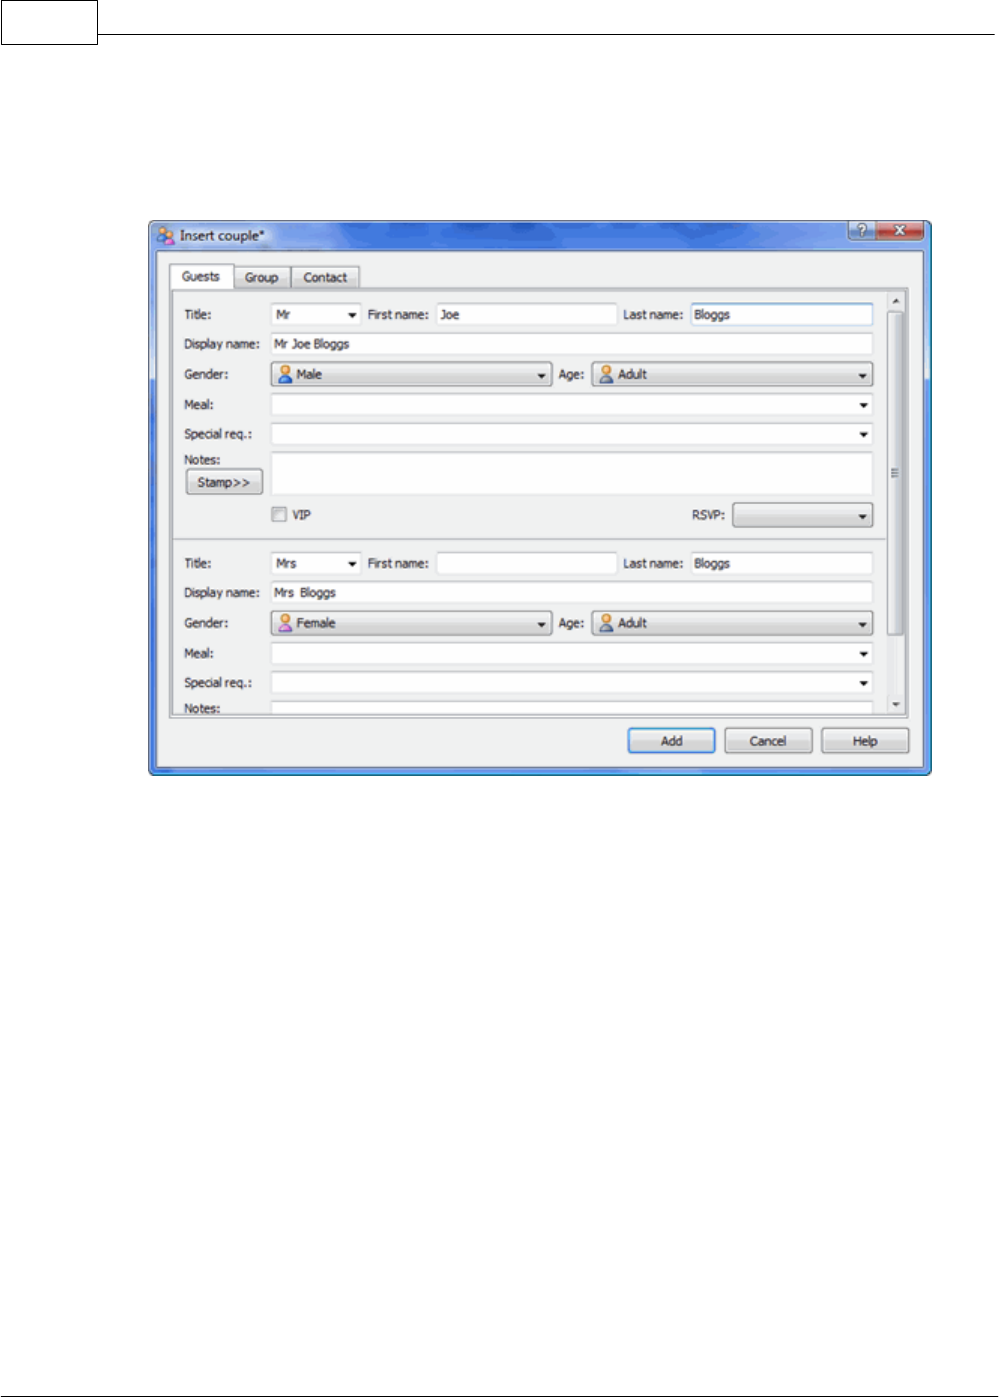
Click on the Insert guest couple button in the left (Insert) tool bar. The Insert
PerfectTablePlan24
© 2008 Oryx Digital Ltd
couple window will appear. Fill in the details of the first guest of the couple, as
below. Click on the VIP check box to show that this is a particularly important
guest:
Now move the scroll bar down and complete the details of the second guest of the
couple, as below:

PerfectTablePlan 3.1.4 25
© 2008 Oryx Digital Ltd
Click the Add button.
Click on the 2.Proximity button in the Task tool bar. Notice that a is
displayed in the Proximity pane.
This means that Joe Bloggs and Jill Bloggs should be placed on a table next to each
other.
Click on the 1.Guests button in the Task tool bar.

PerfectTablePlan26
© 2008 Oryx Digital Ltd
Click on the Insert guest family button in the left (Insert) tool bar. The Insert
family window will appear. Add the following guests:
Title
First name
Last name
Gender
Age
Mr
William
Jones
Male
Adult
Mrs
Nicola
Jones
Female
Adult
Master
Jason
Jones
Male
Child
Miss
Natasha
Jones
Female
Child
Click the Add button.
Click on the 2.Proximity button in the Task tool bar. Notice that a is
displayed in the Proximity pane for Mr and Mrs Jones. A is displayed for all
the other family members. This means that Mr and Mrs Jones should be placed on a
table next to each other, and the rest of the family members near to each other.
Click on the 1.Guests button in the Task tool bar.
Select File> Save to save the plan. The Save as window will appear. Enter a
sensible name, such as
tutorial
, and click Save.
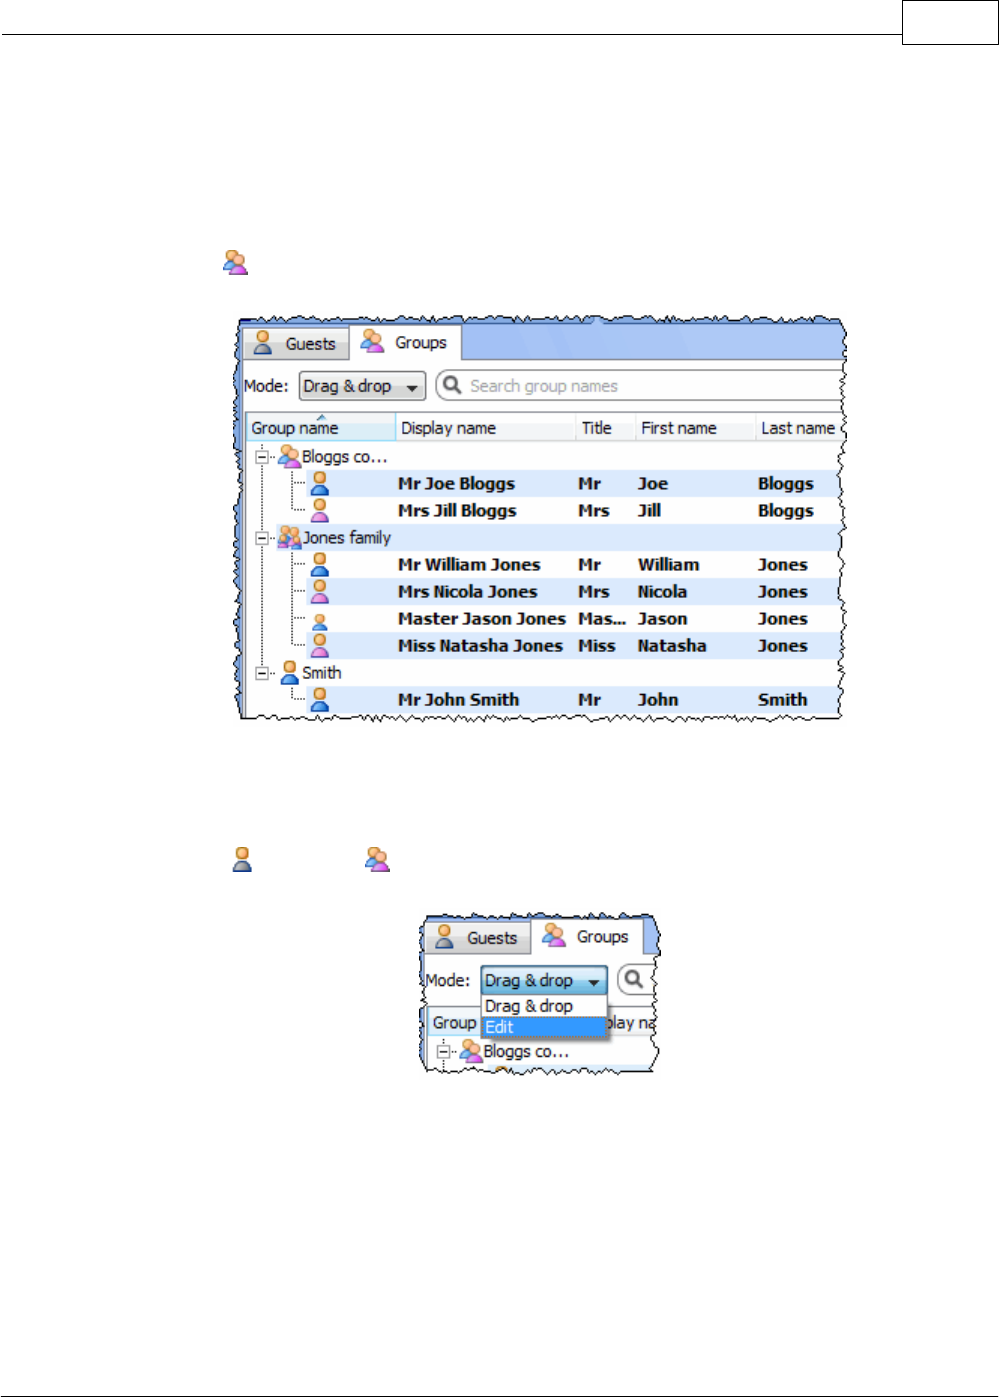
Look at the Guests pane.
PerfectTablePlan 3.1.4 27
© 2008 Oryx Digital Ltd
Notice that you can determine age and gender from the guest icon. The guests are
shown in bold as they haven't yet been assigned to seats.
Click on Display name, Title and other column headers to sort the guests.
Click on the Groups tab.
Notice that the guests have been grouped as a couple, a family and a single person
(you can easily re-arrange the groups using drag and drop).
In either the Guests or Groups pane select Edit mode:
Then click on the row with Mr John Smith and in the Title column. Type
Dr
and
press the Enter key.

PerfectTablePlan28
© 2008 Oryx Digital Ltd
Note the Display name is also updated (unless you have previously edited it). You
can also view/edit this guest by double clicking on his icon to display the
Guest properties window.
You can also set guest's choice of meal, special requirements, whether they have
accepted their invitation etc in this pane.
Note You can also add guests by importing them from other applications such as
Excel, Outlook and Outlook Express. This can save you a lot of typing.
Next: 3. Set proximity >>
4.4 3. Set Proximity
Note You can also view this tutorial as a movie on our website.
The next step to creating your table plan is to decide who should sit near (or not
near) whom.
Click on the 2.Proximity button in the Task tool bar. Look at the Proximity
pane:

PerfectTablePlan 3.1.4 29
© 2008 Oryx Digital Ltd
The means that these guests should be placed next to each other. The means
that these guests should be placed near to each other, either next to or on the
same table, but lower priority than .
Let us assume you have been asked not to seat
Jason
and
Natasha
next to each
other. Click on the cell where the column for
Jason
and the row for
Natasha
intersect. Pull down the drop-down list and select not next to.
Notice that the corresponding row for
Jason
and column for
Natasha
changes to
keep the table symmetric.
Click on the button at the top of the pane to show additional options. Select by
group from the Show drop-down list. The Proximity pane now shows just one
group at a time.

PerfectTablePlan30
© 2008 Oryx Digital Ltd
The proximity will become important when we start assigning guests to seats.
Next: 4. Add tables >>
4.5 4. Add tables
Note You can also view this tutorial as a movie on our website.
The next step to creating your table plan is to add some tables for the guests to sit
at. Click on the 3.Tables button in the Task tool bar. Click on the Insert head
table button in the Insert tool bar.
The Insert head table window will appear.

PerfectTablePlan 3.1.4 31
© 2008 Oryx Digital Ltd
Click the Add button. A long rectangular table with 8 seats down one side will now
appear near the centre of the Floor Plan pane.
Click on the Insert circular table button in the left Insert tool bar. The Insert
circular table window will appear. Change Seats to 6. Change Create to 2.

PerfectTablePlan32
© 2008 Oryx Digital Ltd
Note that you can see how many seats you will have after the tables have been
added, in this case 20 seats.
Click the Add button. Two circular tables, each with 6 seats, will now appear in
the Floor Plan pane. Click the Zoom so all tables visible button at the top of
the Floor plan pane to centre and zoom on the tables you have added.
Drag a table (left click on the centre of a table, hold down the mouse button,
move the mouse and then release). The table will be moved to a new position.
Drag the tables to the approximate positions shown below.

PerfectTablePlan 3.1.4 33
© 2008 Oryx Digital Ltd
Experiment with zooming in and out and scrolling the floor plan using the and
buttons and the scroll bars.
Note You can also use the mouse wheel (if you have one) for zooming or scrolling
(depending on the setting in the Preferences window).
You can change the size of the floor plan using the button. This allows you to
enter the dimensions of the venue in which the event will take place.
You can add shapes and text to the floor plan by clicking on the
and
buttons.
You can rotate a table, shape or text by clicking the button. You can move a
table, shape or text behind another by clicking the button.
You can change the colours and fonts in the floor plan by clicking the button at
the top of the pane.
The Status bar now shows that you have 7 guests and 20 seats:

PerfectTablePlan34
© 2008 Oryx Digital Ltd
Click on the 1.Guests button in the Task tool bar. Add another 11 guests using
the same approach as in Tutorial section 2, so that you have a total of 18 guests.
Set any groups, names, genders and proximities you like.
Click on the 3.Tables button in the Task tool bar. You now have 18 guests and
20 seats. Right click on the head table in the Floor plan pane and select
Properties.
Change the number of seats to 6. Click the OK button.
There are now 18 seats and 18 guests.
Select File> Save to save the plan.
Note PerfectTablePlan creates a back-up file every time you save the plan (unless
you have disabled this in the Preferences window). This is useful if you ever
need to retrieve an old version of the plan.
Next: 5. Assign guests >>
PerfectTablePlan 3.1.4 35
© 2008 Oryx Digital Ltd
4.6 5. Assign guests
Note You can also view this tutorial as a movie on our website.
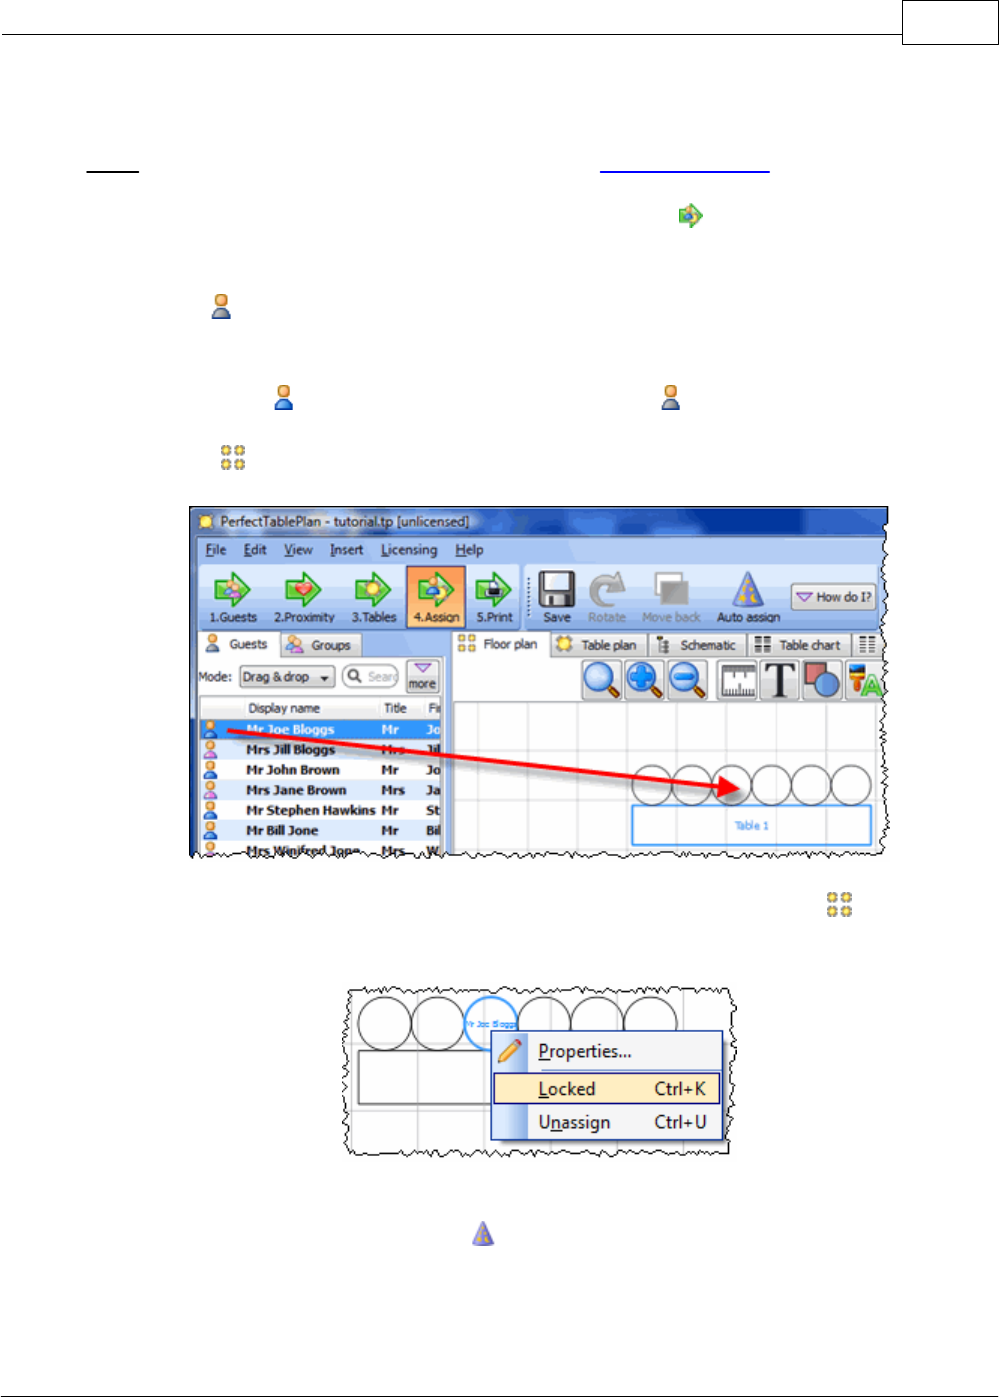
The next step is to assign guests to seats. Click on the 4.Assign button in the
Task tool bar.
Ensure the Guests pane is at the front and set the Mode to Drag & drop (not
Edit).
Left click on the icon for
Mr Joe Bloggs
in the Guests pane. Drag him (hold
down the mouse button, move the mouse and then release) to a seat on the head
table in the Floor Plan pane.
Right click on the seat you have dragged
Mr Joe Bloggs
to in the Floor plan
pane and select Locked.
A locked guest cannot be re-assigned until they have been unlocked. This is
particularly useful for stopping the Auto seat assign from moving guests who you
wish to remain in their assigned seat. You can also select a table and lock all the
guests on it.
PerfectTablePlan36
© 2008 Oryx Digital Ltd
Drag
Mrs Jill Bloggs
to the next seat to
Mr Joe Bloggs
and lock her, in the
same way. Note that locked guest appear underlined in the Guests and Groups
panes.
Now that you have assigned your VIPs, you are going to assign the rest of the
guests automatically.
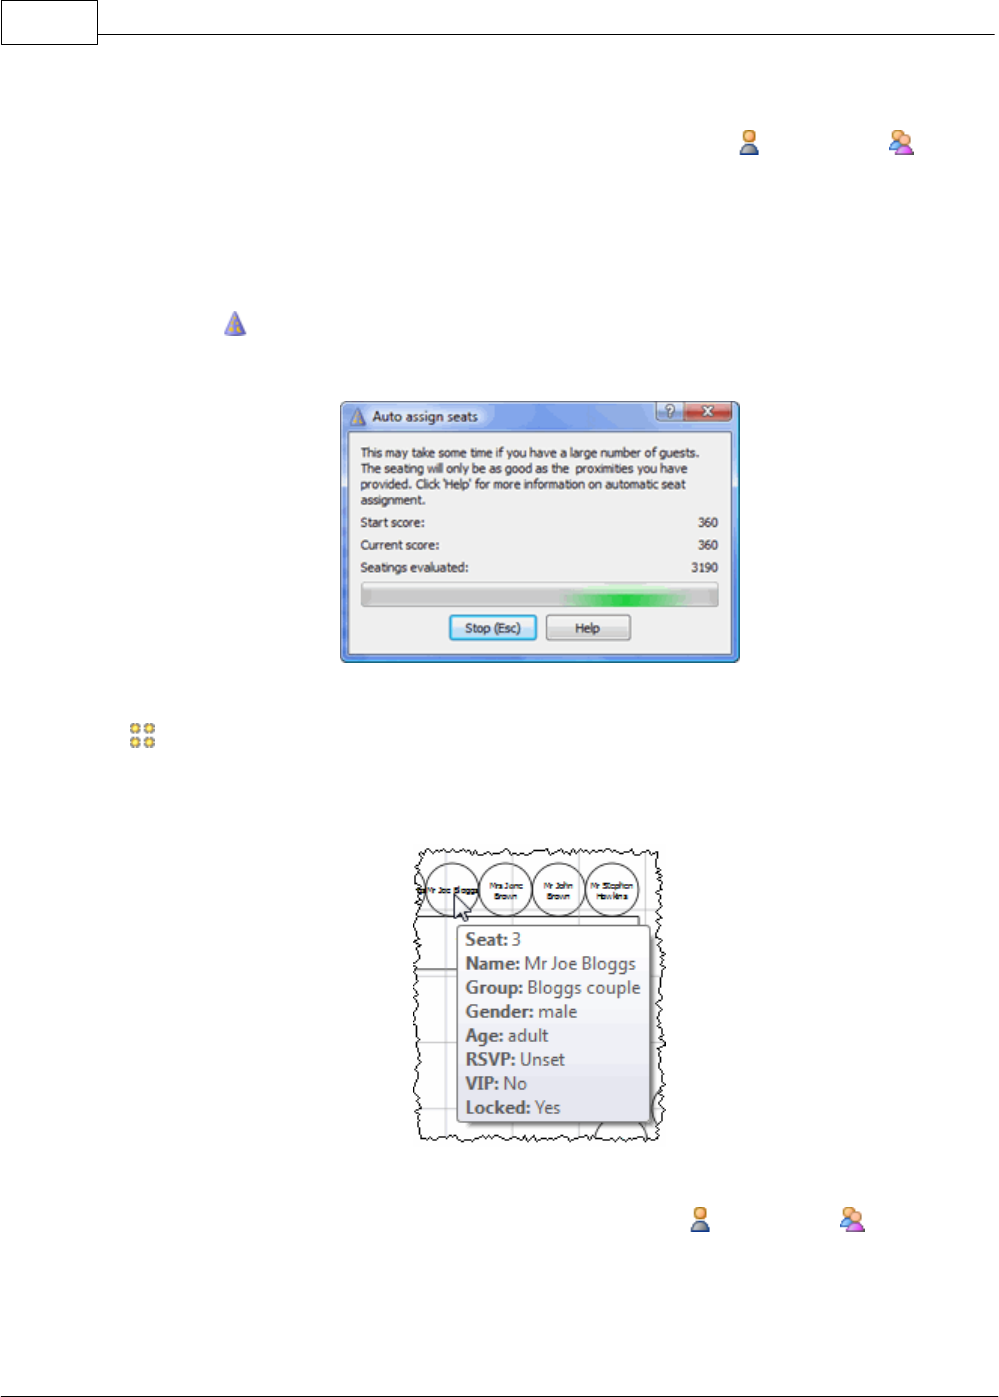
Click on the Auto seat assign button in the Main tool bar. The Auto assignment
window will appear:
The Auto assignment window should disappear after a few seconds. If you look at
the Floor plan pane you should see that all seats now have guests assigned. If
you hover the mouse cursor over a seat the details of the guest assigned will be
displayed:
Notice that the locked guests have not been moved and that guests that are
assigned to seats are no longer displayed in bold in the Guests and Groups
pane.
You can customise the assignments by dragging guests between seats. If you drag a

PerfectTablePlan 3.1.4 37
© 2008 Oryx Digital Ltd
guest to a seat occupied by another guest they will swap seats.
You may wish to use the Table plan pane, which displays just one table at a
time with an optional legend. Use the navigation buttons to change
table.
Next: 6. Assess plan >>
4.7 6. Assess plan
Note You can also view this tutorial as a movie on our website.
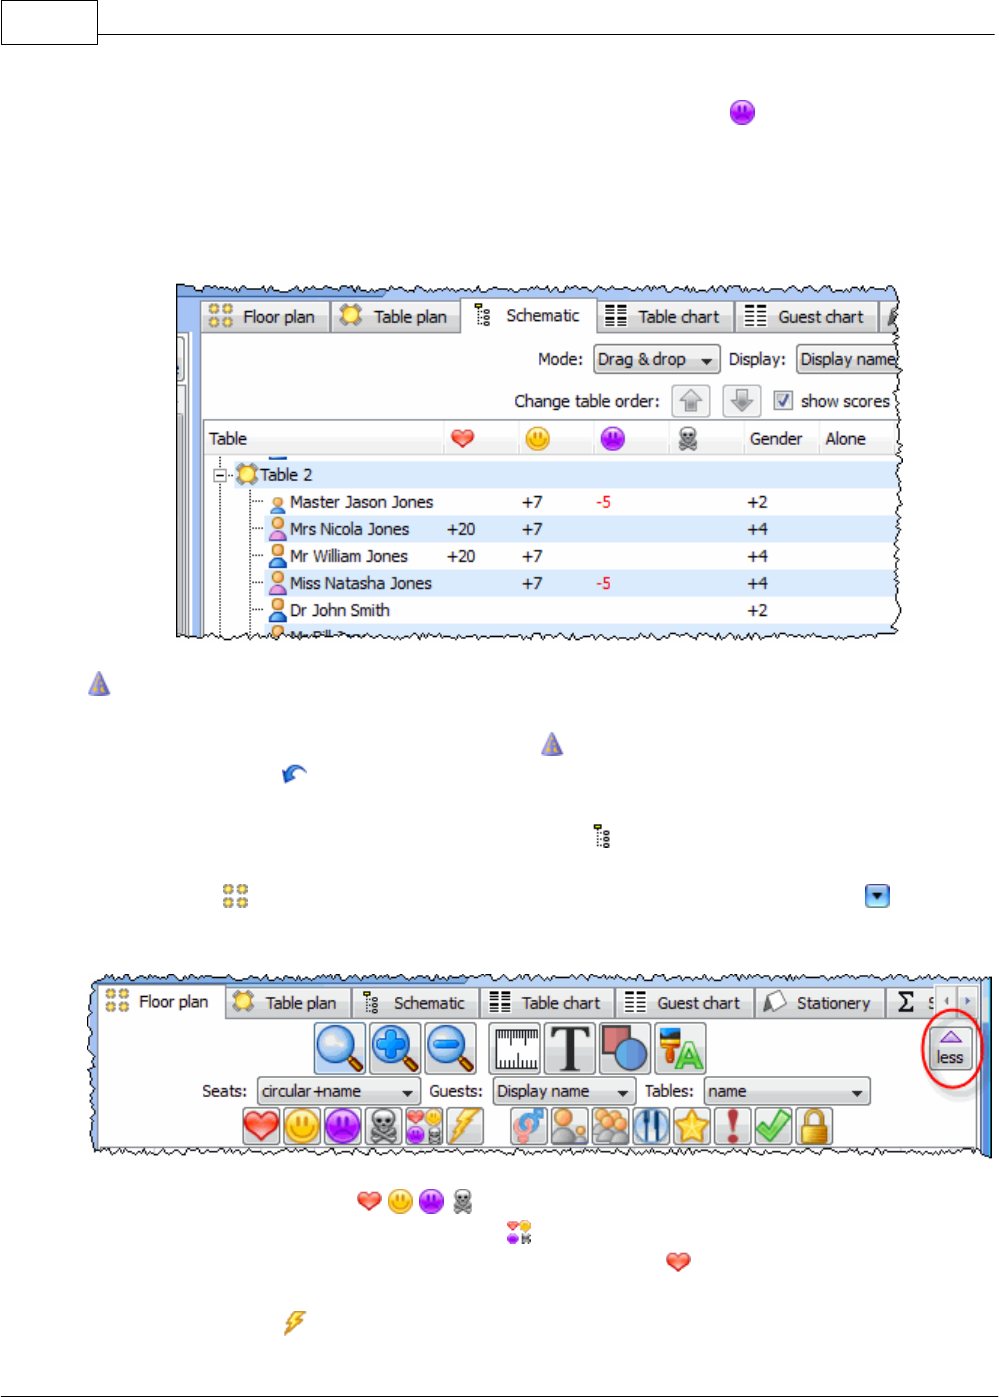
For an alternative view of the table plan look at the Schematic pane. It shows
the same information in a different format. It doesn't show the positioning of
tables, but it does show the scoring. Click the button and check the show
scores check box. The higher the score, generally the better the plan. In the
example below (which may be different to yours) you can see that
Jason Jones
has a total score of +4 made up of:
+5 for being next to
Mrs Nicola Jones
with proximity
+2 for being on same table as
Mr William Jones
with proximity
PerfectTablePlan38
© 2008 Oryx Digital Ltd
-5 for being on same table to
Miss Natasha Jones
with proximity
+2 for being a male next to a female
= +4 total
Auto assign seats tries to find the highest scoring layout. You can run it as often
as you like. Each time it will start with the current plan and attempt to improve it.
If you don't like the changes made by the Auto assign seats you can undo them
by selecting Edit> Undo.
You can also drag guests between seats in the Schematic pane.
Click on the Floor plan pane tab to bring it to the front. Click on the button,
some additional buttons will be shown.
Holding down any of the buttons will draw lines between guests who
have this proximity. Holding down the button shows all proximities. The lines
are coloured according to the proximity, e.g. red for .
Holding down the button draws lines between guests who are not optimally

PerfectTablePlan 3.1.4 39
© 2008 Oryx Digital Ltd
placed, for example guests with proximity who are sat on the same table.
Depress the button to show guest genders (blue for male, pink for female).
Depress the button to show guest age (children are shown smaller).
Depress the button to show groups (different groups are shown in different
colours, up to 100 groups - the colours are selected automatically).
Depress the button to show guest and table VIP status (shown with stars).
Depress the button to show which guests are locked (a padlock is displayed for
locked guests).
Depress the button to show any guests with special requirements (i.e. with an
entry in their Special req field).
Some of the above will be easier to see if you use simple (e.g. default ) colours in
the Floor plan pane. Note that your layout is likely to be different to the one
shown below.
Gender (colour), age (size) and proximity (lines) are displayed.
Using these buttons allows you to easily see whether moving guests to different
seats could improve your table plan. Try dragging some of the guests to different

PerfectTablePlan40
© 2008 Oryx Digital Ltd
seats. But keep an eye on the score in the Status bar to make sure that making
some things better doesn't make other things worse.
You can also see a useful summary of your plan in the Statistics pane.
If you want to try to create a more realistic table plan, try loading one of the
example plans installed with PerfectTablePlan (select File> Open).
See also:
Creating a good table plan
Next: 7. Print plan >>
4.8 7. Print plan
Note You can also view this tutorial as a movie on our website.
The next step is to print and/or export your table plan. Click on the 5.Print
button in the Task tool bar.
Select File> Print or the equivalent Main tool bar button to print the front tab in
the Top pane. The Print window will appear.

PerfectTablePlan 3.1.4 41
© 2008 Oryx Digital Ltd
Increase the Size until the plan will be printed across 4 pages (setting it to 100%
should be about right). Click on the navigation control to preview different pages.
Click on Fit to page to fit the plan on a single page.
Click on the Setup button to change printer settings, for example to select the

PerfectTablePlan42
© 2008 Oryx Digital Ltd
printer (if more than one is available), paper size, print resolution etc. The
controls available on the Windows will depend on the pane you are printing. Click
on the Print button to print.
Print the Floor plan pane to see the overall layout of the tables and guests.
Print the Table plan pane for details of individual tables.
Print the Table chart pane to see your plan ordered by table.
Print the Guest chart pane to see your plan ordered by guest or group (sorted by
their last name).
Print the Statistics pane for an overview of numbers at your event.
You can copy the contents of the Floor plan, Table plan, Table chart,
Guest chart or Statistics panes into the clipboard using Edit> Copy, for
example to paste into Microsoft Word or Excel.
You can also export these panes using File> Export, for example to email or put
on a web page. You can also use File> Export to export for use in another
application, for example to create custom reports.
Next: 8. Print stationery >>
4.9 8. Print stationery
Note You can also view this tutorial as a movie on our website.
You can use the Stationery pane to print place cards, tickets, badges, escort
cards, invitations, thank you letters etc. We are going to create some place cards.
Bring the Stationery pane to the front. Click on the Stationery layout button.
The Stationery layout window will appear. From the filters select Tent card and
then click on the DecaDry place cards. Click OK.

PerfectTablePlan 3.1.4 43
© 2008 Oryx Digital Ltd
Set the number of Guides to
3
in the Stationery pane. These help to position
the text. Now click on the Add text button. The cursor will change to a
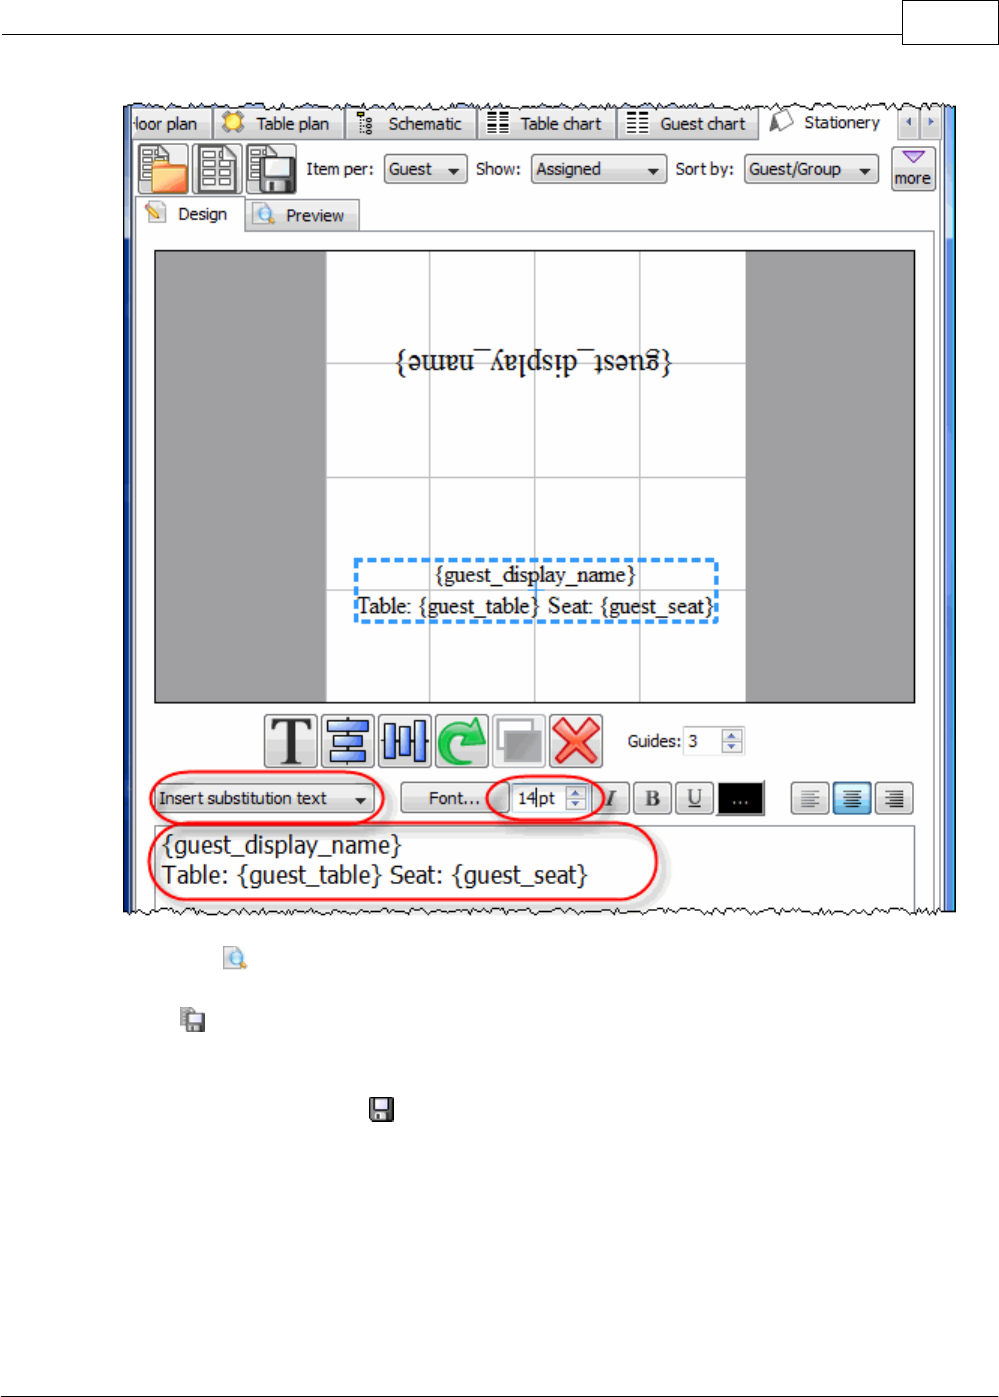
crosshair. Click on the bottom centre of the place card (as shown below).
Ensure Item per is set to Guest (at the top of the pane) and select

PerfectTablePlan44
© 2008 Oryx Digital Ltd
{guest_display_name} from Insert substitution text.
Click the Add text button again. The cursor will change to a crosshair. Click on
the top centre of the place card (as shown below).
We want the text to be displayed on both sides of the folded tent cards. Select
{guest_display_name} from Insert substitution text. Click on the Rotate button
twice.

PerfectTablePlan 3.1.4 45
© 2008 Oryx Digital Ltd
Click on the Preview tab to preview how the place cards will be printed. Notice
that the text inside the curly brackets has been substituted by guest display
names. Change the page number to see what each page will look like.

PerfectTablePlan46
© 2008 Oryx Digital Ltd
We now want to add additional text to help the staff to lay out the cards. Bring
the Design tab to the front. Click on the bottom text and add the additional text
as below by a combination of typing and using the Insert substitution text drop-
down. Reduce the font size so the text fits on the card.
PerfectTablePlan 3.1.4 47
© 2008 Oryx Digital Ltd
Click on the Preview tab to preview the changes.
Click on Save stationery to save this stationery design to use again (perhaps in
another plan).
Save your plan using File> Save.
To create address labels we would follow a similar approach, but would set Item
per to Group and for the substitution text we could use:
{group_name}
{group_contact}
PerfectTablePlan48
© 2008 Oryx Digital Ltd
You can also adapt the sample stationery we ship with PerfectTablePlan.
Note You can only save, print or export plans with more than 30 guests if you have
a valid licence for the software.
You have now completed the main part of the tutorial. If you want to find out how
to import guests whose details you have in a spreadsheet you might also want to
do the Import guests tutorial.
Next: 9. Import guests >>
See also:
Frequently Asked Questions
Movies
4.10 9. Import guests
Note You can also view this tutorial as a movie on our website.
You can import guest details from spreadsheets, databases and other formats, so
that you don't have to re-type them. We will illustrate this by importing some
guest details from Excel. The principles are similar for other applications and file
formats.
Note The user interface of Excel may differ between different versions.
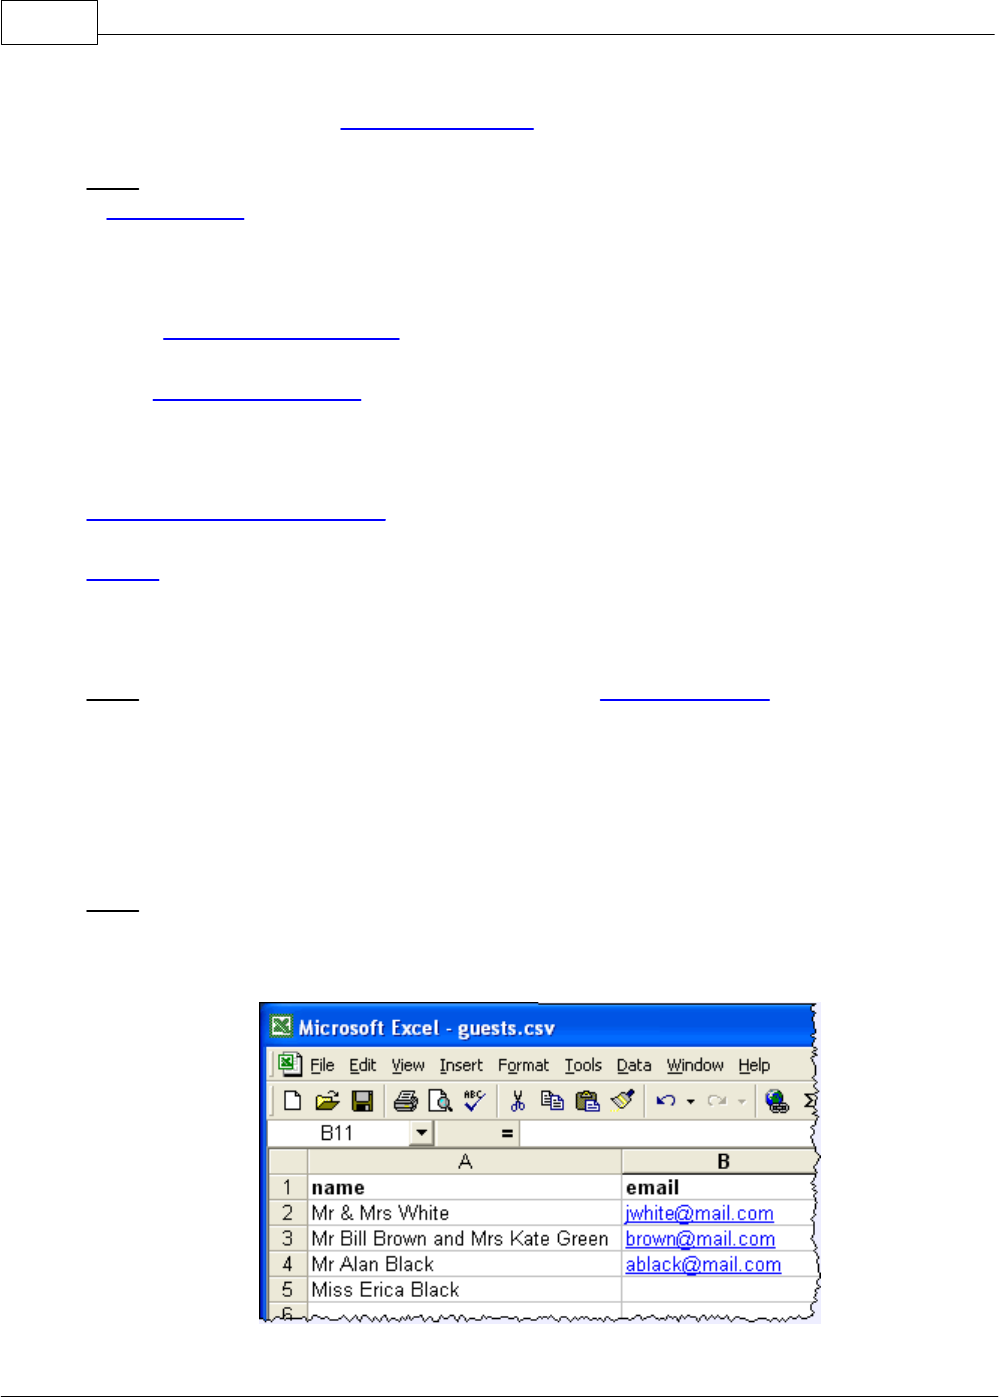
Create a simple Excel spreadsheet like the one below:

PerfectTablePlan 3.1.4 49
© 2008 Oryx Digital Ltd
PerfectTablePlan can't read .xls files as they are in a proprietary binary format.
Select File>Save as and save it as the .csv file
guests.csv
(do not just rename
a .xls file to a .csv file). Click OK on any windows warning you about changing
format.
The data is now in a format PerfectTablePlan can read.
If PerfectTablePlan is running create a new plan by selecting File> New.
Otherwise start PerfectTablePlan.
Select File> Import. The Import window will appear.
Ensure text/CSV file is selected and click the OK button. An Open window will
appear. Navigate to the .csv file you just created and click Open. You should now
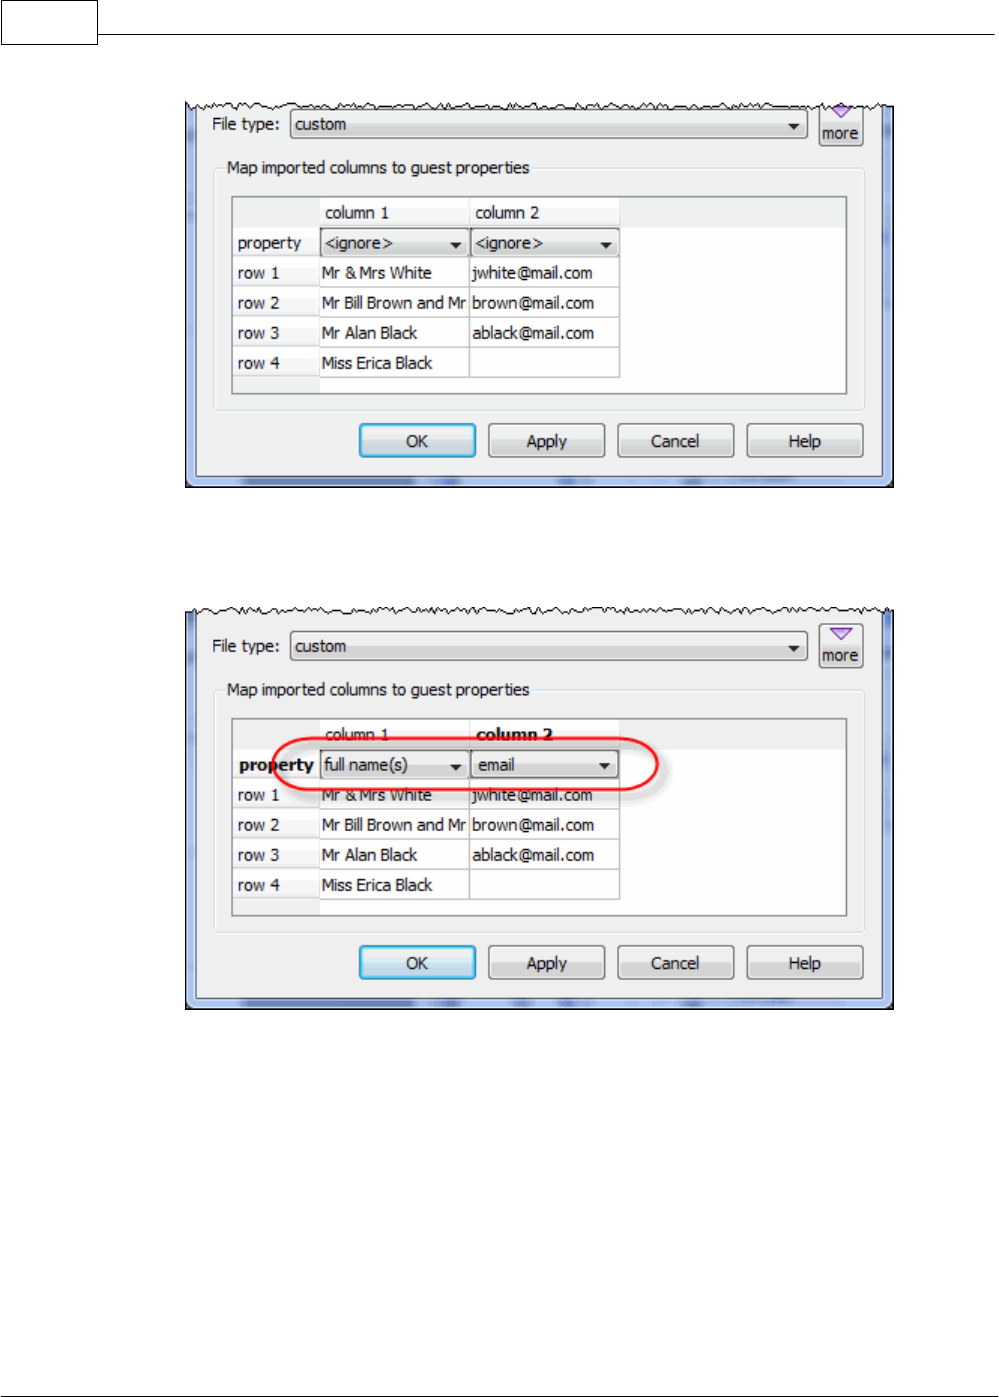
see the contents of the Excel file in the Import data window.
PerfectTablePlan50
© 2008 Oryx Digital Ltd
We now need to tell PerfectTablePlan which columns correspond to which guest
properties. Select from the drop-down lists as shown below.
Note that you can edit the data in the table before you import it. This will not
affect the original .csv file.
Click the OK button. The guests should now be imported as below.

PerfectTablePlan 3.1.4 51
© 2008 Oryx Digital Ltd
PerfectTablePlan has used title preferences to extract titles and guess age and
gender. If it has guessed anything wrong you can easily change it in Edit mode.
The email address has been added to the guest Contact information.
It has also placed guests into groups. Note that
Mr Alan Black
and
Miss Erica
Black
have been placed in the same group because they were listed one after the
other with the same last name.

PerfectTablePlan52
© 2008 Oryx Digital Ltd
If you don't like how they have been grouped you can easily drag guests between
groups in Drag and drop mode in the Groups pane.
If you look in the Proximity pane you will see it has set proximity for the
guests in each group.
If you want more control over groups you can add a group column to your
spreadsheet. You can also specify unnamed guests to import.
Select File> New to clear the current plan. Click on Don't save. Add an
additional group column and guest column to your spreadsheet, as below.

PerfectTablePlan 3.1.4 53
© 2008 Oryx Digital Ltd
File>Save as to
guests2.csv
and import into PerfectTablePlan (as above). Select
the property drop-down lists as shown below.
The guests have now been imported in the groups you specified and an unnamed
guest has been added for
Mr Alan Black
.

PerfectTablePlan54
© 2008 Oryx Digital Ltd
You can also import many other properties, such as addresses, meal choice, VIP
status, RSVP status etc. See Import data window for more details.
If you are importing data in a format PerfectTablePlan already knows about you
can select the format from the File type menu:
Click on the button in the Import data window to show additional options.
These options give you full control over how the import file is interpreted. For
example you can specify that columns in the import file are separated by Tab
characters, rather than commas:
Note If your spreadsheet contains non-ASCII characters (e.g. Chinese or other
Unicode characters) these may be lost when you save your Excel .xls file to a .csv
file. To avoid this problem save as Unicode text (*.txt) and import using Custom
format and a TAB delimiter.
You can also import guest name data using the simpler (but less flexible) Insert
guests scratch-pad window.
You can also import guests from any application that supports vCard format. This
includes many email and address book applications. Just drag the guest vCard(s) on


PerfectTablePlan56
© 2008 Oryx Digital Ltd
The Main window in basic mode ( View>User interface>Basic ).
This is the main window of the application. Use the buttons at the top of the
window to minimise, maximise or close it.
Which panes and tool bar buttons are displayed will depend on whether View>User
interface>Basic or View>User interface>Expert is selected.
See also:
Menu bar
Task tool bar
Main tool bar
Insert tool bar
Status bar
Left pane

PerfectTablePlan 3.1.4 57
© 2008 Oryx Digital Ltd
Top pane
Bottom pane
Windows
Drag and drop
5.2 Menu bar
Use the Menu bar to access various actions supported by the software.
The File menu supports various actions on the current plan file.
The Edit menu supports various edit actions. Apart from Undo/Redo and Copy
these act on the selected items in the most recently selected pane (the icon for
this pane is shown in the Status bar).
The View menu allows you control which elements of the user interface are
visible.
The Insert menu allows you to insert new guests and tables into your plan.
The Licensing menu allows you to add or update your licence key.
The Help menu allows you to access various forms of help information.
Hint You can use keyboard shortcuts to access menu items. For example to access
File>Exit without using the mouse type +Q.
5.3 Task tool bar
The Task tool bar takes you through each stage of creating a table plan. Depending
on which stage is selected some panes and tool bar buttons will be hidden.
The Task tool bar is only displayed if View>User interface>Basic is selected.
Button
Meaning

PerfectTablePlan58
© 2008 Oryx Digital Ltd
Step 1: Add guests to plan
Step 2: Decide who to sit together/
apart
Step 3: Add tables to plan
Step 4: Assign guests to seats
Step 5: Print/export plan
5.4 Main tool bar
Use the Main tool bar to access common actions. All of these actions are also
available through the Menu bar. Many of them are also available as keyboard
accelerators, for example +O opens an existing plan file. Look at the Menu bar
to see the keyboard accelerators.
Note All of the Main tool bar icons are only displayed if you have selected
View>User interface>Expert. Otherwise only icons appropriate to the current task
are displayed.
Button
Meaning
New plan
Import guest information
Open existing plan
Open recently accessed plan
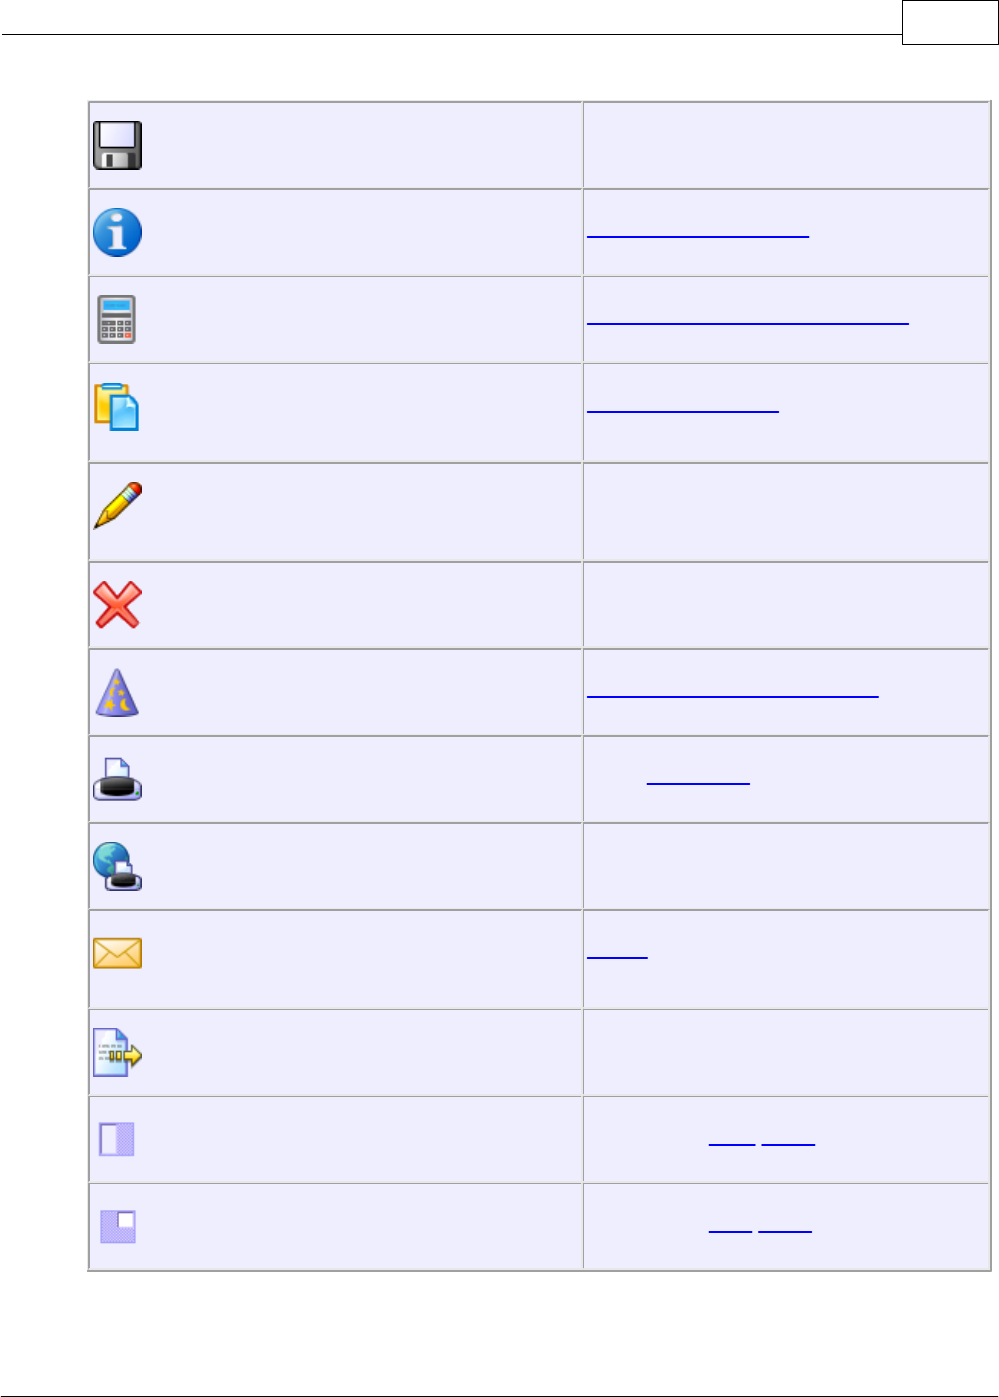
PerfectTablePlan 3.1.4 59
© 2008 Oryx Digital Ltd
Save plan
Information window
Numbers and budget window
Copy to clipboard contents of top
pane
Show/edit properties of selected
item
Delete selected item(s)
Automatic seat assignment
Print Top pane
Order plan online
Email plan as an attachment (not
available on Mac)
Export plan in various formats
Show/hide Left pane
Show/hide Top pane

PerfectTablePlan60
© 2008 Oryx Digital Ltd
Show/hide Bottom pane
Show list of tasks you might need
help with
Hint Hover the mouse cursor over a tool bar button to get a tool tip window
explaining the action. You can turn tool tips on/off in the Preferences window.
5.5 Insert tool bar
Use the Insert tool bar to add guests and tables. All of these actions are also
available through the Menu bar. Many of them are also available as keyboard
accelerators, for example +G inserts a new single guest. Look at the Menu bar to
see the keyboard accelerators.
Note All of the Insert tool bar icons are only displayed if you have selected
View>User interface>Expert. Otherwise only icons appropriate to the current task
are displayed.
Button
Meaning
Insert single guest
Insert guest couple
Insert guest family
Insert guest group
Insert guests scratch-pad
Insert circular table

PerfectTablePlan 3.1.4 61
© 2008 Oryx Digital Ltd
Insert rectangular table
Insert banquet table
Insert head table
Insert custom table
Hint Hover the mouse cursor over a tool bar button to get a tool tip window
explaining the action. You can turn tool tips on/off in the Preferences window.
5.6 Status bar
The Status bar shows various useful information:
·
a description of any menu item or tool bar button currently being hovered over
or selected
·
the icon for the currently selected pane (where File>Edit> Delete and other
operations will be carried out)
·
the total number of guests, the number of guests with RSVP accepted, the
number of guests assigned to a seat, the number of seats and the score
·
whether the software is licensed (and a Purchase licence button, if it isn't)
5.7 Left pane
5.7.1 Left pane
The Left pane contains the Guests pane and Groups pane. These are two
different views of the guests in your plan.

PerfectTablePlan62
© 2008 Oryx Digital Ltd
If View>User interface>Expert is selected you can hide this pane by clicking on
the button at top-right of the pane or using View> Left pane or the
equivalent Main tool bar button.
You can resize this pane using the splitter between it and the other two panes.
5.7.2 Guests pane
The Guests pane shows all the guests in the current plan as individuals.
The icon shown for a guest is determined from the details you have entered about
their gender and age.
Guests who have declined or cancelled are shown with strikethrough text. Guests
who have not been assigned to seats are shown in bold. Guests who are locked are
shown with underlined text.
Select from the Mode drop-down list to change the behaviour of the pane (see
below).
Type text in the Search field to find guests by name. The default behaviour is to
hide non-matching names. E.g. if you type
jo
it will hide all guests without
jo
in
their name (case is ignored). Click the cancel icon to clear the field.
You can change the behaviour to jump to the first matching name by changing
Guest/group search in the Preferences window to selects first match. E.g. if you
type
jo
it will first try to find a guest with a name beginning with
jo
(e.g.
john
)
and if it can't find one it will try to find a guest whose name contains
jo
.
Click on the button to allow you to choose which columns are displayed.
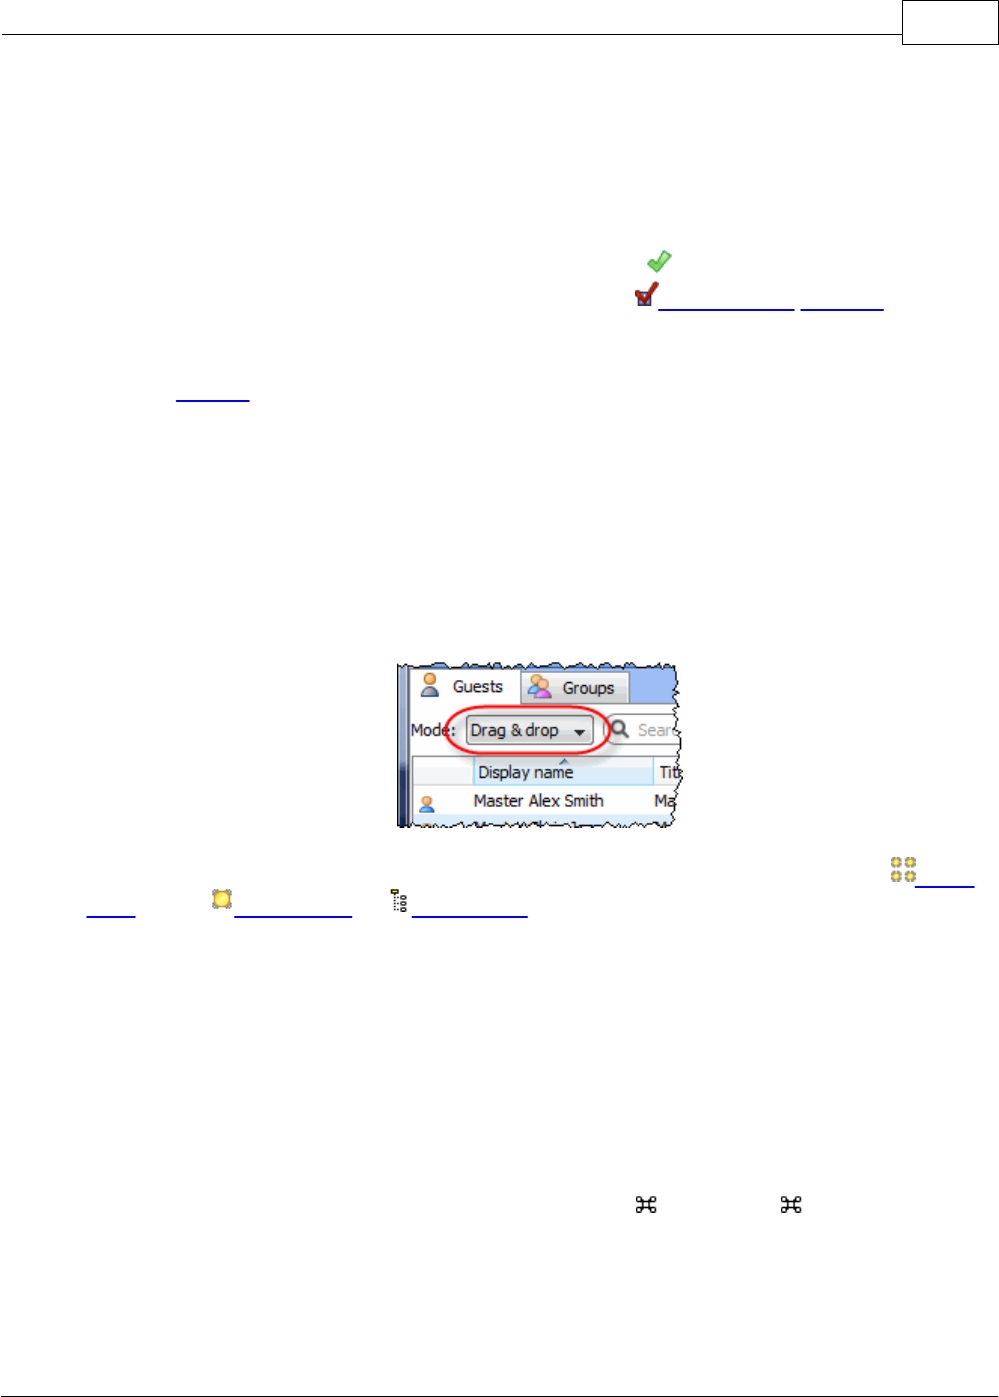
PerfectTablePlan 3.1.4 63
© 2008 Oryx Digital Ltd
Click on any of the column headers (for example on Display name) to sort by that
column. Clicking a column again reverses the sort order.
Ctrl+click on a guest to display actions in a pop-up menu.
Note that changing the RSVP status of a guest from Accepted may unassign them
from their seat, depending on your settings in the Preferences window.
Drop a plan file onto this pane to open it. Drop a vCard, text or CSV file onto this
pane to import it.
Drag a guest from another PerfectTablePlan window to add them to the current
plan.
Mode
drag & drop
Left click on one or more a guests and drag them to a seat or table in the Floor
plan pane, Table plan or Schematic pane to assign them to a seat. Hold down
the Shift key to also drag all the other members of their group.
Edit guest properties by double-clicking on them or Ctrl+click and select
Properties from the pop-up menu.
Ctrl+click on a guest to display actions in a pop-up menu.
Double-click on a guest to display the Properties window.
Select more than one guest by using Shift+click or +click. Use +A to select
everything in this pane.
edit

PerfectTablePlan64
© 2008 Oryx Digital Ltd
Click on a guest property to edit it.
Use the Enter, Tab or +arrow keys to change row or column. Use the Space or
arrow down keys to edit a drop-down list.
See also: Add or remove dots at the end of titles
5.7.3 Groups pane
The Groups pane shows all the guests in the current plan arranged in their
groups.
The icon shown for a guest is determined from the details you have entered about
their gender and age.
Guests who have declined or cancelled are shown with strikethrough text. Guests
who have not been assigned to seats are shown in bold. Guests who are locked are
shown with underlined text.
The icon shown for a group is based on PerfectTablePlan's best guess at whether
the group is a family, couple etc. The group icon is just a visual cue, it doesn't
affect anything else.
Select from the Mode drop-down list to change the behaviour of the pane (see
below).
Type text in the Search field to find groups by name. The default behaviour is to
hide non-matching names. E.g. if you type
jo
it will hide all groups without
jo
in
their name (case is ignored). Click the cancel icon to clear the field.
You can change the behaviour to jump to the first matching group/guest name by
changing Guest/group search in the Preferences window to selects first match. E.
g. if you type
jo
it will first try to find a guest or group with a name beginning

PerfectTablePlan 3.1.4 65
© 2008 Oryx Digital Ltd
with
jo
(e.g.
john
) and if it can't find one it will try to find a guest or group
whose name contains
jo
.
Click on the button to allow you to choose which columns are displayed.
Click Expand all or Collapse all to expand/collapse all the groups.
Check the various check boxes to hide/show columns.
Click on the Group name headers to sort groups by that column. Click on one of
the other columns to sort by Group name and then by the clicked column. Clicking
a column again reverses the sort order.
Note that changing the RSVP status of a guest from Accepted may unassign them
from their seat, depending on your settings in the Preferences window.
Drop a plan file onto this pane to open it. Drop a vCard, text or CSV file onto this
pane to import it.
Drag a guest from another PerfectTablePlan window to add them to the current
plan.
Note Deleting a group deletes all the guests in it.
Mode
drag & drop
To assign seats left click on one or more guests or groups and drag them to a seat
or table in the Floor plan pane, Table plan or Schematic pane.
To change group membership left click on one or more a guests or groups and drag
them from one group to another within the Groups pane
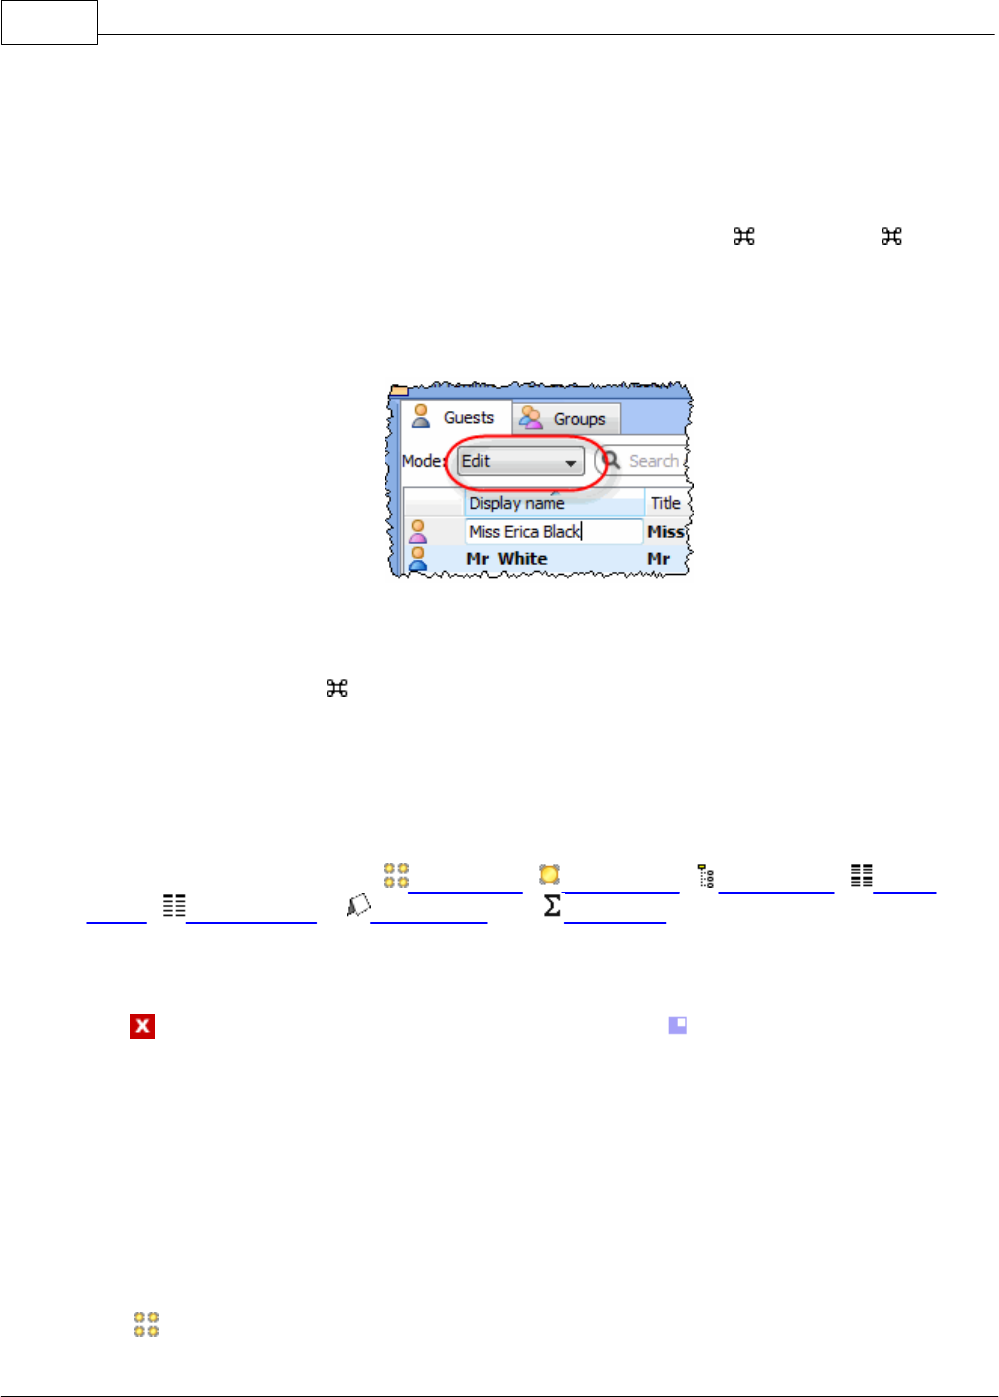
PerfectTablePlan66
© 2008 Oryx Digital Ltd
Ctrl+click on a guest or group to display actions in a pop-up menu.
Double-click on a guest or group to display the Properties window.
Select more than one guest or group by using Shift+click or +Click. Use +A to
select everything in this pane.
edit
Click on a guest or group property to edit it.
Use the Enter, Tab or +arrow keys to change row or column. Use the Space or
arrow down keys to edit a drop-down list.
5.8 Top pane
5.8.1 Top pane
The Top pane contains the Floor plan, Table plan, Schematic, Table
chart, Guest chart , Stationery and Statistics panes. These are all
different views of your plan.
If View>User interface>Expert is selected you can hide this pane by clicking on
the button at top-right of the pane or using View> Top pane or the
equivalent Main tool bar button.
You can resize this pane using the splitter between it and the Left pane and the
splitter between it and the Bottom pane.
5.8.2 Floor plan pane
The Floor Plan pane shows an 'aerial' view of your table plan. You can only

PerfectTablePlan 3.1.4 67
© 2008 Oryx Digital Ltd
select one seat or table at a time in this pane.
Appearance
Clicking on the and buttons zooms in and out. Clicking on the button
zooms and scrolls (pans) the display to show all the tables in your plan. When you
are zoomed in you can move around by clicking on the scroll bars or by dragging
the background (the cursor will change to a hand).
By default the inside of the floor plan is shown in white and the outside of the
floor plan is shown in grey.
You can change the floor plan dimensions and units by clicking on the button.
You can also set whether a grid is drawn (and what size) and whether tables,
shapes and text are snapped to a grid (and what size).
Click the Insert text button to add text to the floor plan (e.g. a title). We would
really appreciate a mention of www.perfecttableplan.com in the footer!
Click the Insert shape button to add shapes to the floor plan (e.g. to represent
dance floors or stages).
Click the Rotate button to rotate the selected table, shape or text item 45
degrees clockwise. For finer control use the Angle field in the Table properties
window.
Click the Move to back button to move the selected item behind (under) others
in the vertical stacking order.
Click the button to change the fonts and colours. The table colour will be
overridden by colours set for individual tables through the Table properties
window.
Hint If you want to seamlessly join two tables set the inner and outer colours of
the table to be the same.
Click on the button to show additional options.
Select from the Seats drop-down list according to how you want seats to be
displayed.

PerfectTablePlan68
© 2008 Oryx Digital Ltd
Select from the Guests drop-down list to change the text that is displayed for
assigned seats.
Select from the Tables drop-down list according to what text you want displayed
for the table. If you show unassigned seats any unassigned seats may also be
highlighted with a red cross, depending on the setting for Seats.
Changing the Floor plan
New tables are inserted in a vacant space near the current centre of the pane.
Once a table has been placed you can drag it to any location inside the floor plan.
Guests can be dragged between seats or from the Guests pane or Groups pane
(set the Left pane Mode to drag & drop). Drop a guest away from a seat or table
to unassign them.
Note If you drag a guest on to a seat where another guest is already assigned the
guests will swap seats with the guest being dragged.
Double-click on a table or guest to show the Properties window.
Ctrl+click on a table or seat to display actions in a pop-up menu.
Assessing your plan
When you hover the mouse cursor over a table or assigned seat a tool tip window
with summary information will appear. You can turn these tool tips on/off in the
Preferences window.
Hold down the button to show all guests that should be sitting next to each
other.
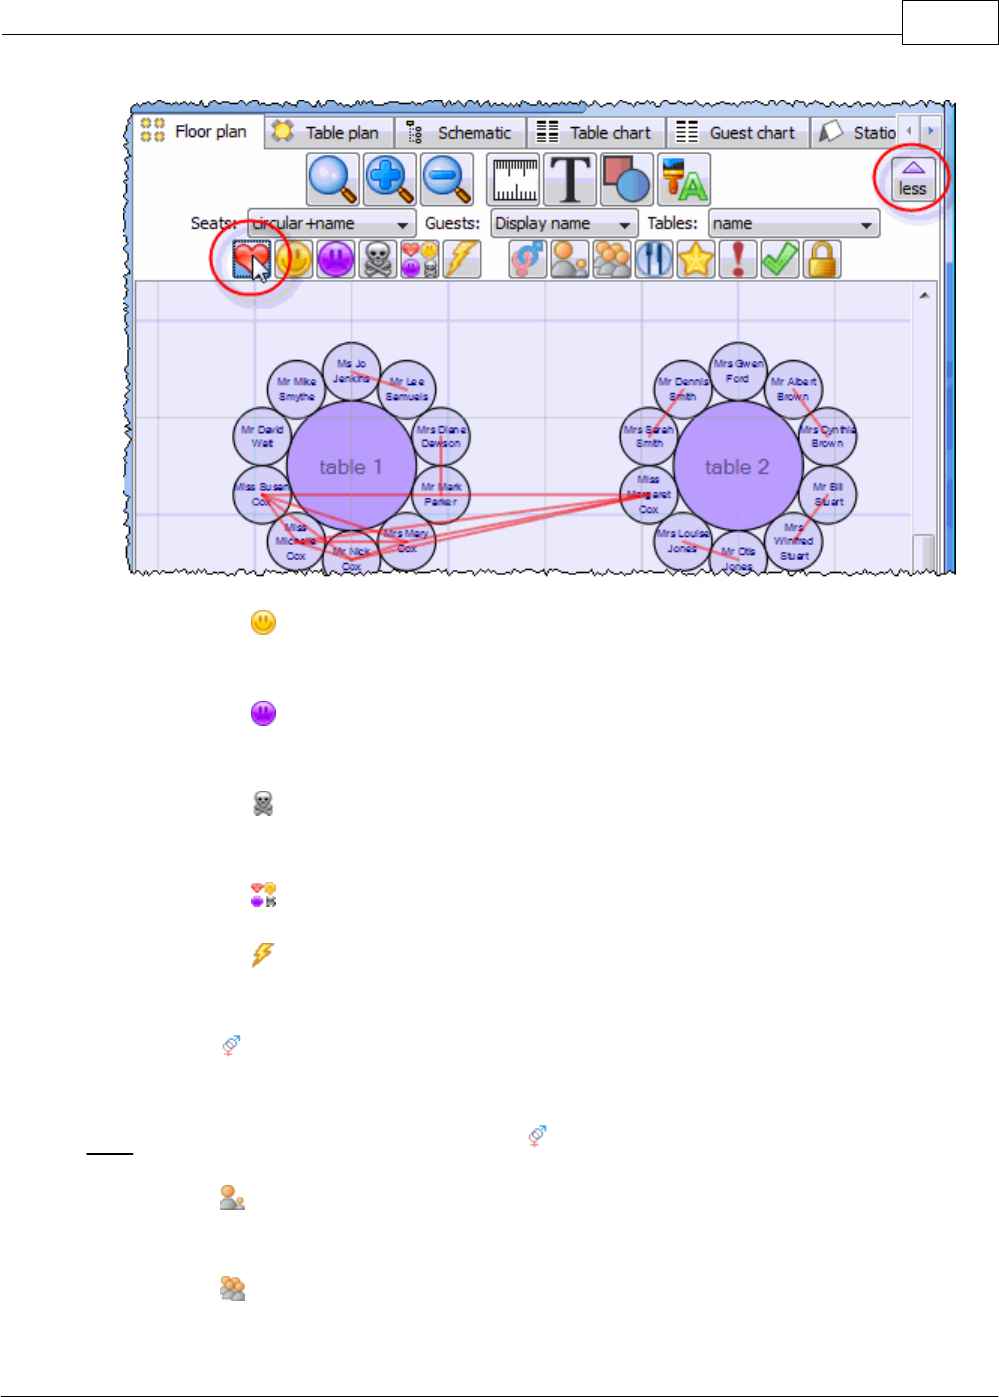
PerfectTablePlan 3.1.4 69
© 2008 Oryx Digital Ltd
Hold down the button to show all guests that should be sitting near to each
other.
Hold down the button to show all guests that should not be sitting next to each
other.
Hold down the button to show all guests that should be not be sitting near to
each other.
Hold down the button to show all guest proximities.
Hold down the button to show all non-optimal seating arrangements, e.g. guests
that should be sitting next to each other that aren't.
Depress the button to show the gender of guests (blue for male, pink for
female).
Hint It is easier to see proximities if the button is not depressed.
Depress the button to show the age of guests (large circle for adult, small circle
for child).
Depress the button to show which groups guests belong to. The seats are colour
coded for up to 100 groups (and then repeat the colour sequence).

PerfectTablePlan70
© 2008 Oryx Digital Ltd
Depress the button to show colour-coded meal choices. Each meal is displayed
in a different colour (up to 10 colours). If you have more than one course (e.g.
“soup,fish,ice cream”) the courses will be displayed as concentric rings: outer
ring=first course, second ring=second course etc.
Note The colours for the groups and meals visualisations are chosen automatically -
you can't change them. The colours should be distinguishable even for people with
most types of colour blindness.
Depress the button to show VIP guests and VIP tables.
Depress the button to show guests with special needs.
Depress the button to show guest RSVP status.
Depress the button to show locked guests.
Hint Some of the above will be easier to see if you use simple (e.g. default )
colours in the Floor plan pane.
Keyboard accelerators
You can change the selected table or seat using Alt+Left arrow and Alt+Right
arrow (change table) and Alt+Up arrow and Alt+Down arrow (change seat).
Printing, copying and exporting
When you are happy with the layout you can print this page with File> Print. You
can also export the image as a PDF, PNG, BMP or JPEG file using File> Export or
copy it to the clipboard using Edit> Copy.
5.8.3 Table plan pane
The Table Plan pane shows a single table, with an optional legend (text). You
can only select a single seat or table in this pane. The legend cannot be selected.
Appearance
Clicking on the and buttons zooms in and out. Clicking on the button
zooms and pans the display to show all the contents. When you are zoomed in you

PerfectTablePlan 3.1.4 71
© 2008 Oryx Digital Ltd
can move around by clicking on the scroll bars or by dragging the background (the
cursor will change to a hand).
Click the button to change the fonts and colours. The table colour will be
overridden by colours set for individual tables through the Table properties
window.
Hint If you want to hide table names in the floor plan just set the colour of the
table font to the same as the colour of the table.
Click on the buttons to display the first, previous, next or last table.
Click on the button to show additional options.
Select from the Arrow to drop-down list to display a directional arrow. This arrow
can point up, right, down, left or to any table. Note the arrow will not be
displayed if it is set to point to the current table.
Select from the Seats drop-down list according to how you want seats to be
displayed.
Change the Guests drop-down to change the text that is displayed for assigned
seats.
Check the legend check box to show the text legend. Check the header, seat
numbers, VIP, gender, age, meal, special or notes check boxes to show the
corresponding information in the legend.
Note The Event: entry in the legend is set in the Information window.
Changing the Table plan
Guests can be dragged between seats or from the
Guests pane or Groups pane (set the Left pane Mode to drag & drop). Drop a
guest away from a seat or table to unassign them.
Note If you drag a guest on to a seat where another guest is already assigned the
guests will swap seats with the guest being dragged.
Double-click on a table or guest to show the Properties window.

PerfectTablePlan72
© 2008 Oryx Digital Ltd
Ctrl+click on a table or seat to display actions in a pop-up menu.
Assessing your plan
When you hover the mouse cursor over a table or assigned seat a tool tip window
with useful information will appear. You can turn these tool tips on/off in the
Preferences window.
Hold down the button to show all guests that should be sitting next to each
other.
Hold down the button to show all guests that should be sitting near to each
other.
Hold down the button to show all guests that should not be sitting next to each
other.
Hold down the button to show all guests that should be not be sitting near to
each other.
Hold down the button to show all guest proximities.
Hold down the button to show all non-optimal seating arrangements, e.g. guests
that should be sitting next to each other that aren't.
Note Only the proximities for guests on the current table are shown.
Depress the button to show the gender of guests (blue for male, pink for
female).
Hint It is easier to see proximities if the button is not depressed.

PerfectTablePlan 3.1.4 73
© 2008 Oryx Digital Ltd
Depress the button to show the age of guests (large for adult, small for child).
Depress the button to show which groups guests belong to.
Depress the button to show colour-coded meal choices. Each meal is displayed
in a different colour (up to 10 colours). If you have more than one course (e.g.
“soup,fish,ice cream”) the courses will be displayed as concentric rings: outer
ring=first course, second ring=second course etc.
Note The colours for the groups and meals visualisations are chosen automatically -
you can't change them. The colours should be distinguishable even for people with
most types of colour blindness.
Depress the button to show VIP guests.
Depress the button to show guests with special needs.
Depress the button to show guest RSVP status.
Depress the button to show locked guests.
Hint Some of the above will be easier to see if you use simple (e.g. default )
colours in the Table plan pane.
Keyboard accelerators
You can change the selected table or seat using Alt+Left arrow and Alt+Right
arrow (change table) and Alt+Up arrow and Alt+Down arrow (change seat).
Printing, copying and exporting
When you are happy with the layout you can print this page with File> Print. You
can also export the image as a PDF, PNG, BMP,JPEG file using File> Export or
copy it to the clipboard using Edit> Copy.
5.8.4 Schematic pane
The Schematic pane shows the table plan in an abstract form that is convenient
for browsing. It also optionally shows the assignment scoring.

PerfectTablePlan74
© 2008 Oryx Digital Ltd
Guests who have declined or cancelled are shown with strikethrough text. Guests
who are locked are shown with underlined text.
Select from the Mode drop-down list to change the behaviour of the pane (see
below).
Change the Display drop-down list to change the way in which the names of
assigned guests are displayed.
The order of the tables can be changed by clicking on Table order button to
display the Table order window.
Click on the button to show additional options.
New tables are added are the bottom of the pane. You can change the position of
a table in the order by dragging it. Alternative, select the table and use the and
buttons at the top of the pane to move the table up or down the order.
Check the show scores check box to show the assignment scores.
Click Expand all or Collapse all to expand/collapse all the tables.
Mode
drag and drop
Drag one or more guests to a seat or table within in the Schematic pane to re-
assign their seat. Hold down the Shift key to also drag all the other members of
their group. You can also drag guests from the Guests pane or Groups pane to
the Schematic pane.
Note If you drag a guest on to a seat where another guest is already assigned the
guests will swap seats.
Drag a table within the Schematic pane to change the order in which it is
displayed here and in the Table chart pane.
Edit guest or table properties by double-clicking on them or Ctrl+click and select
Properties from the pop-up menu.
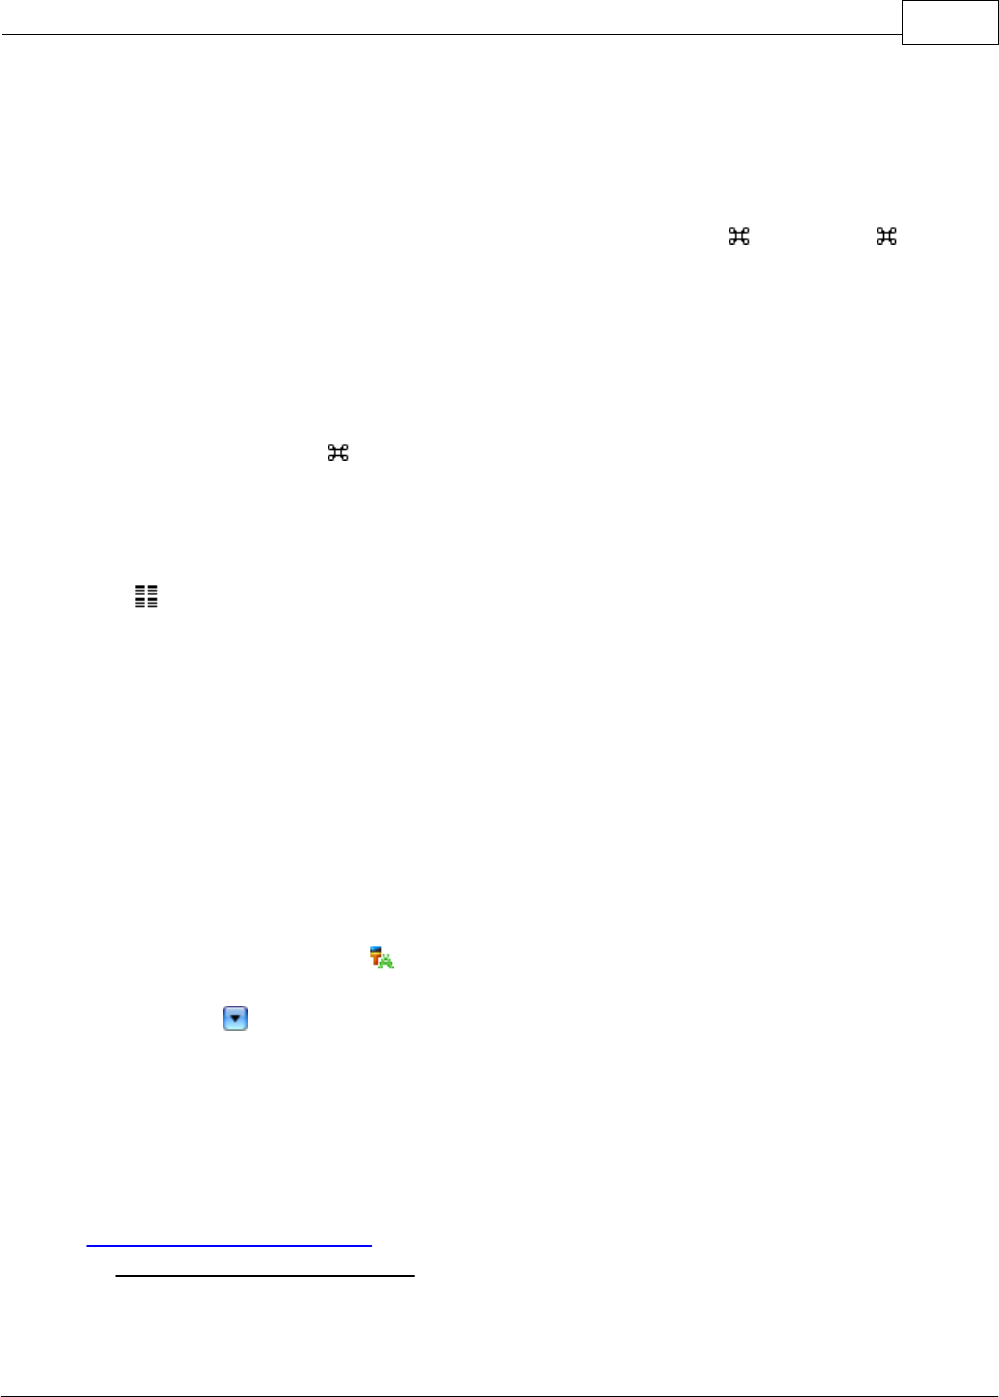
PerfectTablePlan 3.1.4 75
© 2008 Oryx Digital Ltd
Ctrl+click on a guest or table to display actions in a pop-up menu.
Double-click on a guest or table to display the Properties window.
Select more than one guest or table by using Shift+click or +Click. Use +A to
select everything in this pane.
edit
Click on a guest locked column or table name to edit it.
Use the Enter, Tab or +arrow keys to change row or column. Use the Space or
arrow down keys to edit a drop-down list.
5.8.5 Table chart pane
The Table chart pane shows a seating chart, ordered by table. This can be very
useful for displaying at the entrance to an event. Tables with no guests assigned
are omitted. It is not possible to change the plan from this pane.
Use the By drop-down list to display a line per Guest or a line per Group.
Use the Display drop-down list to change how guest/group names are displayed.
Use the Sort by drop-down list to change the way how guests/groups are ordered
on each table.
You can also change the number of Columns in the chart and control the font and
colours by clicking on the button.
Click on the button to show additional options.
You can optionally show the seat, notes, meal choice, special requirements, RSVP
status and group. The meal choice and special requirements can be very useful for
caterers.
Click on the Title or Footer button to add/edit a title or footer for this pane. The
Chart title/footer window will be displayed. We would really appreciate a mention
of www.perfecttableplan.com in the footer!
The order of the tables can be changed by clicking on Table order button to

PerfectTablePlan76
© 2008 Oryx Digital Ltd
display the Table order window. Alternatively, you can change the order in the
Schematic pane. Tables are laid out left to right and then top to bottom.
You can copy the contents of the whole pane to the clipboard as plain text and
HTML using Edit> Copy. Use right click and Copy to copy selected text to the
clipboard.
When you are happy with the layout you can print this page with File> Print.
You can export the pane as an Excel CSV, plain text or HTML file using File>
Export and selecting table chart to text/CSV/HTML file. Select Excel CSV file,
Text file or HTML file from the Save as type drop-down in the Export window.
Plain text may be useful for emailing to your stationary supplier. HTML preserves
the layout and is useful for web pages and other HTML-aware applications, such as
Microsoft Word. CSV files can be opened as Excel spreadsheets.
Hint Use +A to select everything in this pane.
5.8.6 Guest chart pane
The Guest chart pane shows a chart, ordered by guest name (alphabetically by
last name then first name). This allows guests to find their table quickly and can
be very useful for displaying at the entrance to an event. You can also print off a
full guest list. It is not possible to change the plan from this pane.
Use the By drop-down list to display a line per Guest or a line per Group.
Use the Display drop-down list to change how guest/group names are displayed.
Using the Show drop-down list you can display:
·
guests who have (or haven't) been assigned to seats; or
·
guests who have (or haven't) accepted their invitations; or
·
all guests
You can also change the number of Columns in the chart and control the font and
colours by clicking on the button.
Click on the button to show additional options.

PerfectTablePlan 3.1.4 77
© 2008 Oryx Digital Ltd
You can optionally show the headers, table, seat, notes, meal choice, special
requirements, RSVP status and group. The meal choice and special requirements
can be very useful for caterers.
Click on the Title or Footer button to add/edit a title or footer for this pane. The
Chart title/footer window will be displayed. We would really appreciate a mention
of www.perfecttableplan.com in the footer!
You can copy the contents of the pane to the clipboard as plain text and HTML
using Edit> Copy. Use right click and Copy to copy selected text to the
clipboard.
When you are happy with the layout you can print this page with File> Print.
You can export the pane as an Excel CSV, plain text or HTML file using File>
Export and selecting guest chart to text/CSV/HTML file. Select Excel CSV file,
Text file or HTML file from the Save as type drop-down in the Export window.
Plain text may be useful for emailing to your stationary supplier. HTML preserves
the layout and is useful for web pages and other HTML-aware applications, such as
Microsoft Word. CSV files can be opened as Excel spreadsheets.
Hint Use +A to select everything in this pane.
5.8.7 Stationery pane
The Stationery pane allows you to design and print items of stationery and easily
merge in details of your guests and their seating arrangements from your
PerfectTablePlan data. Each page can contain a single stationery item (e.g. an A4
invitation letter) or multiple items (e.g. 3x6 address labels).
You design a master for your stationery items in the Design tab and preview it in
the Preview tab.
Top controls
Click on the Open stationery button to load a stationery design. A few samples
are included with PerfectTablePlan. You can also save your own designs to use
later or send to other PerfectTablePlan users.
Click on the Stationery layout button to change the layout of the existing
design. For example to change the page size or the number and dimensions of

PerfectTablePlan78
© 2008 Oryx Digital Ltd
items on the page.
Click on the Save stationery button to save the current stationery design to a
file. You will be able to load this design back into this plan, or another plan, at a
later date.
Select from the Item per drop-down list to create a stationery item for each guest,
each group or each table.
Select from the Show drop-down list to choose which guests you wish to create
stationery items for.
For example, if you are printing place cards, you probably want to select Item
per=Guest and Show=Assigned. If you are printing invitations you probably want
to select Item per=Group and Show=All.
Select from the Sort by drop-down list to determine the order in which stationery
items are ordered. This feature should make it easier to set up place cards if you
have hundreds of guests. It is only available for Item per=Guest .
Click on the button to show additional options.
Select from the Fold drop-down list to a horizontal or vertical fold. This can be
useful for designing and printing tent fold cards. Folds are displayed in printouts.
Set the Border thickness greater than 0 to add a border to each stationery item.
Click on the Border colour button to change the colour of the border around each
item. This has no effect if the Border thickness is 0.
Click on the Background colour button to change the background colour of each
item.
Design tab
To add text to your design:
1. click on the Insert text button
2. click on the area of the design you wish to add the text

PerfectTablePlan 3.1.4 79
© 2008 Oryx Digital Ltd
3. type in the text you wish to add
4. add substitution fields by selecting from the Insert substitution text drop-down
list
Click on the Horizontal centre or Vertical centre buttons to horizontally/
vertically centre the currently selected text.
Click on the Rotate button to rotate the selected text 90 degrees.
Click on the Move to back button to move the selected text behind any other
text.
To delete text click select the text and click the Delete button.
Change the value of Guides to the number of guidelines you wish to add to the
design. These can be useful for aligning text neatly. They are not shown in
printouts.
Click on the Font button to change the font of the selected text. Alternatively you
can use the Font size spin box or the Italic, Bold and Underline buttons.
Click on the Colour button to change the colour of the selected text.
Click on the Left align, Centre align or Right align buttons to change the
alignment of the selected text.
Drag the splitter a the top of the text edit box to increase or decrease the size of
the text edit area.
Preview tab
Select Display to show either a full page of items or a single item (e.g. 3x6 address
labels or a single address label) and the number of the page/item to display.
Set Start position to position on the page where you wish the first item to be
printed.
Check cut marks if you would like cut marks to be printed on the page. This can
be useful if you are using a guillotine to cut the page.

PerfectTablePlan80
© 2008 Oryx Digital Ltd
Substitution text
If you use the following text in your design it will be substituted by the appropriate
data from your plan.
In alphabetical order:
Substitution text
Substituted by
Example
Available for 'Item
per'
{event_date}
event date from
Information
window
31/1/2007
Guest, group or
Table
{event_name}
event name
from
Information
window
Gala dinner
Guest, group or
Table
{event_notes}
event notes
from
Information
window
Guest, group or
Table
{event_venue}
event venue
from
Information
window
The Crown hotel
Guest, group or
Table
{group_address}
the address of
the group
1 The Street
The Town
Nowhereshire
NW1 123
England
Guest or Group

PerfectTablePlan 3.1.4 81
© 2008 Oryx Digital Ltd
{group_address1}
line 1 of the
group address
1 The Street
Guest or Group
{group_address2}
line 2 of the
group address
Guest or Group
{group_country}
the address
country
England
Guest or Group
{group_contact}
full contact
details of group
(address +
contact
numbers)
Guest or Group
{group_email}
email address
Guest or Group
{group_home_phon
e}
home phone
number
111-111-1111
Guest or Group
{group_meals}
meals of group
members
fish + beef
Guest or Group
{group_members_
multi_line}
list of group
members, one
per line
Mr J Smith
Mrs K Smith
Guest or Group
{group_members}
list of group
members on one
line
Mr & Mrs J Smith
Guest or Group

PerfectTablePlan82
© 2008 Oryx Digital Ltd
{group_mobile}
mobile phone
number
111-111-1111
Guest or Group
{group_name}
group name
Smith family
Guest or Group
{group_notes}
notes for the
group
Guest or Group
{group_special_req
s}
special
requirements of
group members
wheelchair
Guest or Group
{group_state_count
y}
the address
state/county
Nowhereshire
Guest or Group
{group_tables}
the table(s) the
group is assigned
to
table 1
Guest or group
{group_town_city}
the address
town/city
The Town
Guest or Group
{group_work_phon
e}
work phone
number
111-111-1111
Guest or Group
{group_zip_postcod
e}
the address zip/
postcode
NW1 123
Guest or Group
{guest_age}
guest age
adult
Guest
{guest_display_nam
e}
guest display
name
Mr John Smith
Master of
Ceremonies
Guest
{guest_display_nam
e**1}
guest display
name before **
Mr John
Smith**Master of
Ceremonies -> Mr
Guest

PerfectTablePlan 3.1.4 83
© 2008 Oryx Digital Ltd
John Smith
{guest_display_nam
e**1}
guest display
name after **
Mr John
Smith**Master of
Ceremonies ->
Master of
Ceremonies
Guest
{guest_first_name}
guest first name
John
Guest
{guest_gender}
guest gender
male
Guest
{guest_last_name}
guest last name
Smith
Guest
{guest_meal}
guest meal
fish
Guest
{guest_notes}
notes for the
guest
Guest
{guest_rsvp}
guest RSVP
status
Accepted
Guest
{guest_seat}
seat guest
assigned to
1
Guest
{guest_special_req}
guest special
requirements
visually impaired
Guest
{guest_table}
table guest
assigned to
Table 3
Guest
{guest_title}
guest title
Mr
Guest
{guest_vip}
guest VIP status
VIP
Guest
{table_guests_multi
_line}
list of guests at
table, one guest
Mr J Smith
Table

PerfectTablePlan84
© 2008 Oryx Digital Ltd
per line
Mrs K Smith
{table_guests}
list of guests at
table on one line
Mr & Mrs J Smith
Table
{table_name}
the name of the
table
Table 1
Table
{table_name**1}
table name
before **
Table1**HeadTable -
> Table1
Table
{table_name**2}
table name after
**
Table1**HeadTable -
> Head table
Table
{table_notes}
notes for the
table
Table
Note Text will only be substituted if Item per is set to the correct value, e.g.
{guest_title}will not be substituted if you are display Item per=Table.
5.8.8 Statistics pane
The Statistics pane shows simple summary statistics for your plan. It is not
possible to make changes to the plan from this pane.
You can copy the contents of the whole pane to the clipboard as plain text and
HTML using Edit> Copy. Use right click and Copy to copy selected text to the
clipboard.
When you are happy with the layout you can print this page with File> Print.
You can export the pane as an Excel CSV, plain text or HTML file using File>
Export... and selecting statistics to text/CSV/HTML file. Select Excel CSV file,
Text file or HTML file from the Save as type drop-down in the Export window.
Plain text may be useful for emailing to your caterer. HTML preserves the layout
and is useful for web pages and other HTML-aware applications, such as Microsoft
Word. CSV files can be opened as Excel spreadsheets.
Hint Use +A to select everything in this pane.

PerfectTablePlan 3.1.4 85
© 2008 Oryx Digital Ltd
5.9 Bottom pane
5.9.1 Bottom pane
The Bottom pane contains the Proximity pane.
If View>User interface>Expert is selected you can hide this pane by clicking on
the button at top-right of the pane or using View> Bottom pane or the
equivalent Main tool bar button.
You can resize this pane using the splitter between it and the Left pane and the
splitter between it and the Top pane.
5.9.2 Proximity pane
The Proximity pane shows an abstract view of who should be placed near whom.
Note The table is symmetric, if you change the proximity for column A and row B,
the proximity for row B and column A will change automatically.
You can move around the table and change values using the Arrow keys, Space bar
and Return key.
Select from Display to change how the guest names are displayed.
Use Search row and Search column to quickly find guest rows and columns. It will
first look for a row/column that starts with the text and then one that contains the
text.
Default proximity values are set automatically for guests when they are added as a
couple, family or group, but you can add to or override as you wish. For example,
if you add Mr & Mrs A as a couple they will be automatically assigned proximity
Next to (a will appear in the cells where the columns and rows for Mr A and Mrs
A intersect). The automatic assignment will then try to put them next to each
other. To change this proximity to Not next to (perhaps they have had an
argument!) click on the cell and select from the drop-down list.
Click on the button to show additional options.
Select from Show to:
·
all: all guests

PerfectTablePlan86
© 2008 Oryx Digital Ltd
·
by group: guests in the selected group
·
by group+: guests in the selected group and all guests with non-neutral
proximity to members of this group
Select from the drop-down list or click on the and buttons to change the
selected group.
Check assignable guests only to show only guests who can be assigned to seats
(due to their locked + RSVP status and settings in the Preferences window).
Hint If you want to change the proximity for everyone in a group it may be easier
to select a group (in the Groups pane) or more than one guest (in the Guests
pane or Groups pane) and then select Edit>Proximity.
You can set the proximity for everyone on a table by selecting the table and then
Edit>Proximity. This can be useful for arranging multiple seatings.
5.10 Windows
5.10.1 Windows
Help on the following windows is available:
About window
Change group window
Dimensions window
Export window
Export data window
Export PDF window
Export vCard window
Fonts and colours window
Group properties window

PerfectTablePlan 3.1.4 87
© 2008 Oryx Digital Ltd
Guest properties window
Import window
Import data window
Information window
Insert couple window
Insert family window
Insert group window
Insert guest window
Insert guests scratch-pad window
Insert shape window
Insert table window
Insert text window
Licence window
Main window
Most recently accessed window
Numbers and budget window
Preferences window
Print window
Print setup window
Save stationery layout window
Shape properties window

PerfectTablePlan88
© 2008 Oryx Digital Ltd
Stationery layout window
Table order window
Table properties window
Text properties window
5.10.2 About window
The About window tells you which version of PerfectTablePlan you are using. To
display this window select select PerfectTablePlan>About PerfectTablePlan.
Click on Credits to see the credits list.
Click on Close to close the window.
5.10.3 Change group window
The Change group window allows you to move one or more guests from one
group to another. To display this window select one or more guests and then
select Edit>Change group....
Move guest(s) displays the guests that will be moved.
Select the group you want to move the guests to in To group and click OK.
Note You can also change the group of a guest by dragging and dropping them from
one group to another in the Groups pane.
5.10.4 Chart title/footer window
The Chart title/footer window allows you to change the title or footer displayed in
the Table chart or Guest chart pane. To display this window click the Title or
Footer button at the top of the appropriate pane. Click on the button to reveal
the button.
Type the text of the title or footer in the Text edit.
Set the size of the text relative to the rest of the text in the pane using the
Relative size drop down list.
+4
is the largest text and
-4
is the smallest text.

PerfectTablePlan 3.1.4 89
© 2008 Oryx Digital Ltd
Click on the Colour button to change the colour of the title or footer.
Check bold, italic and underline to set whether the text attributes of the title or
footer.
Click OK to accept the changes. Click Cancel to discard the changes. Any changes
you make to dimensions only apply to the current plan.
5.10.5 Dimensions window
The Dimensions window allows you to change the dimensions of the floor plan.
To display this window click the button at the top of the Floor plan pane.
Units allows you to choose metres or feet, as you prefer.
Depth (Y) is the depth of the floor plan in metres/feet (top to bottom on the
screen).
Breadth (X) is the breadth of the floor plan in metres/feet (left to right on the
screen).
Area is Depth x Breadth, in m
2
or ft
2
(depending on your choice of units).
Area per guest is the amount of area per guest, in m
2
or ft
2
(depending on your
choice of units).
Area per accepted guest is the amount of area per guest who has accepted, in
m2 or ft2 (depending on your choice of units). As a rough guideline:
seating type
comfortable space per guest
minimum space per guest
ft
2
m
2
ft
2
m
2
all standing
7
0.7
5
0.5
all seated,
rectangular
tables
11
1
8
0.7

PerfectTablePlan90
© 2008 Oryx Digital Ltd
all seated,
circular tables
14
1.3
11
1
Note Local fire regulations may specify limits on the number of guests for a venue.
Seat width is the number of metres/feet between the centre of one seat and the
next (including elbow room). Automatic table size is calculated from seat width, so
increasing/decreasing seat size may increase/decrease table sizes.
Check Draw grid if you would like a visible grid to be drawn in the Floor plan
pane. If checked you can set the drawn grid Size in the chosen units. The grid is
not shown in print outs or export files.
Check Snap to grid if you would like the centres of items in the Floor plan pane
to be constrained to a grid. If checked you can set the snap grid Size in the chosen
units. If you turn Snap to grid on or change the snap grid Size, you will be given
the option to snap all tables, shapes and text to the new grid.
Note The drawn grid and the snap grid are independent of each other.
Click OK to accept the changes. Click Cancel to discard the changes. Any changes
you make to dimensions only apply to the current plan.
5.10.6 Export window
The Export window allows you to choose a type of file to export. To display this
window select File> Export or the equivalent Main tool bar button. You cannot
export data if your plan is empty.
5.10.7 Export data window
The Export data window allows you to export guest and seat assignment data from
your plan to use in other applications, for example to import into spreadsheets to
create customised reports. To display this window select File> Export, select
guest and seating data to text/CSV file in the Export window and click OK. You
cannot export data if your plan has no guests.
Set the Export a record per drop-down to guest or group, depending on whether

PerfectTablePlan 3.1.4 91
© 2008 Oryx Digital Ltd
you want to export a record (line) for each guest or a record for each group of
guests. For example:
·
If you want to create a mail merge you will probably only want to send one letter
to each group, so you should select group.
·
If you want a complete list of guests to send to your stationery supplier, you
should select guest.
Select a from the Filter drop-down menu depending on which guests you wish to
export.
Check Output header record if you want to add a record with the field headings
at the top of the export file.
Select the appropriate Fields check boxes, depending on what information you
want to export to the file. Use the Select all, Unselect all and Invert selection
buttons to save time changing your selection.
Use the Format drop-down list to choose whether the exported file is in Excel CSV
format or a custom delimited format (e.g. fields separated by Tab characters). If
you are using a custom format, set Field separator and Record separator to the
field and record separators you want in the export file.
Preview shows you what the export file will look like. It shows the effect of
changes made to Export a record per, Output header record etc. If there are
more than 20 records to export, it only shows the first 20.
Set Export file to the location of the file you wish to create. You will be prompted
if there is already a file at this location. Click on the Browse... button to browse to
a location.
Click Apply to export the data. Click OK to export the data and close the window.
Click Cancel to discard the changes.
See also:
Export formats

PerfectTablePlan92
© 2008 Oryx Digital Ltd
5.10.8 Export PDF window
The Export PDF window allows you to set the paper size and orientation of the
PDF document you are about to create. To display this window export a file in PDF
format.
Choose the page size from the Page size drop-down list.
Choose the page orientation from the Orientation drop-down list.
Click OK to create the PDF document and close the window. Click Cancel to cancel
the export process.
See also:
Export formats
5.10.9 Export vCard window
The Export vCard window allows you to export guest data from your plan in vCard
format to use in other applications, for example to import into address books of
other applications. To display this window select File> Export, select guest data
to vCard file in the Export window and click OK. You cannot export data if your
plan has no guests.
Select from the Export drop-down list whether you wish to export all guests in the
plan or just those currently selected in the front tab of the Left pane (all members
of any group selected will be exported).
Select from the to drop-down list whether you wish to export all guests to a single
vCard file or a separate vCard file for each guest.
Set Location to the folder you wish to create the export file(s) in. You will be
prompted if there is already a file with the same name. Click on the Browse...
button to browse to a location.
Click OK to export the data and close the window. Click Cancel to discard the
changes.
See also:

PerfectTablePlan 3.1.4 93
© 2008 Oryx Digital Ltd
Export formats
5.10.10 Fonts and colours window
The Fonts and colours window allows you to change fonts and colours/gradients
in the Floor plan, Table plan, Table chart and Guest chart panes. To
display this window click the button at the top of the appropriate pane. The
exact appearance of the window depends on the which pane is at the front. Use
'themes' to load and save groups of font and colour choices.
Click the coloured buttons to set the colours/gradients for the appropriate text,
tables, seats and backgrounds.
Click Font... to set the appropriate font.
Click on the button to load the selected theme from the Themes list.
Click on the button to save the existing colours and fonts into the Themes list
for future use.
Click on the button to delete the selected theme from the Themes list.
Click More fonts to go to the PerfectTablePlan fonts web page.
Click Default to set all colours and fonts back to their original settings.
The effects of changes are shown in the Preview.
Click OK to accept the changes and close the window. Click Apply to apply the
changes without closing the window. Click Cancel to discard the changes and close
the window.
Once a theme has been created it will be available for other plans.
5.10.11 Group properties window
The Group properties window allows you to show/edit group properties. To
display this window select a single group in the Group pane and select Edit>
Properties or the equivalent Main tool bar button.
Group

PerfectTablePlan94
© 2008 Oryx Digital Ltd
Name is the name of the group. PerfectTablePlan will attempt to guess a
reasonable name from the names of the members when the group is created, but
you can change this at any time.
Notes is for any general notes relevant to everyone in the group. Click on Stamp
>> to add a time and date stamped comment to the top of the Notes.
Contact
These fields store contact information for everyone in the group. This can be
useful for creating address labels.
Buttons
Click on the buttons to display the properties of the first, previous,
next or last group. The groups are ordered alphabetically.
Click OK to accept the changes and close the window. Click Apply to apply the
changes without closing the window. Click Cancel to discard the changes.
5.10.12 Guest properties window
The Guest properties window allows you to show/edit guest properties. To
display this window select a single guest in the Guests, Groups, Floor plan,
Table plan or Schematic panes and select Edit> Properties or the
equivalent Main tool bar button or double-click on the guest.
Guest
Title is the guest's title. You can type the title or select it from existing choices in
the drop-down list. Once you have typed it in once, it will be available to select
next time you create a guest in this plan. Titles can also be configured in the
Preferences window.
First name is the guest's first (given) name(s).
Last name is the guest's last (family) name(s).
Note The Title, First name and Last name will be automatically capitalised (e.g.
mr john smith
converted to
Mr John Smith
) unless you have disabled this

PerfectTablePlan 3.1.4 95
© 2008 Oryx Digital Ltd
option in the Preferences window.
Display name is a name that can include the guests' qualification, rank, post-
nominal titles and/or role, e.g.
Mr John Smith Phd, Master of
Ceremonies
. See names and titles for more details.
Gender is the gender of the guest. This can be useful information when doing the
assignments. The automatic assignment will endeavour to alternate men and
women where it can (unless you have disabled this in the Preferences window).
PerfectTablePlan will try to set the Gender from the Title, but you can change
this at any time.
Age is the age of the guest, adult or child. Typically a child is anyone under the
age of 16. This can be useful information when doing the seat assignments.
PerfectTablePlan will try to set the age from the Title where it can, but you can
change this at any time.
Meal is the meal choice for this guest. You can type the meal or select it from
existing choices in the drop-down list. Once you have typed it in once, it will be
available to select next time. If you have a choice of more than one course you
should enter the courses separated by commas, e.g. soup,fish,flan, the Statistics
pane will then total each course separately.
Special req. is any special requirements the guest has, for example: nut allergy,
elderly or in a wheel chair. If there is more than one special requirement they
should be separated by commas, the Statistics pane will then total each special
requirement separately.
Notes is for any general notes relevant to the guest. This can be used to store any
information not stored elsewhere, for example whether the guest has paid. Click
on Stamp >> to add a time and date stamped comment to the top of the Notes.
Check VIP if the guest is an important guest, for example a guest of honour or a
member of a wedding party. The automatic assignment will take special care
assigning their seat, trying to assign them to a VIP table if there is one.
Check Locked to lock the guest to their current seat (or no seat). You will have to
unlock them to reassign their seat. This is particularly useful for stopping the
automatic assignment from moving them.
Select the RSVP status according to whether an invite has been sent, accepted,

PerfectTablePlan96
© 2008 Oryx Digital Ltd
declined or cancelled. Note that you may not be able to assign guests who have
not Accepted, depending on your settings in the Preferences window.
Assigned shows which seat the guest has been assigned to (if any).
All fields are optional, except that a guest must have at least a First name or a
Last name.
Note You can also edit many of these properties directly in the Guests pane and
Groups pane.
Group
Name is the name of the group. PerfectTablePlan will attempt to guess a
reasonable name from the names of the members when the group is created, but
you can change this at any time.
Notes is for any general notes relevant to everyone in the group. Click on Stamp
>> to add a time and date stamped comment to the top of the Notes.
Note You can easily change the group of a guest by dragging them from one group
to another in the Groups pane.
Contact
These fields store contact information for everyone in the group. This can be
useful for creating stationery, such as address labels.
Buttons
Click on the buttons to display the properties of the first, previous,
next or last guest. The guests are ordered alphabetically.
Click OK to accept the changes and close the window. Click Apply to apply the
changes without closing the window. Click Cancel to discard the changes and close
the window. You will be warned if you the guest has been edited to have the same
First Name, Last name and Title as an existing guest (unless you have disabled this
warning).
See also:

PerfectTablePlan 3.1.4 97
© 2008 Oryx Digital Ltd
Add or remove dots at the end of titles
5.10.13 Import window
The Import window allows you to choose a type of file to import. To display this
window select File> Import or the equivalent Main tool bar button.
See also:
Importing
Import data window
5.10.14 Import data window
The Import data window allows you to import data into your plan from other
applications, for example from an Excel CSV file. This can save you a lot of typing.
To display this window select File> Import... or the equivalent Main tool bar
button. The Import window will be displayed. Select text/CSV file and click OK.
An Open window will be displayed. Select the file you wish to import. The
Import data window will be displayed.
Note PerfectTablePlan cannot read Excel binary (.xls) files. If you have a .xls file
you must open it in Excel and save it as a CSV (.csv) file. Renaming the file from .
xls to .csv will not work. See importing from Excel for more details.
Mapping imported columns to guest properties
Setting up common titles will often help PerfectTablePlan to make better sense of
the data you are importing. Click on the Titles button to set your title preferences.
Select File type to import a pre-defined file type. Select custom to define your
own.
Map imported columns to guest properties shows you how the file data will be
imported, including the effects of various options described below.
If you have selected the File type as custom you need to tell PerfectTablePlan
which columns in the import file correspond to which guest properties. Select from
the drop-down lists at the top of each column to do this. For example the column
1 might correspond to the guest title, column 2 column to the guest last name and

PerfectTablePlan98
© 2008 Oryx Digital Ltd
the column 4 column to the guest meal choice. Leave the drop-down list as
<ignore> to ignore the contents of a column.
If you have multiple guests in one row or the title, first name or last name are not
in separate columns PerfectTablePlan will attempt to unravel them. For example it
can handle all the following:
If title is imported, but not gender or age, the import will attempt to guess the
gender or age from the title using the titles set in the Preferences window.
Note You can edit information in the table. This will change the information
imported, but not affect the contents of the file you are importing. Make sure you
press Enter to confirm any edits before clicking on Apply or OK.
Text is imported directly except for Gender, Age, VIP and RSVP, which are based
on the values below:
Column
Values

PerfectTablePlan 3.1.4 99
© 2008 Oryx Digital Ltd
Gender
Text must start with:
·
'F' or 'f' for a female
·
'M' or 'm' for male
otherwise the guest is imported with unknown gender
Age
Text must start with:
·
'C' or 'c' for a child
otherwise the guest is imported as an adult
VIP
Text must start with:
·
'Y' or 'y' for a VIP
otherwise the guest is imported as an non-VIP
RSVP
Text must start with:
·
'S' or 's' for sent
·
'A', 'a', 'Y' or 'y' for accepted
·
'C' or 'c' for cancelled
·
'D', 'd', 'N' or 'n' for declined
otherwise the RSVP status is unset.
You can easily edit any of these properties at a later point.
Importing groups
If you wish to import guests as couples, families and/or group you need to:

PerfectTablePlan100
© 2008 Oryx Digital Ltd
1. have a groups column in your input data
2. use the same name in the group column for each person in the couple, family or
group
3. make this column the group field during import
If no group is set then consecutive guests with the same surname will be added to
the same group. You can choose the proximity to use for members of the same
group from the Proximity for guests in the same group drop-down list.
The Num. guests field is the number of additional guests to be added for a given
guest in the same group. It can be from 0 to 999. For example if the guest is "John
Smith" and Num. guests field is 2 the guests "John Smith", "guest 1 of John Smith"
and "guest 2 of John Smith" will be added (all in the same group).
You can easily change the grouping of guests later by dragging them to another
group in the Groups pane.
Further options
Click on the button to show more options.
Location shows the location of the import file. Click on the Browse... button to
change the file you wish to import.

PerfectTablePlan 3.1.4 101
© 2008 Oryx Digital Ltd
Use Ignore first if you wish to ignore one or more rows in the file. Often you won't
want to import the first row as it is a header record.
Use the Format drop-down list to choose whether the imported file is in Excel CSV
format or a custom format (e.g. columns separated by Tab characters). If you are
using a custom format, set Column separator and Row separator to the field and
record separators in the import file.
Note If your spreadsheet contains non-ASCII characters (e.g. Chinese or other
Unicode characters) these may be lost when you save your Excel .xls file to a .csv
file. To avoid this problem save as Unicode text (*.txt) and import using custom
format with a TAB column separator and CARRIAGE RETURN row separator.
Click on Add row to add an additional row to be input. This is useful if you want to
type in the data for additional guests. If a row is selected the new row will be
added below, otherwise it will be added to the end.
Click on Delete row to delete the currently selected row.
Click on Add column to add an additional column to be input. This is useful if you
want to type in some additional data for each guest, e.g. their gender or group. If
a column is selected the new row will be added to the right, otherwise it will be
added to the end.
Click on Delete column to delete the currently selected column.
Buttons
Click Apply to import the data. Click OK to import the data and close the window.
Click Cancel to discard the changes.
See also:
Importing
Insert guests scratch-pad window
Importing guests from vCards
Importing guests from text and Excel CSV files

PerfectTablePlan102
© 2008 Oryx Digital Ltd
Import guest details from an Excel spreadsheet
Import guest details from Outlook
Import guest details from Outlook Express
5.10.15 Information window
The Information window allows you to show/edit general properties of the plan.
To display this window select File> Information or the equivalent Main tool bar
button.
Event allows you to enter a brief description of the event.
Venue allows you to enter a brief description of the event location.
Date allows you to enter the date of the event. The date format conforms to your
system locale. For example if you have set your locale to the USA you should see
MM/DD/YYYY format dates and if you have set your local to the UK you should see
DD/MM/YYYY format dates. You can change your locale through the operating
system. You need to restart PerfectTablePlan after changing the locale to see the
effect.
Days remaining shows the number of days remaining until the event.
Notes is for general notes on the vent.
Click OK to accept the changes and close the window. Click Cancel to discard the
changes.
Note Budget related information has been moved to the Numbers and budget
window in version 3 of PerfectTablePlan.
5.10.16 Insert couple window
The Insert couple window allows you to enter details for a couple. To display
this window select Insert> Guest couple or the equivalent Insert tool bar button.
Note Guests added as a couple will share the same contact details. If this isn't
appropriate add them as individual guests with Insert> Single guest instead.

PerfectTablePlan 3.1.4 103
© 2008 Oryx Digital Ltd
Guests
Title is the guest's title. You can type the title or select it from existing choices in
the drop-down list. Once you have typed it in once, it will be available to select
next time you create a guest in this plan. You can also add standard titles in the
Preferences window.
First name is the guest's first (given) name. You can also add middle names here.
Last name is the guest's last (family) name. For convenience, the last name of the
second guest is set to the same as the last name of the first guest, but you can
change this at any time.
Note The Title, First name and Last name will be automatically capitalised (e.g.
mr john smith
converted to
Mr John Smith
) unless you have disabled this
option in the Preferences window.
Display name is a name that can be used in various views. This could include the
guests' qualification, rank, post-nominal titles and/or role, e.g.
Mr John Smith
Phd, Master of Ceremonies
. PerfectTablePlan will try to construct a sensible
display name from the Title, First name and Last name, but you can change this
at any time.
Gender is the gender of the guest. This can be useful information when assigning
seats. The automatic assignment will endeavour to alternate men and women
where it can (unless you have disabled this in the Preferences window).
PerfectTablePlan will try to set the gender from the Title where it can, but you
can change this at any time.
Age is the age of the guest, adult or child. Typically a child is anyone under the
age of 16. This can be useful information when assigning seats. PerfectTablePlan
will try to set the age from the Title where it can, but you can change this at any
time.
Meal is the meal choice for a guest. You can type the meal choice or select it from
existing choices in the drop-down list. Once you have typed it in once, it will be
available to select next time. If you have a choice of more than one course you
should enter the courses separated by commas, e.g. soup,fish,flan, the Statistics
pane will then show a total for each course separately.
Special req. is any special requirements the guest has, for example: nut allergy,

PerfectTablePlan104
© 2008 Oryx Digital Ltd
elderly or in a wheel chair. Once you have typed it in once, it will be available to
select next time. If there is more than one special requirement they should be
separated by commas, the Statistics pane will then total each separately.
Notes is for any general notes relevant to the guest. This can be used to store
information any other relevant information. Click on Stamp >> to add a time and
date stamped comment to the top of the Notes.
Check VIP if the guest is an important guest, for example a guest of honour or a
member of a wedding party. The automatic assignment will take special care
assigning their seat, trying to assign them to a VIP table if there is one.
Select the RSVP status according to whether an invite has been sent, accepted,
declined or cancelled.
Note You need to scroll down using the scroll bar to fill out all the details for the
other guest in the couple.
All fields are optional, except that each guest must have either a First name or a
Last name.
A couple will automatically be given proximity Next to. You can change this at
any time in the Proximity pane.
Group
Select create new if you wish these guests to be the only member of a new group.
Select add to existing and select a group if you wish these guests to be added to
an existing group.
Name is the name of the group. PerfectTablePlan will try to construct a display
name from the names of the couple, but you can change this at any time.
Notes is for any general notes relevant to the group. This is shared by all member
of the group. Click on Stamp >> to add a time and date stamped comment to the
top of the Notes.
Note You can easily change the group membership of a guest later by dragging
them from one group to another in the Groups pane.
PerfectTablePlan 3.1.4 105
© 2008 Oryx Digital Ltd
Contact
This tab contains contact details for all members of the group. This information is
optional.
Contact data is shared by all members of the group.
Buttons
Click Add to accept the changes and close the window. You will be warned if you
are adding a guest with the same First Name, Last name and Title as an existing
guest (unless you have disabled this warning). Click Cancel to discard the changes.
5.10.17 Insert family window
The Insert family window allows you to enter details for a family with two or
more members. To display this window select Insert> Guest family or the
equivalent Insert tool bar button.
Note Guests added as a family will share the same group notes and contact details.
If this isn't appropriate add them as individual guests with Insert> Single guest
instead.
Guests
Members is the number of members in the family. You can set this to 0 to create
an empty group.
Title is the guest's title. You can type the title or select it from existing choices in
the drop-down list. Once you have typed it in once, it will be available to select
next time you create a guest in this plan. Titles can also be configured in the
Preferences window.
First name is the guest's first (given) name(s).
Last name is the guest's last (family) name(s).
Note The Title, First name and Last name will be automatically capitalised (e.g.
mr john smith
converted to
Mr John Smith
) unless you have disabled this
option in the Preferences window.

PerfectTablePlan106
© 2008 Oryx Digital Ltd
Display name is a name that can include the guests' qualification, rank, post-
nominal titles and/or role, e.g.
Mr John Smith Phd, Master of
Ceremonies
.
See names and titles for more details.
Gender is the gender of the guest. This can be useful information when assigning
seats. The automatic assignment will endeavour to alternate men and women
where it can (unless you have disabled this in the Preferences window).
PerfectTablePlan will try to guess the gender from the Title where it can, but you
can change this at any time.
Age is the age of the guest, adult or child. Typically a child is anyone under the
age of 16. This can be useful information when assigning seats. PerfectTablePlan
will try to set the age from the Title where it can, but you can change this at any
time.
Meal is the meal choice for a guest. You can type the meal choice or select it from
existing choices in the drop-down list. Once you have typed it in once, it will be
available to select next time. If you have a choice of more than one course you
should enter the courses separated by commas, e.g.
soup,fish,flan
, the
Statistics pane will then show a total for each course separately.
Special req. is any special requirements the guest has, for example: nut allergy,
elderly or in a wheel chair. Once you have typed it in once, it will be available to
select next time. If there is more than one special requirement they should be
separated by commas, the Statistics pane will then total each separately.
Notes is for any general notes relevant to the guest. This can be used to store
information any other relevant information. Click on Stamp >> to add a time and
date stamped comment to the top of the Notes.
Check VIP if the guest is an important guest, for example a guest of honour or a
member of a wedding party. The automatic assignment will take special care
assigning their seat, trying to assign them to a VIP table if there is one.
Select the RSVP status according to whether an invite has been sent, accepted,
declined or cancelled.
Note You need to scroll down using the scroll bar to fill out all the details for the
other guests in the family.

PerfectTablePlan 3.1.4 107
© 2008 Oryx Digital Ltd
All fields are optional, except that each guest must have either a First name or a
Last name.
If the first two guests in a family are adults of opposite gender they will
automatically be given proximity Next to each other. The rest of the members
of the family with be given proximity Near to each other. You can change this at
any time in the Proximity pane.
Group
Select create new if you wish these guests to be the only member of a new group.
Select add to existing and select a group if you wish these guests to be added to
an existing group.
Name is the name of the family group. PerfectTablePlan will try to construct a
display name from the names of the family, but you can change this at any time.
Notes is for any general notes relevant to the family group. This is shared by all
member of the family group. Click on Stamp >> to add a time and date stamped
comment to the top of the Notes.
Note You can easily change the group membership of a guest later by dragging
them from one group to another in the Groups pane.
Contact
This tab contains contact details for all members of the family group. This
information is optional.
Contact data is shared by all members of the group.
Buttons
Click Insert guest to add another guest. Click Delete guest to delete the last
guest.
Click Add to accept the changes and close the window. You will be warned if you
are adding a guest with the same First Name, Last name and Title as an existing
guest (unless you have disabled this warning). Click Cancel to discard the changes

PerfectTablePlan108
© 2008 Oryx Digital Ltd
and close the window.
5.10.18 Insert group window
The Insert group window allows you to enter details for a group with two or
more members. This is useful for quickly adding a group of friends or work
colleagues. To display this window select Insert> Guest group or the equivalent
Insert tool bar button.
Note Guests added as a group will share the same group notes and contact details.
If this isn't appropriate add them as individual guests with Insert> Single guest
instead.
Guests
Members is the number of members in the group. You can set this to 0 to create
an empty group.
Title is the guest's title. You can type the title or select it from existing choices in
the drop-down list. Once you have typed it in once, it will be available to select
next time you create a guest in this plan. Titles can also be configured in the
Preferences window.
First name is the guest's first (given) name(s).
Last name is the guest's last (family) name(s).
Note The Title, First name and Last name will be automatically capitalised (e.g.
mr john smith converted to Mr John Smith) unless you have disabled this option in
the Preferences window.
Display name is a name that can include the guests' qualification, rank, post-
nominal titles and/or role, e.g.
Mr John Smith Phd, Master of
Ceremonies
.
See names and titles for more details.
Gender is the gender of the guest. This can be useful information when assigning
seats. The automatic assignment will endeavour to alternate men and women
where it can (unless you have disabled this in the Preferences window).
PerfectTablePlan will try to guess the gender from the Title where it can, but you

PerfectTablePlan 3.1.4 109
© 2008 Oryx Digital Ltd
can change this at any time.
Age is the age of the guest, adult or child. Typically a child is anyone under the
age of 16. This can be useful information when assigning seats. PerfectTablePlan
will try to set the age from the Title where it can, but you can change this at any
time.
Meal is the meal choice for a guest. You can type the meal choice or select it from
existing choices in the drop-down list. Once you have typed it in once, it will be
available to select next time. If you have a choice of more than one course you
should enter the courses separated by commas, e.g. soup,fish,flan, the Statistics
pane will then show a total for each course separately.
Special req. is any special requirements the guest has, for example: nut allergy,
elderly or in a wheel chair. Once you have typed it in once, it will be available to
select next time. If there is more than one special requirement they should be
separated by commas, the Statistics pane will then total each separately.
Notes is for any general notes relevant to the guest. This can be used to store
information any other relevant information. Click on Stamp >> to add a time and
date stamped comment to the top of the Notes.
Check VIP if the guest is an important guest, for example a guest of honour or a
member of a wedding party. The automatic assignment will take special care
assigning their seat, trying to assign them to a VIP table if there is one.
Check Accepted invite if the guest has responded to say that they will definitely
be attending. Leave it unchecked if you aren't sure.
Note You need to scroll down using the scroll bar to fill out all the details for the
other guests in the group.
All fields are optional, except that each guest must have either a First name or a
Last name.
All the members of the group with be given proximity Near to each other. You
can change this at any time in the Proximity pane.
Group
Select create new if you wish these guests to be the only member of a new group.
PerfectTablePlan110
© 2008 Oryx Digital Ltd
Select add to existing and select a group if you wish these guests to be added to
an existing group.
Name is the name of the group. PerfectTablePlan will try to construct a display
name from the members of the group, but you can change this at any time.
Notes is for any general notes relevant to the group. This is shared by all members
of the group. Click on Stamp >> to add a time and date stamped comment to the
top of the Notes.
Note You can easily change the group membership of a guest later by dragging
them from one group to another in the Groups pane.
Contact
This tab contains contact details for all members of the group. This information is
optional.
Contact data is shared by all members of the group.
Buttons
Click Insert guest to add another guest. Click Delete guest to delete the last
guest.
Click Add to accept the changes and close the window. You will be warned if you
are adding a guest with the same First Name, Last name and Title as an existing
guest. Click Cancel to discard the changes and close the window.
5.10.19 Insert guest window
The Insert guest window allows you to enter details for a single guest. To display
this window select Insert> Single guest or the equivalent Insert tool bar button.
Note A single guest is created as the only member of their own group. To add a
guest to an existing group select add to existing in the Group tab.
Guest
Title is the guest's title. You can type the title or select it from existing choices in
PerfectTablePlan 3.1.4 111
© 2008 Oryx Digital Ltd
the drop-down list. Once you have typed it in once, it will be available to select
next time you create a guest in this plan. Titles can also be configured in the
Preferences window.
First name is the guest's first (given) name(s).
Last name is the guest's last (family) name(s).
Note The Title, First name and Last name will be automatically capitalised (e.g.
mr john smith
converted to
Mr John Smith
) unless you have disabled this
option in the Preferences window.
Display name is a name that can include the guests' qualification, rank, post-
nominal titles and/or role, e.g.
Mr John Smith Phd, Master of
Ceremonies
.
See names and titles for more details.
Gender is the gender of the guest. This can be useful information when assigning
seats. The automatic assignment will endeavour to alternate men and women
where it can (unless you have disabled this in the Preferences window).
PerfectTablePlan will try to guess the gender from the Title where it can, but you
can change this at any time.
Age is the age of the guest, adult or child. Typically a child is anyone under the
age of 16. This can be useful information when assigning seats. PerfectTablePlan
will try to set the age from the Title where it can, but you can change this at any
time.
Meal is the meal choice for a guest. You can type the meal choice or select it from
existing choices in the drop-down list. Once you have typed it in once, it will be
available to select next time. If you have a choice of more than one course you
should enter the courses separated by commas, e.g.
soup,fish,flan
, the
Statistics pane will then show a total for each course separately.
Special req. is any special requirements the guest has, for example: nut allergy,
elderly or in a wheel chair. Once you have typed it in once, it will be available to
select next time. If there is more than one special requirement they should be
separated by commas, the Statistics pane will then total each separately.
Notes is for any general notes relevant to the guest. This can be used to store

PerfectTablePlan112
© 2008 Oryx Digital Ltd
information any other relevant information. Click on Stamp >> to add a time and
date stamped comment to the top of the Notes.
Check VIP if the guest is an important guest, for example a guest of honour or a
member of a wedding party. The automatic assignment will take special care
assigning their seat, trying to assign them to a VIP table if there is one.
Select the RSVP status according to whether an invite has been sent, accepted,
declined or cancelled.
All fields are optional, except that a guest must have either a First name or a Last
name.
Group
Select create new if you wish this guest to be the only member of a new group.
Select add to existing and select a group if you wish this guest to be added to an
existing group.
Name is the name of the group. The software will try to construct a display name
from the name of the guest, but you can change this at any time.
Notes is for any general notes relevant to the group. This is shared by all member
of the group. Click on Stamp >> to add a time and date stamped comment to the
top of the Notes.
Note You can easily change the group membership of a guest later by dragging
them from one group to another in the Groups pane.
Contact
This tab contains contact details for the guest. This information is optional.
Buttons
Click Add to accept the changes and close the window. You will be warned if you
are adding a guest with the same First Name, Last name and Title as an existing
guest (unless you have disabled this warning). Click Cancel to discard the changes.

PerfectTablePlan 3.1.4 113
© 2008 Oryx Digital Ltd
5.10.20 Insert guests scratch-pad
The Insert guests scratch-pad window allows to quickly enter guest names in
free text. To display this window select Insert> Guests scratch-pad or the
equivalent Insert tool bar button.
Click on the Titles... button to set-up standard titles in the Preferences window.
This will help PerfectTablePlan make better guesses about how to split the text
correctly into titles, first names and last names and to guess gender.
Enter the names, one guest/couple/family/group per line and click Next. Some
examples of allowed formats are shown in the window.
Click Back to go back and make corrections to the text.
Click OK to add the guests to your plan.
Click Cancel to discard your changes.
5.10.21 Insert shape window
The Insert shape window allows you to add shapes to the Floor plan pane.
These shapes can be useful for representing dance floors, stages, walls and other
floor plan features. To display this window click the Insert shape button at the
top of the Floor plan pane.
Name is the name of the shape (optional).
Click the Font... button to set the font for the name.
Click the Name colour button to set the colour for the shape name text.
Set the Shape drop down list to the desired shape.
Set Angle to the rotation angle of the shape.
Use the Inside colour button to set the colour for the inside of the shape.
Use the Outside colour button to set a colour for the outside of the shape.
Set the Size field(s) to the dimensions of the shape.
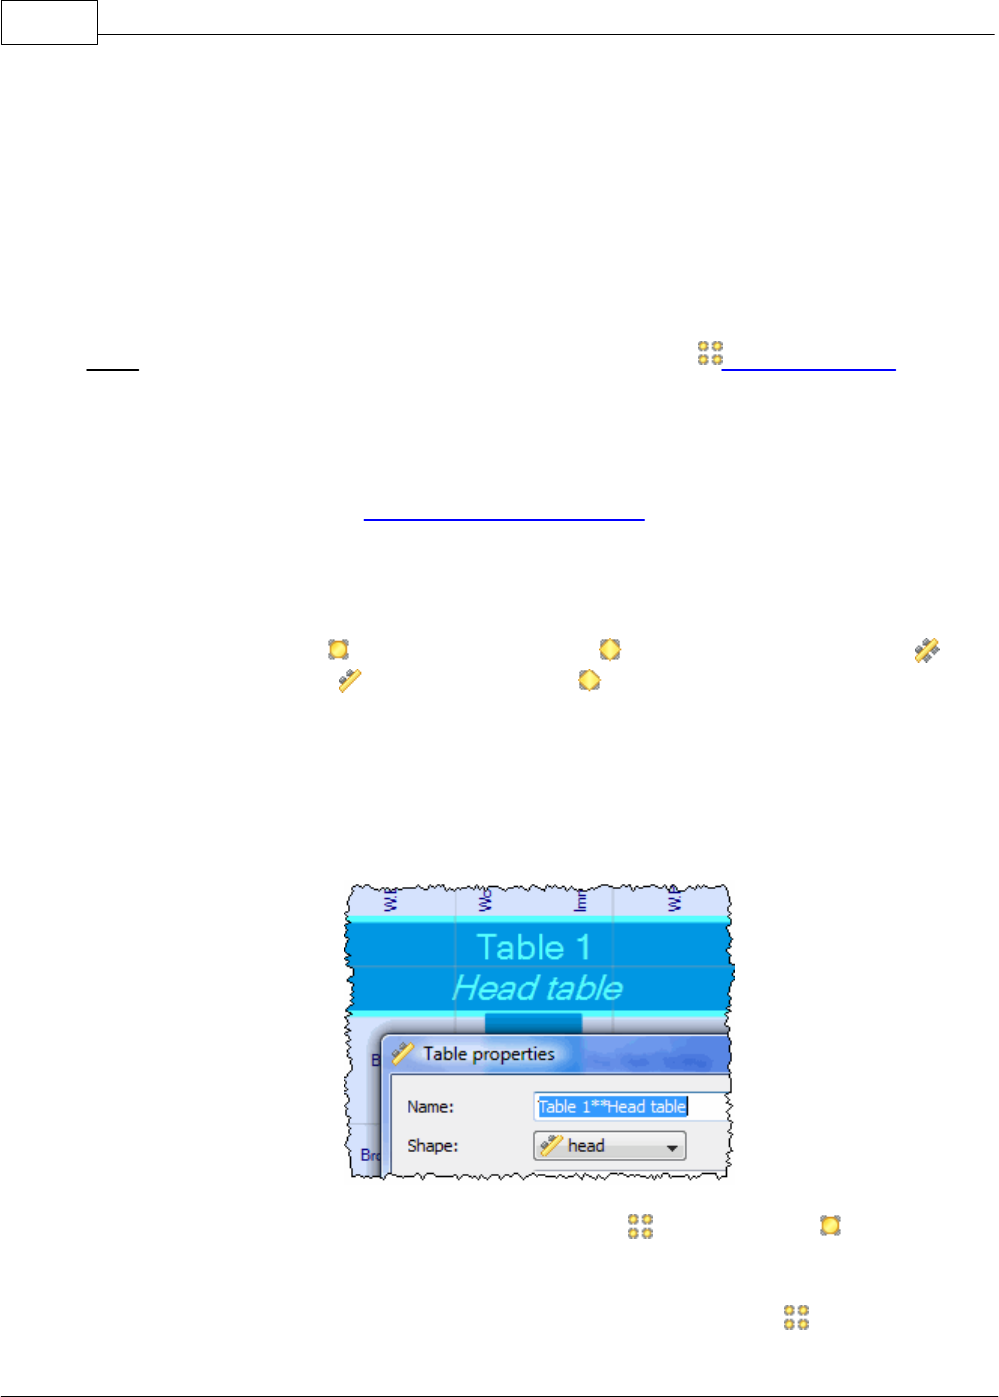
PerfectTablePlan114
© 2008 Oryx Digital Ltd
Set the Units drop-down list to your preferred units.
Notes can be used to store any relevant notes for the shape. Click on Stamp >> to
add a time and date stamped comment to the top of the Notes.
Click Add to accept the changes and close the window. Click Cancel to discard the
changes.
Note The new shape will be placed automatically in the Floor plan pane. It will
attempt to place it in a space near the centre of the room. You can then drag it to
the appropriate position.
You can change any of the shape properties (including the name and shape type)
at a later point using the Shape properties window.
5.10.22 Insert table window
The Insert table window allows you to create one or more tables. To display this
window select Insert> Circular table, Insert> Rectangular table, Insert>
Banquet table, Insert> Head table, Insert> Custom table or the equivalent
Insert tool bar button.
Name is the name of the table. The software will choose a unique name for you,
but the names don't have to be unique and can be blank. To display the table
name as 2 lines, with the second line in italics use a ** separator, for example:
Set Angle to the desired angle of the table in the Floor plan and Table plan
panes.
Click the Colour button to choose the colour of the table in the Floor plan and

PerfectTablePlan 3.1.4 115
© 2008 Oryx Digital Ltd
Table plan panes. This overrides any table colour set for the pane.
Shape is the shape of the table. The available shapes of table are:
Table
Icon
Meaning
Circular
a circular tables with
seats all around it
Rectangular
a rectangular or square
table with the same
number of seats on
opposite sides
Banquet
a long table with seats on
two sides
Head (top)
a long table with seats on
only one side, for
example a head table at a
wedding
Custom
a rectangular or square
table with a potentially
different numbers of
seats on each of the 4
sides
Seats is the number of seats. For a circular or head table you specify the total
number of seats. For a banquet table you specify the number of seats across. For a
rectangular table you specify the number of seats across and the number of seats
down. For a custom table you specify the number of seats on each of the 4 sides.
Note For a square table create a rectangular table and set the number of seats
across and down the same. You can specify a table with no seats for a cake, gift
or serving table - it will not be shown in the Table chart pane.
Size is the size of the table. Check the auto check box to automatically size the

PerfectTablePlan116
© 2008 Oryx Digital Ltd
table according to the number of seats and the seat size (as set in the
Dimensions window). Uncheck the auto check box to set your own table size.
VIP is used to designate tables for VIPs to sit at. The automatic assignment will
attempt to seat VIPs on VIP tables.
Notes can be used to store any relevant notes for the table, e.g. details of table
decorations. Click on Stamp >> to add a time and date stamped comment to the
top of the Notes.
Create can be used to create more than one table at a time. The text alongside
tells you how many seats will be available after the new tables have been created.
Click Add to accept the changes and close the window. Click Cancel to discard the
changes.
Note The new table(s) will be placed automatically in the Floor plan pane. It
will attempt to place them in spaces near the centre of the room. You can then
drag them to the appropriate position.
You can change any of the table properties (including the name and shape) at a
later point using the Table properties window.
5.10.23 Insert text window
The Insert text window allows you to add text to the Floor plan pane. This
text can be used for titles, headers, footer and captions. To display this window
click the Insert text button at the top of the Floor plan pane.
Text is the content of the text.
Set Angle to the rotation angle of the text.
Click the Font... button to set the font for the text.
Use the Colour button to set a colour for the text.
Click Add to accept the changes and close the window. Click Cancel to discard the
changes.
Note The new text will be placed automatically in the Floor plan pane. It will

PerfectTablePlan 3.1.4 117
© 2008 Oryx Digital Ltd
attempt to place it in a space near the centre of the room. You can then drag it to
the appropriate position.
You can change any of the text properties at a later point using the Text
properties window.
5.10.24 Licence window
The Licence window allows you to enter your licence key. To display this
window select Licensing>Licence.
Your licence status is displayed. If the software is unlicensed you will only be able
to save, export or print plans with 30 or less guests.
If you have a licence key type or paste +V it into the Key field. The key will only
be comprised of the number characters 0-9 and the alphabetic characters a-f.
Dash (-) and space characters are optional and are ignored.
Click Purchase licence key to purchase a licence key on-line (an Internet
connection is required).
Click Upgrade V2 to V3 if you have a version 2 key and wish to upgrade to version
3.
Click Subscribe to newsletter to go to a web page where you can subscribe to our
occasional newsletter. The newsletter includes details of new releases of
PerfectTablePlan.
Click troubleshoot licence problems to go to our Frequently Asked Questions web
page.
Click resend licence key to go to our key retrieval page.
Click more details on licensing to go to our licensing web page.
Click OK to enter the licence key. If you have entered a new key you will be
notified of whether the key is valid or not.
Click Cancel to discard the changes.
See also:

PerfectTablePlan118
© 2008 Oryx Digital Ltd
Licensing
5.10.25 Most recently accessed window
The Most recently accessed window is a convenient way to open plans that you
have been recently opened or saved, rather than having to search your computer
for them. To display this window select File> Open recent... or click on the
equivalent Main tool bar button.
Plan files are shown in the order they were last opened/saved (most recent at the
top).
To display this window every time PerfectTablePlan select Show this window from
the At start-up drop-down list. It will only be displayed at start-up if there is at
least one file in the list and a file has not already been loaded (e.g. by double
clicking on a plan file to start PerfectTablePlan).
To open a plan file select it in the list and click the OK button or double click on
the plan file. To close the window without opening a plan click the Cancel button.
5.10.26 Numbers and budget window
The Numbers and budget window allows you to estimate approximate number
of guests attending and costs. To display this window select File>Numbers and
budget or the equivalent Main tool bar button.
Fixed allows you to enter the fixed cost of the event, regardless of the number of
guests, e.g. venue and band hire cost.
Per child allows you to enter the cost of the event per child, e.g. the food and
drink cost per child.
Per adult allows you to enter the cost of the event per adult, e.g. the food and
drink per adult.
Set the Chance of attending to values that you feel reflect the probability of
guests attending, depending on their RSVP status. For example, set Accepted to
95% if you think guests who have accepted their invitation are 95% likely to attend.
The Guests column shows the number of guests for each RSVP status.
PerfectTablePlan 3.1.4 119
© 2008 Oryx Digital Ltd
The Sub total column shows the estimated number of guests attending for each
RSVP status.
Estimated guests is an estimate of the number of guests attending (rounded to the
nearest whole number). For example, if you have 10 guests 0% likely to attend, 10
guests 10% likely to attend, 10 guests 95% likely to attend and 5 guests 100%
likely to attend the estimated number of guests is 16 ( 10 x 0% + 10 x 10% + 10 x
95% + 5 x 100%). Due to rounding the total number of guests may not be the same
as estimated adults + estimated children.
Estimated cost is derived from the cost data provides and the estimated number
of guests.
Obviously the results are only as good as the data you provide.
Note You can easily change guest RSVP status in the Guests pane.
Click OK to accept the changes and close the window. Click Cancel to discard the
changes.
5.10.27 Preferences window
The Preferences window allows you to change the behaviour of the software
according to your preferences. Changes apply to all plans edited by the current
user henceforth, not just the current plan. To display this window select
PerfectTablePlan>Preferences.
General
Check automatically capitalise names to automatically capitalise guests titles,
first names and last names as they are typed (e.g. convert
mr john smith
automatically to
Mr John Smith
).
Check show tool tips to display helpful tool tips when you hover the mouse over
controls and over tables and seats in the Floor plan pane and Table plan pane
.
Check large toolbar icons to display tool bar icons as 32x32 pixels, otherwise they
will be displayed 24x24 pixels.
Check toolbar text to show text under each tool bar icon.

PerfectTablePlan120
© 2008 Oryx Digital Ltd
Check export/copy image as large as possible to make Floor plan or Table
plan images created by exporting or copying to the clipboard as large as possible
(each seat up to 500 pixels across, depending on the amount of memory available).
If this box is unchecked images will be exported/copied as standard size (each seat
up to 100 pixels across, depending on the amount of memory available).
The At start-up drop-down list allows you to choose how to open plan files at
start-up. If you wish to open the most recently accessed plan each time you start
PerfectTablePlan, select Open last plan. If you wish to show the Most recently
accessed window each time you start PerfectTablePlan, select Open 'Most recent'
window. If you wish to start with a new empty plan, select Don't open anything.
Select User interface style according to whether you want to use the newer
'unified' style, with a merged toolbar and titlebar for the Main window. The
'unified' style is only available for MacOSX 10.4 and later.
Standard style
Unified style
Set New table name format according to how you would like new tables to be
named. See below for examples. You can rename the tables at any point using the
Table properties window.
Example table name format
Example table names
Table {next_table_num}
“Table 1”, “Table 2”, “Table 3”
{next_table_num}
“1”, “2” , “3”
PerfectTablePlan 3.1.4 121
© 2008 Oryx Digital Ltd
table
“table” , “table”
Set export/copy image margin to the % margin you want around Floor plan or
Table plan images created by exporting or copying to the clipboard.
Select Floor/Table Plan pane mouse wheel behaviour according to whether you
want the mouse wheel to zoom in, zoom out or scroll down when you move the
mouse wheel backwards in the Floor plan pane and Table plan pane . Hold
down the key while moving the mouse wheel to get the opposite (zoom->scroll,
scroll->zoom) behaviour.
Select Guest/group search according to whether you want to hide non-matching
guests/group or select the first matching guest/group. See Guests pane and
Groups pane for more details.
Select Allow seat assignment with RSVP according to which RSVP statuses you
wish to allow guests to be assigned with. Changing this the selection can cause
guests to be unassigned from their seats if their RSVP status is incompatible with
the new setting.
Auto assignment
Select according to guest proximity if you want to the auto seating to assign
guests according to the proximities set in the Proximity pane. Select randomly
to assign guests to seats completely randomly (this may be useful for some types of
events).
Select seconds if you wish the automatic assignment to stop after the specified
number of seconds. We recommend at least 30 seconds. If you have a lot of guests
or a very slow PC you may have to increase this time considerably.
Select attempts without improvement if you wish the automatic assignment to
stop after a specified number of attempts without improvement. We recommend
you allow at least 10 attempts. If you set this number very high and have a lot of
guests or a very slow PC the automatic assignment may run for a long time.
Select whichever happens first to stop when either of the above criteria is met,
e.g. the automatic assignment has run for x seconds or y attempts without an
improvement.
PerfectTablePlan122
© 2008 Oryx Digital Ltd
Note You can stop the automatic assignment at any time by pressing the Stop
button or the Esc key. This will keep the best assignment so far.
See automatic assignment for a discussion of automatic assignment times.
Check Alternate males and females if you want the automatic assignment to try to
alternate males and females around each table (e.g. M-F-M-F-M-F...).
Titles
Titles that you add here will be available in the guest Title field for all plans. Add
titles appropriate to your usage, for example military ranks, Masonic ranks or non-
English titles.
Note This is intended for titles that come before the name, e.g. Dr, Herr, Colonel
etc. It is not intended for titles that come after the name (post-nominal). These
are best handled by adding them individually to the Display name field in the
Guest properties window.
You can also specify a default gender, age and VIP status. This is used when
inserting new guests. It is also used when importing to set guest gender, age and
VIP status (if not supplied) from their title.
Click Add to add a new title.
Click Delete to delete the selected title(s).
Click Up to move the selected title(s) up one row.
Click Down to move the selected title(s) down one row.
Click Sort to sort the titles alphabetically.
Click Import from plan to import titles from the current plan into the preferences.
Set Default couple to the titles you wish to use as the default when adding a
couple or family.
Back-ups

PerfectTablePlan 3.1.4 123
© 2008 Oryx Digital Ltd
Check when saved to create a back-up file each time you save a plan.
Check on auto-assignment to create a back-up file each time you run an auto-
assignment.
Check automatically every to create a back-up file at the specified time interval.
The plan will only be backed-up if it has been changed during this time.
Warnings
Check warn on delete guest or group to confirm each guest or group deletion.
Check warn on delete table to confirm each table deletion.
Check warn if auto assignment will re-assign guests to confirm each time the
automatic assignment will re-assign unlocked guests to new seats.
Check warn if guests have duplicate names to confirm adding a guest with the
same title, first name and last name as an existing guest.
Check warn if printing stationery to wrong page & size/orientation to warn when
printing stationery if the stationery page size or orientation does not match the
printer settings.
Buttons
Click OK to accept the changes. Click Cancel to discard the changes. Changes to
this window affect all plans.
5.10.28 Print window
The Print window is displayed when you print the front pane in the Top pane.
To display this window select File> Print or the equivalent Main tool bar button.
You can only print the Floor plan, Table plan, Table chart, Guest chart,
Stationery and Statistics panes. The exact controls visible in the window will
depend on the type of pane being printed.
Change the Size spin box to change the size of the print out.
Click Fit to page to set the print size to fit on a single page.

PerfectTablePlan124
© 2008 Oryx Digital Ltd
Check Centre to centre the print on the page(s).
If you are printing across more than one page the Page control will be displayed.
Click on a page or one of the arrows to change the previewed page.
The page navigation control
Click on the button to show additional controls.
Change Horizontal fine adjust and Vertical fine adjust to make small adjustments
to the position of the printout on the page. This can be useful to ensure that
multi-page prints are correctly paginated (e.g. a line of text does not get split by a
page boundary).
Select landscape or portrait to change the orientation of the print out.
Setup shows the current printer settings. Click the Setup button to select a
different printer, page size or set-up using the Print setup window.
You can add titles and footers to the printout in the Table chart and Guest
chart panes. We would really appreciate a mention of www.perfecttableplan.com
in the footer!
See also:
Export to PDF format
5.10.29 Print setup window
The Print setup window allows you to change printer settings. To display the Print
setup window click the Setup... button in the Print window.
Select a printer from the Printer drop-down menu.
Select a preset printer settings from the Presets drop-down menu.

PerfectTablePlan 3.1.4 125
© 2008 Oryx Digital Ltd
Use Copies to set the number of copies you want to print.
Select Preview to change other printer settings, such as the page orientation.
Click on the Print button to return to confirm the change to printer settings and
Cancel to abandon the changes (this button should be named OK, but it is a system
window and we are unable to change it).
See also:
Export to PDF format
5.10.30 Save stationery layout window
The Save stationery layout window allows you to save the layout of stationery
so you can use it again. It appears when you change the stationery layout in the
Stationery Layout window.
Name is the name of the new stationery, e.g. "My address labels".
Manufacturer is the manufacturer of the stationery, e.g. "Office Depot". You can
type or select from the list.
Type is the type of stationery, e.g. "Tent card". You can type or select from the
list.
You need to supply a Name, Manufacturer and Type before you can save the
layout.
Click OK to save the stationery layout and close the window. You will be prompted
before overwriting an existing layout. Click Cancel to discard any changes and
close the window.
5.10.31 Shape properties window
The Shape properties window allows you to show/edit shape properties. To
display this window select a single shape in the Floor plan pane and select Edit>
Properties or the equivalent Main tool bar button.
Name is the name of the shape (optional). You can change it to anything you like.

PerfectTablePlan126
© 2008 Oryx Digital Ltd
Click the Name colour button to set the colour for the shape name text.
Change the Shape drop-down list to change the shape.
Set Angle to the rotation angle of the shape.
Use the Inside colour button to set the colour for the inside of the shape.
Use the Outside colour button to set a colour for the outside of the shape.
Set the Size field(s) to the dimensions of the shape.
Set the Units drop-down list to your preferred units.
Notes can be used to store any relevant notes for the shape. Click on Stamp >> to
add a time and date stamped comment to the top of the Notes.
Click OK to accept the changes and close the window. Click Apply to apply the
changes without closing the window. Click Cancel to discard the changes.
5.10.32 Stationery layout window
The Stationery layout window allows you to change the size of a page and the
items on the page. To display this window click the Stationery layout button in
the Stationery pane.
The Preview tab shows the shape of the page and the size and position of the
stationery items.
The Nomenclature tab shows the meaning of the dimension fields in this window.
Change Units to change between mm and inches.
Click on a Pre-defined stationery type to set the layout accordingly. Use the
Manufacturers, Types and Paper sizes filters to control which pre-defined
stationery are listed.
Type a text into the Search field to find a particular stationery type, e.g. type
J8161 to find Avery J8161 address labels.
Change the Orientation between Portrait and Landscape, depending on how you

PerfectTablePlan 3.1.4 127
© 2008 Oryx Digital Ltd
wish to print the stationery.
Click Centre items to centre the items in the page (i.e. Left margin = Right
margin and Top margin = Bottom margin).
If you create your own layout you will be prompted to save it by the Save
stationery layout window.
Note Right margin and Bottom margin are set automatically based on the other
dimensions.
Click OK accept the changes and close the window. Click Cancel to discard any
changes and close the window.
5.10.33 Table order window
The Table order window allows you to change the order of tables, as they are
displayed in the Table chart pane and Schematic pane. To display this window
click the Table order... button at the top of the Table chart pane.
Select a table and use the Up and Down buttons to change its order.
Click on the Sort button to order tables. The sort is basically alphabetic, but is
intelligent enough to order "table 10" after "table 2". The sort is not case sensitive.
Note You can also change the table order in the Schematic pane by dragging and
dropping tables or by using the and buttons at the top of the pane.
5.10.34 Table properties window
The Table properties window allows you to show/edit table properties. To display
this window select a single table in the Floor plan , Table plan or
Schematic panes and select Edit> Properties or the equivalent Main tool bar
button.
Name is the name of the table. You an change this to anything you like. The name
doesn't have to be unique and can be blank. To display the table name as 2 lines,
with the second line in italics use a ** separator, for example:
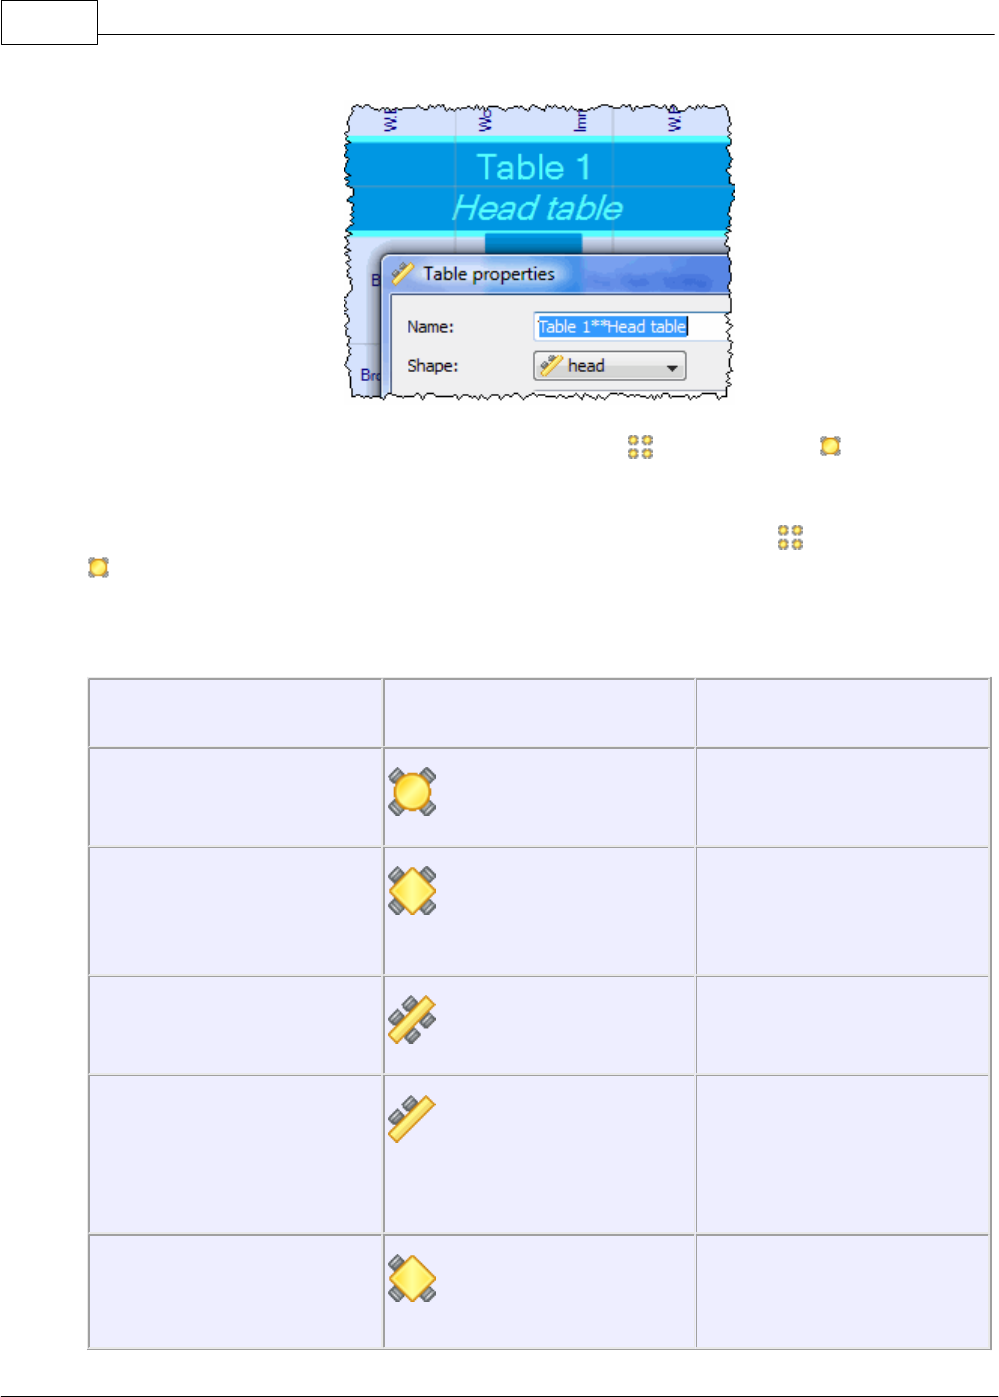
PerfectTablePlan128
© 2008 Oryx Digital Ltd
Set Angle to the desired angle of the table in the Floor plan and Table plan
panes.
Click the colour button to choose the colour of the table in the Floor plan and
Table plan panes. This overrides any table colour set for the pane.
Shape is the shape of the table. The available shapes of table are:
Table
Icon
Meaning
Circular
a circular tables with
seats all around it
Rectangular
a rectangular or square
table with seats on four
sides
Banquet
a long table with seats on
two sides
Head
a long table with seats on
only one side, for
example a head (top)
table at a wedding
Custom
a rectangular or square
table with potentially

PerfectTablePlan 3.1.4 129
© 2008 Oryx Digital Ltd
different numbers of
seats on each of the 4
sides
Seats is the number of seats. For a circular or head table you specify the total
number of seats. For a banquet table you specify the number of seats across. For a
rectangular table you specify the number of seats across and the number of seats
down. For a custom table you specify the number of seats on each of the 4 sides.
Note For a square table create a rectangular table and set the number of seats
across and down the same. You can specify a table with no seats for a cake, gift
or serving table - it will not be shown in the Table chart pane.
Size is the size of the table. Check the auto check box to automatically size the
table according to the number of seats and the seat size (as set in the
Dimensions window). Uncheck the auto check box to set your own table size.
VIP is used to designate tables for VIPs to sit at. The automatic assignment will
attempt to seat VIPs on VIP tables.
Notes can be used to store any relevant notes for the table, e.g. details of table
decorations. Click on Stamp >> to add a time and date stamped comment to the
top of the Notes.
Click on the buttons to display the properties of the first, previous,
next or last table. The tables are ordered in the same sequence as they are in the
Schematic pane.
Click OK to accept the changes and close the window. Click Apply to apply the
changes without closing the window. Click Cancel to discard the changes.
5.10.35 Text properties window
The Text properties window allows you to show/edit text properties. To display
this window select a single text item in the Floor plan pane and select Edit>
Properties or the equivalent Main tool bar button.
Text is the content of the text.
Set Angle to the rotation angle of the text.
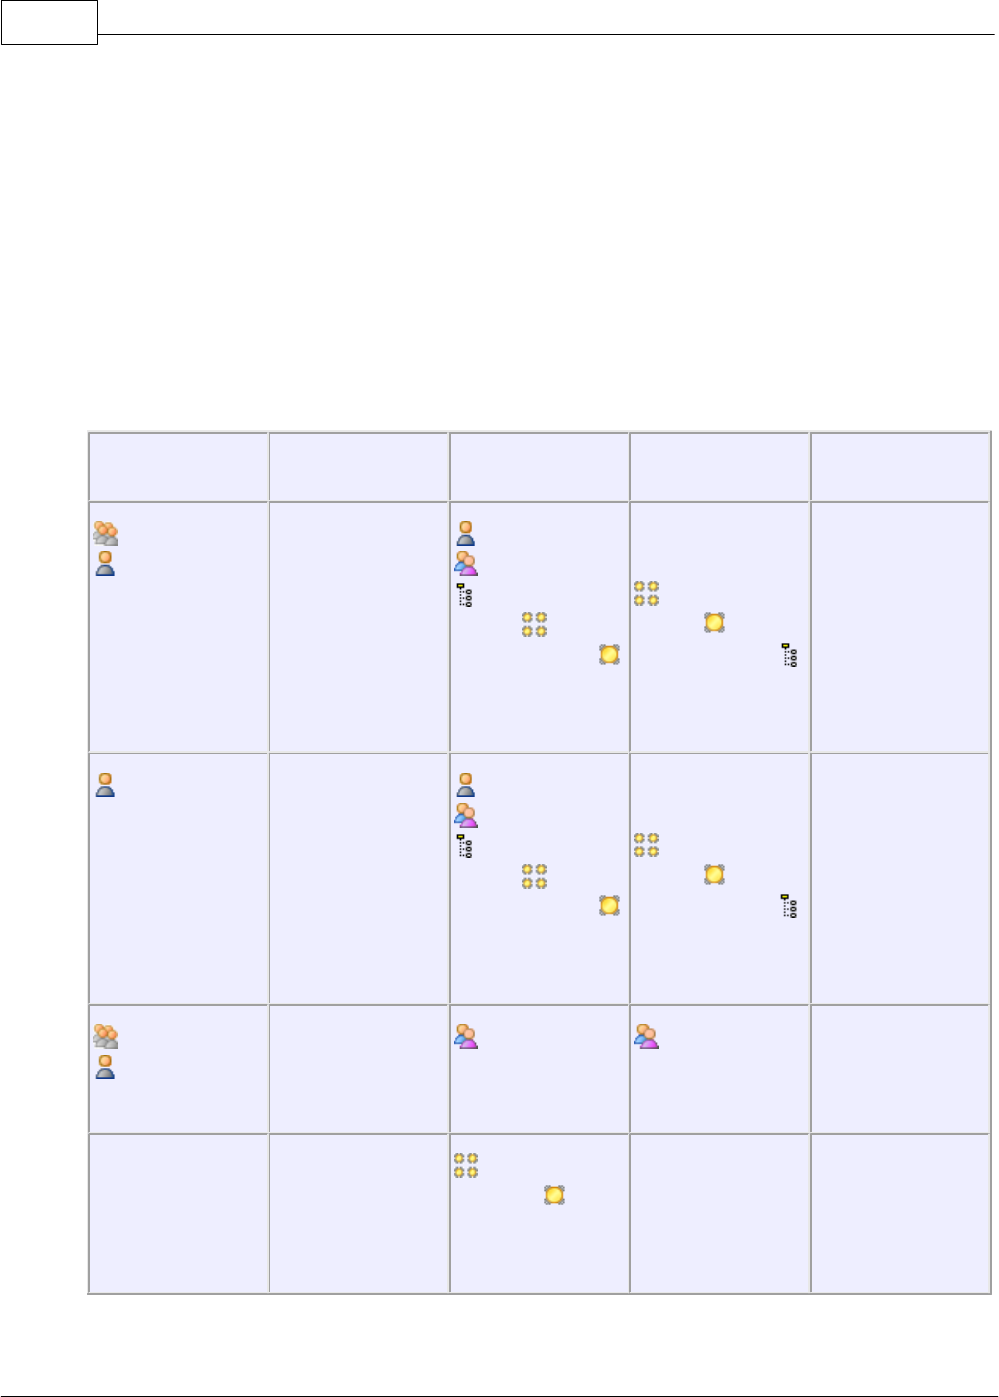
PerfectTablePlan130
© 2008 Oryx Digital Ltd
Click the Font... button to set the font for the text.
Use the Colour button to set a colour for the text.
Click OK to accept the changes and close the window. Click Apply to apply the
changes without closing the window. Click Cancel to discard the changes.
5.11 Drag and drop
The following drag and drop operations are supported:
Item
Modifier key
From
To
Result
group(s) or
guest(s)
none
Guests pane,
Groups pane,
Schematic
pane, Floor
Plan pane or
Table Plan
pane
seat, table or
background in
Floor plan
pane, Table
Plan pane or
Schematic
pane
guest(s) (re)
assigned/
unassigned
guest(s)
Shift
Guests pane,
Groups pane,
Schematic
pane, Floor
plan pane or
Table plan
pane
seat, table or
background in
Floor plan
pane, Table
plan pane or
Schematic
pane
all members of
group(s) (re)
assigned/
unassigned
group(s) or
guest(s)
none
Groups pane
Groups pane
group
membership
changed
background
none
Floor plan
pane or
Table plan
pane
different
position
scrolls

PerfectTablePlan 3.1.4 131
© 2008 Oryx Digital Ltd
table
none
Floor plan
pane
Floor plan
pane
table moved
table
none
Schematic
pane
Schematic
pane
table order
changed
plan (.tp)
file
none
operating
system
Guests or
Groups pane
open plan
vCard (.vcf)
file
none
operating
system
Guests or
Groups pane
import vCard
text/CSV
file
none
operating
system
Guests or
Groups pane
import text/
CSV file
group(s) or
guest(s)
none
Guests pane,
Groups pane,
Schematic
pane, Floor
plan pane or
Table plan
pane
operating
system or other
application
export vCard
6 Importing
6.1 Importing
If you already have guest details (for example in an email or organiser address
book, spreadsheet or text file) you can import the data directly into
PerfectTablePlan, rather than re-typing it.
PerfectTablePlan can import information in 3 major formats:
·
Excel CSV (Comma Separated Value ) - A text file that can be produced by Excel
(select File>Save as and choose .csv as the file type). Columns and rows are
delimited by commas and carriage returns, respectively. " and , characters are
quoted.

PerfectTablePlan132
© 2008 Oryx Digital Ltd
·
Delimited text data - A text file with the user's choice of delimiters (separators).
Many applications can produce data in this form. Excel CSV is a special form of
delimited text data.
·
vCard file - vCard files be exported from most applications with address books,
including Outlook, Palm Pilot desktop and Apple Address Book.
As a simpler alternative to importing you can also use the Insert guests scratch-
pad window.
Note PerfectTablePlan cannot import table, seating or proximity data, as there is
no established format for such data.
See also:
Import window
Importing guests from vCard files
Importing guests from text and Excel CSV files
6.2 Importing guests from vCard files
PerfectTablePlan can import guest information from vCard files. Many types of
application can export contact information in vCard format, including personal
organiser and email packages such as Apple AddressBook.
To import guest information from a vCard file:
·
drag the vCard(s) files (extension .vcf) onto the Guests pane or Groups pane
; or
·
select File> Import, choose vCard file and click OK. Select the vCard file to
import and click Open
In some application (such as Apple AddressBook) you can even drag vCards direct
from the application into the Guests or Groups pane.
PerfectTablePlan will attempt to preserve groups defined in the vCard. Guests in
the same group will have their proximity set to 'near to'.

PerfectTablePlan 3.1.4 133
© 2008 Oryx Digital Ltd
To change the group and proximity of imported guests:
1. bring the Groups pane to the front
2. drag and drop couples/families/groups into the same group (you can rename the
group if required)
3. right click on each group and set the appropriate proximity
4. delete the empty groups
See also:
Import guests tutorial
Import guest details from the Apple Address Book
6.3 Importing guests from text and Excel CSV files
Many types of application can export data as text files, for example Excel can
export CSV (comma separated value) files. PerfectTablePlan can import guest and
group information from these files.
To import a text/CSV file either:
·
drag the file onto the Guests pane or Groups pane; or
·
select File> Import, choose text/CSV file, click OK and select a file to import
The Import data window will appear. For more information see Import data
window and the Import guests tutorial.
See also:
Import guest details from an Excel spreadsheet
Import guest details from Outlook
Import guest details from Outlook Express
Insert guests scratch-pad window

PerfectTablePlan134
© 2008 Oryx Digital Ltd
7 Names and titles
7.1 Names and titles
Title is the guest's title (e.g.
Mr
) or rank (e.g.
Captain
). You can configure titles
in the Preferences window - this can be particularly useful for military ranks,
Masonic titles etc.
First name is the guest's first (given) name. You can also add middle names here or
use initials, if you prefer.
Last name is the guest's last (family) name. If you don't know the name of your
guest you can give them a generic name, e.g. set Last name to 'guest of John
Smith' or 'Acme Ltd employee' and then fill the name in when you know it.
Note The Title, First name and Last name will be automatically capitalised (e.g.
mr john smith
converted to
Mr John Smith
) unless you have disabled this
option in the Preferences window.
Display name can include the guests' qualification, rank, post-nominal titles and/
or role, e.g.
Mr John Smith Phd, Master of Ceremonies
. PerfectTablePlan
will try to construct a sensible display name from the Title, First name and Last
name, but you can change this at any time.
A standard convention for displaying names is to display the guests's name and title
on the first line, followed by their role in italics on the second line. You can do
this in PerfectTablePlan by using ** in the Display name field to separate the two
lines. For example:
The substitution fields {guest_display_name**1} and {guest_display_name**2}
can be used to display the parts of the Display name field before and after the **
separately in the Stationery pane.

PerfectTablePlan 3.1.4 135
© 2008 Oryx Digital Ltd
8 Groups
8.1 Groups
Every guest belongs to a group, even if they are the only member of the group,
and each group has a single set of contact details. We therefore recommend that
guests are grouped according to their address, e.g. by family or work-place. You
can easily reassign guests between groups by dragging them to another group in
the Groups pane or using Edit>Change group....
You can drag a whole group to the Floor plan, Table plan or Schematic
panes by either:
·
dragging a group from the Groups pane; or
·
holding down the Shift key and dragging a guest from that group from the
Guests, Groups, Floor plan, Table plan or Schematic panes
Whether guests should sit together is determined by the proximities set in the
Proximity pane and not by group. This gives you the flexibility to use the
automatic assignment to separate members of a group (e.g. if you don't want to sit
couples and work colleagues next to each other). However couples, families and
groups are set to sit next to or near to each other by default.
You can easily see where different members of a group are sat by click on the
Groups button in the Floor plan pane.
Different groups are shown in different colours for up to 100 groups - the colours
are selected automatically.
9 RSVP status
9.1 RSVP status
RSVP stands for "Répondez s'il vous plaît", French for "Respond please".

PerfectTablePlan136
© 2008 Oryx Digital Ltd
PerfectTablePlan allows you to track RSVP status for each guest.
RSVP status
Description
Unset
No RSVP status has been
set.
Sent
An RSVP has been sent, a
reply is awaited.
Accepted
The guest has accepted
their invitation and will
attend.
Declined
The guest has declined
their invitation and will
not attend.
Cancelled
The guest originally
accepted and later
declined.
You can (re)set the RSVP status in a number of ways, including selecting one or
more guests or groups in the Guests or Groups pane and selecting Edit>RSVP.
Whether you can assign a guest to a seat depends on their RSVP status and the
settings in the Preferences window.
You can show the RSVP status of guests in most panes, for example by clicking on
the button at the top of the Floor plan pane.
You can see a summary of the RSVPs in the Statistics pane. You can estimate
guest number and budget from RSVP status in the Numbers and budget window.

PerfectTablePlan 3.1.4 137
© 2008 Oryx Digital Ltd
10 Seat assignment
10.1 Seat assignment
Guests can be assigned to seats by:
·
automatic seat assignment; and/or
·
dragging and dropping guests or groups onto seats
The automatic seat assignment takes account of any proximities you have set to
create a harmonious seating plan (unless you have set it to random in the
Preferences window). To get the best results it is usually advisable to use the
automatic seat assignment and then fine-tune with drag and drop.
Note If you drop a guest onto a seat that is already assigned to a guest, the seats
of the two guests will be swapped.
Locking guests
If you wish to lock a guest to a seat, so they can't be re-assigned by drag and
drop or automatic seat assignment:
·
select the guest(s)/group(s)/table(s)
·
select Edit>Locked
Toggle the lock off in the same way.
Note You can lock a guest who has no seat assigned.
RSVP status and assigning
Generally you won't want guests who have cancelled or declined their invitations
to be assigned a seat. You can control which RSVP status guests are allowed to be
assigned to seats in the Preferences window.
Assigning to tables (not seats)
If you wish to assign guests to tables, rather than seats, you should still assign still
assign seats but not include seat numbers in your final table chart, guest chart or

PerfectTablePlan138
© 2008 Oryx Digital Ltd
stationery.
Unassigning
To unassign guests from seats:
·
select the guest(s)/group(s)
·
select Edit>Unassign
You can also drag a guest from their seat and drop them on the Floor plan or
Table plan pane background to unassign them.
10.2 Automatic seat assignment
PerfectTablePlan will do an automatic seat assignment if you select File> Auto
assign seats or the equivalent Main tool bar button.
Unless you have set it to assign seats randomly (in the Preferences window) the
automatic assignment will attempt to:
·
put people near to or not near to each other, according to your settings in the
Proximity pane
·
not leave people on their own
·
alternate males and females (unless you have unselected this in the Preferences
window )
·
assign VIP guests to VIP tables
·
prioritise VIP guests
Note The automatic assignment may try to put 2 'near to' proximity guests next to
each other if no 'next to' proximity guests are available.
It does this by assigning a score to each plan and using a genetic algorithm to try
to find the highest scoring plan. you can check you have enough seats by looking at
the Status bar.
You can run File> Auto assign seats as often as you like. Click on the Stop button

PerfectTablePlan 3.1.4 139
© 2008 Oryx Digital Ltd
at any time during calculation to keep the best (highest scoring) plan so far.
Select Edit> Undo to go back to the previous plan.
Note Guests who have been locked by you will not be (re)assigned by the
automatic assignment.
Scoring
A plan is scored as follows:
Criterion
Score
Next to proximity guests next to each
other
+20
Near to proximity guests next to each
other
+5
Not next to proximity guests next to
each other
-10
Not near to proximity guests next to
each other
-40
Next to proximity guests on same
table
+10
Near to proximity guests on same
table
+2
Not next to proximity guests on same
table
-5
Not near to proximity guests on same
table
-20

PerfectTablePlan140
© 2008 Oryx Digital Ltd
Male next to female
+2 (0 if you have disabled this in the
Preferences window)
VIP guest assigned to VIP table
+10
VIP guest not assigned to VIP table (if
there is one)
-10
Guest with no-one sat next to them
-9
Guest not assigned a seat when (apart
from locked guests and guests who
aren't seated due to their RSVP status)
-100
In addition VIP scores are multiplied by 3.
The scoring simply takes account of whether guests are sat next to or on the same
table as other guests. It doesn't allow for whether the guests might be able to see
each other or be within talking distance. This simplification allows the genetic
algorithm to search the vast space of possible solutions reasonably quickly. You
may have to tweak the automatic assignment a little 'by hand' to get the best
possible result. For example you might have to move/rotate tables so that people
who don't like each other aren't sat back to back. However you should find that the
automatic assignment will be quite close to ideal, and this will save you a great
deal of time.
Time
You can set the stopping criteria for the automatic assignment in the
Preferences window. The automatic assignment time goes up rapidly with the
number of guests. This is in the nature of combinatorial problems.
The longer the automatic assignment is run, generally the better it will be. Select
Edit> Preferences and on the Auto assignment tab click on seconds and set an
appropriate number of seconds (1 hour = 3600 seconds). Then select File> Auto
assign seats.
Note if you have a single core/processor PC you won't be able to do much else on

PerfectTablePlan 3.1.4 141
© 2008 Oryx Digital Ltd
your computer while the automatic assignment is running, as it will try to use all
the power of the processor.
10.3 Genetic algorithm
You don't need to know how a genetic algorithm works to use PerfectTablePlan.
This section is just included in case you are interested.
It isn't possible to try every combination of guests and seats, because there are so
many. Even just 25 guests can be assigned to 25 seats in a staggering
15,511,210,043,330,985,984,000,000 different ways. So we have to find an
efficient way to search though the possible assignments to find a good one in a
reasonable time. PerfectTablePlan does this using a 'genetic algorithm'.
A genetic algorithm works my mimicking the Darwinian process of natural selection
over successive generations:
1. An initial population of assignments is created using various rules of thumb
('heuristics').
2. The assignments are randomly mutated and spliced to produce new layouts.
3. Weak assignments (those with low scores) are eliminated from the population.
4. If the best assignment isn't satisfactory go to step 2.
Because of the way a genetic algorithm works, it cannot be guaranteed to give a
mathematically optimal answer - sometimes you can spot ways to improve the
assignment score with simple drag and drop. But if we were to use an approach
that was guaranteed to give a mathematically optimal answer, it might take years
to run! The PerfectTablePlan genetic algorithm will usually get close to an optimal
solution in a reasonable time.
Problem size
The number of combinations for seating n guests in n seats is n! ( n factorial). 3! is
3x2x1. 10! is 10x9x8x7x6x5x4x3x2x1. This means that the difficulty of the problem
rises very rapidly with the number of guests. For example:
25! = 15511210043330985984000000

PerfectTablePlan142
© 2008 Oryx Digital Ltd
50! = 30414093201713378043612608166064768844377641568960512000000000000
100! =
933262154439441526816992388562667004907159682643816214685929638952175999
932299156089414639761565182862536979208272237582511852109168640000000000
00000000000000
200! =
788657867364790503552363213932185062295135977687173263294742533244359449
963403342920304284011984623904177212138919638830257642790242637105061926
624952829931113462857270763317237396988943922445621451664240254033291864
131227428294853277524242407573903240321257405579568660226031904170324062
351700858796178922222789623703897374720000000000000000000000000000000000
000000000000000
So don't be surprised if PerfectTablePlan takes a while to do an automatic
assignment for 1000+ guests.
11 Copying to the clipboard
11.1 Copying to the clipboard
You can copy the contents of the Floor plan, Table plan, Table chart,
Guest chart and Statistics panes to the clipboard for pasting into other
applications (such as Microsoft Word). Bring the appropriate pane to the front of
the Top pane and select Edit> Copy or the equivalent Main tool bar button.
The Floor plan and Table plan will be copied to the clipboard as an image.
Note If you want a larger image check export/copy image as large as possible in
the Preferences window.
The Table chart, Guest chart and Statistics panes will be copied to the
clipboard as both plain text (no formatting) and HTML (some formatting). Which
one is used will depend on the capabilities of the application you paste into, for
example Word will use HTML and Notepad will use plain text.
Note that font size is not preserved when you copy a Table chart or Guest
chart as HTML, as there is no reliable way to map between point size and HTML
font size. You should be able to reset the font size easily enough in the other
application. The chart layout can look cramped if the chart is too big for the page
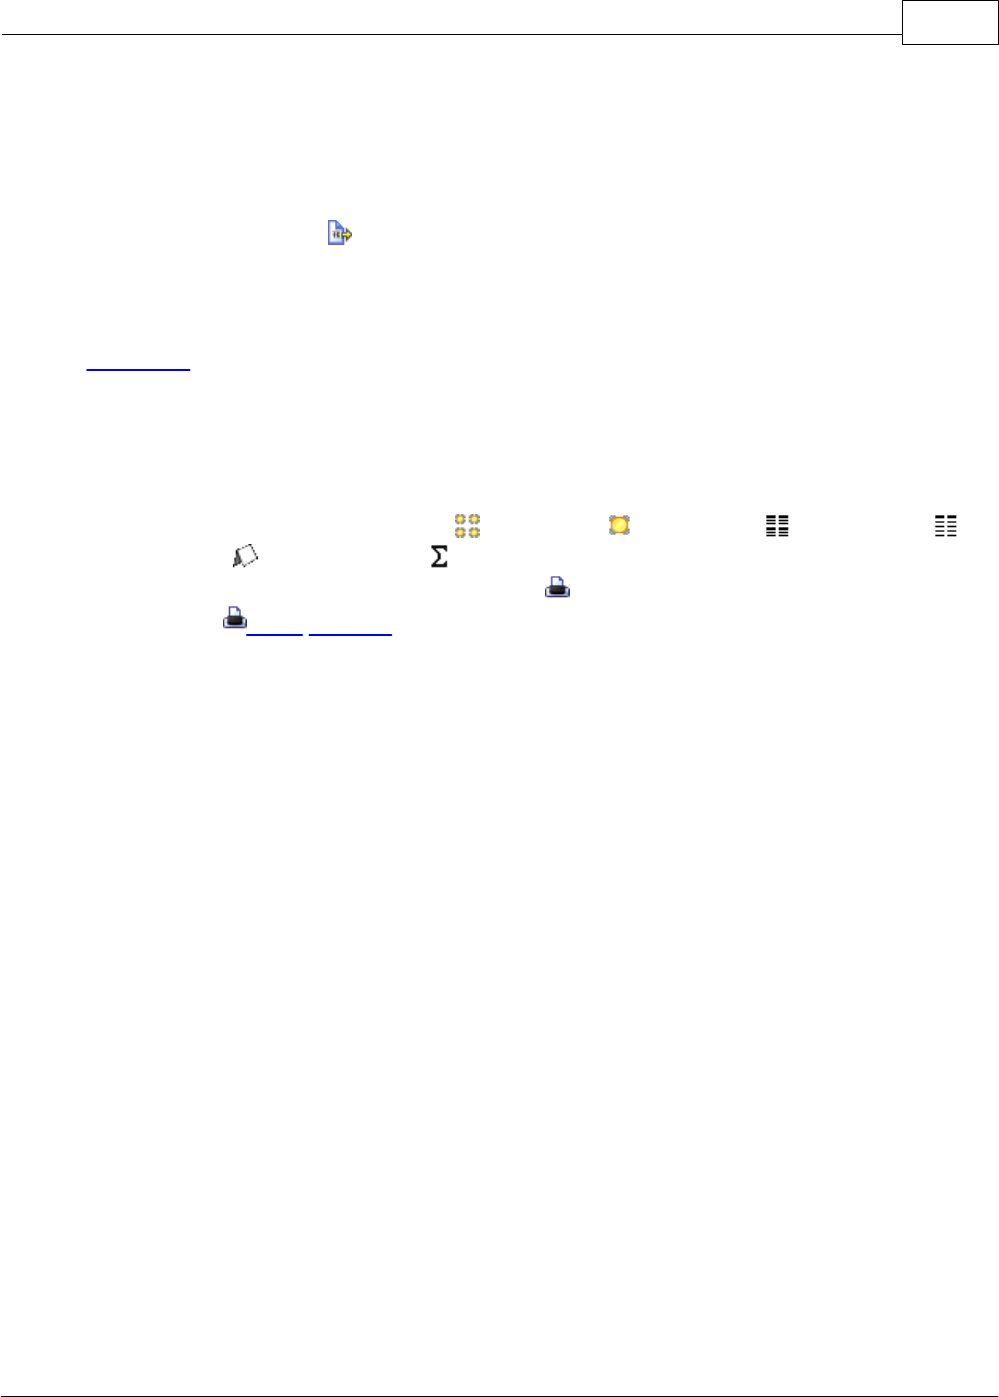
PerfectTablePlan 3.1.4 143
© 2008 Oryx Digital Ltd
you paste it into. You may be able to fix this by reducing the font size, changing
the page orientation to landscape and/or reducing the number of columns in the
chart.
You can also use File> Export to transfer data to other applications via a file.
See also:
Exporting
12 Printing
12.1 Printing
You can print the contents of the Floor plan, Table plan, Table chart,
Guest chart, Stationery and Statistics panes. Bring the appropriate pane to
the front of the Top pane and select File> Print or the equivalent Main tool bar
button. The Print window will appear.

PerfectTablePlan144
© 2008 Oryx Digital Ltd
The controls displayed will depend on the pane that you are printing.
If you only have a standard size (e.g. A4) printer you might find that text on the
Floor plan pane isn't very legible when printed to a single A4 sheet. You may have
to span multiple sheets or print it on a larger format printer. See printing legible
plans on a small format printer.
You can also copy or export your floor plan, table chart or guest chart to other
applications, and print them from there, by using Edit> Copy or File> Export.
We would really appreciate a mention of www.perfecttableplan.com in the footer!

PerfectTablePlan 3.1.4 145
© 2008 Oryx Digital Ltd
See also:
Print window
Print setup window
12.2 Stationery
In addition to floor plans, table charts and guest charts PerfectTablePlan can print
various types of stationery, including:
·
save the date cards
·
invitations
·
address labels
·
place cards
·
table cards
·
escort cards
·
badges
·
personalised wine bottle labels and menus
·
thank you cards
You can easily personalise the stationery for each guest, group or table using
substitution text. For example, if you wish to add the display name and seat
number of each guest to a place card you just add the substitution text
{guest_display_name}
and
{guest_seat}
to your design. This text will then
be replaced by the appropriate values for each guest.
See also:
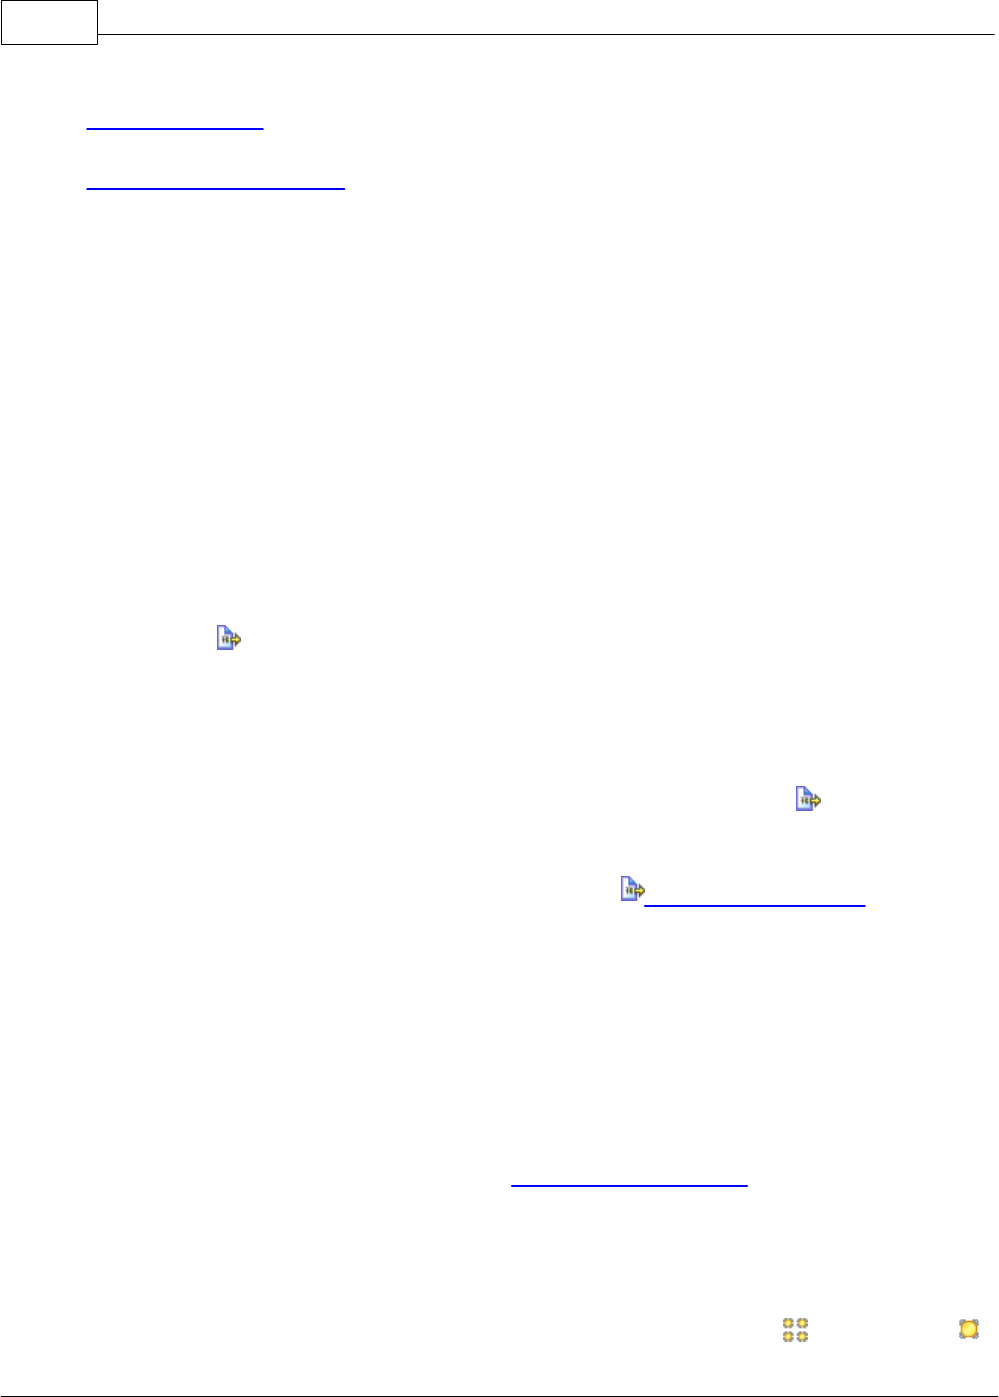
PerfectTablePlan146
© 2008 Oryx Digital Ltd
Stationery pane
Print stationery tutorial
13 Emailing
13.1 Emailing
This feature is not available on the Macintosh as there is no standard
programmatic way of creating an email with an attachment.
14 Exporting
14.1 Exporting
Data in PerfectTablePlan can be exported in a variety of formats for use in other
applications, such as image editors, spreadsheets and wordprocessors.
Select File> Export... to display the Export window.
data
Select guest and seating data to text/CSV file to export data in a flexible, text
form for import by other applications, such as spreadsheets. The Export data
window will appear. This window allows you to specify which guest properties to
export and what file format to use. For export to a spreadsheet or database you
would typically export an Excel CSV file. See the Export data window page for
more details.
vCard file
Select guest data to vCard file to export guest data in a form that can be
imported into most applications with address books, including Outlook, Palm Pilot
desktop and Apple Address Book. The Export vCard window will appear. This
window allows you to specify which guests to export and whether to export each
guest to a separate vCard file. See the Export vCard window page for more
details.
image
Select floor plan to image or table plan to image to export the Floor plan or

PerfectTablePlan 3.1.4 147
© 2008 Oryx Digital Ltd
Table plan pane as an raster or vector image file. You can choose to export in PDF
(vector) or PNG, JPEG, BMP (raster) formats by changing the Save as type field.
PDF format gives the best quality when you need to enlarge an image. PNG is a
good compromise between size and quality. JPEG files are small, but are of lower
quality. BMP files can be very large and are not usually recommended. To export a
BMP, JPEG or PNG image as large as possible check export/copy image as large as
possible in the Preferences window.
Usage
Recommended format
Printing to poster size
PDF
Outputting to an image for modification
in Photoshop/PaintShop/Paint
PNG
Sending an image by email
JPEG
text
Select table chart to text/CSV/HTML, guest chart to text/CSV/HTML or statistics
to text/CSV/HTML to export the appropriate pane as text. You can choose to
export in Excel CSV, plain text or HTML format by changing the Save as type field
in the Export chart window.
HTML retains some of the formatting, but not the font size as there is no direct
way to translate point size into HTML. You should be able to reset the font size
easily enough in the other application. Also the chart layout can look cramped if
the chart is too big for the other application. You may be able to fix this by
reducing the font size, changing the page orientation to landscape and/or reducing
the number of columns in the chart.
See also:
Export formats
Export window

PerfectTablePlan148
© 2008 Oryx Digital Ltd
Export data window
Export VCard window
Export to PDF format
Copying to the clipboard
14.2 Export formats
PerfectTablePlan exports information in 7 major forms:
·
Excel CSV (Comma Separated Value ) - A text file readable by Microsoft Excel.
Columns and rows are delimited (separated) by commas and carriage returns,
respectively. " and , characters are quoted.
·
Delimited text data - A text file with the user's choice of delimiters. Useful for
importing into a wide range of applications. Excel CSV is a special form of
delimited text data.
·
vCard file - vCard files be imported into most applications with address books,
including Outlook, Palm Pilot desktop and Apple Address Book.
·
Raster image (e.g. .PNG, .JPG and .BMP) - An image described as a 2 dimension
array of coloured cells (pixels) that can be read by many graphics packages, such
as Photoshop and Microsoft Paint.
·
Vector image (e.g. PDF) - An image described in terms of primitive shapes, e.g.
a circle of a given radius and position, that can be read by some drawing
packages such as Adobe Acrobat.
·
HTML text (e.g. .HTML) - A textual representation with layout and formatting
that can be read into a web browser, such as Internet Explorer, Mozilla Firebird
or Safari. Many wordprocessors, such as Microsoft Word, can also read HTML.
·
plain text (e.g. .TXT) - A textual representation without layout and formatting
that can be read into a wide range of applications.
Different formats are useful for different things. However there are important
things to bear in mind when deciding whether to use raster or vector images:

PerfectTablePlan 3.1.4 149
© 2008 Oryx Digital Ltd
·
Raster images can degrade when resized, for example when printed to poster
size. Vector images can normally be resized without problems.
·
Raster images are much harder to edit than vector images, because a table is
drawn as an array of many separate cells rather than a circle or a rectangle.
·
Vector image formats are less widely supported than raster formats and can
therefore be harder to print or modify.
15 Back-up files
15.1 Back-up files
There are many ways you can lose your work on a computer including: power
outages; hardware failure; human error; and software errors. To guard against this
PerfectTablePlan can create back-ups of your plan files. This saves you from
continually saving to a new name file, e.g. plan1.tp, plan2.tp etc.
Depending on the choices in the Preferences window the software can create
automatic back-ups of the software:
·
every time you File> Save the plan
·
every time you do an auto-assignment
·
every n minutes (assuming the plan has been changed in that n minutes)
Note Plans with more than 30 guests will only be backed up if you have purchased
a licence key.
Backup files are created in a 'backup' folder in your plans folder. These back-ups
are created with the extension .tpb (Table Plan Backup) and include a time and
date stamp. For example, if you save myplan.tp at 17:42:05 on 11th February 2005
it will create a backup file
myplan_2005-02-11T17-42-05.tpb
. If some
problem occurs with
myplan.tp
(or you just want to compare it with the older
version) you can open
myplan_2005-02-11T17-42-05.tpb
and File>Save as it
as a new .tp file.
To open a back-up file:

PerfectTablePlan150
© 2008 Oryx Digital Ltd
·
select File> Open or the equivalent Main tool bar button, the Open window
will appear
·
select Table planner backup Table planner backup in the Enable drop-down.
·
navigate to the folder containing the backup files, usually:
~\Documents\tableplans\backups
·
select the back-up file you want and click the Open button
Note Any number of back-up files on your harddisk will be useless if your harddisk
dies. Make sure you back up to separate storage devices.
16 Creating a good table plan
16.1 Creating a good table plan
For an up-to-date list of tips on how to create a good table plan see our tips web
page.
17 Multiple user access
17.1 Mutliple user access
If you are using PerfectTablePlan across a network (e.g. 2 or more users accessing
the same file on a shared disk) you need to be careful that users don't overwrite
each other's changes.
File locking is not currently available on MacOSX.
18 Frequently asked questions
18.1 Frequently asked questions
For an up-to-date list of frequently asked questions see our wwww.
perfecttableplan.com FAQ page.

PerfectTablePlan 3.1.4 151
© 2008 Oryx Digital Ltd
19 Integrating PerfectTablePlan
19.1 Integrating PerfectTablePlan
You may wish to use PerfectTablePlan to create a table plan from data produced
by another software package, for example an event registration system. There are
two ways you can do this.
Integrate via text/CSV file
If your software package can create a delimited text file (e.g. CSV file) you can
output this and import it into PerfectTablePlan. If you are able to script/program
the package you can get it to start PerfectTablePlan with the input file from the
command line.
For example to start up importing the file export.csv using the predefine 'theknot.
com' mapping :
/Applications/PerfectTablePlan.app/Contents/MacOS/
PerfectTablePlan -import export.csv -import_type theknot
Please email [email protected] if you are interested in us adding a
mapping for your import file format.
Integrate via XML file
The above approach is sufficient for most needs, however it only allows you to
supply guest details, not details of tables or seating. If you need to do this you can
generate your own PerfectTablePlan plan file and start PerfectTablePlan to open
it.
For example to start up PerfectTablePlan and open a myplan.tp file:
/Applications/PerfectTablePlan.app/Contents/MacOS/
PerfectTablePlan myplan.tp
PerfectTablePlan plan (.tp) files are in a simple text/XML format. Please email
[email protected] if you need help with the format.
19.2 Command line arguments
PerfectTablePlan recognises the following command line syntax:
argument
Comments
Example

PerfectTablePlan152
© 2008 Oryx Digital Ltd
<plan file>
The location of the .tp file
to load at start-up.
myplan.tp
-import <import file>
The location of the data
file to import on start-up.
-import import.csv
-import_type <import
type>
A pre-defined import file
type. PerfectTablePlan
will look through the list
of pre-defined types until
it finds one that contains
the string passed in. For
example
-import_type
evite
will match the
pre-define type "evite.
com export". This
argument is ignored if
-
import
is not specified.
-import_type evite
See also:
Integrating PerfectTablePlan
19.3 PerfectTablePlan file format
PerfectTablePlan plan (.tp) files are stored as text in an XML format.
The format is fairly straightforward and you should be able to work out most of the
details by creating a few .tp files from PerfectTablePlan and examining them. A
few important points are noted below.
Indexing
Where different records in the XML reference each other they do so by numerical
indexes starting from 0.
<version>
For PerfectTablePlan v3.1.0 you should set the version to 6, e.g.:
<version value="6" />

PerfectTablePlan 3.1.4 153
© 2008 Oryx Digital Ltd
<guests>..</guests>
This section contains details of all the guests.
The guest group attribute is the index of the corresponding group record.
The meaning of the accepted attribute is given below:
Accepted attribute
Meaning
0
Unset
1
Accepted
2
Sent
3
Declined
4
Cancelled
<groups>..</groups>
This section contains details of all the groups.
<tables>..</tables>
This section contains details of all the tables.
The meaning of the shape attribute is given below:
Shape attribute
Meaning
0
Circular
1
Rectangular
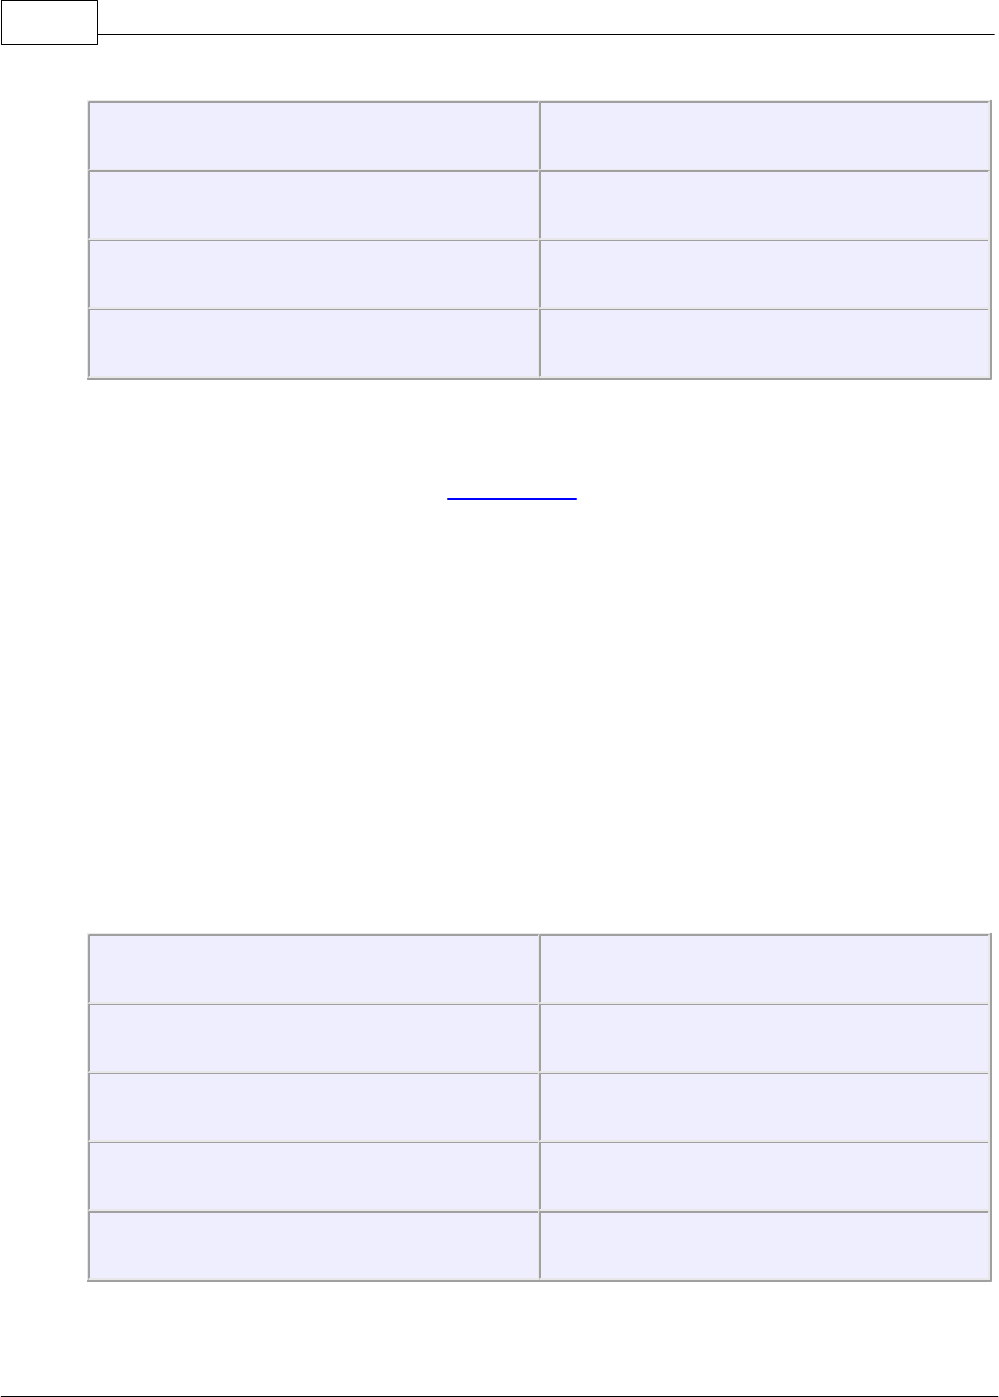
PerfectTablePlan154
© 2008 Oryx Digital Ltd
2-5
no longer used
6
Custom
7
Head
8
Banquet
The position of a table is recorded in pixels, with 167 pixels to a metre.
The table assigned attribute is a url encoded list of guests assigned to the seats of
the table, e.g. an unencoded attribute "9,0,-1" means:
·
seat 0 contains the guest with index 9
·
seat 1 contains the guest with index 0
·
seat 2 contains no guest
<floorplan_shapes>..</floorplan_shapes>
This section contains details of the shapes added to the floor plan.
The meaning of the shape attribute is given below:
Shape attribute
Meaning
0
Circle
1
Ellipse
2
Square
3
Rectangle
PerfectTablePlan 3.1.4 155
© 2008 Oryx Digital Ltd
<floorplan_text>.. </floorplan_text>
This section contains details of the shapes added to the floor plan.
<affinities>..</affinities>
This section contains details of all the guest proximities (who should sit next to
who).
The affinity guest1 and guest2 attributes correspond to the 2 guests who the
affinity is set for. If no affinity is set, neutral is assumed.
The meaning of the affinity value attribute is given below:
Value attribute
Meaning
0
Next to
1
Near to
2
Neutral
3
Not next to
4
Not near to
<stationery>..</stationery>
This section contains details of the current stationery design.
20 How do I?
20.1 How do I?
This section covers common tasks that you might want to achieve. If you can't find
the answer to your question here or in the rest of the Help try the
PerfectTablePlan FAQ page . Most of these topics are available in a context-
sensitive form from the How do I? button in the main tool bar.

PerfectTablePlan156
© 2008 Oryx Digital Ltd
Add a chart title/footer
Add a dance floor, stage etc to the floor plan
Add a graphic or logo
Add a new stationery layout
Add a title or text into the floor plan
Add or remove dots at the end of titles
Arrange multiple seatings for an event
Assign guests to seats
Change fonts and/or colours
Change how guest names are displayed in the floor plan
Change proximity for multiple guests
Change the print pagination
Change the size of the room
Change the table order
Choose a format to export to
Copy guests from one plan to another
Create a template floor plan
Customise standard guest titles
Email my plan
Estimate numbers and budget
Export a chart to Excel/Word

PerfectTablePlan 3.1.4 157
© 2008 Oryx Digital Ltd
Export guest and seating data to Excel
Export to PDF format
Handle guests with unknown names
Handle post-nominal titles
Import guest details from Apple Address Book
Import guest details from Excel spreadsheets
Import guest details from Outlook
Import guest details from Outlook Express
Import guests in couples/families/groups
Insert a new guest into an existing group
Liaise with caterers
Load sample stationery
Lock guests to seats
Move guests from one group to another
Only assign guests who have accepted
Order a bespoke plan online
Print a guest list
Print invitations, place cards, badges, labels etc
Print legible plans on a small format printer
Print to poster size
Rename a table
PerfectTablePlan158
© 2008 Oryx Digital Ltd
Retrieve old versions of the plan
Set the RSVP status for multiple guests
Show gender in the floor plan
Show groups in the floor plan
Show the proximity for one group at a time
Show unassigned seats
Track details of non-seated guests
Turn off guest name capitalisation
Turn the floor plan grid on/off
Zoom in/out of the floor plan
20.2 Add a chart title/footer
To add a title/header/footer to the Table chart or Guest chart pane:
1. click on the button at the top of the pane.
2. Click on the Title or Footer button.
3. Set the title/footer text, size and colour.
4. Click OK.
20.3 Add a dance floor, stage etc to the floorplan
You can use rectangular, square, elliptical or circular shapes to represent floor
plan features such as dance floors, stages and walls. Click on the Shape button
at the top of the Floor plan pane to add a shape to the floor plan.
20.4 Add a graphic or logo
At present you can't add graphics or logos to PerfectTablePlan. As a workaround
PerfectTablePlan 3.1.4 159
© 2008 Oryx Digital Ltd
you can always pass the plan/chart/stationery through a printer twice and use
another package to add the graphics/logo on the second pass.
20.5 Add a new stationery layout
PerfectTablePlan comes with a comprehensive library of stationery templates. This
includes many sizes of labels and cards from leading stationery manufacturers. If
we don't provide a template for the type of stationery you want to use:
1. At the top of the Stationery pane click the Stationery layout button. The
Stationery layout window will appear.
2. Set the various fields to the appropriate dimensions. You can choose mm or
inches. Click on the Nomenclature tab for a visual representation of the various
parameters. The layout is shown in the Preview tab.
3. Click OK. The Save stationery layout window will appear.
4. Complete the details for the new layout and click OK if you want it to be saved
into the stationery database for next time.
20.6 Add a title or text into the floor plan
To add a title or text into the floor plan:
1. Click the Insert text button at the top of the Floor plan pane. The Insert
text window will appear.
2. Set the text, angle, font and colour.
3. Click OK. The new text item will be added.
4. Drag the new text item to the appropriate position.
Double click on the text item if you wish to edit it later.
20.7 Add or remove dots at the end of titles
“Mr” (without a dot) is standard in the UK and “Mr.” (with a period) is standard in
the USA (ref: Longman Guide to English Usage 1988). In the interests of
international relations you can toggle between the two by using the +period (in

PerfectTablePlan160
© 2008 Oryx Digital Ltd
the Main window hold down the key and press the '.' (period) key). If you don’t
like the results you can undo them.
If you want to use “Mr.” (with a period) as standard you should edit the titles
available in the Titles tab of the Preferences window.
20.8 Arrange multiple seatings for an event
If you have an event that includes several meals you might wish to have each
person sit with different people at each meal. PerfectTablePlan can help you
achieve this.
1. Do the first seating plan as usual and save the plan.
2. Right click on each table and set the proximity to Not near to.
3. Select File> Auto assign seats.
4. Use drag and drop to fine-tune the seating plan as required.
5. Select File>Save as... to save the plan to a new file.
6. If another seating is required go to 2.
Note If you have guests you don't want moved you can lock them to their seat.
20.9 Assign guests to seats
You can assign guests to seats by drag and drop, automatic seat assignment or a
combination of both.
For more details see seat assignment.
20.10 Change fonts and/or colours
In the Floor plan, Table plan, Table chart or Guest chart pane click on
the Colours and fonts button at the top of the pane.
In the Stationery pane select the appropriate text and click on the Font and
Colour buttons at the bottom of the Design tab
.
PerfectTablePlan 3.1.4 161
© 2008 Oryx Digital Ltd
20.11 Change how guest names are displayed in the floor plan
To change how the name of a guest is displayed in the floor plan:
1. Click the button at the top right of the Floor plan pane.
2. Select the appropriate entry from the Seats drop-down list
20.12 Change proximity for multiple guests
To set the proximity for all the guests in a group (e.g. to set all the guests in a
group to 'near to' each other):
1. Right click on the group in the Groups pane.
2. Select the proximity from the pop-up menu.
To set the proximity for multiple guests (e.g. to set 5 guests to have proximity
'near to' each other):
1. Use click/ +click/Shift+click to select the appropriate guests in the Guests
pane.
2. Right click.
3. Select the proximity from the pop-up menu.
20.13 Change the print pagination
Use the fine adjust controls in the Print window. Click on the button to show
them.

PerfectTablePlan162
© 2008 Oryx Digital Ltd
20.14 Change the size of the room
To change the size of the floor plan:
1. Click on the Dimensions button at the top of the Floor plan pane.
2. Set the Depth and Breadth of the room in the appropriate Units.
3. Click OK.
20.15 Change the table order
The Table chart and Schematic panes show tables in a certain order. By
default this is the order in which the tables were created, but you can change it by
either:
·
clicking on the Table order... button in the Table chart or Schematic pane;
or
·
dragging a table up or down the order in the Schematic pane; or
·
selecting a table and using the up and down arrows at the top of the
Schematic pane to change its position in the table order
To sort the tables in alphanumeric order:
1. Go to the Table chart or Schematic pane (click on the button at the
top-right of the Table chart pane).

PerfectTablePlan 3.1.4 163
© 2008 Oryx Digital Ltd
2. Click on the Table order... button.
4. Click the Sort button.
5. Click OK.
20.16 Choose a format to export to
·
To create a high quality image suitable for printing to large sizes, choose PDF.
·
To create a medium quality image suitable for printing to smaller sizes, choose
PNG.
·
To create a low quality image suitable for emailing, choose JPG.
·
To import into Word or create a web page, choose HTML.
·
To import into Excel, a database or other application, choose CSV.
For more details see exporting.
20.17 Copy guests from one plan to another
Just drag the guests from one plan to the other:
1. Start 2 instances of PerfectTablePlan. You may have to duplicate the
PerfectTablePlan.app
file before you can do this.
2. Select the guests you want to copy from the Guests or Groups pane of the first
instance of PerfectTablePlan ( +A to select all).
3. Drag the guests/groups to the Guests pane of the second instance of
PerfectTablePlan.
You can also export the guest data to a .csv file and re-import it, but drag and
drop is easier.
Note You may not be able to drag guests between 2 instances of PerfectTablePlan
in MacOSX 10.5. You can work around this by:
1. Dragging the guests from the Guests or Groups pane to the desktop (or any

PerfectTablePlan164
© 2008 Oryx Digital Ltd
other folder), which creates vCard files.
2. Dragging the vCard files to the Guests pane of the new plan.
See also:
Create a re-useable floor plan template
20.18 Create a re-useable floor plan template
To Create a floor plan template that you can re-use for similar events:
1. Create a new plan with a standard table layout.
2. File>Save as to a new file, e.g. 'template.tp'.
Each time you need to create a new plan based on the template:
1. File>Open the template plan you created.
2. File>Save as to a new plan file, e.g. ‘event.tp’
3. Add guests.
See also:
Copy guests from one plan to another
20.19 Customise standard guest titles
You can add your own custom titles to PerfectTablePlan. These could be military
or Masonic titles or foreign language equivalents of Mr/Mrs/Master/Miss. These
custom titles can have default gender, age and VIP status, which is particularly
useful when you are importing guests with known titles.
To add custom titles:
1. Open the Preferences window.
2. Select the Titles tab.
PerfectTablePlan 3.1.4 165
© 2008 Oryx Digital Ltd
3. Click on Add.
4. Type a name and select a default gender, age and VIP status.
5. Click OK.
Titles in your current plan can be imported by clicking on Import from current
plan.
You may also wish to set the Default couple titles.
20.20 Email my plan
To email a copy of your plan to someone with PerfectTablePlan:
1. File> Save your plan.
2. Compose an email in your standard email package and attach the saved plan (.
tp) file.
Note If they don't need to save, print or export your plan they can download and
use the free trial version of PerfectTablePlan.
To email a copy of your plan to someone without PerfectTablePlan:
1. Export your plan into the appropriate format.
2. Compose an email and add the exported file as an attachment.
20.21 Estimate numbers and budget
Select File> Numbers and budget... and use the Numbers and budget window
to estimate guest numbers and help keep track of your budget.
20.22 Export a chart to Excel/Word
To export the contents of the Guest chart, Table chart or Statistics pane to
Word or Excel:
1. Bring the Guest chart , Table chart or Statistics pane to the front.

PerfectTablePlan166
© 2008 Oryx Digital Ltd
2. Select Edit>Copy from the menu bar (not +C, this only copies selected text).
3. Start Word/Excel.
4. Select Edit>Paste in Word/Excel.
20.23 Export guest and seating data to Excel
To export guest and seating data into a form that it can be used in Excel:
1. Select File> Export. The Export window will appear.
2. Select guest and seating data to text/CSV file and click OK. The Export data
window will appear.
3. Select whether you want to export a record per guest or per group and check/
uncheck the appropriate check boxes. Leave the format as Excel CSV.
4. Edit the Export file field or click on the Browse button to set the output file.
5. Click OK.
The CSV file created should be readable by Excel.
20.24 Export to PDF format
PDF is a vector image format popularised by Adobe Acrobat. Many print shops will
prefer PDF format if you want to print a Floor Plan, Table Chart or Guest
Chart to poster size. Direct PDF export is supported in PerfectTablePlan from
v3.1.0. For example, to export the Floor Plan pane as a PDF:
1. Select File> Export, the Export window will appear.
2. Select floor plan to PDF/PNG/JPG/BMP image file.
3. Click OK, the Export Floor plan window will appear.
4. select the file type as PDF, choose a file name and location and click Save, the
Export PDF window will appear.
5. Select the appropriate Size and Orientation for the PDF and click OK.

PerfectTablePlan 3.1.4 167
© 2008 Oryx Digital Ltd
If you have problems with built-in PDF export you can also export PDFs indirectly,
as described below.
Creating PDFs indirectly on Macintosh
The ability to print straight to a PDF document is built into MacOSX, you don’t
need to install any additional software.
·
Select File> Print, the PerfectTablePlan Print window will appear.
·
Click the Setup... button, the MacOSX Print window will appear.
·
Drag the PDF button down to Save as PDF....
·
Choose a location for the file in the Save window and click Save, the Page Setup
window will appear.
·
Choose the page setup and click OK.
·
Click OK on the PerfectTablePlan Print window.
A PDF format document should now have been created.
Checking the output
You can check that the PDF output is acceptable using the free Adobe Acrobat
reader. Many web browsers can also read PDF files.
20.25 Handle guests with unknown names
Give them last names such as "guest of John Smith 1", "guest of John Smith 2" and
then replace this with their proper name when you know it.
20.26 Handle post-nominal titles
Most titles come before the name, e.g. Dr, Herr, Colonel etc. These are handled
by the Title field in the Guest properties window. You can configure the titles
available by default in the Preferences window.
However some titles come after the name, e.g. PhD or MBE (post-nominals). These
PerfectTablePlan168
© 2008 Oryx Digital Ltd
are best handled by adding them individually to the Display name field in the
Guest properties window. For example you might have:
Field
Example
Title
Sir
First name
John
Last name
Smith
Display name
Sir John Smith MBE
See also Names and titles.
20.27 Import guest details from Apple Address Book
To import guests from Apple Address Book to PerfectTablePlan:
MacOSX 10.3.9 or MacOSX 10.4.x:
1. select the appropriate group(s) or person(s) in the Apple Address Book
2. drag them to the Guests pane or Groups pane in PerfectTablePlan
MacOSX 10.5.x:
1. select the appropriate group(s) or person(s) in the Apple Address Book
2. drag them to your Mac OS X desktop to create a vCard file
3. drag the vCard file to the Guests pane or Groups pane in PerfectTablePlan
Guests in the same group will have their proximity set to 'Near to'. You can easily
change this by right clicking on the group and changing the proximity.
PerfectTablePlan will attempt to maintain groups, but you can easily rearrange
guests into groups afterwards by dragging guests between groups in the
PerfectTablePlan Groups pane.
PerfectTablePlan 3.1.4 169
© 2008 Oryx Digital Ltd
20.28 Import guest details from Excel spreadsheets
If you already have guest information in a Microsoft Excel™ spreadsheet you can
import it, rather than re-typing it.
See the Import guests tutorial and Importing guests from text and Excel CSV files.
20.29 Import guest details from Outlook
If you already have guest information in Microsoft Outlook™ you can import it,
rather than re-typing it.
Note The user interface of Outlook may differ between different versions.
Method 1: Drag and drop
1. Start Microsoft Outlook (we can accept no liability for you installing or using
third party software).
2. Select Tools>Address book to display the Outlook Address Book window.
3. Select one or more guests in the Address Book window.
4. Drag the guests to the PerfectTablePlan Guests pane or Groups pane.
Note You can easily rearrange guests into groups afterwards by dragging guests
between groups in the PerfectTablePlan Groups pane.
Method 2: Import CSV file
1. Start Microsoft Outlook (we can accept no liability for you installing or using
third party software).
2. Select File>Import and Export. The Import and Export Wizard window will
appear.
3. Select Export to a file and click the Next button.
4. Select Comma separated values (Windows) and click the Next button.
5. Select Contacts and click the Next button.
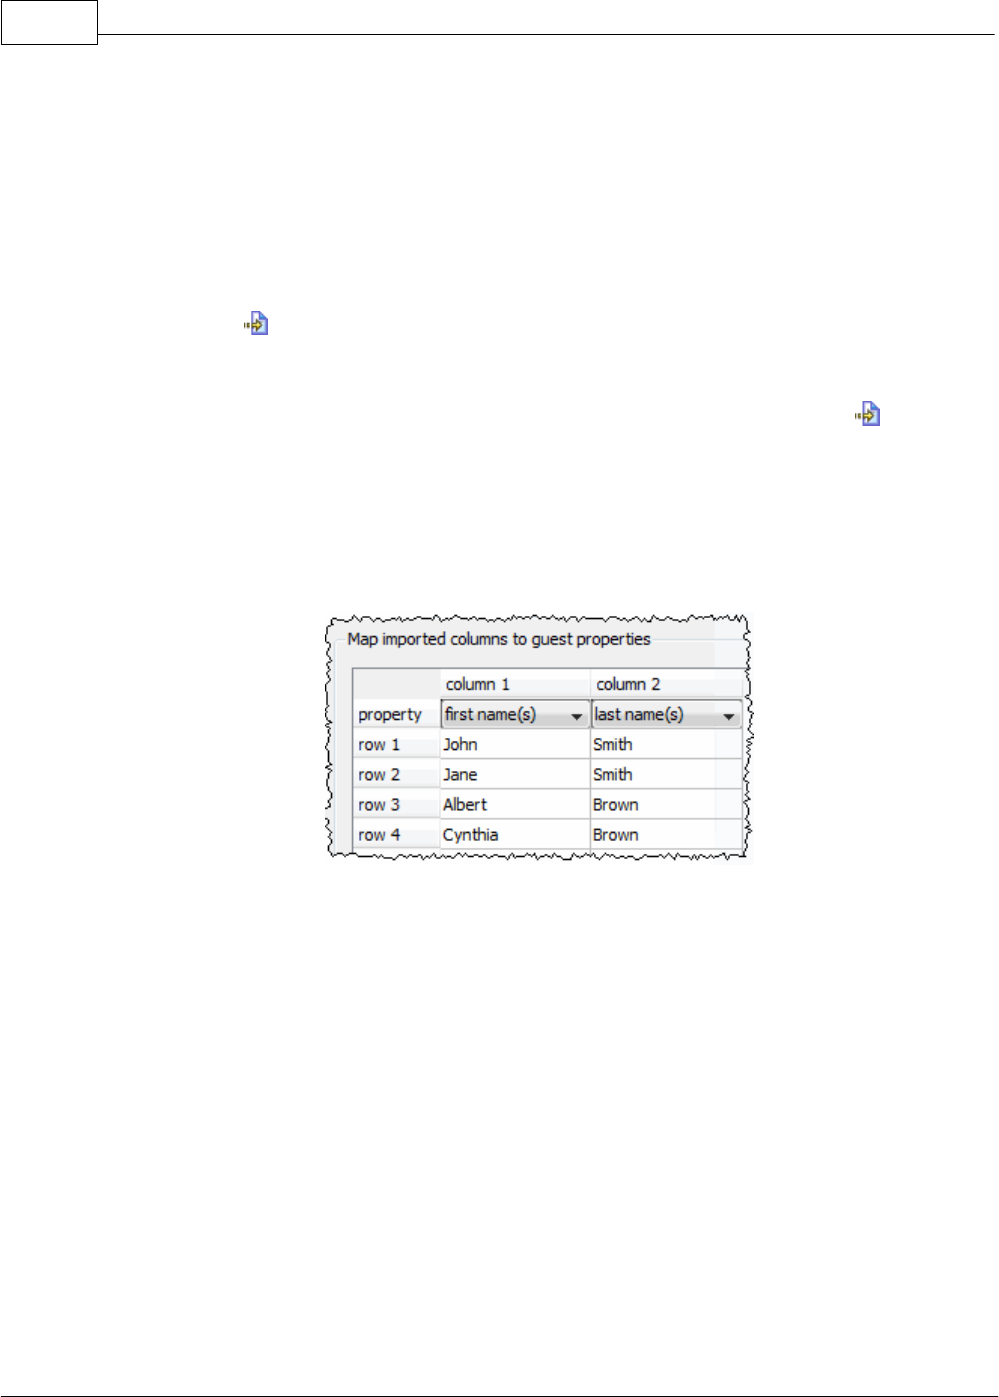
PerfectTablePlan170
© 2008 Oryx Digital Ltd
6. Choose a name and location for the exported file e.g. outlook.csv and click the
Next button.
7. Click Finish.
8. Start PerfectTablePlan.
9. Select File> Import, select text/CSV file and click OK. An Open window will
appear.
10.Navigate to the Outlook export file and click the Open button. The Import
data window will appear.
11.In the table select first name in the drop-down for the column with the first
name and last name in the drop-down for the column with the last name. You
can also choose other guest properties as appropriate.
15.Edit the text in the preview as appropriate.
16.Click the OK button. The guests will now be added to the plan.
If you wish to import guests as couples, families and/or groups you need to:
1. have a groups column in your spreadsheet
2. use the same name in the group column for each person in the couple, family or
group
3. make this column the group field during import

PerfectTablePlan 3.1.4 171
© 2008 Oryx Digital Ltd
These guests will then be placed in the same group with proximity selected in
Proximity for guests in same group. You can easily change the proximity by right
clicking on the group and selecting the appropriate proximity later.
For more information see Import data window and Microsoft Outlook™
documentation.
20.30 Import guest details from Outlook Express
If you already have guest information in Microsoft Outlook Express™ you can import
it, rather than re-typing it.
Note The user interface of Outlook Express may differ between different versions.
Method 1: Drag and drop
1. Start Microsoft Outlook Express (we can accept no liability for you installing or
using third party software).
2. Select Tools>Address book to display the Outlook Express Address Book
window.
3. Select one or more guests in the Address Book window.
4. drag the guests to the PerfectTablePlan Guests pane or Groups pane.
Note You can easily rearrange guests into groups afterwards by dragging guests
between groups in the PerfectTablePlan Groups pane.
Method 2: Import CSV file

PerfectTablePlan172
© 2008 Oryx Digital Ltd
1. Start Microsoft Outlook Express (we can accept no liability for you installing or
using third party software).
2. Select File>Export>Address book. The Address Book Export Tool window will
appear.
3. Select Text file (Comma Separated Values) and click on the Export button.
The CSV Export window will appear.
4. Choose a sensible name and location for the export file and click the Next
button.
5. Check all the fields you wish to export. This should include First Name and Last
Name.
6. Click the Finish button.
7. Click the OK button.
8. Start PerfectTablePlan.
9. Select File> Import, select text/CSV file and click OK. An Open window will
appear.
10.Navigate to the Outlook Express export file and click the Open button. The
Import data window will appear.
11.In the table select first name in the drop-down for the column with the first
name and last name in the drop-down for the column with the last name. You
can also choose other guest properties as appropriate.
15.Edit the text in the preview as appropriate. Use the Add row and Delete row

PerfectTablePlan 3.1.4 173
© 2008 Oryx Digital Ltd
buttons to add and remove rows.
16.Click the OK button. The guests will now be added to the plan.
If you wish to import guests as couples, families and/or groups you need to:
1. have a groups column in your spreadsheet
2. use the same name in the group column for each person in the couple, family or
group
3. make this column the group field during import
These guests will then be placed in the same group with proximity selected in
Proximity for guests in same group. You can easily change the proximity by right
clicking on the group and selecting the appropriate proximity later.
For more information see Import data window and Microsoft Outlook™ Express
documentation.
20.31 Import guests in couples/families/groups
You can import guests in groups by using a 'group' column during import. For more
details see Importing groups here.
20.32 Insert a new guest into an existing group
To add a guest to an existing group:
·
Select Insert>Single guest, the Insert guest window will appear.
·
Choose Add to existing from the Group drop-down list in the Group tab.

PerfectTablePlan174
© 2008 Oryx Digital Ltd
20.33 Liaise with caterers
The easiest way to send your seating plan to your caterer is to email the plan file.
They can download a free version of PerfectTablePlan to look at it (they will need
a licence to save changes). Alternatively you can export and email the information
they will need in a range of formats.
Total numbers and meal choices
You can print or export this information from the Statistics pane (note that meal
courses and special requirements will be totalled separated if they are separated
by commas, e.g. soup,fish,flan). Use File> Export and select statistic to text/
CSV/HTML file to export an HTML or text file.
General layout, size and shape of tables
You can print or export this information from the Floor plan pane. Use File>
Export and select Floor plan to image file to export an image file.
Who is sitting where, meal choices and special
requirements
You can print or export this information from the Table chart pane or Table
plan pane for each table. Ensure the notes, special and meal information is
displayed. Use File> Export and select table chart to text/CSV/HTML file to
export a text, CSV or HTML file. Use File> Export and select Table plan to image
file to export an image file.
20.34 Load sample stationery
Some sample stationery templates are installed with PerfectTablePlan. To load a
sample click on the Load stationery button at the top of the Stationery pane.

PerfectTablePlan 3.1.4 175
© 2008 Oryx Digital Ltd
The sample are installed into different locations on different operating system. On
MacOSX you may have dragged them from the disk image file to your
Documents
folder.
20.35 Lock guests to seats
You can lock a guest to a seat (or to no seat) to stop them being re-assigned by
drag and drop or automatic seat assignment.
To toggle the lock status of a guest on/off:
1. Right click on the guest.
2. Select Locked from the pop-up menu.
Note You can select multiple guests in the Guests or Groups pane using
+click/Shift+click.
You can also lock all the guests in a group or at a table by right clicking on the
group/table and selecting Locked from the pop-up menu.
20.36 Move guests from one group to another
Select the guest in the Groups pane and drag them to the appropriate group.
You can also use Edit>Change group.

PerfectTablePlan176
© 2008 Oryx Digital Ltd
20.37 Only assign guests who have accepted
You may wish to assign to seats only those guests who have accepted your
invitation.
1. Select Edit>Preferences. The Preferences window will be displayed.
2. Select Accepted in the Allow seat assignment with RSVP drop-down menu.
3. Click OK.
4. If you have unaccepted guests assigned you will have the option to unassign
them. Click Unassign.
5. If you have unassigned guests select File> Auto assign seats. Only guests who
have accepted will be assigned to seats.
20.38 Order a bespoke plan online
We have partnered with some leading table plan/seating chart companies to make
it as easy as possible for you to get a large-format bespoke print. Click here for
details.
20.39 Print a guest list
To print a list of all the guests (including unassigned guests):
·
Bring the Guest chart pane to the front of the Top pane.
·
Select All from the Show drop-down list at the top of the pane.
·
Select File> Print or the equivalent Main tool bar button.
20.40 Print place cards, invitations, address labels etc
You can design and print various types of stationery from the Stationery pane.
PerfectTablePlan makes it very easy for you to merge in the guest names, contact
details, seat assignments etc.
For more details see the Printing Stationery tutorial.
You can also load sample stationery we install with the software.

PerfectTablePlan 3.1.4 177
© 2008 Oryx Digital Ltd
See also:
Printing stationery
20.41 Print legible plans on a small format printer
If you only have access to a standard format (e.g. A4 or letter) printer it can be
difficult to print a legible floor plan on a single sheet. Here are some suggestions:
·
Print the Floor Plan pane on multiple sheets of paper and join them together.
·
Print each table on a separate page from the Table plan pane.
·
Set the Floor Plan pane to display seat numbers, instead of names, by
selecting Seat reference from the Display drop-down. Set the Table chart
pane to display seat numbers as well as names. Print out both Floor plan and
Table chart panes. The floor plan can then be cross-referenced against the
table chart.
·
Select Name only (radial) from the Seats drop-down list at the top of the
Floor Plan pane.
·
Move the tables closer together in the Floor Plan pane. This will make them
appear bigger when scaled to fit the page.
·
Increase the size of the fonts in the Floor Plan pane by clicking on the
button. The size of table and seat fonts can be set separately.
·
Export the floor plan as an image and ask a someone with a larger format (e.g.
A3 or A2) printer to print it for you. Check export/copy image as large as
possible in the Preferences window to increase the resolution of the image.
Set export/copy image margin to 0% in the Preferences window to reduce the
unused area. If you want to print it at high resolution you should also consider
exporting it as a PDF.
·
Order a bespoke large-format plan online from one of our partners.

PerfectTablePlan178
© 2008 Oryx Digital Ltd
20.42 Print to poster size
You can get a poster size print by printing across multiple sheets of paper and
sticking them together.
If you want a large print without joins we recommend you export it to PDF format
and send it to a company with a large format printer, e.g. Fedex Kinko. PDF is
accepted by most print shops and can be re-sized large without noticeable loss of
quality. Raster image formats such as PNG and JPG can degrade significantly when
enlarged.
Alternatively you can order a bespoke table plan from one of our partners.
20.43 Rename a table
To rename a table:
1. Select the table in the Floor plan, Table plan or Schematic pane
2. Select Edit> Properties from the menu bar.
3. Change the name.
4. Click OK.
You can also display the Properties window by double-clicking on the table or
selecting Properties from the right-click menu.
To rename large numbers of tables:
1. Go to the Schematic pane
2. Select Edit from the Mode drop-down list at the top of the pane
3. Retype the table names
20.44 Retrieve old versions of the plan
You may be able to access old versions of your plan from automatic back-up files
made by PerfectTablePlan.

PerfectTablePlan 3.1.4 179
© 2008 Oryx Digital Ltd
20.45 Set the RSVP status for multiple guests
To change the RSVP status of multiple guests:
1. Select multiple guests in the Guests or Groups pane using +click/Shift
+click.
2. Right-click and select the appropriate RSVP status from the pop-up menu.
You can also right-click on a group to set the RSVP status of everyone in the group
.
20.46 Show gender in the floor plan
To show gender in the Floor plan or Table plan pane:
1. Click on the button at the top-right of the pane.
2. Click on the Gender button. Males will be shown in blue and females in pink.
Note This option is only available if you are displaying circular seats.
See also:
Floor plan pane
20.47 Show groups in the floor plan
To show groups in the Floor plan or Table plan pane:
1. Click on the button at the top-right of the pane.
2. Click on the Groups button. Each group will be shown in a different colour (or
combination of colours). You cannot change the colours.
Note This option is only available if you are displaying circular seats.
See also:
Floor plan pane
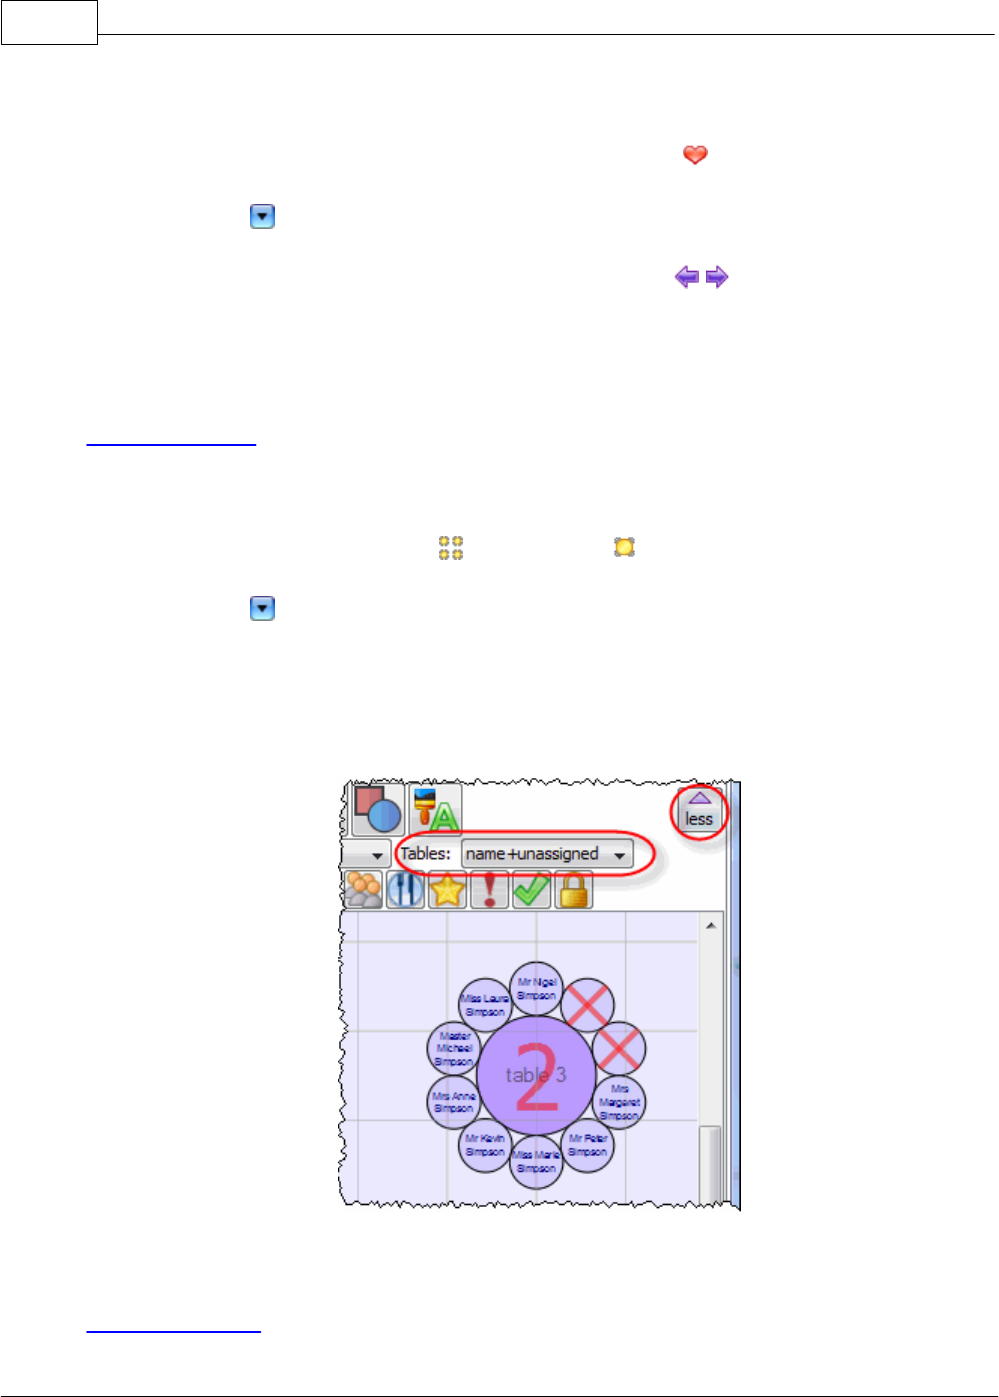
PerfectTablePlan180
© 2008 Oryx Digital Ltd
20.48 Show the proximity for one group at a time
To show the proximities for one group at a time in the Proximity pane:
1. Click on the button at the top-right of the pane.
2. Set the Shown drop-down list to by group. Use the buttons or the drop-
down list to change group.
See also:
Proximity pane
20.49 Show unassigned seats
To show unassigned seats in the Floor plan or Table plan pane:
1. Click on the button at the top-right of the pane.
2. Set the Tables drop-down list to name+unassigned. The number of unassigned
seats will be shown in the centre of each table and unassigned seats will be
shown with a red cross.
See also:
Floor plan pane

PerfectTablePlan 3.1.4 181
© 2008 Oryx Digital Ltd
20.50 Track details of non-seated guests
You may have guests that are attending your event, but won’t require a seat at
the dinner. We recommend that you track their RSVPs as normal but lock them
with no seat assigned to ensure they won’t be inadvertently assigned a seat. You
might also want to add a reminder in their Notes field, e.g. “evening only guest”.
20.51 Turn off guest name capitalisation
By default the first letter of each guest names is capitalised. To turn this off
uncheck automatically capitalise names in the General tab of the Preferences
window.
20.52 Turn the floor plan grid on/off
The floor plan has 2 separate grids - a drawn grid (for display only) and a snap grid
(which 'snaps' the centres of items to a discrete position) .To turn these grids on/
off:
1. Click the Dimensions button at the top of the Floor plan pane. The
Dimensions window will be displayed.
2. Check/uncheck the Draw grid check box to turn the drawn grid on/off.
3. Check/uncheck the Snap to grid check box to turn the snap grid on/off.
4. Change the Units drop-down list or Size fields to change the grid sizes.
5. Click OK.
See also:
Dimensions window
20.53 Zoom in/out of the floor/table plan
To zoom so all items are visible click the Zoom all button at the top of the pane.
To zoom in click the Zoom in button at the top of the pane.
To zoom out click the Zoom out button at the top of the pane.

PerfectTablePlan182
© 2008 Oryx Digital Ltd
You can pan from side to side while zoomed in by left-clicking on the Floor plan
pane background and dragging it.
See also:
Floor plan pane
21 Licensing
21.1 Licensing
In order to use this software fully you will need a valid licence key. Without a
licence key you can only save, export or print plans with 30 or fewer guests.
To purchase a licence key go to www.perfecttableplan.com .
To fully activate the software select Licensing>Licence and enter the key into
the Licence window.
If you purchased the software electronically off the Internet, the key will have
been emailed to you.
If you purchased the software as a CD, the licence key will either be printed inside
the box or will have been emailed to you.
To retrieve a licence you have previously purchased from www.perfecttableplan.
com select Licensing>Retrieve key.
Note A licence entitles one named person to use this software on any number of
computers. If you have more than one person using the software you should
purchase a licence key for each user. However, we have no objection to a couple
sharing a licence when planning their wedding.
The same licence key will work on both Windows and Macintosh.
Version 2 licence keys are not valid for version 3. You can upgrade from version 2
to version 3.

PerfectTablePlan 3.1.4 183
© 2008 Oryx Digital Ltd
22 Support
22.1 Contact support
If you are having problems with the software please check if your question has
already been answered in this documentation or on the www.perfecttableplan.
com FAQ page. If you can't find an answer here or on the web site then email us
at [email protected] . We will reply as quickly as we can.
22.2 Report a bug
We take every effort to deliver high quality software. However, the sheer
complexity of software and the number of platforms and configurations we have to
support means that we can't guarantee our software is completely bug free. Please
report any bugs you find to [email protected] and we will attempt to fix
them. Please include:
·
a description of the bug
·
your operating system (e.g. Windows XP or MacOSX 10.4)
·
the version of PerfectTablePlan (from the About window)
·
a step-by-step description of how we can reproduce the problem
The step-by-step description is particularly important - if we can't reproduce your
problem, then we probably won't be able to fix it.
To assist us in fixing bugs we have added email-based error reporting. When
PerfectTablePlan detects that something has gone horribly wrong it will try to
email a report to [email protected] (with your permission). Please send
the email and add any relevant details.
22.3 Request an enhancement
We are always very interested to hear your suggestions on how the software can be
improved. Please email us at [email protected] .

PerfectTablePlan184
© 2008 Oryx Digital Ltd
23 Updates
23.1 Updates
From time to time we release new versions of the software with new features and/
or bug fixes. Minor updates are available for no charge (e.g. v3.0.0 and v3.1.1 will
both work with a v3 licence key). Major updates require a licence key upgrade (e.
g. a v2 licence key will not work with version 3.0.0). If you purchased a licence key
close to a major upgrade you may get a free upgrade licence key. See our licensing
page for details of our upgrade policy.
To check which version of the software you are running look in the About window.
To check if you are running the latest version select Help>Check for updates. This
requires an Internet connection.
PerfectTablePlan will also check for software updates automatically. You can set it
to check for updates monthly, weekly or never in the Preferences window (the
default is weekly). It will only advise the availability of updates, you still have to
download and install the update from a web page.
You can also subscribe to our email newsletter for update information.
23.2 Newsletter
If you subscribe to our newsletter you will receive occasional email newsletters
telling you when new releases of this software become available, and other useful
information. You can always unsubscribe at a later date and we won't sell your
details to anyone else.
24 Uninstalling
24.1 Uninstalling
To uninstall PerfectTablePlan drag the PerfectTablePlan application from
Applications
(or wherever you installed) to the waste bin.
Note You may also wish to delete any table plan files from the
Documents
folder.

Index
185
© 2008 Oryx Digital Ltd
Index
- A -
About window 88
accepted 94
assessing your plan 66
assigning seats 137
automatic seat assignment 138
- B -
back-up files 149
BMP format 146
Bottom pane 85
budget 165
bugs 183
- C -
capitalise names automatically 119
caterers 174
Change group window 88
Chart title/footer window 88
clipboard 142
colour system requirements 7
colours 93
changing colours 160
command line arguments 151
context sensitive help 7
conventions in this document 6
copy to clipboard 142
creating a good table plan 150
CSV file import 133
custom table 114
- D -
demonstration movies 18
Dimensions window 89
display name 134
drag and drop 130
- E -
emailing a plan file 146
enhancements 183
Estimating guest numbers 118
etiquette for table plans 150
Excel 169
export chart to Excel 165
export guest and seating data to Excel 166
Excel CSV format
export 148
import 131
Export data window 90
export formats 148
Export PDF window 92
Export vCard window 92
Export window 90
exporting 146
- F -
FAQ 150
floor plan features (dance floors, stages etc) 158
Floor plan pane 66
grid 181
show gender 179
show groups 179
show unassigned seats 180
fonts 93
changing font 160
Fonts and colours window 93
footer 88
frequently asked questions 150
- G -
genetic algorithm 141
graphics 158
Group properties window 93
groups 135
displaying in the floor plan 179
inserting guests into existing groups 173
moving guests between groups 175
Groups pane 64
Guest chart pane 76
guest list 62

PerfectTablePlan186
© 2008 Oryx Digital Ltd
guest list printing 176
Guest properties window 94
Guests pane 62
- H -
head table 114
help system 7
hide seats in floor plan 66
How do I 155
- I -
Import data window 97
Import window 97
importing 131
Apple AddressBook 168
CSV/text files 133
Excel 169
Outlook 169
Outlook Express 171
tutorial 48
vCard files 132
Information window 102
Insert couple window 102
Insert family window 105
Insert group window 108
Insert guest window 110
Insert Guests scratch-pad window 113
Insert shape window 113
Insert table window 114
Insert text window 116
Insert tool bar 60
integrating PerfectTablePlan 151
introduction 6
invitation 176
- J -
JPEG format 146
- L -
labels 176
Left pane 61
letters 176
Licence window 117
licensing 182
locking a guest 137
logos 158
- M -
mail merge 77
Main tool bar 58
memory 7
Menu bar 57
Microsoft Excel 169
Microsoft Outlook 171
Microsoft Outlook Express 171
Most recently access window 118
movies 18
multiple seatings 160
multi-user access 150
- N -
name badges 145
newsletter 184
non-seated guests 167, 181
Numbers and budget window 118
- O -
operating system 7
order plan online 176
Outlook 169
Outlook Express 171
- P -
panes 55
Bottom pane 85
Floor plan pane 66
Groups pane 64
Guest chart pane 76
Guests pane 62
Left pane 61
Proximity pane 85
Schematic pane 73
Stationery pane 77
Statistics pane 84
Table chart pane 75
Table plan pane 70

Index
187
© 2008 Oryx Digital Ltd
panes 55
Top pane 66
PDF format 166
PerfectTablePlan file format 152
place cards 145
PNG format 148
post nominal titles 134
poster sized prints 178
post-nominal titles 167
Preferences window 119
Print setup window 124
Print window 123
printing
guest list 176
on a small printer 177
poster size 143, 178
Proximity pane 85
- Q -
quick start guide 9
- R -
read-only access 150
renaming tables 178
re-ordering tables 162
report a bug 183
RSVP status 135
- S -
Save stationery layout window 125
Schematic pane 73
scoring 138
screen resolution 7
search
in Groups pane 64
in Guests pane 62
in Proximity pane 85
seat assignment 137
Shape properties window 125
snap to grid 181
stationery
tutorial 42, 145
Stationery layout window 126
Stationery pane 77
stationery samples 174
Statistics pane 84
Status bar 61
Substitution text 77
support 183
system requirements 7
- T -
Table chart pane 75
table order 162
Table order window 127
Table plan pane 70
Table properties window 127
template floor plan 164
Text properties window 129
themes 93
title
customising 164
in Guest chart or Table chart pane 88
in Guest properties window 94
in Preferences window 119
names and titles 134
post-nominal 167
title/footer for chart 158
tool bars 55
Insert 60
Main 58
Task 57
Top pane 66
tutorial 18
- U -
uninstalling 184
updates 184
- V -
vCard export 146
vCard import 132
vector formats 148
version of PerfectTablePlan 88
versions of the plan 178
VIP 94

PerfectTablePlan188
© 2008 Oryx Digital Ltd
- W -
web pages 7
What's this help 7
Windows 86
About window 88
Change group window 88
Chart title/footer window 88
Dimensions window 89
Export data window 90
Export PDF window 92
Export VCard window 92
Export window 90
Fonts and colours window 93
Group properties window 93
Guest properties window 94
Import data window 97
Import window 97
Information window 102
Insert couple window 102
Insert family window 105
Insert group window 108
Insert guest window 110
Insert guests scratch-pad 113
Insert shape window 113
Insert table window 114
Insert text window 116
Licence window 117
Main window 55
Most recently accessed window 118
Numbers and budget window 118
Preferences window 119
Print setup window 124
Print window 123
Save stationery layout window 125
Shape properties window 125
Stationery layout window 126
Table order window 127
Table properties window 127
Text properties window 129
- Z -
zooming in/out 181
