
ibm.com/redbooks
Front cover
Discovering MySQL
on IBM i5/OS
Hernando Bedoya
Francisco Javier Dieguez
Bruno Digiovani
Erwin Earley
Shirley Pintos
Install and configure the MySQL
Database Server on i5/OS
Explore tools to manage, back up, and
recover the MySQL Database Server
Leverage existing MySQL
applications on i5/OS


International Technical Support Organization
Discovering MySQL on IBM i5/OS
March 2008
SG24-7398-00

© Copyright International Business Machines Corporation 2008. All rights reserved.
Note to U.S. Government Users Restricted Rights -- Use, duplication or disclosure restricted by GSA ADP Schedule
Contract with IBM Corp.
First Edition (March 2008)
This edition applies to Version 5, Release 4 of IBM i5/OS (5722-SS1).
Note: Before using this information and the product it supports, read the information in “Notices” on
page vii.

© Copyright IBM Corp. 2008. All rights reserved. iii
Contents
Notices . . . . . . . . . . . . . . . . . . . . . . . . . . . . . . . . . . . . . . . . . . . . . . . . . . . . . . . . . . . . . . . . . vii
Trademarks . . . . . . . . . . . . . . . . . . . . . . . . . . . . . . . . . . . . . . . . . . . . . . . . . . . . . . . . . . . . . viii
Preface . . . . . . . . . . . . . . . . . . . . . . . . . . . . . . . . . . . . . . . . . . . . . . . . . . . . . . . . . . . . . . . . . ix
The team that wrote this book . . . . . . . . . . . . . . . . . . . . . . . . . . . . . . . . . . . . . . . . . . . . . . . . ix
Become a published author . . . . . . . . . . . . . . . . . . . . . . . . . . . . . . . . . . . . . . . . . . . . . . . . . . xi
Comments welcome. . . . . . . . . . . . . . . . . . . . . . . . . . . . . . . . . . . . . . . . . . . . . . . . . . . . . . . . xi
Part 1. Introduction to the MySQL Database Server on i5/OS . . . . . . . . . . . . . . . . . . . . . . . . . . . . . . . . . 1
Chapter 1. Overview of the MySQL Database Server on i5/OS. . . . . . . . . . . . . . . . . . . . 3
1.1 The IBM and MySQL AB announcement . . . . . . . . . . . . . . . . . . . . . . . . . . . . . . . . . . . . 4
1.2 Current support of the MySQL Database Server on i5/OS . . . . . . . . . . . . . . . . . . . . . . . 4
1.3 Future Statement of Direction of the MySQL Database Server on i5/OS . . . . . . . . . . . . 5
Chapter 2. Overview of the MySQL Database Server . . . . . . . . . . . . . . . . . . . . . . . . . . . 7
2.1 Why the MySQL Database Server on i5/OS . . . . . . . . . . . . . . . . . . . . . . . . . . . . . . . . . . 8
2.2 Who is using the MySQL Database Server. . . . . . . . . . . . . . . . . . . . . . . . . . . . . . . . . . . 8
2.3 Top reasons to use the MySQL Database Server . . . . . . . . . . . . . . . . . . . . . . . . . . . . . 8
2.4 An overview of the MySQL Database Server architecture . . . . . . . . . . . . . . . . . . . . . . . 9
2.4.1 Storage engines . . . . . . . . . . . . . . . . . . . . . . . . . . . . . . . . . . . . . . . . . . . . . . . . . . 10
2.5 Features of the MySQL Database Server . . . . . . . . . . . . . . . . . . . . . . . . . . . . . . . . . . . 18
2.6 Licensing . . . . . . . . . . . . . . . . . . . . . . . . . . . . . . . . . . . . . . . . . . . . . . . . . . . . . . . . . . . . 19
Part 2. Installing, configuring, and managing the MySQL Database Server on i5/OS . . . . . . . . . . . . . 21
Chapter 3. Installing and configuring V5.0 of MySQL Database Server on i5/OS. . . . 23
3.1 Packaging . . . . . . . . . . . . . . . . . . . . . . . . . . . . . . . . . . . . . . . . . . . . . . . . . . . . . . . . . . . 24
3.2 Product structure . . . . . . . . . . . . . . . . . . . . . . . . . . . . . . . . . . . . . . . . . . . . . . . . . . . . . . 24
3.3 The i5/OS PASE runtime environment . . . . . . . . . . . . . . . . . . . . . . . . . . . . . . . . . . . . . 27
3.3.1 File systems . . . . . . . . . . . . . . . . . . . . . . . . . . . . . . . . . . . . . . . . . . . . . . . . . . . . . 28
3.3.2 Shells and utilities . . . . . . . . . . . . . . . . . . . . . . . . . . . . . . . . . . . . . . . . . . . . . . . . . 28
3.3.3 Additional commands . . . . . . . . . . . . . . . . . . . . . . . . . . . . . . . . . . . . . . . . . . . . . . 30
3.3.4 Additional information and links . . . . . . . . . . . . . . . . . . . . . . . . . . . . . . . . . . . . . . 31
3.4 Installation and configuration of the MySQL Database Server on i5/OS . . . . . . . . . . . 31
3.4.1 Checking the prerequisites . . . . . . . . . . . . . . . . . . . . . . . . . . . . . . . . . . . . . . . . . . 31
3.4.2 Installing and configuring the MySQL Database Server on i5/OS . . . . . . . . . . . . 33
3.4.3 Verifying the installation . . . . . . . . . . . . . . . . . . . . . . . . . . . . . . . . . . . . . . . . . . . . 42
3.4.4 Post installation tasks . . . . . . . . . . . . . . . . . . . . . . . . . . . . . . . . . . . . . . . . . . . . . . 43
3.4.5 Common installation and restoration errors . . . . . . . . . . . . . . . . . . . . . . . . . . . . . 46
3.4.6 Upgrading the MySQL Database Server on i5/OS from a previous version . . . . . 47
3.4.7 Uninstalling the MySQL Database Server on i5/OS . . . . . . . . . . . . . . . . . . . . . . . 47
Chapter 4. Administration: Tools and general tasks . . . . . . . . . . . . . . . . . . . . . . . . . . . 49
4.1 Overview of the administration command line tools . . . . . . . . . . . . . . . . . . . . . . . . . . . 50
4.1.1 Invoking command line tools. . . . . . . . . . . . . . . . . . . . . . . . . . . . . . . . . . . . . . . . . 51
4.2 Overview of the graphical administration tools . . . . . . . . . . . . . . . . . . . . . . . . . . . . . . . 53
4.2.1 Overview of MySQL GUI Tools . . . . . . . . . . . . . . . . . . . . . . . . . . . . . . . . . . . . . . . 54
4.2.2 Overview of phpMyAdmin . . . . . . . . . . . . . . . . . . . . . . . . . . . . . . . . . . . . . . . . . . . 54

iv Discovering MySQL on IBM i5/OS
4.3 Installation of the administration tools . . . . . . . . . . . . . . . . . . . . . . . . . . . . . . . . . . . . . . 55
4.3.1 Installing the server-side tools. . . . . . . . . . . . . . . . . . . . . . . . . . . . . . . . . . . . . . . . 55
4.3.2 Installing the MySQL GUI Tools . . . . . . . . . . . . . . . . . . . . . . . . . . . . . . . . . . . . . . 55
4.3.3 Installing phpMyAdmin . . . . . . . . . . . . . . . . . . . . . . . . . . . . . . . . . . . . . . . . . . . . . 59
4.4 General administration tasks. . . . . . . . . . . . . . . . . . . . . . . . . . . . . . . . . . . . . . . . . . . . . 65
4.4.1 Starting the MySQL Database Server. . . . . . . . . . . . . . . . . . . . . . . . . . . . . . . . . . 65
4.4.2 Stopping the MySQL Database Server. . . . . . . . . . . . . . . . . . . . . . . . . . . . . . . . . 68
4.4.3 Checking the status of the MySQL Database Server . . . . . . . . . . . . . . . . . . . . . . 69
4.4.4 Automating the starting and stopping tasks . . . . . . . . . . . . . . . . . . . . . . . . . . . . . 74
4.4.5 Enabling, maintaining, and querying logs . . . . . . . . . . . . . . . . . . . . . . . . . . . . . . . 77
4.4.6 Checking the consistency of databases . . . . . . . . . . . . . . . . . . . . . . . . . . . . . . . . 83
Chapter 5. Security, access control, and privileges . . . . . . . . . . . . . . . . . . . . . . . . . . . 87
5.1 The privilege system . . . . . . . . . . . . . . . . . . . . . . . . . . . . . . . . . . . . . . . . . . . . . . . . . . . 88
5.2 The privilege system of the MySQL Database Server . . . . . . . . . . . . . . . . . . . . . . . . . 88
5.3 Privileges provided by the MySQL Database Server . . . . . . . . . . . . . . . . . . . . . . . . . . 90
5.4 Creating a user, granting privileges, and revoking privileges . . . . . . . . . . . . . . . . . . . . 91
5.4.1 Executing the MySQL Database Server commands. . . . . . . . . . . . . . . . . . . . . . . 91
5.4.2 User accounts . . . . . . . . . . . . . . . . . . . . . . . . . . . . . . . . . . . . . . . . . . . . . . . . . . . . 92
5.4.3 The GRANT statement . . . . . . . . . . . . . . . . . . . . . . . . . . . . . . . . . . . . . . . . . . . . . 92
5.4.4 GRANT: Column values in the privilege tables . . . . . . . . . . . . . . . . . . . . . . . . . . . 93
5.4.5 Scope column . . . . . . . . . . . . . . . . . . . . . . . . . . . . . . . . . . . . . . . . . . . . . . . . . . . . 94
5.4.6 Revoking privileges . . . . . . . . . . . . . . . . . . . . . . . . . . . . . . . . . . . . . . . . . . . . . . . . 95
5.5 When privilege changes take effect . . . . . . . . . . . . . . . . . . . . . . . . . . . . . . . . . . . . . . . 95
5.6 Granting user privileges in MySQL Administrator . . . . . . . . . . . . . . . . . . . . . . . . . . . . . 96
Chapter 6. Backup and restore of the MySQL databases . . . . . . . . . . . . . . . . . . . . . . . 99
6.1 Methods for backup and restore . . . . . . . . . . . . . . . . . . . . . . . . . . . . . . . . . . . . . . . . . 100
6.2 Making a backup of the MySQL Database Server . . . . . . . . . . . . . . . . . . . . . . . . . . . 100
6.2.1 The mysqldump script for backup . . . . . . . . . . . . . . . . . . . . . . . . . . . . . . . . . . . . 100
6.2.2 The mysqlhotcopy script for backup . . . . . . . . . . . . . . . . . . . . . . . . . . . . . . . . . . 106
6.2.3 MySQL Administrator for backup . . . . . . . . . . . . . . . . . . . . . . . . . . . . . . . . . . . . 108
6.2.4 phpMyAdmin for backup . . . . . . . . . . . . . . . . . . . . . . . . . . . . . . . . . . . . . . . . . . . 117
6.3 Restoring the MySQL databases . . . . . . . . . . . . . . . . . . . . . . . . . . . . . . . . . . . . . . . . 120
6.3.1 The mysqlimport command for restore . . . . . . . . . . . . . . . . . . . . . . . . . . . . . . . . 120
6.3.2 The source command for restore . . . . . . . . . . . . . . . . . . . . . . . . . . . . . . . . . . . . 123
6.3.3 MySQL Administrator for restore. . . . . . . . . . . . . . . . . . . . . . . . . . . . . . . . . . . . . 124
6.3.4 phpMyAdmin for restore . . . . . . . . . . . . . . . . . . . . . . . . . . . . . . . . . . . . . . . . . . . 127
6.4 Additional tools for backup and restore. . . . . . . . . . . . . . . . . . . . . . . . . . . . . . . . . . . . 128
6.4.1 Security backup to TAPE . . . . . . . . . . . . . . . . . . . . . . . . . . . . . . . . . . . . . . . . . . 128
6.4.2 Security backup to *SAVF. . . . . . . . . . . . . . . . . . . . . . . . . . . . . . . . . . . . . . . . . . 129
6.4.3 Restoring from TAPE . . . . . . . . . . . . . . . . . . . . . . . . . . . . . . . . . . . . . . . . . . . . . 131
6.4.4 Restoring from *SAVF. . . . . . . . . . . . . . . . . . . . . . . . . . . . . . . . . . . . . . . . . . . . . 131
6.5 Common backup and restore errors . . . . . . . . . . . . . . . . . . . . . . . . . . . . . . . . . . . . . . 132
6.5.1 Additional information . . . . . . . . . . . . . . . . . . . . . . . . . . . . . . . . . . . . . . . . . . . . . 132
Chapter 7. Replication and clustering. . . . . . . . . . . . . . . . . . . . . . . . . . . . . . . . . . . . . . 133
7.1 Introduction to clustering in MySQL . . . . . . . . . . . . . . . . . . . . . . . . . . . . . . . . . . . . . . 134
7.2 Terminology . . . . . . . . . . . . . . . . . . . . . . . . . . . . . . . . . . . . . . . . . . . . . . . . . . . . . . . . 134
7.3 Configuring the replication . . . . . . . . . . . . . . . . . . . . . . . . . . . . . . . . . . . . . . . . . . . . . 134
7.3.1 Creating a user for replication . . . . . . . . . . . . . . . . . . . . . . . . . . . . . . . . . . . . . . . 135
7.3.2 Configuring the replication master . . . . . . . . . . . . . . . . . . . . . . . . . . . . . . . . . . . 136
7.3.3 Configuring the replication slave . . . . . . . . . . . . . . . . . . . . . . . . . . . . . . . . . . . . . 136
7.3.4 Obtaining the master replication information. . . . . . . . . . . . . . . . . . . . . . . . . . . . 136

Contents v
7.3.5 Creating a data snapshot . . . . . . . . . . . . . . . . . . . . . . . . . . . . . . . . . . . . . . . . . . 138
7.3.6 Setting up replication with new master and slave servers . . . . . . . . . . . . . . . . . 138
7.3.7 Setting up replication with existing data . . . . . . . . . . . . . . . . . . . . . . . . . . . . . . . 139
7.3.8 Adding replication slaves to an existing replication environment . . . . . . . . . . . . 140
7.3.9 Monitoring replication . . . . . . . . . . . . . . . . . . . . . . . . . . . . . . . . . . . . . . . . . . . . . 140
Part 3. Application support and usage . . . . . . . . . . . . . . . . . . . . . . . . . . . . . . . . . . . . . . . . . . . . . . . . . . 143
Chapter 8. Open community application support on i5/OS . . . . . . . . . . . . . . . . . . . . 145
8.1 Terminology . . . . . . . . . . . . . . . . . . . . . . . . . . . . . . . . . . . . . . . . . . . . . . . . . . . . . . . . 146
8.2 Overview of PHP Web applications . . . . . . . . . . . . . . . . . . . . . . . . . . . . . . . . . . . . . . 146
8.3 Popular PHP Web applications supported on i5/OS . . . . . . . . . . . . . . . . . . . . . . . . . . 147
8.4 Installing Web applications on i5/OS. . . . . . . . . . . . . . . . . . . . . . . . . . . . . . . . . . . . . . 149
8.4.1 MediaWiki . . . . . . . . . . . . . . . . . . . . . . . . . . . . . . . . . . . . . . . . . . . . . . . . . . . . . . 149
8.4.2 SugarCRM . . . . . . . . . . . . . . . . . . . . . . . . . . . . . . . . . . . . . . . . . . . . . . . . . . . . . 153
8.4.3 Joomla . . . . . . . . . . . . . . . . . . . . . . . . . . . . . . . . . . . . . . . . . . . . . . . . . . . . . . . . 165
8.4.4 Zen Cart . . . . . . . . . . . . . . . . . . . . . . . . . . . . . . . . . . . . . . . . . . . . . . . . . . . . . . . 169
8.4.5 PmWiki . . . . . . . . . . . . . . . . . . . . . . . . . . . . . . . . . . . . . . . . . . . . . . . . . . . . . . . . 175
8.4.6 phpBB . . . . . . . . . . . . . . . . . . . . . . . . . . . . . . . . . . . . . . . . . . . . . . . . . . . . . . . . . 176
8.4.7 PHP-Nuke . . . . . . . . . . . . . . . . . . . . . . . . . . . . . . . . . . . . . . . . . . . . . . . . . . . . . . 178
Chapter 9. Querying a MySQL database. . . . . . . . . . . . . . . . . . . . . . . . . . . . . . . . . . . . 181
9.1 Setting up a sample database. . . . . . . . . . . . . . . . . . . . . . . . . . . . . . . . . . . . . . . . . . . 182
9.2 SQL reference . . . . . . . . . . . . . . . . . . . . . . . . . . . . . . . . . . . . . . . . . . . . . . . . . . . . . . . 183
9.2.1 System terms versus SQL terms . . . . . . . . . . . . . . . . . . . . . . . . . . . . . . . . . . . . 183
9.2.2 The Structured Query Language . . . . . . . . . . . . . . . . . . . . . . . . . . . . . . . . . . . . 184
9.3 The mysql command line tool for queries . . . . . . . . . . . . . . . . . . . . . . . . . . . . . . . . . . 185
9.3.1 mysql options . . . . . . . . . . . . . . . . . . . . . . . . . . . . . . . . . . . . . . . . . . . . . . . . . . . 185
9.3.2 mysql commands . . . . . . . . . . . . . . . . . . . . . . . . . . . . . . . . . . . . . . . . . . . . . . . . 186
9.3.3 Running mysql interactively . . . . . . . . . . . . . . . . . . . . . . . . . . . . . . . . . . . . . . . . 187
9.3.4 Executing SQL statements from a text file . . . . . . . . . . . . . . . . . . . . . . . . . . . . . 188
9.4 MySQL Query Browser . . . . . . . . . . . . . . . . . . . . . . . . . . . . . . . . . . . . . . . . . . . . . . . . 189
9.4.1 Windows and functions of the MySQL Query Browser . . . . . . . . . . . . . . . . . . . . 190
9.4.2 Building and running queries with the MySQL Query Browser . . . . . . . . . . . . . . 194
9.5 Running queries in phpMyAdmin . . . . . . . . . . . . . . . . . . . . . . . . . . . . . . . . . . . . . . . . 197
9.5.1 Accessing phpMyAdmin and selecting the database to query . . . . . . . . . . . . . . 198
9.5.2 Creating and executing the query with phpMyAdmin . . . . . . . . . . . . . . . . . . . . . 200
Chapter 10. Porting non-MySQL databases . . . . . . . . . . . . . . . . . . . . . . . . . . . . . . . . . 205
10.1 Introduction to the MySQL Migration Toolkit . . . . . . . . . . . . . . . . . . . . . . . . . . . . . . . 206
10.2 Architecture of the MySQL Migration Toolkit. . . . . . . . . . . . . . . . . . . . . . . . . . . . . . . 206
10.3 Methodology of the MySQL migration. . . . . . . . . . . . . . . . . . . . . . . . . . . . . . . . . . . . 207
10.3.1 Overview of the eight-step method . . . . . . . . . . . . . . . . . . . . . . . . . . . . . . . . . . 208
10.4 MySQL Migration Toolkit online tutorials. . . . . . . . . . . . . . . . . . . . . . . . . . . . . . . . . . 209
Related publications . . . . . . . . . . . . . . . . . . . . . . . . . . . . . . . . . . . . . . . . . . . . . . . . . . . . 211
IBM Redbooks . . . . . . . . . . . . . . . . . . . . . . . . . . . . . . . . . . . . . . . . . . . . . . . . . . . . . . . . . . 211
Online resources . . . . . . . . . . . . . . . . . . . . . . . . . . . . . . . . . . . . . . . . . . . . . . . . . . . . . . . . 211
How to get Redbooks. . . . . . . . . . . . . . . . . . . . . . . . . . . . . . . . . . . . . . . . . . . . . . . . . . . . . 212
Help from IBM . . . . . . . . . . . . . . . . . . . . . . . . . . . . . . . . . . . . . . . . . . . . . . . . . . . . . . . . . . 212
Index . . . . . . . . . . . . . . . . . . . . . . . . . . . . . . . . . . . . . . . . . . . . . . . . . . . . . . . . . . . . . . . . . 213

vi Discovering MySQL on IBM i5/OS

© Copyright IBM Corp. 2008. All rights reserved. vii
Notices
This information was developed for products and services offered in the U.S.A.
IBM may not offer the products, services, or features discussed in this document in other countries. Consult
your local IBM representative for information on the products and services currently available in your area. Any
reference to an IBM product, program, or service is not intended to state or imply that only that IBM product,
program, or service may be used. Any functionally equivalent product, program, or service that does not
infringe any IBM intellectual property right may be used instead. However, it is the user's responsibility to
evaluate and verify the operation of any non-IBM product, program, or service.
IBM or its suppliers may have patents or pending patent applications covering subject matter described in this
document. The furnishing of this document does not give you any license to these patents. You can send
license inquiries, in writing, to:
IBM Director of Licensing, IBM Corporation, North Castle Drive, Armonk, NY 10504-1785 U.S.A.
The following paragraph does not apply to the United Kingdom or any other country where such
provisions are inconsistent with local law: INTERNATIONAL BUSINESS MACHINES CORPORATION
PROVIDES THIS PUBLICATION "AS IS" WITHOUT WARRANTY OF ANY KIND, EITHER EXPRESS OR
IMPLIED, INCLUDING, BUT NOT LIMITED TO, THE IMPLIED WARRANTIES OF NON-INFRINGEMENT,
MERCHANTABILITY OR FITNESS FOR A PARTICULAR PURPOSE. Some states do not allow disclaimer of
express or implied warranties in certain transactions, therefore, this statement may not apply to you.
This information could include technical inaccuracies or typographical errors. Changes are periodically made
to the information herein; these changes will be incorporated in new editions of the publication. IBM or its
suppliers may make improvements and/or changes in the product(s) and/or the program(s) described in this
publication at any time without notice.
Any references in this information to non-IBM Web sites are provided for convenience only and do not in any
manner serve as an endorsement of those Web sites. The materials at those Web sites are not part of the
materials for this IBM product and use of those Web sites is at your own risk.
IBM may use or distribute any of the information you supply in any way it believes appropriate without incurring
any obligation to you.
Information concerning non-IBM products was obtained from the suppliers of those products, their published
announcements or other publicly available sources. IBM has not tested those products and cannot confirm the
accuracy of performance, compatibility or any other claims related to non-IBM products. Questions on the
capabilities of non-IBM products should be addressed to the suppliers of those products.
This information contains examples of data and reports used in daily business operations. To illustrate them
as completely as possible, the examples include the names of individuals, companies, brands, and products.
All of these names are fictitious and any similarity to the names and addresses used by an actual business
enterprise is entirely coincidental.
COPYRIGHT LICENSE:
This information contains sample application programs in source language, which illustrate programming
techniques on various operating platforms. You may copy, modify, and distribute these sample programs in
any form without payment to IBM, for the purposes of developing, using, marketing or distributing application
programs conforming to the application programming interface for the operating platform for which the sample
programs are written. These examples have not been thoroughly tested under all conditions. IBM, therefore,
cannot guarantee or imply reliability, serviceability, or function of these programs.

viii Discovering MySQL on IBM i5/OS
Trademarks
The following terms are trademarks of the International Business Machines Corporation in the United States,
other countries, or both:
AIX®
AS/400®
DB2 Universal Database™
DB2®
eServer™
IBM®
Integrated Language Environment®
iSeries®
i5/OS®
Language Environment®
OS/400®
PowerPC®
POWER™
POWER5™
pSeries®
Redbooks®
Redbooks (logo) ®
System i™
System i5™
The following terms are trademarks of other companies:
Oracle, JD Edwards, PeopleSoft, Siebel, and TopLink are registered trademarks of Oracle Corporation and/or
its affiliates.
MySQL®, MySQL Enterprise®, MySQL Query Browser™,MySQL Administrator™, MySQL Migration
Toolkit™ and the MySQL logo are trademarks of MySQL AB in the United States, other countries, or both.
Java, JDBC, Solaris, and all Java-based trademarks are trademarks of Sun Microsystems, Inc. in the United
States, other countries, or both.
Access, Excel, Internet Explorer, Microsoft, MSN, SQL Server, Windows NT, Windows, and the Windows logo
are trademarks of Microsoft Corporation in the United States, other countries, or both.
Intel, Intel logo, Intel Inside logo, and Intel Centrino logo are trademarks or registered trademarks of Intel
Corporation or its subsidiaries in the United States, other countries, or both.
UNIX is a registered trademark of The Open Group in the United States and other countries.
Linux is a trademark of Linus Torvalds in the United States, other countries, or both.
Other company, product, or service names may be trademarks or service marks of others.

© Copyright IBM Corp. 2008. All rights reserved. ix
Preface
The MySQL Database Server is the leading open-source database offering and is the most
popular database to use with PHP applications. MySQL AB boasts 11 million installations of
the MySQL database, which is used in both large and small organizations.
While the MySQL Database Server can be used independently of PHP, a large number of
implementations of the MySQL Database Server on the IBM® System i™ platform are likely
to be directly associated with PHP. PHP is a widely-used general-purpose scripting language
that is especially suited for Web development. Typically, PHP is embedded inside of HTML
and provides the business logic for enabling data access and manipulation from within HTML
Web pages. Often the MySQL Database Server is the data repository that PHP applications
will access and manipulate.
The MySQL Database Server, especially when coupled with PHP, is well suited for the
development and deployment of Web-based applications. In fact, the Web arena is seeing a
steady shift away from customized development toward the deployment of Web applications
by content owners who use open community applications to deploy their content with their
own design and usage capabilities. Support for the MySQL Database Server on IBM i5/OS®
facilitates the deployment of such applications on the System i platform.
In this IBM Redbooks® publication, we explain how you can install, configure, tailor, and
manage the MySQL Database Server on i5/OS. We also help to broaden your understanding
of its architecture on i5/OS. In addition, we illustrate open community applications that can be
installed and run on IBM i5/OS.
The team that wrote this book
This book was produced by a team of specialists from around the world working at the
International Technical Support Organization (ITSO), Rochester Center.
Hernando Bedoya is an IT Specialist for the IBM ITSO, in
Rochester, Minnesota. He writes extensively and teaches IBM
classes worldwide in all areas of DB2® for i5/OS. Before joining
the ITSO more than seven years ago, he worked for IBM
Colombia as an IBM AS/400® IT Specialist doing presales
support for the Andean countries. He has 24 years of experience
in the computing field and has taught database classes in
Colombian universities. He holds a master degree in computer
science from EAFIT, Colombia. His areas of expertise are
database technology, application development, and data
warehousing.

x Discovering MySQL on IBM i5/OS
Francisco Javier Dieguez is a Certified IT Specialist for IBM in
Madrid, Spain. His focus is on Technical Support/Sales for IBM
POWER™, modular, storage, and mainframe for IBM employees,
customers, and Business Partners in Spain, Portugal, Greece,
Israel, and Turkey. He has been working on i5/OS projects for
more than two years. He has twenty-two years of experience in
the computing field, including twelve years of experience in
teaching computer science. Francisco holds a degree in computer
science from the Computer Technical School Palomeras Vallecas
in Madrid.
Bruno Digiovani is a System i Field Technical Sales Specialist for
IBM in Argentina. He leads the design and architecture of
System i solutions for Argentina’s core accounts. He joined IBM in
1998, first working with the IBM eServer™ pSeries® platform,
targeting competitive accounts and working in the e-business
laboratories in his country. He has been working with Linux® and
open source solutions since 1997 and is currently working with
new workloads on the System i platform. Bruno has had the
personal experience of running his own Web site with PHP and
MySQL since 2003, and PHP and MySQL on i5/OS since they
began as a community effort.
Erwin Earley is an Advisory Software Engineer in the IBM Lab
located in Rochester, Minnesota. He leads the Open Community
Technologies Center of Competency for System i within the
System i Technology Center. At the System i Technology Center,
he provides education and enablement services for Open
Community Technologies on System i including Linux, PHP, and
MySQL. Erwin has worked in the IT industry for 30 years and has
experience with numerous UNIX® variants, as well as Linux and
i5/OS. He holds a bachelor degree in Information Management
Science from the University of Maryland and a master degree in
Business Organization Management from Concordia University in
St. Paul, Minnesota.
Shirley Pintos is a Software Engineer for IBM in Rochester,
Minnesota. She began her career at IBM in December 2000. For
the past six years, she has been part of the database team in the
support center. Her role includes providing second-level support
to System i clients. Her areas of support include SQL, database,
query performance, and journaling. She is the SQL subject matter
expert on the database team and has taught new release
education. She holds a master degree in Computer Science in
Information Systems from the University of Phoenix.

Preface xi
Thanks to the following people for their contributions to this project:
Thomas Gray
James Hansen
Joanna Pohl-Miszczyk
Linda Robinson
Jenifer Servais
ITSO, Rochester Center
Robert Andrews
Craig Johnson
Chip Larson
Eric Will
IBM Rochester
Omer BarNir
Kent Boortz
David Madsen
Robin Schumacher
MySQL AB
Become a published author
Join us for a two- to six-week residency program! Help write a book dealing with specific
products or solutions, while getting hands-on experience with leading-edge technologies. You
will have the opportunity to team with IBM technical professionals, Business Partners, and
Clients.
Your efforts will help increase product acceptance and customer satisfaction. As a bonus, you
will develop a network of contacts in IBM development labs, and increase your productivity
and marketability.
Find out more about the residency program, browse the residency index, and apply online at:
ibm.com/redbooks/residencies.html
Comments welcome
Your comments are important to us!
We want our books to be as helpful as possible. Send us your comments about this book or
other IBM Redbooks in one of the following ways:
Use the online Contact us review Redbooks form found at:
ibm.com/redbooks
Send your comments in an e-mail to:
Mail your comments to:
IBM Corporation, International Technical Support Organization
Dept. HYTD Mail Station P099
2455 South Road
Poughkeepsie, NY 12601-5400

xii Discovering MySQL on IBM i5/OS

© Copyright IBM Corp. 2008. All rights reserved. 1
Part 1 Introduction to the
MySQL Database
Server on i5/OS
In this part, we introduce the MySQL Database Server and open community development.
We describe the relationship between IBM and MySQL AB with a focus on current support
and the Statement of Direction regarding future support of the MySQL Database Server on
i5/OS.
In addition, we discuss the MySQL ecosystem. We provide information about its architecture
and licensing, as well as describe those organizations that are using the MySQL Database
Server and why they are using it.
This part includes the following chapters:
Chapter 1, “Overview of the MySQL Database Server on i5/OS” on page 3
Chapter 2, “Overview of the MySQL Database Server” on page 7
Part 1

2 Discovering MySQL on IBM i5/OS

© Copyright IBM Corp. 2008. All rights reserved. 3
Chapter 1. Overview of the MySQL Database
Server on i5/OS
The MySQL Database Server in i5/OS provides System i customers with an
open-community-related development and deployment stack known as
iAMP. (See 1.2,
“Current support of the MySQL Database Server on i5/OS” on page 4). The following factors
are driving the usage of open-community Web development stacks:
Constant pressure on development staffs to do more, faster, and with less resources, as
firms strive to reduce costs, improve returns on IT investments, and accelerate time-to
value
A growing adoption of service-oriented architecture (SOA) environments for enterprise
integration, allowing a wider choice of application development and implementation
technologies by enabling heterogeneous systems to interact freely at the service level
A faster pace of improvement of open community software relative to proprietary products
that are facilitated by active participation of global user communities
In this chapter, we introduce the MySQL Database Server on i5/OS, describe the available
support of the MySQL Database Server on i5/OS, and discuss future plans for the MySQL
Database Server on the System i platform.
In this chapter, we include the following topics:
“The IBM and MySQL AB announcement” on page 4
“Current support of the MySQL Database Server on i5/OS” on page 4
“Future Statement of Direction of the MySQL Database Server on i5/OS” on page 5
1

4 Discovering MySQL on IBM i5/OS
1.1 The IBM and MySQL AB announcement
At the 2007 MySQL conference and Expo in Santa Clara, California, IBM and MySQL AB (the
developers of the MySQL Database Server) announced plans to support the MySQL
database engine in i5/OS. Prior to this announcement, it was possible to run the MySQL
Database Server on the platform, which System i customers had done to support PHP
applications. They did this by downloading and installing the AIX® MySQL binary in the i5/OS
Portable Application Solutions Environment (PASE) environment. The announcement by IBM
and MySQL AB formalized support for the MySQL Database Server on i5/OS.
1.2 Current support of the MySQL Database Server on i5/OS
The MySQL database software is supported on the System i platform on i5/OS by MySQL
AB. Currently version 5.0 of MySQL is supported.
The MySQL Database Server, along with PHP, in i5/OS provides an open-community
supported Web development and deployment stack, call the
iAMP stack. The iAMP stack,
which includes i5/OS, Apache, MySQL, and PHP, provides the foundation on which to deploy
numerous open community applications, such as blogs, wikis, e-commerce, customer
relationship management (CRM), and so on, without changing the source code of those
applications. The iAMP stack is an i5/OS native Web development or deployment stack that
allows for development of Web-based applications integrated with the MySQL open
community database. iAMP is well suited for those customers or environments that want to
leverage existing open source applications based on PHP and the MySQL Database Server.
Figure 1-1 provides a high-level view of the iAMP stack.
Figure 1-1 The iAMP stack
Support: Support for the MySQL Database Server on i5/OS is provided by MySQL AB,
who supports the enterprise deployment of the MySQL Database Server.
Application
PHP
Apache
MySQL
IBM i5/OS Web Server
i5/OS
i5/OS
PASE

Chapter 1. Overview of the MySQL Database Server on i5/OS 5
1.3 Future Statement of Direction of the MySQL Database
Server on i5/OS
The joint announcement made by IBM and MySQL AB included a Statement of Direction. The
Statement of Direction indicated that DB2 for i5/OS will become a certified MySQL storage
engine, which will facilitate the implementation of online and transactional MySQL
applications while storing the data in DB2. When realized, this support will allow existing
DB2-based applications access to MySQL application data and existing DB2 data to be
accessible by new MySQL applications.
Figure 1-2 provides an overview of the expected relationships between the MySQL and DB2
database engines and data when this future stage is realized.
Figure 1-2 MySQL and DB2 relationship
Important: The plans, directions, and intent of IBM and MySQL AB are subject to change
or withdrawal without notice.
Existing
DB2
applications
DB2
Server
DB2
storage
engine
Joins to share
Data between storage
engines
DB2 storage engine
embedded within i5/OS
pre-installed on the
System i environment
New
MySQL
applications
MySQL
Server
Specialty
storage
engines

6 Discovering MySQL on IBM i5/OS

© Copyright IBM Corp. 2008. All rights reserved. 7
Chapter 2. Overview of the MySQL Database
Server
In this chapter, we provide an overview of the MySQL Database Server software. In this
chapter, we discuss the following topics:
“Why the MySQL Database Server on i5/OS” on page 8
“Who is using the MySQL Database Server” on page 8
“Top reasons to use the MySQL Database Server” on page 8
“An overview of the MySQL Database Server architecture” on page 9
“Features of the MySQL Database Server” on page 18
“Licensing” on page 19
2

8 Discovering MySQL on IBM i5/OS
2.1 Why the MySQL Database Server on i5/OS
With the adoption of the MySQL Database Server in i5/OS, the System i platform now offers
an integrated and open Web application deployment environment based on Apache, MySQL,
and PHP on i5/OS. The MySQL Database Server in i5/OS provides value in the following
ways:
The ability to deploy applications faster and maintain systems easier
– i5/OS provides a leading integrated and complete environment for open-community
(iAMP)-based applications.
– i5/OS delivers enterprise scalability from one to 64-way IBM POWER5™ processors.
– The integrated i5/OS architecture is secure and virus resistant by design.
– i5/OS delivers industry leading availability and reliability.
– i5/OS provides the ability to easily integrate Web applications with business
applications on the same server.
– i5/OS has a proven track record of delivering the lowest total cost of ownership (TCO)
and highest customer satisfaction.
The ability to access i5/OS applications and data easier and faster
Applications, such as PHP applications, have direct and easy access to business
applications and data, including MySQL data, running on i5/OS.
The ability to run open-community applications directly on i5/OS
2.2 Who is using the MySQL Database Server
It is estimated that more than 11 million MySQL installations are currently in use. The MySQL
Database Server is being used to power Web sites, important enterprise applications, and
packaged software.
One organization provides a specific example of the usage of an open-community
development stack that encompasses the MySQL Database Server. The following list
highlights the activity supported by the deployment stack for this organization:
8,000 HTTP requests per second
25,000 SQL requests per second
12 database servers
15 applications servers in an external storage role
20 application servers in an object cache role
2.3 Top reasons to use the MySQL Database Server
You should consider using the MySQL Database Server on the System i platform for several
reasons, including the following reasons:
It is easy to set up and use.
It is the most popular open community database.
It has gained popularity in the Web application world and is used in most of the leading
PHP applications.

Chapter 2. Overview of the MySQL Database Server 9
It is supported by the open community, but is also backed commercially.
It is used in more than 11 million installations.
It can be used cross-platform on over 20 platforms including i5/OS, Microsoft® Windows®,
Linux, OS/X, HP-UX, AIX, and NetWare.
2.4 An overview of the MySQL Database Server architecture
MySQL operates in a network environment using a client/server architecture. In such an
environment, a central program acts as a server, and various client programs connect to the
server to make requests. A MySQL Database Server installation has the following major
components:
MySQL Database Server
Client program
MySQL non-client utilities
Figure 2-1 provides an overview of the MySQL Database Server architecture.
Figure 2-1 MySQL architecture
The MySQL database engine runs in the i5/OS Portable Application Solutions Environment
(PASE). The files that represent the MySQL databases, database tables, and data reside in
the integrated file system.
The MySQL Database Server (mysqld) is the database server program. The server manages
access to the databases on disk and in memory.
MySQL Server Process
Client
Process
MySQL
Database
mysqld
Client
Process
mysql
TCP/IP Socket
PHP
(localhost)
Integrated File System
PASE Environment
ODBC
PHP
TCP/IP
TCP/IP

10 Discovering MySQL on IBM i5/OS
The client processes are programs that are used to communicate with the server to
manipulate information in the databases that the server manages. MySQL AB provides the
following client programs for the MySQL Database Server among other client programs:
Graphical front-ends for the database server include MySQL Query Browser and MySQL
Administrator.
mysql is a command-line program that acts as a text-based front end for the database
server. It is used interactively from a terminal window for issuing queries and viewing the
results.
Other command-line clients include mysqlimport for importing data files, mysqldump for
making backups, mysqladmin for server administration, and mysqlcheck for checking the
integrity of the database files.
2.4.1 Storage engines
One of the strengths of the MySQL Database Server is its pluggable storage engine
architecture. With the MySQL pluggable storage engine architecture, you can select a
specialized storage engine for a particular application need while being shielded from the
need to manage any specific application coding requirement.
Figure 2-2 provides an overview of the pluggable storage engine architecture.
Figure 2-2 Pluggable storage engine architecture

Chapter 2. Overview of the MySQL Database Server 11
In the MySQL Database Server, a client process works with data in tables (retrieve, update,
and so on) by issuing requests to the MySQL Database Server in the form of SQL
statements. The MySQL Database Server executes each statement using a two-tier
approach:
The upper tier includes the SQL parser and optimizer.
The lower tier is comprised of a set of storage engines.
For the most part, the SQL tier is free of dependencies on which a storage engine manages
any given table. Clients are normally are not concerned about which engines are involved in
processing SQL statements and can access and manipulate tables using statements that are
the same regardless of which engine manages them.
Figure 2-3 provides an overview of the MySQL Database Server and its interaction with
storage engines.
Figure 2-3 Storage engine architecture overview
The modular architecture of the pluggable storage engines provides the foundation for
performance and manageability benefits. The architecture helps to support particular
application needs, such as data warehousing, transaction processing, and high-availability
solutions. In addition, it has the ability to use a set of interfaces and services that are
independent of any one storage engine.
From a technical perspective, storage engines have the following key differentiations:
Concurrency/locking
Each storage engine handles the processes of synchronization mechanisms for enforcing
limits on access to a resource in an environment that has many threads of execution.
Transaction support
Certain storage engines handle transactional processing, which ensures that the integrity
of the database is maintained during the processing of multiple SQL statements.
Physical storage
Each table uses its own method of storing the data that it contains.
Parse Optimize
Retrieve
Store
MyISAM InnoDB Memory
MySQL
Cluster
Other*
*Other storage engines can eventually include an i5/OS DB2 storage
engine to store MySQL data in DB2 on i5/OS.
Note: This represents a statement regarding IBM and MySQL AB’s
plans, directions, and intent and is subject to change or withdrawal
without notice.
Pluggable Storage Engines

12 Discovering MySQL on IBM i5/OS
Backup and recovery
The storage engine that is implemented will drive the method used for backup and
recovery of the table data.
Optimization
Specific issues are associated with each storage engine for the optimization of storage
and retrieval of the data through the MySQL Database Server.
Special features
A number of features exist only in certain storage engines including full-text search,
referential integrity, and the ability to handle spatial data.
In the following sections, we summarize some of the storage engines that are available with
the MySQL Database Server.
MyISAM storage engine
The MyISAM storage engine is the default engine in the MySQL Database Server. This
storage engine has the following characteristics:
Represents each table using three files (stored in the integrated file system):
– A format file that stores the definition of the table structure (mytable.frm)
– A data file that stores the contents of table rows (mytable.MYD)
– An index file that stores any indexes on the table (mytable.MYI)
Can be converted into fast, compressed, read-only tables to save space
Manages contention between queries for MyISAM table access using table-level locking
Supports FULLTEXT searching and spatial data types
Portable table storage format, so that table files can be copied directly to another host and
used by a server there
The MyISAM storage engine offers the following advantages:
No practical storage limits; table sizes constrained only by file size limits
Low storage cost (efficient storage handling)
Support for B-Tree, FullText, and GIS indexes
Fast insert performance
Fast query performance
Maintains accurate count of number of rows stored in table (SELECT COUNT(*) very fast)
Support for prefix-length index keys
The MyISAM storage engine has the following disadvantages:
No transactional support
Table-level locking
No crash recovery
Blocking online backup
No support for foreign key constraints
MySQL functions: Most MySQL functions operate in the same way, regardless of the
storage engine that is used. All the usual SQL commands are independent of the storage
engine.

Chapter 2. Overview of the MySQL Database Server 13
InnoDB storage engine
The InnoDB storage engine has the following characteristics:
Each InnoDB table is represented on disk by a .frm format file in the database directory as
well as data and index storage in the InnoDB table space:
– The table space is a set of files (one or more) that InnoDB uses to store data and
indexes.
– By default, it uses a single table space that is shared by all tables.
– Table sizes can exceed the maximum file size that is allowed by the file system.
– InnoDB can be configured so that each table created has its own table space.
It supports transactions with COMMIT and ROLLBACK.
It provides full ACID compliance; see the following shaded box.
It provides auto-recovery after a crash of the MySQL Database Server.
It supports row-level locking with Multi-Versioning Concurrency Control (MVCC) and
non-locking reads.
It supports foreign keys and referential integrity, including cascaded deletes and updates.
It supports consistent and online logical backup.
The InnoDB storage engine offers the following advantages:
ACID-transaction compliance
Support for crash recovery
High storage limit (64 TB per table space)
Unlimited row-level locking
Support for foreign keys
MVCC support (readers do not block writers and writers do not block readers)
Clustered, B-Tree index support (as well as Hash indexes)
MySQL-supplied online, non-blocking backup
Advanced memory cache mechanisms
The InnoDB storage engine has the following disadvantages:
No full-text or GIS index support
Online backup utility as an add-on cost option
ACID: Atomic, Consistent, Isolated, Durable (ACID) is a set of properties that guarantee
that database transactions are processed reliably. More specifically, ACID refers to the
following properties:
Atomic: All the statements execute successfully or are canceled as a unit.
Consistent: A database that is in a consistent state when a transaction begins is left in
a consistent state by the transaction.
Isolated: One transaction does not affect another.
Durable: All the changes made by a transaction that completes successfully are
recorded properly in the database. Changes are not lost.

14 Discovering MySQL on IBM i5/OS
MEMORY storage engine
The MEMORY storage engine uses tables that are stored in memory and that have
fixed-length rows. Obviously MEMORY storage engine tables are temporary. The MEMORY
storage engine table management has the following characteristics:
Each table is represented on disk by a .frm format file in the database directory. Table
data and indexes are stored in memory.
In-memory storage results in fast performance.
The contents do not survive a restart of the server. The structure survives, but the table
contains zero rows.
MySQL manages query contention using table-level locking.
The table cannot contain TEXT or BLOB columns.
The MEMORY storage engine offers the following advantages:
Extremely fast read and write operations
Support for B-tree and Hash indexes
Main memory database management
The MEMORY storage engine has the following disadvantages:
No data persistence between server shutdowns
No transactional support
No support for foreign keys
No full-text or GIS index support
Table-level locking
Cannot store BLOB or text data
Comparison of storage engines
Table 2-1 summarizes the features of these three storage engines.
Table 2-1 Storage engine features
Other optional storage engines
Some storage engines are always available, such as MyISAM, InnoDB, and MEMORY. Other
storage engines are optional. Optional storage engines typically can be enabled or disabled
with a server startup option. The following storage engines are some of those that are
supported by the MySQL Database Server:
Falcon is designed to work within high-traffic transactional applications for systems that
are able to support larger memory architectures and multi-threaded or multi-core CPU
environments.
FEDERATED provides access to tables that are located remotely.
NDB is the MySQL cluster storage engine.
MyISAM InnoDB MEMORY
Usage Fastest for read heavy
applications
Fully ACID compliant
transactions
In-memory storage
Locking Large-grain table locks,
no non-locking reads
Multi-versioning, row-level
locking
Large grain table locks
Durability Table recovery Durability recovery No disk I/O or persistence
Supports
transactions
No Yes No

Chapter 2. Overview of the MySQL Database Server 15
ARCHIVE is the archival storage for a large number of records that will never be altered.
CSV stores data in the comma-separated values (CSV) format, as plain text.
BLACKHOLE discards data that is stored in a table, causing the data to disappear.
Specifying the storage engine
The storage engine to use is defined at the table level. You can specify the storage engine for
a MySQL database table in several ways:
For the initial creation of a database table, specify the ENGINE option as shown in
Example 2-1.
Example 2-1 CREATE TABLE statement with ENGINE option
CREATE TABLE test (number INT) ENGINE = InnoDB;
For existing tables, use the ALTER TABLE statement to change the storage engine for the
table as shown in Example 2-2.
Example 2-2 ALTER TABLE with ENGINE option
ALTER TABLE test ENGINE = MEMORY;
If the ENGINE option is not specified on the CREATE statement, then the default storage
engine “MyISAM” is used. To change the default storage engine, include the
default-storage-engine option on the mysql startup command line as shown in
Example 2-3.
Example 2-3 The default-storage-engine directive
--default-storage-engine=InnoDB
You can also specify the default storage engine in the mysql configuration file as shown in
Example 2-4.
Example 2-4 Default storage engine specified in configuration file
[mysqld]
default-storage-engine=InnoDB
Displaying storage engine information
Several methods for determining the storage engine are available to manage a MySQL
database table:
The SHOW CREATE TABLE statement displays information of the SQL create statement
for the table. Example 2-5 shows the SHOW CREATE TABLE statement to display the
create statement for the City table.
Example 2-5 SHOW CREATE TABLE example
mysql> SHOW CREATE TABLE City\G
Note: You can omit unneeded storage engines from the running configuration of the
MySQL Database Server. For example, starting the MySQL engine with the --skip-InnoDB
option disables the InnoDB storage engine.

16 Discovering MySQL on IBM i5/OS
The statement in Example 2-5 provides output similar to that which is shown in Figure 2-4.
Figure 2-4 SHOW CREATE TABLE output
The SHOW TABLE STATUS statement displays the table including the storage engine.
Example 2-6 illustrates the use of the SHOW TABLE STATUS statement to show the
status of the CountryLanguage table.
Example 2-6 SHOW TABLE STATUS example
mysql> SHOW TABLE STATUS LIKE ‘CountryLanguage’\G
The statement in Example 2-6 provides output similar to that which is shown in Figure 2-5.
Figure 2-5 SHOW TABLE STATUS output
*************************** 1. row ***************************
Table: City
Create Table: CREATE TABLE ‘City’ (
‘ID’ int(11) NOT NULL auto_increment,
‘Name’ char(35) NOT NULL defualt ‘’,
‘ContryCode’ char(3) NOT NULL default ‘’,
‘District’ char(20) NOT NULL default ‘’,
‘Population’ int(11) NOT NULL default ‘0’,
PRIMARY KEY (‘ID’)
) ENGINE=MYISAM DEFAULT CHARSET=latin1
1 row in set (0.00 sec)
*************************** 1. row ***************************
Name: CountryLanguage
Engine: MyISAM
Version: 10
Row_format: Fixed
Rows: 984
Avg_row_length: 39
Data_length: 38376
Max_data_length: 167503724543
Index_length: 22528
Data_free: 0
Auto_increment: NULL
Create_time: 2005-04-26: 22:15:35
Update_time: 2005-04-26 22:15:43
Check_time: NULL
Collation: latin1_swedish_ci
Checksum: NULL
Create_options:
Comment:
1 row in set (0.00 sec)

Chapter 2. Overview of the MySQL Database Server 17
The storage engine for a database table can also be determined from the information
schema. Example 2-7 illustrates the use of selecting the storage engine from the
information schema.
Example 2-7 SELECT engine from Information_Schema example
mysql> SELECT TABLE NAME, ENGINE FROM INFORMATION_SCHEMA.TABLES
-> WHERE TABLE_NAME = ‘City’
-> AND TABLE_SCHEMA = ‘world’\G
The statement in Example 2-7 generates output similar to that which is shown in
Figure 2-6.
Figure 2-6 SELECT Engine from Information_Schema output
The storage engines that are supported by the MySQL Database Server depend on several
factors including the version of the MySQL Database Server, how the MySQL Database
Server was configured, and the options used to start the server. The storage engines that are
supported by the current running instance of the server can be displayed with the SHOW
ENGINES statement as shown in Example 2-8.
Example 2-8 SHOW ENGINES example
SHOW ENGINES\G
The statement in Example 2-8 generates output similar to that which is shown in Figure 2-7.
Figure 2-7 SHOW ENGINES output
The “Support” column can include the following possible values:
YES to indicate that the engine is available
NO to indicate that the engine is not available
DISABLED to indicate that the engine is present but turned off
DEFAULT to indicate that the engine is present and the default engine used if not
specified in the CREATE TABLE statement
*************************** 1. row ***************************
TABLE_NAME: city
ENGINE: MyISAM
1 row in set (2.20 sec)
*************************** 1. row ***************************
Engine: MyISAM
Support: DEFAULT
Comment: Default engine as of MySQL 3.23 with great performance
*************************** 2. row ***************************
Engine: MEMORY
Support: YES
Comment: Hash based, stored in memory, useful for temporary tables
*************************** 3. row ***************************
Engine: InnoDB
Support: YES
Comment: Supports transactions, row-level locking, foreign keys

18 Discovering MySQL on IBM i5/OS
2.5 Features of the MySQL Database Server
The MySQL Database Server has attracted a strong developer base over the years. It
supports the following features:
Portability
Platforms include i5/OS, Mac OS/X, Linux, Windows, and Solaris™. MySQL can run on
small embedded systems as well as mainframes that handle massive data stores.
Hardware platforms that are supported by MySQL include Intel®, X86, SPARC,
PowerPC®, and IA64. Moving data from one MySQL platform to another is a simple task.
Ease of use
Good documentation and many tutorials (especially online) are readily available. The
MySQL client program allows access to both local and remote MySQL Database Servers.
The SQL is standards based and easy to learn and implement.
Multi-user support
The MySQL Database Server supports multiple users. Access control can be based on
location as well as username and password. Access can be restricted to the database or
table level. Access can also be restricted based on the type of query. For example, a user
might have read access (SELECT) to a table, but not write access (INSERT, UPDATE).
Scalability
The MySQL Database Server can scale up to large and complex databases. For example,
databases of 50 million records are in use at the MySQL Web site. Hundreds of users can
access the MySQL Database Server simultaneously.
Standards compliant
The MySQL Database Server strives to maintain compliance with appropriate standards
and supports most of the features of the ANSI/ISO SQL standard.
Replication
The MySQL Database Server supports replication. It is possible to set up a master server
and a series of slave servers that copy the content of the master. With the replication
support of the MySQL Database Server, you can stop the slave and run a backup utility
without taking down the master. Load balancing can be implemented where reads are
satisfied by the slave servers and writes are satisfied by the master server. Replication in
the MySQL Database Server occurs over a TCP/IP network, which allows the slave
servers to be remote. Replication in the MySQL Database Server is incremental and can
survive network disruptions.
Support for transactions
The MySQL Database Server can support transactions on a table-by-table basis through
the usage of a storage engine that supports transactions. The ability to support
transactions on a table-by-table basis facilitates the ability to implement fine-grained
optimization.
The --skip-engines option: Storage engines can be displayed by specifying the
--skip-engines option when starting the MySQL client. For example, specifying
--skip-InnodDB disables the InnoDB storage engine.

Chapter 2. Overview of the MySQL Database Server 19
Wide application support
The MySQL Database Server has application program interfaces (APIs) for a wide range
of programming languages including C, C++, ODBC, Java™, PHP, Perl, Phython, and Tcl.
2.6 Licensing
The MySQL Database Server has both open source and a commercial license. The open
source version of the MySQL Database Server is called the
Community Server. The
Community Server is targeted at open source developers and technology enthusiasts who
want to get started with the MySQL Database Server. The commercially-licensed version of
the MySQL Database Server is called the
Enterprise Server. It is targeted at those
enterprises that want to implement applications on the MySQL Database Server and benefit
from a structured support channel.
MySQL Community Server is licensed under the GNU Public License (GPL). Essentially the
license indicates that you can use the MySQL software on the condition that any
modifications you make or any applications that you develop (and plan on distributing) that
use or incorporate the MySQL software must also be licensed under the GPL. That is, the
source code to the application must be made freely available. With the Community Server,
there is no direct access to support engineers. However support for the Community Server
relies on the following tools:
Mailing lists
Forums
Community articles
Bugs database
PlanetMySQL blogs
When using the Enterprise Server, you are bound by the MySQL commercial license.
Essentially this license indicates the following guidelines:
The source code for any application that you develop that uses MySQL software can
remain proprietary.
If you plan to profit from using MySQL software in your application, then you must pay for
a licensed version.
You should consider using the commercial license for the following indications:
Selling software that includes MySQL software to customers who installed the software on
their own machines
Selling software that requires customers to install MySQL software themselves on their
own systems
Building a hardware system that includes MySQL software and selling that hardware
system to customers for installing at their own locations
If you include the MySQL Database Server with an application that is not licensed under
the GPL or GPL-compatible license
If you develop and distribute a commercial application, and as part of using your
application, the user must download a copy of MYSQL software
If you include one or more of the MySQL drivers in your non-GPL application

20 Discovering MySQL on IBM i5/OS
MySQL lists a number of considerations when choosing between using the Community
Server and the Enterprise Server. Table 2-2 summarizes the uses and requirements for each
server and provides a comparison to assist in understanding the differences.
Table 2-2 Differences between the Enterprise Server and the Community Server
The left side of the table shows what MySQL provides to the user community, while the right
side shows what the user community provides to MySQL as well as the rest of the community.
Finally, Figure 2-8 shows the progression of code and feature implementation into the MySQL
Enterprise Server from user input, to the MySQL Community Server placement and testing,
to further improvements that are placed in the MySQL Enterprise Server product.
Figure 2-8 MySQL code and feature progression
Note: The previous statements are not legally-binding facts. You are encouraged to work
with your legal advisors concerning this dual-licensed approach. You can find more
information concerning the licensing of the MySQL Database Server on the Web at:
http://www.mysql.com/company/legal/licensing/commercial-license.html
MySQL AB MySQL Community
Open source database server New ideas
Minimum two binaries per year and fixes per
features
Code contributions
Constant source code drops Bug reports
Free management tools/connectors Help, forums
Help, forums Spread MySQL goodwill
Community/
Third-Party
Development
Many ideas/
Submissions
MySQL
Community Server
Selected Submissions
Become Features
MySQL
Enterprise Server
Mature Features
Only
•Community
Recommendations
• Community Server Code
Contributions – Direct
• Community Code
Contributions – MySQL
Forge
• Third-party contributions
Design/Development
• Delivery of Community
and Customer
Recommendations
• Acceptance/Rejection of
Community Code
Contributions
• Community Testing and
Validation
• “As needed” release
schedule, including bug
fixes and new features
Community Purpose
• Selected feature set for
enterprise installations
• Predictable service pack
schedule
• Strong internal quality
assurance testing
• External quality assurance
testing
• Certified for popular
platforms and applications
• Formal technical support
Enterprise Grade

© Copyright IBM Corp. 2008. All rights reserved. 21
Part 2 Installing, configuring,
and managing the
MySQL Database
Server on i5/OS
In this part, we guide you step by step through the MySQL Database Server installation
process and the most common tasks to administer, secure and back up your new database
server. We show you different ways to execute those tasks through the command line
interface and graphical tools from MySQL AB and third parties.
This part includes the following chapters:
Chapter 3, “Installing and configuring V5.0 of MySQL Database Server on i5/OS” on
page 23
Chapter 4, “Administration: Tools and general tasks” on page 49
Chapter 5, “Security, access control, and privileges” on page 87
Chapter 6, “Backup and restore of the MySQL databases” on page 99
Chapter 7, “Replication and clustering” on page 133
Part 2

22 Discovering MySQL on IBM i5/OS

© Copyright IBM Corp. 2008. All rights reserved. 23
Chapter 3. Installing and configuring V5.0 of
MySQL Database Server on
i5/OS
In this chapter, we explain how to install and configure version 5 of the MySQL Database
Server on i5/OS. We also discuss the i5/OS Portable Applications Solutions Environment
(PASE) runtime environment on which the MySQL Database Server runs.
Specifically, we address the following topics:
“Packaging” on page 24
“Product structure” on page 24
“The i5/OS PASE runtime environment” on page 27
“Installation and configuration of the MySQL Database Server on i5/OS” on page 31
3

24 Discovering MySQL on IBM i5/OS
3.1 Packaging
The Version 5.0 package of the MySQL Database Server on i5/OS was created in
cooperation with IBM. The MySQL Database Server works within the i5/OS PASE
environment on System i hardware and provides database services for the MySQL Database
Server on i5/OS. Basically the MySQL Database Server provides an open source database
that is installed on the i5/OS integrated file system.
3.2 Product structure
When you install the MySQL Database Server on i5/OS, the product uses the following
objects:
Library
User profile
Directories
Files
We describe each of these objects in the sections that follow.
Library
The MYSQLINST library contains i5/OS-specific code for installing, configuring, and starting
the product environment.
User profile
You must create the user profile that is described in Table 3-1 during the installation process.
The user profile is created when you run the Install MySQL (INSMYSQL) command.
Table 3-1 MySQL 5.0 user profiles
Version 5 of the MySQL Database Server on i5/OS uses the QSECOFR (or *SECOFR user
profile) system-supplied user profile for the entire installation process including the MYSQL
user-profile creation.
Current release: The Version 5.0 package of the MySQL Database Server on i5/OS is the
current stable (production-quality) release.
User
profile
User
class
Special
authorities
Group
profile
Description
MYSQL *USER *NONE *NONE This profile is for the MySQL administrative user.
The profile is used for specific tasks such as to start
or end subsystem jobs and internal tasks for i5/OS
PASE and i5/OS.
Important: The MySQL user profile is created without a password. For this reason, you
cannot use the user profile to sign on to the system.

Chapter 3. Installing and configuring V5.0 of MySQL Database Server on i5/OS 25
Directories
Version 5 of the MySQL Database Server on i5/OS uses the following directory structures in
the integrated file system:
/QOpensys/mysql
This directory, shown in Figure 3-1, contains the MySQL databases.
Figure 3-1 Structure of the MySQL databases in the integrated file system
Important: All folders that depend on the data folder are schemas. The mysql schema
inside the /QOpenSys/mysql/ folder is the most important one because it contains the
MySQL system schema and other related important data. Therefore, you must not
delete these folders.

26 Discovering MySQL on IBM i5/OS
/Root/usr/local/mysql and /Root/usr/local/mysql-5.0.45-i5os-power-64bit
This directory, shown in Figure 3-2, contains the MySQL product.
Figure 3-2 Structure of the MySQL product in the integrated file system
Important: Both folders are necessary for running the MySQL Database Server on i5/OS.
Therefore, you must not delete these folders.
The mysql folder contains symbolic links to the mysql-5.045-i5os-power-64bit folder.
The mysql-5.045-i5os-power-64bit folder contains the actual product.

Chapter 3. Installing and configuring V5.0 of MySQL Database Server on i5/OS 27
Files
One available configuration file, named my.cnf, for the MySQL Database Server on i5/OS is
located in the /etc folder. Figure 3-3 shows the contents of this file, which is generated during
the installation process.
Figure 3-3 The my.cnf file
The following two rows are of particular importance:
The following row indicates the database directory:
datadir = /QOpenSys/mysql/data
The following row indicates the MySQL user profile:
user = MYSQL
These parameters are provided during the installation process in which the INSMYSQL
command was issued. We explain how to use the INSMYSQL command in 3.4.2, “Installing
and configuring the MySQL Database Server on i5/OS” on page 33.
3.3 The i5/OS PASE runtime environment
The MySQL Database Server on i5/OS runs in an i5/OS PASE runtime environment. This
environment consists of an interface between i5/OS and the AIX environment. It is not a
complete shell, but it is suitable for general purposes.
i5/OS PASE is designed to expand the solutions portfolio of the System i platform by allowing
customers and software vendors to port existing AIX applications to i5/OS with minimal effort.
i5/OS PASE is an integrated runtime environment for AIX or other UNIX-like applications that
run on i5/OS. It provides a broad subset of the application binary interface (ABI) of AIX. As a
runtime environment, i5/OS PASE does not experience the drawbacks of an emulation
environment. However, i5/OS PASE is not a UNIX operating system on i5/OS, nor is it a Linux
operating system on i5/OS. i5/OS PASE is designed to accept direct ports from AIX. Ports
from any other UNIX-based environment might require an initial port to AIX as the first step
toward compatibility.
Edit File: /etc/my.cnf
Record : 1 of 4 by 10 Column : 1 522 by 126
Control :
CMD ....+....1....+....2....+....3....+....4....+....5....+....6....+....7....+....8....+....9....+....0....+.
************Beginning of data**************
Ñ Created at installation.
^mysqld!
datadir = /QOpenSys/mysql/data
user = MYSQL
************End of Data********************
F2=Save F3=Save/Exit F12=Exit F15=Services F16=Repeat find F17=Repeat change F19=Left F20=Right

28 Discovering MySQL on IBM i5/OS
3.3.1 File systems
All of the file systems that are available in the i5/OS integrated file system are available
within i5/OS PASE. Table 3-2 lists the file systems that are available to the i5/OS PASE
environment.
Table 3-2 File systems available to i5/OS PASE environment
3.3.2 Shells and utilities
The default i5/OS PASE shell /QOpenSys/usr/bin/sh is the Korn shell. The Bourne and C
shells are also available. i5/OS does not currently provide support for teletypewriter (TTY)
devices or Berkeley job control. Therefore, the shell functions that depend on these elements
are not supported by the i5/OS PASE shells.
The i5/OS PASE shells and utilities run in ASCII and do no conversion between
ASCII/EBCDIC bytestream file data. Users can run the iconv utility to do conversions as
needed.
The i5/OS PASE shells and utilities listed in Table 3-3 on page 29 are shipped with i5/OS
Option 33 as symbolic links in the /QOpenSys/usr/bin directory. The AIX documentation that
follows Table 3-3 on page 29 describes the syntax and behavior of all the shells and utilities
except for the i5/OS-unique utility system, which provides an interface for invoking CL
commands or programs from the i5/OS PASE terminal.
File system Description
/ Root file system
QOpenSys Case sensitive, hierarchical file system; designed to support POSIX standards
QSYS.LIB Library file system, library/file.member (database storage)
QOPT Optical file system, CD-ROM access
QNTC Microsoft® Windows NT® servers using SMB, the Microsoft file serving protocol
QFileSvr.400 IBM OS/400® File Server, access to remote IBM AS/400 systems
QDLS Document Library Services, folder and document library objects; these were
used by OV/400, the AS/400 office support product
/dev/QASPxx User-defined file system, created in the auxiliary storage pool

Chapter 3. Installing and configuring V5.0 of MySQL Database Server on i5/OS 29
Table 3-3 i5/OS PASE-supplied AIX utilities
The system utility
The system utility is a unique i5/OS command that runs a CL command that was introduced in
V4R5. The system utility manages ASCII/EBCDIC conversions for stdin, stdout, and stderr so
that any Integrated Language Environment® (ILE) code that is run by the CL command uses
EBCDIC data, while the i5/OS PASE shell and utilities detect ASCII data. An explanation of
the system utility is provided in the following sections.
Syntax
The system command runs a CL command. You might need to quote the CL command to
avoid i5/OS PASE shell processing for special characters in the command string. The
command has the following syntax:
system [-b] [-h] [-i] [-k] [-K] [-n] [-q] [-s] [-v] CL-command
Flags
The flags for the system command are explained as follows:
-b Forces binary mode processing for the stdin, stdout, or stderr files used by the CL
command. When -b is not specified, the system command converts any data that is
read from stdin from the i5/OS (ASCII) PASE CCSID to the (EBCDIC) job default
CCSID, and any data written to stdout or stderr from EBCDIC to ASCII.
This option only controls processing for stream data that is read and written by the
CL command processing program. It does not affect the encoding of text lines that
are written to stdout and stderr for messages and spooled output file data, which is
always converted to ASCII.
-h Writes a brief description of allowable syntax for the system command to stdout.
-i Runs the CL command in the same process (i5/OS job) where the system utility
runs. Many CL commands are not supported in a multithreaded process. The
system utility creates multiple threads to handle CCSID conversion for stdin, stdout,
and stderr, so that it defaults to running any CL command in a separate i5/OS job
with only a single thread. Using this option can improve performance for CL
commands that can tolerate operation in a multithreaded job.
alias
apply
ar
awk
banner
basename
bc
bdiff
bfs
bg
bsh
cat
cd
chgrp
chmod
chown
chroot
cksum
cmp
colrm
comm
command
compress
cp
cpio
csh
csplit
cut
date
dbx
dc
dd
diff
diff3
dircmp
dirname
dspcat
dspmsg
du
dump
echo
egrep
env
expand
expr
false
fc
fg
fgrep
file
find
fold
getconf
getopt
getopts
grep
hash
head
hostname
iconv
id
install
jobs
join
kill
ksh
ln
locale
logname
ls
mkdir
mv
nawk
newform
nl
nm
od
pack
pagesize
paste
patch
pax
pcat
pr
printenv
printf
ps
psh
pwd
read
rev
rm
rmdir
sed
sh
sleep
sort
split
strings
strip
sum
system
tab
tail
tar
tee
test
time
touch
tr
true
type
ulimit
umask
unalias
uname
uncompress
unexpand
uniq
unpack
untab
wait
wc
what
which
xargs
yes
zcat

30 Discovering MySQL on IBM i5/OS
-k Keeps spooled output files after they are processed by writing the data to stdout.
The system utility defaults to removing spooled output files that are produced by the
CL command after it writes the data to stdout. This option retains the spooled
output files.
-K Generates a job log for the process where the CL command runs. In most cases,
the system utility does not force a job log even if the CL command ends in error.
This option can help problem determination when a CL command does not work as
expected.
-n Does not include i5/OS message identifiers in any text line written to stdout or stderr
for a message that is sent by the CL command. The default format for any text lines
written for i5/OS messages is XXX1234: message text, where “XXX1234” is the
i5/OS message identifier. This option suppresses the message identifier, so that
only the (first-level) message text is written to the stream.
-q Does not write any text lines to stdout or stderr for any i5/OS messages that are
sent by the CL command.
-s Does not process spooled output files that are produced by the CL command.
Spooled data is not written to stdout, and spooled output files are not deleted.
-v Writes the CL command invocation string to stdout before running the CL
command.
Exit status
The system command reports either of the following results for exit status:
0 The CL command completed successfully.
>0 An error occurred.
3.3.3 Additional commands
By using the commands shown in Table 3-4, you can obtain a secure connection, a secure
copy, and a secure transfer.
Table 3-4 Additional commands
Command Description
ssh A secure Telnet replacement that allows an i5/OS user to connect as a client to a
server running the sshd daemon. An ssh client can also be used to connect to the
Hardware Management Console (HMC) on System i models.
scp A secure FTP replacement. As with all implementations of sftp on other platforms,
scp can only transfer data in binary format.
sftp A secure FTP replacement. As with all implementations of sftp on other platforms,
sftp can only transfer data in binary format. Note that sftp also does not provide the
enhanced functions that are available.
ssh-keygen A public/private key generation and management tool. SSH allows users to
authenticate using these public and private keys as an alternative to using their
operating system signon password.
ssh-agent An authentication agent that can store private keys. ssh-agent allows a user to load
their public/private key passphrase into memory to avoid retyping the passphrase
each time an SSH connection is started.
sshd The daemon that handles incoming ssh connections. The sshd daemon utility allows
users to connect to i5/OS via an ssh client.

Chapter 3. Installing and configuring V5.0 of MySQL Database Server on i5/OS 31
3.3.4 Additional information and links
For additional information about the i5/OS PASE runtime environment, refer to Porting UNIX
Applications Using AS/400 PASE, SG24-5970.
You might also consider referring to the following Web pages for more information:
Recommended i5/OS fixes (including database)
http://www-912.ibm.com/s_dir/slkbase.nsf/recommendedfixes
Current i5/OS PASE PTFs by i5/OS release
http://www.ibm.com/servers/enable/site/porting/iseries/pase/misc.html
MySQL official Web site downloads
http://dev.mysql.com/downloads/mysql/5.0.html
IBM Redbooks Web site
http://www.redbooks.ibm.com
IBM System i Domain Redbooks publications
http://www.redbooks.ibm.com/portals/systemi
3.4 Installation and configuration of the MySQL Database
Server on i5/OS
In this section, we explain the tasks to install the MySQL Database Server on i5/OS and to
perform the basic configuration.
3.4.1 Checking the prerequisites
By taking the time to check the items on your system as presented in this section, you can
avoid common installation problems. We recommend that you perform the following activities
to ensure that your system is ready for installing the MySQL Database Server on i5/OS.
Hardware prerequisites
At this time, no formal hardware requirements exist for running the MySQL Database Server
on i5/OS. For the MySQL product itself, not including software prerequisites, we recommend
that you have at least 165 MB of free hard disk space.
The MySQL Database Server on i5/OS environment that is provided by the MySQL
Community Server for i5/OS itself is not highly processing-intensive or heavily constrained by
system resources.
The hardware resource requirements depend on your answers to the following questions:
How many PHP, C, MySQL Query Browser, and similar-type applications are you planning
to run? How large and complex are they?
How many users are you planning to support? How intensive do you anticipate their usage
to be, for example, light or heavy?
Schema and database: Inside the MySQL Database Server environment, the terms
schema and database both refer to a collection of database objects, such as tables,
indexes, views, and so on.

32 Discovering MySQL on IBM i5/OS
How processing-intensive are your PHP, C, MySQL Query Browser, and similar-type
applications? Is there a high degree or low degree of dynamic content?
How much database or system object access do your PHP, C, MySQL Query Browser,
and similar-type applications perform?
The higher the amount is of applications or files, users, processing, and resource access, the
more hardware resources you need.
Software prerequisites
Before you install the MySQL Database Server on i5/OS, make sure all prerequisite software
and fixes have been installed.
Checking the licensed programs
Ensure that your server is at V5R4 (required) and then perform the following steps to verify
that all prerequisite licensed programs are installed on your system:
1. Sign on to i5/OS and run the GO LICPGM command.
2. On the Work with Licensed Programs display, type option 10 (Display installed licensed
programs).
3. Press F11 twice to display the product options.
4. Ensure that the software listed in Table 3-5 is installed.
Table 3-5 Software prerequisites
5. Press F3 twice to return to the main menu.
Licensed
program
Option Description text
5722SS1 *BASE i5/OS Version 5 Release 4 (V5R4)
5722SS1 30 Qshell
5722SC1 *BASE IBM Portable Utilities for i5/OS
5722SS1 13 System Openness Includes
a
a. System Openness Includes are not necessary but may be useful. This licensed program
provides all source includes for APIs that ship with i5/OS.
5722SS1 33 Portable Application Solutions Environment
b
b. IBM Portable Utilities for i5/OS is not necessary but might be useful. For more information,
refer to 3.3, “The i5/OS PASE runtime environment” on page 27.
5799PTL *BASE iSeries® Tools for Developers
c
c. iSeries Tools for Developers is not necessary but is required for the Perl compiler in an
AIX environment running under i5/OS PASE. Some MySQL scripts may be compiled before
running the script, such as mysqlhotcopy.

Chapter 3. Installing and configuring V5.0 of MySQL Database Server on i5/OS 33
Checking the i5/OS fixes
Make sure that you have the latest individual and group fixes for your system. A group fix is a
collection of fixes that pertain to a specific product. See the following resources to identify the
latest fix levels:
i5/OS fixes (including database)
http://www-912.ibm.com/s_dir/slkbase.nsf/recommendedfixes
i5/OS PASE fixes
http://www.ibm.com/servers/enable/site/porting/iseries/pase/misc.html
Use the Display PTF (DSPPTF) command (for individual fixes) and the Work with PTF
Groups (WRKPTFGRP) command (for group fixes) to check which fixes have been applied to
your system. Be sure to order and install any missing fixes prior to installing the MySQL
Database Server on i5/OS.
User profile authorities
For the installation process (and other administrative activities), you must use a user profile of
the *SECOFR user class (with all special authorities). Use the Work with User Profiles
(WRKUSRPRF) command to check your user profile.
TCP/IP configuration
Web technologies rely heavily on TCP/IP. Before you install the MySQL Database Server,
ensure that TCP/IP is appropriately configured. In particular, check the following configuration
settings:
1. Ensure that a host name is defined for the system. Run the Configure TCP/IP (CFGTCP)
command and select option 12 (Change TCP/IP domain information) to display this
setting. Make sure that a value is listed in the Host name field.
2. Make sure that the loopback entry, which represents “localhost” or 127.0.0.1, is configured
in the TCP/IP host table. Run the Configure TCP/IP (CFGTCP) command and select option
10 (Work with TCP/IP host table entries) to display the host table. Ensure that an entry for
IP address 127.0.0.1 exists and is mapped to the host names LOOPBACK and
LOCALHOST.
In addition on this display, check that the IP address of the System i5™ machine is
mapped to its host name, such as SYSTEMA, and fully qualified host name, such as
SYSTEMA.MYCOMPANY.COM. You should be able to successfully ping both the
loopback address and the fully qualified host name of your system from i5/OS, and the
fully qualified host name from any browser that will be used to access PHP scripts.
3.4.2 Installing and configuring the MySQL Database Server on i5/OS
After you have verified and set up the prerequisites, you are ready to install the MySQL
Database Server on i5/OS product. The MySQL Database Server on i5/OS is provided as a
save file (.savf) package that you can download directly without performing any additional
steps.
Tar file procedure: Alternatively, you can download a compressed tar file (.tar) package to
install the MySQL Database Server on i5/OS. The installation procedure of the tar file
package, which is not explained in this book, preceded the method of using the save file
package. For more information about the tar file method, see the following Web address:
http://www-941.haw.ibm.com/collaboration/ibmwiki/display/sg247327/05-02-00%20My
SQL

34 Discovering MySQL on IBM i5/OS
To install the MySQL Database Server on i5/OS:
1. Go to the MySQL 5.0 Downloads page (Figure 3-4) at:
http://dev.mysql.com/downloads/mysql/5.0.html
2. On the MySQL 5.0 Downloads page, in the upper right corner above the menu bar, click
Register.
If you have already registered, click the Download button under MySQL Community
Server and go to step 4.
Figure 3-4 MySQL 5.0 Downloads page
3. On the Register for a MySQL.com Account page, complete the form and click Submit to
download the MySQL Package. Registration is not mandatory, but it is useful for future
references.

Chapter 3. Installing and configuring V5.0 of MySQL Database Server on i5/OS 35
4. On the next page (Figure 3-5), scroll down until you find the IBM i5/OS SAFV or TAR
packages. Click either the Download or Pick a mirror link to download the file.
Figure 3-5 Downloading packages for the MySQL Database Server on i5/OS
5. In the File Download window (Figure 3-6) that opens, click Save to save the package file
to your workstation.
Figure 3-6 Save file dialog box
6. Log on to i5/OS with a user profile that has a user class of *SECOFR with all special
authorities (QSECOFR if available).
7. Create a save file with the following command:
CRTSAVF FILE(QGPL/MYSQLINST) TEXT(‘MySQL 5.0 save file’)
Important: You must select the i5/OS (POWER, 64-bit) option regardless of whether
you choose the SAVF or TAR download package.
Tip: The Pick a mirror option is useful for you to download packages from a different
site. Use the MD5 checksum and GnuPG signatures to verify the integrity of the
packages that you download.

36 Discovering MySQL on IBM i5/OS
8. Verify that FTP is running on your i5/OS system:
NETSTAT *CNN
Look for ftp-con (or port 21 by pressing F14) in the Local Port column as shown in
Figure 3-7.
If FTP is not running on your system, then enter the following command:
STRTCPSVR *FTP
Figure 3-7 FTP ports view
9. On your workstation, open a command prompt and transfer the MySQL save file to i5/OS
by using the ftp command:
a. Change the directory to the one that contains the files that you downloaded from the
MySQL Web site, for example:
cd /temp
b. Run the ftp command and specify the name of your i5/OS system, for example:
ftp systema
c. If requested, enter a valid user profile and password.
d. Enter the bin command to specify a binary transfer.
Work with TCP/IP Connection Status
System: RCHASM27
Type options, press Enter.
3=Enable debug 4=End 5=Display details 6=Disable debug
8=Display jobs
Remote Remote Local
Opt Address Port Port Idle Time State
* * ftp-con > 067:43:58 Listen
* * telnet 001:01:32 Listen
* * www-http 000:00:33 Listen
* * ntp 000:42:59 *UDP
* * netbios > 067:43:02 Listen
* * netbios > 000:00:15 *UDP
* * netbios > 000:00:14 *UDP
* * netbios > 067:42:57 Listen
* * ldap 067:42:43 Listen
* * cifs 067:37:22 Listen
* * drda 067:44:04 Listen
* * ddm 067:44:04 Listen
More...
F3=Exit F5=Refresh F9=Command line F11=Display byte counts F12=Cancel
F20=Work with IPv6 connections F22=Display entire field F24=More keys
Tip: You can see the entire ftp transaction process by typing the hash command.
When you do this, you see a progress bar that uses the #####... characters.

Chapter 3. Installing and configuring V5.0 of MySQL Database Server on i5/OS 37
e. Transfer the save file to i5/OS by entering the following command, for example:
put mysql-5.0.45b-i5os-power-64bit.savf mysqlinst.savf
f. When the transfer has completed, enter the quit command.
10.Return to the 5250 session and run the Display Saved Objects (DSPSAVF) command:
DSPSAVF FILE(MYSQLINST)
11.In the Display Saved Objects panel (Figure 3-8), verify the contents of the save file that
you uploaded before. Press F3 to return to the main menu.
Figure 3-8 Display Saved Objects panel
12.Restore the MYSQLINST library that is compressed into the save file that you uploaded to
i5/OS by using the ftp command.
13.Restore the library by using the Restore Library (RSTLIB) command:
RSTLIB SAVLIB(MYSQLINST) DEV(*SAVF) SAVF(MYSQLINST) MBROPT(*ALL)
ALWOBJDIF(*ALL)
14.When you finish restoring the MYSQLINST library, check that all necessary objects for
installation are on the system by typing the Display Library (DSPLIB) command:
DSPLIB LIB(MYSQLINST)
Tip: The i5/OS naming convention does not support long names that have more
than ten characters, nor does it support special characters.
Display Saved Objects
Library saved . . . . . . . : MYSQLINST
Type Options, press Enter.
5=Display
Opt Object Type Attribute Owner Size (K) Data
MYSQLINST *LIB PROD MYSQLDEV 84 YES
INSMYSQL *PGM CLP MYSQLDEV 68 YES
TARF *FILE SAVF MYSQLDEV 59416 YES
INSMYSQL *CMD MYSQLDEV 8 YES
Bottom
F3=Exit F11=Alternate view F12=Cancel F16=Display header
Security changes message: Ignore the security changes-type messages at the
bottom of your panel. The messages are in regard to the objects that you just restored
and are normally displayed.

38 Discovering MySQL on IBM i5/OS
15.Review the information on the Display Library panel (Figure 3-9). Then press F3 to return
to the main menu.
Figure 3-9 Display MYSQLINST library
5. Enter the INSMYSQL command:
MYSQLINST/INSMYSQL
Display Library
Library . . . . . . : MYSQLINST Number of objects . : 3
Type . . . . . . . . : PROD Library ASP number . : 1
Create authority . . : *SYSVAL Library ASP device . : *SYSBAS
Library ASP group . : *SYSBAS
Type options, press Enter.
5=Display full attributes 8=Display service attributes
Opt Object Type Attribute Size Text
INSMYSQL *PGM CLP 69632 Install MySQL
TARF *FILE SAVF 60841984
INSMYSQL *CMD 8192 Install MySQL
Bottom
F3=Exit F12=Cancel F17=Top F18=Bottom
Installation on DBCS systems: On DBCS systems, a problem has been identified
with the installation process. On these systems, you must change your job’s coded
character set identifier (CSSID) to 37 (EBCDIC) before you run the INSMYSQL
installation command:
1. Determine your existing CSSID by using the DSPJOB command and selecting
option 2.
2. Enter the following command:
CHGJOB CSSID(37)
3. Run the INSMYSQL command to install MySQL.
4. Run the CHGJOB command again with your original CSSID.

Chapter 3. Installing and configuring V5.0 of MySQL Database Server on i5/OS 39
6. On the Install MySQL (INMYSQL) panel (Figure 3-10), you see the following installation
parameters:
– DIR(‘/usr/local’)
This parameter identifies the installation location for the MySQL files. The directory is
created if it does not exist.
– DATADIR(‘/QOpenSys/mysql/data’)
This parameter defines the location of the directory that will be used to store the
database files and binary logs. This is the default value.
– USRPRF(MYSQL)
This parameter defines the user profile that will own the files that are installed.
Press F4 to start the MySQL installation on the i5/OS server.
Figure 3-10 INSMYSQL panel
Note: The MySQL Database Server on i5/OS can be installed anywhere. For this
example we assume that the MySQL Database Server will be installed into the
/usr/local folder in the integrated file system.
Install MySQL (INSMYSQL)
Type choices, press Enter.
INSTALLATION DIRECTORY . . . . . '/usr/local'
DATA DIRECTORY . . . . . . . . . '/QOpenSys/mysql/data'
OWNING USER PROFILE . . . . . . MYSQL Character value
Bottom
F3=Exit F4=Prompt F5=Refresh F12=Cancel F13=How to use this display
F24=More keys

40 Discovering MySQL on IBM i5/OS
In Figure 3-11, you can see the source code of the INSMYSQL program that you can
retrieve by using the Retrieve CL Source (RTVCLSRC) command.
Figure 3-11 Source code of the INSMYSQL CL program
100 PGM PARM(&TARGETDIR &DATADIR &USERPROF)
200 DCL VAR(&TARGETDIR) TYPE(*CHAR) LEN(512)
300 DCL VAR(&DATADIR) TYPE(*CHAR) LEN(512)
400 DCL VAR(&USERPROF) TYPE(*CHAR) LEN(10)
500 DCL VAR(&USERCLASS) TYPE(*CHAR) LEN(10)
600 DCL VAR(&TARF) TYPE(*CHAR) LEN(256) VALUE('/tmp/mysql_i5os_insta-
700 ll.tar')
800 DCL VAR(&TARBASE) TYPE(*CHAR) LEN(24) VALUE('/QOpenSys/usr/bin/t-
900 ar')
1000 DCL VAR(&SHELLCMD) TYPE(*CHAR) LEN(800)
1100 RTVUSRPRF USRPRF(*CURRENT) USRCLS(&USERCLASS)
1200 IF COND(&USERCLASS *NE '*SECOFR') THEN(GOTO CMDLBL(EXITFAIL))
1300 CRTUSRPRF USRPRF(&USERPROF) STATUS(*DISABLED) TEXT('MYSQL -
1400 PROFILE')
1500 MONMSG MSGID(CPF2214)
1600 CHGVAR VAR(&SHELLCMD) VALUE('if [ ! -e ' *BCAT &TARGETDIR *BCAT -
1700 ' ]; then mkdir -p ' *BCAT &TARGETDIR *BCAT ' ; fi;')
1800 QSH CMD(&SHELLCMD)
1900 CHGVAR VAR(&SHELLCMD) VALUE('if [ ! -e ' *BCAT &DATADIR *BCAT ' -
2000 ]; then mkdir -p ' *BCAT &DATADIR *BCAT ' ; fi;')
2100 QSH CMD(&SHELLCMD)
2200 RST DEV('/qsys.lib/mysqlinst.lib/tarf.file') OBJ((&TARF))
2300 MONMSG MSGID(CPF383E)
2400 CHGVAR VAR(&SHELLCMD) VALUE(&TARBASE *BCAT '-xf' *BCAT &TARF)
2500 CHGCURDIR DIR(&TARGETDIR)
2600 QSH CMD(&SHELLCMD)
2700 RMVLNK OBJLNK('mysql')
2800 MONMSG MSGID(CPFA0A9)
2900 MONMSG MSGID(CPFA0B1)
3000 CHGVAR VAR(&SHELLCMD) VALUE('newPath=`' *CAT &TARBASE *BCAT -
3100 '-tf' *BCAT &TARF *BCAT ' | head -n 1`; ln -s $newPath mysql; cd -
3200 $newPath; chown -R ' *BCAT &USERPROF *BCAT ' .')
3300 QSH CMD(&SHELLCMD)
3400 CHGVAR VAR(&SHELLCMD) VALUE('if [ ! -e /etc/my.cnf ]; then -
3500 export QIBM_CCSID=819; echo "# Created at installation." > -
3600 /etc/my.cnf; echo "[mysqld]" >> /etc/my.cnf; -
3700 echo "datadir = ' *CAT &DATADIR *CAT '">> /etc/my.cnf; echo "user = '-
3800 *CAT &USERPROF *CAT '" >> /etc/my.cnf; chmod 660 /etc/my.cnf; fi;')
3900 QSH CMD(&SHELLCMD)
4000 CHGVAR VAR(&SHELLCMD) VALUE('if [ ! -e ' *CAT &DATADIR *TCAT -
4100 '/mysql/user.frm ]; then cd mysql; /QOpenSys/usr/bin/sh -
4200 ./scripts/mysql_install_db --defaults-file=/etc/my.cnf; fi;')
4300 QSH CMD(&SHELLCMD)
4400 RMVLNK OBJLNK(&TARF)
4500 GOTO CMDLBL(END)
4600 EXITFAIL:
4700 SNDPGMMSG MSG('THE INSTALL PROGRAM REQUIRES *SECOFR USER CLASS')-
4800 TOPGMQ(*EXT)
4900 END:
5000 ENDPGM

Chapter 3. Installing and configuring V5.0 of MySQL Database Server on i5/OS 41
After successful completion of the INSMYSQL command, you see a message like the
example in Figure 3-12.
Figure 3-12 INSMYSQL message
PLEASE REMEMBER TO SET A PASSWORD FOR THE MySQL root USER ]
To do so, start the server, then issue the following commands:
./bin/mysqladmin -u root password ‘new-password’
./bin/mysqladmin -u root -h RCHASM27.RCHLAND.IBM.COM password ‘new-password’
See the manual for more instructions.
You can start the MySQL deamon with:
cd . ; ./bin/mysqld_safe &
You can test the MySQL deamon with mysql-test-run.pl
cd mysql-test ; perl mysql-test-run.pl
Please report any problems with the ./bin/mysqlbug script]
The latest information about MySQL is available on the Web at
http://www.mysql.com
Support MySQL by buying support/licenses at http://shop.mysql.com
Press ENTER to end terminal session.
===>
F3=Exit F4=End of File F6=Print F9=Retrieve F17=Top
F18=Bottom F19=Left F20=Right F21=User Window

42 Discovering MySQL on IBM i5/OS
3.4.3 Verifying the installation
After you install the MySQL Database Server on i5/OS, you must ensure that the installation
process was successful:
1. Press Enter or F3 to exit the INSMYSQL message panel (Figure 3-12 on page 41).
2. Run the Display Job Log (DSPJOBLOG) command and press F10 in order to check the
previous command execution. You should see the Display All Message panel
(Figure 3-13).
The words “exit status 0” indicate that the installation has completed successfully.
Figure 3-13 Display All Messages panel
‘Security’ and ‘object not found’ messages: Ignore the security messages and the
“Object not found” message because these are normally occurring messages.
Display All Messages
System: RCHASM27
Job . . : QPADEV0001 User . . : JAVIER Number . . . : 013126
Special authorities granted *NONE.
User profile MYSQL created.
Command ended normally with exit status 0.
Command ended normally with exit status 0.
Owner changed for object /tmp/mysql_i5os_install.tar.
Security changes ocurred for 1 objects.
1 object restored. 0 objects not restored.
Current directory changed.
Command ended normally with exit status 0.
Object not found. Object is mysql.
Command ended normally with exit status 0.
Command ended normally with exit status 0.
Command ended normally with exit status 0.
Link removed.
More...
Press Enter to continue.
F3=Exit F5=Refresh F12=Cancel F17=Top F18=Bottom

Chapter 3. Installing and configuring V5.0 of MySQL Database Server on i5/OS 43
3.4.4 Post installation tasks
In this section, we explain the additional steps that are necessary to complete the MySQL
Database Server configuration so that you can access MySQL by using either a command
line or MySQL Administrator on Linux or Windows NT, 2000, or XP. For information about how
to install MySQL Tools 5.0, see 4.3.2, “Installing the MySQL GUI Tools” on page 55.
In this section, we explain the steps by using the command line:
1. Sign on to i5/OS and execute the QP2TERM program to start the i5/OS PASE
environment:
CALL QP2TERM
2. In the terminal window that opens (Figure 3-14), on the i5/OS PASE command line, enter
the following command to change to the MySQL commands directory:
cd /usr/local/mysql/bin
Figure 3-14 CALL QP2TERM (terminal console)
3. Check that you are in the correct directory by entering the following command:
pwd
Note: In order to make your work easier, we recommend that you change your user
profile to your home directory by using the following command:
CHGPRF HOMEDIR(‘/usr/local/mysql/bin’)
You must sign off and then sign on again for the change to take effect. By using this
command, every time you start the i5/OS PASE environment by using CALL
QP2TERM, you always be in the /usr/local/mysql/bin folder, which will be easier to
invoke the MySQL commands.
/QOpenSys/usr/bin/-sh
$
= = = >
F3=Exit F6=Print F9=Retrieve F11=Truncate/Wrap
F13=Clear F17=Top F18=Bottom F21=CL command entry

44 Discovering MySQL on IBM i5/OS
4. Before creating a MySQL user profile, verify whether the MySQL Database Server is
started by using the following steps:
a. Verify whether the MySQL Database Server is started by typing one of the following
commands:
mysqladmin -u root status
mysqladmin -u root ping
If it is started, you see a message like the one shown in Figure 3-15.
Figure 3-15 MySQL Database Server server status
b. If the MySQL Database Server is not started, then type the following command:
mysqld_safe -u root &
You now see a message like the one shown in Figure 3-16.
Figure 3-16 MySQL starting server
c. Verify that the MySQL Database Server has started:
ps -ef | grep mysqld
A panel like the one in Figure 3-17 opens indicating that the MySQL Database Server
has started.
Figure 3-17 MySQL Database Server status
> mysqladmin -u root status
Uptime: 80618 Threads: 1 Questions: 254 Slow queries: 0 Opens: 32 Flush tables: 2 Open tables: 19 Queries per second avg:
0.003
$
> mysqladmin -u root ping
mysqld is alive
$
Note: Notice that the command ends with the ampersand (&) character, which
indicates batch execution.
> mysqld_safe -u root &
^1! 182
$ Starting mysqld daemon with databases from /QOpenSys/mysql/data
/QOpenSys/usr/bin/-sh
$
> cd /usr/local/mysql/bin
$
> pwd
/usr/local/mysql/bin
$
> mysqld_safe -u root &
^1! 182
$ Starting mysqld daemon with databases from /QOpenSys/mysql/data
> ps -ef | grep mysqld
javier 182 181 0 10:36:55 - 0:00 /bin/sh mysqld_safe -u root
javier 202 182 0 10:37:04 - 0:00 /usr/local/mysql/bin/mysqld --basedir=/usr/local/mysql --datadir=/QOpenSys/mysql/data
--user=MYSQL --pid-file=/QOpenSys/mysql/data/RCHASM27.RCHLAND.IBM.COM.pid -u root
$
===>
F3=Exit F6=Print F9=Retrieve F11=Truncate/Wrap
F13=Clear F17=Top F18=Bottom F21=CL command entry

Chapter 3. Installing and configuring V5.0 of MySQL Database Server on i5/OS 45
5. Create an administrative user profile by adding this user to the user table into the mysql
schema with the following command. In this example, we use itso for the administrative
user profile.
mysql -u root mysql -e “insert into user (host, user, password) values (‘%’,
‘itso’, ‘itso’)”
6. Grant administrative privileges to the user itso and encrypt the password that was
generated before by entering the following commands as shown in Figure 3-18:
mysql -u root mysql -e “grant all privileges on *.* to ‘itso’@’%’ identified by
‘itso’ with grant option”
mysql -u root mysql -e “flush privileges”
Figure 3-18 Creating the MySQL administrative user profile with the grant option
7. Check the user profile you created before. Enter the following command to log in to the
MySQL Database Server:
mysql -u root
8. Select the mysql schema:
use mysql;
9. Execute a query over the table user:
select user, password from user;
> mysql -u root mysql -e "insert into user (host, user, password) values ('%', 'itso', 'itso')"
$
> mysql -u root mysql -e “grant all privileges on *.* to ‘itso’@’%’ identified by ‘itso’ with grant
option”
$
> mysql -u root mysql -e “flush privileges”
$
Messages: Notice that no messages are displayed in this step, unless an error occurs
upon entering the command.

46 Discovering MySQL on IBM i5/OS
Figure 3-19 shows the results of running the command.
Figure 3-19 MySQL query
10.To stop the MySQL Database Server, type the following command and wait for it to stop:
mysqladmin -u root shutdown
11.Type quit to log out of MySQL Database Server and press Enter.
3.4.5 Common installation and restoration errors
Installation failures are usually caused by one or more of the following conditions:
Your user profile does not have sufficient authority.
You entered the wrong folder in the command. The folder must be /usr/local/mysql/bin.
Structures from a previous installation are found by the installer.
The library list does not contain the QGPL or QTEMP libraries.
Prerequisite software products or fixes are missing.
The /etc/my.cnf file has invalid values, which are the same as for the INSMYSQL
command. Remove this file if necessary for a newer installation.
If any of these conditions exist, correct the problem, and then remove any product files that
were created during the failed installation. To find some of the installation failures, run the
Display Job Log (DSPJOBLOG) command. Press F10 and check for messages in the job log.
You can also check for suitable logs in the integrated file system.
Use care when restoring objects to the i5/OS. The most common problems during object
restoration are related to object authorities or nonexistent users in the system. You should
use valid users with enough authority to restore the MYSQLINST library. Otherwise, you will
not be able to restore all the objects.
> mysql -u root
Welcome to the MySQL monitor. Commands end with ; or \g.
Your MySQL connection id is 2
Server version: 5.0.45 MySQL Community Server (GPL)
Type 'help;' or '\h' for help. Type '\c' to clear the buffer.
mysql>
> select user, password from user;
+--------+-------------------------------------------+
| user | password |
+--------+-------------------------------------------+
| root | |
| root | |
| root | |
| javier | *B174F2517BA8F7BD62D6AF171D91AB2F537BCB94 |
| itso | *63C5A3E03987225C0620E974CD173F0A77FF888D |
+--------+-------------------------------------------+
5 rows in set (0.01 sec)
Further information: For verification, configuration, and administration information, refer
to Chapter 4, “Administration: Tools and general tasks” on page 49.

Chapter 3. Installing and configuring V5.0 of MySQL Database Server on i5/OS 47
3.4.6 Upgrading the MySQL Database Server on i5/OS from a previous version
Before you begin an upgrade, we recommend that you back up the entire contents of the
mysql folder in the integrated file system or workstation.
For some reason, if you need to upgrade the MySQL Database Server on i5/OS from a
previous version, use the same parameters of the INSMYSQL command to ensure that the
updating process goes smoothly.
During the installation process, the following actions occur in a typical binary installation
process automatically:
All the necessary files are copied into a directory that matches the package version, for
example mysql-5.0.45b-i5os-power-64bit.
The ownership is set on those files.
The MySQL Database Server on i5/OS environment is set up.
The MySQL Database Server on i5/OS configuration file (in /etc/my.cnf) is created.
If this is a new installation of the MySQL Database Server on i5/OS, or the installer program
detects that it is a new version of the MySQL Database Server on i5/OS (because the
/etc/my.cnf does not exist), then the initial core of the MySQL Database Server on i5/OS
databases is also created during the installation process.
3.4.7 Uninstalling the MySQL Database Server on i5/OS
Before you uninstall the MySQL Database Server on i5/OS, we recommend that you verify
that you no longer need the MySQL database. If you want to make a copy of your database
before you delete the product, see Chapter 6, “Backup and restore of the MySQL databases”
on page 99.
When you are sure that you want to delete the MySQL Database Server, follow these steps:
1. Sign on to a 5250 session on your System i environment with a user profile that has a user
class of *SECOFR with all special authorities (QSECOFR if available).
2. Connect i5/OS with the i5/OS PASE interface:
CALL QP2TERM
3. Stop the MySQL Database Server to avoid lock problems during file deletion in the
integrated file system:
cd /usr/local/mysql/bin
mysqld_safe -u root &
4. Ensure that the server is shut down by running the following command. You might have to
wait for a while.
ps -ef | grep mysqld
If no rows are shown, the server is shut down.

48 Discovering MySQL on IBM i5/OS
5. Delete completely the following folders:
– /QOpenSys/mysql
– /usr/local/mysql
– /usr/local/mysql-5.045-i5os-power-64bit
To delete these folders:
a. Enter the Work With Link (WRKLNK) command.
b. Navigate to the correct folder.
c. Select option 2 (Edit) in the parent directory in order to delete all files and folders that
are contained in the specific folder to be deleted.
d. Select option 9 (delete recursively).
6. Navigate to /etc folder and delete it to remove the /etc/my.cnf file.
7. Delete the user profile and all the objects for which the ownership is MYSQL:
DLTUSRPRF USRPRF(MYSQL) OWNOBJOPT(*DLT)
You have now uninstalled the MySQL Database Server.
Attention: Make a backup of your folders before you start deleting them. The integrated
file system has no way to recover deleted folders if you delete the wrong one.

© Copyright IBM Corp. 2008. All rights reserved. 49
Chapter 4. Administration: Tools and
general tasks
In this chapter, we discuss the popular administration tools that are available for the MySQL
Database Server and how you can execute the most common administrative tasks for each
one. We also show graphical and native command line interface (CLI) tools. In addition, we
review some tools for running queries on your MySQL Database Server.
Specifically, we discuss the following topics:
“Overview of the administration command line tools” on page 50
“Overview of the graphical administration tools” on page 53
“Installation of the administration tools” on page 55
“General administration tasks” on page 65
4

50 Discovering MySQL on IBM i5/OS
4.1 Overview of the administration command line tools
Several command line programs are provided by the MySQL Database Server that are used
for administration tasks. Most of the programs have options that are specific to their own
operation, but the syntax is similar for all of them. We describe the individual options and
provide a general overview of how to invoke the programs and the options that they
recognize.
The MySQL Database Server and server startup scripts
You use the following programs to start, control, and monitor the MySQL Database Server:
mysqld The SQL daemon (that is, the MySQL Database Server). To use client
programs, mysqld must be running, because clients gain access to
databases by connecting to the server.
mysqld_safe The server startup script that calls the mysqld daemon to start the
MySQL Database Server.
mysqlmanager The MySQL Instance Manager that monitors and manages MySQL
Database Server instances.
Client programs
The following client programs require the server to be running so that you can execute
different administration tasks:
mysql A command-line client for executing SQL statements interactively or
from a file in batch mode.
mysqladmin A client that performs administrative operations, such as creating or
dropping databases, reloading the grant tables, flushing tables to disk,
and reopening log files. mysqladmin can also be used to retrieve
version, process, and status information from the server.
mysqlcheck Performs table maintenance operations, as well as checks, repairs,
optimizes, and analyzes tables.
mysqlimport Provides a command-line interface to the LOAD DATA INFILE SQL
statement.
mysqlshow Displays information about databases and tables. The mysqlshow client
can be used to quickly see which databases exist, their tables, or the
columns or indexes of a table.
Note: The save file of the MySQL Database Server on i5/OS includes all of these
programs. If you are missing one or more of the command line programs, refer to
Chapter 3, “Installing and configuring V5.0 of MySQL Database Server on i5/OS” on
page 23, for information about how to get those programs.

Chapter 4. Administration: Tools and general tasks 51
Utility programs
The following programs operate independently of the status of the server. You also use these
programs to perform analysis and maintenance tasks:
myisamchk Performs offline table maintenance operations. The myisamchk utility
works with MyISAM tables, so that you can obtain information about
your database tables or check, repair, or optimize them.
mysqlbinlog A tool for reading statements from binary log files. The log of executed
statements contained in the binary log files can be used to help
recover from a crash.
perror Prints a description for a system or storage engine error code instead
of searching the documentation.
4.1.1 Invoking command line tools
To invoke a MySQL command line program, you must call the i5/OS PASE shell from a
command line by executing CALL QP2TERM.
You may find it necessary to invoke MySQL programs by using the path name to the bin
directory in which they are installed. This is likely to be the case if you get a “program not
found” error message whenever you attempt to run a MySQL program from any directory
other than the bin directory. To make it more convenient to use MySQL, you can add the path
name of the bin directory to your PATH environment variable setting, so that you can run a
program by typing only its name, and not its entire path name. For example, if mysql is
installed in /usr/local/mysql/bin, you will be able to run it by invoking it as mysql. It is not
necessary to invoke it as /usr/local/mysql/bin/mysql.
Another option is use cd command to move into the bin directory inside MySQL Database
Server and run the command from there.
In your shell, enter the program name followed by any options or other arguments that are
needed to instruct the program what you want it to do. Consider the following sample
invocation of the commands in which we call the command interpreter of the MySQL
Database Server:
cd /usr/local/mysql/bin
mysql -u root test
Note: For more information about how to run commands in an i5/OS PASE shell or to add
environment variables, refer to Porting UNIX Applications Using AS/400 PASE,
SG24-5970.

52 Discovering MySQL on IBM i5/OS
When we connect to the MySQL Database Server, a panel like the one shown in Figure 4-1 is
displayed.
Figure 4-1 Sample invocation of the command tools
In the following example, we demonstrate two more command invocations:
1. Check the status of the MySQL Database Server:
mysqladmin -u root status
2. Show the tables of the database world:
mysqlshow -u root world
Figure 4-2 on page 53 shows the output.
/QOpenSys/usr/bin/-sh
> pwd
/usr/local/mysql/bin
$
> mysql -u root test
Welcome to the MySQL monitor. Commands end with ; or \g.
Your MySQL connection id is 751
Server version: 5.0.45-log MySQL Community Server (GPL)
Type 'help;' or '\h' for help. Type '\c' to clear the buffer.
mysql>
===>
F3=Exit F6=Print F9=Retrieve F11=Truncate/Wrap
F13=Clear F17=Top F18=Bottom F21=CL command entry
Important: We are now inside the command interpreter of the MySQL Database Server.
However, before we can run another command in the i5/OS PASE environment, we must
exit the MySQL command interpreter. Therefore, we type quit.

Chapter 4. Administration: Tools and general tasks 53
Figure 4-2 mysqladmin and mysqlshow sample invocations
Arguments that begin with a single dash (-) or a double dash (--) are option arguments. You
use options typically to indicate the type of connection that a program should make to the
server or to affect its operational mode.
Non-option arguments (arguments with no leading dash) provide additional information to the
program. For example, the mysql program interprets the first non-option argument as a
database name. For example, the mysql -u root test command indicates that you want to
use the test database.
4.2 Overview of the graphical administration tools
Two of the most popular graphical administration tools to manage the MySQL Database
Server are
MySQL GUI Tools and phpMyAdmin. On i5/OS, we cannot start and stop the
MySQL Database Server unless we are connected locally. Therefore, we use these
administration tools to monitor server status and connections, manage user accounts,
manage backups and restores, and navigate through database catalogs and tables.
/QOpenSys/usr/bin/-sh
> mysqladmin -u root status
Uptime: 13736 Threads: 1 Questions: 5686 Slow queries: 0 Opens: 219
Flus
h tables: 1 Open tables: 64 Queries per second avg: 0.414
$
> mysqlshow -u root world
Database: world
+-----------------+
| Tables |
+-----------------+
| City |
| Country |
| CountryLanguage |
+-----------------+
$
===>
F3=Exit F6=Print F9=Retrieve F11=Truncate/Wrap
F13=Clear F17=Top F18=Bottom F21=CL command entry
Note: In Figure 4-2, “world” is the name of a sample database from the MySQL Web site.
You can download the world database from the following Web address:
http://dev.mysql.com/doc/

54 Discovering MySQL on IBM i5/OS
4.2.1 Overview of MySQL GUI Tools
Earlier in this chapter, we discussed the MySQL command line tools that are provided with
the MySQL Database Server. According to the MySQL AB Web site, MySQL AB offers three
GUI-based client programs for use with the MySQL Database Server:
MySQL Administrator
A tool used for administering MySQL Database Servers, databases, tables, and
user accounts.
MySQL Query Browser
A graphical tool for creating, executing, and optimizing queries on MySQL
databases.
MySQL Migration Toolkit
A tool that helps you to migrate databases and data from other relational
database management systems to the MySQL Database Server.
For information about how to install these tools, see 4.3.2, “Installing the MySQL GUI Tools”
on page 55.
4.2.2 Overview of phpMyAdmin
The phpMyAdmin tool is written in PHP and is intended to handle the administration of the
MySQL Database Server over the Web. Currently phpMyAdmin supports the following functions:
Browse and drop databases, tables, views, fields, and indexes
Create, copy, drop, rename, and alter databases, tables, fields and indexes
Maintain a server, databases, and tables, with proposals on a server configuration
Execute, edit and bookmark any SQL-statement, even batch-queries
Load text files into tables
Create and read dumps of tables
Export data to various formats including CSV, XML, PDF, ISO/IEC 26300 -
OpenDocument Text and Spreadsheet, Microsoft Word, Microsoft Excel®, and LATEX
Manage MySQL users and privileges
Check referential integrity in MyISAM tables
Using Query-by-example (QBE), create complex queries that automatically connect
required tables
Search globally in a database or a subset of it
Transform stored data into any format using a set of predefined functions, such as
displaying BLOB data as an image or a download link
Support InnoDB tables and foreign keys
Support mysqli, the improved MySQL extension
Communicate in 54 different languages
For information about how to install phpMyAdmin, see 4.3.3, “Installing phpMyAdmin” on
page 59.
Note: For additional information, the GUI programs each have their own manuals, which
you can access on the Web at:
http://dev.mysql.com/doc/

Chapter 4. Administration: Tools and general tasks 55
4.3 Installation of the administration tools
In this section, we review the installation process for the administration tools that we have
mentioned earlier.
4.3.1 Installing the server-side tools
The save file of the MySQL Database Server on i5/OS includes all of the command line
programs. If you seem to be missing one or more programs, refer to Chapter 3, “Installing and
configuring V5.0 of MySQL Database Server on i5/OS” on page 23, for information about how
to obtain those programs.
4.3.2 Installing the MySQL GUI Tools
MySQL GUI Tools run on Windows, Linux, and Mac OS X. You can find MySQL GUI Tools for
the operating system of your choice on the MySQL GUI Tools Downloads page (Figure 4-3) at
the following address:
http://dev.mysql.com/downloads/gui-tools/5.0.html
Figure 4-3 MySQL GUI Tools Downloads page
In this section, we explain how to install MySQL GUI Tools on Windows. MySQL GUI Tools
run on recent 32-bit Windows NT-based operating systems, including Windows 2000, XP, and
2003. They do not run on Windows NT 4 and earlier. You can install MySQL GUI Tools on all
Windows operating systems by using the Windows Installer (.msi) installation package. The
MSI package is contained within a compressed archive named
mysql-gui-tools-version-win32.msi, where version indicates the MySQL GUI Tools version.
Microsoft Windows Installer Engine: The Microsoft Windows Installer Engine was
updated with the release of Windows XP. Those users who are using a previous version of
Windows can reference Microsoft Knowledge Base article 292539 at the following address
for information about upgrading to the latest version of the Windows Installer Engine:
http://support.microsoft.com/kb/292539/en-us

56 Discovering MySQL on IBM i5/OS
To install MySQL GUI Tools:
1. Double-click the MSI file.
2. In the Welcome window (Figure 4-4), click Next to begin the installation process.
Figure 4-4 Welcome window
3. In the License Agreement window (Figure 4-5), review the agreement, select I accept the
terms in the license agreement, and click Next.
Figure 4-5 License Agreement window

Chapter 4. Administration: Tools and general tasks 57
4. In the Destination Folder window (Figure 4-6), change to the desired folder or accept the
default. Click Next.
Figure 4-6 Destination Folder window
5. In the Setup Type window (Figure 4-7), choose the setup type that best suits your needs.
You can choose a complete or custom installation. If you do not want to install all of the
MySQL GUI Tools, choose the Custom option. Custom installation also gives you the
option of installing support for languages other than English. MySQL GUI Tools supports,
German, Greek, Japanese, Polish, and Brazilian Portuguese. Otherwise, click Complete.
Click Next.
Figure 4-7 Setup Type window

58 Discovering MySQL on IBM i5/OS
6. In the Ready to Install the Program window (Figure 4-8), review the options that you have
selected. Click Back if you want to change any of the options that are shown. Otherwise,
click Install.
Figure 4-8 Selected options before the final installation
7. If the installation process is successful, you see the Wizard Completed window
(Figure 4-9). Click Finish to exit the installation program.
Figure 4-9 Successful installation window

Chapter 4. Administration: Tools and general tasks 59
4.3.3 Installing phpMyAdmin
In this section, we explain how to install phpMyAdmin on i5/OS and then how to configure and
protect the installation.
Checking the prerequisites
We recommend that you comply with the following prerequisites to ensure that your system is
ready for installing phpMyAdmin on i5/OS:
Ensure that you have a PHP 4.1 or newer engine to have phpMyAdmin running on your
server. We recommend that you install Zend Core for i5/OS as your PHP engine. For
detailed instructions on how to install Zend Core for i5/OS, see PHP: Zend for i5/OS,
SG24-7327.
Ensure that you have GD2 support in PHP to display inline thumbnails of JPEGs
("image/jpeg:inline") with their original aspect ratio.
When using the cookie authentication method, we recommend the mcrypt extension for
most users. This extension is required for 64-bit machines. If you choose not to use
mcrypt, phpMyAdmin will load pages significantly slower.
Ensure that the MySQL Database Server is installed and running on your server.
Ensure that you have a Web browser with cookies enabled.
Installing the product
After you verify and set up the prerequisites, install phpMyAdmin on your server:
1. Go to the phpMyAdmin Project page at:
http://www.phpmyadmin.net/home_page/downloads.php
In the Downloads box (Figure 4-10 on page 60), under File, choose a distribution kit with
the appropriate language and format. Some kits contain messages in English only, while
other kits contain messages in all languages in the UTF-8 format, which is suitable for
most environments. In addition, other kits contain all languages and all character sets.
Installer alternative: If you have problems running the installer, as an alternative, you can
download a compressed file, called
mysql-gui-tools-noinstall-version-win32.zip, without
an installer. Using a suitable program, unpack the file to the directory of your choice. You
might also want to create shortcuts to MySQLAdministrator.exe, MySQLMigrationTool.exe,
and MySQLQueryBrowser.exe for your desktop or the quick launch bar.
Tip: You can eliminate most installation problems by taking the time to verify the
prerequisites.
Tar.gz format: In our example, we chose the tar.gz format. To use the instructions as
presented in this section, you must download a file with the tar.gz extension.

60 Discovering MySQL on IBM i5/OS
Figure 4-10 Distributions that are available from phpMyAdmin Web site
2. Copy the downloaded file from the PC to the server into the Zendcore Web root directory.
Although there are various methods to copy the file, we used FTP to upload the file into
the directory by using the following commands:
a. On the PC, go to a command line and change to the directory of the downloaded file.
For example, if your file resides in a directory called phpMyAdmin, type the following
command:
cd phpMyAdmin
b. Connect to your server by using FTP:
ftp IP address
c. Sign on with a valid i5/OS user and password.
d. Change to binary transfer mode:
bin
e. Change to the Zendcore Web server root directory, which is usually the
/www/zendcore/htdocs directory, by entering the following command. If the path that
you are using is different, change the directory to reflect your path.
cd /www/zendcore/htdocs
File decompression: The tar.gz file has two levels of compression. Before you upload
the file to the server, you need a file with the .tar extension only. We used the 7ZIP utility
to help us obtain the desired .tar extension. The decompression utility that you use
should allow you to see only the file that ends with the .tar extension.
To download the 7ZIP utility, go to the following address:
http://www.7-zip.org/download.html

Chapter 4. Administration: Tools and general tasks 61
f. Type the following command to place the file in the directory:
put phpMyAdmin-2.11.0-rc1-all-languages.tar
g. After the transfer has finished, type the following command:
bye
3. Log in to an i5/OS session and start the i5/OS PASE shell by running:
CALL QP2TERM
4. Change directory to the Zendcore Web server directory, which is usually
/www/zendcore/htdocs:
cd /www/zendcore/htdocs
5. Untar the file in your system:
tar -xvf phpMyAdmin-2.*.*.tar
6. Create a symbolic link to facilitate later access to the tool:
ln -s ./phpMyAdmin-2.11.0-rc1-all-languages phpMyAdmin
By using this command, you create a symbolic link to the real directory. After that, you can
access your phpMyAdmin tool with the whole path or only the new short path.
You can see the link by issuing the ls -l command. Notice an arrow that points from the
new alias to the real directory as shown in Figure 4-11.
Figure 4-11 Symbolic link created to phpMyAdmin
Creating a configuration file for phpMyAdmin
To configure your installation, you can use one of two methods. Traditionally, users have
manually edited a copy of the config.inc.php file, but now a wizard-style setup script is
available for those users who prefer a graphical installation. Creating a config.inc.php file is
still a fast way to get started and is necessary for some advanced features.
Manual phpMyAdmin configuration
To manually create the config.inc.php file, use your text editor in the main (top-level)
phpMyAdmin directory (the one that contains index.php). You can copy the
config.sample.inc.php file to this directory first to have a minimal configuration file.
phpMyAdmin first loads libraries/config.default.php and then overrides the values with those
found in the config.inc.php file. If the default value is acceptable for a particular setting, it is
not necessary to include it in the config.inc.php file. To begin, use the following directives.
Non-.tar formats: If you downloaded a different version, replace
phpMyAdmin-2.11.0-rc1-all-languages.tar with the name of the file that you
downloaded.
i5/OS case sensitivity: The i5/OS PASE environment is case sensitive. Be sure to
enter the following commands by using the case that is shown.
lrwxrwxrwx 1 bruno 0 74 Aug 17 12:16 phpMyAdmin -> ./phpMyAdmin-2.11.0-rc1-all-languages
drwxr-sr-x 11 bruno 0 53248 Aug 17 14:31 phpMyAdmin-2.11.0-rc1-all-languages
lrwxrwxrwx 1 bruno 0 26 Aug 22 14:32 pmwiki -> pmwiki-2.1.27

62 Discovering MySQL on IBM i5/OS
Example 4-1 shows a simple configuration.
Example 4-1 Simple configuration for phpMyAdmin
<?php
$cfg['blowfish_secret'] = 'itso_rebooks_rules'; // use here a value of your
choice
$i=0;
$i++;
$cfg['Servers'][$i]['auth_type'] = 'cookie';
?>
If you prefer not to be prompted every time that you log in, use a configuration file as shown in
Example 4-2.
Example 4-2 Configuration to avoid prompting for a password
<?php
$i=0;
$i++;
$cfg['Servers'][$i]['user'] = 'root';
$cfg['Servers'][$i]['password'] = 'root_passwd'; // use here your password
?>
Automatic setup script for phpMyAdmin
Instead of manually editing the config.inc.php file, you can use the setup script as explained in
the following steps.
1. Create a folder named config inside the phpMyAdmin directory. On the i5/OS PASE shell,
type the following commands to create and give write permissions to the new directory:
mkdir config
chmod o+rw config
2. Run the setup script in your browser:
http://your_host/path_to_phpMyAdmin/scripts/setup.php
In our case, we entered:
http://rchas55.rchland.ibm.com:89/phpMyAdmin/scripts/setup.php
Configuration values: For a full explanation of the possible configuration values, see the
official phpMyAdmin documentation supplied in the Documentation.html file with your code
or refer the phpMyAdmin wiki on the Web at:
http://wiki.cihar.com/
Existing configuration: If you want to edit an existing configuration, copy it to the
config directory before you invoke the setup script, and give it write permissions:
cp config.inc.php config/
chmod o+w config/config.inc.php

Chapter 4. Administration: Tools and general tasks 63
3. On the page that opens (Figure 4-12), under Servers, click the Add button.
Figure 4-12 Available options in the automatic setup script
4. On the next page (Figure 4-13), complete the form with the necessary parameters.
Figure 4-13 Configuring the server task under the PHPmyAdmin script setup
Notice that each parameter has a question mark (?), which you can click to obtain detailed
information about the parameter.
Normally the script saves the new config.inc.php file to the config subdirectory, but if the
Web server does not have the proper permissions, you might see the error message:
Cannot load or save configuration.
Ensure that the config directory exists and has the proper permissions. Another option is
to click the Download link to save the config file locally and upload it later to the proper
location.
Tip: Do not specify a control user or phpMyAdmin database during the initial setup, or
you will experience problems with the auth type cookie or http login.

64 Discovering MySQL on IBM i5/OS
5. After the file is saved, move it from the config directory and reset the permissions, as a
security measure:
mv config.inc.php .
chmod o-rw config.inc.php
Now the file is ready to be used. You can choose to review the file or edit it with your favorite
editor if you prefer to set advanced options that the setup script does not provide.
Checking the phpMyAdmin installation
To check your installation:
1. Open the phpMyAdmin tool in your browser by using the correct path:
http://your_host/path_to_phpMyAdmin/
In our case, we entered:
http://rchas55.rchland.ibm.com:89/phpMyAdmin/
2. If you used the basic configuration directives that are supplied, you see a page like the one
shown in Figure 4-14. See “Manual phpMyAdmin configuration” on page 61 for details.
Authenticate by selecting your language and providing a valid user name and password for
the MySQL Database Server to log in. Then click Go.
Figure 4-14 PHPmyAdmin login page

Chapter 4. Administration: Tools and general tasks 65
You are then redirected to the phpMyAdmin main page (Figure 4-15).
Figure 4-15 phpMyAdmin main page
In the following section, we discuss several tasks that you can perform with the PHPMyAdmin
tools.
4.4 General administration tasks
You can perform the most common administrative tasks with each of tools that we have
discussed. In this section, we first show you how to complete the tasks by using the native
command line interface. Then we show you how to perform these tasks by using the graphical
tools.
4.4.1 Starting the MySQL Database Server
In this section, we explain how to stop the MySQL Database Server by using mysqld_safe
and mysqlmanager.
Starting the MySQL Database Server by using mysqld_safe
The mysqld_safe script is the MySQL Database Server startup script and is the easiest way
to start the MySQL Database Server on i5/OS. To start MySQL Database Server on i5/OS,
enter the following command:
mysqld_safe -user=mysql &
Note: In the sections that follow, we do not repeat the steps of how to start each one of the
tools. Each session begins with the understanding that you have already completed the
steps to open the tool.

66 Discovering MySQL on IBM i5/OS
A panel like the one shown in Figure 4-16 opens.
Figure 4-16 The mysqld_safe script starting the server
If the mysqld_safe script fails, even when invoked from the MySQL installation directory, you
can specify the --ledir and --datadir options to indicate the directories in which the server
and databases are located on your system.
All options that are specified to the mysqld_safe script on the command line are passed to
mysqld daemon. mysqld_safe supports many options, of which the frequently most used
ones are listed in Table 4-1.
Table 4-1 Frequently used options for mysqld
Starting the the MySQL Database Server by using mysqlmanager
Another way to start the MySQL Database Server on i5/OS is to use mysqlmanager. This
program is the MySQL Instance Manager, with which you can monitor and manage MySQL
Database Server instances. MySQL Instance Manager runs on an i5/OS PASE environment
as a UNIX daemon that listens on a TCP/IP port and a socket file.
MySQL Instance Manager is included in MySQL distributions from version 5.0.3, and can be
used in place of the mysqld_safe script to start and stop one or more instances of the MySQL
Database Server.
/QOpenSys/usr/bin/-sh
> mysqld_safe -user=mysql &
[2] 11522
$ Starting mysqld daemon with databases from /QopenSys/mysql/data
Option Description
--help Displays a help message and exit.
--user=user_name Runs the mysqld server as the user having the name user_name. The
occurrence of “user” in this context refers to a system login account, not a
MySQL user listed in the grant tables.
--basedir=path The path to the MySQL installation directory.
--datadir=path The path to the data directory.
--ledir=path If mysqld_safe cannot find the server, use this option to indicate the path
name to the directory where the server is located.
--log-error=file_name Writes the error log to the given file.
--port=port_num The port number that the server should use when listening for TCP/IP
connections.
--timezone=timezone Sets the TZ time zone environment variable to the given option value.
Consult your operating system documentation for legal time zone
specification formats.
Additional information: For an exhaustive list of options that are available for
mysqld_safe, see the MySQL 5.0 Reference Manual on the Web at the following address:
http://dev.mysql.com/doc/refman/5.0/en/mysqld-safe.html

Chapter 4. Administration: Tools and general tasks 67
The MySQL Instance Manager offers the following capabilities:
It can start and stop instances, and report on the status of instances
Server instances can be treated as guarded or unguarded:
– When the MySQL Instance Manager starts, it starts each guarded instance. If the
instance crashes, the MySQL Instance Manager detects this and restarts it. When the
MySQL Instance Manager stops, it stops the instance.
– An unguarded instance is not started when the MySQL Instance Manager starts nor is
monitored by it. If the instance crashes after being started, the MySQL Instance
Manager does not restart it. When the MySQL Instance Manager exits, it does not stop
the instance if it is running.
Instances are guarded by default. An instance can be designated as unguarded by
including the unguarded option in the configuration file.
It provides an interactive interface for configuring instances, so that the need to edit the
configuration file manually is reduced or eliminated.
To create a basic configuration file and start the MySQL Database Server:
1. By using your favorite editor, create the my.cnf configuration file with the contents shown in
Example 4-3 and copy it into the /etc directory.
Example 4-3 Sample configuration of my.cnf for mysqlmanager
[mysqld]
mysqld-path=/usr/local/mysql/bin/mysqld
socket=/tmp/mysql.sock
pid-file = /tmp/hostname.pid1
port=3306
server_id=1
# Log activation statements
log-bin=/usr/local/mysql/data/mybinlog
log-error
log=mylog
log-slow-queries
2. Create an instance manager password file.
The MySQL Instance Manager stores its user information in a password file. On i5/OS, the
default file is /etc/mysqlmanager.passwd. If the password file does not exist or contains no
password entries, you cannot connect to the instance manager.
To create a new user and password, run the following statement:
mysqlmanager --passwd >> /etc/mysqlmanager.passwd
Sometimes this procedure does not work on i5/OS due to a problem between the script and
the 5250 emulation. If you were not prompted by the previous command for a password,
enter the following command to generate the correct /etc/mysqlmanager.passwd file.
Replace your_user_name and your_password with your values:
mysql -B --skip-column-names -u root -e 'select
"your_user_name",password("your_password")' | awk '{print $1":"$2 }' >>
/etc/mysqlmanager.passwd
Tip: In Example 4-3, the occurrence of mysqld that is enclosed between brackets is the
instance name of the MySQL Database Server. You can use the name of your choice.

68 Discovering MySQL on IBM i5/OS
3. Run the mysqlmanager program:
mysqlmanager --run-as-service &
The MySQL Instance Manager supports a number of command options. For a brief listing,
invoke mysqlmanager with the --help option either on the command line or in the MySQL
Instance Manager configuration file. In i5/OS, the standard file is /etc/my.cnf. To specify a
different configuration file, start the MySQL Instance Manager with the --defaults-file
option.
Starting the server by using graphical tools
MySQL Administrator and PHPMyAdmin tools needs a MySQL Database Server to be
running before they can connect. Therefore, we cannot use the MySQL Administrator and
PHPMyAdmin tools to control the startup of the MySQL Database Server.
4.4.2 Stopping the MySQL Database Server
In this section, we explain how to stop the MySQL Database Server by using mysqladmin and
mysqlmanager.
Stopping the server by using mysqladmin
mysqladmin is a client for performing administrative operations. You can use it to stop the
server by specifying the user name and password of your installation:
If your installation has no password, enter the following command:
mysqladmin -u root shutdown
If your installation is password protected, use the following command:
mysqladmin -u root shutdown --password=your_password
Stopping the server by using mysqlmanager
To stop your instance using mysqlmanager:
1. Connect to the mysqlmanager instance through the mysql CLI using the valid user and
password that you created in step 2 on page 67:
mysql --port=2273 --host=rchas55 --user="your_user" --password="your_password"
You see a panel like the one shown in Figure 4-17.
Figure 4-17 mysqlmanager instance connection
Additional information: For an exhaustive list of options that are available for
mysqlmanager, see the MySQL 5.0 Reference Manual on the Web at the following address:
http://dev.mysql.com/doc/refman/5.0/en/instance-manager.html
> mysql --port=2273 --host=rchas55 --user="bruno" --password="itso"
Welcome to the MySQL monitor. Commands end with ; or \g.
Your MySQL connection id is 1
Server version: 0.2-alpha
Type 'help;' or '\h' for help. Type '\c' to clear the buffer.
mysql>

Chapter 4. Administration: Tools and general tasks 69
2. When you are connected, enter the following command:
STOP INSTANCE instance_name;
Replace instance_name with the parameter that is specified in my.cnf file as shown in
Figure 4-18.
Figure 4-18 Execution of STOP INSTANCE and SHOW INSTANCES
3. When you finish the execution, check the status by entering the following command:
SHOW INSTANCES;
4.4.3 Checking the status of the MySQL Database Server
There are several ways to check the availability of the MySQL Database Server instances by
using graphical and command line tools.
Checking the status of the instance by using mysqladmin
As you have seen before, mysqladmin is a client for performing administrative operations. You
can monitor the status of your MySQL instances by calling:
mysqladmin ping -u root
If your MySQL Database Server instance is
alive, you see a panel like the one shown in
Figure 4-19.
Figure 4-19 Checking the instance status with mysqladmin
mysql>
> STOP INSTANCE mysqld;
Query OK, 0 rows affected (3.16 sec)
mysql>
> SHOW INSTANCES;
+---------------+---------+
| instance_name | status |
+---------------+---------+
| mysqld | offline |
+---------------+---------+
1 row in set (0.00 sec)
mysql>
===>
Tip: Remember to exit from the mysql command interpreter by typing quit before you
attempt to run more commands in the i5/OS PASE environment.
mysqladmin ping -u root
mysqld is alive
$

70 Discovering MySQL on IBM i5/OS
Checking the status of the instance by using mysqlmanager
After you connect to the mysqlmanager instance by using the mysql CLI as shown in step 1 on
page 68, you can run the following commands to display details about the status of your
instances.
For example, type the following command to learn the status of each instance of the MySQL
Database Server:
SHOW INSTANCES;
You then see output like the example in Figure 4-20.
Figure 4-20 Sample output for SHOW INSTANCES;
You can run the following command, where instance_name is the name of your instance, to
see the status and version information of a determined instance as shown in Figure 4-21:
SHOW INSTANCE STATUS instance_name
Figure 4-21 Individual instance status
> SHOW INSTANCES;
+---------------+--------+
| instance_name | status |
+---------------+--------+
| mysqld | online |
+---------------+--------+
1 row in set (0.00 sec)
/QOpenSys/usr/bin/-sh
> SHOW INSTANCE STATUS mysqld;
+---------------+--------+---------------------------------------------------
| instance_name | status | version
+---------------+--------+---------------------------------------------------
| mysqld | online | Ver 5.0.45 for ibm-i5os on power (MySQL Community
+---------------+--------+---------------------------------------------------
1 row in set (0.00 sec)
mysql>
===>
Additional information: For a detailed list of options that are available for MySQL
Instance Manager commands, refer to the MySQL 5.0 Reference Manual on the Web at
the following address:
http://dev.mysql.com/doc/refman/5.0/en/instance-manager.html

Chapter 4. Administration: Tools and general tasks 71
Checking the status of the instance by using MySQL Administrator
Another way to check whether your MySQL Database Server is active is by trying to connect
with MySQL Administrator.
Open MySQL Administrator, and enter the information for your server and your user data as
shown in Figure 4-22. You can leave the default port if you do not change that setting in your
my.cnf file or when you call mysqld_safe. Otherwise, you must specify the port that is used.
Figure 4-22 MySQL Administrator login window
If you cannot connect to the server by using the right access data, but you can access the
server from your workstation by using the ping command, your MySQL instance might be
down.
Password privileges: Before you attempt to connect to MySQL Administrator, you must
have a valid password in MySQL Database Server with the appropriate privileges to
access from your computer. You cannot access the MySQL Database Server by using an
i5/OS user profile.
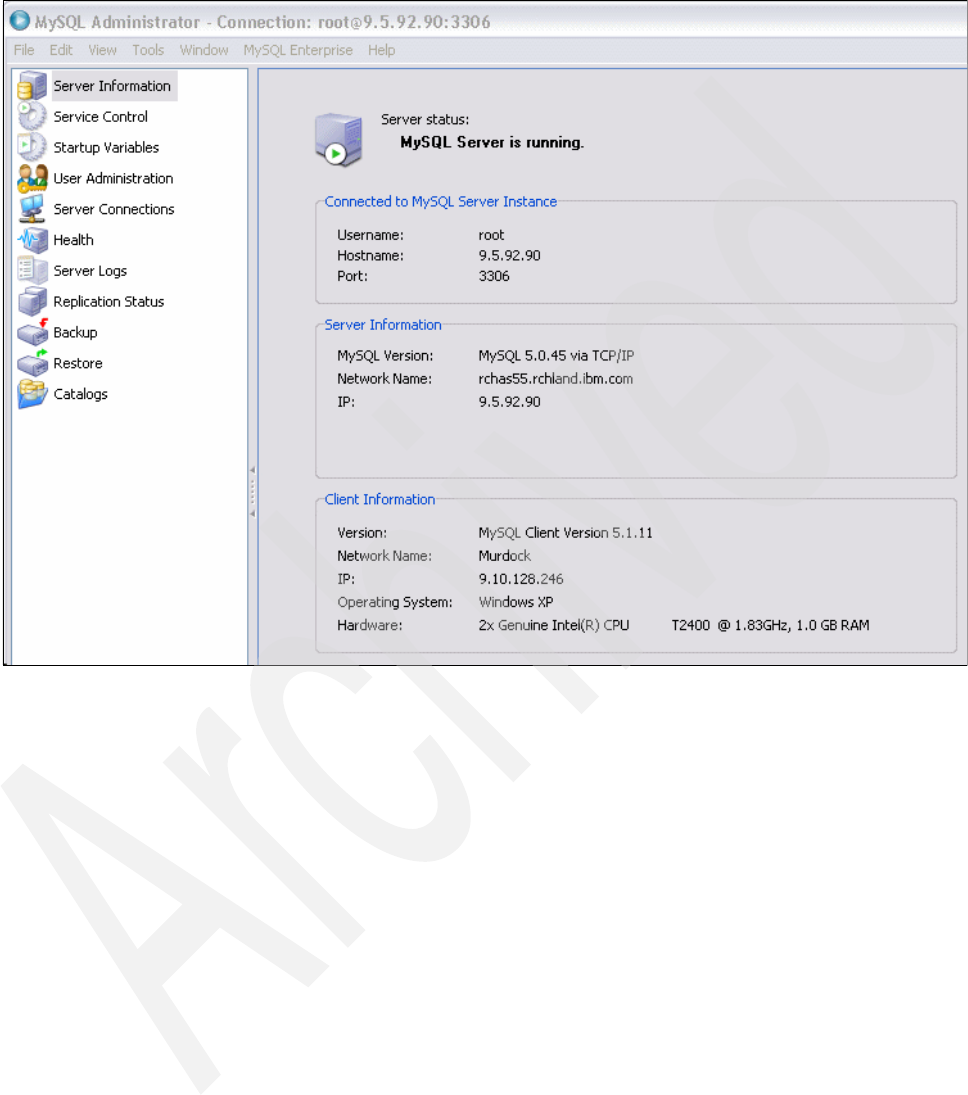

Chapter 4. Administration: Tools and general tasks 73
Also, under the Health section, you can click the System Variables tab to obtain more
information such as that which is shown in Figure 4-24.
.
Figure 4-24 MySQL Administrator displaying system variables
Checking the status of the instance by using phpMyAdmin
To check your MySQL Database Server by using phpMyAdmin, point your browser to:
http://yourserver:port/path_to_phpMyAdmin/
See “Checking the phpMyAdmin installation” on page 64 for details about how to access
phpMyAdmin.
Again, if you are unable to connect to the server by using the correct access data, your
MySQL instance might be down. In such a case, you see an error message like the one
shown in Figure 4-25.
Figure 4-25 Error message indicating that the phpMyAdmin server is not responding

74 Discovering MySQL on IBM i5/OS
If there is no error message, you are taken to the phpMyAdmin index page. On this page, you
can click Show MySQL runtime information to see a more detailed status of your server like
the example shown in Figure 4-26.
Figure 4-26 phpMyAdmin status page
4.4.4 Automating the starting and stopping tasks
The MySQL Database Server runs as a server within the i5/OS PASE environment. Many
users want the ability to start the server automatically. A method that loads only the server by
using a call to QP2SHELL can start the server, but it normally starts in the batch subsystem
that is set by your profile. If this batch subsystem is QBATCH and you have the subsystem set
to a single batch stream, no other jobs can be loaded.
Valid user name and password: You must use a valid user name and password
combination for your mysql phpMyAdmin installation. See “Creating a configuration file for
phpMyAdmin” on page 61 for details.
Tip: You can navigate through several options to see more information about your system.
For a detailed review of the options, see the phpMyAdmin documentation in the
Documentation.html file in your code, or check the phpMyAdmin wiki on the Web at:
http://wiki.cihar.com/

Chapter 4. Administration: Tools and general tasks 75
To overcome this problem, we create several objects through which the job can be submitted
to its own subsystem and the programs can start and end the MySQL Database Server
automatically when you start or end the i5/OS subsystem. In this example, we use
MYSQLLIB as the name of the library. You can use any name that you prefer, but the
parameters must be set as accordingly:
1. Grant permissions on mysql and the auxiliary directories.
We created the tables by using -user=mysql, but had problems with the authority. To
correct the problems, we changed the authority on the following directories:
– /usr/local/mysql/
– /QopenSys/mysql/data
– /tmp
–/etc
We changed the authority by calling the following command for each of the directories as
shown in Figure 4-27:
CHGAUT OBJ('path_to_change') USER(MYSQL) DTAAUT(*RWX) OBJAUT(*OBJMGT *OBJEXIST
*OBJALTER *OBJREF) SUBTREE(*ALL)
Figure 4-27 Sample CHGAUT panel for the /usr/local/mysql directory
2. Create a library to hold all of the objects:
CRTLIB LIB(MYSQLLIB) TEXT('MySQL Lib')
3. Create a source file to hold the programs that we will use for starting and ending the
server:
CRTSRCPF FILE(MYSQLLIB/QCLSRC) TEXT('Source File to hold mySQL programs')
Change Authority (CHGAUT)
Type choices, press Enter.
Object . . . . . . . . . . . . . > '/usr/local/mysql'
User . . . . . . . . . . . . . . > MYSQL Name, *PUBLIC, *NTWIRF
+ for more values
New data authorities . . . . . . > *RWXE *SAME, *NONE, *RWX, *RX...
New object authorities . . . . . *SAME *SAME, *NONE, *ALL...
+ for more values
Authorization list . . . . . . . Name, *NONE
Directory subtree . . . . . . . > *YES *NONE, *ALL
Symbolic link . . . . . . . . . *NO *NO, *YES
Bottom
F3=Exit F4=Prompt F5=Refresh F12=Cancel F13=How to use this display
F24=More keys
Alternative: If you do not perform this step, you can start the server by using
QP2TERM and the /usr/local/mysql/bin/mysqld_safe -u root, but you would not be
able to start the following programs due to authority issues.

76 Discovering MySQL on IBM i5/OS
4. Create the members with the code of your choice.
We provide the minimum code. Consider adding some error checking and cleanup
routines. You must choose the adequate program depending on whether you are
implementing the startup with mysqld_safe or mysqlmanager.
If you want to use the mysqld_safe script to start the database, use the code shown in
Example 4-4.
Example 4-4 Code sample for startup if you are using mysqld _safe
PGM
SBMJOB CMD(SBMJOB CMD(CALL PGM(QP2SHELL) +
PARM('/usr/local/mysql/bin/mysqld_safe' +
'--no-defaults' '--user=mysql')) +
JOB(MYSQLD) JOBD(MYSQLLIB/MYSQLJOBD) +
JOBQ(MYSQLLIB/MYSQLJOBQ))
ENDPGM
Otherwise, if you want to use mysqlmanager to start the database, use the program shown
in Example 4-5.
Example 4-5 Code sample for startup if you are using mysqlmanager
PGM
DCL VAR(&CMD) TYPE(*CHAR) LEN(33)
SBMJOB CMD(CALL PGM(QP2SHELL) +
PARM('/usr/local/mysql/bin/mysqlmanager' +
'--run-as-service')) JOB(MYSQLD) +
JOBD(MYSQLLIB/MYSQLJOBD) JOBQ(MYSQLLIB/MYSQLJOBQ)
ENDPGM
5. Create the job queue object:
CRTJOBQ JOBQ(MYSQLLIB/MYSQLJOBQ) TEXT('MySQL JOBQ')
6. Create the job description with the routing data and request data to call the startup
program:
CRTJOBD JOBD(MYSQLLIB/MYSQLJOBD) JOBQ(MYSQLLIB/MYSQLJOBQ) TEXT('Mysql Job
Description') USER(MYSQL) RTGDTA('MYSQL') RQSDTA('call mysqllib/strmysql')
7. Create a class:
CRTCLS CLS(MYSQLLIB/MYSQLCLS) RUNPTY(50) TEXT('MySQL Class')
8. Create the subsystem description:
CRTSBSD SBSD(MYSQLLIB/MYSQLSBS) POOLS((1 *BASE)) TEXT('MySQL Subsystem')
9. Add a job queue entry to link the job queue that we created previously to the subsystem:
ADDJOBQE SBSD(MYSQLLIB/MYSQLSBS) JOBQ(MYSQLLIB/MYSQLJOBQ) MAXACT(*NOMAX)
10.Add two routing entries to ensure that the job routing is carried out:
ADDRTGE SBSD(MYSQLLIB/MYSQLSBS) SEQNBR(100) CMPVAL(MYSQL) PGM(QCMD)
CLS(MYSQLLIB/MYSQLCLS)
ADDRTGE SBSD(MYSQLLIB/MYSQLSBS) SEQNBR(999) CMPVAL(*ANY) PGM(QCMD)
11.Add an autostart job to the subsystem that will be called when the subsystem is started:
ADDAJE SBSD(MYSQLLIB/MYSQLSBS) JOB(AUTOSTART) JOBD(MYSQLLIB/MYSQLJOBD)
Now when you start the MYSQLSBS subsystem, you automatically start the MySQL
Database Server.

Chapter 4. Administration: Tools and general tasks 77
Starting and ending MySQL Database Server subsystem
We created a subsystem like others that you might find in i5/OS, so that the subsystems
operate in the same way.
To start the new subsystem, enter the following command:
STRSBS MYSQLLIB/MYSQLSBS
To stop the MySQL Database Server, end the subsystem by entering the following command:
ENDSBS SBS(MYSQLSBS)
Alternatively, you can use the *IMMED option.
4.4.5 Enabling, maintaining, and querying logs
The MySQL Database Server has various logs that you can use to help determine what is
happening inside mysqld when the tools run queries. Table 4-2 shows the different types of
logs.
Table 4-2 MySQL log types
The error log
The error log file contains information that indicates when mysqld was started and stopped,
as well as any critical errors that occur while the server is running. If mysqld notices a table
that must be automatically checked or repaired, it writes a message to the error log.
Tip: You must ensure that the mysql user has the proper authorizations to the library and
programs that we created.
Error messages: If the server fails to start, various error messages are returned
depending on your configuration. To identify the problems, you can look in the out queue
QPRINT, where you should find a printout from the jobs that failed. No job logs are created
in the i5/OS PASE environment for the failing processes. You can also look in the error log
that is created as part of the installation. In our example, the error log is
RCHAS55.RCHLAND.local.err, where RCHAS55 is the system name and RCHLAND is
the domain.
Log type Information written to log
Error log Problems encountered with starting, running, or stopping mysqld
General query log Established client connections and statements received from clients
Binary log All statements that change data; also used for replication
Slow query log All queries that took more than long_query_time seconds to execute or did
not use indexes
Log flushing: By default, all log files are created in the mysqld data directory. You can
force mysqld to close and reopen the log files (or in some cases switch to a new log) by
flushing the logs. Log flushing occurs when you issue a FLUSH LOGS statement or run
either mysqladmin flush-logs or mysqladmin refresh.

78 Discovering MySQL on IBM i5/OS
If mysqld_safe is used to start mysqld and mysqld dies unexpectedly, mysqld_safe notices
that it needs to restart mysqld and writes a restarted mysqld message to the error log.
You can specify where mysqld stores the error log file with the --log-error[=file_name]
option. If no file_name value is given, mysqld uses the name host_name.err and writes the file
in the data directory.
When you execute tail error_log_filename.err, you see a panel like the one shown in
Figure 4-28.
Figure 4-28 Sample error log content
The general query log
The general query log is a general record of what mysqld is doing. The server writes
information to this log when clients connect or disconnect and logs each SQL statement that
is received from clients. The general query log can be useful when you suspect an error in a
client and want to know exactly what the client sent to mysqld.
mysqld writes statements to the query log in the order that it receives them, which might differ
from the order in which they are executed. This logging order contrasts from the binary log, for
which statements are written after they are executed but before any locks are released. Also,
the query log contains all statements, where the binary log does not contain statements that
only select data.
Server restarts and log flushing do not cause a new general query log file to be generated,
although flushing closes and reopens it. You can rename the file and create a new one to
refresh the general query log.
/QOpenSys/usr/bin/-sh
$
> tail RCHAS55.RCHLAND.IBM.COM.err
070821 10:03:21 [Note] /usr/local/mysql/bin/mysqld: ready for connections.
Version: '5.0.45' socket: '/tmp/mysql.sock' port: 3306 MySQL Community
Ser
ver (GPL)
070821 10:59:41 [Note] /usr/local/mysql/bin/mysqld: Normal shutdown
070821 10:59:43 InnoDB: Starting shutdown...
070821 10:59:46 InnoDB: Shutdown completed; log sequence number 0 43655
070821 10:59:46 [Note] /usr/local/mysql/bin/mysqld: Shutdown complete
FLUSH LOGS: If you execute FLUSH LOGS in the mysql CLI, the error log is renamed
with the suffix -old, and mysqld creates a new empty log file.
Tip: To enable the general query log, start mysqld by using either the --log[=file_name]
or -l [file_name] option or include log=[file-name] in the mysqlmanager my.cnf file for
the instance. If no file_name value is given for --log or -l, the default name is
host_name.log in the data directory.

Chapter 4. Administration: Tools and general tasks 79
The binary log
The binary log contains all statements that update data or potentially can update it, such as a
DELETE that matched no rows. Statements are stored in the form of “events” that describe
the modifications. The binary log also contains information about how long each statement
took that updated data.
The binary log is not used for statements, such as SELECT or SHOW, that do not modify
data. If you want to log all statements, for example, to identify a problem query, use the
general query log. See “The general query log” on page 78.
The primary purpose of the binary log is to update databases during a restore operation as
fully as possible, because the binary log contains all updates that are done after a backup is
made. The binary log is also used on master replication servers as a record of the statements
to be sent to slave servers.
When started with the --log-bin[=base_name] option or when you include log-bin in the
my.cnf configuration file for the instance, mysqld writes a log file that contains all SQL
commands that update the data.
If no base_name value is given, the default name is the name of the host machine followed by
-bin. If a base name is given, but not as an absolute path name, the server writes the file in
the data directory. If you supply an extension in the log name, for example,
--log-bin=base_name.extension, the extension is silently removed and ignored.
mysqld appends a numeric extension to the binary log base name. The number increases
each time the server creates a new log file, thus creating an ordered series of files. The server
creates a new binary log file each time it starts or flushes the logs. The server also creates a
new binary log file automatically when the size of the current log reaches max_binlog_size. A
binary log file might become larger than max_binlog_size if you are using large transactions
because a transaction is written to the file in one piece and never split between files.
You can display the contents of binary log files with the mysqlbinlog utility. This utility is useful
when you want to reprocess statements in the log. For details, see “Using mysqlbinlog to
analyze binary log” on page 82.
The slow query log
The slow query log consists of all SQL statements that took more than long_query_time
seconds to execute. The time to acquire the initial table locks is not counted as execution
time. mysqld writes a statement to the slow query log after it has been executed and after all
locks have been released, so log order might be different from execution order. The minimum
and default values of long_query_time are 1 and 10, respectively.
To enable the slow query log, start mysqld with the --log-slow-queries[=file_name] option
or include log-slow-queries in the mysqlmanager my.cnf configuration file.
Slight performance decrease:
Running the server with the binary log enabled slows
performance by about 1%. However, the benefits of the binary log for restore operations and
in allowing you to set up replication generally outweigh this minor performance decrement.
Additional information: For a complete reference of available options to mysqld that
affect what is logged to the binary log, see “The Binary Log” in the MySQL 5.0 Reference
Manual on the Web at the following address:
http://dev.mysql.com/doc/refman/5.0/en/binary-log.html

80 Discovering MySQL on IBM i5/OS
If no file_name value is given for --log-slow-queries, the default name is
host_name-slow.log. If a file name is given, but not as an absolute path name, the server
writes the file in the data directory.
You can use the slow query log to find queries that take a long time to execute and are
therefore candidates for optimization. However, examining a long slow query log can become
a difficult task. To make this easier, you can process the slow query log by using the
mysqldumpslow command to summarize the queries that appear in the log. Use
mysqldumpslow --help to see the options that this command supports.
Server log maintenance
The MySQL Database Server can create several different log files that make it easy to see
what is happening. See Table 4-2 on page 77 for details. However, you must clean up these
files regularly to ensure that the logs do not take up too much disk space.
When using the MySQL Database Server with logging enabled, you might want to back up
and remove old log files from time to time and tell the MySQL Database Server to start
logging to new files.
For the binary log, you can set the expire_logs_days system variable to expire binary log files
automatically after a given number of days. If you are using replication, set the variable no lower
than the maximum number of days that your slave servers might lag behind the master server.
You can force the MySQL Database Server to start using new log files in the following ways:
A FLUSH LOGS statement in mysql CL or a query tool
mysqladmin flush-logs
mysqladmin refresh
A log flushing operation results in the following actions:
If general query logging (--log) or slow query logging (--log-slow-queries) to a log file is
enabled, the server closes and reopens the general query log file or slow query log file.
If binary logging (--log-bin) is used, the server closes the current log file and opens a
new log file with the next sequence number.
If the server was given an error log file name with the --log-error option, it renames the
error log with the suffix -old and creates a new empty error log file.
The server creates a new binary log file when you flush the logs. However, it only closes and
reopens the general and slow query log files. To cause new files to be created on UNIX,
rename the current logs before you flush them. At flush time, the server opens new logs with
the original names. For example, if the general and slow query logs are named
mysql.log and
mysql-slow.log, you can use a series of commands like those shown in Example 4-6.
Example 4-6 Commands for mysql.log and mysql-slow.log
cd mysql-data-directory
mv mysql.log mysql.old
mv mysql-slow.log mysql-slow.old
mysqladmin flush-logs
At this point, you can make a backup of mysql.old and mysql-slow.log and remove them from
the disk.
Tip: Set the session sql_log_off variable to ON or OFF to disable or enable general query
logging for the current connection.

Chapter 4. Administration: Tools and general tasks 81
Checking for active logs
To know which are your active logs, you can use mysqladmin or connect to a mysqlmanager
instance and run some commands as explained in the following sections.
Checking log activation using mysqladmin
To check for log activation by using the mysqladmin command, enter:
mysqladmin variables -u root | grep log
When you examine the output, you see lines that show the name of the log and the status,
like the output shown in Figure 4-29.
Figure 4-29 A portion of the mysqladmin output showing information about the logs
Checking log activation using mysqlmanager
To check for log activation by using mysqlmanager:
1. Log in to the mysqlmanager instance:
mysql --port=2273 --host=rchas55 --user="bruno" --password="itso"
Replace the values inside the double quotation marks with your user name and password.
2. Enter the following command, and you see a panel like the one shown in Figure 4-30 on
page 82:
SHOW instance_name LOG FILES;
| log_bin_trust_function_creators | OFF
|
| log_error | /tmp/hostname.err
|
| log_queries_not_using_indexes | OFF
|
| log_slave_updates | OFF
|
| log_slow_queries | ON
|
| log_warnings | 1
|
| max_binlog_cache_size | 18446744073709551615

82 Discovering MySQL on IBM i5/OS
Figure 4-30 Checking for active log files in an instance by using mysqlmanager
Querying logs
The binary log files that the server generates are written in binary format. To examine these
files, you can use several tools, including mysqlbinlog and phpMyAdmin, which are explained
in the following sections.
Using mysqlbinlog to analyze binary log
To examine the binary log in text format, use the mysqlbinlog utility. The generic way for
calling mysqlbinlog is:
mysqlbinlog [options] log_file ...
For example, to display the contents of the binary log file named binlog.000003, use this
command:
mysqlbinlog binlog.0000001
The output includes all events that are contained in binlog.000001. Event information includes
the statement that is executed, the amount of time the statement took, the thread ID of the
client that issued it, the time stamp when it was executed, and so forth.
Normally, you use mysqlbinlog to read binary log files directly and apply them to the local
MySQL Database Server. It is also possible to read binary logs from a remote server by using
the --read-from-remote-server option. When you read remote binary logs, the connection
parameter options can be given to indicate how to connect to the server. These options are
--host, --password, --port, --protocol, --socket, and --user. They are ignored except
when you also use the --read-from-remote-server option. Consider the following example:
mysqlbinlog log_file | mysql -h server_name
/QOpenSys/usr/bin/-sh
| File size |
+-------------+-------------------------------------------------------------
-
-------------+-----------+
| ERROR LOG |
/usr/local/mysql-5.0.45-i5os-power-64bit/data/RCHAS55.RCHLAND
.IBM.COM.err | 465741 |
| GENERAL LOG | /usr/local/mysql-5.0.45-i5os-power-64bit/data/mylog
| 1648849 |
| SLOW LOG |
| 0 |
+-------------+-------------------------------------------------------------
-
-------------+-----------+
3 rows in set (0.00 sec)
Additional information: For a complete reference of available options for mysqlbinlog to
affect what is logged to the binary log, see the mysqlbinlog section in the MySQL 5.0
Reference Manual on the Web at:
http://dev.mysql.com/doc/refman/5.0/en/mysqlbinlog.html

Chapter 4. Administration: Tools and general tasks 83
Binary logs in phpMyAdmin
To see the binary log by using phpMyAdmin, you only need to log in to phpMyAdmin and click
the Binary log link on the main page. If the binary log is active, you see a page like the one
shown in Figure 4-31.
Figure 4-31 phpMyAdmin binary log page
4.4.6 Checking the consistency of databases
In this section, we discuss two client tools, myisamchk and mysqlcheck, to check, repair,
optimize, and analyze tables. The myisamchk utility is an offline tool for the MyISAM tables.
The mysqlcheck utility helps to check and repair MySQL databases without stopping the
server.
myisamchk
The myisamchk utility obtains information about your database tables or checks, repairs, or
optimizes them. This utility works with the MyISAM tables, which are tables that have .MYD
and .MYI files for storing data and indexes.
To use the myisamchk utility, enter the following statement:
myisamchk [options] tbl_name ...
The options specify the tasks that you want myisamchk to perform. We provide a few
examples on how to invoke the program. You can obtain a full list of options by entering:
myisamchk --help
With no options specified, the myisamchk utility simply checks your table as the default
operation. To obtain more information or to tell myisamchk to take corrective action, specify
options as explained in the following discussion.
Attention: Before you perform a table repair operation, make a backup of the table. Under
some circumstances, the operation might cause data loss, which may be a result of file
system errors, as well other possible errors.

84 Discovering MySQL on IBM i5/OS
tbl_name is the database table that you want to check or repair. If you run myisamchk
somewhere other than in the database directory, you must specify the path to the database
directory, because myisamchk does not know where the database is located. In fact, it is not
important to myisamchk whether the files that you are working on are located in a database
directory. You can copy the files that correspond to a database table to some other location
and perform recovery operations on them there.
You can name several tables on the myisamchk command line if you want. You can also
specify a table by naming its index file, that is the file with the .MYI suffix, so that you can
specify all tables in a directory by using the pattern *.MYI. For example, if you are in a
database directory, you can check all the MyISAM tables in that directory as shown in the
following example:
myisamchk *.MYI
If you are not in the database directory, you can check all the tables there by specifying the
path to the directory:
myisamchk /path/to/database_dir/*.MYI
You can also check all tables in all databases by specifying a wildcard with the path to the
MySQL data directory:
myisamchk /path/to/datadir/*/*.MYI
The recommended way to quickly check all MyISAM tables is to enter:
myisamchk --silent --fast /path/to/datadir/*/*.MYI
If you want to check all MyISAM tables and repair any that are corrupted, you can use the
following command:
myisamchk --silent --force --fast --update-state --key_buffer_size=64M
--sort_buffer_size=64M --read_buffer_size=1M --write_buffer_size=1M
/path/to/datadir/*/*.MYI
mysqlcheck
The mysqlcheck program is a utility to check, repair, optimize, and analyze tables. This
program is similar in function to the myisamchk utility, but it works differently. The main
operational difference is that you must use mysqlcheck when the mysqld server is running,
where you use myisamchk when it is not running. The benefit of using mysqlcheck is that you
do not have to stop the server to check or repair your tables.
The mysqlcheck utility uses the SQL statements CHECK TABLE, REPAIR TABLE, ANALYZE
TABLE, and OPTIMIZE TABLE in a convenient way for the user. It determines which
statements to use for the operation that you want to perform and then sends the statements to
the server to be executed.
The MyISAM storage engine supports all four statements, so that you can use mysqlcheck to
perform all four operations on the MyISAM tables. Other storage engines do not necessarily
Note: Ensure that no other program is using the tables while you are running myisamchk.
The most effective means of ensuring this is to shut down the MySQL Database Server
while running myisamchk, or to lock all tables on which myisamchk is being used.
Otherwise, when you run myisamchk, you might see an error message such as this one:
warning: clients are using or haven't closed the table properly

Chapter 4. Administration: Tools and general tasks 85
support all operations. In such cases, an error message is displayed. For example, if test.t is a
MEMORY table, an attempt to check it produces the result shown in Example 4-7.
Example 4-7 mysqlcheck execution with a non-supported storage engine
mysqlcheck test t
test.t
note : The storage engine for the table doesn't support check
You can invoke mysqlcheck by using one of the following methods:
mysqlcheck [options] db_name [tables]
mysqlcheck [options] --databases db_name1 [db_name2 db_name3...]
mysqlcheck [options] --all-databases
If you do not name any tables following db_name or if you use the --databases or
--all-databases option, entire databases are checked.
Table 4-3 summarizes the most common mysqlcheck options.
Table 4-3 Common options for the mysqlcheck utility
Attention: Before you perform a table repair operation, make a backup of the table. Under
some circumstances, the operation might cause data loss, which may be a result of file
system errors, as well other possible errors.
Tip: The mysqlcheck utility has a special feature compared to other client programs. The
default behavior of checking tables (--check) can be changed by renaming the binary. If you
want a tool that repairs tables by default, make a copy of mysqlcheck and name it
mysqlrepair, or make a symbolic link to mysqlcheck named mysqlrepair.
Use the following names to change the default behavior of mysqlcheck:
Use mysqlrepair to act as though you used the --repair option.
Use mysqlanalyze to act as though you used the --analyze option.
Use mysqloptimize to act as though you used the --optimize option.
Option Description
--help, -? Displays a help message and exits.
--all-databases, -A Checks all tables in all databases.
--analyze, -a Analyzes the tables.
--auto-repair If a checked table is corrupted, automatically fixes it. Any necessary repairs
are done after all tables are checked.
--check, -c Checks the tables for errors. This is the default operation.
--databases, -B Processes all tables in the named databases. Normally, mysqlcheck treats
the first name argument on the command line as a database name and the
names that follow as table names. With this option, it treats all name
arguments as database names.
--extended, -e If you are using this option to check tables, it ensures that they are 100%
consistent but it takes a long time. If you are using this option to repair tables,
it runs an extended repair that might take a long time to execute and also
produce a lot of garbage rows.

86 Discovering MySQL on IBM i5/OS
--fast, -F Checks only tables that have not been closed properly.
--force, -f Continues even if an SQL error occurs.
--medium-check, -m Performs a check that is faster than an --extended operation. It finds only
99.99% of all errors, which should be good enough in most cases.
--optimize, -o Optimizes the tables.
--password, -p The password to use when connecting to the server. If you use the short
option form (-p), you cannot have a space between the option and the
password. If you omit the password value following the --password or -p
option on the command line, you are prompted for one.
--quick, -q If you are using this option to check tables, it prevents the check from
scanning the rows to check for incorrect links. This is the fastest check
method. If you are using this option to repair tables, it tries to repair only the
index tree. This is the fastest repair method.
---repair, -r Performs a repair that can fix almost anything except unique keys that are not
unique.
--silent, -s Silent mode. Prints only error messages.
--tables Overrides the --databases or -B option. All name arguments following the
option are regarded as table names.
--user, -u The MySQL user name to use when connecting to the server.
--verbose, -v Verbose mode. Prints information about the various stages of program
operation.
--version, -V Displays version information and exits.
Option Description

© Copyright IBM Corp. 2008. All rights reserved. 87
Chapter 5. Security, access control, and
privileges
In this chapter, we discuss the access control system of the MySQL Database Server. We
explain how it uses the grant tables to determine who connects to the server, where the tables
can connect from, and the operations that they can perform on the system.
We address the following topics:
“The privilege system” on page 88
“The privilege system of the MySQL Database Server” on page 88
“Privileges provided by the MySQL Database Server” on page 90
“Creating a user, granting privileges, and revoking privileges” on page 91
“When privilege changes take effect” on page 95
“Granting user privileges in MySQL Administrator” on page 96
5

88 Discovering MySQL on IBM i5/OS
5.1 The privilege system
The primary function of the privilege system is to authenticate a user who connects from a
given host and to associate that user with the privileges that the user has on a database such
as SELECT, INSERT, UPDATE, and DELETE. Additional functionality includes the ability to
have anonymous users and to grant privileges for MySQL-specific functions such as LOAD
DATA INFILE and administrative operations.
5.2 The privilege system of the MySQL Database Server
When a user attempts to connect to the MySQL Database Server, the privilege system uses a
two-stage access control process as follows:
Stage 1: Connection verification
During stage 1, the system checks the grant tables to see if the user has a valid account.
Based on the findings, the connection is either accepted or rejected. A user account is a
combination of the following components:
– User name
– Host from which the user can connect
– Password
The MySQL Database Server considers both your host name and user name in identifying
you. The MySQL Database Server handles this by allowing you to distinguish users on
different hosts that happen to have the same name. For example, you can grant one set of
privileges for connections by joe from office.example.com and a different set of privileges
for connections by joe from home.example.com.
Stage 2: Request verification
After the connection verification stage has concluded and the user is authorized to the
connection, the system moves to the connection verification stage. Every command that
you execute in the MySQL command line must be verified, and the system must conclude
whether you have sufficient privileges to perform the requested operation. This is where
the privilege columns in the grant tables come to play.
The MySQL Database Server reads account privilege information from the privilege
columns in the grant tables in order to determine eligibility for the command request. The
grant tables include the user, db, host, tables_priv, columns_priv, and procs_priv tables,
which are stored in the mysql database.
The server uses the user, db, and host tables in the MySQL database at both stages of
access control. During the second stage of access control, the server might also consult the
tables_priv and columns_priv tables for requests that involve tables. The tables_priv and
columns_priv tables provide finer privilege control at the table and column levels.
Table 5-1 shows a comparison of the fields in the user, db, and host tables.
Table 5-1 Comparison of fields in the user, db, and host tables
Table name user db host
Scope columns Host Host Host
User Db Db
Password User

Chapter 5. Security, access control, and privileges 89
Privilege
columns
Select_priv Select_priv Select_priv
Insert_priv Insert_priv Insert_priv
Update_priv Update_priv Update_priv
Delete_priv Delete_priv Delete_priv
Index_priv Index_priv Index_priv
Alter_priv Alter_priv Alter_priv
Create_priv Create_priv Create_priv
Drop_priv Drop_priv Drop_priv
Grant_priv Grant_priv Grant_priv
Create_view_priv Create_view_priv
Show_view_priv Show_view_priv
Create_routine_priv Create_routine_priv
Alter_routine_priv Alter_routine_priv
Execute_priv Execute_priv
Create_tmp_table_priv Create_tmp_table_priv Create_tmp_table_priv
Lock_tables_priv Lock_tables_priv Lock_tables_priv
References_priv References_priv References_priv
Reload_priv
Shutdown_priv
Process_priv
File_priv
Show_db_priv
Super_priv
Repl_slave_priv
Repl_client_priv
Create_user_priv
Security
columns
ssl_type
ssl_cipher
x509_issuer
x509_subject
Resource control
columns
max_questions
max_updates
max_connections
max_user_connections
Table name user db host

90 Discovering MySQL on IBM i5/OS
In summary, the grant tables are conventionally used by the privilege system in the following
manner:
The user table grants privileges that are assigned to you on a global basis and that apply
regardless of what the default database privileges are set to. Therefore, user table
privileges are equivalent to superuser privileges.
The db and host tables grant database-specific privileges as specified by user account.
Information from both tables can be cross-referenced to determine privilege eligibility.
The tables_priv, columns_priv, and procs_priv tables grant table-specific, column-specific,
and routine-specific privileges.
The system accesses the MySQL Database Server grant tables in a particular order. The
hierarchy for the grant tables is as follows:
1. The user table
2. The db and host tables
3. The tables_priv and columns_priv tables
The content of the grant tables is normally manipulated by Structured Query Language (SQL)
statements such as GRANT and REVOKE. These statements are customarily used to set up
accounts and control the privileges that are available to each account.
5.3 Privileges provided by the MySQL Database Server
As previously noted, information about account privileges is stored in the user, db, host,
tables_priv, columns_priv, and procs_priv tables in the mysql database. The MySQL
Database Server reads the content of these tables into memory when it starts and rereads
them under the circumstances listed in 5.5, “When privilege changes take effect” on page 95.
Access-control decisions are based on the in-memory copies of the grant tables.
Table 5-2 shows the privileges that can be assigned to user accounts via the GRANT and
REVOKE statements. It also lists the column names and the type of database object to which
the privilege applies.
Table 5-2 Privileges that can be assigned via GRANT and REVOKE
Privilege Column Content
CREATE Create_priv Database, tables, or indexes
DROP Drop_priv Databases or tables
GRANT OPTION Grant_priv Databases, tables, or stored routines
REFERENCES References_priv Databases, tables (unused)
EVENT Event_priv Databases
ALTER Alter_priv Tables
DELETE Delete_priv Tables
INDEX Index_priv Tables
INSERT Insert_priv Tables
SELECT Select_priv Tables
UPDATE Update_priv Tables

Chapter 5. Security, access control, and privileges 91
For a complete explanation of each privilege including syntax, refer to the MySQL 5.0
Reference Manual on the Web at the following address:
http://dev.mysql.com/doc/refman/5.0/en/index.html
5.4 Creating a user, granting privileges, and revoking privileges
You can choose from multiple ways to create a MySQL Database Server user account and
assign the desired privileges. We explain how to run general administrative commands on the
System i environment from the MySQL command line and the MySQL Admininstrator GUI.
5.4.1 Executing the MySQL Database Server commands
To run such commands as GRANT, REVOKE, SET PASSWORD, INSERT, DELETE, or
UPDATE interactively, the user must be in the MySQL shell. To access the MySQL shell:
1. Sign on to i5/OS and execute the QP2TERM program to start the i5/OS PASE
environment:
CALL QP2TERM
2. In the terminal window that opens, on the i5/OS PASE command line, enter the following
command to change to the MySQL command directory:
cd /usr/local/mysql/bin
3. When the MySQL Database Server is initially installed, accounts with the user name of
root
are created. These are superuser accounts that can do anything. The initial root account
CREATE VIEW Create_view_priv Views
SHOW VIEW Show_view_priv Views
ALTER ROUTINE Alter_routine_priv Stored routines
CREATE ROUTINE Create_routine_priv Stored routines
FILE File_priv File access on server host
EXECUTE Execute_priv Stored routines
CREATE TEMPORARY TABLES Create_tmp_table_priv Server administration
LOCK TABLES Lock_tables_priv Server adminstration
CREATE USER Create_user_priv Server adminstration
PROCESS Process_priv Server adminstration
RELOAD Reload_priv Server administration
REPLICATION CLIENT Repl_slave_priv Server administration
REPLICATION SLAVE Repl_slave_priv Server adminstration
SHOW DATABASES Show_db_priv Server administration
SHUTDOWN Shutdown_priv Server administration
SUPER Super_priv Server administration
Privilege Column Content

92 Discovering MySQL on IBM i5/OS
passwords are empty, so that anyone can connect to the MySQL Database Server as root,
without a password, and be granted all privileges. We recommend that you set a password
for the root account in order to secure the databases from the users. Enter the following
command, assuming that the root password has not been set, to log in as root:
mysql -u root
4. To obtain information about the command, type help or \h.
5. Type quit to exit the MySQL shell.
5.4.2 User accounts
You can create MySQL Database Server accounts by using one of the following ways:
Statements such as CREATE USER or GRANT that are intended for creating accounts
Manipulation of the MySQL grant tables directly with statements such as INSERT,
UPDATE, or DELETE
MySQL Administrator
One of several available third-party programs, such as phpMyAdmin, that offer capabilities
for the account administration of the MySQL Database Server
5.4.3 The GRANT statement
The GRANT statement enables system administrators to create user accounts for the MySQL
Database Server and to grant rights to and from the accounts. To use the GRANT statement,
you must have the GRANT OPTION privilege, and you must have the privileges that you are
granting. You can grant privileges at a global level, database level, table level, column level,
and routine level. Figure 5-1 shows the syntax of the GRANT statement.
Figure 5-1 GRANT syntax
GRANT priv_type [(column_list)] [, priv_type [(column_list)]] ...
ON [object_type] {tbl_name | * | *.* | db_name.*}
TO user [IDENTIFIED BY [PASSWORD] 'password']
[, user [IDENTIFIED BY [PASSWORD] 'password']] ...
[REQUIRE
NONE |
[{SSL| X509}]
[CIPHER 'cipher' [AND]]
[ISSUER 'issuer' [AND]]
[SUBJECT 'subject']]
[WITH with_option [with_option] ...]
object_type =
TABLE
| FUNCTION
| PROCEDURE
with_option =
GRANT OPTION
| MAX_QUERIES_PER_HOUR count
| MAX_UPDATES_PER_HOUR count
| MAX_CONNECTIONS_PER_HOUR count
| MAX_USER_CONNECTIONS count

Chapter 5. Security, access control, and privileges 93
The following statement shows an example of the basic syntax for the GRANT statement:
GRANT privilege ON database TO 'user'@'host' IDENTIFIED BY 'password';
In the following example, you see how to use the GRANT statement to create a user profile of
test3:
GRANT ALL PRIVILEGES ON *.* TO 'test3'@'localhost' IDENTIFIED BY 'test3' WITH
GRANT OPTION;
This is a superuser account because the user has all privileges to all databases and can
grant privileges due to use of the GRANT OPTION. The syntax *.* gives the user privileges to
all databases. The user test3 can only connect from the local host.
The following GRANT statement gives Mary SELECT, INSERT, UPDATE, and DELETE
privileges to the accounting database. She can connect from any host.
GRANT SELECT, INSERT, UPDATE, DELETE ON accounting.* TO 'mary'@'%';
There are many other combinations of values that you can specify for the database and the
host. We discuss the grant values in the next section. For a more extensive list of GRANT
statement examples or additional information, see the MySQL 5.0 Reference Manual on the
Web at the following address:
http://dev.mysql.com/doc/refman/5.0/en/index.html
If you want to verify the type of access that a user has, you can use the SHOW GRANTS
command. To display privileges that are assigned to a user at the local host, you use the
command as shown in the following example:
SHOW GRANTS FOR 'user'@'localhost';
5.4.4 GRANT: Column values in the privilege tables
The following statements apply to the db and host column values when granting privileges in
the GRANT statement:
The wildcard characters '%' and '_' can be used in the Host and Db columns of either table.
They have the same meaning as pattern-matching operations that are performed with the
LIKE operator. If you want to use either character literally when granting privileges, you
must escape it by typing a backslash. For example, to include the underscore character ('_')
as part of a database name, specify it as
'\_'
in the GRANT statement.
A '%' Host value in the db table means “any host.” A blank Host value in the db table
means “consult the host table for further information.”
A '%' or blank Host value in the host table means “any host.”
A '%' or blank Db value in either table means “any database.”
A blank User value in either table matches the anonymous user.
The following statements apply to the column values in the tables_priv, columns_priv, and
procs_priv tables. The values in the scope columns of these tables can take the following
forms:
The wildcard characters '%' and '_' can be used in the Host column. They have the same
meaning as pattern-matching operations that are performed with the LIKE operator.
A '%' or blank Host value means “any host.”
The Db, Table_name, and Column_name columns cannot contain wildcards or be blank.

94 Discovering MySQL on IBM i5/OS
5.4.5 Scope column
A scope column is a column within the grant tables that is used during stage one of the
privilege system. The scope columns include user, host, db, and password.
In order to connect, a user password is not required for a user account. However, if an
account is created with a password, one must be provided by the user in order to sign in.
Table 5-3 shows various combinations of values for the Host and User columns in the user
table.
Table 5-3 Examples of Host and User columns in the user table
Host values in the user table may be specified as follows:
A host value may be a host name, an IP number, or 'localhost' to indicate the local host.
You can use the wildcard characters '%' and '_' in Host column values. These characters
have the same meaning as pattern-matching operations that are performed with the LIKE
operator.
Many other potential values can be used in the host column and other columns in grant
tables that can affect how a user is authenticated.
For further information, refer to the MySQL 5.0 Reference Manual on the Web at the following
address:
http://dev.mysql.com/doc/refman/5.0/en/index.html
Host value User value Allowable connections
'thomas.loc.gov' 'fred' fred, connecting from thomas.loc.gov
'thomas.loc.gov' '' Any user, connecting from thomas.loc.gov
‘%’ 'fred' fred, connecting from any host
‘%’ '' Any user, connecting from any host
‘%.loc.gov’ 'fred' fred, connecting from any host in the loc.gov domain
'x.y.%' 'fred' fred, connecting from x.y.net, x.y.com, x.y.edu, and
so on (this is probably not useful)
'144.155.166.177' 'fred' fred, connecting from the host with IP address
144.155.166.177
'144.155.166.%' 'fred' fred, connecting from any host in the 144.155.166
class C subnet
'144.155.166.0/255.255.255.0' 'fred' Same as the previous example

Chapter 5. Security, access control, and privileges 95
5.4.6 Revoking privileges
The REVOKE statement enables system administrators to revoke privileges from MySQL
Database Server accounts. To use the REVOKE statement, you must have the GRANT
OPTION privilege, and you must have the privileges that you are revoking. Figure 5-2 shows
the syntax of the REVOKE statement.
Figure 5-2 Syntax of the REVOKE statement
Each account is named using the same format as for the GRANT statement, for example,
'jeffrey'@'localhost'. If you specify only the user name part of the account name, the host
name part of '%' is used. For additional information about specifying account names, see
5.4.3, “The GRANT statement” on page 92.
If the grant tables hold privilege rows that contain mixed-case database or table names and
the lower_case_table_names system variable is set to a non-zero value, the REVOKE
statement cannot be used to revoke these privileges. It is necessary to manipulate the grant
tables directly. GRANT does not create such rows when lower_case_table_names is set, but
such rows might have been created prior to setting the variable.
To revoke all privileges, use the following syntax, which drops all global, database-, table-,
and column-level privileges for the named user or users:
REVOKE ALL PRIVILEGES ON *.* FROM 'user'@'localhost';
To use this REVOKE statement, you must have the global CREATE USER privilege or the
UPDATE privilege for the mysql database.
The REVOKE statement removes privileges, but it does not drop user table entries. You must
do that explicitly by using the DELETE or DROP USER commands.
5.5 When privilege changes take effect
When mysqld starts, it reads all grant table contents into memory. The in-memory tables
become effective for access control at that point. When the server reloads the grant tables,
privileges for existing client connections are affected as follows:
Table and column privilege changes take effect with the client’s next request.
Database privilege changes take effect at the next USE db_name statement.
Changes to global privileges and passwords take effect the next time the client connects.
If you modify the grant tables indirectly by using statements such as GRANT, REVOKE, or
SET PASSWORD, the server notices these changes and loads the grant tables into memory
again immediately.
REVOKE priv_type [(column_list)] [, priv_type [(column_list)]] ...
ON [object_type] {tbl_name | * | *.* | db_name.*}
FROM user [, user] ...
Note: Client applications may cache the database name, which might not be visible to
them without changing to a different database or executing a FLUSH PRIVILEGES
statement.
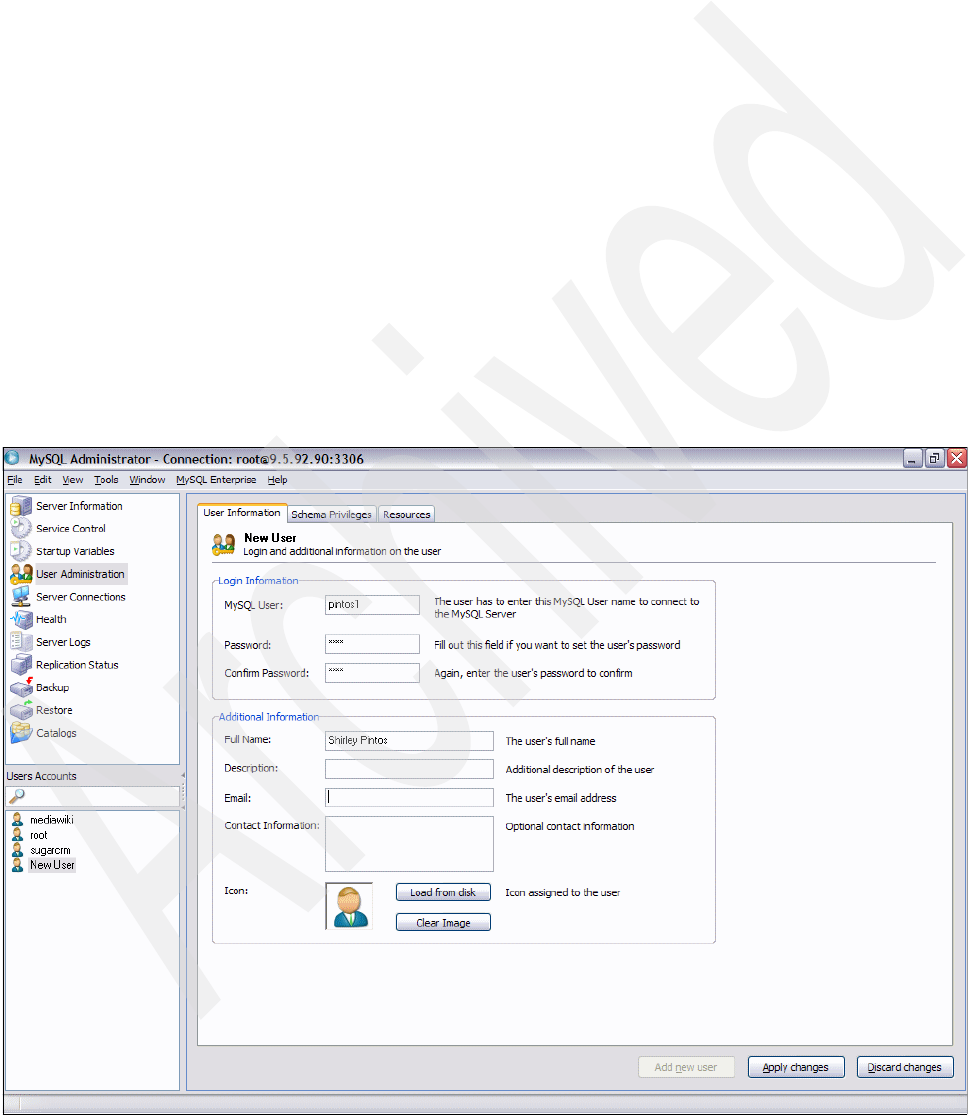
96 Discovering MySQL on IBM i5/OS
If you modify the grant tables directly by using statements such as INSERT, UPDATE, or
DELETE, your changes have no effect on privilege checking until you either restart the server
or tell it to reload the tables. To reload the grant tables manually, run a FLUSH PRIVILEGES
statement or execute the mysqladmin flush-privileges or mysqladmin reload command.
If you change the grant tables directly, but forget to reload them, your changes have no effect
until you restart the server, which may leave you wondering why your changes do not seem to
make any difference.
5.6 Granting user privileges in MySQL Administrator
Administrators can create user accounts and assign privileges in MySQL Administrator. For
more details about the capabilities and installation of MySQL Administrator, see 4.2,
“Overview of the graphical administration tools” on page 53.
To add a user:
1. Launch MySQL Administrator and sign in.
2. In the MySQL Administrator window, in the left navigation pane, select User
Administration.
3. In the pane on the right, on the User Information tab, click the Add new user button.
Enter the user information as shown in Figure 5-3.
Figure 5-3 Adding a new user on the User Information tab

Chapter 5. Security, access control, and privileges 97
4. Click the Schema Privileges tab. Assign privileges to each database:
a. Select the database.
b. Click the add (>) or add all (>>) buttons to add a privilege or privileges to each
database as shown in Figure 5-4. Click the remove (<) or remove all (<<) buttons to
remove a privilege or privileges.
Figure 5-4 Schema Privileges tab

98 Discovering MySQL on IBM i5/OS
5. Click the Apply Changes button at the bottom of the window to apply the changes.
You can assign additional information that pertains to the resources on the Resources tab
(Figure 5-5). This information includes the maximum number of queries that a user can
execute, the number of updates that a user can execute within an hour, the number of
connections to the server that a user can open within one hour, and the number of
simultaneous connections to the server from the account.
Figure 5-5 Resources tab

© Copyright IBM Corp. 2008. All rights reserved. 99
Chapter 6. Backup and restore of the
MySQL databases
In this chapter, we describe the most important methods that are available for backup and
restore of the MySQL databases. These methods include using a command line and GUI
tools. In this chapter, we discuss all of the common tasks that are related to the backup and
restore tools.
Specifically, we explain the following topics:
“Methods for backup and restore” on page 100
“Making a backup of the MySQL Database Server” on page 100
“Restoring the MySQL databases” on page 120
“Additional tools for backup and restore” on page 128
“Common backup and restore errors” on page 132
6

100 Discovering MySQL on IBM i5/OS
6.1 Methods for backup and restore
You can perform backup and restore of the MySQL Database Server by using a variety of
ways, including the following methods:
Command line using the i5/OS PASE runtime environment:
– mysqldump
– mysqlhotcopy
– mysqlimport
–source
MySQL Administrator (GUI)
See 4.3, “Installation of the administration tools” on page 55, for installation and other
related tasks.
phpMyAdmin (GUI)
Firefox, Netscape, or Microsoft Internet Explorer® is required for this method. See 4.3,
“Installation of the administration tools” on page 55.
A copy to tape or save file to disk, after a database backup is made to disk
6.2 Making a backup of the MySQL Database Server
In the i5/OS PASE runtime environment, you can use one of several options to make a
backup.
6.2.1 The mysqldump script for backup
The mysqldump client is a backup program that was originally written by Igor Romanenko. You
can use this program to dump a database or a collection of databases for backup or transfer
to another SQL server that is not necessarily a MySQL Database Server. The dump typically
contains SQL statements to create a table, populate it, or both. The mysqldump program can
also be used to generate files in comma-separated value (CSV), other delimited text, or XML
format.
If you are doing a backup on the server and your tables all are MyISAM tables, consider using
the mysqlhotcopy utility instead because it can accomplish faster backups and faster restores.
There are three general ways to invoke mysqldump:
For a backup of only one database:
mysqldump [options] db_name [tables]
For a backup of more than one database:
mysqldump [options] --databases db_name1 [db_name2 db_name3...]
For a backup of all databases:
mysqldump [options] --all-databases
If you do not name any tables following db_name or if you use the --databases or
--all-databases option, entire databases are dumped.
To obtain a list of the options that your version of mysqldump supports, use:
mysqldump --help

Chapter 6. Backup and restore of the MySQL databases 101
Some mysqldump options are shorthand for groups of other options. The options --opt and
--compact fall into this category. For example, use of --opt is the same as specifying the
following options:
--add-drop-table --add-locks --create-options --disable-keys --extended-insert
--lock-tables --quick --set-charset
Keep in mind that all of the options that --opt stands for also are on by default because --opt
is on by default.
To reverse the effect of a group option, uses its --skip-xxx form (--skip-opt or
--skip-compact). It is also possible to select only part of the effect of a group option by
following it with options that enable or disable specific features. Consider the following
examples:
To select the effect of --opt except for some features, use the --skip option for each
feature. For example, to disable extended inserts and memory buffering, use:
--opt --skip-extended-insert --skip-quick
As of MySQL 5.0, --skip-extended-insert --skip-quick is sufficient because --opt is
on by default.
To r eve r se --opt for all features, except index disabling and table locking, use:
--skip-opt --disable-keys --lock-tables
When you selectively enable or disable the effect of a group option, order is important
because options are processed first to last. For example, --disable-keys --lock-tables
--skip-opt does not have the intended effect. It is the same as --skip-opt by itself.
The mysqldump script can retrieve and dump table contents row by row, or it can retrieve all
the contents from a table and buffer it in memory before dumping it. Buffering in memory can
be a problem if you are dumping large tables. To dump tables row by row, use the --quick
option (or --opt, which enables --quick). --opt (and therefore --quick) is enabled by default
as of MySQL 5.0. To enable memory buffering, use --skip-quick.
If you are using a recent version of mysqldump to generate a dump to be reloaded into an old
MySQL Database Server, do not use the --opt or --extended-insert option. Use
--skip-opt instead.
Table 6-1 lists some of the options that the mysqldump script supports.
Table 6-1 mysqldump options
Option Description
--add-drop-database Add a DROP DATABASE statement before each CREATE DATABASE
statement.
--add-drop-table Add a DROP TABLE statement before each CREATE TABLE
statement.
--all-databases, -A Dump all tables in all databases. This is the same as using the
--databases option and naming all the databases on the command
line.
--comments, -i Write additional information in the dump file such as program version,
server version, and host. This option is enabled by default. To suppress
this additional information, use --skip-comments.
--complete-insert, -c Use complete INSERT statements that include column names.

102 Discovering MySQL on IBM i5/OS
--create-options Include all MySQL-specific table options in the CREATE TABLE
statements.
--databases, -B Dump several databases. Normally, mysqldump treats the first name
argument on the command line as a database name and following
names as table names. With this option, it treats all name arguments
as database names. CREATE DATABASE and USE statements are
included in the output before each new database.
--disable-keys, -K For each table, surround the INSERT statements with /*!40000 ALTER
TABLE tbl_name DISABLE KEYS */; and /*!40000 ALTER TABLE
tbl_name ENABLE KEYS */; statements. This makes loading the dump
file faster because the indexes are created after all rows are inserted.
This option is effective only for non-unique indexes of MyISAM tables.
--lock-all-tables, -x Lock all tables across all databases by acquiring a global read lock for
the duration of the whole dump. This option automatically turns off
--single-transaction and --lock-tables.
--lock-tables, -l Lock all tables before dumping them. The tables are locked with READ
LOCAL to allow concurrent inserts in the case of MyISAM tables. For
transactional tables, such as InnoDB and BDB, --single-transaction
is a much better option, because it does not need to lock the tables at
all. Note that when dumping multiple databases, --lock-tables locks
tables for each database separately. Therefore, this option does not
guarantee that the tables in the dump file are logically consistent
between databases. Tables in different databases may be dumped in
completely different states.
--no-create-info, -t Do not write CREATE TABLE statements that recreate each dumped
table.
--no-data, -d Do not write any table row information. That is, do not dump table
contents. This is useful if you want to dump only the CREATE TABLE
statement for the table.
--opt This option is shorthand. It is the same as specifying
--add-drop-table --add-locks --create-options --disable-keys
--extended-insert --lock-tables --quick --set-charset. It should
give you a fast dump operation and produce a dump file that can be
reloaded into a MySQL Database Server quickly. The --opt option is
enabled by default. Use --skip-opt to disable it. See the discussion at
the beginning of this section for information about selectively enabling
or disabling certain options that are affected by --opt.
--order-by-primary Sorts each table’s rows by its primary key, or by its first unique index, if
such an index exists. This is useful when dumping a MyISAM table to
be loaded into an InnoDB table, but will make the dump itself take
considerably longer.
--password[=password],
-p[password]
The password to use when connecting to the server. If you use the
short option form (-p), you cannot have a space between the option
and the password. If you omit the password value following the
--password or -p option on the command line, you are prompted for
one.
Option Description

Chapter 6. Backup and restore of the MySQL databases 103
To back up a schema or database by using the mysqldump script:
1. Sign on to i5/OS and execute the QP2TERM program to start the i5/OS PASE
environment:
CALL QP2TERM
2. In the i5/OS PASE Terminal Console, enter the following command to change to MySQL
commands directory:
cd /usr/local/mysql/bin
3. Verify that you are in the correct directory:
pwd
4. Start the MySQL Database Server if it is not started yet:
mysqld_safe -u root &
5. Verify that the MySQL Database Server has started:
ps -ef | grep mysqld
6. Log in to the MySQL Database Server:
mysql -u root
--result-file=file, -r file Direct output to a given file. Use this option on Windows to prevent new
line ‘\n’ characters from being converted to ‘\r\n’ carriage return or new
line sequences. The result file is created and its contents are
overwritten, even if an error occurs while generating the dump. The
previous contents are lost.
--tab=path, -T path Produce tab-separated data files. For each dumped table, mysqldump
creates a tbl_name.sql file that contains the CREATE TABLE
statement that creates the table, and a tbl_name.txt file that contains
its data. The option value is the directory in which to write the files. By
default, the .txt data files are formatted by using tab characters
between column values and a new line at the end of each line. The
format can be specified explicitly by using the --fields-xxx and
--lines-terminated-by options. Use this option only when mysqldump
is run on the same machine as the mysqld server. You must have the
FILE privilege, and the server must have permission to write files in the
directory that you specify.
--tables Override the --databases or -B option. mysqldump regards all name
arguments following the option as table names.
--triggers Dump triggers for each dumped table. This option is enabled by
default. You can disable it by using --skip-triggers. This option was
added in MySQL 5.0.11. Before that, triggers were not dumped.
--user=user_name, -u
user_name
The MySQL user name to use when connecting to the server.
--where='where_condition',
-w 'where_condition'
Dump only rows that are selected by the given WHERE condition.
Quotation marks around the condition are mandatory if it contains
spaces or other characters that are special to your command
interpreter.
--xml, -X Write dump output as well-formed XML.
Option Description

104 Discovering MySQL on IBM i5/OS
7. Select the schema that you want to work with, which in our case is world:
use world;
8. To view the tables of the schema, enter the following command. In our example, the world
schema contains three tables.
show tables;
You should see the list of tables like the example shown in Figure 6-1.
Figure 6-1 MySQL show tables
9. Type quit and then press Enter to exit the MySQL command line server.
> use world;
Reading table information for completion of table and column names
You can turn off this feature to get a quicker startup with -A
Database changed
mysql>
> show tables;
+-----------------+
| Tables_in_world |
+-----------------+
| City |
| Country |
| CountryLanguage |
+-----------------+
3 rows in set (0.00 sec)
mysql>
Note: If you want to make a backup of one, many, or all schemas into a desired folder
that does not exist, type the following command, so that you create a backup folder into
the integrated file system:
mkdir /backup_folder
By default, when you run the mysqldump script for first time, the
/usr/local/mysql/bin/backup folder is created.

Chapter 6. Backup and restore of the MySQL databases 105
10.Make a backup by using mysqldump as demonstrated in the following examples:
– Use mysqldump to back up only one schema or database called world:
mysqldump --user=itso --password=itso world > backup/backup_world.sql
Figure 6-2 shows the result.
Figure 6-2 mysqldump for one database
– In this example, we back up two schemas called world and mysql:
mysqldump --opt --user=itso --password=itso --databases world mysql >
backup/backup_world_mysql.sql
Figure 6-3 shows the results.
Figure 6-3 mysqldump for more than one database
> mysqldump --opt --user=itso --password=itso world > backup/backup_world.sql
$
> ls -la backup
total 1704
drwxrwsrwx 2 javier 0 8192 Aug 25 20:37 .
drwxrwsrwx 31 qsys 0 602112 Aug 25 18:13 ..
-rw-rw-rw- 1 javier 0 243219 Aug 25 20:37 backup_world.sql
$
Attention: You must add a destination file and folder. In this example, we use
/usr/local/mysql/bin/backup/backup_world.sql. If you do not add a destination file
and folder, mysqldump command execution is redirected to the panel, and no backup
file is created.
> mysqldump --user=itso --password=itso --databases world mysql > backup/backup_world_mysql.sql
$
> ls -la backup
total 2984
drwxrwsrwx 2 javier 0 8192 Aug 25 20:46 .
drwxrwsrwx 31 qsys 0 602112 Aug 25 18:13 ..
-rw-rw-rw- 1 javier 0 243219 Aug 25 20:45 backup_world.sql
-rw-rw-rw- 1 javier 0 623081 Aug 25 20:46 backup_world_mysql.sql
$

106 Discovering MySQL on IBM i5/OS
– In this example, we use mysqldump to back up all schemas into a file:
mysqldump --user=itso --password=itso --all-databases >
backup/backup_all_databases.sql
Figure 6-4 shows the results.
Figure 6-4 mysqldump for all databases
In these three examples, notice that not all possibilities of the mysqldump command were
explained. If you want to do a custom backup, refer to Table 6-1 on page 101 for more
options.
6.2.2 The mysqlhotcopy script for backup
mysqlhotcopy is a Perl script that was originally written and contributed by Tim Bunce. It uses
LOCK TABLES, FLUSH TABLES, and cp or scp to make a database backup quickly. It is the
fastest way to make a backup of the database or single tables, but it can be run only on the
same machine where the database directories are located. mysqlhotcopy works only for
backing up MyISAM and ARCHIVE tables. It runs on UNIX and NetWare.
mysqlhotcopy reads the [client] and [mysqlhotcopy] option groups from the option files. To
execute mysqlhotcopy, you must have access to the files for the tables that you are backing
up, the SELECT privilege for those tables, the RELOAD privilege (to execute FLUSH
TABLES), and the LOCK TABLES privilege (to lock the tables).
You can invoke the mysqlhotcopy script by using one of the following methods:
For backup of only one database
mysqlhotcopy [options] db_name [/path/to/new_directory]
For backup of more than one database
mysqlhotcopy [options] db_name1 [db_name2 db_name3...]
For backup of a specific table of a database
mysqlhotcopy [options] db_name1./regex
> mysqldump --user=itso --password=itso --all-databases > backup/backup_all_databases.sql
$
> ls -la backup
total 5552
drwxrwsrwx 2 javier 0 8192 Aug 25 20:53 .
drwxrwsrwx 31 qsys 0 602112 Aug 25 18:13 ..
-rw-rw-rw- 1 javier 0 623215 Aug 25 20:54 backup_all_databases.sql
-rw-rw-rw- 1 javier 0 243219 Aug 25 20:45 backup_world.sql
-rw-rw-rw- 1 javier 0 623081 Aug 25 20:46 backup_world_mysql.sql
$
Attention: The mysqlhotcopy script has many requirements for using it that are not
completely covered in this book. To run the mysqlhotcopy script, you must have the Perl
compiler and Database Independent Interface (DBI) installed on AIX. For more
information, go to:
http://www.perl.org/

Chapter 6. Backup and restore of the MySQL databases 107
Table 6-2 shows the different options for the mysqlhotcopy script.
Table 6-2 mysqlhotcopy options
Option Description
--help, -? Displays a help message and exit.
--addtodest Does not rename the target directory if it exists; merely adds
files to it.
--allowold Does not abort if a target exists; renames it by adding an _old
suffix.
--checkpoint=db_name.tbl_name Inserts checkpoint entries into the specified database
db_name and table tbl_name.
--chroot=path Base directory of the chroot jail in which mysqld operates. The
path value should match that of the --chroot option given to
mysqld.
--debug Enables debug output.
--dryrun, -n Reports actions without performing them.
--flushlog Flushes logs after all tables are locked.
--host=host_name, -h host_name The host name of the local host to use for making a TCP/IP
connection to the local server. By default, the connection is
made to localhost by using a UNIX socket file.
--keepold Does not delete the previous (renamed) target when done.
--method=command The method for copying files (cp or scp).
--noindices Does not include full index files in the backup. This makes the
backup smaller and faster. The indexes for reloaded tables can
be reconstructed later by using myisamchk -rq.
--password=password, -ppassword The password to use when connecting to the server. Note that
the password value is not optional for this option, unlike for
other MySQL programs. You can use an option file to avoid
giving the password on the command line. Specifying a
password on the command line should be considered insecure.
--port=port_num, -P port_num The TCP/IP port number to use when connecting to the local
server.
--quiet, -q Is silent except for errors.
--record_log_pos=
db_name.tbl_name
Record master and slave status in the specified database
db_name and table tbl_name.
--regexp=expr Copies all databases with names that match the given regular
expression.
--resetmaster Resets the binary log after locking all the tables.
--resetslave Resets the master.info file after locking all the tables.
--socket=path, -S path The UNIX socket file to use for the connection.
--suffix=str The suffix for names of copied databases.
--tmpdir=path The temporary directory. The default is /tmp.
--user=user_name, -u user_name
The MySQL user name to use when connecting to the server.

108 Discovering MySQL on IBM i5/OS
To do a backup by using the mysqlhotcopy script:
1. Sign on to i5/OS and execute the QP2TERM program to start the i5/OS PASE
environment:
CALL QP2TERM
2. In the i5/OS PASE Terminal Console, enter the following command to change to MySQL
commands directory:
cd /usr/local/mysql/bin
3. Verify that you are in the correct directory:
pwd
4. Start the MySQL Database Server if it is not started yet:
mysqld_safe -u root &
5. Verify that the MySQL Database Server has started:
ps -ef | grep mysqld
6. Do a backup by using the mysqlhotcopy script. In this example, we back up only one
schema or database called world:
mysqlhotcopy --user=itso --password=itso world > backup/backup_world.sql
This example showed how to back up tables from a specific schema by using the
mysqlhotcopy script. Since we do not cover all the possibilities to do a backup by using this
command, refer to Table 6-2 on page 107 for options to do a customer backup.
6.2.3 MySQL Administrator for backup
In this section, we introduce an easy way to do a backup by using MySQL Administrator. For
information about how to install MySQL Tools for 5.0, see 4.3.2, “Installing the MySQL GUI
Tools” on page 55.
You must have created an administrator user before you connect to MySQL Administrator. In
our example, we use the itso administrator user profile. See 3.4.4, “Post installation tasks” on
page 43. After this program is installed in your workstation and an administrator user is
created:

Chapter 6. Backup and restore of the MySQL databases 109
1. Go to Start → Programs → MySQL → MySQL Administrator.
2. In the login window (Figure 6-5), type the values for Server Host (host name or system IP
address), Username, and Password. Then click OK.
Figure 6-5 Starting MySQL Administrator
Note: You can create several connections to select from on the login window in order to
connect any other MySQL Database Server. See 9.4.1, “Windows and functions of the
MySQL Query Browser” on page 190, for more information.


Chapter 6. Backup and restore of the MySQL databases 111
The right pane of the MySQL Administrator window changes as shown in Figure 6-7 to
display three tabs.
You can do a backup by using either of the following methods:
– Click the Backup Project tab to create a new project and save it.
– Use a stored project, which must have been created previously in order to use it.
Then you can execute a backup by using either of these methods:
– In an scheduled manner
In this case, you must click the Schedule tab and select all available options to
schedule that project (if it is a new project).
– Immediately by using the Execute Backup Now button
In addition, you can click the Advanced Options tab to specify detailed settings of how your
backup should be performed.
Figure 6-7 MySQL Backup window

112 Discovering MySQL on IBM i5/OS
If your password is encrypted before you start, you must change the Password storage
method to Obscured as shown in Figure 6-8:
a. In the MySQL Administrator window, select Tools → Options...
b. In the left navigation pane under Category, select General Options. In the right pane,
in the Password Storage section, for Password storage method, select Obscured.
Figure 6-8 MySQL general options window

Chapter 6. Backup and restore of the MySQL databases 113
4. Create a new backup project and save it so that we can use it later to restore a schema (or
schemata). In the MySQL Backup window (Figure 6-9), complete these tasks:
a. Click the New Project button at the bottom of the window.
b. On the Backup Project tab, under General, enter a project name.
c. Under Schemata, select a schema and click the > button to add this schema to the
project. Notice that you can select which tables you want to back up. All tables are
selected by default. In this case, we chose to add all tables to test_backup_project.
Figure 6-9 MySQL Backup Project tab


Chapter 6. Backup and restore of the MySQL databases 115
e. Click the Schedule tab. On this tab, select the Schedule this backup project check
box to make available all schedule options. Notice that you can select a Target folder
and Filename to add a time stamp to the file name as shown in Figure 6-11. Now clear
the Schedule this backup project check box.
Figure 6-11 MySQL options for the Schedule tab

116 Discovering MySQL on IBM i5/OS
f. Click the Save Project button. In the Save As window (Figure 6-12), save your project.
Figure 6-12 MySQL Save As window
g. In the left pane under Backup Projects, check to see that this new project has been
added.
h. Click the Execute Backup Now button.
You have now completed the backup process by using MySQL Administrator.

Chapter 6. Backup and restore of the MySQL databases 117
6.2.4 phpMyAdmin for backup
To perform a backup by using phpMyAdmin:
1. Start your browser and go to the following URL:
http://system name:89/phpMyAdmin/index.php
2. On the Welcome page for phpMyAdmin (Figure 6-13), type the user name and password.
Then click the Go button.
Figure 6-13 phpMyAdmin Welcome page
Port 89: In order to connect to phpMyAdmin, you must use port 89, by default, after the
system name or IP address.


Chapter 6. Backup and restore of the MySQL databases 119
4. On the next page (Figure 6-15), complete these tasks:
a. Export the test schema by using the preferred format. In this example, we export the
test schema by using SQL. Therefore, in the Export box, select the test schema and
then below the box, select SQL. If you prefer any of the other export formats or
additional export options, you can select those instead.
b. Select the Save as file check box. If you do not do this, the execution is redirected to
the panel. Then for File name template, type the name.
c. Click the Go button.
Figure 6-15 phpMyAdmin export main page
5. Save the backup script to the workstation. Choose the desired folder and name and save
the backup script file.
You have now finalized the backup process by using phpMyAdmin.

120 Discovering MySQL on IBM i5/OS
6.3 Restoring the MySQL databases
In this section, we describe the various ways to restore the MySQL Database Server on i5/OS
databases.
6.3.1 The mysqlimport command for restore
The mysqlimport client provides a command line interface (CLI) to the LOAD DATA INFILE
SQL statement. Most options to mysqlimport correspond directly to clauses of the LOAD
DATA INFILE syntax. This command is useful to import data from a file or files into a table.
The mysqlimport command uses the following syntax:
mysqlimport [options] db_name textfile1 [textfile2 ...]
For each text file named on the command line, mysqlimport strips any extension from the file
name and uses the result to determine the name of the table into which to import the file’s
contents. For example, files called names.txt, names.text, and names are all imported into a
table called names.
Table 6-3 shows some of the mysqlimport options.
Table 6-3 mysqlimport options
Option Description
--help, -? Displays a help message and exit.
--columns=column_list, -c column_list This option takes a comma-separated list of column names as its value.
The order of the column names indicates how to match data file
columns with table columns.
--compress, -C Compresses all information that is sent between the client and the
server if both support compression.
--debug[=debug_options], -# [debug_options] Writes a debugging log. The debug_options string often is
'd:t:o,file_name'.
--delete, -D Empties the table before importing the text file.
--fields-terminated-by=...,
--fields-enclosed-by=...,
--fields-optionally-enclosed-by=...,
--fields-escaped-by=...
Have the same meaning as the corresponding clauses for LOAD DATA
INFILE.
--force, -f Ignores errors. For example, if a table for a text file does not exist, it
continues processing any remaining files. Without --force, mysqlimport
exits if a table does not exist.
--host=host_name, -h host_name Imports data to the MySQL Database Server on the given host. The
default host is localhost.
--ignore, -i See the description for the --replace option.
--lines-terminated-by=... Has the same meaning as the corresponding clause for LOAD DATA
INFILE. For example, to import Windows files that have lines terminated
with carriage return/linefeed pairs, use
--lines-terminated-by="\r\n". You might have to use double
backslashes, depending on the escape conventions of your command
interpreter.
--local, -L Reads input files locally from the client host.

Chapter 6. Backup and restore of the MySQL databases 121
In the following example, we introduce a common situation of importing data from an Excel
spreadsheet into a MySQL database by using the mysqlimport command and other tools.
Suppose that you have an Excel spreadsheet with only two columns called
id and name. First,
you must save this Excel spreadsheet as a text file by using the Excel Save options. Second,
you must upload the file to the System i environment by using FTP or another tool, such as
iSeries Navigator.
In this case, we upload a text file named itso_names to /usr/local/mysql/bin/backup to
facilitate the data import process. Then follow these steps:
1. Sign on to i5/OS and execute the QP2TERM program to start the i5/OS PASE
environment:
CALL QP2TERM
2. In the i5/OS PASE Terminal Console, type the following command to run the MySQL
commands:
cd /usr/local/mysql/bin
3. Verify whether you are in the correct directory:
pwd
4. Start MySQL Database Server if it is not started yet:
mysqld_safe -u root &
5. Verify that the MySQL Database Server has started:
ps -ef | grep mysqld
6. Connect to the MySQL Database Server and select the test schema:
mysql -u root
use test;
--lock-tables, -l Locks all tables for writing before processing any text files. This ensures
that all tables are synchronized on the server.
--low-priority Uses LOW_PRIORITY when loading the table. This affects only storage
engines that use only table-level locking (MyISAM, MEMORY, and
MERGE).
--password[=password], -p[password] The password to use when connecting to the server. If you use the short
option form (-p), you
cannot have a space between the option and the
password. If you omit the password value following the --password or
-p option on the command line, you are prompted for one. Specifying a
password on the command line should be considered insecure.
--replace, -r The --replace and --ignore options control the handling of input rows
that duplicate existing rows on unique key values. If you specify
--replace, new rows replace existing rows that have the same unique
key value. If you specify --ignore, input rows that duplicate an existing
row on a unique key value are skipped. If you do not specify either
option, an error occurs when a duplicate key value is found, and the rest
of the text file is ignored.
--silent, -s Silent mode. Produce output only when errors occur.
--socket=path, -S path For connections to localhost, the UNIX socket file to use, or, on
Windows, the name of the named pipe to use.
--user=user_name, -u user_name The MySQL user name to use when connecting to the server.
Option Description

122 Discovering MySQL on IBM i5/OS
7. Create a TABLE called itso_names and import it into a schema called test:
create table itso_names(id int, name varchar(30));
8. Verify the contents of the test schema and the itso_names table:
show databases;
select * from itso_names;
9. After you verify that the itso_names table is created and all data has been uploaded to
/usr/local/mysql/bin/backup, you are ready to import data into this table:
a. Exit from the MySQL Database Server command line:
quit
b. Enter the following mysqlimport script to import data into this table:
mysqlimport --local --user=itso --password=itso test backup/itso_names.txt
10.Verify the contents of the table itso_names:
mysql -u root -e "select * from itso_names" test -B
Figure 6-16 shows the contents of the itso_names table.
Figure 6-16 Checking the imported data
In this example, we showed how to import a specific schema using the mysqlimport
command. Notice that we used only a subset of all possible options of the mysqlimport
command.
> mysqlimport --local --user=itso --password=itso test backup/itso_names.txt
test.itso_names: Records: 5 Deleted: 0 Skipped: 0 Warnings: 0
$
> mysql -u root -e "select * from itso_names" test -B
id name
1 Hernando Bedoya
2 Shirley Pintos
3 Bruno Digiovani
4 Ervin Earley
5 Javier Dieguez
$
-B option: Notice that in this sample we used the -B option, which is useful for better
data display.

Chapter 6. Backup and restore of the MySQL databases 123
6.3.2 The source command for restore
The source command provides an easy way to restore a selected schema when a backup file
is provided. To use this command, you must have a backup copy from the database that you
are going to restore and then upload it to the System i environment by using FTP or another
tool such as iSeries Navigator.
In this case, we upload the file called
test.sql to /usr/local/mysql/bin/backup to make it easier
to import data:
1. Sign on to i5/OS and execute the QP2TERM program to start the i5/OS PASE
environment:
CALL QP2TERM
2. In the i5/OS PASE Terminal Console, type the following command so that you can run the
MySQL commands:
cd /usr/local/mysql/bin
3. Verify whether you are in the correct directory:
pwd
4. Start the MySQL Database Server if it is not started yet:
mysqld_safe -u root &
5. Verify that the MySQL Database Server has started:
ps -ef | grep mysqld
6. Connect to the MySQL Database Server:
mysql -u root
7. For demonstration purposes only, drop the test schema in order to restore it later:
drop database test;
8. Verify that all the schemas are available. Notice that the test schema is not included
because we just deleted it:
show databases;
9. After you verify that the test database does not exist, you can restore it by using the source
command and then use the show command to view all databases again:
source backup/backup_test.sql;
show databases;

124 Discovering MySQL on IBM i5/OS
Figure 6-17 shows the panel on which the previous steps occur.
Figure 6-17 The source command panel
6.3.3 MySQL Administrator for restore
In this section, we restore a schema, which you would do only in a case of disaster, or a table
or tables into a specific schema. We also explain the easiest way to restore a security backup
by using MySQL Administrator on a Windows XP workstation.
For information about how to install MySQL Tools for 5.0, see 4.3.2, “Installing the MySQL
GUI Tools” on page 55.
> mysql -u root
Welcome to the MySQL monitor. Commands end with ; or \g.
Your MySQL connection id is 64
Server version: 5.0.45 MySQL Community Server (GPL)
Type 'help;' or '\h' for help. Type '\c' to clear the buffer.
mysql>
> drop database test;
Query OK, 2rows affected (0.16 sec)
mysql>
> show databases;
+--------------------+
| Database |
+--------------------+
| information_schema |
| mysql |
| world |
+--------------------+
3 rows in set (0.00 sec)
mysql>
> source backup/backup_test.sql
Query OK, 0 rows affected (0.00 sec)
..........
..........
..........
Query OK, 0 rows affected (0.00 sec)
mysql>
> show databases;
+--------------------+
| Database |
+--------------------+
| information_schema |
| mysql |
| test |
| world |
+--------------------+
4 rows in set (0.00 sec)
mysql>

Chapter 6. Backup and restore of the MySQL databases 125
To perform these steps, you must have an administrator user profile created before you can
connect to MySQL Administrator. In our example, we use
itso administrator user profile. See
3.4.4, “Post installation tasks” on page 43.
In this case, we restore the complete schema that we saved in 6.2.3, “MySQL Administrator
for backup” on page 108. The schema is called
test. To do this, we need a backup copy from
the test schema.
1. After this program is installed in your workstation and an administrator user is created,
from your desktop, select Start → Programs → MySQL → MySQL Administrator.
2. In the login window (Figure 6-5 on page 109), type the values for Server Host (host name
or system IP), Username, and Password. Then click OK.
3. In the MySQL Administrator window (Figure 6-19):
a. In the left pane, select the Restore option.
b. In the right pane, click the Open Backup File button.
c. On the General tab, for File to restore, select the file. In this case, we select
test_backup_project 20070829 1250.sql.
d. For Target schema, select Another schema and choose the schema. In this example,
we select test.
Figure 6-18 MySQL restore window

126 Discovering MySQL on IBM i5/OS
e. Click the Restore content tab (Figure 6-19). On this tab, you can restore all tables of a
desired schema, a subset of the tables, or just one of the tables. You click the Analyze
Backup File Content button and then choose all tables, some tables, or one table to
restore them. All tables are selected by default.
f. Click Start Restore.
Figure 6-19 MySQL restore content tab window
You have now finalized the restore process by using MySQL Administrator.

Chapter 6. Backup and restore of the MySQL databases 127
6.3.4 phpMyAdmin for restore
In this section, we explain how to use phpMyAdmin to do a restore from a previous backup.
This method has additional requirements that you must complete before you begin. See
4.3.3, “Installing phpMyAdmin” on page 59, for information about these requirements.
After you install phpMyAdmin:
1. Start your Internet browser and go to the following address:
http://server name:89/phpMyAdmin/index.php
2. On the Welcome page for phpMyAdmin (Figure 6-13 on page 117), type the user name
and password. Then click the Go button.
3. On the phpMyAdmin main page (Figure 6-20), select the Import option and click the
Browse button in order to select a previous backup file. In this case, we select
backup_phpMyAdmin.sql. Then click Go.
Figure 6-20 phpMyAdmin import main page
You have now completed the restore process by using phpMyAdmin.
Note: In order to connect to phpMyAdmin, you must use 89 port after the system name
or IP address by default.
Important: You can only use this method when the database does not exist. If you attempt
to use this method and the database already exists, you will receive an error message.

128 Discovering MySQL on IBM i5/OS
6.4 Additional tools for backup and restore
Additional tools are available that can help to fix database problems. In this section, we
introduce the following tools:
Security backup to TAPE
Security backup to *SAVF
Restoring from TAPE
Restoring from *SAVF
6.4.1 Security backup to TAPE
To avoid a loss of data in the event of disk failure, make an external copy of your database.
For more information, see The System Administrator's Companion to AS/400 Availability and
Recovery, SG24-2161.
Because this method is only for external backup, you must first know:
The name of the tape device.
The full path of folder that contains backup files or full path of backup file (if you only want
to save just one backup file) on the integrated file system that you will save to tape.
Then enter the Save Object (SAV) command and press F4. In this example, as shown in
Figure 6-21 on page 129, we save the /usr/local/mysql/bin/backup folder that contains all
backup files of MySQL Database Server to the TAP01 device.
Note: This section is intended only for external backup.
Specific file backup to tape: You can replace '*' with the name of the file only if you want
to back up a specific file to tape.

Chapter 6. Backup and restore of the MySQL databases 129
Figure 6-21 SAV command to tape
6.4.2 Security backup to *SAVF
The easiest and most popular way to make a security backup to disk (not covered in this
book) is to use a compressed save file. In this case, make a copy to an external device, such
as tape, workstation, CD, or DVD.
Because we do not cover all the save and restore utilities for i5/OS to manage common
backup and restore errors, refer to The System Administrator's Companion to AS/400
Availability and Recovery, SG24-2161, for more information.
Save Object (SAV)
Type choices, press Enter.
Device . . . . . . . . . . . . . > '/qsys.lib/tap01.devd'
+ for more values
Objects:
Name . . . . . . . . . . . . . > '/usr/local/mysql/bin/backup/*'
Include or omit . . . . . . . *INCLUDE *INCLUDE, *OMIT
+ for more values
Name pattern:
Pattern . . . . . . . . . . . '*'
Include or omit . . . . . . . *INCLUDE *INCLUDE, *OMIT
+ for more values
Directory subtree . . . . . . . *ALL *ALL, *DIR, *NONE, *OBJ, *STG
Save active . . . . . . . . . . *NO *NO, *YES, *SYNC
More...
F3=Exit F4=Prompt F5=Refresh F10=Additional parameters F12=Cancel
F13=How to use this display F24=More keys

130 Discovering MySQL on IBM i5/OS
1. Create a Save File (CRTSAVF) to allow save backup files:
CRTSAVF FILE(QGPL/BACKUP)
2. Run the Save Object (SAV) command and press F4. In the example shown in Figure 6-22,
we save the /usr/local/mysql/bin/backup folder that contains all backup files of the MySQL
Database Server to back up the save file device.
Figure 6-22 SAV command to save a file
Note: You can replace '*' with the name of the file if you only want to back up a
specific file to a save file.
Save Object (SAV)
Type choices, press Enter.
Device . . . . . . . . . . . . . > '/qsys.lib/qgpl.lib/backup.file'
+ for more values
Objects:
Name . . . . . . . . . . . . . > '/usr/local/mysql/bin/backup/*'
Include or omit . . . . . . . *INCLUDE *INCLUDE, *OMIT
+ for more values
Name pattern:
Pattern . . . . . . . . . . . '*'
Include or omit . . . . . . . *INCLUDE *INCLUDE, *OMIT
+ for more values
Directory subtree . . . . . . . *ALL *ALL, *DIR, *NONE, *OBJ, *STG
Save active . . . . . . . . . . *NO *NO, *YES, *SYNC
More...
F3=Exit F4=Prompt F5=Refresh F10=Additional parameters F12=Cancel
F13=How to use this display F24=More keys

Chapter 6. Backup and restore of the MySQL databases 131
3. Check the contents of the backup save file:
DSPSAVF FILE(QGPL/BACKUP)
The Display Saved Objects - Save File panel (Figure 6-23) shows the objects of the save
file.
Figure 6-23 DSPSAVF panel
6.4.3 Restoring from TAPE
To restore a file from a TAPE device into the integrated file system:
RST DEV(‘/qsys.lib/tap01.devd’) OBJ(‘/usr/local/mysql/bin/backup/*’)
6.4.4 Restoring from *SAVF
To restore a file from a save file into the integrated file system:
RST DEV(‘/qsys.lib/qgpl.lib/backup.file’) OBJ(‘/usr/local/mysql/bin/backup/*’)
Display Saved Objects - Save File
Display level . . . . . : 1
Directory . . . . . . . : < /local/mysql-5.0.45-i5os-power-64bit//bin/backup
Type options, press Enter.
5=Display objects in subdirectory 8=Display object specific information
Opt Object Type Owner Size Data
backup_all_dat > *STMF JAVIER 655360 Yes
backup_test.sq > *STMF JAVIER 8192 Yes
backup_world.s > *STMF JAVIER 524288 Yes
backup_world_m > *STMF JAVIER 655360 Yes
imptest.txt *STMF JAVIER 8192 Yes
itso_names.txt *STMF JAVIER 8192 Yes
Bottom
F3=Exit F11=View 2 F12=Cancel F16=Display header
F22=Display entire field
6 objects saved on media file.
Note: You can replace '*' with the name of the file if you only want to restore a specific file
from TAPE.
Note: You can replace '*' with the name of the file if you only want to restore a specific file
from a save file.

132 Discovering MySQL on IBM i5/OS
6.5 Common backup and restore errors
Use care when restoring objects into i5/OS or into the integrated file system. One of the most
common problems during the restore process is with objects authorities or inexistent users
into the system. Use valid users with enough authority to back up and restore the MySQL
databases. Check suitable logs into the integrated file system.
You can also display i5/OS job logs by running the Display Job Log (DSPJOBLOG)
command. Then press F10 and check for messages in the job log.
Installation failures are usually caused by one or more of the following conditions:
Your user profile does not have enough authority.
The command has the wrong folder. It must be /usr/local/mysql/bin.
When using command line procedure, you do not have an authorized profile.
Prerequisite software products or fixes are missing.
The MySQL Database Server is not started yet.
6.5.1 Additional information
For additional information about backup and restore of MySQL databases, consult the
following references:
i5/OS fixes (including database)
http://www-912.ibm.com/s_dir/slkbase.nsf/recommendedfixes
i5/OS PASE fixes
http://www.ibm.com/servers/enable/site/porting/iseries/pase/misc.html
IBM Redbooks
http://www.redbooks.ibm.com
IBM System i Domain Redbooks
http://www.redbooks.ibm.com/portals/systemi
MySQL Community Server download page
http://dev.mysql.com/downloads/mysql/5.0.html
phpMyAdmin official home Web site
http://phpmyadmin.net
phpMyAdmin official Web site downloads
http://www.phpmyadmin.net/home_page/index.php
The Perl directory
http://www.perl.org/

© Copyright IBM Corp. 2008. All rights reserved. 133
Chapter 7. Replication and clustering
In this chapter, we provide an overview of how the replication and clustering features of the
MySQL Database Server can be used to implement a highly available MySQL database
environment on i5/OS. We concentrate on how to set up the replication and clustering
aspects of the MySQL Database Server to implement highly available MySQL databases. We
also discuss the high availability aspects of the MySQL Database Server. In addition to
implementing high availability strategies for the database, the applications that use the data
must also be made highly available.
We focus on the following topics in this chapter:
“Introduction to clustering in MySQL” on page 134
“Terminology” on page 134
“Configuring the replication” on page 134
7
Prerequisite: Prior to reading this chapter, you must have a basic understanding of the
concepts and terminology regarding high availability. We also recommend that you consult
the MySQL 5.0 Reference Manual for more detailed information about replication of
MySQL databases:
http://dev.mysql.com/doc/refman/5.0/en/replication.html

134 Discovering MySQL on IBM i5/OS
7.1 Introduction to clustering in MySQL
This chapter focuses on clustering as it is related to databases. MySQL clustering is based on
a
shared-nothing database cluster, which is a cluster that does not leverage any shared
storage. In this type of clustering, multiple nodes are distributed across systems to ensure
continuous availability in the event of a node or network failure. Clustering in the MySQL
Database Server uses a storage engine that consists of a set of data nodes to store data that
can be accessed by using standard SQL with the MySQL Database Server.
7.2 Terminology
You should know and understand the following terms, which are used in this chapter:
Binary logging
A log of all data changes that occur on the master. MySQL replication uses the
binary log to implement a
log-shipping replication solution. With log-shipping
replication, all data changes that occur on the master are stored in a log and then
retrieved by the slave and executed from these received log files. The binary log is
storage-engine independent, meaning that replication works regardless of the
storage engine that is being used.
Coordinate system
A way for binary logs to identify events. A coordinate for the binary log includes the
log file name and the byte offset.
7.3 Configuring the replication
In the following sections, we explain how to configure the MySQL replication. With a variety of
methods to choose from, the method that you use will depend on how you set up your
replication and whether you already have data within the master database. The replication
configuration methods are:
Setting up a new MySQL master server with one or more slave servers. In this method,
only the configuration must be established because there is no data to exchange.
Setting up a new replication environment for an existing MySQL database. In this method,
the configuration data must be transferred to the slave server or servers before replication
starts.
Setting up additional slave servers for an existing replication environment.
Note: With the implementation of MySQL on i5/OS, the clustering nodes can be separate
i5/OS logical partitions (LPARs) on the same System i environment or multiple i5/OS
LPARS on separate System i environments.

Chapter 7. Replication and clustering 135
Figure 7-1 provides a high-level view of the replication environment.
Figure 7-1 MySQL replication architecture
Note the following explanation:
The binary log represents the log of data changes on the replication server. This log is
sent in real time to the replication slave.
The relay log on the replication slave is a copy of the binary log file from the replication
server.
The .info files represent control information for the replication. Information in the info files
is persistent across restarts and allows for replication functions to survive restarts of the
replication slave.
7.3.1 Creating a user for replication
Each slave server must connect to the master server by using a standard MySQL user name
and password. The user for the replication operations can be any user. However, the user
must be granted the REPLICATION SLAVE privilege.
The MySQL statement shown in Example 7-1 creates a user named ‘repl’ that allows all hosts
within the domain ‘mydomain.com’ to connect for replication.
Example 7-1 Creating the replication user
GRANT REPLICATION SLAVE ON *.* TO ‘repl’@’%.mydomain.com’ IDENTIFIED BY
‘slavepass’;
Applications
Binary
Log
Replication
Server
Replication
Slave
Relay
Log
.info
file
Replication privileges: You do not need to create a specific MySQL user for replication.
However, keep in mind that the user name and password that are used for replication are
stored as plain text in the master.info configuration file. Consider creating a MySQL user
that only has privileges for replication.

136 Discovering MySQL on IBM i5/OS
7.3.2 Configuring the replication master
Replication of MySQL databases relies on the binary logging feature of the MySQL Database
Server. The binary log is used to exchange data between the master and slave servers.
Each server within a replication group must have a unique server-id. The server-id is used to
identify individual servers within the group and must be a positive integer value. Configuration
of both the binary logging feature and the server-id requires that the MySQL Database Server
be shut down and changes made to the MySQL configuration file. Both options are configured
in the [mysqld] section of the configuration file. For example, to enable binary logging and set
the server-id to 1, the entries shown in Example 7-2 are added (or uncommented) in the
configuration file.
Example 7-2 Configuring the master replication settings
[mysqld]
log-bin=mysql-bin
server-id=1
7.3.3 Configuring the replication slave
A unique server-id must be configured for the replication slave. The server-id must be
different from the server-ID of the replication master or any other replication slaves in the
configuration. Example 7-3 shows the settings of the server ID in the MySQL configuration
file.
Example 7-3 Configuring the slave replication settings
[mysqld]
server-id=2
7.3.4 Obtaining the master replication information
To properly establish replication on the replication slave servers, you must determine the
current point in the binary log for the master replication server. This information is necessary
to ensure that the replication slave server starts processing events from the binary log at the
correct point.
If the replication master already contains data that you want to synchronize on the replication
slaves, then the processing of statements on the master must be halted prior to establishing
MySQL user: You can either use the same MySQL user for replication from each slave or
use a different user from each slave as long as each user has the REPLICATION SLAVE
privilege.
Skip-networking option: If networking is disabled, then the slave server is unable to
establish communications with the master server, and the replication attempt fails. Ensure
that the skip-networking option has not been enabled on the replication master server.
Binary logging: Binary logging (log-bin=mysql-bin) does not need to be set on the
replication slave. However, configuring binary logging on the slave enables the ability to
use the binary log for data backups and crash recovery of the slave.

Chapter 7. Replication and clustering 137
the current point in the binary log. Failure to stop processing of statements causes
inconsistency between the replication master and slave servers. It can also result in corrupted
databases on the slave server.
To obtain the master status information:
1. From the command line client, enter the statement shown in Example 7-4 to flush all
tables and block write statements:
Example 7-4 Flushing the tables and blocking writes on the master replication server
myql> FLUSH TABLES WITH READ LOCK;
2. Determine the current binary log name and the offset on the master server as shown in
Example 7-5.
Example 7-5 Displaying the status of master replication server
mysql> SHOW MASTER STATUS
The SHOW MASTER STATUS statement causes the binary log file and offset to be
displayed as shown in Figure 7-2.
Figure 7-2 Master replication server status
Two values from the SHOW MASTER STATUS statement are required when setting up the
replication slave:
– The FILE column provides the name of the binary log.
– The POSITION column provides the offset within the current log file.
+---------------+----------+--------------+------------------+
| File | Position | Binlog_Do_DB | Binlog_Ignore_DB |
+---------------+----------+--------------+------------------+
| mysql-bin.005 | 81 | example | manual,mysql |
+---------------+----------+--------------+------------------+
Notes:
If binary logging has not been previously established on the master server, then the
values for FILE and POSITION will be blank. In this case, when configuring the slave
server’s log file and position, an empty string (‘’) is used for the log file and ‘4’ is used
for the position.
If the master server contains data to be synchronized with the slave server, then
leave the client running, so that the lock remains in place.

138 Discovering MySQL on IBM i5/OS
7.3.5 Creating a data snapshot
At this point, a snapshot of the data from the master replication server is required. After the
data snapshot has been completed, the snapshot is used to import data into the slave
replication server before starting the replication process.
To create the snapshot:
1. Use the flush tables statement as shown in Example 7-6 to lock the tables on the server
and prevent queries that update data from executing.
Example 7-6 Locking the tables on the master replication server
mysql> FLUSH TABLES WITH READ LOCK;
2. From an i5/OS PASE session, use the mysqldump statement as shown in Example 7-7 to
create a dump of either all of the databases on the server or individual databases.
Example 7-7 Dumping the existing data from the master replication server
$ mysqldump --all-databases --lock-all-tables > dbdump.db
The resulting dump file, which in this case is dbdump.db, must be copied to the slave
replication server.
7.3.6 Setting up replication with new master and slave servers
This is the simplest replication method that you can use to establish the replication
environment because there is no existing data to copy prior to the replication process. To
establish the replication environment:
1. Configure the master replication server. See 7.3.2, “Configuring the replication master” on
page 136.
2. Start the MySQL engine on the master replication server.
3. Create a replication user on the master replication server. See 7.3.1, “Creating a user for
replication” on page 135.
4. Determine the status information for the master replication server. See 7.3.4, “Obtaining
the master replication information” on page 136.
5. Release the read lock on the master replication server by using the command shown in
Example 7-8.
Example 7-8 Releasing the locks on the master replication server
mysql> UNLOCK TABLES;
6. Configure the slave replication server. See 7.3.3, “Configuring the replication slave” on
page 136.
7. Start the MySQL engine on the slave replication server.

Chapter 7. Replication and clustering 139
8. From the slave replication server, use the CHANGE MASTER command as shown in
Example 7-9 to configure the master replication server settings.
Example 7-9 Configuring the master replication server connection on a slave replication server
mysql> CHANGE MASTER TO
MASTER_HOST=’master.mydomain.com’,
MASTER_USER=’repl’;
MASTER_PASSWORD=’slavepass’,
MASTER_PORT=3306,
MASTER_LOG_FILE=’mysql-bin.005’,
MASTER_LOG_POS=81,
MASTER_CONNECT_RETRY=10;
7.3.7 Setting up replication with existing data
By using this method, you establish a replication environment where existing data must be
established on the slave replication server prior to starting the replication. To establish this
environment:
1. Configure the master replication server. See 7.3.2, “Configuring the replication master” on
page 136.
2. Determine the binary log file name and offset it from the master replication server. See
7.3.4, “Obtaining the master replication information” on page 136.
3. Obtain a snapshot of the master replication server. See 7.3.5, “Creating a data snapshot”
on page 138.
4. Create a replication user on the master replication server. See 7.3.1, “Creating a user for
replication” on page 135.
5. Configure the slave replication server. See 7.3.3, “Configuring the replication slave” on
page 136.
6. From the i5/OS PASE environment, import the data from mysqldump into the replication
slave server as shown in Example 7-10.
Example 7-10 Loading the existing data on the slave replication server
$ mysql < dbdump.db
7. From the slave replication server, use the CHANGE MASTER command as shown in
Example 7-11 to configure the master replication server settings.
Example 7-11 Configuring the master replication server connection on the slave replication server
mysql> CHANGE MASTER TO
MASTER_HOST=’master.mydomain.com’,
MASTER_USER=’repl’;
MASTER_PASSWORD=’slavepass’,
MASTER_PORT=3306,
MASTER_LOG_FILE=’mysql-bin.005’,
MASTER_LOG_POS=81,
MASTER_CONNECT_RETRY=10;

140 Discovering MySQL on IBM i5/OS
7.3.8 Adding replication slaves to an existing replication environment
The process for adding a new replication slave server to an existing replication server is
essentially to duplicate the settings and data from an existing slave replication server. To
duplicate the slave replication server use the following steps:
1. From the PASE environment, shut down the existing slave replication server as shown in
Example 7-12.
Example 7-12 Shutting down the MySQL Database Server
$ mysqladmin shutdown
2. Copy the data directory from the existing slave replication server to the new slave
replication server.
3. Copy the master.info and replay.info files from the existing slave replication server to the
new slave replication server.
4. Start the MySQL engine on the existing slave replication server.
5. On the new slave replication server, change the configuration to provide a unique server-id
to the new slave replication server (see 7.3.3, “Configuring the replication slave” on
page 136).
6. Start the MySQL engine on the new slave replication server.
7.3.9 Monitoring replication
You can use the SHOW SLAVE STATUS command, which is shown in Example 7-13, to
monitor the state of reposition between the master and slave MySQL Database Server.
Example 7-13 SHOW SLAVE STATUS
SHOW SLAVE STATUS\G

Chapter 7. Replication and clustering 141
The SHOW SLAVE STATUS statement generates output similar to that which is shown in
Figure 7-3.
Figure 7-3 SHOW SLAVE STATUS output
*************************** 1. row ***************************
Slave_IO_State: Waiting for master to send event
Master_Host: localhost
Master_User: root
Master_Port: 3306
Connect_Retry: 3
Master_Log_File: mysql-bin.005
Read_Master_Log_Pos: 81
Relay_Log_File: mysql-relay-bin.005
Relay_Log_Pos: 525
Relay_Master_Log_File: mysql-bin.005
Slave_IO_Running: Yes
Slave_SQL_Running: Yes
Replicate_Do_DB:
Replicate_Ignore_DB:
Last_Errno: 0
Last_Error:
Skip_Counter: 0
Exec_Master_Log_Pos: 79
Relay_Log_Space: 552
Until_Condition: None
Until_Log_FIle:
Until_Log_Pos: 0
Master_SSL_Allowed: No
Master_SSL_CA_File:
Master_SSL_CA_Path:
Master_SSL_Cert:
Master_SSL_Cipher:
Master_SSL_Key:
Seconds_Behind_Master: 0

142 Discovering MySQL on IBM i5/OS

© Copyright IBM Corp. 2008. All rights reserved. 143
Part 3 Application support
and usage
After you set up your MySQL Database Server, you want to query it and test some
applications with it. In this part, we explain how to install seven popular open community
applications. We also explain how to query your MySQL Database Server by using the
command line and several graphical tools.
This part includes the following chapters:
Chapter 8, “Open community application support on i5/OS” on page 145
Chapter 9, “Querying a MySQL database” on page 181
Chapter 10, “Porting non-MySQL databases” on page 205
Part 3

144 Discovering MySQL on IBM i5/OS

© Copyright IBM Corp. 2008. All rights reserved. 145
Chapter 8. Open community application
support on i5/OS
In this chapter, we discuss the PHP Web applications. We also explain how to install seven
popular open source PHP applications on i5/OS by using the MySQL Database Server and
Zend Core for i5/OS. We discuss the following topics:
“Terminology” on page 146
“Overview of PHP Web applications” on page 146
“Installing Web applications on i5/OS” on page 149
8
Version of the application: The versions of the PHP Web applications that we use in this
chapter were current at the time this book was written. When you go to the respective Web
sites for the applications, you might find that the versions have changed.

146 Discovering MySQL on IBM i5/OS
8.1 Terminology
In this chapter, we refer to the following terms:
Open source A set of creeds and practices that advocate access to the design and
production of goods and knowledge. The term is most commonly
related to the source code of software that is available to the general
public with relaxed or non-existent intellectual property restrictions.
The software is generally downloaded free of charge so that users can
alter the source code and customize the applications to meet their
individual needs.
Wiki A collaborative Web site that can be directly edited by anyone with
access to it. The Web site was originally described by its developer,
Ward Cunningham, as “the simplest online database that could
possibly work.”
MMORPG Massive(ly) multiplayer online role-playing game. A genre of online
role-playing video games (RPGs) that involves a large number of
players interacting with one another in a virtual world.
Infotainment Derived from a combination of “information” and “entertainment.” It
refers to a general type of media broadcast program that provides a
blend of current events, news, and “feature news,” or “features stories.”
Web portal A site that functions as a point of access to information on the World
Wide Web. What normally distinguishes Web portals from the
standard search engine is that Web portals offer other services such
as news, stock prices, infotainment, and various other features.
Content management system (CMS)
A system used to administer the content of a Web site. A CMS
generally consists of two components: the content management
application (CMA) and the content delivery application (CDA).
Customer relationship management (CRM)
A term to describe a method that is used by companies to manage their
business relationships. The process includes capture, storage, and
analysis of clients, vendors, partners, and internal process information.
E-commerce Relates to the buying and selling of a product or service via an
electronic means such as the Internet.
8.2 Overview of PHP Web applications
Most of us read e-mail, shop online, participate in auctions, search for information on Web
sites, post our opinions in an online message board, or conduct some type of business on the
World Wide Web. Web applications are used to implement Webmail, online retail sales, online
auctions, wikis, Weblogs (blogs), discussion boards, MMORPGs, and many other functions.
Today, Web applications are part of everyone’s integral daily life.
A growing number of powerful open source PHP Web applications are available for personal
and commercial use. Open source PHP Web applications are a gold mine for users and
businesses because the software can be downloaded, used, or altered free of charge.
Businesses can use the Web applications to conduct electronic commerce, manage their
clients, improve customer relations, and increase productivity. Additionally, users can share

Chapter 8. Open community application support on i5/OS 147
and access information globally with control and ease. The range of available open source
Web applications and their functions are phenomenal.
8.3 Popular PHP Web applications supported on i5/OS
In this section, we discuss some of the more popular PHP-based applications and their
general purpose. Among the most common supported Web applications, the System i
environment supports the following applications:
MediaWiki
SugarCRM
Joomla
Zen Cart
PmWiki
phpBB
PHP-Nuke-7.8
Table 8-1 summarizes the general purpose of each application.
Table 8-1 Web applications and functions
In the sections that follow, we describe each application’s function in more detail. For
additional information about each product, visit their official Web site.
MediaWiki
MediaWiki is a free software wiki package. The package is currently used in several
Wikimedia Foundation projects, MediaWiki’s official site, and many other wikis. For more
information, go to the following address:
http://www.mediawiki.org
SugarCRM
SugarCRM is the world’s leading provider of commercial open source customer relationship
management for companies of all sizes. The software is adaptable to any business
environment. SugarCRM allows companies to customize and integrate customer-facing
business processes in order to maintain and enhance customer relations.
Several deployment options are offered by SugarCRM to enhance security, integration, and
configuration demands. The options include on-demand, on-premise, and appliance-based
solutions. For more information, go to the following address:
http://www.sugarcrm.com
Web application Function
MediaWiki Wiki
SugarCRM Customer relationship management
Joomla Web portal or content management and online commerce
Zen Cart E-commerce
PmWiki Wiki
phpBB Bulletin board solutions
PHP-Nuke Web portal or content management

148 Discovering MySQL on IBM i5/OS
Joomla
Joomla is an award-winning CMS that is used to assist in building Web sites and other
powerful online applications. The range of functions include Web sites or portals, online
commerce, personal home pages, magazines and newspapers, among many other uses. For
more information, go to the following address:
http://www.joomla.org/
Zen Cart
Zen Cart is an online store management system. It is PHP-based and uses a MySQL
database and HTML components. It provides support for many languages and currencies.
For more information, go to the following address:
http://www.zen-cart.com/
PmWiki
PmWiki is a wiki-based package that is normally used for collaborative creation and
maintenance of Web sites. For more information, go to the following address:
http://www.pmwiki.org/
phpBB
phpBB provides bulletin board solutions and an Open Source forum. For more information, go
to the following address:
http://www.phpbb.com/
PHP-Nuke-7.8
PHP-Nuke is a Web Portal System or content management system. The goal of PHP-Nuke is
to have an automated Web site to distribute news and articles with user’s systems. Each user
can submit comments to discuss the articles. PHP-Nuke includes the following features:
Web-based administration
Surveys
Top page
Access statistics page with counter
User customizable box
Themes manager for registered users
Easy-to-use administration GUI with graphic topic manager
Option to edit or delete stories
Option to delete comments
Moderation system
Reference page to know who links to the site
Sections manager
Customizable HTML blocks
User and authors edit
An integrated Banners Ads system
Search engine
Backend/headlines generation (RSS/RDF format)
Many, many more easy-to-use functions
For more information, go to the following address:
http://www.phpnuke.org/

Chapter 8. Open community application support on i5/OS 149
8.4 Installing Web applications on i5/OS
For all Web applications that we discuss in this chapter, you must have installed the MySQL
Database Server and PHP. The instructions as presented here are written under the
assumption that MySQL and Zend Core for i5/OS have been installed on your System i
environment.
8.4.1 MediaWiki
To install MediaWiki:
1. Point your browser to the following Web address and download the file
mediawiki-1.9.3.tar.gz:
http://www.mediawiki.org
2. Extract the mediawiki-1.9.3.tar.gz file on your PC.
3. Copy the mediawiki-1.9.3.tar file from the PC to the /www/zendcore/htdocs directory on
your System i environment by using either FTP or iSeries Navigator as explained in the
following steps:
To u se
FTP:
a. On the PC, go to your command prompt and change directories to the path where the
mediawiki-1.9.3.tar file is located:
cd path
b. Use FTP to send the file to the IP address of the System i machine:
ftp IP address
c. Sign on with your System i user ID and password.
d. Change to binary mode:
bin
e. Change to the /www/zendcore/htdocs directory:
cd /www/zendcore/htdocs
f. Place the file mediawiki-1.9.3.tar in the /www/zendcore/htdocs directory:
put mediawiki-1.9.3.tar
Important: These applications are not IBM products and are not supported by IBM. Use
accordingly. For support, maintenance, and further instruction, visit the respective
application’s official Web site.
File decompression: We used 7ZIP to obtain the desired level of decompression. The
decompression utility that you use should allow you to see
only the file that is called
mediawiki-1.9.3.tar. If you choose to use 7ZIP, download it from the Web at:
http://www.7-zip.org/download.html
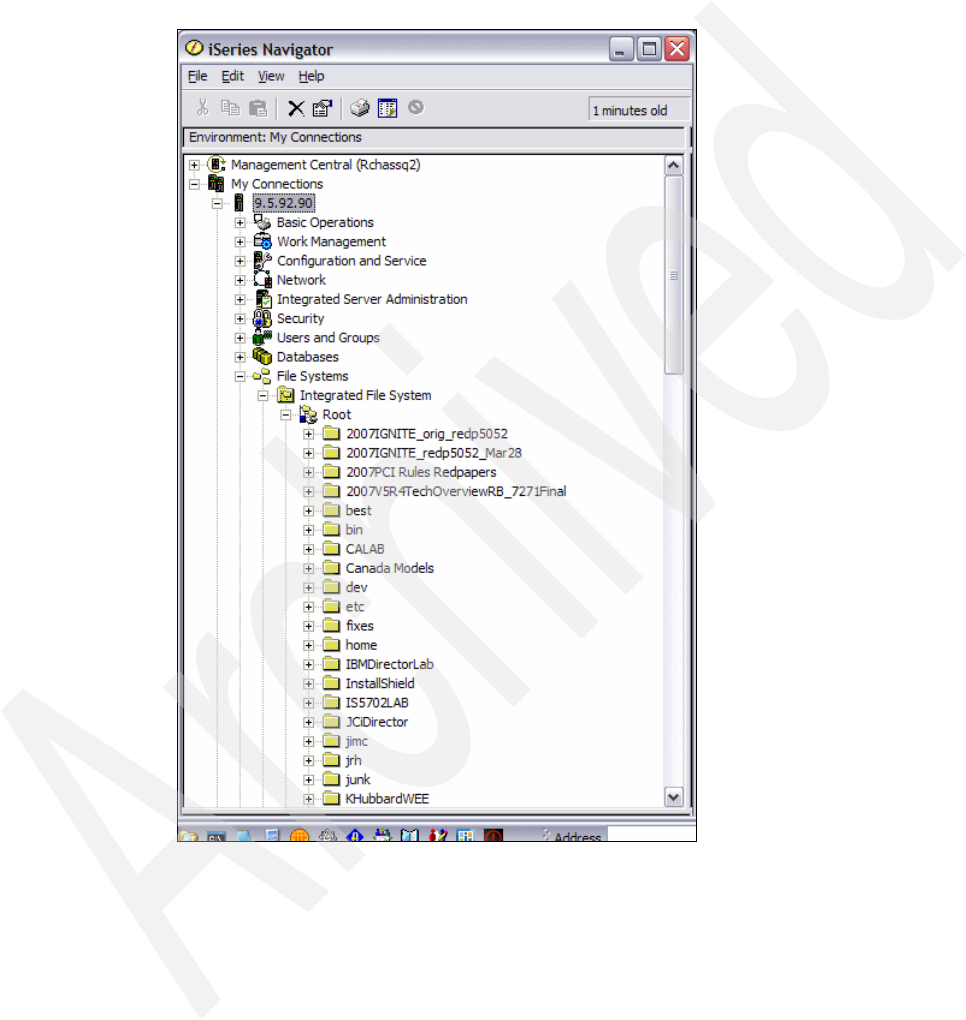
150 Discovering MySQL on IBM i5/OS
To u se iSeries Navigator:
a. Double-click the iSeries Navigator icon to open iSeries Navigator.
b. Under My Connections, select the system and sign on to the System i environment.
c. Expand File Systems → Integrated File System → Root and navigate to
/www/zendcore/htdocs as shown in Figure 8-1.
Figure 8-1 iSeries Navigator to navigate to the directory
d. Open your file explorer and navigate to the Mediawiki-1.9.3.tar file.
e. Drag the Mediawiki-1.9.3.tar file from the file explorer to the htdocs folder in iSeries
Navigator. Alternatively, right-click the Mediawiki-1.9.3.tar file in your file explorer and
select Edit → Copy to copy the file. Then in iSeries Navigator, in the htdocs folder,
right-click and select Paste.
4. Sign on to i5/OS and launch the QP2TERM program to start the i5/OS PASE environment:
CALL QP2TERM
5. Change to the /www/zendcore/htdocs/ mediawiki-1.9.3 directory:
cd /www/zendcore/htdocs/ mediawiki-1.9.3

Chapter 8. Open community application support on i5/OS 151
6. Verify that you are in the correct directory and decompress the file by running the following
command:
tar -xvf mediawiki-1.9.3.tar
7. Change the permissions on the config folder:
chmod a+w config
8. In a browser, enter the following URL:
http://system name:89/mediawiki-1.9.3
9. On the page that opens (Figure 8-2), click the set up the wiki link. Then follow the
prompts.
Figure 8-2 MediaWiki setup link

152 Discovering MySQL on IBM i5/OS
10.Ensure that you have created a user profile in the MySQL Database Server in order to
complete the database configuration prompts. Otherwise, you must select the Use
superuser account option and provide a superuser name and superuser password as
shown in Figure 8-3.
Figure 8-3 Database configuration
When the installation is complete, you see a page like the one in Figure 8-4 indicating that
the installation is complete.
Figure 8-4 MediaWiki installed

Chapter 8. Open community application support on i5/OS 153
11.In your i5/OS PASE environment, move the file
/www/zendcore/htdocs/mediawiki-1.9.3/config/LocalSettings.php to the parent directory:
a. Change directory:
cd www/zendcore/htdocs/mediawiki-1.9.3/config/LocalSettings.php
b. Move the file:
mv LocalSettings.php ../
12.Point your browser to the following URL to verify the installation:
http://system name:89/mediawiki-1.9.3/
You have now completed the installation of MediaWiki.
8.4.2 SugarCRM
To install SugarCRM:
1. Go to the following Web address and download Sugar Community Edition 4.5.1e to your
PC:
http://www.sugarcrm.com
2. On your PC, use a decompression utility to extract the SugarCE-4.5.1e.zip file.
3. Copy the uncompressed folder SugarCE-4.5.1e from your PC to your System i directory
/www/zendcore/htdocs/sugarcrm.
a. Open iSeries Navigator and expand Integrated File System → root. Navigate to the
/www/zendcore/htdocs/sugarcrm directory.
b. Open your file explorer and navigate to the SugarCE-4.5.1e folder.
c. Copy the folder and paste it to the /www/zendcore/htdocs/sugarcrm directory.
4. Go to the Zend Admin Console by typing your IP address and port number as follows:
http://IP address:port/
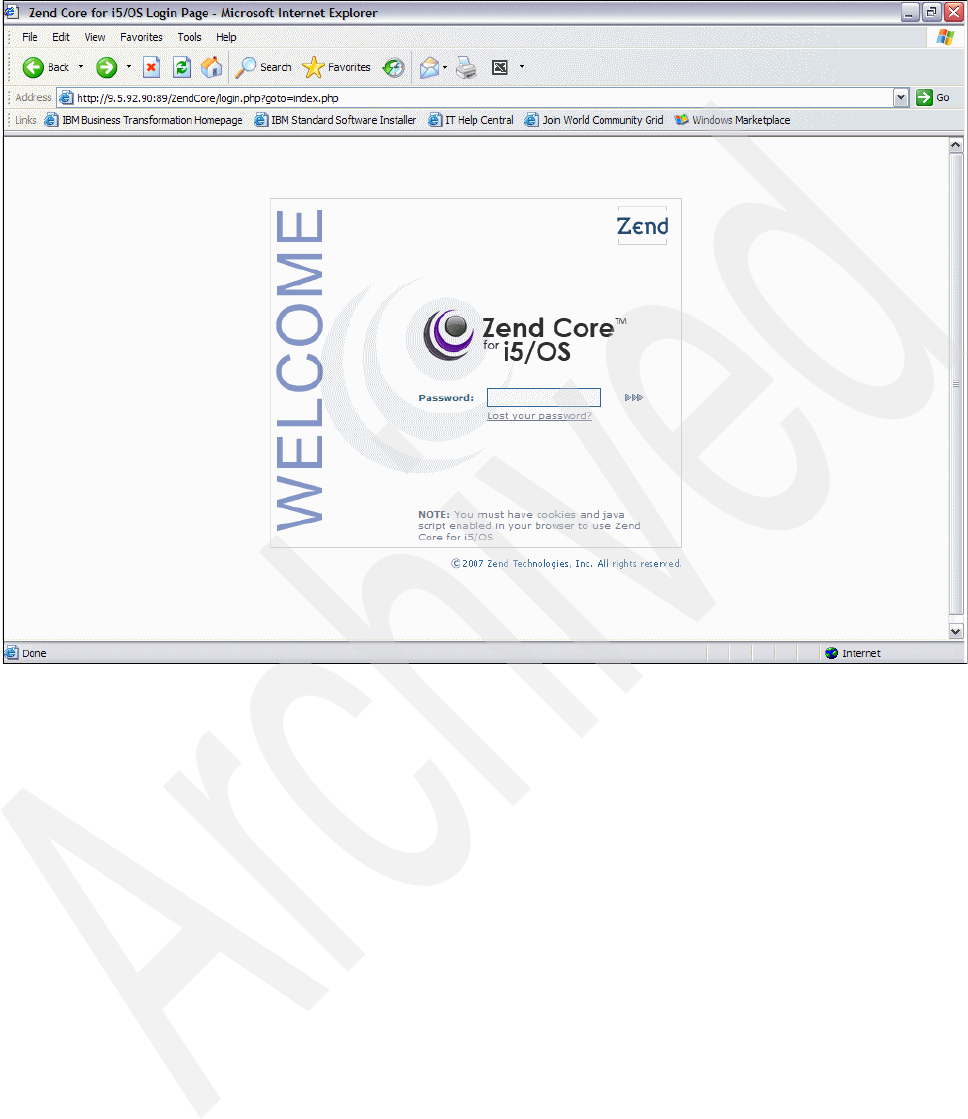

Chapter 8. Open community application support on i5/OS 155
6. At the top of the Zend Core for i5/OS page (Figure 8-6), select the Configuration tab and
then the Extensions subtab. Under Extension Configuration, enable the mbstring -
Multibyte Character Processing PHP extension by clicking the Enable/Disable icon
next to the light bulb.
Figure 8-6 PHP extensions
Web server restart: In order for the changes to take effect, you must restart the Web
server after you save all the changes.

156 Discovering MySQL on IBM i5/OS
7. On the Zend Core administrative console (Figure 8-7), click the Configuration tab and the
PHP subtab. Under PHP Configuration, expand File Uploads. Under File Uploads,
change upload_max_filesize from 2M to 6M.
Figure 8-7 Uploading the file
8. Click the Configuration tab and the PHP subtab. On the PHP subtab, expand Resource
Limits. Change memory_limit from 8M to 32M as shown in Figure 8-8.
Figure 8-8 Resource limits

Chapter 8. Open community application support on i5/OS 157
9. Restart the Web server:
a. On an i5/OS CL command line, type:
go zendcore/zcmenu
b. Select option 5, Service Management menu.
c. Select option 6, Restart Apache server instances.
10.Change your php.ini file to indicate a path for saving sessions:
a. On an i5/OS command line, type the following command:
wrklnk 'etc/php.ini'
You go to the etc directory, which contains the php.ini file as shown in Figure 8-9.
Figure 8-9 Results of the wrklnk ‘etc/php.ini’ command
b. On the next panel (Figure 8-10), select option 2, Edit, to edit the php.ini file.
Figure 8-10 Editing the php.ini file
Work with Object Links
Directory . . . . : /etc
Type options, press Enter.
2=Edit 3=Copy 4=Remove 5=Display 7=Rename 8=Display attributes
11=Change current directory ...
Opt Object link Type Attribute Text
php.ini STMF
Bottom
Parameters or command
===>
F3=Exit F4=Prompt F5=Refresh F9=Retrieve F12=Cancel F17=Position to
F22=Display entire field F23=More options
Work with Object Links
Directory . . . . : /etc
Type options, press Enter.
2=Edit 3=Copy 4=Remove 5=Display 7=Rename 8=Display attributes
11=Change current directory ...
Opt Object link Type Attribute Text
2 php.ini STMF
Bottom
Parameters or command
===>
F3=Exit F4=Prompt F5=Refresh F9=Retrieve F12=Cancel F17=Position to
F22=Display entire field F23=More options

158 Discovering MySQL on IBM i5/OS
c. Find the line (see Figure 8-11) that contains session.save_path and ensure that the
line reads:
session.save_path = "/tmp"
Make any changes if necessary and then press F3 to exit and save the changes.
Figure 8-11 Changing the session.save_path
Note: Ensure that there is no semicolon in front of session.save_path = "/tmp".
The path specified can be set to meet user preferences.
Edit File: /etc/php.ini
Record : 2918 of 4308 by 10 Column : 1 69
by 126
Control :
CMD
....+....1....+....2....+....3....+....4....+....5....+....6....+....7....+....
8....+....9....+....0....+....
session.save_path = "/tmp"
;
; where N is an integer. Instead of storing all the session files in
; /path, what this will do is use subdirectories N-levels deep, and
; store the session data in those directories. This is useful if you
F2=Save F3=Save/Exit F12=Exit F15=Services F16=Repeat find F17=Repeat
change F19=Left F20=Right

Chapter 8. Open community application support on i5/OS 159
11.Restart the Zend Core server to make the changes in the php.ini file take effect.
a. Type the following command on the i5/OS command line:
go zendcore/zcmenu
b. In the Zend Core for IBM i5/OS Setup Tool panel (Figure 8-12), select option 5, Service
Management menu, and press Enter.
Figure 8-12 Zendcore menu
c. In the next panel (Figure 8-13):
i. Select option 2, Stop Zend Core Subsystem, and press Enter.
ii. Select option 1, Start Zend Core Subsystem, and press Enter.
Figure 8-13 Service management menu
ZCMENU Zend Core for IBM i5/OS Setup Tool
System: RCHAS55
Select one of the following:
1. Set Zend Core Web Administartion Console password
2. Update via Zend Network menu
3. Run Support Tool
5. Service Management menu
7. System Information and Server IDs
90. Signoff
Selection or command
===>
F3=Exit F4=Prompt F9=Retrieve F12=Cancel F23=WRKUSRJOB
ZCAMENU Zend Core for IBM i5/OS Setup Tool
System: RCHAS55
Select one of the following:
1. Start Zend Core Subsystem
2. Stop Zend Core Subsystem
4. Start Apache server instances
5. Stop Apache server instances
6. ReStart Apache server instances
8. Start i5_COMD service
9. End i5_COMD service
Selection or command
===>
F3=Exit F4=Prompt F9=Retrieve F12=Cancel F23=WRKUSRJOB


162 Discovering MySQL on IBM i5/OS
15.For Step 3: Database Configuration (Figure 8-16), follow the prompts. In this example, we
selected the options Create Database, Create User, Populate Database with Demo
Data?, and Use multi-byte text in demo data?. We used the defaults for all other
settings.
Figure 8-16 Step 3: Database configuration


164 Discovering MySQL on IBM i5/OS
17.Follow the prompts for steps 5 and 6. Step 7 completes the installation as shown in
Figure 8-18.
Figure 8-18 Completing the setup
18.Point your browser to the following URL and log in as shown in Figure 8-19 to verify the
installation:
http://system name:89/sugarcrm/
Figure 8-19 SugarCRM login
You have now completed the steps for installing and setting up SugarCRM.

Chapter 8. Open community application support on i5/OS 165
8.4.3 Joomla
To install Joomla:
1. Go to the Joomla Web site at the following address and download the
Joomla_1.0.13-Stable-Full_Package.tar.gz file to your PC:
http://www.joomla.org/
2. On your PC use a decompression utility to extract
Joomla_1.0.9-Stable-Full_Package.tar.gz.
3. Copy the Joomla_1.0.13-Stable-Full_Package.tar file from your PC to the
/www/zendcore/htdocs/joomla directory on your System i environment. You can copy the
file to the directory by using either FTP or iSeries Navigator.
4. Start an i5/OS PASE session:
call qp2term
5. Navigate to the joomla folder:
cd /www/zendcore/htdocs/joomla
6. Decompress the Joomla_1.0.13-Stable-Full_Package.tar file:
tar -xvf Joomla_1.0.13-Stable-Full_Package.tar
7. Make the following changes in the php.ini file in the etc directory:
a. Ensure that your php.ini file in etc directory has the following syntax. There must not be
any semicolon before it.
session.save_path = "/tmp"
b. Change 'display_errors = Off' to 'display_errors = On'.
c. Change 'magic_quotes_gpc = Off' to 'magic_quotes_gpc = On'.
8. On the System i machine, create a profile of
nobody with read/write permission to the
following directories:
CHGAUT OBJ('/www/zendcore/htdocs/joomla/xxxx/xxxxx’) USER(NOBODY) DTAAUT(*RWX)
– /www/zendcore/htdocs/joomla/administrator/backups/
– /www/zendcore/htdocs/joomla/administrator/components/
– /www/zendcore/htdocs/joomla/administrator/modules/
– /www/zendcore/htdocs/joomla/administrator/templates/
– /www/zendcore/htdocs/joomla/cache/
– /www/zendcore/htdocs/joomla/components/
– /www/zendcore/htdocs/joomla/images/
– /www/zendcore/htdocs/joomla/images/banners/
– /www/zendcore/htdocs/joomla/images/stories/
– /www/zendcore/htdocs/joomla/language/
– /www/zendcore/htdocs/joomla/mambots/
– /www/zendcore/htdocs/joomla/mambots/content/
– /www/zendcore/htdocs/joomla/mambots/editors/
– /www/zendcore/htdocs/joomla/mambots/editors-xtd/
– /www/zendcore/htdocs/joomla/mambots/search/
php.ini file: See 8.4.2, “SugarCRM” on page 153, for more details about how to alter
the php.ini file and make the changes to take effect. Remember that you must restart
the server.

166 Discovering MySQL on IBM i5/OS
– /www/zendcore/htdocs/joomla/mambots/system/
– /www/zendcore/htdocs/joomla/media/
– /www/zendcore/htdocs/joomla/modules/
– /www/zendcore/htdocs/joomla/templates/
9. Point your browser to the following URL:
http://system name>:89/joomla/
10.On the pre-installation check page (Figure 8-20), ensure that you see a green status for all
items checked and click the Next button.
Figure 8-20 Joomla pre-installation check page

Chapter 8. Open community application support on i5/OS 167
11.Read the license agreement (Figure 8-21) and click the Next button.
Figure 8-21 License agreement
12.For step 1 (Figure 8-22), enter the following information and then click Next:
– For Host Name, type localhost.
– For MySQL User Name, type root.
– For MySQL Database Name, type joomla.
Figure 8-22 Step 1: Database configuration

168 Discovering MySQL on IBM i5/OS
13.For step 2, specify the site name of your choice.
14.For step 3, enter the following information as shown in Figure 8-23:
– For URL, type http://system name:89/joomla.
– For Path, type /www/zendcore/htdocs/joomla.
– For Your E-mail and Admin password, type your e-mail and password.
Figure 8-23 Step 3 Confirm URL, path and email
15.Step 4 completes the installation. You should see a page with the message
“Congratulations! Joomla is installed”.
16.Delete the /www/zendcore/htdocs/joomla/installation directory. In iSeries Navigator,
navigate to the path, right-click the installation folder, and select Delete.

Chapter 8. Open community application support on i5/OS 169
17.Verify the installation by pointing your browser to the following URL and signing in:
http://system name:89/joomla/index.php
Figure 8-24 shows the main Joomla page.
Figure 8-24 Joomla login
You have now installed Joomla.
8.4.4 Zen Cart
To install Zen Cart on the System i environment:
1. Go to the following Web address and download Zen Cart v1.3.7:
http://www.zen-cart.com/
2. Use a decompression utility to extract the file.
3. Copy the extracted contents of the .zip file to /www/zendcore/htdocs/zencart on the
System i machine.
4. Type your IP address and port number as follows to access the Zend Admin Console:
http://IP address:89/

Chapter 8. Open community application support on i5/OS 171
6. As shown in Figure 8-26, select the Configuration tab and the Extensions subtab.
Enable curl - cURL and gd - GD by clicking the Enable/Disable icon next to the light bulb.
Then click Save Settings.
Figure 8-26 Zend Core extensions
7. Restart the Web server:
a. On the System i environment, type:
go zendcore/zcmenu
b. Select option 5, Service Management menu.
c. Select option 6, Restart Apache server instances.
8. Point your browser to the following URL:
http://system name:89/zencart/
Web server restart: In order for the changes to take effect, you must restart the Web
server after you save all the changes.

172 Discovering MySQL on IBM i5/OS
9. Follow the prompts until you reach the Zen Cart Setup - System Setup page. Zen Cart
guides you through a set of pages (steps), which include welcome, license, prerequisites,
system setup, database setup, store setup, admin setup, and finish. Figure 8-27 shows the
Welcome page. Click Continue.
Figure 8-27 Zen Cart Welcome page

Chapter 8. Open community application support on i5/OS 173
10.On the Prerequisites page (Figure 8-28), make sure that all of the items that are selected
have a green check mark. Correct any errors and recheck if necessary. After all items are
green, click the Install button at the bottom of the page.
Figure 8-28 Zen Cart prerequisites page showing the system inspection results
11.On the Zen Cart Setup - System Setup page (Figure 8-29), for all settings, replace
https://127.0.0.1:8000 with http://system name:89.
Figure 8-29 Zend Cart System Setup page


Chapter 8. Open community application support on i5/OS 175
12.Continue to follow the prompts through the Database Setup, Store Setup, and Admin
Setup pages until the installation is complete. Finally you see the Zen Cart Setup -
Finished page as shown in Figure 8-31.
Figure 8-31 Zen Cart Setup Finished page
13.Remove the /www/zendcore/htdocs/zencart/zc_install directory.
14.Change permissions on /www/zendcore/htdocs/zencart/includes/configure.php to read
only. One way to do this is to enter the following CL command on your System i
environment:
CHGAUT OBJ('/www/zendcore/htdocs/zencart/includes/configure.php') USER(*
BLIC) DTAAUT(*R) OBJAUT(*NONE)
You have now completed the installation of Zen Cart.
8.4.5 PmWiki
To install PmWiki:
1. Point your browser to the PmWiki Web page at the following address and download
pmwiki-latest.tgz to your PC:
http://www.pmwiki.org/
2. Use a decompression utility to extract pmwiki-latest.tgz.
3. Copy the pmwiki-latest.tar file from the PC to the System i directory
/www/zendcore/htdocs.
4. On the System i environment, start an i5/OS PASE session:
call qp2term
5. Change directories to /www/zendcore/htdocs:
cd /www/zendcore/htdocs

176 Discovering MySQL on IBM i5/OS
6. Decompress the file:
tar -xvf pmwiki-latest.tar
7. In i5/OS PASE, create the wiki.d file and make it editable:
mkdir /www/zendcore/htdocs/pmwiki-2.1.27/wiki.d
chmod 777 /www/zendcore/htdocs/pmwiki-2.1.27/wiki.d
8. Edit /www/zendcore/htdocs/pmwiki-2.1.27/pmwiki.php:
a. Use the WRKLNK command to navigate to the path
/www/zendcore/htdocs/pmwiki-2.1.27/pmwiki.php.
b. Select option 2 to edit the pmwiki.php file.
c. Find the following line:
$ScriptUrl = 'http://'.$_SERVER['HTTP_HOST'].$_SERVER['SCRIPT_NAME'];
Replace it with this line:
$ScriptUrl = $_SERVER['SCRIPT_NAME'];
d. Press F3 to save and exit.
9. Point your browser to the following URL to verify the installation of PmWiki:
http://system name:89/pmwiki-2.1.27/pmwiki.php
You have now completed the installation of PmWiki. For additional configuration information,
see the official PmWiki Web site at the following address:
http://www.pmwiki.org/
8.4.6 phpBB
To install phpBB:
1. Go to the phpBB Web site at the following address and download phpBB-2.0.22.tar.gz to
your PC:
http://www.phpbb.com/
2. Use a PC decompression utility to extract the phpBB-2.0.22.tar file.
3. Using FTP or iSeries Navigator, copy the phpBB-2.0.22.tar file to the
/www/zendcore/htdocs directory.
4. Sign on to i5/OS and launch the QP2TERM program to start the i5/OS PASE environment:
call qp2term
5. In the i5/OS PASE environment, change the directory to /www/zendcore/htdocs:
cd /www/zendcore/htdocs
6. In the i5/OS PASE environment, decompress the phpBB-2.0.22.tar file:
tar -xvf phpBB-2.0.22.tar
7. On the MySQL Database Server:
a. Create a phpBB database:
i. Change to the directory /usr/local/mysql/bin/.
ii. In the MySQL shell, enter the following command:
CREATE DATABASE phpBB;
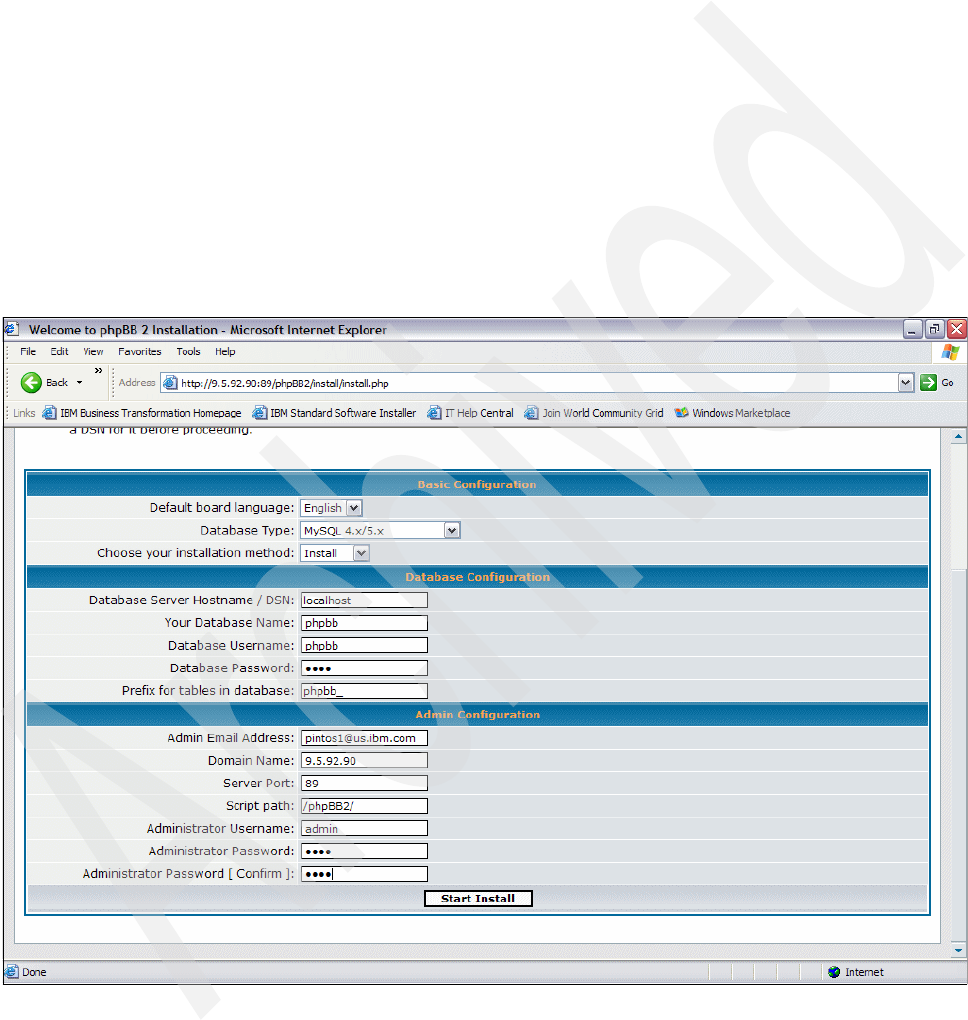
Chapter 8. Open community application support on i5/OS 177
For further details about the interface in which to execute the command, see 9.3.3,
“Running mysql interactively” on page 187.
b. Create a phpBB user in MySQL:
GRANT ALL PRIVILEGES ON *.* TO 'phpBB'@'localhost' IDENTIFIED BY
'phpBB';
For further details about setting up authorities, see 5.4.3, “The GRANT statement” on
page 92, and 5.6, “Granting user privileges in MySQL Administrator” on page 96.
8. On the System i machine, create a profile of
nobody with write access to config.php in
/phpBB2, by typing the following CL command:
CHGAUT OBJ('/www/zendcore/htdocs/phpBB2/config.php') USER(NOBODY) DTAAUT(*RW)
9. Point your browser to the following URL:
http://system name:89/phpBB2/
10.Complete the setup information including your MySQL DB name, user ID, and password.
Make sure that you change Domain Name to your server, and change Server Port to 89 as
shown in Figure 8-32. Click Start Install.
Figure 8-32 phpBB installation settings
11.Delete the /www/zendcore/htdocs/phpBB2/install and
/www/zendcore/htdocs/phpBB2/contrib directories by using iSeries Navigator.
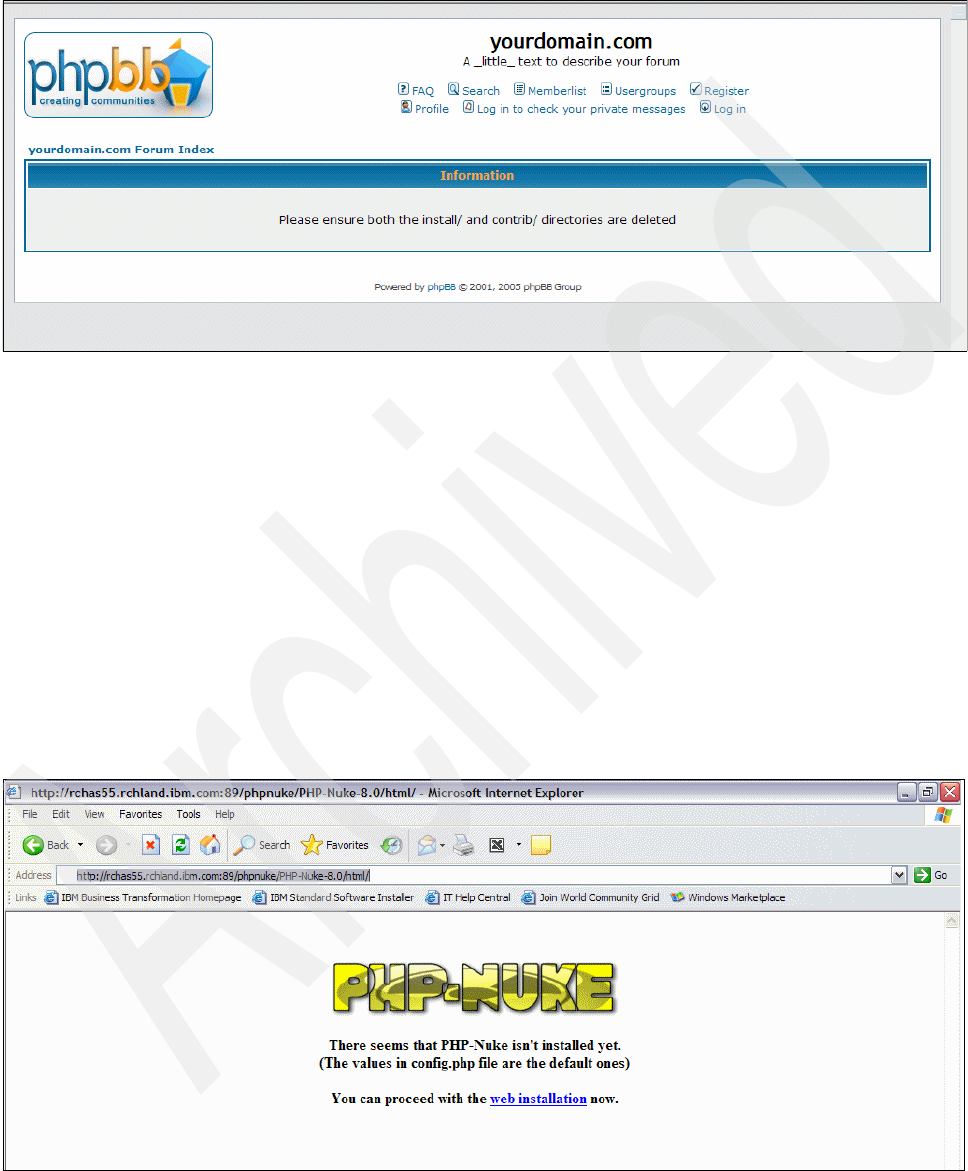
178 Discovering MySQL on IBM i5/OS
The phpbb yourdomain.com page opens like the example in Figure 8-34. You are now ready
to use phpBB.
Figure 8-33 Signon page
8.4.7 PHP-Nuke
To use PHP-Nuke, you must purchase the tool from BMT Micro Inc. for a nominal price that
goes toward future development of the tool. You can purchase and download PHP-Nuke on
the Web at:
http://www.phpnuke.org/
After you purchase the tool, install it as explained in the steps that follow:
1. Extract the file and copy it to the System i directory /www/zendcore/htdocs/phpnuke.
2. Point your browser to the following URL to begin the installation:
http://system name:89/phpnuke/PHP-Nuke-7.8/html/
Figure 8-35 shows the main PHP-Nuke page.
Figure 8-34 PHPNuke setup

Chapter 8. Open community application support on i5/OS 179
3. On the pre-installation check page (Figure 8-36), ensure that all items have a status in
green before proceeding with the installation. Click Next.
Figure 8-35 Pre-installation check
4. For the license step, review the license agreement and click the Next button.
5. For step 1 (Figure 8-36), enter the requested information and click Next.
Figure 8-36 Step 1: MySQL database configuration


© Copyright IBM Corp. 2008. All rights reserved. 181
Chapter 9. Querying a MySQL database
In this chapter, we discuss some popular tools to run queries in your MySQL Database Server
environment. We explain how to create and query a sample database by using the MySQL
command line interface (CLI) and other graphical tools such as the MySQL Query Browser
and phpMyAdmin.
Specifically, we present the following topics:
“Setting up a sample database” on page 182
“SQL reference” on page 183
“The mysql command line tool for queries” on page 185
“MySQL Query Browser” on page 189
“Running queries in phpMyAdmin” on page 197
9

182 Discovering MySQL on IBM i5/OS
9.1 Setting up a sample database
To begin, we must first set up a sample database to run our queries against it. We have
chosen a sample database from the MySQL Database Server named
world that contains
interesting sample data that you can query.
1. Go to the following Web address and download the world database .zip file:
http://dev.mysql.com/doc/
2. Extract the file that you have downloaded on your computer by using your tool of
preference.
3. Copy the world.sql file to your server in the /usr/local/mysql/bin directory.
4. Log in to your server and start the i5/OS PASE environment:
CALL QP2TERM
5. Change to the directory where the MySQL tools are installed:
cd /usr/local/mysql/bin
6. Load the contents of the world.sql file into the MySQL Database Server:
a. Connect to the MySQL Database Server:
mysql -u root
b. Create a new schema:
CREATE DATABASE world;
c. Select world as the default schema to work with:
USE world;
d. Enter the following command to direct mysql to read and process the contents of
world.sql:
SOURCE world.sql;
mysql produces a large amount of output from reading queries from the world.sql file
and executing them.
Notice: The sample data used in the world database is from Statistics Finland, which you
can find on the Web at the following address:
http://www.stat.fi/worldinfigures

Chapter 9. Querying a MySQL database 183
7. After mysql finishes processing the world.sql file, enter the following statement:
SHOW TABLES;
The output should list all three of the tables shown as in Figure 9-1. Depending on your
server configuration, SHOW TABLES might display the table names in lowercase. If
lowercase is used for the table names, then you must use lowercase names whenever you
refer to the tables by name later.
Figure 9-1 Output from SHOW TABLES
8. Exit the mysql command interpreter interface:
quit
The world tables contains the following information:
Country Information about the countries of the world.
City Information about some cities in those countries.
CountryLanguage Languages spoken in each country.
9.2 SQL reference
In this section, we provide a mapping between the terms that are used in MySQL Database
Server and i5/OS. We also discuss the Structured Query Language (SQL) and provide a
simple reference to the SELECT statement syntax for use with our queries.
9.2.1 System terms versus SQL terms
In the relational model of data that uses the MySQL Database Server, all data is perceived as
existing in tables. DB2 Universal Database™ for i5/OS objects are created and maintained as
system objects. Table 9-1 shows the relationship between the terms for i5/OS and the SQL
relational database to help you to understand the relationship between the objects that we
query and those that are more common to you.
Table 9-1 Relationship of system terms to SQL terms
> SHOW TABLES;
+-----------------+
| Tables_in_world |
+-----------------+
| City |
| Country |
| CountryLanguage |
+-----------------+
3 rows in set (0.00 sec)
System terms SQL terms
Library Groups related objects so that you
can find the objects by name.
Schema Consists of a library, a journal, a
journal receiver, an SQL catalog,
and optionally a data dictionary. A
schema groups related objects so
that you can find the objects by
name.
Physical file A set of records. Table A set of columns and rows.

184 Discovering MySQL on IBM i5/OS
9.2.2 The Structured Query Language
SQL is used within host programming languages or interactively to access information from a
database. SQL is the industry standard database interface that is used to access and modify
relational database products. SQL uses a relational model of data. That is, it perceives all
data as existing in tables. SQL consists of statements and clauses that describe what you
want to do with the data in a database and under what conditions you want to do it.
There are four types of SQL statements:
Data definition language (DDL) statements
Data manipulation language (DML) statements
Dynamic SQL statements
Miscellaneous statements
In this book, we suppose that you have knowledge about SQL. We only briefly describe the
syntax of the SELECT statement that we use in the next examples.
The SELECT statement
In this section, we cover some options of the SELECT statement syntax. Example 9-1 shows
a simplified structure of the SELECT statement.
Example 9-1 SELECT statement simplified syntax
SELECT select_expr
FROM table_references
WHERE where_condition
Each occurrence of select_expr indicates a column that you want to retrieve. There must be
at least one occurrence of select_expr. table_references, which indicates the table or tables
from which to retrieve rows.
The WHERE clause, if given, indicates the condition or conditions that rows must satisfy to be
selected. where_condition is an expression that evaluates true for each row to be selected.
The statement selects all rows if there is no WHERE clause.
We use the query in Example 9-2 to test the different tools in this chapter.
Example 9-2 Sample query
SELECT * FROM City WHERE Name LIKE "QUI%";
This statement selects all available columns from the City table where the Name of the city
matches with the pattern QUI%. That means that all cities that begin with the three characters
QUI and any number of characters, even zero characters behind, are selected.
Record A set of fields. Row The horizontal part of a table
containing a serial set of columns.
Field One or more characters of related
information of one data type.
Column The vertical part of a table of one
data type.
Logical file A subset of fields and records of
one or more physical files.
View A subset of columns and rows of
one or more tables.
System terms SQL terms

Chapter 9. Querying a MySQL database 185
9.3 The mysql command line tool for queries
mysql is a simple SQL shell. It supports both interactive use and non-interactive use. When
used interactively, query results are presented in an ASCII table format. When used
non-interactively, the results are presented in the tab-separated format. The output format can
be changed by using the command options.
9.3.1 mysql options
mysql supports multiple options through the command line. Table 9-2 shows the most used
options during a call to the mysql program.
Table 9-2 The most common options for the mysql command line
Note: For a complete reference about SQL for MySQL, see Chapter 11, “SQL Statement
Syntax” of the MySQL 5.0 Reference Manual on the Web at the following address:
http://dev.mysql.com/doc/refman/5.0/en/sql-syntax.html
Option Description
--help, -? Displays a help message and exit.
--batch, -B Prints results by using a tab as the column separator, with each row on a new
line. With this option, mysql does not use the history file.
--column-names Writes column names in results.
--database=db_name, -D db_name The database to use. This is useful primarily in an option file.
--execute=statement, -e statement Executes the statement and quits. The default output format is like that
produced with --batch.
--force, -f Continues even if an SQL error occurs.
--host=host_name, -h host_name Connects to the MySQL Database Server on the given host.
--html, -H Produces HTML output.
--password[=password], -p[password] The password to use when connecting to the server. If you use the short option
form (-p), you cannot have a space between the option and the password. If
you omit the password value following the --password or -p option on the
command line, you are prompted for one.
--port=port_num, -P port_num The TCP/IP port number to use for the connection.
--quick, -q Does not cache each query result, but prints each row as it is received. This
might slow down the server if the output is suspended. With this option, mysql
does not use the history file.
--raw, -r Writes column values without escape conversion. Is often used with the
--batch option.
--silent, -s Silent mode. Produces less output. This option can be given multiple times to
produce less and less output.
--skip-column-names, -N Does not write column names in results.
--table, -t Displays output in a table format. This is the default for interactive use, but can
be used to produce table output in batch mode.

186 Discovering MySQL on IBM i5/OS
9.3.2 mysql commands
The mysql command sends each SQL statement that you issue to the server to be executed.
In addition, mysql interprets a set of commands. For a list of these commands:
1. Sign on to i5/OS and execute the QP2TERM program to start the i5/OS PASE
environment:
CALL QP2TERM
2. In the terminal window that opens, on the i5/OS PASE command line, enter the following
command to change to MySQL commands directory:
cd /usr/local/mysql/bin
3. Log in to the MySQL Database Server:
mysql -u root
4. To obtain the command information, enter either of the following commands to see the
results shown in Example 9-3:
help
\h
Each command in the output has both a long and short form. The long form is not case
sensitive, but the short form is case sensitive. The long form can be followed by an
optional semicolon terminator, but the short form should not be followed by the semicolon.
Example 9-3 mysql help output
List of all MySQL commands:
Note that all text commands must be first on line and end with ';'
? (\?) Synonym for `help'.
charset (\C) Switch to another charset. Might be needed for processing
binlog with multi-byte charsets.
clear (\c) Clear command.
connect (\r) Reconnect to the server. Optional arguments are db and host.
delimiter (\d) Set statement delimiter. NOTE: Takes the rest of the line as
new delimiter.
edit (\e) Edit command with $EDITOR.
ego (\G) Send command to MySQL Database Server server, display result
vertically.
exit (\q) Exit mysql. Same as quit.
go (\g) Send command to MySQL Database Server.
help (\h) Display this help.
nopager (\n) Disable pager, print to stdout.
notee (\t) Don't write into outfile.
--user=user_name, -u user_name The MySQL user name to use when connecting to the server.
--verbose, -v Verbose mode. Produces more output about what the program does. This
option can be given multiple times to produce more and more output. For
example, -v -v -v produces a table output format even in batch mode.
--vertical, -E Prints query output rows vertically, one line per column value. Without this
option, you can specify vertical output for individual statements by terminating
them with \G.
--xml, -X Produces XML output.
Option Description

Chapter 9. Querying a MySQL database 187
pager (\P) Set PAGER [to_pager]. Print the query results via PAGER.
print (\p) Print current command.
prompt (\R) Change your mysql prompt.
quit (\q) Quit mysql.
rehash (\#) Rebuild completion hash.
source (\.) Execute an SQL script file. Takes a file name as an argument.
status (\s) Get status information from the server.
system (\!) Execute a system shell command.
tee (\T) Set outfile [to_outfile]. Append everything into given outfile.
use (\u) Use another database. Takes database name as argument.
warnings (\W) Show warnings after every statement.
nowarning (\w) Don't show warnings after every statement.
For server side help, type 'help contents'
5. Type quit to exit the mysql shell.
9.3.3 Running mysql interactively
To use mysql:
1. Start the i5/OS PASE shell:
CALL QP2TERM
2. Change to the location of MySQL programs:
cd /usr/local/mysql/bin
3. Launch the shell as follows:
mysql -u root db_name
Alternatively, if your root user has a password, you can enter the following command
statement:
mysql --user=your_user_name --password=your_password db_name
4. Type an SQL statement and end it with ";", \g, or \G. Then press Enter.
5. To exit from the mysql shell, type quit and you return to the i5/OS PASE environment.
Example 9-4 shows all the commands that you need to connect to the world database that we
set up in 9.1, “Setting up a sample database” on page 182, and to run a simple query against
it.
Example 9-4 Simple query execution using mysql interactively
CALL QP2TERM
cd /user/local/mysql/bin
mysql -u root world
SELECT * FROM City WHERE Name LIKE "QUI%";
quit

188 Discovering MySQL on IBM i5/OS
Figure 9-2 shows the output.
Figure 9-2 Sample query execution output
9.3.4 Executing SQL statements from a text file
The mysql client typically is used interactively. However, it is also possible to put your SQL
statements in a file and then have mysql read its input from that file. First, you create a text
file, called text_file, that contains the statements that you want to execute. Then invoke mysql
as shown here:
mysql -u root db_name < text_file
If you place a USE db_name statement as the first statement in the file, it is not necessary to
specify the database name on the command line:
mysql -u root < text_file
Example 9-5 shows all the commands that you need to execute a simple query stored in a
file. Before you run these steps, using your preferred editor, create a file called myqueryfile
inside the /tmp directory in the integrated file system with the following content:
SELECT * FROM City WHERE Name LIKE "QUI%";
You can easily create the file with that content by issuing the following command:
echo 'SELECT * FROM City WHERE Name LIKE "QUI%";' > /tmp/myqueryfile
Example 9-5 Simple query execution by using mysql in batch mode
CALL QP2TERM
cd /user/local/mysql/bin
mysql -u root world < /tmp/myqueryfile
Figure 9-3 shows the output.
Figure 9-3 Sample execution of a query from a file
> SELECT * FROM City WHERE name LIKE "QUI%";
+-----+---------+-------------+--------------+------------+
| ID | Name | CountryCode | District | Population |
+-----+---------+-------------+--------------+------------+
| 74 | Quilmes | ARG | Buenos Aires | 559249 |
| 577 | Quilpué | CHL | Valparaíso | 118857 |
| 594 | Quito | ECU | Pichincha | 1573458 |
+-----+---------+-------------+--------------+------------+
3 rows in set (0.01 sec)
mysql>
> mysql -u root world < /tmp/myqueryfile
ID Name CountryCode District Population
74 Quilmes ARG Buenos Aires 559249
577 Quilpué CHL Valparaíso 118857
594 Quito ECU Pichincha 1573458

Chapter 9. Querying a MySQL database 189
You can also redirect the output of the execution of your SQL statements to a file by calling
mysql in the following way:
mysql -u root db_name < script_file.sql > output_file
Type commands in Example 9-6 to redirect the output of the previous query to a file called
/tmp/myqueryoutput.
Example 9-6 Simple query to redirect output to a file
CALL QP2TERM
cd /user/local/mysql/bin
mysql -u root world < /tmp/myqueryfile > /tmp/myqueryoutput
By typing /tmp/myqueryoutput, you see output like the example shown in Figure 9-4.
Figure 9-4 mysql redirected query output
Finally, if you are already inside the mysql shell, you can execute an SQL script file by using
the source command or the \. command as we did in 9.1, “Setting up a sample database” on
page 182, and as shown in the following example:
source file_name
\. file_name
9.4 MySQL Query Browser
The MySQL Query Browser is a graphical tool that is provided by MySQL for creating,
executing, and optimizing queries in a graphical environment. Where MySQL Administrator is
designed to administer a MySQL Database Server, the MySQL Query Browser is designed to
help you query and analyze data stored within your MySQL database.
While you can also run all queries that are executed in the MySQL Query Browser from the
command line by using the mysql utility, you can use the MySQL Query Browser to query and
edit data in a more intuitive, graphical manner.
> mysql -u root world < /tmp/myqueryfile > /tmp/myqueryoutput
$
> more /tmp/myqueryoutput
ID Name CountryCode District Population
74 Quilmes ARG Buenos Aires 559249
577 Quilpué CHL ValparaM-mso 118857
594 Quito ECU Pichincha 1573458
$ queryoutput: END
Note: For a complete reference of options and commands that are supported by the mysql
program, download the MySQL Reference Manual on the Web at the following address:
http://dev.mysql.com/doc/
You can also view the manual online at the following Web address:
http://dev.mysql.com/doc/refman/5.0/en/index.html

190 Discovering MySQL on IBM i5/OS
9.4.1 Windows and functions of the MySQL Query Browser
In this section, we discuss the main functions and windows of the MySQL Query Browser
tool.
MySQL Query Browser connection
After the MySQL Query Browser is started, a connection window (Figure 9-5) opens. In this
window, you must specify the MySQL Database Server to which you are connecting. You also
specify a valid user and password of MySQL Database Server like the one you created in
3.4.4, “Post installation tasks” on page 43. In addition, you must specify the server to which
you are trying to connect, the port on which it listens (default port is 3306), and the schema
that you will be querying.
Figure 9-5 Login window of the MySQL Query Browser
If the server connection is established, all the values are saved for future connections. The
Password field, however, is always empty. For security reasons, the password is not stored
along with the other options, unless you explicitly specify otherwise in the General Options
section of the Options window.
You can change any of the values in the connection profiles by overwriting the existing values
with new ones. Similarly, if you select another connection profile, you can change any of its
values. When you click the OK button after changing a profile’s values, the changes are
stored permanently only if a successful connection to the MySQL Database Server is
established. You can also click the Ellipses (...) button next to the Stored Connection
Installation: For details about how to install the MySQL Query Browser, see 4.3.2,
“Installing the MySQL GUI Tools” on page 55.
Default schema: You must choose a default schema in order to issue queries. It is
possible to choose a default database after connecting to the server, but setting the default
from the connection window can save time on subsequent connections.

Chapter 9. Querying a MySQL database 191
drop-down list, which takes you to the Connections section of the Options window
(Figure 9-6) for modifying connection profiles.
In the Connections section, you can create, edit, and delete connection profiles. The center
box displays a list of currently available profiles, together with a history of connections that
were made without being stored in a profile. You can collapse or expand both the
Connections and History trees by double-clicking them.
To edit an existing connection profile, click its name and change the values that appear in the
Connection Parameters and Advanced Parameters tabs. Then click the Apply button to save
your changes.
Figure 9-6 Options window of the MySQL Query Browser
Tip: Connections are automatically added to the History tree whenever you establish a
connection to a MySQL Database Server without using one of the profiles stored under the
Connections tree. They do not appear in the Stored Connection list of the connection
window (Figure 9-5), but you can use any of them by manually typing their name into the
Connection field on the Connection Parameters tab of the Options - Connections window.

192 Discovering MySQL on IBM i5/OS
When you select a connection profile from either the Connections or History trees, the
Connection Parameters tab displays the following fields:
Connection
The connection profile label. This is the name by which you refer to the profile and that
appears in the Connection drop-down list of the Connection window. It may contain any
characters, including spaces. The names can help you distinguish connections to different
MySQL Database Servers or connections as different MySQL users to a given server.
Username
The user name used to connect to the MySQL Database Server.
Password
The password used to connect to the MySQL Database Server. Note that passwords are
not stored in the connection profile, unless you specify otherwise in the General Options
section.
Hostname
The name of the server where the MySQL Database Server runs or its IP address.
Port
The TCP/IP port to which the MySQL Database Server listens on the host machine.
Typ e
The protocol used to connect to the database server. The default protocol is MySQL,
which uses the native MySQL protocol.
Schema
The default database for a connection when using the MySQL Query Browser.
Notes
A field to enter comments or additional information that describes the connection profile.
More information: For a complete reference of all available options, you can download the
MySQL Query Browser manual from the Web at the following address:
http://dev.mysql.com/doc/

Chapter 9. Querying a MySQL database 193
MySQL Query Browser main window
After you connect to a MySQL Database Server, you see the main query window (Figure 9-7)
of the MySQL Query Browser. All of the application’s functionality is available through this
window.
Figure 9-7 Main window sections of the MySQL Query Browser
As shown in Figure 9-7, the main query window is divided into several sections:
Query toolbar
In the query toolbar, you create and execute your queries. It is composed of three
navigation buttons (Go Back, Next, and Refresh), the query area, two action buttons
(Execute and Stop), and a status indicator.
All queries, whether generated automatically, graphically, or manually, appear in the query
toolbar. The simplest way to use the MySQL Query Browser is to type a query into the
query area and click the Execute button.
The query area is where the text of all queries and statements are displayed. By default,
the query area is three lines high and automatically expands to a maximum of ten lines in
height. For queries longer than ten lines, the query area is scrollable.
Advanced toolbar
The advanced toolbar contains three sets of buttons, which are the transaction buttons
(Start, Commit, Rollback), the query management buttons (Explain, Compare), and the
query building buttons (Select, From, Where, and so on.)
Advanced Toolbar
Result
Area
Query Toolbar
Object
Browser
Information
Browser
Note: For additional space, you can press the F11 key to maximize the query area. You
can also do this by choosing View → Maximize Query Edit.

194 Discovering MySQL on IBM i5/OS
The advanced toolbar is visible only when the Show advanced toolbars and Show
composer buttons toolbar options are selected in the Browser Options window.
Result area
Displays all query results. Multiple tabs can be active at one time, so that you can work on
multiple queries. The result area can be split vertically and horizontally for performing
comparisons. Also, queries in different parts of a split result area can be joined together for
master detail analysis.
Object browser
Where you manage your databases, bookmarks, and history. You can choose which
database and tables to query, add commonly used queries to a collection of bookmarks,
and browse through previously issued queries in order to use them again.
Information browser
Provides access to all information that is not directly related to actual data within your
database. The Params tab provides different local, global, and dynamic parameters that
can help build your queries, where the Syntax tab provides a convenient reference to the
MySQL query syntax. The Functions tab is a quick reference to the various functions that
are built into MySQL. The Trx tab lists all queries that make up a single transaction and
serves as a history for a single transaction.
9.4.2 Building and running queries with the MySQL Query Browser
The MySQL Query Browser can build and execute queries either manually or automatically.
Entering and editing queries manually
The MySQL Query Browser is most commonly used for executing queries and analyzing their
results. The most direct way to create a query is to type it directly into the query area. As you
type in your query, the SQL syntax portions of the query (SELECT, FROM, WHERE, and so
on) are highlighted in blue.
As you enter your query, the query area expands from an initial three lines in height to a
maximum of ten lines in height. For additional space, you can press the F11 key to maximize
the query area. You can also choose View → Mazimize Query Edit to maximize the query
area. When the query is maximized, line numbers are displayed for the query, and the query
area can be resized by dragging the line that divides the query area from the result area. To
restore the query area, press the F11 key again.
After you have entered a query, click the Execute button and your query results are displayed
in the result area. You can also press Ctrl+Enter to execute the query. If there is an error in
your query, an error area is displayed at the bottom of the result area that shows the relevant
error message and error number.
In addition to loading the query results into the current active result area, you can also create
a new result area for the results of your query or split your current result area and load results
into the new section.
To execute the query and load the results into a new result area, click the down arrow below
the Execute button and select the Execute in New Tab option or press Ctrl+Shift+Enter.
More information: For a complete reference for this window, you can download the
MySQL Query Browser manual from the Web at the following address:
http://dev.mysql.com/doc/

Chapter 9. Querying a MySQL database 195
To split the active result area and display the query results, click the down arrow below the
Execute button and select the Split Tab and Execute option or press Ctrl+Alt+Enter.
To enter and execute a query manually in the MySQL Query Browser:
1. Open the MySQL Query Browser tool.
2. In the connection window (Figure 9-5 on page 190):
a. Enter a valid server, host, and port, user name, and password.
b. In the Default Schema field, type world.
c. Click OK to connect.
3. In the main window (Figure 9-6 on page 191):
a. Type the following statement into the query area inside the query toolbar:
SELECT * FROM City WHERE Name LIKE "QUI%";
b. Click the Execute button.
Figure 9-8 shows the results on the MySQL Query Browser window.
Figure 9-8 Manual query execution in the MySQL Query Browser
Default database: You must set a default database before you can query specific tables.
However, you can still perform queries that are not database specific.
You can set the default database on the connection window. Alternatively, you can
right-click a database in the database browser and choose Make Default Schema, or
select File → Change Default Schema from the menu bar.

196 Discovering MySQL on IBM i5/OS
Building queries automatically
Another feature of the MySQL Query Browser is the ability to build queries automatically. You
can use the database browser to select the columns and tables that you want to query and
have the query created automatically based on your choices.
To automatically create a query:
1. Open the MySQL Query Browser tool.
2. In the connection window:
a. Enter a valid server, host, and port, user name, and password.
b. In the Default Schema field, type world.
c. Click OK to connect.
3. Drag the City table to the query area. SELECT * FROM City C is added to the query area.
You can also double-click a table to start a new SELECT query.
When you select a table from the database browser and drag it over the query area, a
table tool with query composition actions is displayed. Drop the table you are dragging on
the desired action and the query is modified accordingly. The following actions are
possible:
– SELECT replaces the current statement with a SELECT query that contains the
dragged table.
– Add Table adds the dragged table to the list of tables in the current SELECT query.
– JOIN Table refers to when a SELECT query is already in the query box, with a table in
it, and the new dragged table is added as well as the appropriate WHERE clauses to
perform a JOIN.
– LEFT OUTER JOIN is the same as JOIN, but does a LEFT OUTER JOIN instead of a
JOIN.
– UPDATE replaces the current statement with an UPDATE statement that contains the
dragged table.
– INSERT replaces the current statement with an INSERT statement that contains the
dragged table.
– DELETE replaces the current statement with a DELETE statement that contains the
dragged table.
When a table is selected, you can choose specific columns to query. Click the SELECT
button from the query building buttons on the button bar. Your mouse pointer changes to a
select pointer, with which you can choose columns from the database browser.
After you choose the columns that you want to query, you can use the other query building
buttons to complete your query with the WHERE, GROUP BY, and ORDER BY clauses.
When a new section of the query is added with the query building buttons, the cursor in
the query area is placed in position for editing. If you click a field with the WHERE pointer,
the cursor is in position for you to type the details of the WHERE clause.
4. Click the WHERE button on the advanced toolbar to select the condition for our query.
5. Click the Name field inside the City table and you can see that WHERE C.‘Name’ has been
added to the query area.
6. Add the condition of the query by typing LIKE “QUI%” before the semicolon.
7. Click the Execute button.

Chapter 9. Querying a MySQL database 197
Figure 9-9 shows how your window should look.
Figure 9-9 Query builder execution output
9.5 Running queries in phpMyAdmin
In this section, we explain how to run queries with phpMyAdmin. Again, we review two
different ways to run the queries: by either entering them manually or composing them by
using automatic functions. We begin by explaining how to log in and select the database,
which is the same for both methods. Then we explain each of the processes for building and
executing the query.
Tip: If the query building buttons are not visible, you can display them by selecting
Tools → Options, and in the Browser Options, select the Show composer button
toolbar check box.

198 Discovering MySQL on IBM i5/OS
9.5.1 Accessing phpMyAdmin and selecting the database to query
To access phpMyAdmin and select the database:
1. Log in to the tool by opening the phpMyAdmin URL in a browser. We use the same URL
as we did in 4.3.3, “Installing phpMyAdmin” on page 59:
http://your_hostname:89/phpMyAdmin
For your_hostname, replace this value with your server host name or IP address. See
“Checking the phpMyAdmin installation” on page 64, for additional details about how to
access phpMyAdmin.
2. On the login page (Figure 9-10), enter a valid user name and password. See “Creating a
configuration file for phpMyAdmin” on page 61 for details.
Figure 9-10 phpMyAdmin Login page

Chapter 9. Querying a MySQL database 199
3. In this example, we continue working with the world database. Therefore, in the left pane
of the phpMyAdmin page (Figure 9-11), select the world database.
Figure 9-11 Available databases in our installation
Figure 9-12 shows the next page, which contains the tables that are part of the world
database.
Figure 9-12 Available tables in world database
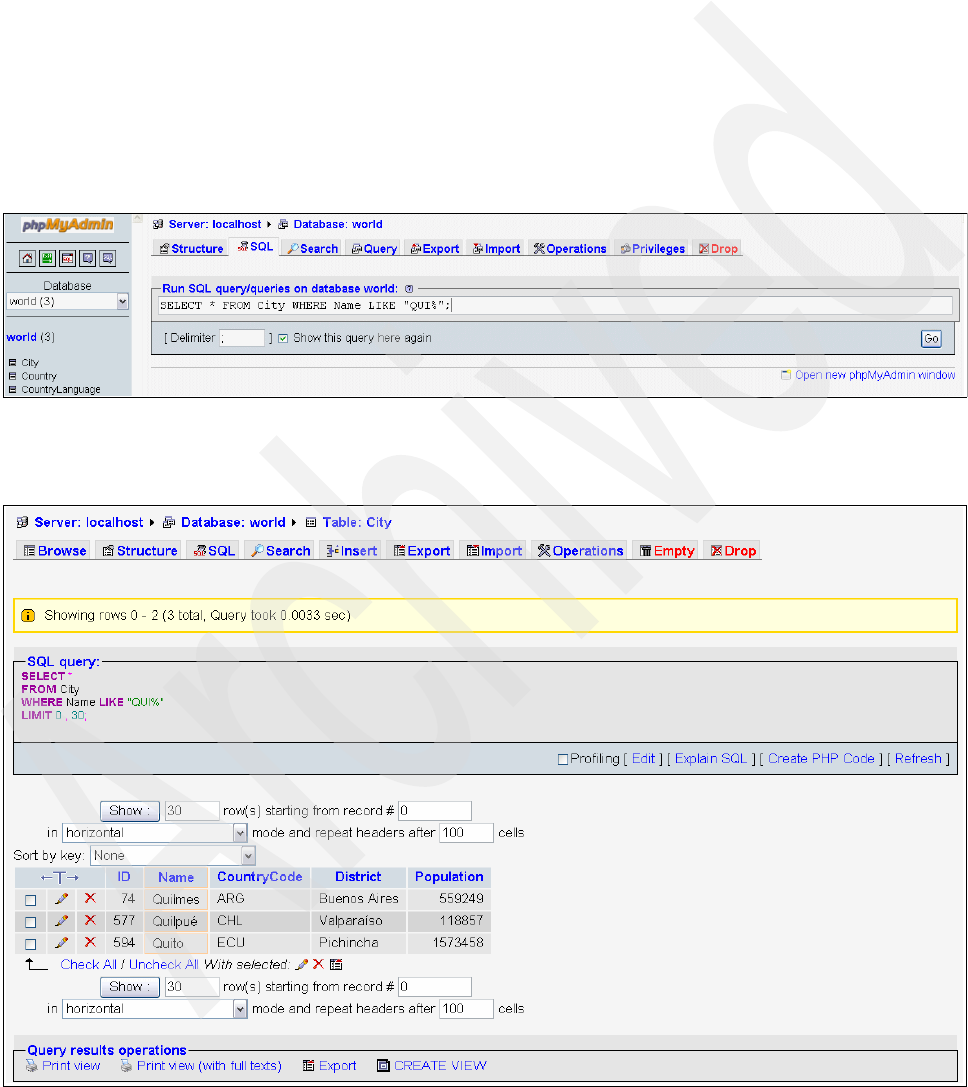
200 Discovering MySQL on IBM i5/OS
9.5.2 Creating and executing the query with phpMyAdmin
We have now selected the world database as explained in 9.5.1, “Accessing phpMyAdmin
and selecting the database to query” on page 198. In this section, we explain two different
ways to create and execute queries, either manually or dynamically.
Manually creating the query in phpMyAdmin
To manually write and execute a query:
1. Click the SQL tab.
2. Type the following query as shown in Figure 9-13:
SELECT * FROM City WHERE Name LIKE “QUI%”;
Click Go button to execute the query.
Figure 9-13 SQL tab to run the query manually
Figure 9-14 shows the result of running the query.
Figure 9-14 Result window from running the query

Chapter 9. Querying a MySQL database 201
Creating the query dynamically in phpMyAdmin
To dynamically create the query:
1. Click the Query tab.
2. On the query page (Figure 9-15), click the Field drop-down list. You see all available fields
in all tables because at this time all the tables are selected.
Figure 9-15 Available fields to select in world database
3. Click Update Query.
4. From the Field drop-down list, select 'City'.'Name'.
5. In the Use Tables box, click the City table and click the Update Query button.
Now when you click the Field drop-down list, you see only the fields that belong to the City
table (Figure 9-16).
6. Click ‘City’.’Name’ in the first Field column.
Figure 9-16 Available City table fields to select

202 Discovering MySQL on IBM i5/OS
7. In the Show row, select the check box in the first column.
8. In the second Field column, select ‘City’.’Name’. For Criteria in the second column, add
the condition LIKE “QUI%”.
9. Click the Update Query button. Figure 9-17 shows the results in which you will notice that
the query is written completely in the SQL query on database world box.
Figure 9-17 Composing a query automatically


204 Discovering MySQL on IBM i5/OS

© Copyright IBM Corp. 2008. All rights reserved. 205
Chapter 10. Porting non-MySQL databases
In this chapter, we discuss the MySQL Migration Toolkit, its architecture, and methodology.
We focus on the following topics:
“Introduction to the MySQL Migration Toolkit” on page 206
“Architecture of the MySQL Migration Toolkit” on page 206
“Methodology of the MySQL migration” on page 207
“MySQL Migration Toolkit online tutorials” on page 209
The migration process is covered in-depth in the official documentation and Web site.
However, we include references at the end of this chapter to practical examples, tutorials, and
documentation for migrating a third-party database to the MySQL Database Server.
10

206 Discovering MySQL on IBM i5/OS
10.1 Introduction to the MySQL Migration Toolkit
The MySQL Migration Toolkit is a powerful framework that is provided by MySQL. By using
this toolkit, you can quickly migrate your schema and data from various relational databases.
The MySQL Migration Toolkit provides a wizard-driven interface that automates manual
migration tasks. It provides a visual environment through which you can control and edit SQL
statements for objects that require manual intervention.
The MySQL Migration Toolkit supports a variety of source database systems, including the
following systems:
Oracle®
Microsoft SQL Server®
Microsoft Access
Sybase
You can fully customize the MySQL Migration Toolkit through its Java runtime interface.
Advanced users can use Java to perform custom data and schema transformations.
The MySQL Migration Toolkit can migrate or map the following database object types from the
source database to the MySQL Database Server:
Tabl e s
Indexes
Views
The MySQL Migration Toolkit can also assist you in the migration of the following object types:
Stored procedures
Tr i g g er s
10.2 Architecture of the MySQL Migration Toolkit
The MySQL Migration Toolkit uses a platform-independent agent that is written in Java so that
you can migrate databases to the MySQL Database Server on multiple platforms. For
example, you can migrate an Oracle database running on Solaris to a MySQL Database
Server running on i5/OS. Standards-based Java Database Connectivity (JDBC™) is used to
connect to the data source, but users have the flexibility to add native methods written in C to
improve performance.
The MySQL Migration Toolkit is built on three primary modules:
Reverse engineering modules retrieve the schema information from the source database
and return GRT objects that describe the schema. Reverse engineering modules have a
name similar to
ReverseEngineeringAccess.
Migration modules convert the source database GRT objects to MySQL GRT objects and
then handle the bulk data transfer between the source and MySQL databases. Migration
modules have a name similar to
MigrationAccess.
Transformation modules convert the MySQL GRT objects into the actual SQL statements
that are used to create objects such as tables and views on the target MySQL Database
Note: MySQL Migration Toolkit is designed to work with MySQL version 5.0 or later and is
available only for Windows. See 4.3.2, “Installing the MySQL GUI Tools” on page 55, for
details about how to install this tool.
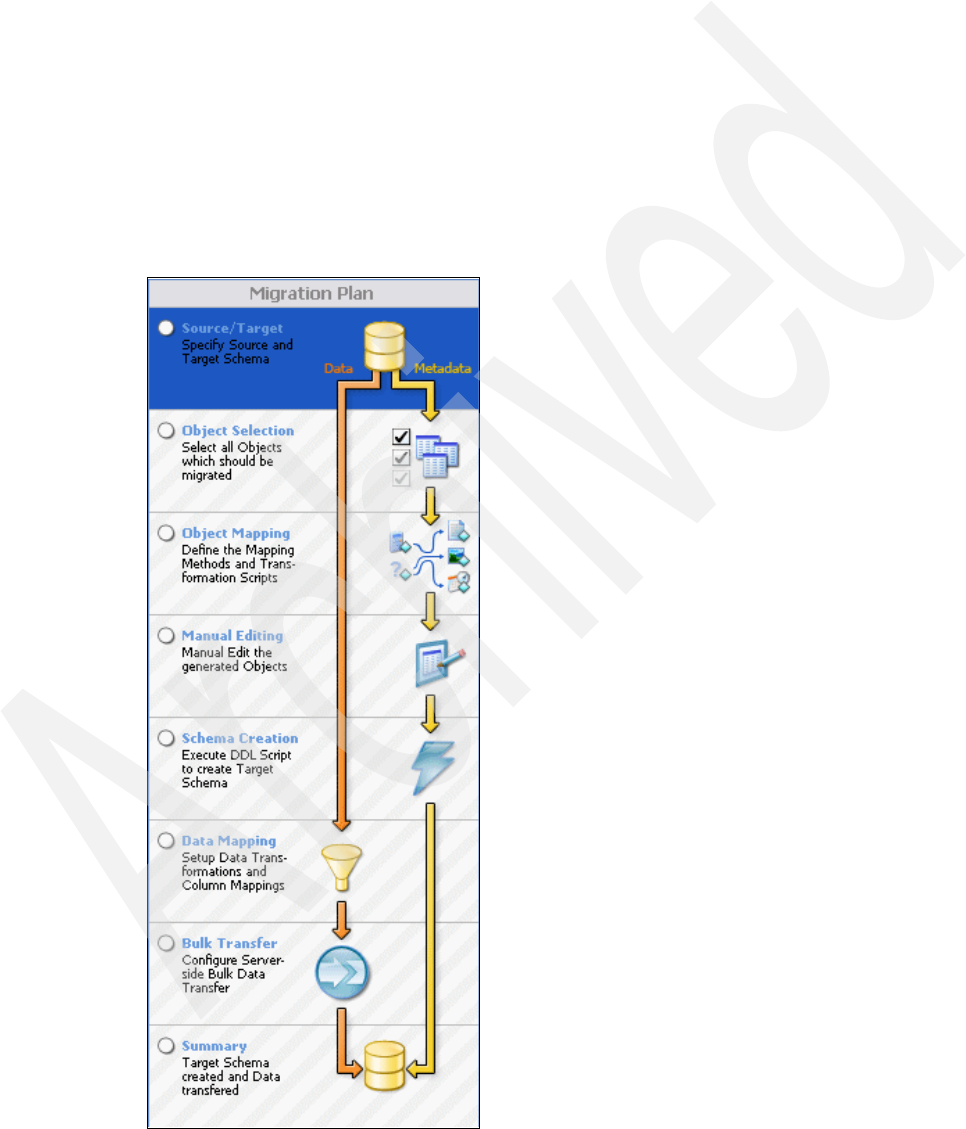
Chapter 10. Porting non-MySQL databases 207
Server. Transformation modules have a name similar to
TransformationMySQL.
Transformation modules are supplied by the MySQL GUI team and do not need to be
created to add support for a new source database.
All modules are derived from base classes whose methods can be rewritten to match the new
source database. The extensible architecture gives users the flexibility to customize existing
modules to migrate data from other database products. In addition, users can extend the
base modules to support additional data types such as geographical data.
10.3 Methodology of the MySQL migration
The MySQL Migration Toolkit implements a proven eight-step migration methodology through
which you have complete control over the migration process to ensure success. The toolkit
walks you step-by-step through the migration of your application, from object selection and
mapping, to schema creation, data mapping, and data transfer as shown in Figure 10-1.
Figure 10-1 Eight-step methodology of the MySQL Migration Toolkit

208 Discovering MySQL on IBM i5/OS
10.3.1 Overview of the eight-step method
In this section, we describe each steps of migration according to the MySQL methodology:
1. Source/Target selection
In this step, you specify the connection parameters for the source and target database
servers.
The appearance of the Source Database page varies depending on the type of source
database that is selected and features a Details button that you can use to view the
Advanced Settings panel. On the Advanced Settings panel, you can manually specify a
JDBC driver and JDBC connection string for your migration session.
The Target Database page uses an interface that is identical to that of the Source
Database page. You use this page to select the target MySQL Database Server used in
the migration and to specify the connection parameters.
2. Object Selection
In this step, you select the objects (tables, views, and stored procedures) that will be
migrated. If there is a large number of databases to choose from, you can search for a
specific database by entering the database name in the schemata text box.
3. Object Mapping
In this step, you choose the method that is used for mapping and transforming the objects
to the MySQL Database Server. The MySQL Migration Toolkit comes with multiple
migration methods that you can use to convert the database objects of an external
RDBMS to MySQL. However, in most cases, the default settings are sufficient.
After you configure data object mapping, the MySQL Migration Toolkit performs the
conversion of the database objects and generates SQL CREATE statements.
4. Manual Editing
In this step, you can manually check and edit the new objects to ensure a proper
transformation. By default, only objects that were not converted are displayed on the
Manual Editing page.
5. Schema Creation
In this step, the MySQL Migration Toolkit creates the transformed object on the target
MySQL Database Server by executing the SQL script that was generated in the previous
step.
6. Data Mapping
In this step, you can specify any changes that need to be made to the data as it is
migrated.
7. Bulk Transfer
After you set the data mapping options, the MySQL Migration Toolkit transfers the data
from the source server to the target server. Data is converted to a MySQL-compatible
format and inserted into the target database server by using bulk INSERT statements.
Data is typically inserted in batches of 15,000 rows at a time to maximize insertion speed.
8. Summary
In this final step, the MySQL Migration Toolkit creates a summary report of the migration
process for your review.

Chapter 10. Porting non-MySQL databases 209
10.4 MySQL Migration Toolkit online tutorials
Finally, if you want to see the MySQL Migration Toolkit in action, the following multimedia
tutorials are available that show a step-by-step migration from the MYSQL Web site. Be sure
to activate the sound on your PC so that you can hear the narration:
Oracle
http://www.mysql.com/products/tools/migration-toolkit/tutorials/OracleMigration
Tutorial.html
Microsoft MS SQL Server
http://www.mysql.com/products/tools/migration-toolkit/tutorials/migrate-sql-ser
ver.html
Microsoft Access
http://www.mysql.com/products/tools/migration-toolkit/tutorials/AccessMigration
Tutorial.html
Note: For a complete reference for these steps, download the MySQL Migration Toolkit
manual from the MySQL Web page at:
http://dev.mysql.com/doc/

210 Discovering MySQL on IBM i5/OS

© Copyright IBM Corp. 2008. All rights reserved. 211
Related publications
The publications listed in this section are considered particularly suitable for a more detailed
discussion of the topics covered in this book.
IBM Redbooks
For information about ordering these publications, see “How to get Redbooks” on page 212.
Note that some of the documents referenced here may be available in softcopy only.
Bringing PHP to Your IBM eServer iSeries Server, REDP-3639
PHP: Zend for i5/OS, SG24-7327
Porting UNIX Applications Using AS/400 PASE, SG24-5970
The System Administrator's Companion to AS/400 Availability and Recovery, SG24-2161
Online resources
These Web sites are also relevant as further information sources:
i5/OS fixes (including database)
http://www-912.ibm.com/s_dir/slkbase.nsf/recommendedfixes
i5/OS PASE fixes
http://www.ibm.com/servers/enable/site/porting/iseries/pase/misc.html
DB2 for i5/OS Portal
http://www.ibm.com/systems/i/software/db2
IBM System i Domain Redbooks publications
http://www.redbooks.ibm.com/portals/systemi
MySQL AB Web site
http://www.mysql.com/
MySQL Community Server downloads page
http://dev.mysql.com/downloads/mysql/5.0.html
MySQL Documentation
http://dev.mysql.com/doc/
phpMyAdmin official home Web site
http://phpmyadmin.net
phpMyAdmin official Web site downloads
http://www.phpmyadmin.net/home_page/index.php
Perl directory
http://www.perl.org/

212 Discovering MySQL on IBM i5/OS
How to get Redbooks
You can search for, view, or download Redbooks, Redpapers, Technotes, draft publications
and Additional materials, as well as order hardcopy Redbooks, at this Web site:
ibm.com/redbooks
Help from IBM
IBM Support and downloads
ibm.com/support
IBM Global Services
ibm.com/services

© Copyright IBM Corp. 2008. All rights reserved. 213
Index
Symbols
*SAVF 129
restore 131
Numerics
7ZIP utility 60, 149
A
ABI (application binary interface) 27
access control 87
ACID 13
compliance 13
active logs 81
administration tools, installation 55
Advanced toolbar 193
AIX 27
utilities for i5/OS PASE 29
ALTER 90
ALTER ROUTINE 91
Apache 8
application binary interface (ABI) 27
architecture
MySQL Database Server 9
MySQL Migration Toolkit 206
ARCHIVE storage engine 15
Atomic (ACID) 13
B
backup
additional tools 128
and recovery 12
common errors 132
MySQL Administrator 108
MySQL databases 99
mysqldump script 100
mysqlhotcopy script 106
phpMyAdmin 117
security backup to *SAVF 129
security backup to TAPE 128
binary log 79, 83, 135–136
binary logging 134
BLACKHOLE storage engine 15
blocking online backup 12
B-Tree index 12
bulk transfer 208
bulletin board solutions 147
C
cascaded deletions 13
CHANGE MASTER 139
client programs 50
Clustered, B-Tree Index support 13
clustering 133
column 184
command line tools 50
MySQL 51
COMMIT 13
Community Server 19–20
concurrency/locking 11
configuration
MySQL Database Server 31
V5 of MySQL Database Server 23
connection verification 88
Consistent (ACID) 13
content management system 146
coordinate system 134
crash recovery 13
CREATE 90
CREATE ROUTINE 91
CREATE TEMPORARY TABLES 91
CREATE USER 91
CREATE VIEW 91
CRM (customer relationship management) 146–147
CSV storage engine 15
customer relationship management (CRM) 146–147
D
data definition language (DDL) 184
data manipulation language 184
data mapping 208
data snapshot 138
database 31
consistency 83
DBCS systems 38
DDL (data definition language) 184
default database 195
DELETE 90, 196
directories 25
DROP 90
Durable (ACID) 13
E
e-commerce 147
Enterprise Server 19–20
error log 77
error messages 77
EVENT 90
exit status 30
F
Falcon storage engine 14
FEDERATED storage engine 14
field 184
file decompression 60, 149
files 27

214 Discovering MySQL on IBM i5/OS
flags, system utility 29
FLUSH LOGS 78
flushing out logs 77
foreign key 13
constraints 12
full-text search 12
G
GD2 support 59
GIS indexes 12
GNU Public License 19
GRANT OPTION 90
privilege 95
GRANT statement 92
column values in privilege tables 93
granting privileges 91
graphical administration tools 53
group fix 33
H
hardware prerequisites 31
high availability 133
I
i5/OS
case sensitivity 61
fixes 33
open community application support 145
PHP Web applications 147
i5/OS PASE 27
file systems 28
MySQL database engine 9
MySQL installation and configuration 23
runtime environment 27
backup and restore 100
shells 28
supplied AIX utilities 29
utilities 28
iAMP 3
stack 4
iconv utility 28
INDEX 90
information browser 194
information schema 17
infotainment 146
InnoDB storage engine 13
INSERT 90, 196
installation
DBCS systems 38
errors 46
INSMYSQL command 38
Joomla 165
MediaWiki 149
MySQL Database Server 31
phpBB 176
PHP-Nuke 178
PmWiki 175
post 43
SugarCRM 153
V5 of MySQL Database Server 23
verification 42
Zen Cart 169
integrated file system 12
iSeries Navigator 150
Isolated (ACID) 13
J
JOIN 196
Joomla 148
installation 165
L
LEFT OUTER JOIN 196
library 183
licensed programs 32
licensing 19
GNU Public License 19
LOCK TABLES 91
log flushing 77
logical file 184
logs
enabling 77
maintaining 77
querying 77, 82
log-shipping replication 134
M
manual editing 208
massive(ly) multiplayer online role-playing game 146
master replication information 136
master server 134
MediaWiki 147
installation 149
memory cache 13
MEMORY storage engine 14
message 45
object not found 42
security 42
Microsoft Windows Installer Engine 55
migration
eight-step method 208
methodology for MySQL 207
modules 206
monitoring replication 140
Multi-Versioning Concurrency Control 13
MyISAM storage engine 12
myisamchk command 51, 83
MySQL 206
architecture components 9
clustering 134
command line tools 51
components, Client Program 9
current release 24
functions 12
migration methodology 207
migration overview 208

Index 215
V5.0 for i5/OS package 24
mysql
command line tools 185
commands 186
options 185
running interactively 187
MySQL AB announcement with IBM 4
MySQL Administrator 10, 54
backup and restore method 100
restore 124
status check 71
mysql command 10
MySQL database
backup and restore 99
query 181
restoration 120
MySQL Database Server
architecture 9
automation of start and stop tasks 74
backup 100
Community Server 19
Enterprise Server 19
features 18
IBM and MySQL AB announcement 4
installation and configuration 23, 31
licensing 19
overview 7
privilege system 88
privileges 90
reasons to use 8
server startup scripts 50
starting the server 65
status of 69
stopping the server 68
storage engine 10
storage engine architecture 11
users 8
MySQL Database Server on i5/OS
current support 4
future Statement of Direction 5
installation and configuration 33
overview 3
product structure 24
uninstallation 47
MySQL GUI Tools
installation 55
overview 54
MySQL Instance Manager 66
MySQL Migration Toolkit 54, 205–206
architecture 206
migration 207
MySQL Query Browser 10, 189
54
building and running queries 194
connection window 190
default database 195
main window 193
windows and functions 190
mysqladmin command 10, 50, 68–69
mysqlbinlog command 51, 82
mysqlcheck command 10, 50, 84
mysqld script 50
mysqld_safe script 50, 65
mysqldump script 10, 100
mysqlhotcopy script 100, 106
mysqlimport script 10, 50, 100
restore 120
MYSQLINST library 24
mysqlmanager script 50, 66, 68, 70
mysqlshow command 50
N
NDB storage engine 14
non-.tar formats 61
non-client utilities 9
non-MySQL databases, porting 205
O
object browser 194
object mapping 208
object not found message 42
object selection 208
open community application support 145
open source 146
open Web application 8
optimization 12
optimizer 11
P
packaging, MySQL 24
password privileges 71
perror command 51
PHP Web applications 146
popular applications supported on i5/OS 147
phpBB 148
forums 174
installation 176
phpMyAdmin
access and database selection 198
automatic setup script 62
backup and restore method 100
binary logs 83
configuration file 61
for backup 117
installation 59
installation verification 64
manual configuration 61
overview 54
prerequisites 59
query creation and execution 200
restore 127
running queries 197
status check 73
PHP-Nuke 148
installation 178
physical file 183
physical storage 11
Pick a mirror option 35

216 Discovering MySQL on IBM i5/OS
pluggable storage engine architecture 10
PmWiki 148
installation 175
porting non-MySQL databases 205
prerequisites
hardware 31
MySQL Database Server on i5/OS 31
replication and clustering 133
software 32
privilege 87
changes take effect 95
GRANT 95
granting 91
granting user privileges 96
MySQL Database Server 88, 90
password 71
REVOKE 95
revoking 91
system 88
product structure 24
directories 25
files 27
MYSQLINST library 24
user profile 24
Q
queries
automatically building 196
manually entering and editing 194
query log 78
query toolbar 193
querying logs 82
R
recovery and backup 12
Redbooks Web site 212
Contact us xi
REFERENCES 90
referential integrity 12–13
Relay log 135
replication
configuration 134
existing data 139
master configuration 136
monitoring 140
new master and slaver servers 138
privileges 135
slave configuration 136
slave to an existing replication environment 140
user creation 135
REPLICATION CLIENT 91
REPLICATION SLAVE 91
request verification 88
restore
additional tools 128
common errors 46, 132
from *SAVF 131
from TAPE 131
MySQL Administrator 124
MySQL databases 99
mysqlimport script 120
phpMyAdmin 127
source command 123
result area 194
reverse engineering modules 206
REVOKE privilege 95
REVOKE statement 95
revoking privileges 91
ROLLBACK 13
row 184
row-level locking 13
runtime environment 27
additional commands 30
backup and restore method 100
file systems 28
shells and utilities 28
S
sample database 182
schema 25, 31, 183
creation 208
scope column 94
security 87
backup 129
backup to *SAVF 129
backup to TAPE 128
changes message 37
message 42
SELECT statement 184
server log maintenance 80
server program, mysqld 9
server startup scripts 50
server-side tools, installation 55
service-oriented architecture (SOA) 3
shared-nothing database cluster 134
SHOW CREATE TABLE statement 15
SHOW DATABASES 91
SHOW ENGINES statement 17
SHOW MASTER STATUS statement 137
SHOW SLAVE STATUS 140
SHOW TABLE STATUS statement 16
SHOW VIEW 91
SHUTDOWN 91
--skip-engines option 18
skip-networking option 136
slow query log 79
SOA (service-oriented architecture) 3
software prerequisites 32
source command
restore 123
Source/Target Selection 208
spatial data 12
SQL 184
parser 11
reference 183
running statements from a text file 188
storage 14
storage engine 5, 10
architecture 11

Index 217
ARCHIVE 15
BLACKHOLE 15
comparison 14
CSV 15
displaying information 15
Falcon 14
FEDERATED 14
InnoDB 13
MEMORY 14
MyISAM 12
NDB 14
other optional 14
specifying 15
SugarCRM 147
installation 153
syntax, system utility 29
system utility 29
exit status 30
flags 29
syntax 29
T
table 183
table space 13
table-level locking 12
TAPE, restore 131
tar file procedure 33
TCP/IP configuration 33
terminology
open community applications 146
system versus SQL 183
total cost of ownership 8
transaction support 11
transformation modules 206
U
UPDATE 90, 196
upgrading 47
user accounts 92
user profile authorities 33
utility programs 51
V
view 184
W
Web portal 146–147
wiki 146–147
Z
Zen Cart 148
installation 169

218 Discovering MySQL on IBM i5/OS

(0.2”spine)
0.17”<->0.473”
90<->249 pages
Discovering MySQL on IBM i5/OS
Discovering MySQL on IBM i5/OS
Discovering MySQL on IBM i5/OS
Discovering MySQL on IBM i5/OS

Discovering MySQL on IBM i5/OS
Discovering MySQL on IBM i5/OS


®
SG24-7398-00 ISBN 0738485691
INTERNATIONAL
TECHNICAL
SUPPORT
ORGANIZATION
BUILDING TECHNICAL
INFORMATION BASED ON
PRACTICAL EXPERIENCE
IBM Redbooks are developed
by the IBM International
Technical Support
Organization. Experts from
IBM, Customers and Partners
from around the world create
timely technical information
based on realistic scenarios.
Specific recommendations
are provided to help you
implement IT solutions more
effectively in your
environment.
For more information:
ibm.com/redbooks
®
Discovering MySQL
on IBM i5/OS
Install and configure
the MySQL Database
Server on i5/OS
Explore tools to
manage, back up, and
recover the MySQL
Database Server
Leverage existing
MySQL applications
on i5/OS
The MySQL Database Server is the leading open-source database
offering and is the most popular database to use with PHP applications.
MySQL AB boasts 11 million installations of the MySQL database,
which is used in both large and small organizations.
While the MySQL Database Server can be used independently of PHP, a
large number of implementations of the MySQL Database Server on
the IBM System i platform are likely to be directly associated with PHP.
PHP is a widely-used general-purpose scripting language that is
especially suited for Web development. Typically, PHP is embedded
inside of HTML and provides the business logic for enabling data
access and manipulation from within HTML Web pages. Often the
MySQL Database Server is the data repository that PHP applications
will access and manipulate.
The MySQL Database Server, especially when coupled with PHP, is well
suited for the development and deployment of Web-based
applications. In fact, the Web arena is seeing a steady shift away from
customized development toward the deployment of Web applications
by content owners who use open community applications to deploy
their content with their own design and usage capabilities. Support for
the MySQL Database Server on IBM i5/OS facilitates the deployment of
such applications on the System i platform.
In this IBM Redbooks publication, we explain how you can install,
configure, tailor, and manage the MySQL Database Server on i5/OS.
We also help to broaden your understanding of its architecture on
i5/OS. In addition, we illustrate open community applications that can
be installed and run on IBM i5/OS.
Back cover
