
Contents
1 About Sophos Anti-Virus.........................................................................................................................3
2 Scanning for threats..................................................................................................................................4
3 Dealing with threats................................................................................................................................27
4 Updating..................................................................................................................................................31
5 Solving problems.....................................................................................................................................36
6 Technical support....................................................................................................................................39
7 Legal notices............................................................................................................................................40
2

1 About Sophos Anti-Virus
Sophos Anti-Virus for Mac OS X, version 7 is software that detects and deals with threats (viruses,
worms, and Trojans) on your Mac or network. As well as being able to detect Mac OS X threats,
it can also detect Windows threats that might be stored on your Mac or network and transferred
to Windows computers.
Sophos Anti-Virus is preconfigured with the recommended settings for protection. We recommend
that you don’t make changes to the settings unless there is a specific need or problem that you are
aiming to address.
3
Help

2 Scanning for threats
2.1 About scanning for threats
On-access scanning is your main method of protection against threats. Whenever you access
(copy, move, or open) a file, Sophos Anti-Virus scans the file and grants access to it only if it does
not pose a threat to your Mac. By default, on-access scanning is turned on and preconfigured with
the recommended settings for protection. We recommend that you don’t make changes to the
settings unless there is a specific need or problem that you are aiming to address.
On-demand scans provide additional protection. An on-demand scan is a scan that you initiate.
You can scan anything from a single file to everything on your Mac to which you have access:
■
Local drives scan
Scan all files to which you have access on local volumes. If you authenticate as an administrator,
files to which you do not have access are scanned as well. Any removable storage devices that
are inserted are included.
You might want to run a local drives scan for one of the following reasons: you want to deal
with a threat that Sophos Anti-Virus has detected, you’re not running on-access scanning on
this Mac because it’s a server, or you want to discover that files are infected before you need to
use them.
■
Custom scans
Scan specific sets of files, folders, or volumes.
You might want to run a custom scan because you want to scan only suspicious parts of a disk
or you want to discover that files are infected before you need to use them.
■
Finder item scans
Scan a file, folder, or volume that you have selected in Finder.
You might want to run a Finder item scan for one of the following reasons: you want to scan
the contents of an archive or compressed file before you need to open it, you want to scan
something before you email it, or you want to scan a CD or DVD.
You can set up email alerts so that any scan type can warn of threats or serious errors.
You can also use Terminal to run scans from the command line.
2.2 On-access scanning
On-access scanning is your main method of protection against threats.Whenever you access (copy,
move, or open) a file, Sophos Anti-Virus scans the file and grants access to it only if it does not
pose a threat to your Mac. By default, on-access scanning is turned on and preconfigured with
4
Sophos Anti-Virus for Mac OS X

the recommended settings for protection. We recommend that you don’t make changes to the
settings unless there is a specific need or problem that you are aiming to address.
2.2.1 Turn on-access scanning on or off
Important: If your organization has specified default preferences, these defaults might override
changes that you make here.
By default, on-access scanning is turned on when you start your Mac.
To turn on-access scanning on or off:
1. Choose Sophos Anti-Virus > Preferences.
2. Click On-access Scanning.
3. If some settings are dimmed, click the lock icon and type an administrator name and password.
4. Change the setting as follows:
■
To turn on-access scanning on, click Start Scanning. The status changes to on and the
Sophos Anti-Virus icon in the menu bar turns black.
■
To turn on-access scanning off, click Stop Scanning. The status changes to off and the
Sophos Anti-Virus icon in the menu bar turns gray.
Important: If you turn on-access scanning off, Sophos Anti-Virus does not scan files that you
access for threats. This puts your Mac at risk.
2.2.2 Configuring on-access scanning
2.2.2.1 Add an on-access exclusion
Important: If your organization has specified default preferences, these defaults might override
changes that you make here.
You can exclude files, folders, or volumes from on-access scanning. For example, you might want
to exclude:
■
Files that are large and therefore take a long time to scan
5
Help

■
Files that cause a scanning error
■
Files that cause a false-positive
■
Backup volumes because the files that are stored on them are scanned when they’re backed up
anyway
Important: Excluding files, folders, or volumes from scanning reduces your protection against
threats.
To add an on-access exclusion:
1. Choose Sophos Anti-Virus > Preferences.
2. Click On-access Scanning.
3. If some settings are dimmed, click the lock icon and type an administrator name and password.
4. Click Excluded Items.
5. Do one of the following:
■
Drag the item(s) to be excluded to the list of excluded items.
■
Click Add (+) and choose the item(s) to be excluded from the dialog.
For information about specifying which items are excluded, see Exclusion rules (page 6).
2.2.2.2 Edit an on-access exclusion
Important: If your organization has specified default preferences, these defaults might override
changes that you make here.
To edit an on-access exclusion:
1. Choose Sophos Anti-Virus > Preferences.
2. Click On-access Scanning.
3. If some settings are dimmed, click the lock icon and type an administrator name and password.
4. Click Excluded Items.
5. In the list of excluded items, double-click an item and edit the item.
For information about specifying which items are excluded, see Exclusion rules (page 6).
2.2.2.3 Exclusion rules
When you add or edit an exclusion, you can type any POSIX path, whether it is a volume, folder,
or file. To specify which items are excluded, use the following rules:
Syntax to useItem(s) to exclude
Suffix the exclusion with a slashA folder and sub-folders recursively
6
Sophos Anti-Virus for Mac OS X

Syntax to useItem(s) to exclude
Suffix the exclusion with a double slashA folder but not sub-folders
Do not suffix the exclusion with a slash or double
slash
A file
Prefix the exclusion with a slashA folder or file in a specific location
Do not prefix the exclusion with a slashA folder or file anywhere locally or on the network
Substitute an asterisk (*) for the filename stemA file whose name has a specific filename extension
Examples
Item(s) that are excludedExclusion path
The file MyApplication in a specific location/MyFolder/MyApplication
All files in the folder MyFolder in a specific location
and sub-folders recursively
/MyFolder/
All files in the folder MyFolder in a specific location
but not sub-folders
/MyFolder//
The file MyApplication in any folder that is called
MyFolder, locally or on the network
MyFolder/MyApplication
All files in any folder that is called MyFolder, locally
or on the network, and sub-folders recursively
MyFolder/
All files in any folder that is called MyFolder, locally
or on the network, but not sub-folders
MyFolder//
The file MyApplication anywhere locally or on the
network
MyApplication
All files whose filename extension is .mov anywhere
locally or on the network
*.mov
All files whose filename extension is .mov in a
specific location
/MyFolder/*.mov
2.2.2.4 Delete an on-access exclusion
Important: If your organization has specified default preferences, these defaults might override
changes that you make here.
7
Help

To delete an on-access exclusion:
1. Choose Sophos Anti-Virus > Preferences.
2. Click On-access Scanning.
3. If some settings are dimmed, click the lock icon and type an administrator name and password.
4. Click Excluded Items.
5. In the list of excluded items, select the exclusion that you want to delete and click Delete (-).
2.2.2.5 Enable on-access scanning inside archives and compressed files
Important: If your organization has specified default preferences, these defaults might override
changes that you make here.
By default, on-access scanning inside archives and compressed files is disabled. However, you
might want to enable the option if you are dealing with several such files at a time and the cost of
not detecting a threat is high. For example, you might be emailing some archives or compressed
files to an important contact.
Note: Sophos recommends that you do not enable this option, for the following reasons:
■
Scanning inside archives and compressed files makes scanning significantly slower.
■
Whether you enable this option or not, when you open a file extracted from an archive, the
extracted file is scanned.
■
Whether you enable this option or not, files compressed with dynamic compression utilities
(PKLite, LZEXE and Diet) are scanned.
To enable on-access scanning inside archives and compressed files:
1. Choose Sophos Anti-Virus > Preferences.
2. Click On-access Scanning.
3. If some settings are dimmed, click the lock icon and type an administrator name and password.
4. Click Options.
5. Select “Inside archives and compressed files”.
2.2.2.6 Enable on-access scanning of files on network volumes
Important: If your organization has specified default preferences, these defaults might override
changes that you make here.
By default, scanning of files that you access on network volumes is disabled because it can slow
down access.
To enable on-access scanning of files on network volumes:
1. Choose Sophos Anti-Virus > Preferences.
2. Click On-access Scanning.
8
Sophos Anti-Virus for Mac OS X

3. If some settings are dimmed, click the lock icon and type an administrator name and password.
4. Click Options.
5. Select “Files on network volumes”.
Note: Files on network volumes that you access through an alias are not scanned.
2.2.2.7 Configure on-access scanning to automatically clean up threats
Important: If your organization has specified default preferences, these defaults might override
changes that you make here.
To deal with threats, we recommend that you use Quarantine Manager (see Dealing with threats
(page 27)). However, you can configure on-access scanning to automatically clean up threats that
it detects.
Important: Sophos Anti-Virus does not ask for confirmation before cleaning up a threat.
To configure on-access scanning to automatically clean up threats:
1. Choose Sophos Anti-Virus > Preferences.
2. Click On-access Scanning.
3. If some settings are dimmed, click the lock icon and type an administrator name and password.
4. Choose “Clean up threat” from the “When a threat is found” pop-up menu.
5. From the “If cleanup fails” pop-up menu, choose what action Sophos Anti-Virus should take
if cleanup fails:
■
To deny access to the threat, choose “Deny access”.
■
To delete the threat, choose “Delete threat”.
■
To move the threat to another folder to prevent it being run, choose “Deny access and
move threat”.
By default, the threats are moved to /Users/Shared/Infected/. To choose a different folder,
click Choose Folder, and enter the folder in the dialog.
Any actions that Sophos Anti-Virus takes against threats are logged in the Sophos Anti-Virus log.
Important: Cleaning up a threat might not be able to undo all the actions the threat has taken
on this Mac. For example, if the threat changed the value of a setting, the cleanup process might
not know the original setting. You might have to verify the Mac’s configuration. Cleaning up an
infected document does not repair any changes the threat has made to the document.
2.2.2.8 Configure on-access scanning to automatically move threats
Important: If your organization has specified default preferences, these defaults might override
changes that you make here.
To deal with threats, we recommend that you use Quarantine Manager (see Dealing with threats
(page 27)). However, you can configure on-access scanning to automatically move threats that
9
Help

it detects to another folder. Moving an infected program reduces the likelihood of it being run.
Note that Sophos Anti-Virus always denies access to infected files that it has moved, as long as
on-access scanning is turned on.
Important: You should use this option only if advised to by Sophos technical support. Sophos
Anti-Virus does not ask for confirmation before moving a threat.
To configure on-access scanning to automatically move threats:
1. Choose Sophos Anti-Virus > Preferences.
2. Click On-access Scanning.
3. If some settings are dimmed, click the lock icon and type an administrator name and password.
4. Choose “Deny access and move threat” from the “When a threat is found” pop-up menu.
By default, the threats are moved to /Users/Shared/Infected/. To choose a different folder, click
Choose Folder, and enter the folder in the dialog.
Any actions that Sophos Anti-Virus takes against threats are logged in the Sophos Anti-Virus log.
2.2.2.9 Configure on-access scanning to automatically delete threats
Important: If your organization has specified default preferences, these defaults might override
changes that you make here.
To deal with threats, we recommend that you use Quarantine Manager (see Dealing with threats
(page 27)). However, you can configure on-access scanning to automatically delete threats that
it detects.
Important: You should use this option only if advised to by Sophos technical support. Sophos
Anti-Virus does not ask for confirmation before deleting a threat.
To configure on-access scanning to automatically delete threats:
1. Choose Sophos Anti-Virus > Preferences.
2. Click On-access Scanning.
3. If some settings are dimmed, click the lock icon and type an administrator name and password.
4. Choose “Delete threat” from the “When a threat is found” pop-up menu.
Any actions that Sophos Anti-Virus takes against threats are logged in the Sophos Anti-Virus log.
Important: Deleting a threat does not undo any actions the threat has taken on this Mac.
2.2.2.10 Restore default on-access scanning preferences
You can set the on-access scanning preferences to defaults. If your organization has specified
default on-access scanning preferences, the on-access scanning preferences will be set to these
defaults. Otherwise, they will be set to defaults recommended by Sophos.
To restore default on-access scanning preferences:
1. Choose Sophos Anti-Virus > Preferences.
10
Sophos Anti-Virus for Mac OS X

2. Click On-access Scanning.
3. If some settings are dimmed, click the lock icon and type an administrator name and password.
4. Click Restore Defaults.
2.2.2.11 Configure desktop alerts
Important: If your organization has specified default preferences, these defaults might override
changes that you make here.
Sophos Anti-Virus displays a desktop alert if a serious error occurs during on-access scanning. By
default, it also displays a desktop alert if it detects a threat during on-access scanning. You can
configure the desktop alerts that are displayed when a threat is detected.
To configure desktop alerts:
1. Choose Sophos Anti-Virus > Preferences.
2. Click Messaging.
3. If some settings are dimmed, click the lock icon and type an administrator name and password.
4. Change the preferences as follows:
■
To add your own message to the desktop alerts about threats, type the message in the “Add
custom message” field.
■
To disable desktop alerts about threats, deselect “Display a desktop alert when a threat is
detected on access”.
2.2.2.12 Restore default alerting preferences
You can restore the alerting preferences to defaults. If your organization has specified default
alerting preferences, the alerting preferences will be set to these defaults. Otherwise, they will be
set to defaults recommended by Sophos.
To restore default alerting preferences:
1. Choose Sophos Anti-Virus > Preferences.
2. Click Messaging.
3. If some settings are dimmed, click the lock icon and type an administrator name and password.
4. Click Restore Defaults.
2.2.2.13 Change logging preferences
Important: If your organization has specified default preferences, these defaults might override
changes that you make here.
All on-access scanning activity (including threats detected) and all updating activity is logged in
the Sophos on-access scanning and updating log. Sophos Anti-Virus can also log such activity in
the Mac OS X system log.
11
Help

To change the logging preferences for on-access scanning and updating:
1. Choose Sophos Anti-Virus > Preferences.
2. Click Logging.
3. If some settings are dimmed, click the lock icon and type an administrator name and password.
4. Change the preferences as follows:
■
To change the log filename or location, click Choose Log File and enter the new filename
or location in the dialog.
■
To delete all entries from the log, click Clear Log.
■
To log all on-access scanning and updating activity in the system log, select “Log events to
system log”.
2.2.2.14 Restore default logging preferences
You can restore the logging preferences for on-access scanning and updating to defaults. If your
organization has specified default logging preferences, the logging preferences will be set to these
defaults. Otherwise, they will be set to defaults recommended by Sophos.
To restore default logging preferences:
1. Choose Sophos Anti-Virus > Preferences.
2. Click Logging.
3. If some settings are dimmed, click the lock icon and type an administrator name and password.
4. Click Restore Defaults.
2.2.3 View on-access scanning and updating log
To view the log of all on-access scanning activity (including threats detected) and all updating
activity:
1. Choose Sophos Anti-Virus > Preferences.
2. In the Logging pane, click View Log.
The log is displayed in Console. At the start of each log entry, there is a tag to show whether the
entry was logged by the on-access scanner (com.sophos.intercheck) or AutoUpdate
(com.sophos.autoupdate).
2.3 Local drives scan
The local drives scan is a scan that you initiate. It is a scan of all files to which you have access on
local volumes. If you authenticate as an administrator, files to which you do not have access are
scanned as well. Any removable storage devices that are inserted are included.
12
Sophos Anti-Virus for Mac OS X

You might want to run a local drives scan for one of the following reasons: you want to deal with
a threat that Sophos Anti-Virus has detected, you’re not running on-access scanning on this Mac
because it’s a server, or you want to discover files that are infected before you need to use them.
2.3.1 Scan local drives
You can run a scan of all files on this Mac to which you have access. If you are an admin user, this
scan also includes all files to which you do not usually have access.
■
To scan all files on local volumes that you have permission to read, choose Scan > Scan Local
Drives.
Sophos Anti-Virus displays the progress of the scan in the Sophos Anti-Virus window.
Note: You can also run the scan in one of the following ways:
■
In the Sophos Anti-Virus window, in the Scan local drives box, click the Play button.
■
Click the Sophos Anti-Virus icon on the right-hand side of the menu bar, and then choose
Scan Local Drives from the shortcut menu.
■
Control-click the Sophos Anti-Virus application icon in the Dock, and then choose Scan Local
Drives from the shortcut menu.
2.3.2 Configuring the local drives scan
2.3.2.1 Disable scanning inside archives and compressed files for the local drives scan
Note: The setting of this option applies to both the local drives scan and Finder item scans.
By default, scanning inside archives and compressed files is enabled for the local drives scan.
To disable scanning inside archives and compressed files for the local drives scan:
1. Choose Sophos Anti-Virus > Preferences.
Note: Alternatively, in the Sophos Anti-Virus window, in the Scan local drives box, click the
Edit button.
2. In the Scan Local Drives pane, deselect “Scan inside archives and compressed files”.
2.3.2.2 Configure the local drives scan to automatically clean up threats
Note: The setting of this option applies to both the local drives scan and Finder item scans.
To deal with threats, we recommend that you use Quarantine Manager (see Dealing with threats
(page 27)). However, you can configure the local drives scan to automatically clean up threats
that it detects.
Important: Sophos Anti-Virus does not ask for confirmation before cleaning up a threat.
13
Help

To configure the local drives scan to automatically clean up threats:
1. Choose Sophos Anti-Virus > Preferences.
Note: Alternatively, in the Sophos Anti-Virus window, in the Scan local drives box, click the
Edit button.
2. In the Scan Local Drives pane, choose “Clean up threat” from the “When a threat is found”
pop-up menu.
3. From the “If cleanup fails” pop-up menu, choose what action Sophos Anti-Virus should take
if cleanup fails:
■
To take no action, choose “Log only”. However, if you have enabled email alerts, Sophos
Anti-Virus also sends an email alert.
■
To delete the threat, choose “Delete threat”.
■
To move the threat to another folder to prevent it being run, choose “Move threat”.
By default, the threats are moved to /Users/Shared/Infected/. To choose a different folder,
click Choose Folder, and enter the folder in the dialog.
Any actions that Sophos Anti-Virus takes against threats are logged in the log of the local drives
scan.
Important: Cleaning up a threat might not be able to undo all the actions the threat has taken
on this Mac. For example, if the threat changed the value of a setting, the cleanup process might
not know the original setting. You might have to verify the Mac’s configuration. Cleaning up an
infected document does not repair any changes the threat has made to the document.
2.3.2.3 Configure the local drives scan to automatically move threats
Note: The setting of this option applies to both the local drives scan and Finder item scans.
To deal with threats, we recommend that you use Quarantine Manager (see Dealing with threats
(page 27)). However, you can configure the local drives scan to automatically move threats that
it detects to another folder. Moving an infected program reduces the likelihood of it being run.
Important: You should use this option only if advised to by Sophos technical support. Sophos
Anti-Virus does not ask for confirmation before moving a threat.
To configure the local drives scan to automatically move threats:
1. Choose Sophos Anti-Virus > Preferences.
Note: Alternatively, in the Sophos Anti-Virus window, in the Scan local drives box, click the
Edit button.
2. In the Scan Local Drives pane, choose “Move threat” from the “When a threat is found”
pop-up menu.
By default, the threats are moved to /Users/Shared/Infected/. To choose a different folder, click
Choose Folder, and enter the folder in the dialog.
14
Sophos Anti-Virus for Mac OS X

Any actions that Sophos Anti-Virus takes against threats are logged in the log of the local drives
scan.
2.3.2.4 Configure the local drives scan to automatically delete threats
Note: The setting of this option applies to both the local drives scan and Finder item scans.
To deal with threats, we recommend that you use Quarantine Manager (see Dealing with threats
(page 27)). However, you can configure the local drives scan to automatically delete threats that
it detects.
Important: You should use this option only if advised to by Sophos technical support. Sophos
Anti-Virus does not ask for confirmation before deleting a threat.
To configure the local drives scan to automatically delete threats:
1. Choose Sophos Anti-Virus > Preferences.
Note: Alternatively, in the Sophos Anti-Virus window, in the Scan local drives box, click the
Edit button.
2. In the Scan Local Drives pane, choose “Delete threat” from the “When a threat is found”
pop-up menu.
Any actions that Sophos Anti-Virus takes against threats are logged in the log of the local drives
scan.
Important: Deleting a threat does not undo any actions the threat has taken on this Mac.
2.3.2.5 Restore default local drives scan preferences
Note: The setting of this option applies to both the local drives scan and Finder item scans.
To set the local drives scan preferences to defaults recommended by Sophos:
1. Choose Sophos Anti-Virus > Preferences.
Note: Alternatively, in the Sophos Anti-Virus window, in the Scan local drives box, click the
Edit button.
2. In the Scan Local Drives pane, click Restore Defaults.
2.3.3 View log of the local drives scan
■
Choose Scan > View Scan Log.
The log is displayed in Console.
2.4 Custom scans
A custom scan is a scan that you initiate. It is a scan of specific sets of files, folders, or volumes.
15
Help

You might want to run a custom scan because you want to scan only suspicious parts of a disk or
you want to discover files that are infected before you need to use them.
2.4.1 Run a custom scan
1.
If the Sophos Anti-Virus window is not open, choose Window > Sophos Anti-Virus to open
it.
2. If the Custom Scans list is not displayed, click the disclosure triangle next to Custom Scans.
3. In the Custom Scans list, select the scan that you want to run.
4. Click the Play button.
Sophos Anti-Virus displays the progress of the scan in the Sophos Anti-Virus window.
2.4.2 Add a custom scan
1. Choose File > New.
2. In the scan editor that is displayed, edit the scan as follows:
■
To rename the scan, in the Scan Name field, type the new name.
■
To specify what to scan, see Specify what to scan (page 17).
■
To specify what not to scan, see Add a custom scan exclusion (page 18), Edit a custom scan
exclusion (page 18), or Delete a custom scan exclusion (page 19) as appropriate.
■
To disable scanning inside archives and compressed files, see Disable scanning inside archives
and compressed files for a custom scan (page 20).
The scan is added to the Custom Scans list in the Sophos Anti-Virus window.
Note: You can also add a scan by clicking Add (+) at the bottom of the Sophos Anti-Virus window.
2.4.3 Copy a custom scan
1.
If the Sophos Anti-Virus window is not open, choose Window > Sophos Anti-Virus to open
it.
2. If the Custom Scans list is not displayed, click the disclosure triangle next to Custom Scans.
3. In the Custom Scans list, select the scan that you want to copy.
4. Choose File > Duplicate.
5. In the scan editor that is displayed, edit the scan as follows:
■
To rename the scan, in the Scan Name field, type the new name.
■
To specify what to scan, see Specify what to scan (page 17).
■
To specify what not to scan, see Add a custom scan exclusion (page 18), Edit a custom scan
exclusion (page 18), or Delete a custom scan exclusion (page 19) as appropriate.
16
Sophos Anti-Virus for Mac OS X

■
To disable scanning inside archives and compressed files, see Disable scanning inside archives
and compressed files for a custom scan (page 20).
The scan is added to the Custom Scans list in the Sophos Anti-Virus window.
Note: You can also copy a selected scan in the Sophos Anti-Virus window in one of the following
ways:
■
Press Command-D.
■
At the bottom of the window, choose Duplicate from the Action pop-up menu.
2.4.4 Configuring a custom scan
2.4.4.1 Open the custom scan editor
1.
If the Sophos Anti-Virus window is not open, choose Window > Sophos Anti-Virus to open
it.
2. If the Custom Scans list is not displayed, click the disclosure triangle next to Custom Scans.
3. In the Custom Scans list, double-click the scan that you want to edit.
Note: You can also open the editor in one of the following ways:
■
Select the scan that you want to edit and click the Edit button.
■
Select the scan that you want to edit and choose Edit Scan from the Action pop-up menu at
the bottom of the window.
2.4.4.2 Rename a custom scan
1. If the scan editor is not open, open it. To find out how to do this, see Open the custom scan
editor (page 17).
2. In the scan editor, in the Scan Name field, type the new name.
2.4.4.3 Specify what to scan
1. If the scan editor is not open, open it. To find out how to do this, see Open the custom scan
editor (page 17).
2. In the Scan Items pane, do one of the following:
■
Drag the item(s) to be scanned to the list of items to scan.
■
Click Add (+) and choose the item(s) to be scanned from the dialog.
Note: If you do not have sufficient privileges to see the contents of a folder that you add,
Sophos Anti-Virus displays the folder with a No Access symbol and does not scan it.
17
Help

2.4.4.4 Add a custom scan exclusion
You can exclude files, folders, or volumes from a custom scan. For example, you might want to
exclude:
■
Files that are large and therefore take a long time to scan
■
Files that cause a scanning error
■
Files that cause a false-positive
■
Backup volumes because the files that are stored on them are scanned when they’re backed up
anyway
Important: Excluding files, folders, or volumes from scanning reduces your protection against
threats.
To add a custom scan exclusion:
1. If the scan editor is not open, open it. To find out how to do this, see Open the custom scan
editor (page 17).
2. In the Excluded Items pane, do one of the following:
■
Drag the item(s) to be excluded to the list of excluded items.
■
Click Add (+) and choose the item(s) to be excluded from the dialog.
For information about specifying which items are excluded, see Exclusion rules (page 18).
2.4.4.5 Edit a custom scan exclusion
1. If the scan editor is not open, open it. To find out how to do this, see Open the custom scan
editor (page 17).
2. In the Excluded Items pane, double-click an item and edit the item.
For information about specifying which items are excluded, see Exclusion rules (page 18).
2.4.4.6 Exclusion rules
When you add or edit an exclusion, you can type any POSIX path, whether it is a volume, folder,
or file. To specify which items are excluded, use the following rules:
Syntax to useItem(s) to exclude
Suffix the exclusion with a slashA folder and sub-folders recursively
Suffix the exclusion with a double slashA folder but not sub-folders
Do not suffix the exclusion with a slash or double
slash
A file
18
Sophos Anti-Virus for Mac OS X
Syntax to useItem(s) to exclude
Prefix the exclusion with a slashA folder or file in a specific location
Do not prefix the exclusion with a slashA folder or file anywhere locally or on the network
Substitute an asterisk (*) for the filename stemA file whose name has a specific filename extension
Examples
Item(s) that are excludedExclusion path
The file MyApplication in a specific location/MyFolder/MyApplication
All files in the folder MyFolder in a specific location
and sub-folders recursively
/MyFolder/
All files in the folder MyFolder in a specific location
but not sub-folders
/MyFolder//
The file MyApplication in any folder that is called
MyFolder, locally or on the network
MyFolder/MyApplication
All files in any folder that is called MyFolder, locally
or on the network, and sub-folders recursively
MyFolder/
All files in any folder that is called MyFolder, locally
or on the network, but not sub-folders
MyFolder//
The file MyApplication anywhere locally or on the
network
MyApplication
All files whose filename extension is .mov anywhere
locally or on the network
*.mov
All files whose filename extension is .mov in a
specific location
/MyFolder/*.mov
2.4.4.7 Delete a custom scan exclusion
1. If the scan editor is not open, open it. To find out how to do this, see Open the custom scan
editor (page 17).
2. In the Excluded Items pane, select the item that you want to delete and click Delete (-).
19
Help

2.4.4.8 Disable scanning inside archives and compressed files for a custom scan
By default, scanning inside archives and compressed files is enabled.
To disable scanning inside archives and compressed files for a custom scan:
1. If the scan editor is not open, open it. To find out how to do this, see Open the custom scan
editor (page 17).
2. In the Options pane, deselect “Inside archives and compressed files”.
2.4.4.9 Configure a custom scan to automatically clean up threats
To deal with threats, we recommend that you use Quarantine Manager (see Dealing with threats
(page 27)). However, you can configure a custom scan to automatically clean up threats that it
detects.
Important: Sophos Anti-Virus does not ask for confirmation before cleaning up a threat.
To configure a custom scan to automatically clean up threats:
1. If the scan editor is not open, open it. To find out how to do this, see Open the custom scan
editor (page 17).
2. In the Options pane, choose “Clean up threat” from the “When a threat is found” pop-up
menu.
3. From the “If cleanup fails” pop-up menu, choose what action Sophos Anti-Virus should take
if cleanup fails:
■
To take no action, choose “Log only”. However, if you have enabled email alerts, Sophos
Anti-Virus also sends an email alert.
■
To delete the threat, choose “Delete threat”.
■
To move the threat to another folder to prevent it being run, choose “Move threat”.
By default, the threats are moved to /Users/Shared/Infected/. To choose a different folder,
click Choose Folder, and enter the folder in the dialog.
Any actions that Sophos Anti-Virus takes against threats are logged in the log of the custom scan.
Important: Cleaning up a threat might not be able to undo all the actions the threat has taken
on this Mac. For example, if the threat changed the value of a setting, the cleanup process might
not know the original setting. You might have to verify the Mac’s configuration. Cleaning up an
infected document does not repair any changes the threat has made to the document.
2.4.4.10 Configure a custom scan to automatically move threats
To deal with threats, we recommend that you use Quarantine Manager (see Dealing with threats
(page 27)). However, you can configure a custom scan to automatically move threats that it detects
to another folder. Moving an infected program reduces the likelihood of it being run.
20
Sophos Anti-Virus for Mac OS X

Important: You should use this option only if advised to by Sophos technical support. Sophos
Anti-Virus does not ask for confirmation before moving a threat.
To configure a custom scan to automatically move threats:
1. If the scan editor is not open, open it. To find out how to do this, see Open the custom scan
editor (page 17).
2. In the Options pane, choose “Move threat” from the “When a threat is found” pop-up menu.
By default, the threats are moved to /Users/Shared/Infected/. To choose a different folder, click
Choose Folder, and enter the folder in the dialog.
Any actions that Sophos Anti-Virus takes against threats are logged in the log of the custom scan.
2.4.4.11 Configure a custom scan to automatically delete threats
To deal with threats, we recommend that you use Quarantine Manager (see Dealing with threats
(page 27)). However, you can configure a custom scan to automatically delete threats that it
detects.
Important: You should use this option only if advised to by Sophos technical support. Sophos
Anti-Virus does not ask for confirmation before deleting a threat.
To configure a custom scan to automatically delete threats:
1. If the scan editor is not open, open it. To find out how to do this, see Open the custom scan
editor (page 17).
2. In the Options pane, choose “Delete threat” from the “When a threat is found” pop-up menu.
Any actions that Sophos Anti-Virus takes against threats are logged in the log of the custom scan.
Important: Deleting a threat does not undo any actions the threat has taken on this Mac.
2.4.5 Delete a custom scan
1.
If the Sophos Anti-Virus window is not open, choose Window > Sophos Anti-Virus to open
it.
2. If the Custom Scans list is not displayed, click the disclosure triangle next to Custom Scans.
3. In the Custom Scans list, select the scan that you want to delete.
4. Click Delete (-).
2.4.6 View a custom scan log
1.
If the Sophos Anti-Virus window is not open, choose Window > Sophos Anti-Virus to open
it.
2. If the Custom Scans list is not displayed, click the disclosure triangle next to Custom Scans.
3. In the Custom Scans list, select the scan for which you want to view the log.
21
Help

4. At the bottom of the window, choose View Scan Log from the Action pop-up menu.
The log is displayed in Console.
2.5 Finder item scans
A Finder item scan is a scan that you initiate. It is a scan of a file, folder, or volume that you have
selected in Finder.
You might want to run a Finder item scan for one of the following reasons: you want to scan the
contents of an archive or compressed file before you need to open it, you want to scan something
before you email it, or you want to scan a CD or DVD.
2.5.1 Run a Finder item scan from a shortcut menu
1. In Finder, select the file, folder, or volume that you want to scan.
You can select more than one item.
2. Control-click the selection, and then do one of the following:
■
On Mac OS X version 10.5, choose More > “Scan with Sophos Anti-Virus” from the
shortcut menu.
■
On other Mac OS X versions, choose “Scan with Sophos Anti-Virus” from the shortcut
menu.
Sophos Anti-Virus displays the progress of the scan in a dialog.
2.5.2 Run a Finder item scan by dragging an item to the Dock icon
1. In Finder, select the file, folder, or volume that you want to scan.
You can select more than one item.
2. Drag the selection to the Sophos Anti-Virus application icon in the Dock.
Sophos Anti-Virus displays the progress of the scan in a dialog.
2.5.3 Run a Finder item scan from the Services submenu
1. On Mac OS X version 10.6, in Finder, select the file, folder, or volume that you want to scan.
You can select more than one item.
2. Choose Finder > Services > “Scan with Sophos Anti-Virus”.
Sophos Anti-Virus displays the progress of the scan in a dialog.
22
Sophos Anti-Virus for Mac OS X

2.5.4 Configuring Finder item scans
2.5.4.1 Disable scanning inside archives and compressed files for a Finder item scan
Note: The setting of this option applies to both the local drives scan and Finder item scans.
By default, scanning inside archives and compressed files is enabled for a Finder item scan.
To disable scanning inside archives and compressed files for a Finder item scan:
1. Choose Sophos Anti-Virus > Preferences.
2. In the Scan Local Drives pane, deselect “Scan inside archives and compressed files”.
2.5.4.2 Configure Finder item scans to automatically clean up threats
Note: The setting of this option applies to both the local drives scan and Finder item scans.
To deal with threats, we recommend that you use Quarantine Manager (see Dealing with threats
(page 27)). However, you can configure Finder item scans to automatically clean up threats that
they detect.
Important: Sophos Anti-Virus does not ask for confirmation before cleaning up a threat.
To configure Finder item scans to automatically clean up threats:
1. Choose Sophos Anti-Virus > Preferences.
2. In the Scan Local Drives pane, choose “Clean up threat” from the “When a threat is found”
pop-up menu.
3. From the “If cleanup fails” pop-up menu, choose what action Sophos Anti-Virus should take
if cleanup fails:
■
To take no action, choose “Log only”. However, if you have enabled email alerts, Sophos
Anti-Virus also sends an email alert.
■
To delete the threat, choose “Delete threat”.
■
To move the threat to another folder to prevent it being run, choose “Move threat”.
By default, the threats are moved to /Users/Shared/Infected/. To choose a different folder,
click Choose Folder, and enter the folder in the dialog.
Any actions that Sophos Anti-Virus takes against threats are logged in the log of the Finder item
scan.
Important: Cleaning up a threat might not be able to undo all the actions the threat has taken
on this Mac. For example, if the threat changed the value of a setting, the cleanup process might
not know the original setting. You might have to verify the Mac’s configuration. Cleaning up an
infected document does not repair any changes the threat has made to the document.
23
Help

2.5.4.3 Configure Finder item scans to automatically move threats
Note: The setting of this option applies to both the local drives scan and Finder item scans.
To deal with threats, we recommend that you use Quarantine Manager (see Dealing with threats
(page 27)). However, you can configure Finder item scans to automatically move threats that
they detect to another folder. Moving an infected program reduces the likelihood of it being run.
Important: You should use this option only if advised to by Sophos technical support. Sophos
Anti-Virus does not ask for confirmation before moving a threat.
To configure Finder item scans to automatically move threats:
1. Choose Sophos Anti-Virus > Preferences.
2. In the Scan Local Drives pane, choose “Move threat” from the “When a threat is found”
pop-up menu.
By default, the threats are moved to /Users/Shared/Infected/. To choose a different folder, click
Choose Folder, and enter the folder in the dialog.
Any actions that Sophos Anti-Virus takes against threats are logged in the log of the Finder item
scan.
2.5.4.4 Configure Finder item scans to automatically delete threats
Note: The setting of this option applies to both the local drives scan and Finder item scans.
To deal with threats, we recommend that you use Quarantine Manager (see Dealing with threats
(page 27)). However, you can configure Finder item scans to automatically delete threats that
they detect.
Important: You should use this option only if advised to by Sophos technical support. Sophos
Anti-Virus does not ask for confirmation before deleting a threat.
To configure Finder item scans to automatically delete threats:
1. Choose Sophos Anti-Virus > Preferences.
2. In the Scan Local Drives pane, choose “Delete threat” from the “When a threat is found”
pop-up menu.
Any actions that Sophos Anti-Virus takes against threats are logged in the log of the Finder item
scan.
Important: Deleting a threat does not undo any actions the threat has taken on this Mac.
2.5.4.5 Restore default Finder item scan preferences
Note: The setting of this option applies to both the local drives scan and Finder item scans.
To set the Finder item scan preferences to defaults recommended by Sophos:
1. Choose Sophos Anti-Virus > Preferences.
24
Sophos Anti-Virus for Mac OS X

2. In the Scan Local Drives pane, click Restore Defaults.
2.5.5 View a Finder item scan log
■
In the progress dialog that is displayed when you run a Finder item scan, click View Scan Log.
The log is displayed in Console.
2.6 Configure email alerts
Important: If your organization has specified default preferences, these defaults might override
changes that you make here.
Sophos Anti-Virus can send an email if it detects a threat or a serious error occurs. This applies
to on-access scanning, the local drives scan, custom scans, and Finder item scans. By default, email
alerts are disabled.
To configure email alerts:
1. Choose Sophos Anti-Virus > Preferences.
2. Click Messaging.
3. If some settings are dimmed, click the lock icon and type an administrator name and password.
4. Select “Send an email alert when a threat is detected or an error occurs”.
5. Change the preferences as follows:
■
To enable Sophos Anti-Virus to send an email alert only if it detects a threat, select Threats.
■
To enable Sophos Anti-Virus to send an email alert if it detects a threat or a serious error
occurs, select “Threats and errors”.
■
To specify the email address to which email alerts should be sent, type the address in the
Recipient field.
■
To specify the address of the email server from which email alerts should be sent, type the
address in the Outgoing Email Server field.
■
To specify the email address from which email alerts should be sent, type the address in the
Sender field.
2.7 Restore default alerting preferences
You can restore the alerting preferences to defaults. If your organization has specified default
alerting preferences, the alerting preferences will be set to these defaults. Otherwise, they will be
set to defaults recommended by Sophos.
To restore default alerting preferences:
1. Choose Sophos Anti-Virus > Preferences.
2. Click Messaging.
25
Help

3. If some settings are dimmed, click the lock icon and type an administrator name and password.
4. Click Restore Defaults.
2.8 Use Sophos Anti-Virus from Terminal
You can run a scan from Terminal, Mac OS X’s command-line interface. To display the
command-line Help for this feature:
1. Open Terminal.
To do this, find the folder /Applications/Utilities and double-click Terminal.
2. At the command prompt, type:
sweep -h
26
Sophos Anti-Virus for Mac OS X

3 Dealing with threats
If a threat is detected on your Mac, it is listed in a component of Sophos Anti-Virus called
Quarantine Manager. You should open Quarantine Manager and deal with the threat there.
3.1 Open Quarantine Manager
To open Quarantine Manager, do one of the following:
■
Choose Window > Quarantine Manager.
■
Click the Sophos Anti-Virus icon on the right-hand side of the menu bar, and then choose
Open Quarantine Manager from the shortcut menu.
■
In the Sophos Anti-Virus window, click Open Quarantine Manager.
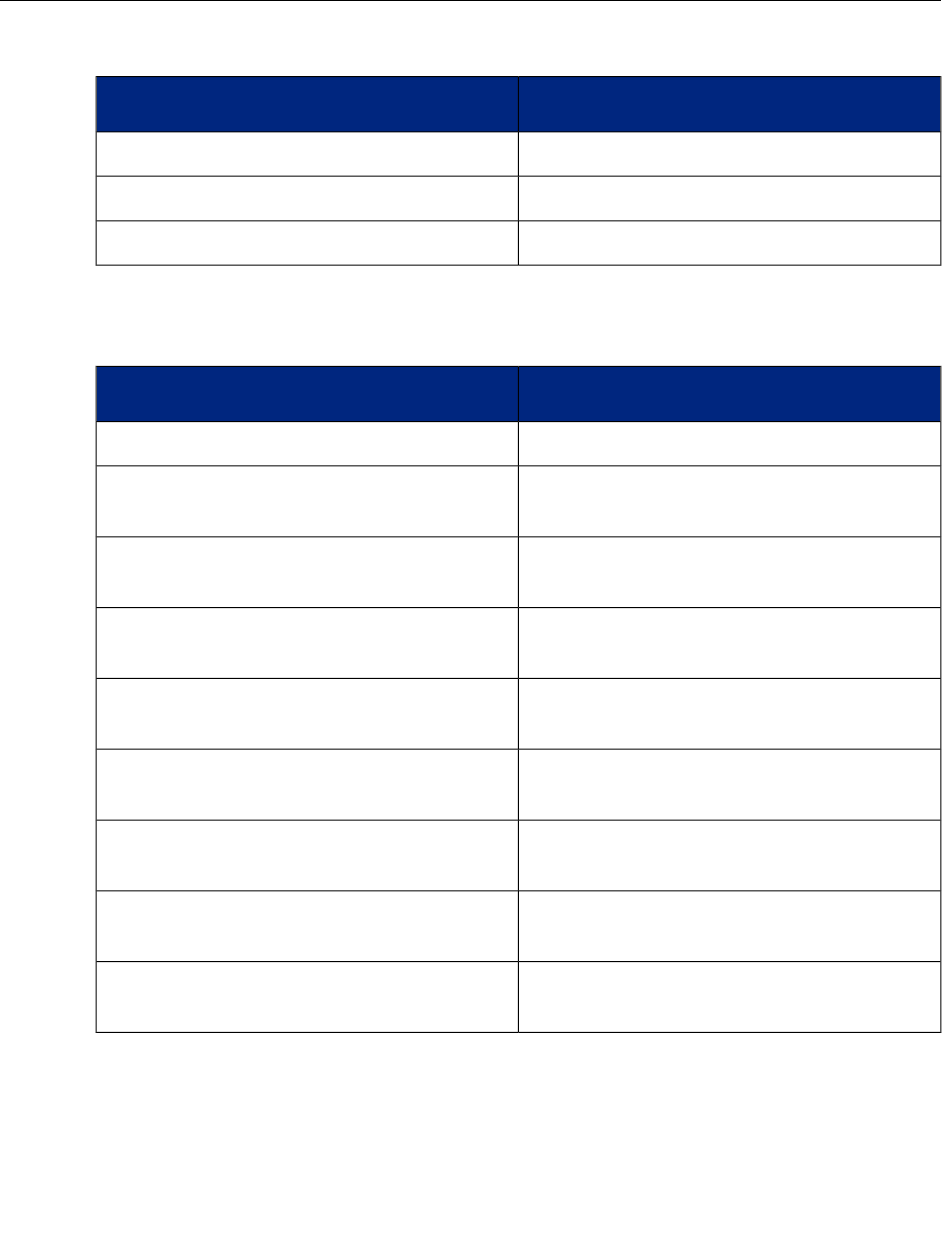
3.2 About Quarantine Manager
Quarantine Manager lists all the threats that have been detected by scanning and enables you to
deal with them. The elements of the Quarantine Manager window are shown below:
27
Help

The date and time of detection. If the threat has been detected multiple times, only the first detection
is included here.
The name of the threat, including a link to the analysis on the Sophos website.
The main file associated with the threat.
The action that you can take to deal with the threat.
The list of threats that have been detected. You can sort the threats by clicking any of the column
headings. You can select one or more threats to deal with at a time. The maximum number of
threats listed is 200. If this limit is reached, the newest threats replace the oldest.
The date and time of detection. If the threat has been detected multiple times, only the first and
last detections are included here.
The locations and names of all the files that comprise the threat.
If the threat has been moved during scanning or partially removed, this element is displayed. All
the original files that comprise the threat are listed.
The action that you can take to deal with the threat and a summary of what action has been taken
so far, if applicable.
Click “Clear from List” to clear a selected threat from Quarantine Manager without dealing with
the threat itself. For more information, see Clear a threat from Quarantine Manager (page 30).
Click Clean Up Threat to clean up a selected threat. For more information, see Deal with threats
in Quarantine Manager (page 29).
3.3 View threat details in Quarantine Manager
In Quarantine Manager, you can view more details on how a threat has affected your Mac, for
example all the files that comprise the threat.
Some details are hidden unless you authenticate by clicking the lock icon at the bottom of the
Quarantine Manager window.
To view details of a threat in Quarantine Manager:
1. In Quarantine Manager, select the threat for which you want to view the details.
You can select more than one threat but the details that are displayed are less specific.
2. Click the disclosure triangle next to Threat Details.
The threat details are displayed in the Threat Details box. For a description of each field, see
About Quarantine Manager (page 27).
28
Sophos Anti-Virus for Mac OS X

3.4 Deal with threats in Quarantine Manager
1. In Quarantine Manager, click the Action Available column heading to sort the list of threats
according to the action available.
2. Select all the threats for which the action available is “Clean up”.
3. Click Clean Up Threat.
You must authenticate by clicking the lock icon at the bottom of the Quarantine Manager
window.
Any threats that are cleaned up are cleared from the list.
4. Click the Action Available column heading to sort the list of threats.
5. If there are any threats for which the action available is Restart, restart your Mac to complete
the cleanup.
6. Click the Action Available column heading to sort the list of threats.
7. If there are any threats for which the action available is “Scan local drives”, run a scan of local
drives (see Scan local drives (page 13)).
8. Click the Action Available column heading to sort the list of threats.
9. If there are any threats for which the action available is “Clean up”, go back to step 3.
10. If there are any threats for which the action available is “Clean up manually”, see Clean up a
threat manually (page 30).
Important: Cleaning up a threat might not be able to undo all the actions the threat has taken
on this Mac. For example, if the threat changed the value of a setting, the cleanup process might
not know the original setting. You might have to verify the Mac’s configuration. Cleaning up an
infected document does not repair any changes the threat has made to the document.
3.5 Disable cleanup warning
By default, Sophos Anti-Virus warns you before it cleans up threats in Quarantine Manager.
To disable the cleanup warning:
1. Choose Sophos Anti-Virus > Preferences.
2. Click Messaging.
3. If some settings are dimmed, click the lock icon and type an administrator name and password.
4. Deselect “Warn before cleaning up threats in Quarantine Manager”.
Note: You can also disable the cleanup warning by selecting “Do not show this message again”
in the warning dialog.
29
Help

3.6 Clean up a threat manually
If Sophos Anti-Virus cannot clean up a threat, Quarantine Manager indicates that it must be
cleaned up manually.
To clean up a threat manually:
1. In Quarantine Manager, click the threat name link.
The threat analysis web page is displayed in your web browser.
2. On the web page, click the Action tab.
3. Follow the instructions there for dealing with the threat.
4. To ensure that the threat has been cleaned up, run a local drives scan (see Scan local drives
(page 13)).
The threat is automatically cleared from Quarantine Manager.
3.7 Clear a threat from Quarantine Manager
To clear a threat, you must authenticate by clicking the lock icon at the bottom of the Quarantine
Manager window.
You might want to clear a threat because:
■
It’s been confirmed as a false-positive
■
You are confident that you have successfully cleaned it up manually
■
You have removed infected removable media
■
You want to clear the list of threats before running a scan of local drives
To clear a threat from Quarantine Manager:
1. In Quarantine Manager, select the threat that you want to clear.
You can select more than one threat at a time.
2. Click “Clear from List”.
Clearing a threat does not delete any files.
30
Sophos Anti-Virus for Mac OS X

4 Updating
4.1 Update Sophos Anti-Virus immediately
By default, Sophos Anti-Virus updates every hour. However, you can update it immediately.
To update Sophos Anti-Virus immediately, do one of the following:
■
Choose Sophos Anti-Virus > Update Now.
■
Click the Sophos Anti-Virus icon on the right-hand side of the menu bar, and then choose
Update Now from the shortcut menu.
■
Control-click the Sophos Anti-Virus application icon in the Dock, and then choose Update
Now from the shortcut menu.
4.2 Configuring updating
4.2.1 Set a source for updates
Important: If your organization has specified default preferences, these defaults might override
changes that you make here.
To specify where Sophos Anti-Virus downloads updates from:
1. Choose Sophos Anti-Virus > Preferences.
2. Click AutoUpdate.
3. If some settings are dimmed, click the lock icon and type an administrator name and password.
4. Change the preferences as follows:
■
To enable Sophos Anti-Virus to update directly from Sophos, choose Sophos from the
“Update from Primary Location” pop-up menu. In the User Name and Password fields,
type the updating credentials that were given to you by Sophos.
■
To enable Sophos Anti-Virus to update from your company web server, choose “Company
Web Server” from the “Update from Primary Location” pop-up menu. In the Address
field, type the web address of the location from which updates will be downloaded. In the
User Name and Password fields, type the updating credentials that are needed to access
the server.
■
To enable Sophos Anti-Virus to update from a network volume, choose “Network Volume”
from the “Update from Primary Location” pop-up menu. In the Address field, type the
network address of the location from which updates will be downloaded. In the User Name
and Password fields, type the updating credentials that are needed to access the volume.
The following are examples of the address. Replace the text inside the brackets with the
appropriate names:
31
Help

http://<server>/<web share>/Sophos Anti-Virus/ESCOSX
smb://<server>/<Samba share>/Sophos Anti-Virus/ESCOSX
afp://<server>/<AppleShare share>/Sophos Anti-Virus/ESCOSX
You can use an IP address or NetBIOS name instead of a domain or host name to refer to the
server. Using an IP address can be better if you have any DNS problems.
If Sophos Anti-Virus must access the update source through the proxy that has been set up in
System Preferences, see Enable updating through the system proxy (page 33). If Sophos Anti-Virus
must access the update source through another proxy, see Enable updating through a custom proxy
(page 33).
4.2.2 Set an alternative source for updates
Important: If your organization has specified default preferences, these defaults might override
changes that you make here.
To specify where Sophos Anti-Virus downloads updates from if it cannot contact its usual source:
1. Choose Sophos Anti-Virus > Preferences.
2. Click AutoUpdate.
3. If some settings are dimmed, click the lock icon and type an administrator name and password.
4. Select “Use a secondary location”. Then, change the preferences as follows:
■
To enable Sophos Anti-Virus to update directly from Sophos, choose Sophos from the
“Update from Secondary Location” pop-up menu. In the User Name and Password fields,
type the updating credentials that were given to you by Sophos.
■
To enable Sophos Anti-Virus to update from your company web server, choose “Company
Web Server” from the “Update from Secondary Location” pop-up menu. In the Address
field, type the web address of the location from which updates will be downloaded. In the
User Name and Password fields, type the updating credentials that are needed to access
the server.
■
To enable Sophos Anti-Virus to update from a network volume, choose “Network Volume”
from the “Update from Secondary Location” pop-up menu. In the Address field, type the
network address of the location from which updates will be downloaded. In the User Name
and Password fields, type the updating credentials that are needed to access the volume.
The following are examples of the address. Replace the text inside the brackets with the
appropriate names:
http://<server>/<web share>/Sophos Anti-Virus/ESCOSX
smb://<server>/<Samba share>/Sophos Anti-Virus/ESCOSX
afp://<server>/<AppleShare share>/Sophos Anti-Virus/ESCOSX
You can use an IP address or NetBIOS name instead of a domain or host name to refer to the
server. Using an IP address can be better if you have any DNS problems.
32
Sophos Anti-Virus for Mac OS X

If Sophos Anti-Virus must access the update source through the proxy that has been set up in
System Preferences, see Enable updating through the system proxy (page 33). If Sophos Anti-Virus
must access the update source through another proxy, see Enable updating through a custom proxy
(page 33).
4.2.3 Enable updating through the system proxy
Important: If your organization has specified default preferences, these defaults might override
changes that you make here.
You can specify that you want Sophos Anti-Virus to update through the proxy that has been set
up in System Preferences.
To enable updating through the system proxy:
1. Choose Sophos Anti-Virus > Preferences.
2. Click AutoUpdate.
3. If some settings are dimmed, click the lock icon and type an administrator name and password.
4. Choose “Use System Proxy Settings” from the pop-up menu at the bottom of the “Primary
Location” section or the “Secondary Location” section, as required.
4.2.4 Enable updating through a custom proxy
Important: If your organization has specified default preferences, these defaults might override
changes that you make here.
You can specify the settings of a proxy through which you want Sophos Anti-Virus to update.
To enable updating through a custom proxy:
1. Choose Sophos Anti-Virus > Preferences.
2. Click AutoUpdate.
3. If some settings are dimmed, click the lock icon and type an administrator name and password.
4. Choose “Use Custom Proxy Settings” from the pop-up menu at the bottom of the “Primary
Location” section or the “Secondary Location” section, as required.
5. In the dialog that appears, type the address and port number of the proxy in the Address fields.
In the User Name and Password fields, type the credentials that are needed to access the proxy.
4.2.5 Schedule updates
Important: If your organization has specified default preferences, these defaults might override
changes that you make here.
By default, Sophos Anti-Virus updates every hour. However, you can change when or how often
it updates.
33
Help

To schedule updates:
1. Choose Sophos Anti-Virus > Preferences.
2. Click AutoUpdate.
3. If some settings are dimmed, click the lock icon and type an administrator name and password.
4. Change the preferences as follows:
■
To enable Sophos Anti-Virus to update at regular intervals, select “Check for updates every”
and enter the time period.
■
To enable Sophos Anti-Virus to update every time that a network connection is established,
select “Check for updates on connection to network or Internet”.
4.2.6 Restore default updating preferences
You can restore the updating preferences to defaults. If your organization has specified default
updating preferences, the updating preferences will be set to these defaults. Otherwise, they will
be set to defaults recommended by Sophos.
To restore default updating preferences:
1. Choose Sophos Anti-Virus > Preferences.
2. Click AutoUpdate.
3. If some settings are dimmed, click the lock icon and type an administrator name and password.
4. Click Restore Defaults.
4.2.7 Change logging preferences
Important: If your organization has specified default preferences, these defaults might override
changes that you make here.
All on-access scanning activity (including threats detected) and all updating activity is logged in
the Sophos on-access scanning and updating log. Sophos Anti-Virus can also log such activity in
the Mac OS X system log.
To change the logging preferences for on-access scanning and updating:
1. Choose Sophos Anti-Virus > Preferences.
2. Click Logging.
3. If some settings are dimmed, click the lock icon and type an administrator name and password.
4. Change the preferences as follows:
■
To change the log filename or location, click Choose Log File and enter the new filename
or location in the dialog.
■
To delete all entries from the log, click Clear Log.
34
Sophos Anti-Virus for Mac OS X

■
To log all on-access scanning and updating activity in the system log, select “Log events to
system log”.
4.2.8 Restore default logging preferences
You can restore the logging preferences for on-access scanning and updating to defaults. If your
organization has specified default logging preferences, the logging preferences will be set to these
defaults. Otherwise, they will be set to defaults recommended by Sophos.
To restore default logging preferences:
1. Choose Sophos Anti-Virus > Preferences.
2. Click Logging.
3. If some settings are dimmed, click the lock icon and type an administrator name and password.
4. Click Restore Defaults.
4.3 Check the progress of an update
■
To check the progress of an update that was started by you or scheduled, click the Sophos
Anti-Virus icon on the right-hand side of the menu bar, and then choose Show AutoUpdate
Window from the shortcut menu.
Note: To view a log of all updating activity, see View on-access scanning and updating log (page
35).
4.4 View on-access scanning and updating log
To view the log of all on-access scanning activity (including threats detected) and all updating
activity:
1. Choose Sophos Anti-Virus > Preferences.
2. In the Logging pane, click View Log.
The log is displayed in Console. At the start of each log entry, there is a tag to show whether the
entry was logged by the on-access scanner (com.sophos.intercheck) or AutoUpdate
(com.sophos.autoupdate).
35
Help

5 Solving problems
5.1 Sophos Anti-Virus does not update
Symptoms
Sophos Anti-Virus is unable to update or does not attempt to do so. If it is unable to update, a
white cross is superimposed on the Sophos Anti-Virus icon on the right-hand side of the menu
bar.
Causes
To find out why this is happening, view the updating log. For information, see View on-access
scanning and updating log (page 35).
Resolve the problem
■
If Sophos Anti-Virus is contacting the wrong source for updates, see Set a source for updates
(page 31). Check that the settings are correct.
■
If Sophos Anti-Virus cannot use your proxy server, see Enable updating through the system
proxy (page 33) or Enable updating through a custom proxy (page 33), depending on which
type of proxy you are using. Check that the settings are correct.
■
If Sophos Anti-Virus is not attempting to update when you expect it to, see Schedule updates
(page 33). Check that the settings are correct.
5.2 Update Now menu command is dimmed
Symptoms
The Update Now menu command is dimmed in the Sophos Anti-Virus menu, the menu bar icon
shortcut menu, or the Dock icon shortcut menu.
Causes
Updating is not configured.
Resolve the problem
See Configuring updating (page 31).
36
Sophos Anti-Virus for Mac OS X

5.3 Sophos Anti-Virus icon is gray
Symptoms
The Sophos Anti-Virus icon on the right-hand side of the menu bar is gray.
Causes
Your Mac is not protected by on-access scanning.
Resolve the problem
Turn on on-access scanning. For information about how to do this, see Turn on-access scanning
on or off (page 5).
5.4 “Scan with Sophos Anti-Virus” menu command is not present
Symptoms
If you try to run a Finder item scan from a shortcut menu, the menu doesn’t contain the command
“Scan with Sophos Anti-Virus”.
Causes
The command isn’t contained in the menu immediately after you install Sophos Anti-Virus.
Resolve the problem
Log in to your Mac again.
5.5 Manual cleanup required
Symptoms
A threat is displayed in Quarantine Manager with the available action Clean up manually.
Causes
This could be for one of the following reasons:
■
Sophos Anti-Virus does not have threat data to clean up the threat.
■
The threat is on a write-protected volume.
37
Help

Resolve the problem
Depending on the reason for the threat not being cleaned up, do one of the following:
■
If Sophos Anti-Virus does not have threat data to clean up the threat, you must clean up the
threat manually (see Clean up a threat manually (page 30)).
■
If you can turn on write access to the volume:
Clear the threat from Quarantine Manager (see Clear a threat from Quarantine Manager (page
30))
Scan for the threat again
Turn on write access to the volume
Clean up the threat in Quarantine Manager (see Deal with threats in Quarantine Manager (page
29))
38
Sophos Anti-Virus for Mac OS X

6 Technical support
You can find technical support for Sophos products in any of these ways:
■
Visit the SophosTalk community at http://community.sophos.com/ and search for other users
who are experiencing the same problem.
■
Visit the Sophos support knowledgebase at http://www.sophos.com/support/.
■
Download the product documentation at http://www.sophos.com/support/docs/.
■
Send an email to [email protected], including your Sophos software version number(s),
operating system(s) and patch level(s), and the text of any error messages.
39
Help

7 Legal notices
Copyright
©
2009, 2010 Sophos Group. All rights reserved. No part of this publication may be
reproduced, stored in a retrieval system, or transmitted, in any form or by any means, electronic,
mechanical, photocopying, recording or otherwise unless you are either a valid licensee where the
documentation can be reproduced in accordance with the licence terms or you otherwise have
the prior permission in writing of the copyright owner.
Sophos and Sophos Anti-Virus are registered trademarks of Sophos Plc and Sophos Group. All
other product and company names mentioned are trademarks or registered trademarks of their
respective owners.
ACE
™
, TAO
™
, CIAO
™
, and CoSMIC
™
ACE
1
, TAO
2
, CIAO
3
, and CoSMIC
4
(henceforth referred to as “DOC software”) are copyrighted
by Douglas C. Schmidt
5
and his research group
6
at Washington University
7
, University of
California
8
, Irvine, and Vanderbilt University
9
, Copyright
©
1993–2005, all rights reserved.
Since DOC software is open-source, free software, you are free to use, modify, copy, and
distribute–perpetually and irrevocably–the DOC software source code and object code produced
from the source, as well as copy and distribute modified versions of this software. You must,
however, include this copyright statement along with code built using DOC software.
You can use DOC software in commercial and/or binary software releases and are under no
obligation to redistribute any of your source code that is built using DOC software. Note, however,
that you may not do anything to the DOC software code, such as copyrighting it yourself or
claiming authorship of the DOC software code, that will prevent DOC software from being
distributed freely using an open-source development model. You needn’t inform anyone that
you’ re using DOC software in your software, though we encourage you to let us
10
know so we can
promote your project in the DOC software success stories
11
.
DOC software is provided as is with no warranties of any kind, including the warranties of design,
merchantability, and fitness for a particular purpose, noninfringement, or arising from a course
of dealing, usage or trade practice. Moreover, DOC software is provided with no support and
without any obligation on the part of Washington University, UC Irvine, Vanderbilt University,
their employees, or students to assist in its use, correction, modification, or enhancement. A
number of companies
12
around the world provide commercial support for DOC software, however.
DOC software is Y2K-compliant, as long as the underlying OS platform is Y2K-compliant.
Washington University, UC Irvine, Vanderbilt University, their employees, and students shall
have no liability with respect to the infringement of copyrights, trade secrets or any patents by
DOC software or any part thereof. Moreover, in no event will Washington University, UC Irvine,
or Vanderbilt University, their employees, or students be liable for any lost revenue or profits or
other special, indirect and consequential damages.
The ACE
13
, TAO
14
, CIAO
15
, and CoSMIC
16
web sites are maintained by the DOC Group
17
at the
Institute for Software Integrated Systems (ISIS)
18
and the Center for Distributed Object Computing
of Washington University, St. Louis
19
for the development of open-source software as part of the
40
Sophos Anti-Virus for Mac OS X

open-source software community
20
. By submitting comments, suggestions, code, code snippets,
techniques (including that of usage), and algorithms, submitters acknowledge that they have the
right to do so, that any such submissions are given freely and unreservedly, and that they waive
any claims to copyright or ownership. In addition, submitters acknowledgethat any such submission
might become part of the copyright maintained on the overall body of code, which comprises the
DOC software. By making a submission, submitter agree to these terms. Furthermore, submitters
acknowledge that the incorporation or modification of such submissions is entirely at the discretion
of the moderators of the open-source DOC software projects or their designees.
The names ACE, TAO, CIAO, CoSMIC, WashingtonUniversity, UC Irvine, and Vanderbilt
University, may not be used to endorse or promote products or services derived from this source
without express written permission from Washington University, UC Irvine, or Vanderbilt
University. Further, products or services derived from this source may not be called ACE, TAO,
CIAO, or CoSMIC nor may the name Washington University, UC Irvine, or Vanderbilt University
appear in their names, without express written permission from Washington University, UC
Irvine, and Vanderbilt University.
If you have any suggestions, additions, comments, or questions, please let me
21
know.
Douglas C. Schmidt
22
References
1. http://www.cs.wustl.edu/~schmidt/ACE.html
2. http://www.cs.wustl.edu/~schmidt/TAO.html
3. http://www.dre.vanderbilt.edu/CIAO/
4. http://www.dre.vanderbilt.edu/cosmic/
5. http://www.dre.vanderbilt.edu/~schmidt/
6. http://www.cs.wustl.edu/~schmidt/ACE-members.html
7. http://www.wustl.edu/
8. http://www.uci.edu/
9. http://www.vanderbilt.edu/
10. mailto:[email protected]
11. http://www.cs.wustl.edu/~schmidt/ACE-users.html
12. http://www.cs.wustl.edu/~schmidt/commercial-support.html
13. http://www.cs.wustl.edu/~schmidt/ACE.html
14. http://www.cs.wustl.edu/~schmidt/TAO.html
15. http://www.dre.vanderbilt.edu/CIAO/
16. http://www.dre.vanderbilt.edu/cosmic/
17. http://www.dre.vanderbilt.edu/
18. http://www.isis.vanderbilt.edu/
19. http://www.cs.wustl.edu/~schmidt/doc-center.html
20. http://www.opensource.org/
21. mailto:[email protected]
22. http://www.dre.vanderbilt.edu/~schmidt/
41
Help

Boost
Version 1.0, 17 August 2003
Permission is hereby granted, free of charge, to any person or organization obtaining a copy of
the software and accompanying documentation covered by this license (the “Software”) to use,
reproduce, display, distribute, execute, and transmit the Software, and to prepare derivative works
of the Software, and to permit third-parties to whom the Software is furnished to do so, all subject
to the following:
The copyright notices in the Software and this entire statement, including the above license grant,
this restriction and the following disclaimer, must be included in all copies of the Software, in
whole or in part, and all derivative works of the Software, unless such copies or derivative works
are solely in the form of machine-executable object code generated by a source language processor.
THE SOFTWARE IS PROVIDED “AS IS”, WITHOUT WARRANTY OF ANY KIND, EXPRESS
OR IMPLIED, INCLUDING BUT NOT LIMITED TO THE WARRANTIES OF
MERCHANTABILITY, FITNESS FOR A PARTICULAR PURPOSE, TITLE AND
NON-INFRINGEMENT. IN NO EVENT SHALL THE COPYRIGHT HOLDERS OR ANYONE
DISTRIBUTING THE SOFTWARE BE LIABLE FOR ANY DAMAGES OR OTHER LIABILITY,
WHETHER IN CONTRACT, TORT OR OTHERWISE, ARISING FROM, OUT OF OR IN
CONNECTION WITH THE SOFTWARE OR THE USE OR OTHER DEALINGS IN THE
SOFTWARE.
dlcompat
Copyright
©
2002 Jorge Acereda ([email protected]ceforge.net) & Peter O’Gorman
([email protected]eforge.net)
Portions may be copyright others, see the Authors section below.
Maintained by Peter O’Gorman ([email protected]eforge.net)
Bug Reports and other queries should go to [email protected]ceforge.net
Permission is hereby granted, free of charge, to any person obtaining a copy of this software and
associated documentation files (the “Software”), to deal in the Software without restriction,
including without limitation the rights to use, copy, modify, merge, publish, distribute, sublicense,
and/or sell copies of the Software, and to permit persons to whom the Software is furnished to do
so, subject to the following conditions:
The above copyright notice and this permission notice shall be included in all copies or substantial
portions of the Software.
THE SOFTWARE IS PROVIDED “AS IS”, WITHOUT WARRANTY OF ANY KIND, EXPRESS
OR IMPLIED, INCLUDING BUT NOT LIMITED TO THE WARRANTIES OF
MERCHANTABILITY, FITNESS FOR A PARTICULAR PURPOSE AND NONINFRINGEMENT.
IN NO EVENT SHALL THE AUTHORS OR COPYRIGHT HOLDERS BE LIABLE FOR ANY
CLAIM, DAMAGES OR OTHER LIABILITY, WHETHER IN AN ACTION OF CONTRACT,
TORT OR OTHERWISE, ARISING FROM, OUT OF OR IN CONNECTION WITH THE
SOFTWARE OR THE USE OR OTHER DEALINGS IN THE SOFTWARE.
42
Sophos Anti-Virus for Mac OS X

Authors
Original code by Jorge Acereda (jace[email protected]eforge.net). This was heavily modified by
Peter O’Gorman ([email protected]).
With input from (in alphabetical order):
■
Stéphane Conversy (conv[email protected])
■
Francis James Franklin ([email protected])
■
Ben Hines ([email protected])
■
Max Horn ([email protected])
■
Karin Kosina (ky[email protected])
■
Darin Ohashi ([email protected])
■
Benjamin Reed ([email protected]om)
Forgive me if I missed you, and e-mail me (o[email protected]ceforge.net) to get added to this
list.
dtoa.c
The author of this software is David M. Gay.
Copyright
©
1991, 2000 by Lucent Technologies.
Permission to use, copy, modify, and distribute this software for any purpose without fee is hereby
granted, provided that this entire notice is included in all copies of any software which is or includes
a copy or modification of this software and in all copies of the supporting documentation for such
software.
THIS SOFTWARE IS BEING PROVIDED "AS IS", WITHOUT ANY EXPRESS OR IMPLIED
WARRANTY. IN PARTICULAR, NEITHER THE AUTHOR NOR LUCENT MAKES ANY
REPRESENTATION OR WARRANTY OF ANY KIND CONCERNING THE MERCHANTABILITY
OF THIS SOFTWARE OR ITS FITNESS FOR ANY PARTICULAR PURPOSE.
libxml2
Except where otherwise noted in the source code (e.g. the files hash.c, list.c and the trio files, which
are covered by a similar licence but with different Copyright notices) all the files are:
Copyright
©
1998–2003 Daniel Veillard. All Rights Reserved.
Permission is hereby granted, free of charge, to any person obtaining a copy of this software and
associated documentation files (the “Software”), to deal in the Software without restriction,
including without limitation the rights to use, copy, modify, merge, publish, distribute, sublicense,
and/or sell copies of the Software, and to permit persons to whom the Software is furnished to do
so, subject to the following conditions:
The above copyright notice and this permission notice shall be included in all copies or substantial
portions of the Software.
43
Help

THE SOFTWARE IS PROVIDED “AS IS”, WITHOUT WARRANTY OF ANY KIND, EXPRESS
OR IMPLIED, INCLUDING BUT NOT LIMITED TO THE WARRANTIES OF
MERCHANTABILITY, FITNESS FOR A PARTICULAR PURPOSE AND NONINFRINGEMENT.
IN NO EVENT SHALL THE DANIEL VEILLARD BE LIABLE FOR ANY CLAIM, DAMAGES
OR OTHER LIABILITY, WHETHER IN AN ACTION OF CONTRACT, TORT OR OTHERWISE,
ARISING FROM, OUT OF OR IN CONNECTION WITH THE SOFTWARE OR THE USE OR
OTHER DEALINGS IN THE SOFTWARE.
Except as contained in this notice, the name of Daniel Veillard shall not be used in advertising or
otherwise to promote the sale, use or other dealings in this Software without prior written
authorization from him.
Authors
■
Daniel Veillard ([email protected]om)
■
Bjorn Reese (br[email protected]orge.net)
■
William Brack (w[email protected])
■
Igor Zlatkovic (igor@zlatkovic.com) for the Windows port
■
Aleksey Sanin (aleksey@aleksey.com)
OpenSSL cryptographic toolkit
The OpenSSL toolkit stays under a dual license, i.e. both the conditions of the OpenSSL License
and the original SSLeay license apply to the toolkit. See below for the actual license texts. Actually
both licenses are BSD-style Open Source licenses. In case of any license issues related to OpenSSL
please contact openssl-c[email protected].
OpenSSL license
Copyright
©
1998–2006 The OpenSSL Project. All rights reserved.
Redistribution and use in source and binary forms, with or without modification, are permitted
provided that the following conditions are met:
1. Redistributions of source code must retain the above copyright notice, this list of conditions
and the following disclaimer.
2. Redistributions in binary form must reproduce the above copyright notice, this list of conditions
and the following disclaimer in the documentation and/or other materials provided with the
distribution.
3. All advertising materials mentioning features or use of this software must display the following
acknowledgment:
“This product includes software developed by the OpenSSL Project for use in the OpenSSL
Toolkit. (http://www.openssl.org/)”
4. The names “OpenSSL Toolkit” and “OpenSSL Project” must not be used to endorse or promote
products derived from this software without prior written permission. For written permission,
please contact openssl-c[email protected].
44
Sophos Anti-Virus for Mac OS X

5. Products derived from this software may not be called “OpenSSL” nor may “OpenSSL” appear
in their names without prior written permission of the OpenSSL Project.
6. Redistributions of any form whatsoever must retain the following acknowledgment:
“This product includes software developed by the OpenSSL Project for use in the OpenSSL
Toolkit (http://www.openssl.org/)”
THIS SOFTWARE IS PROVIDED BY THE OpenSSL PROJECT “AS IS” AND ANY EXPRESSED
OR IMPLIED WARRANTIES, INCLUDING, BUT NOT LIMITED TO, THE IMPLIED
WARRANTIES OF MERCHANTABILITY AND FITNESS FOR A PARTICULAR PURPOSE ARE
DISCLAIMED. IN NO EVENT SHALL THE OpenSSL PROJECT OR ITS CONTRIBUTORS BE
LIABLE FOR ANY DIRECT, INDIRECT, INCIDENTAL, SPECIAL, EXEMPLARY, OR
CONSEQUENTIAL DAMAGES (INCLUDING, BUT NOT LIMITED TO, PROCUREMENT OF
SUBSTITUTE GOODS OR SERVICES; LOSS OF USE, DATA, OR PROFITS; OR BUSINESS
INTERRUPTION) HOWEVER CAUSED AND ON ANY THEORY OF LIABILITY, WHETHER
IN CONTRACT, STRICT LIABILITY, OR TORT (INCLUDING NEGLIGENCE OR OTHERWISE)
ARISING IN ANY WAY OUT OF THE USE OF THIS SOFTWARE, EVEN IF ADVISED OF THE
POSSIBILITY OF SUCH DAMAGE.
This product includes cryptographic software written by Eric Young (eay@cryptsoft.com). This
product includes software written by Tim Hudson (tjh@cryptsoft.com).
Original SSLeay license
Copyright
©
1995–1998 Eric Young (eay@cryptsoft.com) All rights reserved.
This package is an SSL implementation written by Eric Young (eay@cryptsoft.com). The
implementation was written so as to conform with Netscape’s SSL.
This library is free for commercial and non-commercial use as long as the following conditions
are adhered to. The following conditions apply to all code found in this distribution, be it the RC4,
RSA, lhash, DES, etc., code; not just the SSL code. The SSL documentation included with this
distribution is covered by the same copyright terms except that the holder is Tim Hudson
(tjh@cryptsoft.com).
Copyright remains Eric Young’s, and as such any Copyright notices in the code are not to be
removed. If this package is used in a product, Eric Young should be given attribution as the author
of the parts of the library used. This can be in the form of a textual message at program startup
or in documentation (online or textual) provided with the package.
Redistribution and use in source and binary forms, with or without modification, are permitted
provided that the following conditions are met:
1. Redistributions of source code must retain the copyright notice, this list of conditions and the
following disclaimer.
2. Redistributions in binary form must reproduce the above copyright notice, this list of conditions
and the following disclaimer in the documentation and/or other materials provided with the
distribution.
3. All advertising materials mentioning features or use of this software must display the following
acknowledgement:
45
Help

“This product includes cryptographic software written by Eric Young (eay@cryptsoft.com)”
The word “cryptographic” can be left out if the routines from the library being used are not
cryptographic related :-).
4. If you include any Windows specific code (or a derivative thereof) from the apps directory
(application code) you must include an acknowledgement:
“This product includes software written by Tim Hudson (tjh@cryptsoft.com)”
THIS SOFTWARE IS PROVIDED BY ERIC YOUNG “AS IS” AND ANY EXPRESS OR IMPLIED
WARRANTIES, INCLUDING, BUT NOT LIMITED TO, THE IMPLIED WARRANTIES OF
MERCHANTABILITY AND FITNESS FOR A PARTICULAR PURPOSE ARE DISCLAIMED. IN
NO EVENT SHALL THE AUTHOR OR CONTRIBUTORS BE LIABLE FOR ANY DIRECT,
INDIRECT, INCIDENTAL, SPECIAL, EXEMPLARY, OR CONSEQUENTIAL DAMAGES
(INCLUDING, BUT NOT LIMITED TO, PROCUREMENT OF SUBSTITUTE GOODS OR
SERVICES; LOSS OF USE, DATA, OR PROFITS; OR BUSINESS INTERRUPTION) HOWEVER
CAUSED AND ON ANY THEORY OF LIABILITY, WHETHER IN CONTRACT, STRICT
LIABILITY, OR TORT (INCLUDING NEGLIGENCE OR OTHERWISE) ARISING IN ANY WAY
OUT OF THE USE OF THIS SOFTWARE, EVEN IF ADVISED OF THE POSSIBILITY OF SUCH
DAMAGE.
The licence and distribution terms for any publically available version or derivative of this code
cannot be changed. i.e. this code cannot simply be copied and put under another distribution
licence [including the GNU Public Licence.]
Python
PYTHON SOFTWARE FOUNDATION LICENSE VERSION 2
1. This LICENSE AGREEMENT is between the Python Software Foundation (“PSF”), and the
Individual or Organization (“Licensee”) accessing and otherwise using this software (“Python”)
in source or binary form and its associated documentation.
2. Subject to the terms and conditions of this License Agreement, PSF hereby grants Licensee a
nonexclusive, royalty-free, worldwide license to reproduce, analyze, test, perform and/or display
publicly, prepare derivative works, distribute, and otherwise use Python alone or in any
derivative version, provided, however, that PSF’s License Agreement and PSF’s notice of
copyright, i.e., “Copyright
©
2001, 2002, 2003, 2004, 2005, 2006, 2007, 2008, 2009 Python
Software Foundation; All Rights Reserved” are retained in Python alone or in any derivative
version prepared by Licensee.
3. In the event Licensee prepares a derivative work that is based on or incorporates Python or
any part thereof, and wants to make the derivative work available to others as provided herein,
then Licensee hereby agrees to include in any such work a brief summary of the changes made
to Python.
4. PSF is making Python available to Licensee on an “AS IS” basis. PSF MAKES NO
REPRESENTATIONS OR WARRANTIES, EXPRESS OR IMPLIED. BY WAY OF EXAMPLE,
BUT NOT LIMITATION, PSF MAKES NO AND DISCLAIMS ANY REPRESENTATION OR
WARRANTY OF MERCHANTABILITY OR FITNESS FOR ANY PARTICULAR PURPOSE
OR THAT THE USE OF PYTHON WILL NOT INFRINGE ANY THIRD PARTY RIGHTS.
46
Sophos Anti-Virus for Mac OS X

5. PSF SHALL NOT BE LIABLE TO LICENSEE OR ANY OTHER USERS OF PYTHON FOR
ANY INCIDENTAL, SPECIAL, OR CONSEQUENTIAL DAMAGES OR LOSS AS A RESULT
OF MODIFYING, DISTRIBUTING, OR OTHERWISE USING PYTHON, OR ANY
DERIVATIVE THEREOF, EVEN IF ADVISED OF THE POSSIBILITY THEREOF.
6. This License Agreement will automatically terminate upon a material breach of its terms and
conditions.
7. Nothing in this License Agreement shall be deemed to create any relationship of agency,
partnership, or joint venture between PSF and Licensee. This License Agreement does not grant
permission to use PSF trademarks or trade name in a trademark sense to endorse or promote
products or services of Licensee, or any third party.
8. By copying, installing or otherwise using Python, Licensee agrees to be bound by the terms
and conditions of this License Agreement.
Simple ECMAScript Engine
Copyright
©
2003, 2004, 2005, 2006, 2007 David Leonard. All rights reserved.
Redistribution and use in source and binary forms, with or without modification, are permitted
provided that the following conditions are met:
1. Redistributions of source code must retain the above copyright notice, this list of conditions
and the following disclaimer.
2. Redistributions in binary form must reproduce the above copyright notice, this list of conditions
and the following disclaimer in the documentation and/or other materials provided with the
distribution.
3. Neither the name of David Leonard nor the names of its contributors may be used to endorse
or promote products derived from this software without specific prior written permission.
THIS SOFTWARE IS PROVIDED BY THE COPYRIGHT HOLDERS AND CONTRIBUTORS
“AS IS” AND ANY EXPRESS OR IMPLIED WARRANTIES, INCLUDING, BUT NOT LIMITED
TO, THE IMPLIED WARRANTIES OF MERCHANTABILITY AND FITNESS FOR A
PARTICULAR PURPOSE ARE DISCLAIMED. IN NO EVENT SHALL THE COPYRIGHT
OWNER OR CONTRIBUTORS BE LIABLE FOR ANY DIRECT, INDIRECT, INCIDENTAL,
SPECIAL, EXEMPLARY, OR CONSEQUENTIAL DAMAGES (INCLUDING, BUT NOT LIMITED
TO, PROCUREMENT OF SUBSTITUTE GOODS OR SERVICES; LOSS OF USE, DATA, OR
PROFITS; OR BUSINESS INTERRUPTION) HOWEVER CAUSED AND ON ANY THEORY
OF LIABILITY, WHETHER IN CONTRACT, STRICT LIABILITY, OR TORT (INCLUDING
NEGLIGENCE OR OTHERWISE) ARISING IN ANY WAY OUT OF THE USE OF THIS
SOFTWARE, EVEN IF ADVISED OF THE POSSIBILITY OF SUCH DAMAGE.
strcasestr.c
Copyright
©
1990, 1993 The Regents of the University of California. All rights reserved.
This code is derived from software contributed to Berkeley by Chris Torek.
Redistribution and use in source and binary forms, with or without modification, are permitted
provided that the following conditions are met:
47
Help

1. Redistributions of source code must retain the above copyright notice, this list of conditions
and the following disclaimer.
2. Redistributions in binary form must reproduce the above copyright notice, this list of conditions
and the following disclaimer in the documentation and/or other materials provided with the
distribution.
3. Neither the name of the University nor the names of its contributors may be used to endorse
or promote products derived from this software without specific prior written permission.
THIS SOFTWARE IS PROVIDED BY THE REGENTS AND CONTRIBUTORS “AS IS” AND
ANY EXPRESS OR IMPLIED WARRANTIES, INCLUDING, BUT NOT LIMITED TO, THE
IMPLIED WARRANTIES OF MERCHANTABILITY AND FITNESS FOR A PARTICULAR
PURPOSE ARE DISCLAIMED. IN NO EVENT SHALL THE REGENTS OR CONTRIBUTORS
BE LIABLE FOR ANY DIRECT, INDIRECT, INCIDENTAL, SPECIAL, EXEMPLARY, OR
CONSEQUENTIAL DAMAGES (INCLUDING, BUT NOT LIMITED TO, PROCUREMENT OF
SUBSTITUTE GOODS OR SERVICES; LOSS OF USE, DATA, OR PROFITS; OR BUSINESS
INTERRUPTION) HOWEVER CAUSED AND ON ANY THEORY OF LIABILITY, WHETHER
IN CONTRACT, STRICT LIABILITY, OR TORT (INCLUDING NEGLIGENCE OR OTHERWISE)
ARISING IN ANY WAY OUT OF THE USE OF THIS SOFTWARE, EVEN IF ADVISED OF THE
POSSIBILITY OF SUCH DAMAGE.
strnstr.c
Copyright
©
2001 Mike Barcroft (mike@FreeBSD.org). Copyright
©
1990, 1993 The Regents of
the University of California. All rights reserved.
This code is derived from software contributed to Berkeley by Chris Torek.
Redistribution and use in source and binary forms, with or without modification, are permitted
provided that the following conditions are met:
1. Redistributions of source code must retain the above copyright notice, this list of conditions
and the following disclaimer.
2. Redistributions in binary form must reproduce the above copyright notice, this list of conditions
and the following disclaimer in the documentation and/or other materials provided with the
distribution.
3. Neither the name of the University nor the names of its contributors may be used to endorse
or promote products derived from this software without specific prior written permission.
THIS SOFTWARE IS PROVIDED BY THE REGENTS AND CONTRIBUTORS “AS IS” AND
ANY EXPRESS OR IMPLIED WARRANTIES, INCLUDING, BUT NOT LIMITED TO, THE
IMPLIED WARRANTIES OF MERCHANTABILITY AND FITNESS FOR A PARTICULAR
PURPOSE ARE DISCLAIMED. IN NO EVENT SHALL THE REGENTS OR CONTRIBUTORS
BE LIABLE FOR ANY DIRECT, INDIRECT, INCIDENTAL, SPECIAL, EXEMPLARY, OR
CONSEQUENTIAL DAMAGES (INCLUDING, BUT NOT LIMITED TO, PROCUREMENT OF
SUBSTITUTE GOODS OR SERVICES; LOSS OF USE, DATA, OR PROFITS; OR BUSINESS
INTERRUPTION) HOWEVER CAUSED AND ON ANY THEORY OF LIABILITY, WHETHER
IN CONTRACT, STRICT LIABILITY, OR TORT (INCLUDING NEGLIGENCE OR OTHERWISE)
48
Sophos Anti-Virus for Mac OS X

ARISING IN ANY WAY OUT OF THE USE OF THIS SOFTWARE, EVEN IF ADVISED OF THE
POSSIBILITY OF SUCH DAMAGE.
UnRAR
The source code of UnRAR utility is freeware. This means:
1. All copyrights to RAR and the utility UnRAR are exclusively owned by the author - Alexander
Roshal.
2. The UnRAR sources may be used in any software to handle RAR archives without limitations
free of charge, but cannot be used to re-create the RAR compression algorithm, which is
proprietary. Distribution of modified UnRAR sources in separate form or as a part of other
software is permitted, provided that it is clearly stated in the documentation and source
comments that the code may not be used to develop a RAR (WinRAR) compatible archiver.
3. The UnRAR utility may be freely distributed. It is allowed to distribute UnRAR inside of other
software packages.
4. THE RAR ARCHIVER AND THE UnRAR UTILITY ARE DISTRIBUTED “AS IS”. NO
WARRANTY OF ANY KIND IS EXPRESSED OR IMPLIED. YOU USE AT YOUR OWN RISK.
THE AUTHOR WILL NOT BE LIABLE FOR DATA LOSS, DAMAGES, LOSS OF PROFITS
OR ANY OTHER KIND OF LOSS WHILE USING OR MISUSING THIS SOFTWARE.
5. Installing and using the UnRAR utility signifies acceptance of these terms and conditions of
the license.
6. If you don’t agree with terms of the license you must remove UnRAR files from your storage
devices and cease to use the utility.
Thank you for your interest in RAR and UnRAR.
Alexander L. Roshal
49
Help
