
User Manual
November 2019
RESOLVE
Capacity Expansion Model
© 2019 Copyright. All Rights Reserved.
Energy and Environmental Economics, Inc.
44 Montgomery Street, Suite 1500
San Francisco, CA 94104
415.391.5100
www.ethree.com
User Manual
November 2019
RESOLVE
Capacity Expansion Model
Table of Contents
Disclaimer ............................................................................................................................ i
1 Introduction ................................................................................................................. 1
1.1 Overview ....................................................................................................................... 1
1.2 Structure of This Document ....................................................................................... 5
2 Setting Up RESOLVE ................................................................................................. 6
2.1 System Requirements ................................................................................................ 6
2.1.1 Operating System ................................................................................ 6
2.1.2 Python ................................................................................................. 6
2.1.3 Solvers ................................................................................................ 7
2.2 Installing Python and RESOLVE ............................................................................... 7
2.2.1 Basic Installation & Updating Packages .............................................. 8
2.2.2 Advanced Installation (Conda Virtual Environment) ............................ 9
2.3 RESOLVE Package Organization .......................................................................... 10
2.3.1 RESOLVE Package File Hashes ....................................................... 12
3 Interacting with RESOLVE ....................................................................................... 14
3.1 RESOLVE Scenario Tool ......................................................................................... 14
3.1.1 Running Pre-Defined Scenarios ........................................................ 14
3.1.2 Creating New Scenarios .................................................................... 18
3.1.3 Input Data Worksheets ...................................................................... 20
3.2 RESOLVE Results Viewer ....................................................................................... 22
3.2.1 Dashboard ......................................................................................... 22
3.2.2 Portfolio Analytics .............................................................................. 23
3.2.3 Scenario Comparison ........................................................................ 24
3.2.4 Raw Summary Results ...................................................................... 25
3.2.5 Lists ................................................................................................... 26
4 RESOLVE Model Details .......................................................................................... 27
4.1 Raw Input Files .......................................................................................................... 27
4.2 Python Scripts ............................................................................................................ 33
4.3 Raw Output Files ....................................................................................................... 35

© 2019 Energy and Environmental Economics, Inc. Page | i |
Disclaimer
Disclaimer
The core of the RESOLVE model is written in the Python scripting language. The E3 RESOLVE Model is free
software under the terms of the GNU Affero General Public License as published by the Free Software
Foundation, either version 3 of the License, or (at your option) any later version.
NO WARRANTY OF ANY KIND, IMPLIED, EXPRESSED, OR STATUTORY, INCLUDING BUT NOT LIMITED TO
THE WARRANTIES OF NON-INFRINGEMENT OF THIRD PARTY RIGHTS, TITLE, MERCHANTABILITY, FITNESS
FOR A PARTICULAR PURPOSE, AND FREEDOM FROM COMPUTER VIRUS, IS GIVEN WITH RESPECT TO THE
RESOLVE SOFTWARE INCLUDING ITS PYTHON SCRIPTS, THE WEB PAGE HOSTING THE RESOLVE SOFTWARE
OR HYPERLINKS TO OTHER INTERNET RESOURCES. E3 bears no responsibility for the consequences of any
modifications to the model, including its Python scripts, whether intentional or unintentional.

© 2019 Energy and Environmental Economics, Inc. Page | 1 |
Introduction
1 Introduction
1.1 Overview
The purpose of this document is to provide users with the guidance needed to set up and run the RESOLVE
model and to analyze the results of scenarios once they have been completed. RESOLVE is a linear
program written in Python with Excel-based interfaces for scenario development and results processing.
RESOLVE is an optimal investment and operational model designed to inform long-term planning
questions around renewables integration in systems with high penetration levels of renewable energy.
The model is formulated as a linear optimization problem that co-optimizes investment and dispatch for
a selected set of days over a multi-year horizon in order to identify least-cost portfolios for meeting
renewable energy targets and other system goals.
RESOLVE incorporates a representation of neighboring regions in order to characterize transmission flows
into and out of a main zone of interest endogenously. As shown in Figure 1.1, RESOLVE can solve for the
optimal investments in renewable resources, energy storage technologies, demand response, new gas
plants, and retention of existing thermal plants. These least-cost decisions are subject to annual
constraints on delivered renewable energy that reflects the RPS policy, annual constraints on greenhouse
gas emissions, capacity adequacy constraints to maintain reliability, and constraints on the ability to
develop specific renewable resources. RESOLVE simulates operations on sampled days and includes a
linearized version of the unit commitment problem. An overview of constraint groups is shown in Table
1.1.

Page | 2 |
Introduction
Figure 1.1. RESOLVE Least-Cost Capacity Expansion Model

© 2019 Energy and Environmental Economics, Inc. Page | 3 |
Introduction
Table 1.1. Overview of Key Constraint Groups in RESOLVE
Category
Constraint Group
Description
Capacity
Capacity Expansion
Tracks annual resource capacity, including economic resource buildout. Interacts with resource
dispatch and reliability constraints.
Economic Retention
Thermal resources are retained if ongoing fixed costs are lower than value of services provided
to the system. A minimum amount of retention can be enforced.
Transmission Deliverability
Categorize renewable build into "Fully Deliverable" and "Energy Only." Build new transmission
within CAISO.
Power Balance
Zonal Power Balance
Ensure that generation and imports match loads in each modeled zone and in hour. Sets the
hourly zonal marginal energy price.
Loads
Economic EE Investment
Economically select energy efficiency (EE) measures or bundles.
EV Smart Charging
Optimally charge EVs subject to driving pattern limitations.
Hydrogen Electrolysis
Produce hydrogen for non-electricity uses.
Shed DR
Constrain shed DR programs to limited amount of dispatch per year.
Shift DR
Constrain shift DR programs to maintain energy neutrality and underlying availability shape.
Operating Reserves
Reserve Requirements
Maintain sufficient frequency response, regulation up/down, load following up/down, and
spinning reserves. Sets the hourly operational reserve price for each reserve type.
Policy Targets
GHG Target
Meet an annual GHG target, including GHG emissions from unspecified imports into the GHG
target zone.
RPS/CES Target
Meet an annual RPS or CES target, including unbundled Renewable Energy Certificate (REC)
accounting.

Page | 4 |
Introduction
Reliability
Planning Reserve Margin
Meet a Planning Reserve Margin (PRM) requirement in each year. Sets the annual capacity
price.
Local Capacity Area
Build a certain qualifying capacity of resources “locally” – within sub-zones of the primary zone.
Energy Sufficiency
Analogous to the single-hour PRM but evaluates if there is sufficient available energy across the
year on a variable timescale.
Variable Renewable ELCC
Quantifies the cumulative capacity contribution (the PRM contribution) of wind and solar using
an ELCC surface.
Resource Dispatch
Operating Limits
Constrain output to operating limits (including hourly ramping) or expected output.
Storage Energy Tracking
Track state of charge of storage resources to optimally dispatch for energy and reserves.
Unit Commitment
Constrain energy and reserve dispatch of thermal resources using linearized unit commitment
constraints.
Hourly Profiles
Constrain variable resources to fixed production profiles, which can be optimally curtailed for
hourly energy dispatch or to provide operating reserves.
Transmission
Transmission Flows
Limit energy flows between zones (including optional hourly ramps). RESOLVE is a zonal model.
Sets hourly congestion price for energy.
Transmission Expansion
Economically build transmission (increase path ratings) between balancing areas. Interacts with
resource dispatch and reliability constraints. RESOLVE’s transmission expansion feature is not
used for 2019 IRP modeling.

© 2019 Energy and Environmental Economics, Inc. Page | 5 |
Introduction
1.2 Structure of This Document
The remainder of this document is organized as follows:
Section 2. Setting Up RESOLVE
Describes system requirements for running RESOLVE and recommended installation
instructions.
Section 3. Interacting with RESOLVE Interfaces
Overview of how to use the Excel-based user interfaces (Scenario Tool and Results Viewer). For
users seeking only to run RESOLVE cases and view model outputs, this section provides the
necessary background to do so.
Section 4. RESOLVE Model Details
More in-depth discussion on core RESOLVE implementation (input/output text files and Python
scripts).

Page | 6 |
Setting Up RESOLVE
2 Setting Up RESOLVE
2.1 System Requirements
2.1.1 OPERATING SYSTEM
The underlying Python code powering RESOLVE has been tested on Windows, macOS, and Ubuntu. Other
Linux distributions will likely also be able to run the model.
The Excel interfaces used to interact with RESOLVE require access to Microsoft Excel. The RESOLVE user
interface has been tested extensively on Windows.
2.1.2 PYTHON
RESOLVE is compatible with the latest Python 3, while also being backward compatible with Python 2. E3
currently uses Python 3.7.3 (64-bit). E3 recommends installing Anaconda to obtain Python, which also
includes some of the mathematical packages needed to run RESOLVE.
RESOLVE relies on the open-source Python packages numpy, pandas, and pyomo to formulate the
optimization model and process inputs/outputs. Both numpy and pandas are included when installing
Anaconda. E3 currently uses pyomo version 5.6.6.

© 2019 Energy and Environmental Economics, Inc. Page | 7 |
Setting Up RESOLVE
2.1.3 SOLVERS
The default, open-source solver to use with RESOLVE is called cbc.
1
Download cbc-win64.zip, unzip, and
move the executable (cbc.exe) to a folder of your choosing. The final step is to add the folder in which
cbc.exe resides to your PATH system variable, which can be done by following these instructions. E3 has
tested CBC version 2.9.9 (64-bit) on Windows 10. Executables for macOS, and Linux can also be obtained
from the link in the footnote and added to the system PATH following the appropriate instructions for
each operating system or by using the COIN-OR Optimization Suite installer.
If users have licenses for other, commercially available solvers (such as CPLEX and Gurobi
2
), these can be
used with RESOLVE and may provide significantly faster solution times than cbc. RESOLVE model cases
created for the 2019 CPUC IRP experience very long runtimes and E3 and recommends using a commercial
solver if the user plans to run more than a handful of cases. Both CPLEX and Gurobi provide onsite and
cloud licensing options and other commercial solver vendors may have similar options. As with CBC, to
utilize a commercial solver, you will need to make sure the executable for the solver is added to your
system PATH.
2.2 Installing Python and RESOLVE
In this user guide, we offer two installation instructions:
Basic Installation
Users may want to consider this option if they:
1
A 64-bit compatible cbc executable compiled by AMPL Optimization, Inc. can be downloaded at the following link:
https://ampl.com/products/solvers/open-source/
2
E3 has tested Gurobi extensively and has observed that in specific instances Gurobi can have numerical issues when solving RESOLVE cases,
resulting in longer runtimes than expected. Solver settings for Gurobi in run_opt.py address most of the numerical issues, but in certain
circumstances the user may need to change solver settings to allow a case to solve with an acceptable runtime. If the user is experiencing
numerical issues with Gurobi on a specific model run, removing some of the Gurobi solver settings in run_opt.py frequently results in
improved performance.

Page | 8 |
Setting Up RESOLVE
1. Do not use any other Python-based applications on their computer
2. Are not concerned about the specific version of certain Python packages interacting
with other applications on their system
Advanced Installation
Users may want to consider this option if they:
1. Have previously installed a specific version of Python on their system
2. Have applications or scripts on their computer that require a specific version of Python
or Python packages that are incompatible with RESOLVE
2.2.1 BASIC INSTALLATION & UPDATING PACKAGES
As previously discussed in Section 2.1.2, E3 recommends installing the Anaconda distribution of Python.
This installation method will install or update the packages RESOLVE depends on directly to your “base”
Python location using Python’s standard pip
3
installer.
1. Install the Anaconda distribution of Python.
(Skip this step if you would like to use an existing installation of Python).
During the installation process, you should see “Add Anaconda to the system PATH environment
variable” in the Advanced Installation Options (as shown in the screenshot below). This will
allow us to find the installed Python easily when running RESOLVE.
4
3
Read more about pip here
4
If you are not sure if it is in your PATH environment variable, open a Command Prompt window and type the command “python” and press
Enter. If you see a message to the effect of, ‘python’ is not recognized as an internal or external command, you will need to follow the
instructions to add python to your PATH environment variable.

© 2019 Energy and Environmental Economics, Inc. Page | 9 |
Setting Up RESOLVE
Note: Users with prior installations of Python should be careful of the implications of installing
another version of Python on their system if they have other Python scripts and dependencies.
2. (Optional) If you have a pre-existing installation of Python, you may want to use the following
commands to update numpy and pandas to the specific versions that have been tested by E3:
pip install numpy>=1.13.3
pip install pandas>=0.24.0
3. Install the specific version of pyomo for RESOLVE using the following commands:
pip install pyomo==5.6.6
2.2.2 ADVANCED INSTALLATION (CONDA VIRTUAL ENVIRONMENT)
This installation method uses conda’s environment
5
functionality to create a virtual environment to install
a separate version of Python and dependencies specifically for RESOLVE.
5
Read more about conda environments here

Page | 10 |
Setting Up RESOLVE
1. If you have not yet installed Anaconda, follow the first step in the Basic Installation
instructions.RESOLVE Scenario Tool, users will find two options for controlling how the VBA
buttons call RESOLVE from the Scenario Tool:
a. Python Path:
Copy the path you found in step (2) into the yellow input cell. By default, the cell is
blank, and RESOLVE will use the default Python installed on your computer. By inputting
a path here, you are telling RESOLVE to use this specific version of Python.
b. Solver:
By default, this is set to cbc (which is a free open-source solver that can be used with
RESOLVE, see Section 2.1.3). Other options (if the user has correctly installed them) are
cplex and gurobi, and advanced users could modify the Scenario Tool to use additional
solvers if desired.
2.3 RESOLVE Package Organization
While users may wish to review the raw input and output files and Python scripts that constitute the core
of RESOLVE, the RESOLVE package is designed to allow users to run scenarios and analyze results using
only the Excel-based user interfaces for developing scenarios and viewing results. A schematic of the
RESOLVE environment is shown in Figure 2.1.

© 2019 Energy and Environmental Economics, Inc. Page | 11 |
Setting Up RESOLVE
Figure 2.1. Schematic of RESOLVE Modeling Components
The individual components of the RESOLVE modeling environment are described below:
1. RESOLVE Resource Costs and Build Workbook
Excel workbook containing upstream information on baseline resources, candidate resource
cost and potential, and the Pro Forma financial model. Data updates can be implemented in this
workbook and manually copied over to corresponding sheets in the Scenario Tool.
2. RESOLVE Scenario Tool
Excel workbook that includes a scenario management dashboard and input data worksheets.
The Scenario Tool provides a simple interface to develop and run RESOLVE scenarios after
setting up data inputs to the model.
3. Input Files: inputs/
RESOLVE accepts scenario inputs as tab-delimited (.tab) text files. These are created by the
Scenario Tool and contain the minimal set of data needed to define scenario assumptions. The
inputs directory contains scenario subdirectories with input files for each scenario.
4. RESOLVE Python Scripts: resolve_code/
RESOLVE is written in Python and consists of multiple scripts that (1) read the raw input files, (2)
formulates a linear programming optimization model to minimize total incremental system

Page | 12 |
Setting Up RESOLVE
costs, and (3) exports the resulting optimal portfolio of investments and operations across the
analysis time horizon. The resolve_code directory contains the RESOLVE Python scripts.
5. Output Files: results/
RESOLVE prints out results in CSV files. These results files contain all results read by the Results
Viewer, as well as other files that report detailed information. The results directory and
scenario-specific subdirectories are created automatically upon running the RESOLVE code.
6. Results Viewer
Excel workbook that is the interface through which users may review results of a completed
RESOLVE run and compare results across runs. This workbook can be used to import and view
summaries of the raw Output Files for a specific model. Section 3.2 provides a summary of
functionality included in the Results Viewer. Scenario-specific subdirectories in the
results_summaries/ directory containing result summaries for each scenario are created
automatically when results are loaded into the Results Viewer.
7. setup.py
Setup script that installs relevant dependencies to configure RESOLVE.
8. environment.yml
Optional file used by conda to define a new virtual environment.
If the user is interested in reviewing inputs and outputs to the pre-built RESOLVE scenarios, the Resource
Cost and Build Workbook, Scenario Tool, and Results Viewer provide can be used directly in Excel without
installing Python or setting up RESOLVE.
2.3.1 RESOLVE PACKAGE FILE HASHES
File hashes for the current public release of RESOLVE are listed in Table 2.1.

© 2019 Energy and Environmental Economics, Inc. Page | 13 |
Setting Up RESOLVE
Table 2.1. RESOLVE File Hashes
RESOLVE File
SHA-256 Hash
setup.py
771da4bba9eeaeba06f05ebaa92bd970c3250477dac9d21265c7b0a280ccc0b6
environment.yml
8614b3e68e5fbe57ffee555b3d75bd3e422af89f4884f3092e6bae35907da733
resolve_code/create_results_summary.py
bf678e70dc7a638a7faea2f279010a6f55750e53167b3412e283779ab1874920
resolve_code/export_results.py
32e2adda33cd56c0c552f4a9d841de1e4593fc3190fcfacf851493921886aae3
resolve_code/fileio.py
6b9ffba288f440a5670bd0376b0c5635fc44efaef2e62da135e23b3e938653b5
resolve_code/load_data.py
83bea04d476e43140a9461b7312c4a28874438bfdc56191d88fd90a99b117c68
resolve_code/model_formulation.py
0777225ef7f91fb1150bc8ac53d53a978e7ca3b2f8aa3df887ca52f9a42c4be9
resolve_code/run_opt.py
698871f7e374f1353f2e0c5b30c8786137c853421d0b4e8dce4c90ce533398c2
resolve_code/runbatch.py
4c9a34b949b424e5baa545bfef87154d08aa55c8e71a5ab504b1669d2ff55d61

Page | 14 |
Interacting with RESOLVE
3 Interacting with RESOLVE
3.1 RESOLVE Scenario Tool
Cells throughout the Scenario Tool are color-coded to indicate how users should interact with them.
Figure 3.1. RESOLVE Scenario Tool Dashboard
3.1.1 RUNNING PRE-DEFINED SCENARIOS
The RESOLVE Scenario Tool comes with a set of predefined scenarios. Users can load and run a predefined
scenario as follows:
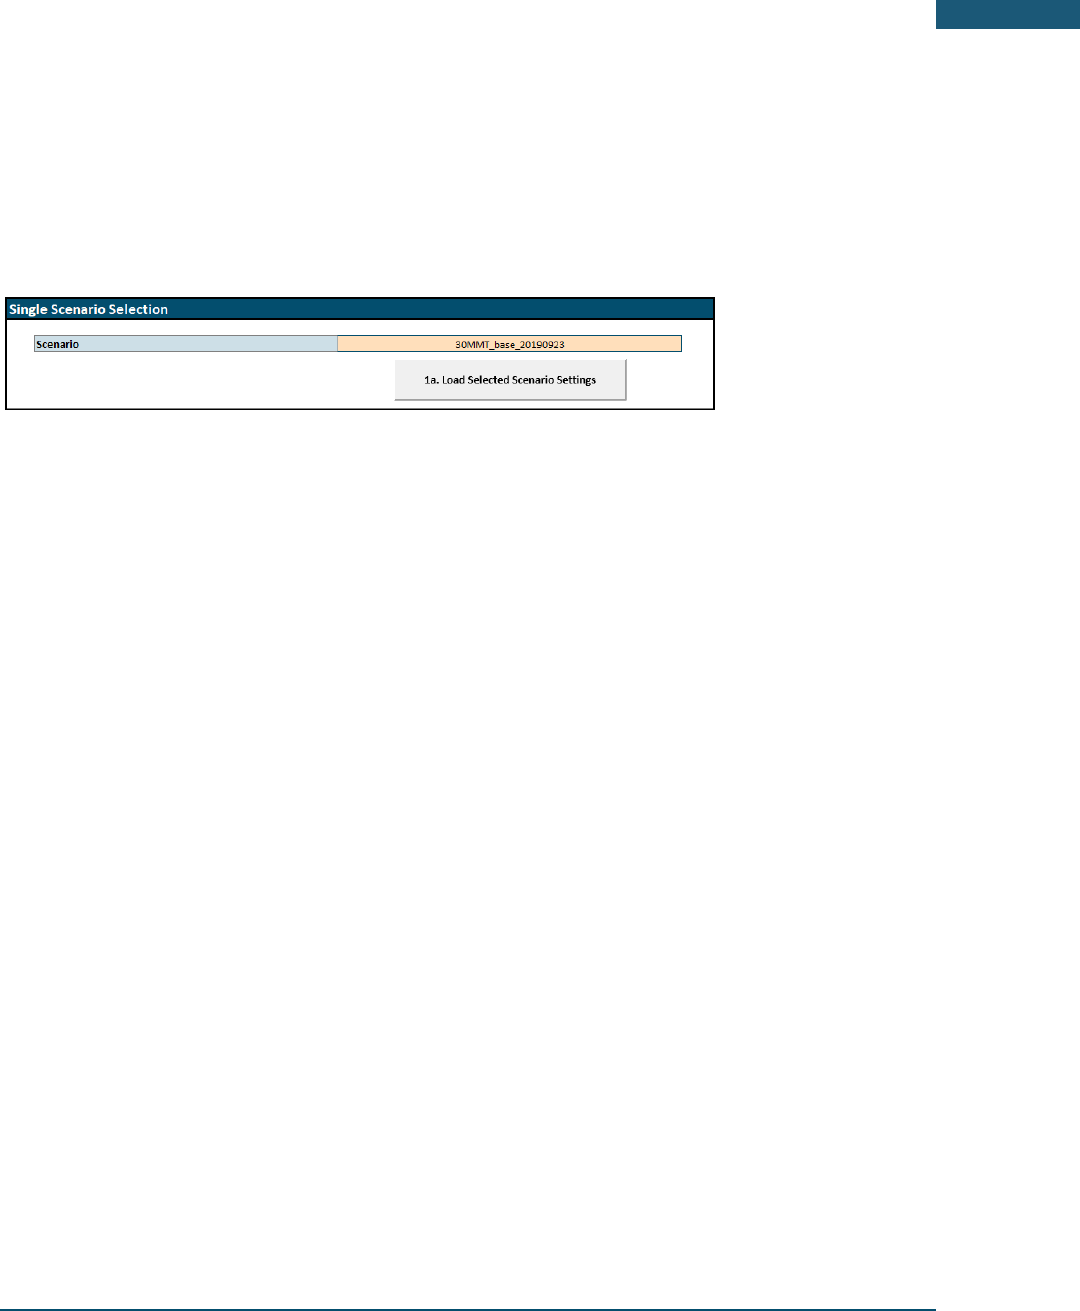
1. The dropdown menu in cell D6 of the Dashboard lists all predefined scenarios (stored on the
Scenario Settings tab). You can use the Single Scenario Selection dropdown and 1a. Load
Cell Type
Notes
Inputs
Yellow cells indicate user-defined inputs. These can be changed by the user, although it is advised to
choose from any of the existing options through the scenario toggles in the Dashboard tab.
Dropdown
Orange cells indicate values. These can be changed by the user but must adhere to a set of pre-defined
options listed in the dropdown list. For example, True/False toggles or the names of available zones in
the pre-defined cases.
(Note: True/False toggles will change color from green to red to help indicate the toggle setting)
Results
Green cells indicate cells linked to other inputs via formulas. These should automatically update, and it is
advised not to change the formulas to ensure links stay intact.
Fixed or
Inactive
Grey cells indicate calculations that should not be changed or values that are inactive.
Labels
These are hard-coded labels indicating what the cell(s) adjacent to it should be used for.
© 2019 Energy and Environmental Economics, Inc. Page | 15 |
Interacting with RESOLVE
Selected Scenario Settings button (shown in Figure 3.2) to load a scenario’s settings into the
Dashboard for viewing.
Figure 3.2. RESOLVE Single Scenario Selection Interface
2. To run scenarios, use the Batch Scenario Run section of the Dashboard to add/remove named
scenarios (listed in the Saved Scenarios list). You may need to press the 2. Refresh Saved
Scenarios List button to update the list. To add selected scenarios, select the cells with the
scenario names you are interested in running, then press the Add Selected button. The selected
scenarios should appear in the Scenarios to be Run list to the right. The Add All button will add
all scenarios in the Saved Scenarios list to the right side. The Remove Selected/All buttons
works similarly.
3. Press the 3. Create Input Files button, which will invoke VBA code that prints out the input data
into the appropriate scenario-specific input files in an input subdirectory with the scenario’s
name.

Page | 16 |
Interacting with RESOLVE
Figure 3.3. RESOLVE Scenario Run Interface
4. Press the 4. Run Scenarios button to run RESOLVE. This will open a command prompt window
and show text output as RESOLVE runs. RESOLVE runs can take anywhere between 10 minutes
to many hours depending on specific scenario settings and which solver is being used. Note that
the command prompt window will stay open even after RESOLVE has completed running.
3.1.1.1 Running RESOLVE via Command Line
There are a few reasons you may choose to run RESOLVE via the command line. For example, if you are
running on a Linux or macOS machine, a machine without Excel installed, or a machine where you cannot
use VBA macros, you will not be able to use the Scenario Tool to run RESOLVE. Additionally, if you want
to use a non-default solver (as described in Section 2.1.3), the easiest way to specify the name of the
solver is as a command line argument.
To run RESOLVE via the command line, navigate in your selected command line terminal (e.g., Command
Prompt, PowerShell, bash, etc.) to the resolve_code directory. This is generally done using the cd

© 2019 Energy and Environmental Economics, Inc. Page | 17 |
Interacting with RESOLVE
command (for change directory). For example, to switch to the directory where you have stored your
resolve_code folder, you would use the command once, as shown below:
>> cd resolve_code
From within the resolve_code directory, you have two options for running RESOLVE cases.
1. The first is to run a single case using the run_opt.py script. There are two command line
arguments that follow. The first argument is required, [scenario name], and is the name of the
single scenario you plan to run. This must correspond to the name of a directory in the inputs
folder. The second argument is optional, [optional: solver name], and is used to specify a
different solver than the default CBC solver:
>> python run_opt.py [scenario name] [optional: solver name]
For example, to run the scenario full_run with and without the solver Gurobi, use the
commands:
>> python run_opt.py full_run
>> python run_opt.py full_run gurobi
2. The second option is to run a batch of scenarios using the runbatch.py script by populating the
CSV file called cases_to_run.csv with the list of scenarios you wish to run. runbatch.py runs all of
the scenarios cases_to_run.csv in serial. The command line input is:
>> python runbatch.py [optional: solver name]
To run a batch of scenarios with and without the solver Gurobi, use the commands:

Page | 18 |
Interacting with RESOLVE
>> python runbatch.py gurobi
>> python runbatch.py
3.1.2 CREATING NEW SCENARIOS
Users may wish to create and run new scenarios based on existing input data, rather than the pre-defined
scenarios. This can be done by adjusting the dropdowns in the Scenario Definition box on the RESOLVE
Dashboard.
To create a new scenario:
0. (Optional) Select and load a scenario of interest in the Single Scenario Selection box
1. Customize the dropdown toggles in the Single Scenario Definition box (as shown in Figure 3.4).
As indicated by the cell color, most of the inputs are dropdowns, but some (such as discount
rate) are direct user inputs.

© 2019 Energy and Environmental Economics, Inc. Page | 19 |
Interacting with RESOLVE
Figure 3.4. RESOLVE Dashboard Single Scenario Selection and Scenario Definition Interface
2. Save the new custom scenario by pressing the 1b. Save Current Inputs as New Scenario button.
A macro will prompt the user to enter a new scenario name and saves the scenario settings in
the Scenario Settings tab. If a user would like to overwrite an existing scenario, they can do so
by entering an existing scenario name in the dialog box. The macro will prompt you to confirm
overwriting the scenario.
Note that if a user changes any scenario toggles, they must be saved via the macro button for
them to take effect in subsequent runs.
3. Press the 3. Create Input Files button, which will invoke VBA code that prints out the input data
into the appropriate scenario-specific input files in an input subdirectory with the scenario’s
name.

Page | 20 |
Interacting with RESOLVE
4. Press the 4. Run Scenarios button to run RESOLVE. This will open a command prompt window
and show text output as RESOLVE runs. RESOLVE runs can take anywhere between 10 minutes
to many hours depending on specific scenario settings and which solver is being used. Note that
the command prompt window will stay open even after RESOLVE has completed running.
3.1.3 INPUT DATA WORKSHEETS
The input data worksheets in the Scenario Tool are categorized into three high-level themes: system,
loads, and resources. Brief summaries of each tab are included in Table 3.1. The cells in these data
worksheets also adhere to the color-coding described at the start of Section 3.1.
Additional documentation of the contents of the data worksheets is provided in the Inputs & Assumptions
documentation.

© 2019 Energy and Environmental Economics, Inc. Page | 21 |
Interacting with RESOLVE
Table 3.1. Description of RESOLVE Scenario Tool Worksheets
Section
Tab
Description
DASHBOARD
Dashboard
Contains a user interface to prepare and run scenarios. This is the main tab the user will interact with
SCENARIOS
Scenario Settings
Database with scenario settings that were saved through the user interface
SYSTEM
Sys - Fuels
Fuel cost assumptions and calculations
Sys - PRM
Planning reserve margin assumptions and calculations
Sys - RPS GHG
Renewable Portfolio Standard and greenhouse gas target assumptions
Sys - Reserves
Operating reserves requirement assumptions
Sys - Tx
Regional assumptions, such as transmission limits, hurdle rates, etc.
Sys - Inputs Passthrough
Inputs to passthrough to the results (e.g., baseline costs)
LOADS
Loads - Profiles
Hourly load profiles by end-use
Loads - Forecasts
Database of load forecasts
Loads - Hydrogen
Inputs for hydrogen electrolysis feature
Loads - EE
Inputs for EE investment feature
Loads - EV
Electric vehicles assumptions and calculations
Loads - DR
Assumptions for candidate demand response resources
Loads - Flexible
Assumptions for flexible loads
SUPPLY RESOURCES
Technologies
Technology characteristics
Resources - All
Resource inputs and mapping to technologies
Resources - Candidate
Inputs for resources that can be expanded
Resources - Variable
Shapes for variable resources
Resources - Hydro
Energy budgets and constraints for hydro resources
Resources - Maintenance
Maintenance/derate schedules (if not defined, resource will be rated at 100%)
Resources - Scenarios
Scenario combinations of cost and planned installed capacities
Resources - Scenario Costs
Database of resource all-in fixed investment costs for expansion
Resources - Scenario Build
Database of resource planned installed capacities
RAW INPUTS
Inputs2Write
Calculation worksheet that converts inputs from all other tabs into model-ready input tables. Do not edit
Inputs2Write_Hourly
Calculation worksheet that converts inputs from all other tabs into model-ready input tables. Do not edit
LISTS
Lists
Calculation worksheet with supporting lists and tables. Do not edit

Page | 22 |
Interacting with RESOLVE
3.2 RESOLVE Results Viewer
The Results Viewer allows the user to look at the summary results of a scenario of interest. It contains
four main worksheets: Dashboard, Portfolio Analytics, Scenario Comparison, and Lists. In addition, it
contains a number of “raw” summary results files for the scenario of interest.
3.2.1 DASHBOARD
The Dashboard worksheet is the main worksheet the user will interact with to look at the results of a
single scenario.
Figure 3.5. Results Viewer Dashboard
The Dashboard contains the following macro buttons:
4. The “Refresh List of Scenarios” macro lists all subdirectories that exist in the results directory.
Note that if a RESOLVE run is interrupted mid-run, a results folder will be created but no results

© 2019 Energy and Environmental Economics, Inc. Page | 23 |
Interacting with RESOLVE
will be available. Consequently, the user will not be able to load results for that scenario until the
simulation has completed running.
5. After selecting one of the scenarios from the list under “Scenarios with Results”, the “Retrieve
Results of Selected Scenario” macro will load all summary results files into the appropriate
worksheets (named raw_ + file name) for the selected scenario.
A common cause of errors is the fso.GetFolder() function in the VBA macro. If this function raises an
error, go to Tools > References > find and tick 'Microsoft Scripting Runtime'.
The Dashboard worksheet contains key summary results for the CAISO zone, such as the resource
buildout, portfolio costs, etc. The worksheet also includes graphs on the right side of the tables.
The year columns are grouped using Excel’s grouping functionality (see Data > Outline > Group), and can
be expanded and minimized by clicking on the “+” or “-“ signs in the columns sidebar, or by clicking on the
numbers (1,2) on the top left of the spreadsheet. Note that expanding the grouped columns will interfere
with the formatting of the charts. If the user has created a RESOLVE scenario that looks at a different set
of years than the default case (2020, 2021, 2022, 2023, 2024, 2026, 2030), the “Regroup Columns” macro
will regroup the columns to show the representative set of years.
3.2.2 PORTFOLIO ANALYTICS
This worksheet contains more detailed summary tables that are pulled from the raw summary results
worksheets and processed where necessary.
The results are grouped using Excel’s grouping functionality (see Data > Outline > Group), and can be
expanded and minimized by clicking on the “+” or “-“ signs in the rows/columns sidebar, or by clicking on
the numbers (1,2) on the top left of the spreadsheet. If the user has created a RESOLVE scenario that looks
at a different set of years than the default case, the “Regroup Columns” macro will regroup the columns
to show the representative set of years.
Page | 24 |
Interacting with RESOLVE
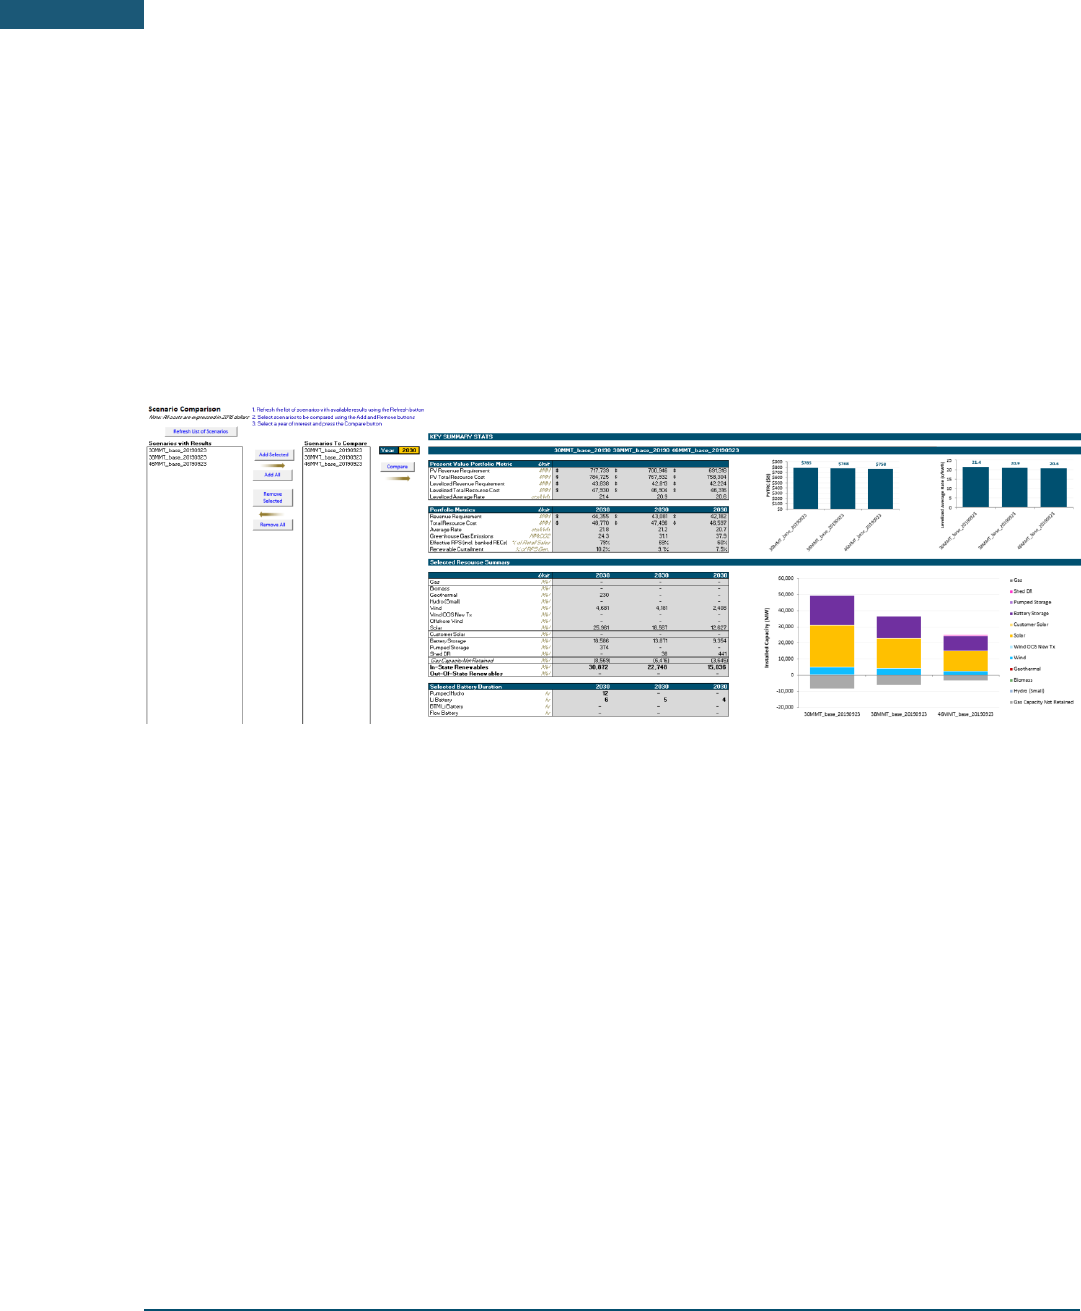
3.2.3 SCENARIO COMPARISON
This worksheet is set up so the user can compare summary results of multiple scenarios. It allows the user
to select scenarios of interest and to compare the summary results of these scenarios for a year of interest.
The summary results are the same as those shown on the Dashboard for an individual scenario.
Figure 3.6. Results Viewer - Scenario Comparison Worksheet
To compare a set of scenarios, follow the steps below:
1. Refresh the list of available scenarios by pressing “Refresh List of Scenarios”. This macro lists all
subdirectories that exist in the results directory. Results files must be present for all scenarios for
the scenario comparison function to work.
2. [Optional] If necessary, remove any scenarios you don’t want to compare from the “Scenarios to
Compare” list by using the “Remove Selected” or “Remove All” Button.
a. The “Remove Selected” macro will remove the selected scenario from the list of scenarios
listed under “Scenarios to Compare”. Note that in this context, selected scenario means
the cell that is selected within the “Scenarios to Compare”. If a cell outside of this box is
selected, a warning will pop up and the macro will stop.

© 2019 Energy and Environmental Economics, Inc. Page | 25 |
Interacting with RESOLVE
b. The “Remove All” macro will remove all scenarios listed under “Scenarios to Compare”.
3. Add scenarios of interest to the “Scenarios to Compare” list using the “Add Selected” or “Add All”
buttons.
a. The “Add Selected” macro will add the selected scenario to the list of scenarios listed
under “Scenarios to Compare”. Note that in this context, selected scenario means the cell
that is selected within the “Saved Scenarios Menu” box (not the value in cell D8). If a cell
outside of this box is selected, a warning will pop up and the macro will stop.
b. The “Add All” macro will add all scenarios listed under “Saved Scenarios” to the list of
scenarios listed under “Scenarios to Compare”.
4. Select a year of interest in cell I8 (shaded yellow). Please ensure that this is a year for which there
are RESOLVE results.
5. Compare all selected scenarios by pressing the “Compare” macro button. This macro will load the
summary results for each of the scenarios listed under “Scenarios to Compare” to the Dashboard,
and then copy the results for the year of interest to the Scenario Comparison table. It can take a
few minutes to compare the results of many scenarios because the “Retrieve Results of Selected
Scenario” macro on the Dashboard is called upon many times in a row.
3.2.4 RAW SUMMARY RESULTS
The set of worksheets that start with “raw_” contain a copy of the raw summary results files for the
scenario of interest. Whenever the macro “Retrieve Results of Selected Scenario” is run, these
worksheets are updated. Note that while the user should be able to find all the information needed in the
first three tabs, if there is interest in investigating the “raw_” tabs to filter or edit any specific data,
rerunning the “Retrieve Results of Selected Scenario” macro will overwrite any changes that have made.
In that case, make sure to press the “Retrieve Results of Selected Scenario” button twice to ensure all
the “raw_” tabs are fully refreshed.

Page | 26 |
Interacting with RESOLVE
3.2.5 LISTS
This worksheet contains a set of lists to support the functions in this workbook. The user should not
change anything in this worksheet.

© 2019 Energy and Environmental Economics, Inc. Page | 27 |
RESOLVE Model Details
4 RESOLVE Model Details
Advanced users may want to review the raw input and output files directly for their own analyses. This section provides a description of the raw
files.
4.1 Raw Input Files
When the user selects and runs a scenario from the Scenario Tool, RESOLVE will generate a series of text-based input files for the linear program.
While running RESOLVE does not require users to manipulate these files directly, users may wish to review their contents and structure. Each of
the input files to RESOLVE is described in Table 4.1. Some input files are only written when certain features are enabled.

Page | 28 |
RESOLVE Model Details
Table 4.1. RESOLVE Raw Input Files
Input File
Description
capacity_groups.tab
Specifies which resources are in each annual capacity installation limit group.
capacity_limits.tab
The maximum capacity of each resource that can be built in each period. Resources that do not have capacity
limits are not included.
capacity_limits_local.tab
The maximum capacity of each resource that can be built in each period, specifically in local capacity areas.
conventional_dr_period_limits.tab
The maximum amount of energy that can be dispatched (shed) annually and daily capacity factor limit (i.e., call
hours/day) from conventional (Shed) demand response resources.
day_weights.tab
The weight associated with each day in RESOLVE; should sum up to 365.
elcc_surface.tab
Effective load carrying capability (ELCC) surface facet coefficients for wind and solar power.
ev_params.tab
The charging efficiency of each EV fleet.
ev_period_params.tab
The total battery capacity of each EV fleet in each period, and the minimum energy that must always be
available in each fleet’s battery.
ev_timepoint_params.tab
The amount of demand from each EV fleet in each timepoint.
feature_toggles.tab
Toggles to enable/disable optional features. Some optional features may not work without input data.
flexible_load_capacity_period_params.tab
Flexible load (shift) minimum and maximum resource potential limits for each period.
flexible_load_cost_curve.tab
Flexible load (shift) supply curve for each period.
flexible_load_cost_curve_index.tab
Indices that define each breakpoint in the flexible load (shift) supply curve.

© 2019 Energy and Environmental Economics, Inc. Page | 29 |
RESOLVE Model Details
Input File
Description
flexible_load_timepoint_params.tab
The amount of load that can be shifted up or down in each timepoint as a fraction of the total daily flexible
load potential.
flexible_params.csv
The maintenance derate fraction (1 is fully available, 0 is completely unavailable) for each resource that has a
specified maintenance schedule. Other parameter values can also be set using this input file.
fuel_prices.tab
The price of each fuel by period and month.
fuels.tab
Defines the set of fuels and the carbon content of each fuel.
ghg_import_rates.tab
The assumed greenhouse gas (GHG) emissions intensity resulting from imports into the main zone in each
period for each transmission line.
ghg_targets.tab
GHG targets for the main zone in each period.
hurdle_rates.tab
Hurdle rates (cost per MW of energy flow) on each transmission line by period for both flow directions.
hydro_daily_params.tab
The daily energy budget, minimum generation level, and maximum generation level for each hydro resource
and each day.
hydro_ramps.tab
The limits on hydro ramps for each ramp duration for the main zone hydro resource.
hydro_resources_ramp_limited.tab
Hydro resources that are subject to multi-hour ramping constraints.
hydrogen_electrolysis_daily_params.tab
The minimum hourly hydrogen load and daily average hydrogen load for each day.
hydrogen_electrolysis_period_params.tab
The hydrogen electrolysis installed capacity for each period.
inputs_passthrough.csv
Values to calculate total future revenue requirement and rate impacts of RESOLVE investment and operational
decisions.
min_cumulative_new_build.tab
The minimum amount of new capacity of each resource that must be built through each period. The cost of
building these resources is not assumed to be sunk (in contrast to planned_installed_capacities.tab).

Page | 30 |
RESOLVE Model Details
Input File
Description
period_discount_factors.tab
The weight/discount factor applied to costs occurring in each period, and the number of years represented by
each period.
planned_installed_capacities.tab
The planned installed capacity, minimum operational capacity (lower bound on thermal retention), and fixed
O&M cost of each resource in each period (as opposed to varying by vintage for new build resources). The
capital cost of capacity included here is assumed to be sunk and consequently is not included in the
optimization.
planned_storage_energy_capacity.tab
The planned installed energy capacity and fixed O&M cost of each storage resource in each period.
planning_reserve_margin.tab
The planning reserve margin target in each period, and other quantities related to the planning reserve margin.
Also included is the amount of capacity needed in local areas in each period.
renewable_targets.tab
RPS target information by period.
reserve_resources.tab
Determines which resources can provide different reserve types.
reserve_timepoint_requirements.tab
The regulation and load-following reserve requirements in each timepoint.
resource_prm_nqc.tab
The net qualifying capacity (NQC) fraction for firm capacity and storage resources.
resource_tx_zone_map.tab
Specifies the relationship between resources and transmission deliverability zones.
resource_tx_zones.tab
Specifies whether the resource is located inside or outside of the planning reserve margin area (for resource
adequacy accounting).
resource_use_tx_capacity.tab
Allocate dedicated firm transmission rights between zones to certain resources.
resource_variable_renewable
Flags indicating which variable renewable resources are curtailable.
resource_variable_renewable_prm.tab
Parameters related to variable renewable resource participation in the planning reserve margin and local
capacity constraints.

© 2019 Energy and Environmental Economics, Inc. Page | 31 |
RESOLVE Model Details
Input File
Description
resource_vintage_params.tab
The annual capital cost per unit of capacity ($/kW-yr) and fixed O&M cost by resource (new build resources
only) and vintage.
resource_vintage_storage_params.tab
The annual fixed cost of per unit of energy capacity ($/kWh-yr) and fixed O&M cost for storage resources by
vintage.
resources.tab
Defines for each resource the associated technology, zone, RPS eligibility, and other characteristics.
shapes.tab
The normalized profiles for each variable resource for each day and hour.
simultaneous_flow_group_lines.tab
The line-directions included in each simultaneous flow group.
simultaneous_flow_groups.tab
The names of the groups of lines over which simultaneous flow constraints are enforced.
simultaneous_flow_limits.tab
The limits on flow over each simultaneous flow group by period.
system_params.tab
A range of single-value parameters including penalties for unserved energy, overgeneration, and reserve
violations; the durations of hydro and intertie ramps to constrain; parameterizations of the sub-hourly
behavior when providing regulation and load-following reserves; parameterizations of the ability of variable
generation to provide reserves; whether to require renewable overbuild when satisfying RPS constraints;
whether to allow RPS banking; whether to enforce GHG targets; the number of hours of duration that receives
full ELCC credit; and the assumed timeframe for operational reserves.
tech_dispatchable_params.tab
Parameters associated with each dispatchable thermal technology: minimum stable level as fraction of
capacity, ramp rate as fraction of capacity, startup and shutdown time (integer hours), unit size, and startup
and shutdown costs.
tech_storage_params.tab
Parameters associated with each storage technology: charging and discharging efficiencies, and minimum
storage duration.
tech_thermal_params.tab
Parameters associated with each thermal technology: the fuel used, and the fuel burn slope and intercept.

Page | 32 |
RESOLVE Model Details
Input File
Description
technologies.tab
All technologies modeled, with flags for various operational characteristics.
timepoints.tab
All timepoints modeled with their associated metadata: which period, month, and day the timepoint is in, and
which hour of the day it represents.
transmission_lines.tab
All transmission lines with their origin (from) and destination (to) for the positive flow direction, the minimum
and maximum flow on the line, a flag for whether the line is ramp-constrained, and a flag for whether a hurdle
rate is applied on the line.
transmission_ramps.tab
The up and down ramp limits for each ramp-constrained line for each ramp duration.
tx_zones.tab
The transmission zone aggregations for which energy only or fully deliverable transmission capacity will be built
for new renewable resources. Capacity limits for energy only and zero-cost fully deliverable capacity are
included, along with the cost to build new fully deliverable capacity.
zone_curtailment_costs
The cost of curtailment in each zone in each period.
zone_timepoint_load.tab
The input load in each zone in each timepoint.
zones.tab
The zones modeled, as well as flags that determine if the zone is included or excluded from various constraints
(RPS, GHG, Planning Reserve Margin, Load Following), and the zonal spinning reserve requirements.

© 2019 Energy and Environmental Economics, Inc. Page | 33 |
RESOLVE Model Details
4.2 Python Scripts
The input files described in Section 4.1 are formatted to be the minimal set of information needed to formulate the linear programming
optimization model written in Python. Users are not expected to interact directly with the Python optimization model or its accompanying
input/output scripts; however, users are welcome to review the structure and logic of RESOLVE’s formulation.
The Python scripts that make up RESOLVE are summarized in Table 4.2
Table 4.2. RESOLVE Python Scripts
Python Script
Description
run_opt.py
This is the ‘main’ script of the RESOLVE model. As described in Section 3.1.1.1, it takes one required argument: the name of the
scenario to run. For example, to run a scenario named ‘full_run,’ the user would need to run the run_opt.py script and give it the
argument full_run. The scenario name must be the same as the name of a subdirectory in the inputs directory.
model_formulation.py
This script contains the RESOLVE problem formulation. RESOLVE is written in Pyomo, a Python-based optimization modeling
language. The model object is defined in model_formulation.py and is called resolve_model. It is a Pyomo AbstractModel object,
which is then assigned various attributes—parameters, sets, variables, and constraints—that describe the RESOLVE linear problem.
load_inputs.py
This script contains the scenario_data function that returns a DataPortal Pyomo object. The DataPortal is a way to load data into a
Pyomo AbstractModel class. The scenario_data function takes the scenario inputs directory as argument, finds the TAB files
containing the scenario data, and initializes the resolve_model class with these data (see the create_problem_instance function in
run_opt.py).
export_results.py
This script contains the export_results function, which is called by run_opt.py when the problem is solved. This function takes the
model instance, results, and scenario results directory as arguments. A final argument, debug_mode, tells the function how to

Page | 34 |
RESOLVE Model Details
Python Script
Description
handle errors that may arise: exit if debug_mode is set to 0, launch the Python debugger if debug_mode is set to 1. The
export_results function calls other functions that export various optimization results, e.g. the build variables, the operations
variables, the transmission flows, etc.
create_summaries.py
Once results are exported, run_opt.py calls the create_summaries function from create_results_summaries.py file. This function
calls various other functions, also in the create_results_summaries.py, that perform various aggregations of the results and write
them to the summary subdirectory in each scenario’s results directory.
runbatch.py
This script simply runs the run_opt.py file in series for each of the scenarios listed in ‘cases_to_run.csv’. It allows users to run a
batch of scenarios simply, rather than waiting for each scenario to finish before running the next one. Note: advanced users may
wish to run many scenarios in parallel by opening multiple command prompt windows. Runbatch.py runs each scenario in series,
not in parallel.
fileio.py
Stores functions related to file input and output.

© 2019 Energy and Environmental Economics, Inc. Page | 35 |
RESOLVE Model Details
4.3 Raw Output Files
Output files in the root scenario results directory (e.g., results/full_run/) are created by export_results.py. Files in the root results directory are not
directly used in the results viewer but are available when more detailed analysis of results is required.
Output files in the summary subdirectory within each scenario results directory (e.g., results/full_run/summary/) are created by
create_results_summary.py. The summary directory contains various aggregations and combinations of the data in the results files described below.
Only data in the summary directory is imported into the results viewer.
Note that the term ‘dual’ is used frequently to refer to the shadow price of a constraint. Technical note on dual values: the reported values reflect
real dollars in either hourly or annual quantities.
Table 4.3. RESOLVE Raw Output Files
Output File
Description
curtailment.csv
This file contains hourly and sub-hourly variable renewable curtailment decisions for each zone in RESOLVE.
Blank cells indicate that RESOLVE does not make this decision.
elcc_surface_facets.csv
This file contains results for each facet of the effective load carrying capability (ELCC) surface in each period. These
results can show which (if any) of the ELCC facets is active in each period.

Page | 36 |
RESOLVE Model Details
Output File
Description
fuel_burn_by_resource.csv
This file contains the hourly fuel burn and greenhouse gas (GHG) emissions by resource.
ghg.csv
This file contains the input GHG emissions target in each period, and the shadow price of meeting that target.
Blank cells indicate that a GHG emissions target was not modeled.
ghg_imports.csv
This file contains the hourly GHG emissions imported along transmission lines.
loads_and_power_balance.csv
This file contains hourly loads for each zone and timepoint that were input into the RESOLVE optimization, as well as the
amount of overgeneration and unserved energy for each zone and timepoint. It also contains the shadow price of the
zonal power balance constraint for each timepoint, which is analogous to the hourly energy price. Care should be taken
interpreting this energy price as the RESOLVE investment framework differs in several fundamental ways from a
conventional production simulation.
local_capacity_resources.csv
This file contains the local capacity investment decisions made by RESOLVE for each local capacity resource in each
period.
objective_function_value.txt
The final value of the objective function for each RESOLVE run.
operations.csv
This file contains the hourly operational decisions made by RESOLVE for each resource on all days modeled in RESOLVE
(currently 37 days per year). Types of operational decisions included in this file are:
• unit commitment
• power production
• reserve commitment
• flexible load dispatch
• storage charging
These operational decisions are also converted to operational costs, including variable O&M costs, fuel costs,
startup/shutdown costs, and curtailment costs.
Blank cells indicate that RESOLVE does not make this decision.

© 2019 Energy and Environmental Economics, Inc. Page | 37 |
RESOLVE Model Details
Output File
Description
planning_reserve_margin.csv
This file contains the input planning reserve margin (PRM) and local capacity targets in each period, as well as the
shadow price of meeting those targets. A summary of PRM contributions by resource type is also included.
ramping_duals.csv
This file contains the hourly values relating to ramp constraints of dispatchable thermal generation.
reserve_timepoints.csv
This file contains the hourly reserve commitment shortfalls (or violations) and shadow prices for each reserve product.
resource_build.csv
This file contains the investment and economic thermal retention decisions made by RESOLVE for each candidate
resource in each period. This file also contains capacities of resources for which no investment decisions were made (e.g.
existing resources and contracted resources that come online at some point in the future). The fully deliverable/energy
only status of new renewable resources is included.
The associated capital and fixed O&M costs for these build and retirement decisions is also included.
Blank cells indicate that RESOLVE does not make this decision.
rps.csv
This file contains the input RPS target level in each period, as well as the shadow price of the RPS constraint, the RPS
credits banked, and a high-level summary of the components of the RPS constraint.
sim_flow_group_duals.csv
This file contains the hourly shadow prices of constraints that limit the sum of flows on groups of transmission lines.
storage_build.csv
This file contains investment decisions made by RESOLVE in every period for the energy capacity of each storage
resource.
Blank cells indicate that RESOLVE does not make a decision.
transmission_costs.csv
This file contains the cost of building new transmission in each period triggered by new renewable resource investment
decisions made by RESOLVE. Also included is the breakdown of fully deliverable/energy only capacity in each
transmission zone in each period.
transmit_power.csv
This file contains the hourly transmission dispatch decisions made by RESOLVE for each transmission line, as well as the
shadow price of flow limits on each line.

Page | 38 |
RESOLVE Model Details
